



I don’t know exactly when I became an artist, but I know the long, difficult journey it took to get here. My work is the result of years of self-discovery, now recognized through signature elements: Portuguese tile backgrounds and the complex, dramatic shadows that define the figures in my paintings.
For me, a painting begins long before the brush touches the surface: it starts as a digital collage. Using Photoshop, I piece together elements from multiple shots, sometimes merging several photos of a model to achieve a single, perfect pose. In this demo piece, I intentionally did not include background tiles, as I was looking for a different mood. However, I kept the flowery quilt in the composition to balance the intricate lace of the dress and the shadows on the skin, softening the transition into the dark background.
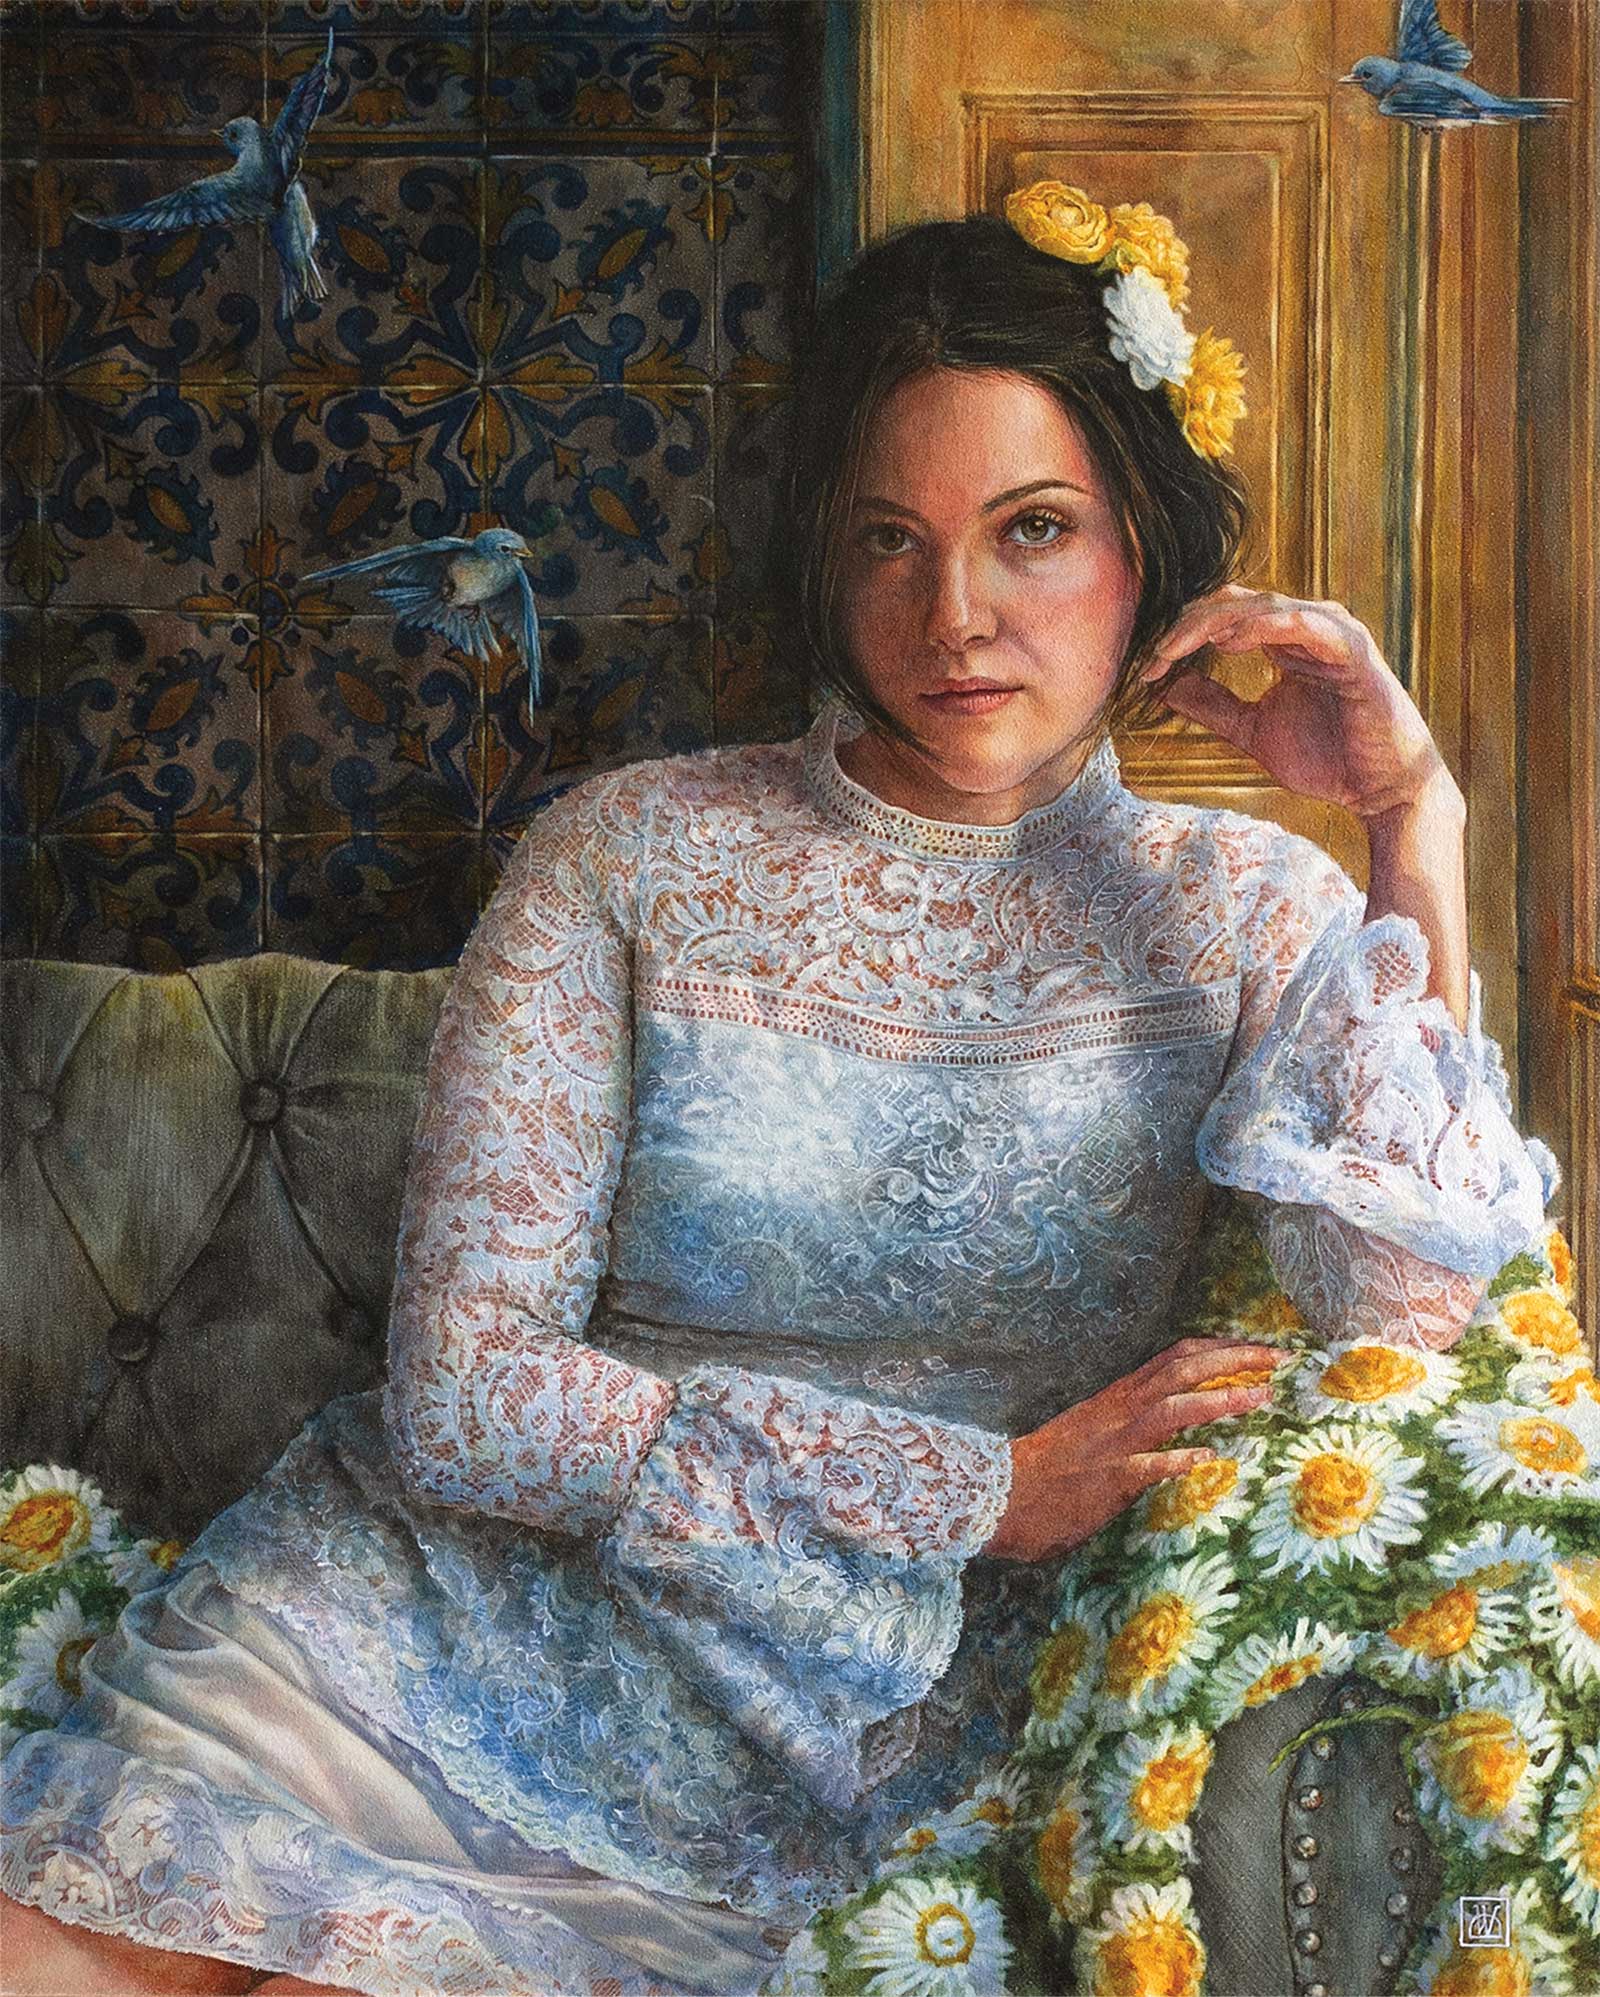
Golden Reverie, watercolor on Aquabord, 20 x 16" (50 x 40 cm)
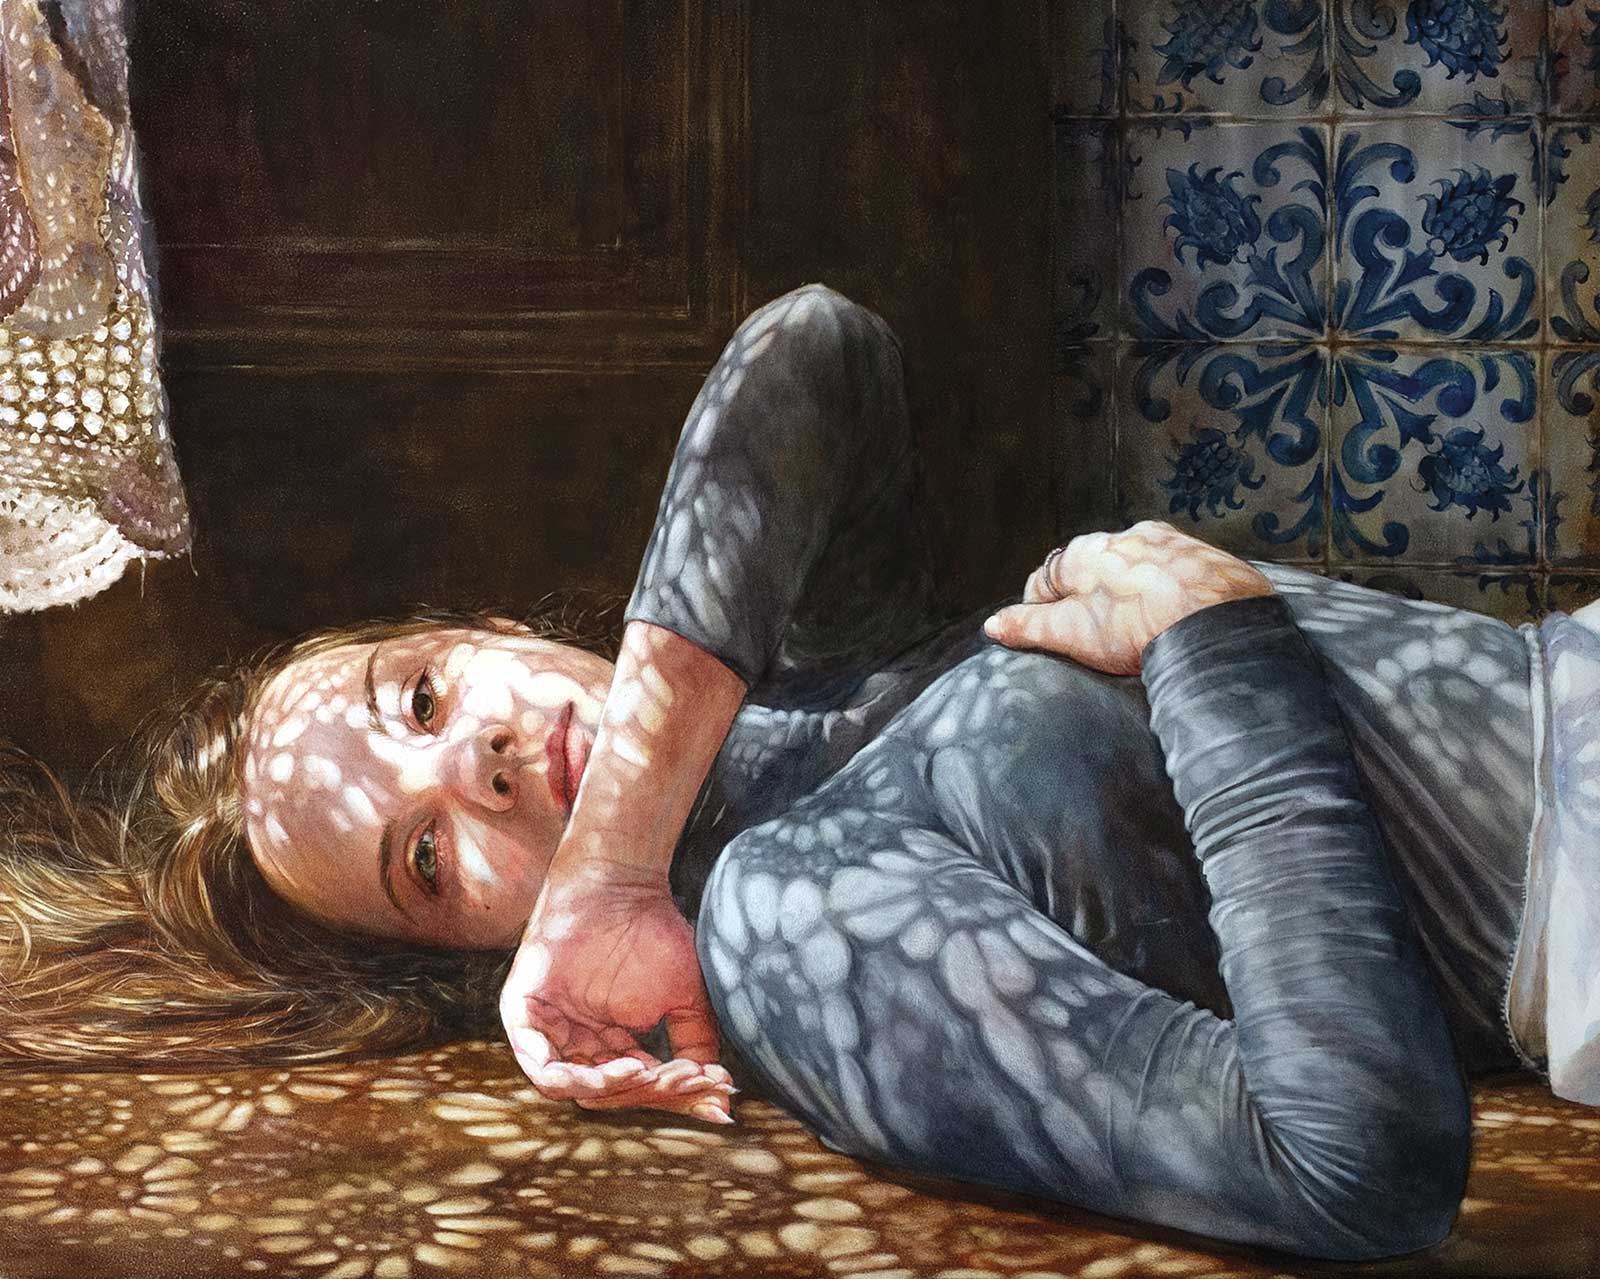
In Full Bloom, watercolor on Aquabord, 16 x 20" (40 x 50 cm)
I always work with a limited palette of four to six colors max: one yellow or orange, one magenta or red, one brown or black, and one blue or green. For this painting I will be using both brown and black due to the dark background in order to reach its depth faster. In some cases, I’ll bring in white gouache for the details. To achieve lifelike skin tones, I rely almost entirely on three colors: blue, magenta and yellow. By layering these three pigments, I can reach a vast range of depth and shade.
To maintain my motivation while painting and avoid the “ugly stage,” I start with a small detail of the focal point, usually the eye. I always finish this small detail completely before moving on. This finished “anchor” guides the rest of the piece.
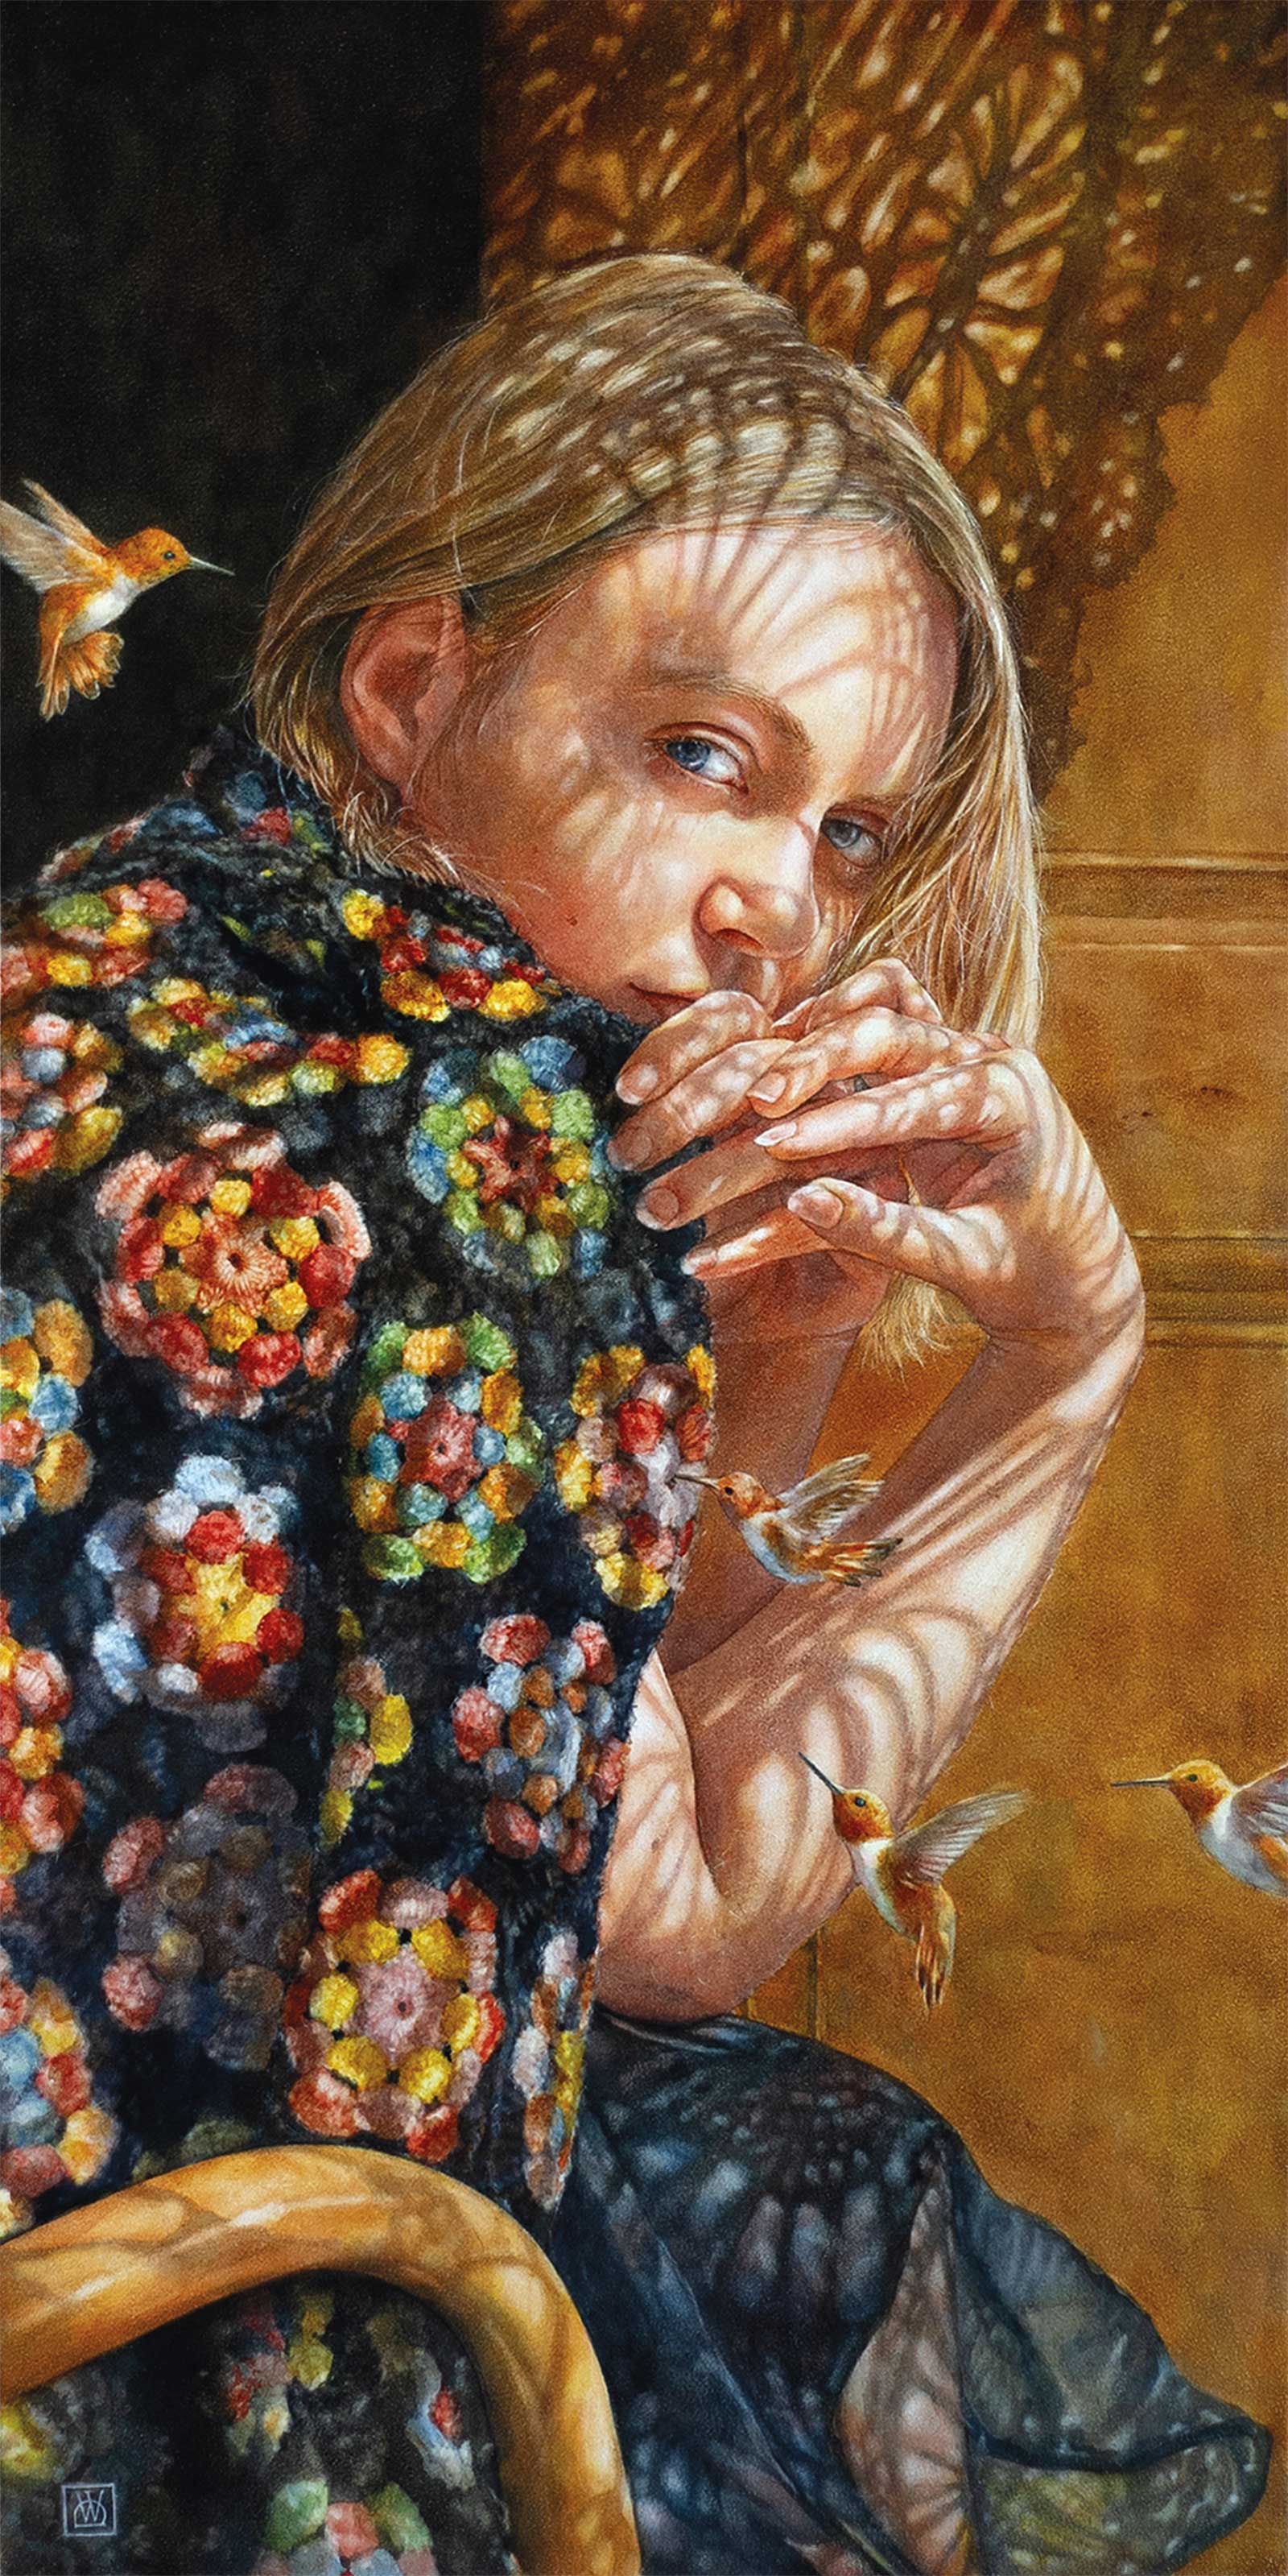
Wrapped In Bloom, watercolor on Aquabord, 24 x 12" (60 x 30 cm)
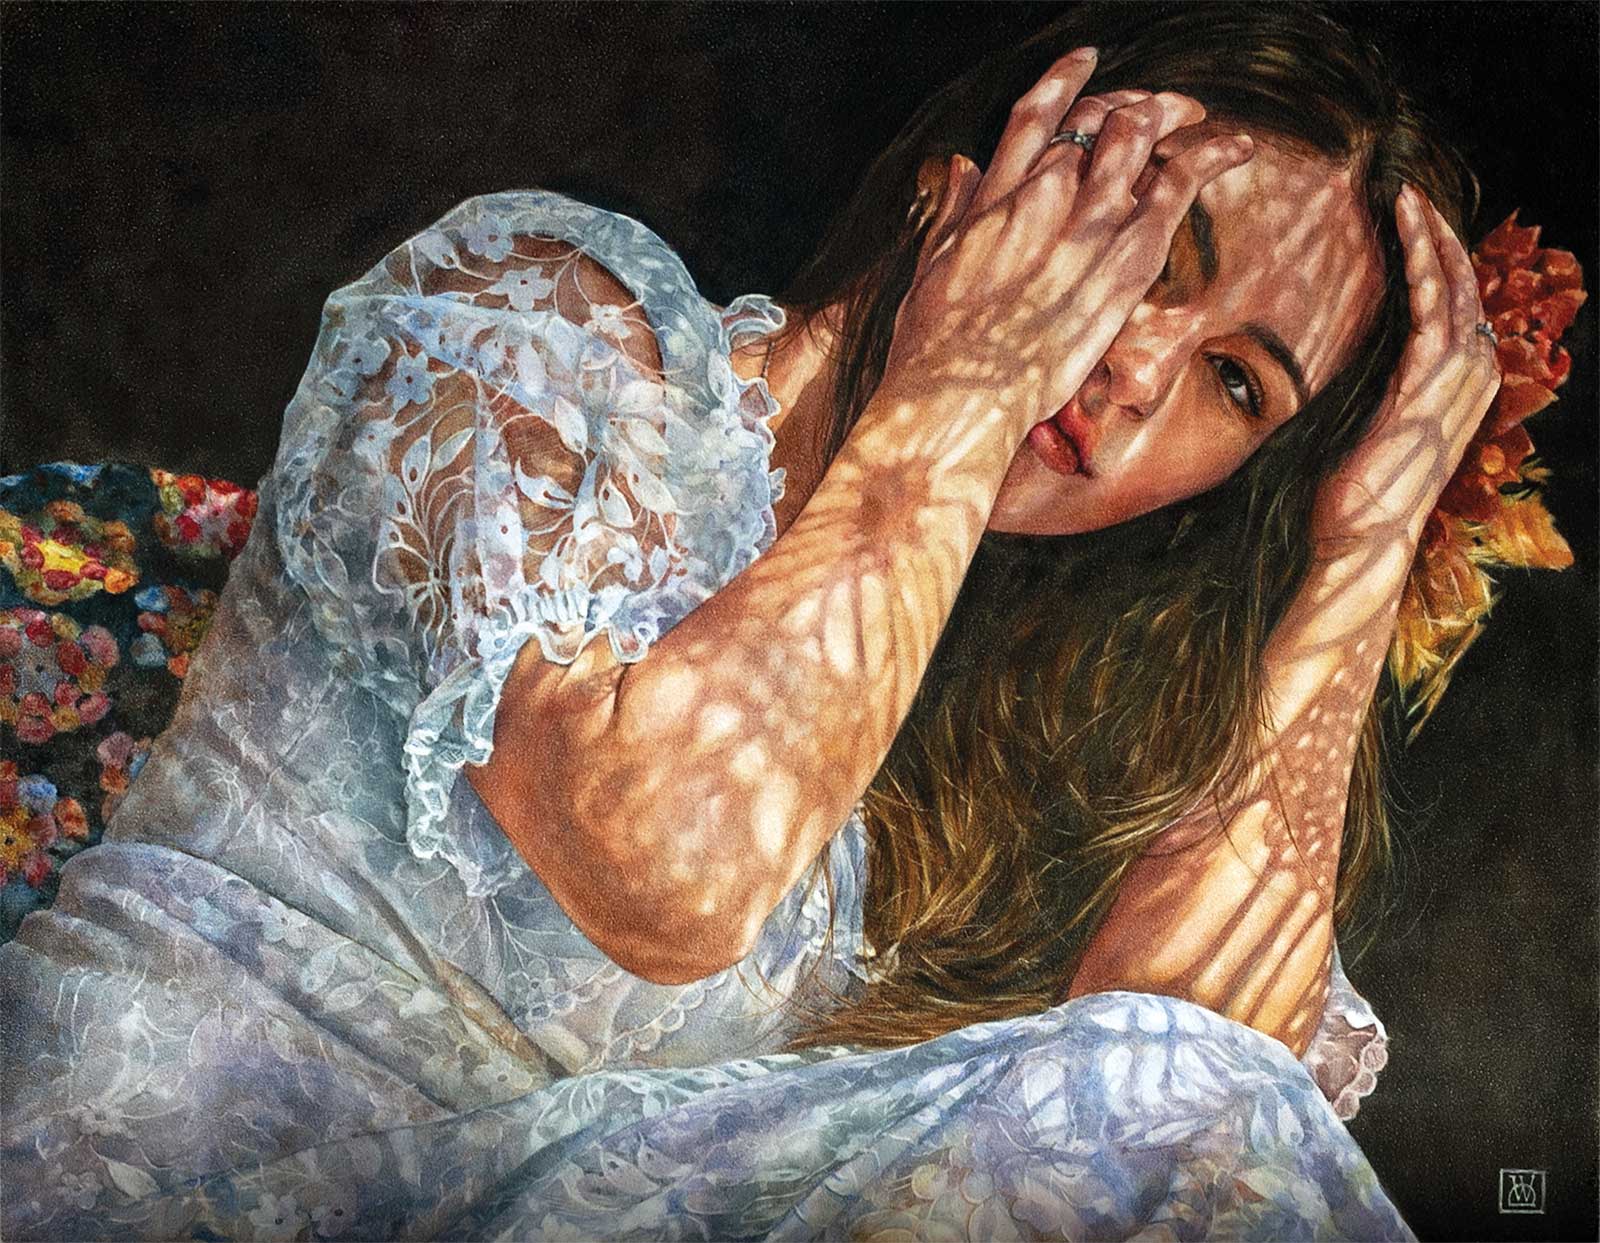
Blooming Through The Lace, watercolor on aquabord, 14 x 18" (35 x 45 cm)
I take a non-traditional approach to watercolor: instead of simply building light to dark, I frequently apply dark pigment and then “lift” it away, repeating the process with lighter layers. This method, enabled by the unique clay surface, allows me to create volume and a natural looking texture. I don’t feel like I am merely painting; I feel as though I am sculpting the image, carving light out of the darkness.
My Art in the Making Listening to the Light
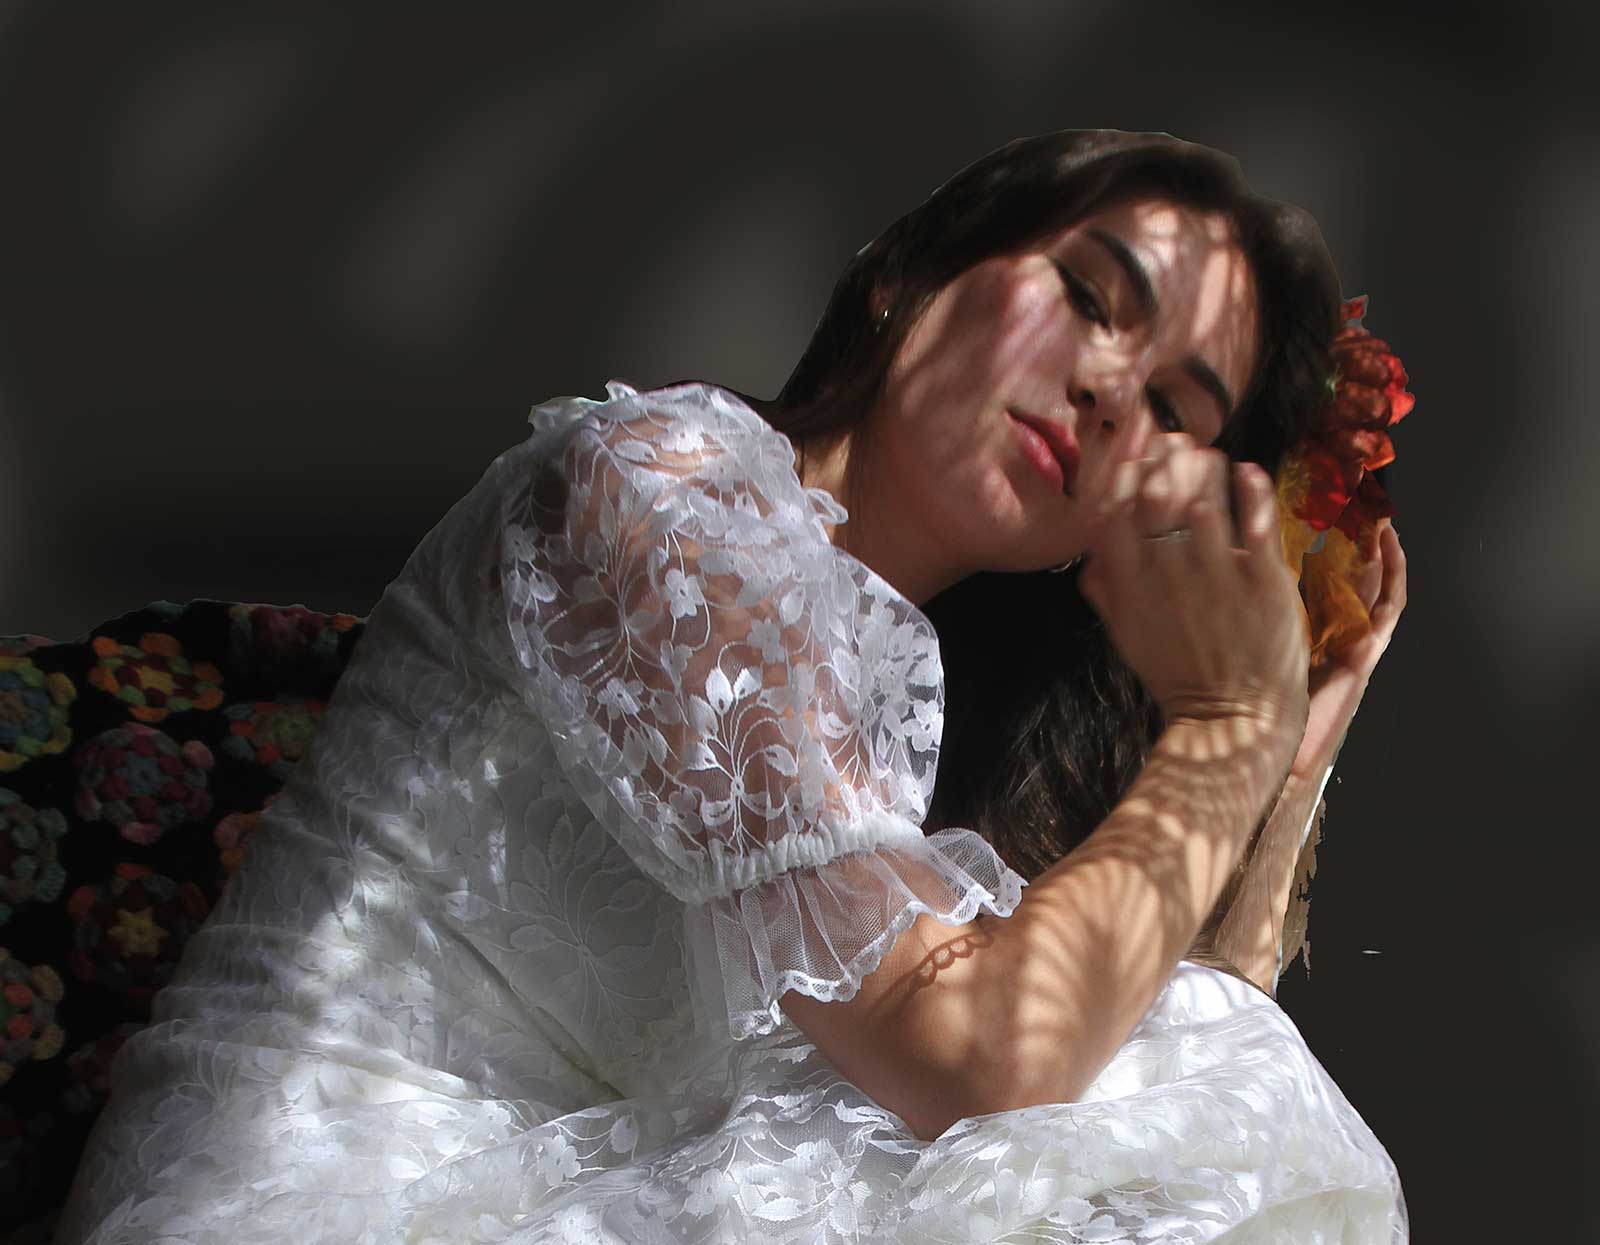
Composition Study/Reference
My process begins with relaxed photoshoots at home. My models, usually family or friends, wear dresses from my collection and simply chat with me while I capture their natural movements. I rarely rely on a single image for a painting. Using Photoshop, I compose a reference by piecing together elements from several shots to create one ideal pose. For this painting, I combined two photos to include the model’s left arm, and I erased the whole background.
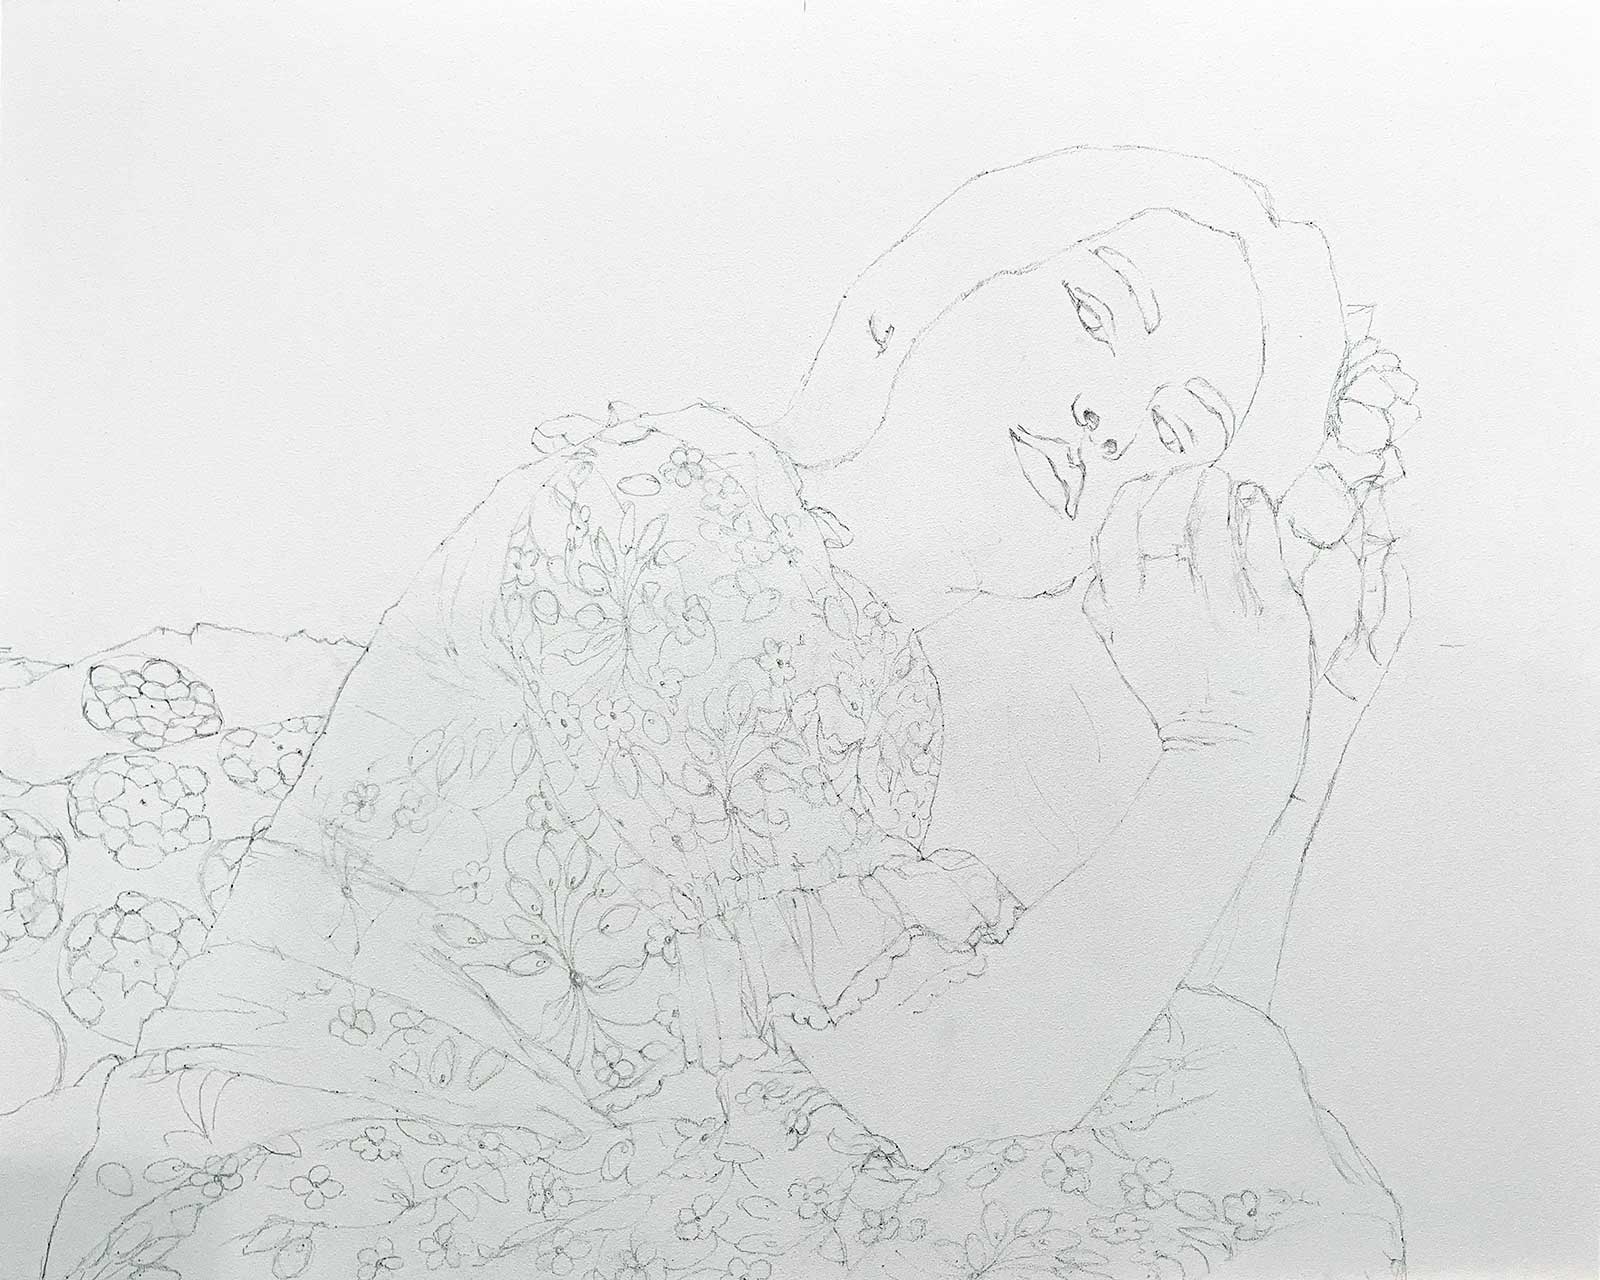 stage 1
Stage 1 Drawing
Once the composition is set, I prepare the board according to the manufacturer’s instructions and start the drawing. There are plenty of ways to do this, but I prefer using “dots” as reference points to map out the sketch. I find it much simpler and cleaner, as it helps me avoid those constant corrections that end up smudging the surface. I typically avoid heavy sketching. I left the shadows on the skin and many other details undrawn to keep the piece airy, but I decided to map out some of the dress’ complex patterns to serve as a guide through its intricate design.
WHAT THE ARTIST USED
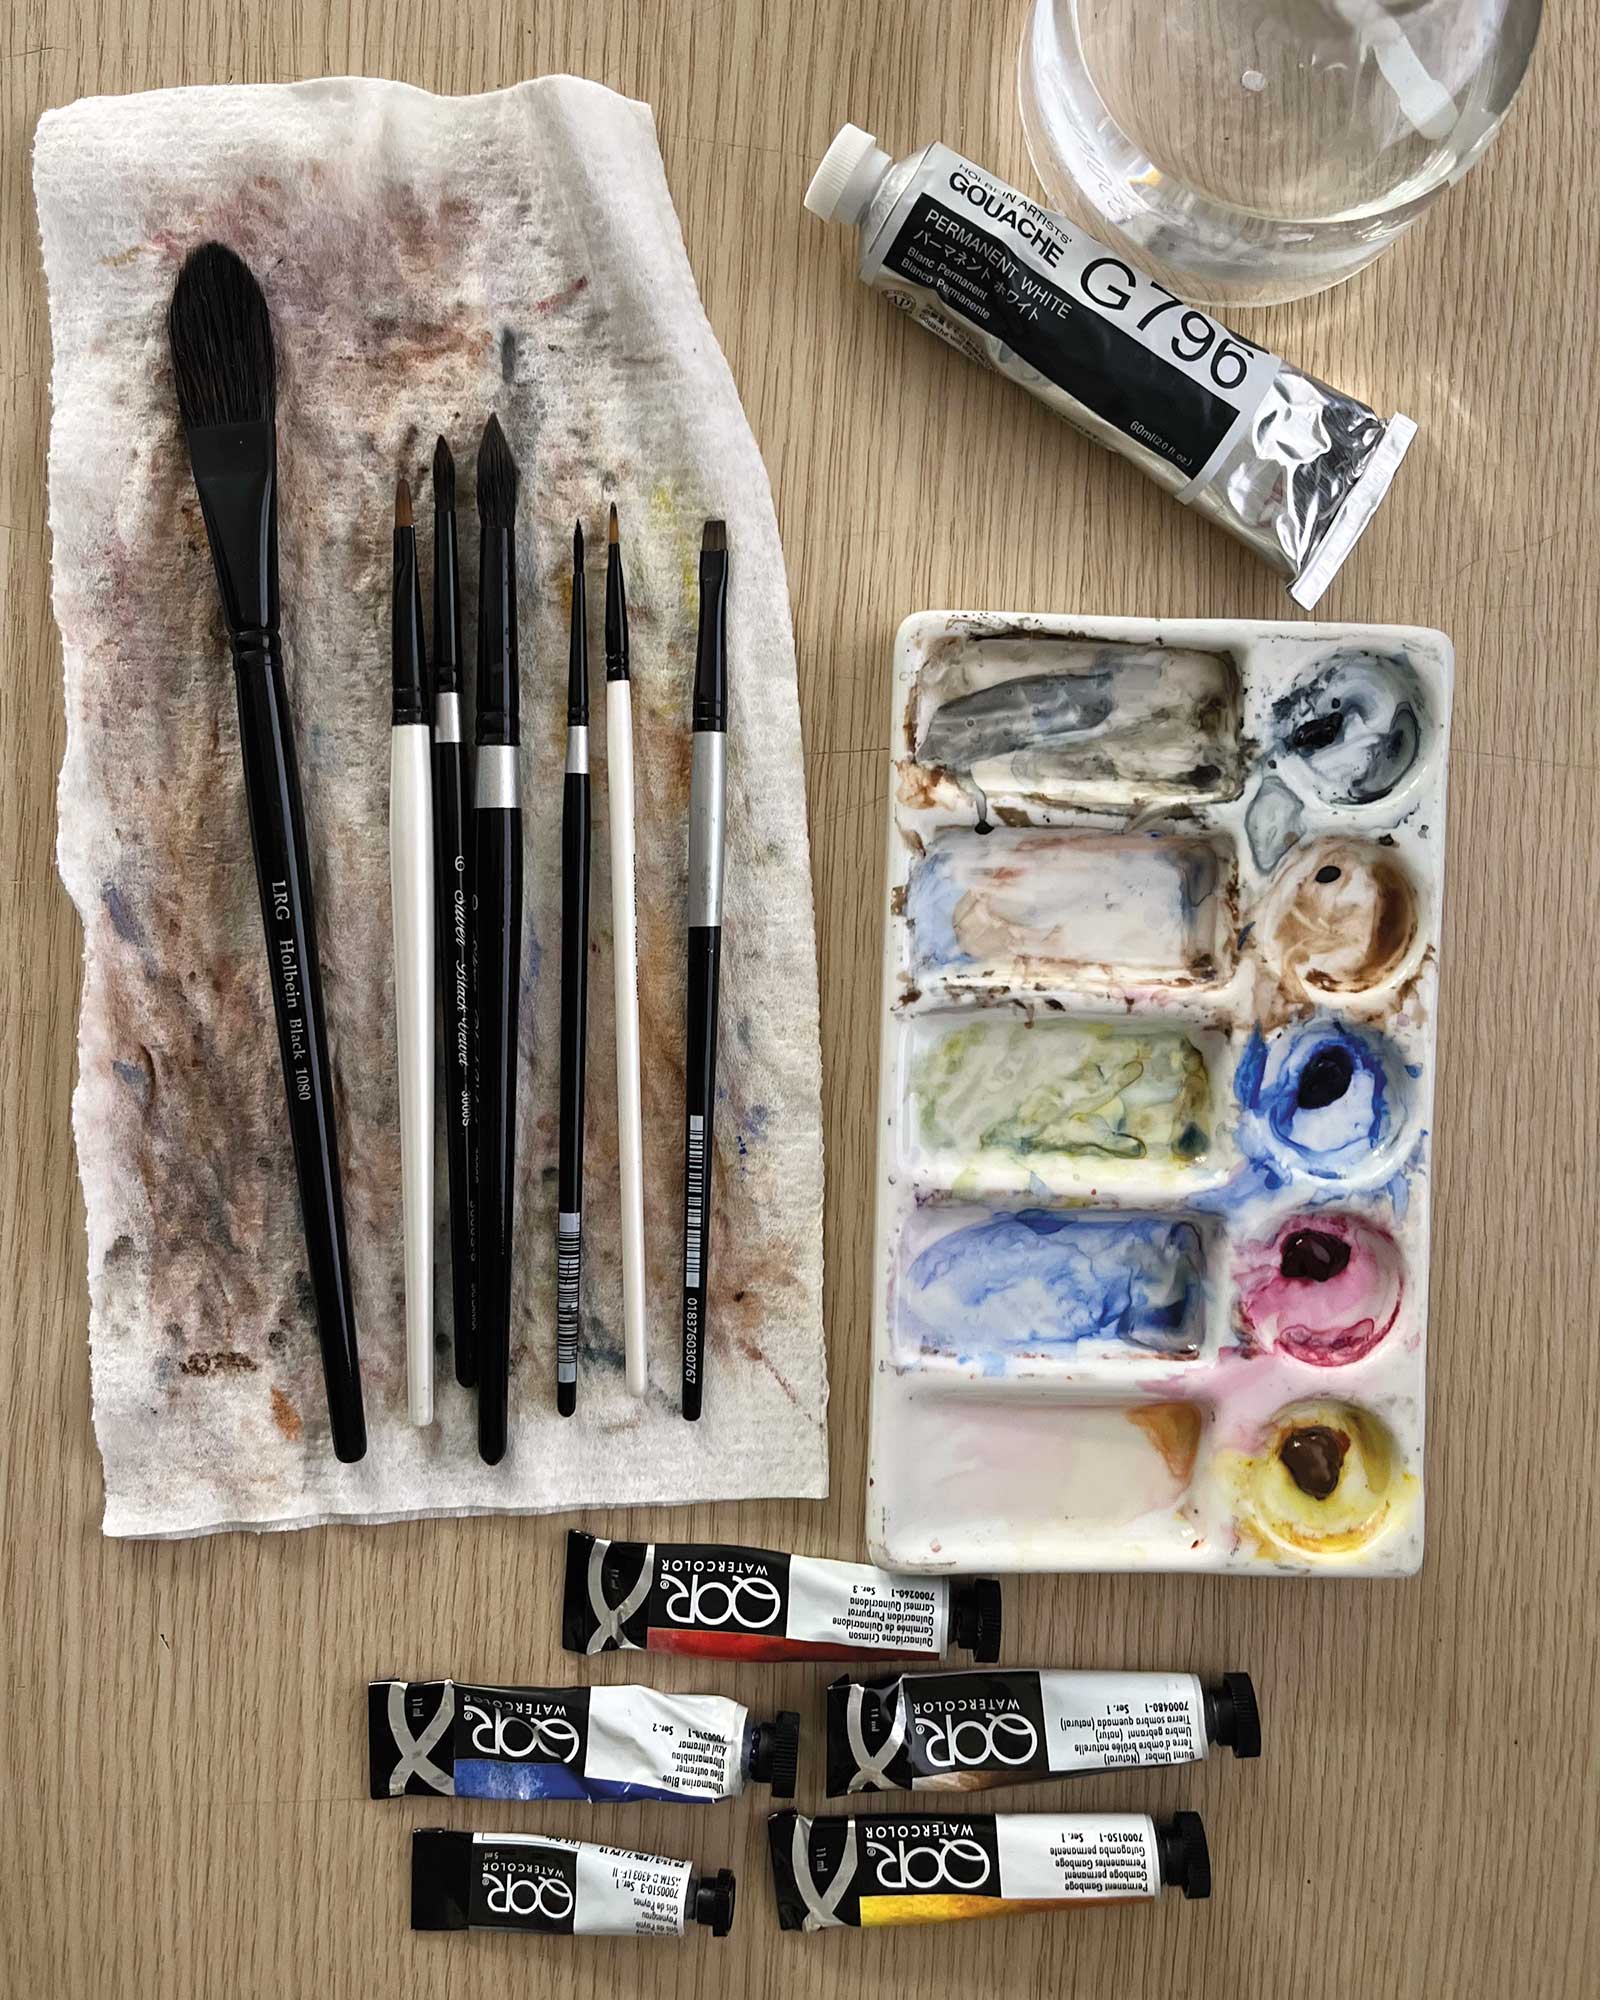
Golden QoR Watercolors
Quinacridone crimson, Permanent gamboge, Ultramarine blue, Burnt umber, Payne’s gray
Brushes
Various round brushes, Silver Black Velvet, sizes 2, 6, 10, Large Cat Tongue (Holbein Black 1080), Filbert (Simply Simmons), size 6, Flat (Black Silver by Dynasty), size 6
Additional Materials
Holbein white gouache, Aquabord, Bucket and spray bottle of water, Paper towels
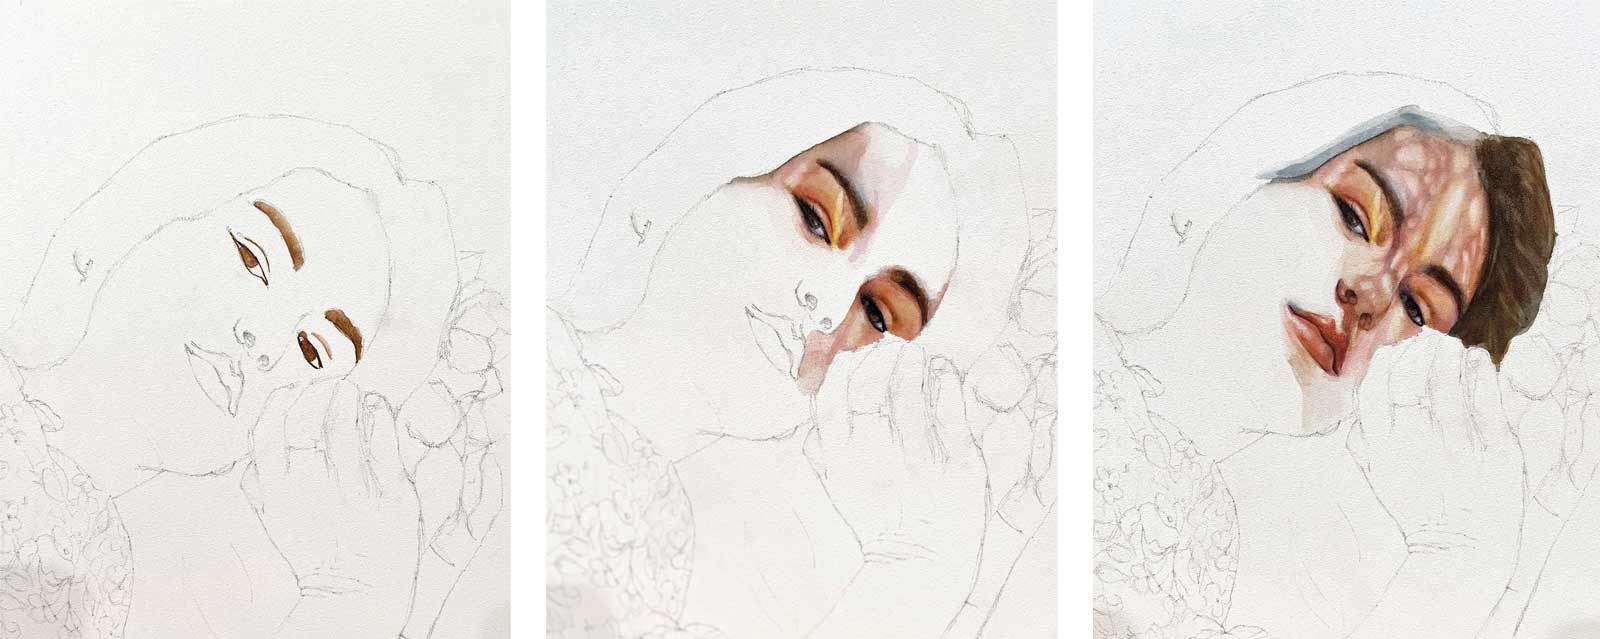 stage 2
Stage 2 The Eyes and Face
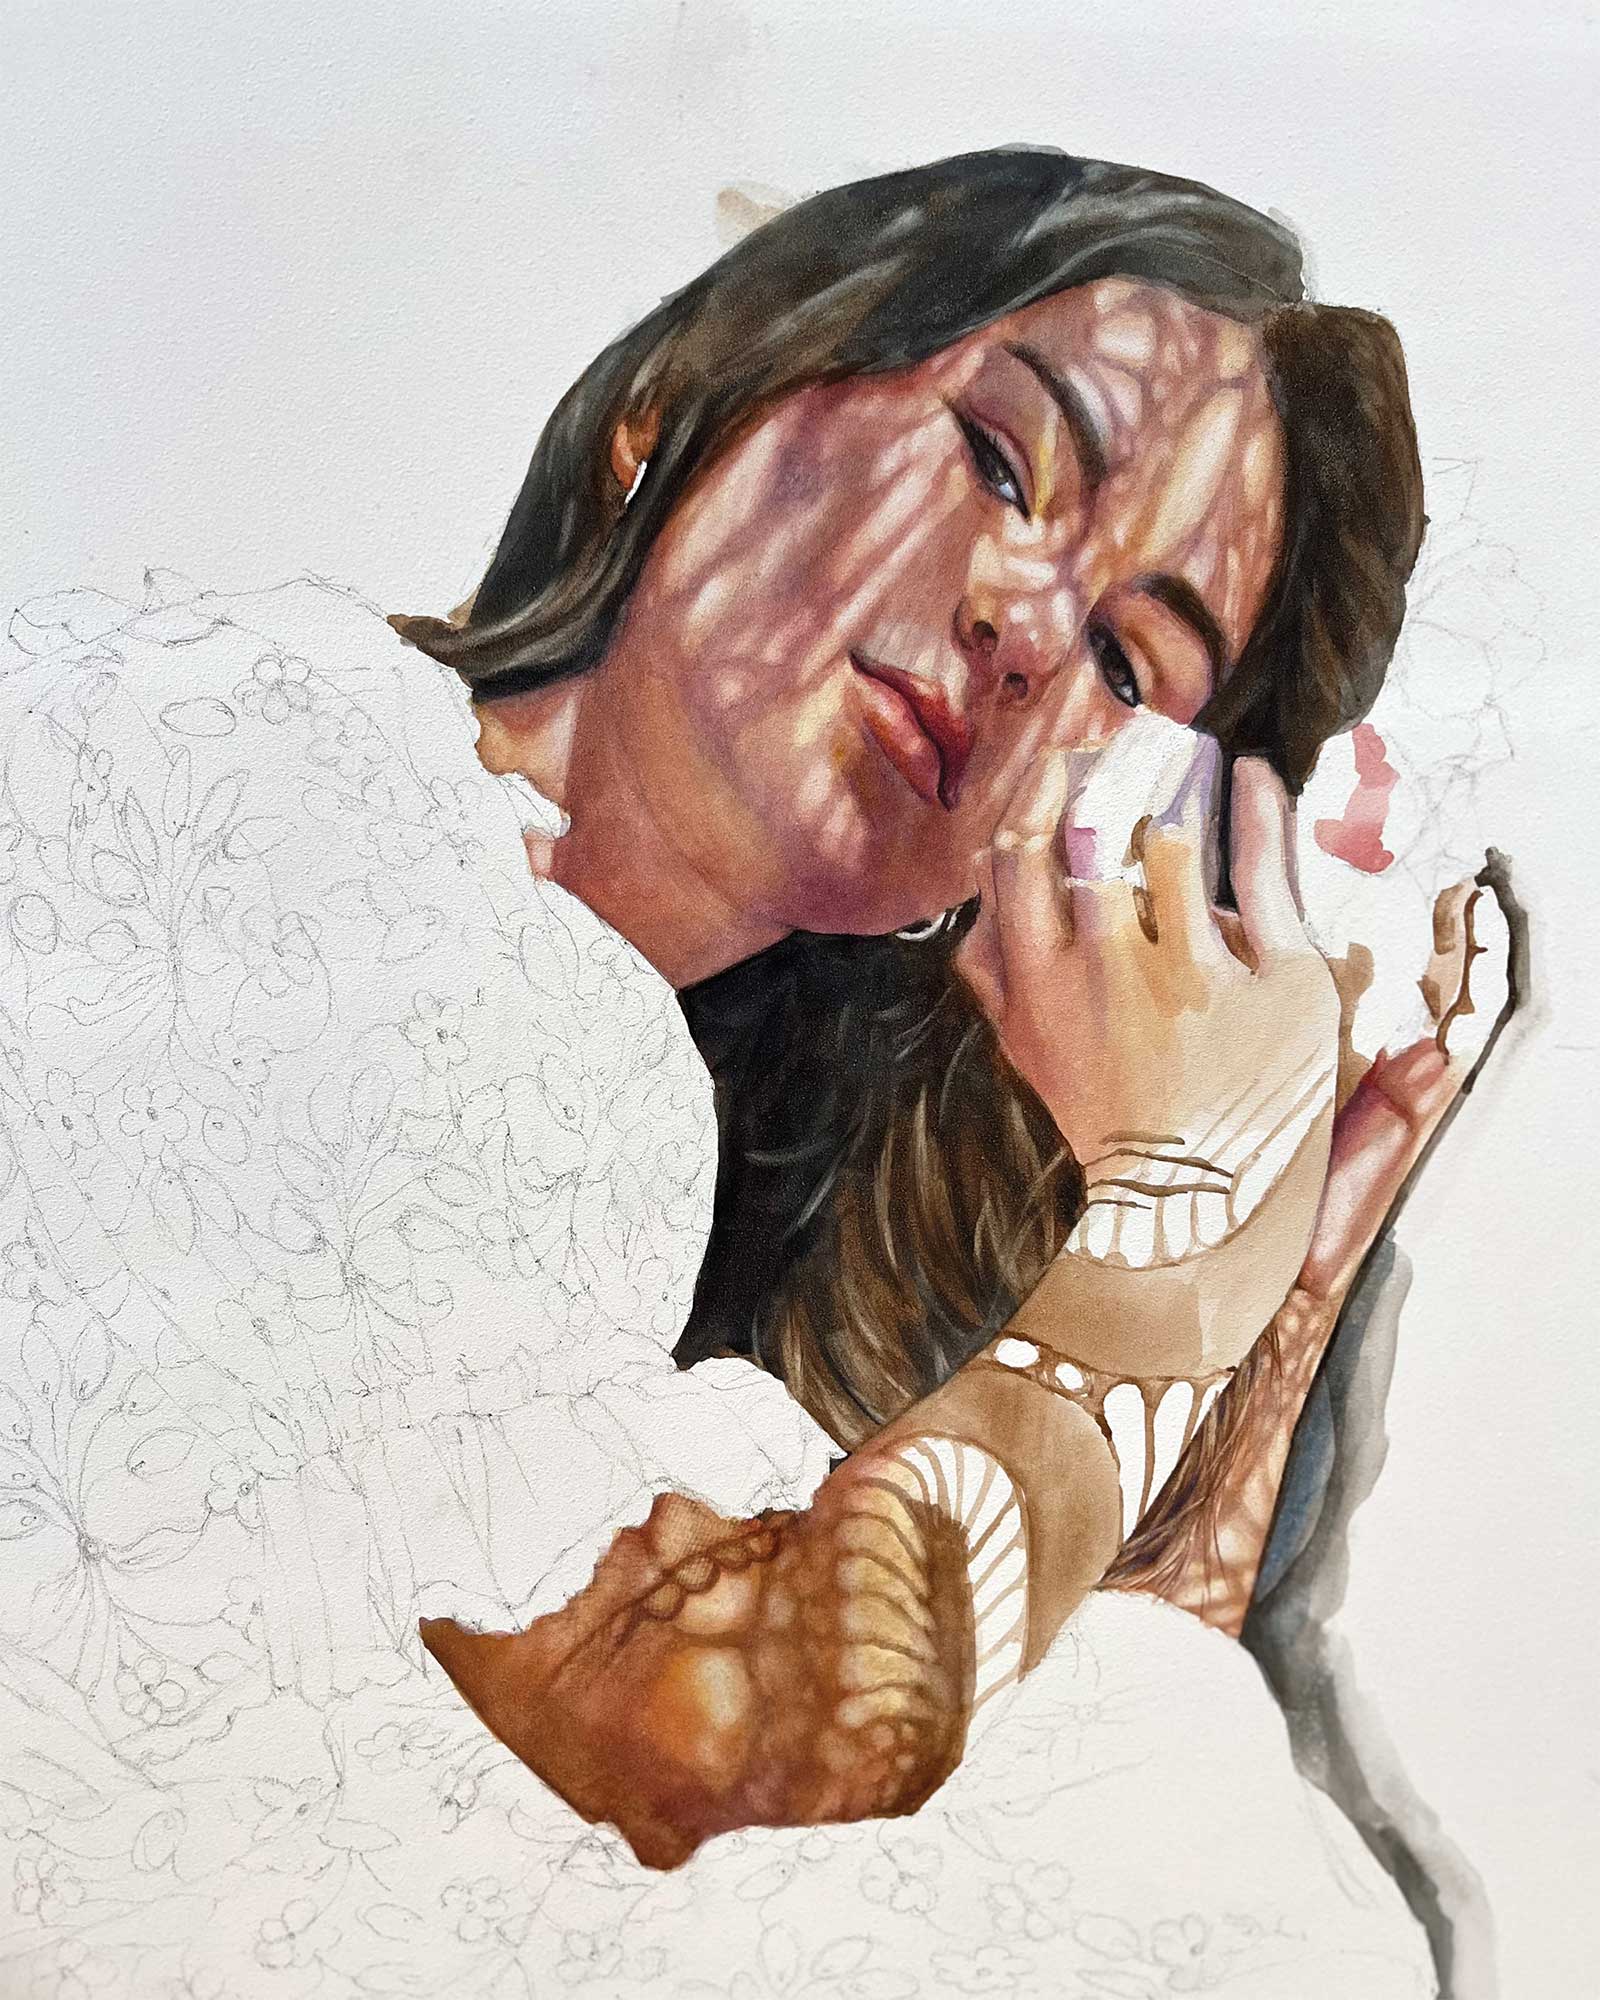
I started with one of the eyes, outlining it in brown, then adding touches of blue or Payne’s gray to create depth. I mixed a little bit of magenta for the shadows too, but I rarely use any yellow in the eyeball itself. From there, I moved to the outside eyelid and eyebrow, then I repeated the same process in the other eye, up to the forehead, then down to the nose and mouth until the whole face is finished. I start “wet on dry,” first to get the precise detail, and then I work wet on wet to finish the skin. For the eyes, I used a round brush size 2 and small flat brush to lift when necessary. For this section I used round brush size 2, 6 and a filbert size 6.
 stage 3
Stage 3 The Skin
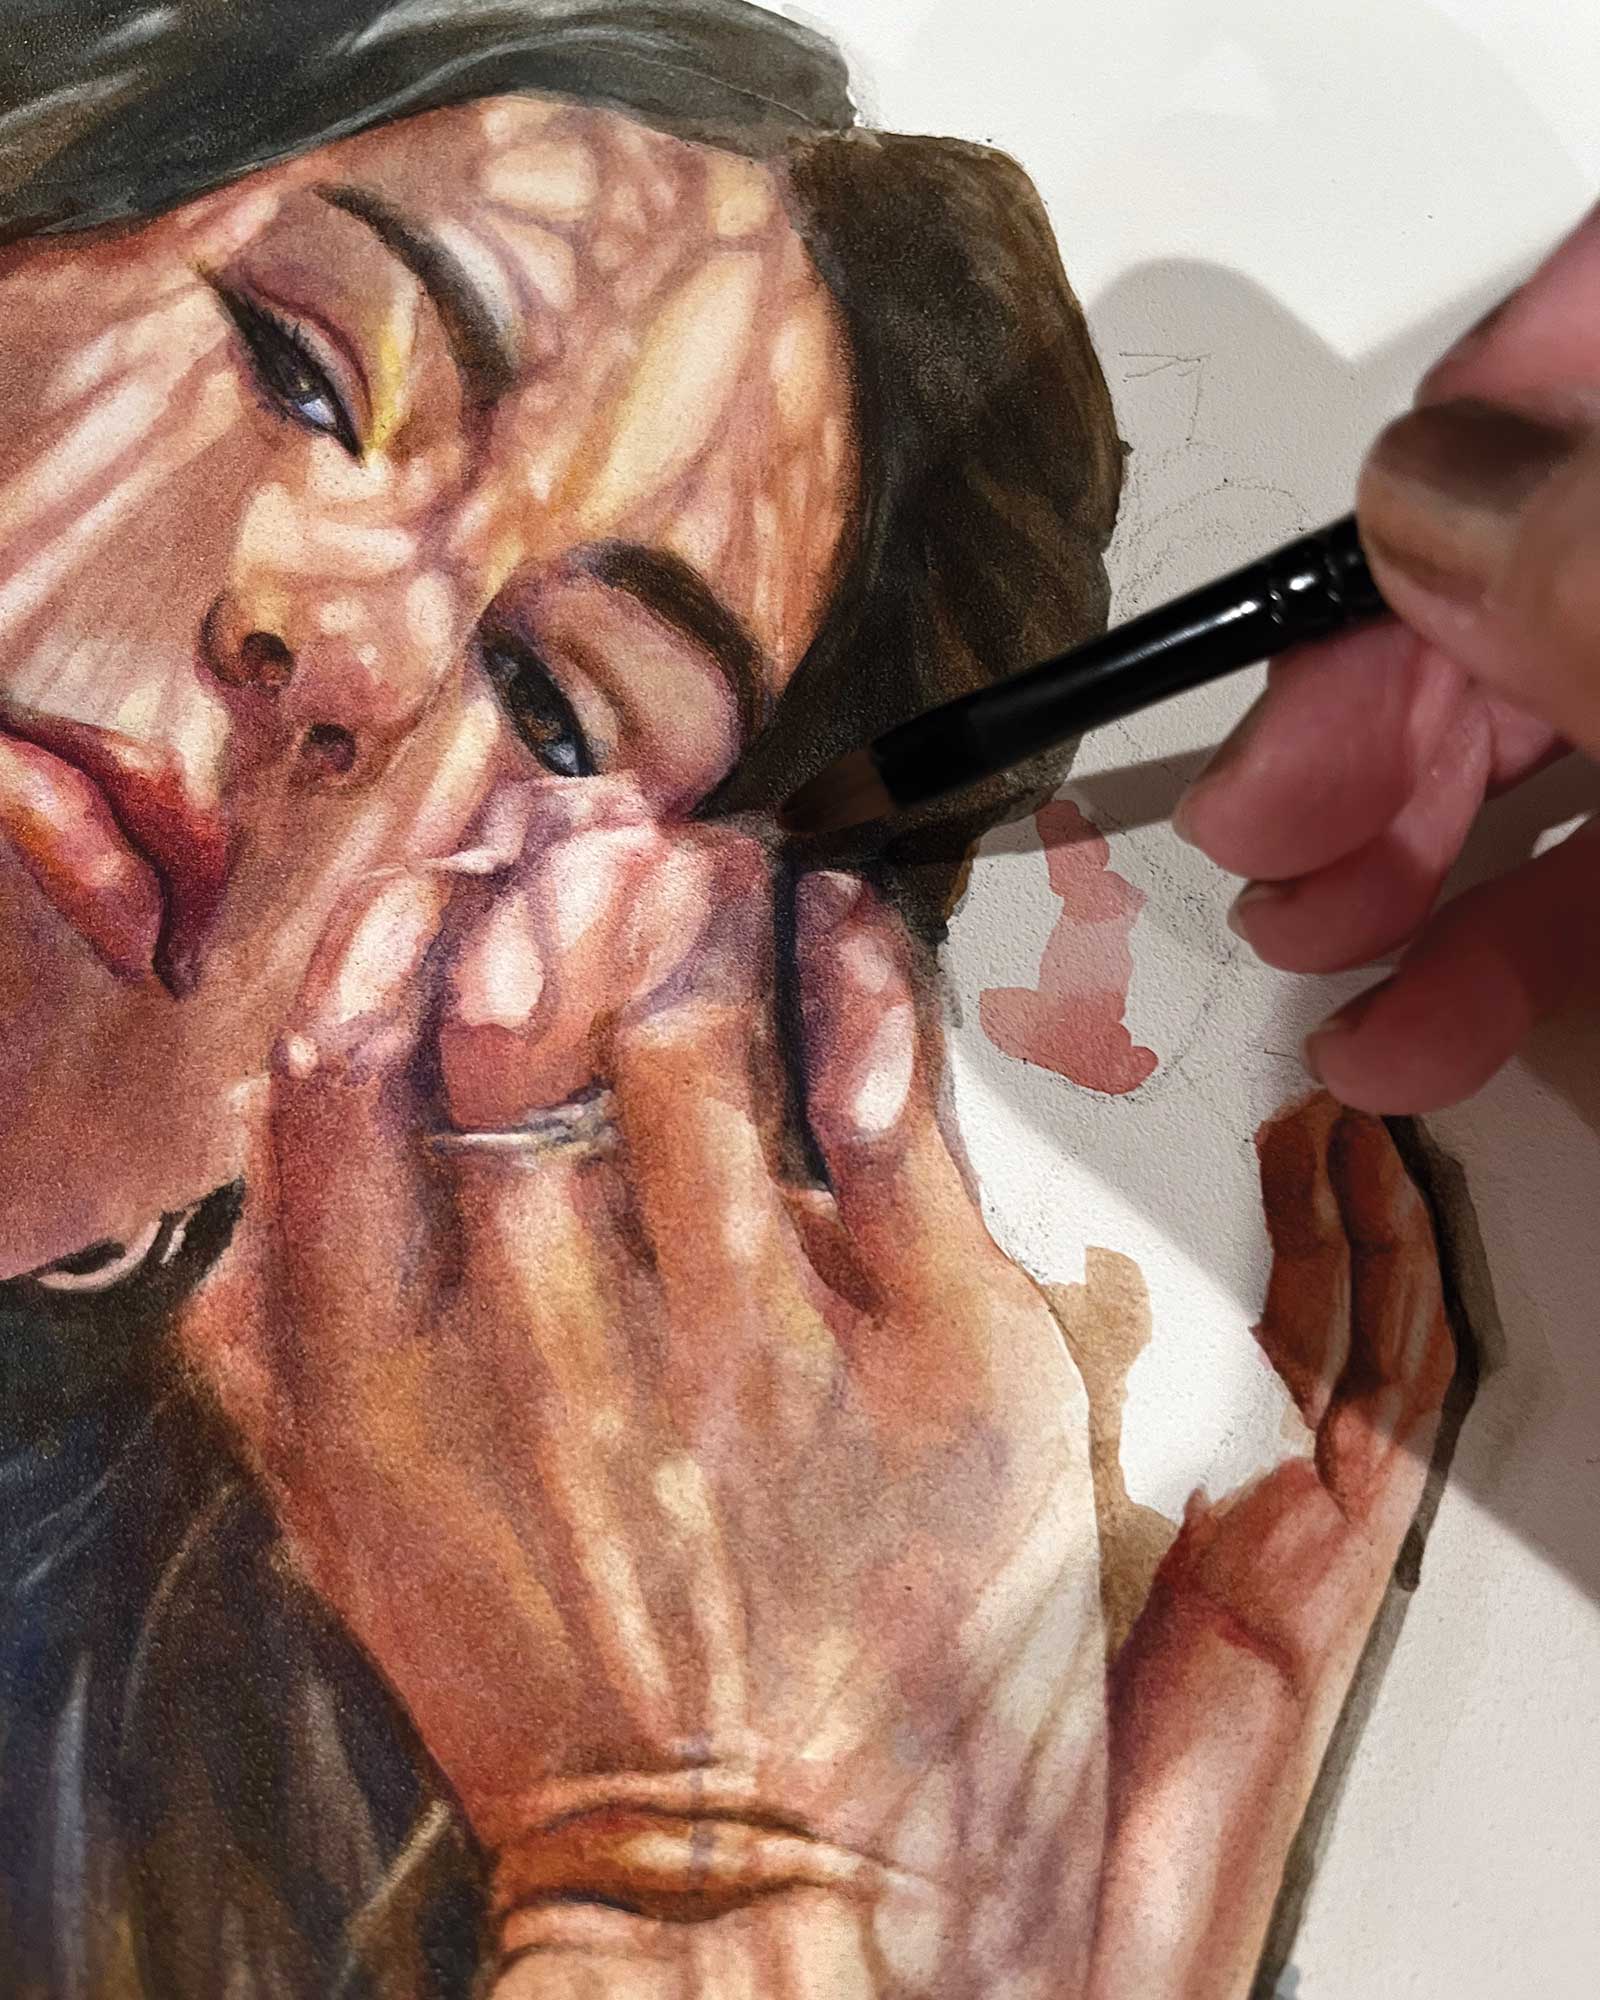
I painted the initials layers of her hair to frame her face, using a round brush size 10. I applied Payne’s gray and burnt umber to create the basics of her hair, and using a damp filbert brush size 6, I lifted a little bit of the pigment to make the hair textures and movement. Next, I moved on to the rest of her body. I don’t sketch out the shadows on the skin; I prefer to go straight in with the paint to keep the work looking clean and light. To mix her skin tones, I only use three colors: ultramarine blue, quinacridone crimson and permanent gamboge. I don’t use any really dark pigments here. After this layer, I added a layer of a mix of quinacridone crimson and permanent gamboge, then, with a damp filbert brush size 6, I lifted a little bit to bring back the white in the center of the light areas in the shadow. Alternating between a filbert brush size 6 and round brushes sizes 6 and 8, I repeated this process two or three times and then moved to the next area.
 stage 4
Stage 4 Motion of Hand
In this piece, her hand in motion was a challenge, as this was the first time I’ve ever painted movement. I applied the skin tone pigments as I did in her arms. Then, while the area was still wet, I carefully lifted in the direction of the movement using a filbert brush, repeating the process as much as needed to reach the color vibrance I wanted.
 stage 5
Stage 5 First and Second Background Layers
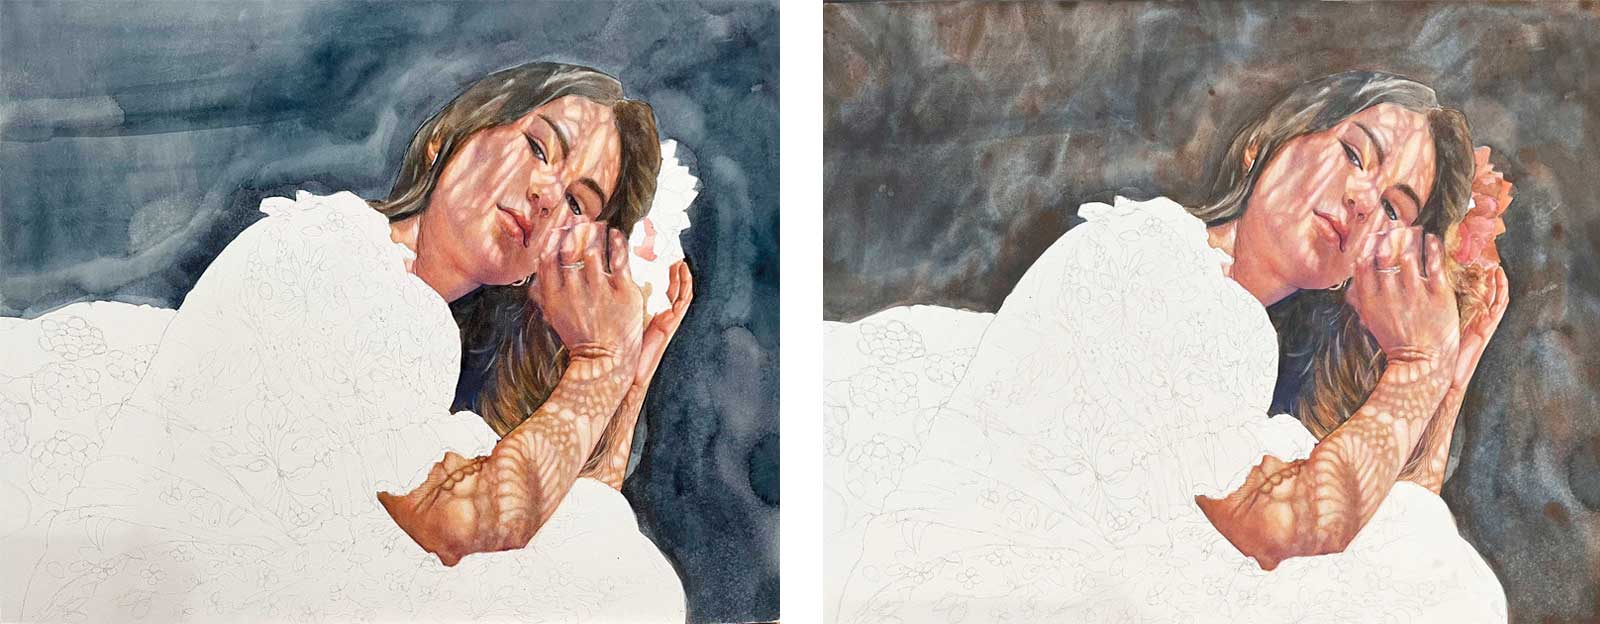
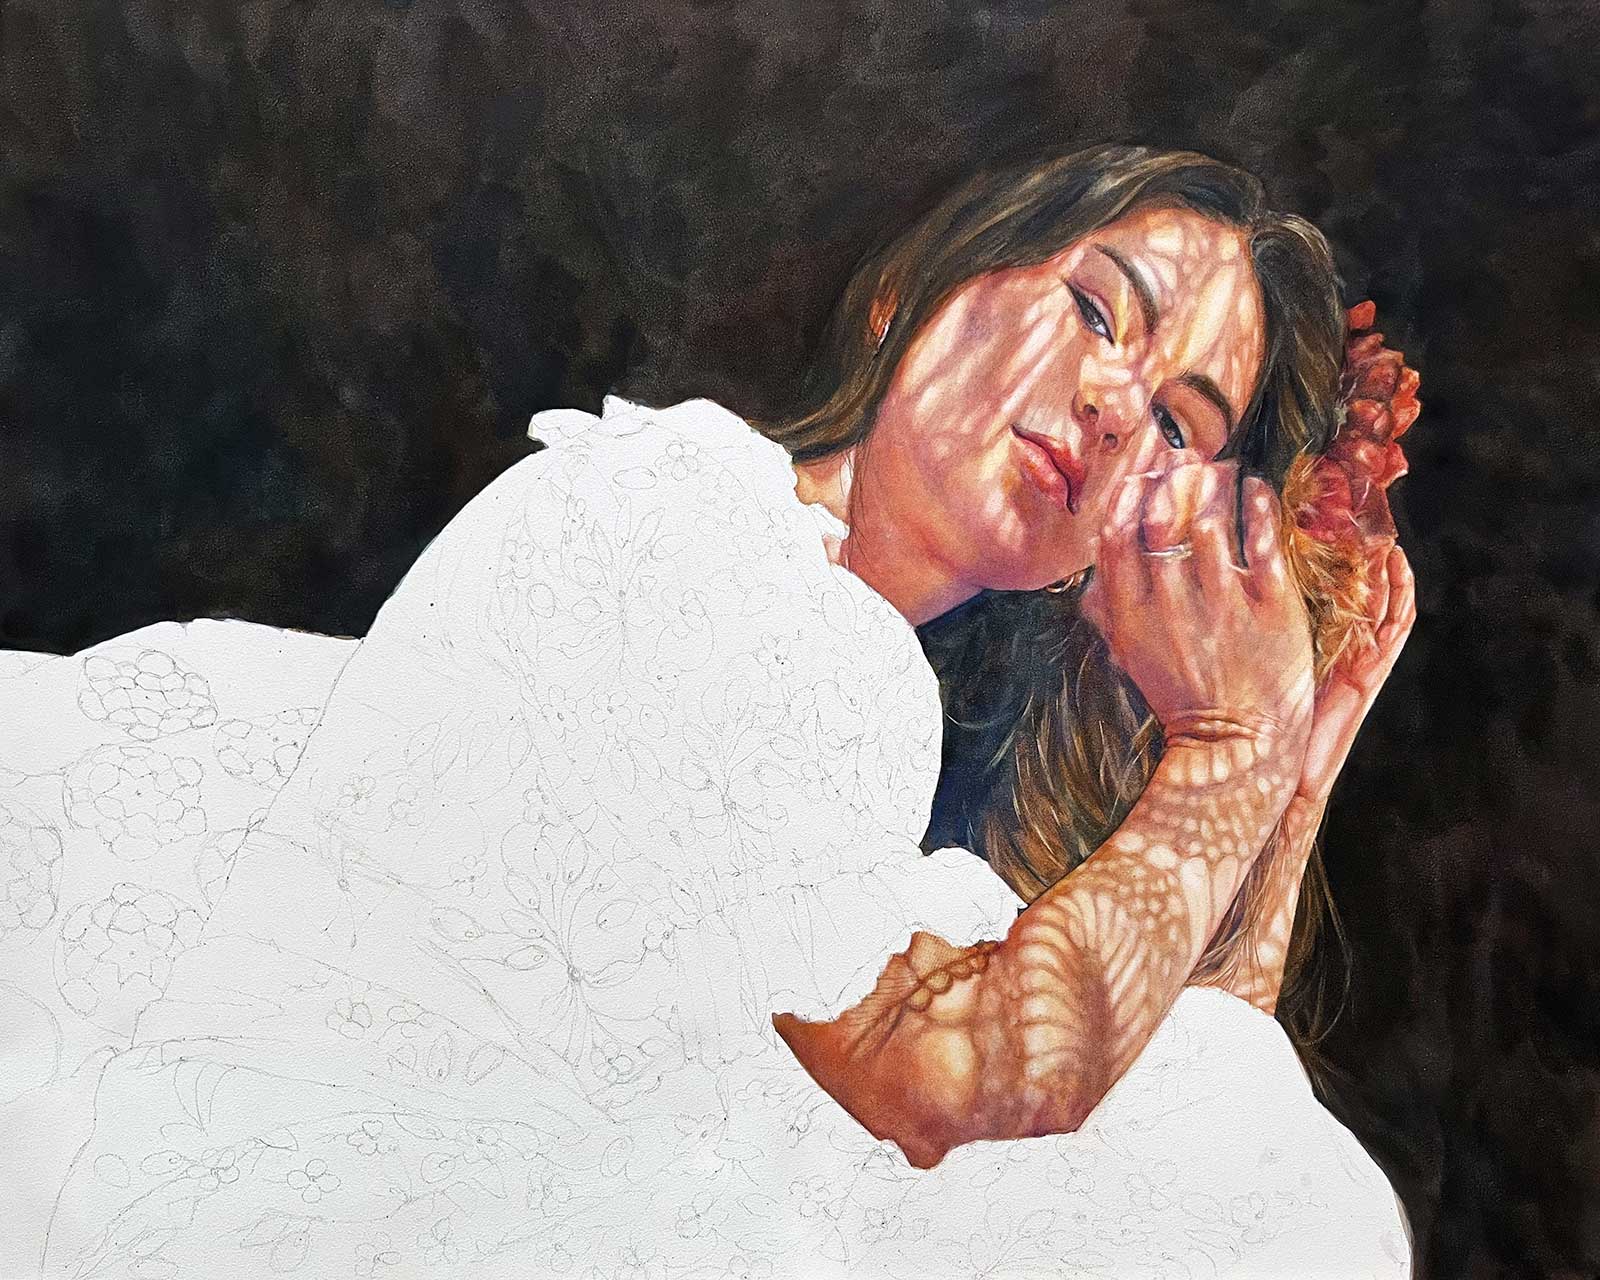
Using a large cat tongue brush, I laid down the first layer of the background using Payne’s gray. While the background is still damp, I go back in with a second layer of burnt umber and let it dry.
 stage 6
Stage 6 First Layers of Flower
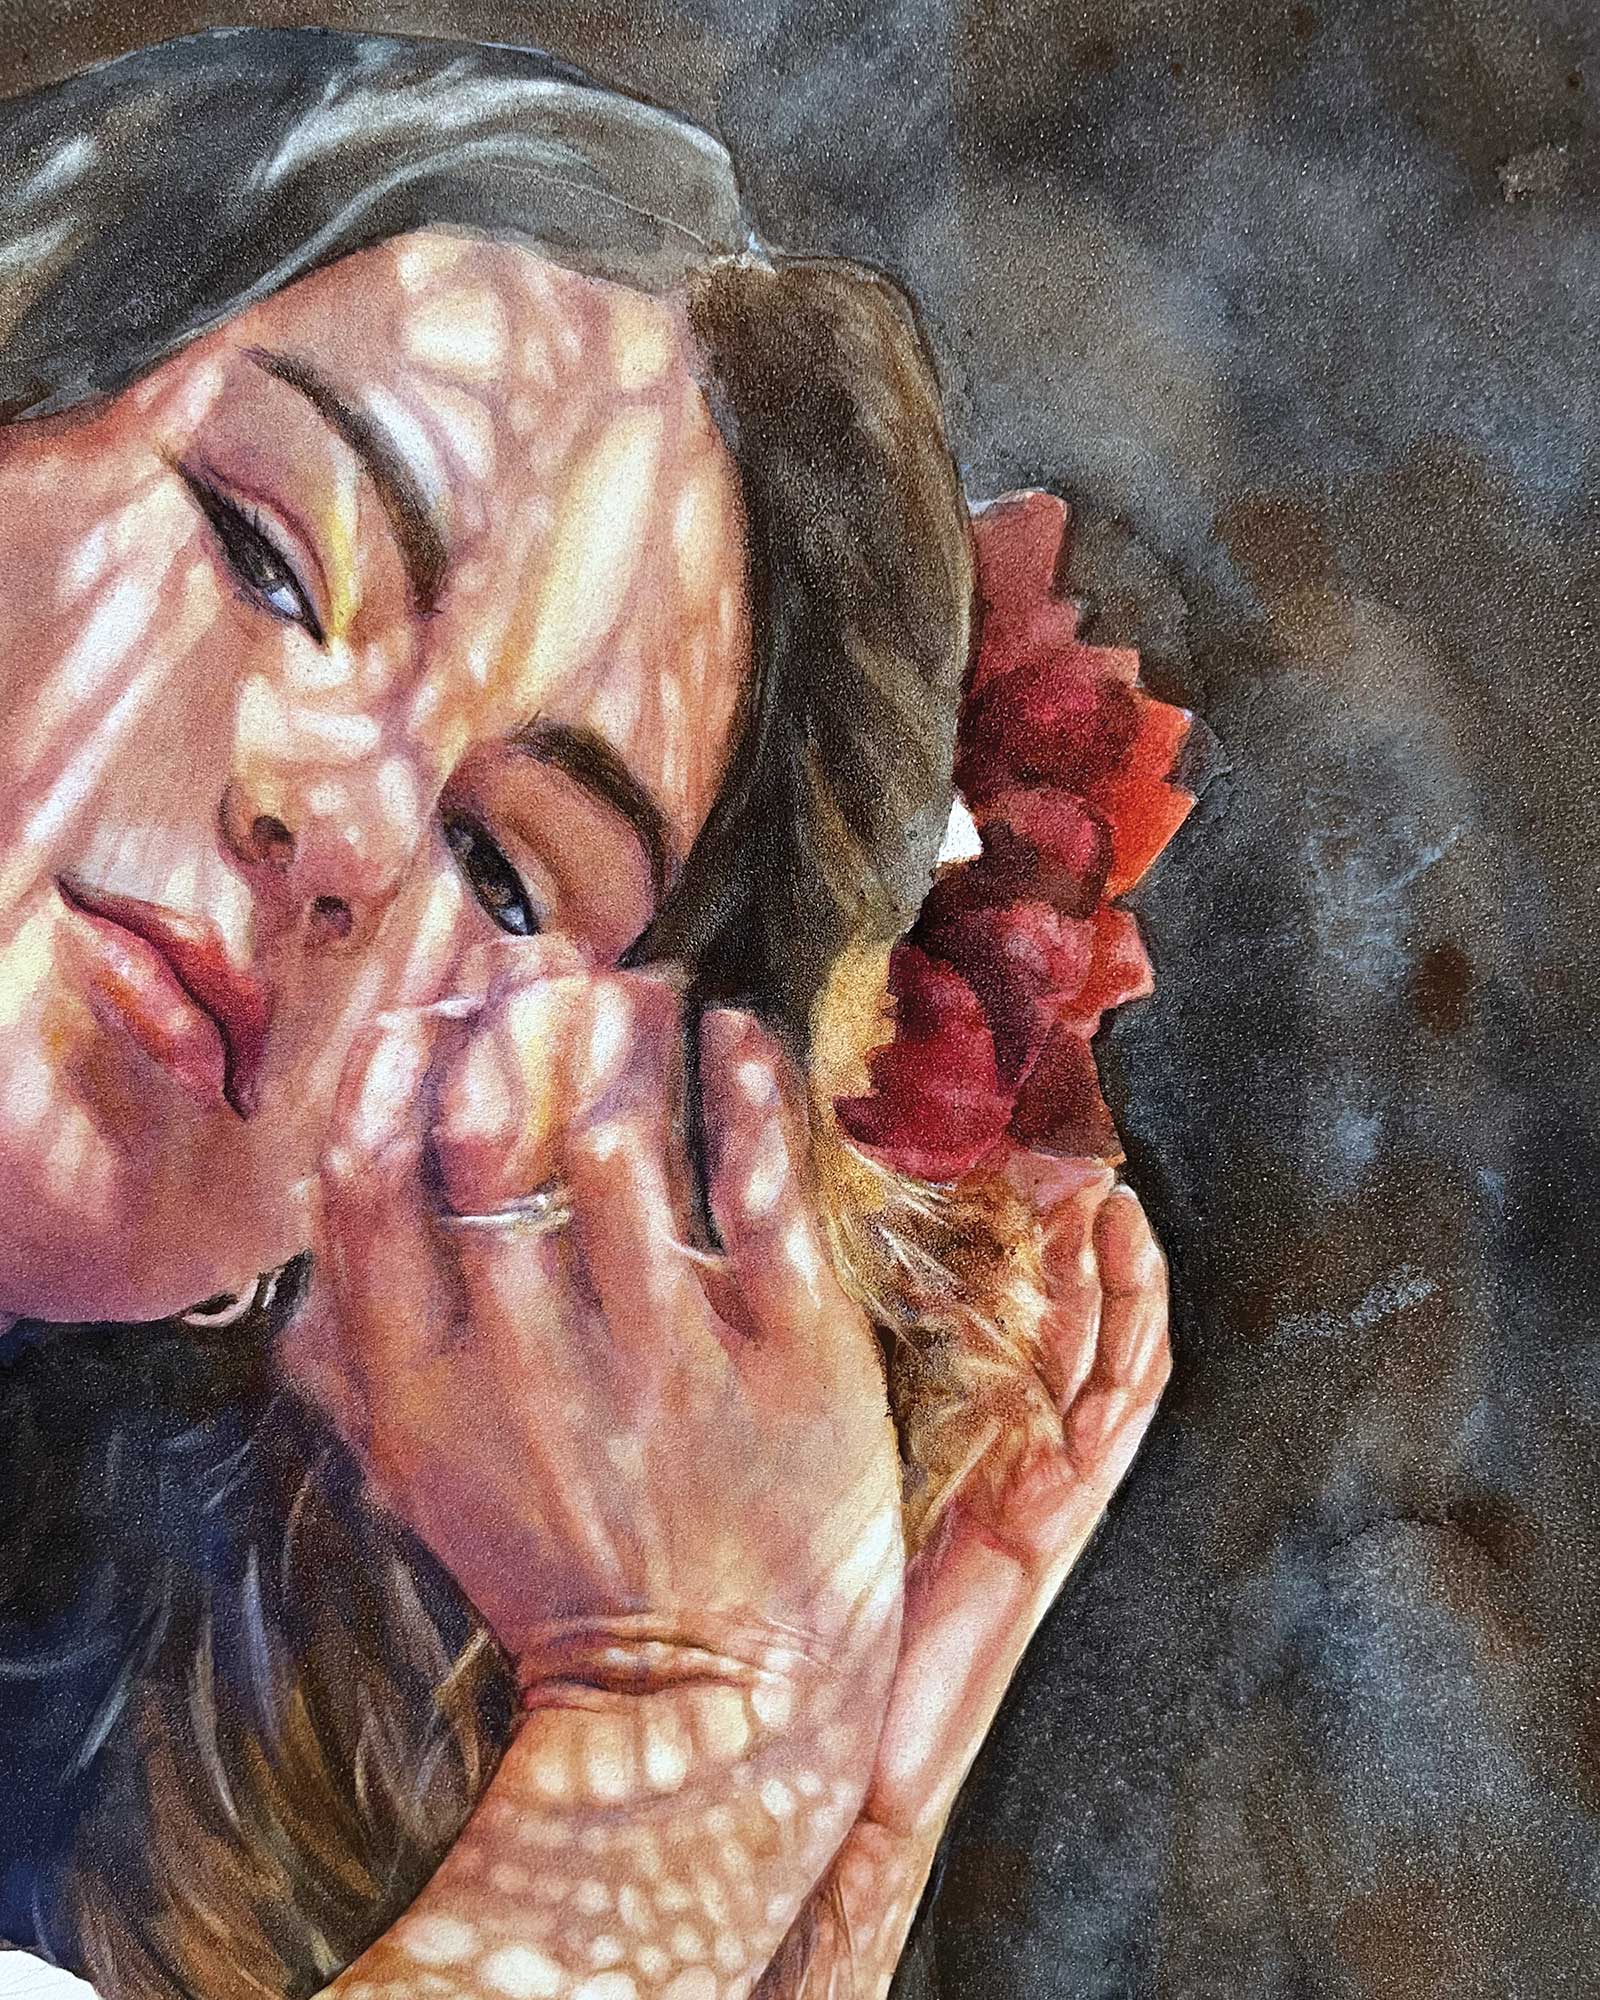
While the background is drying, I work on the first layers of the flower in her hair using just quinacridone crimson, burnt umber and permanent gamboge, repeatedly applying and then lifting to get the texture and light. I’m alternating between a flat brush and round brush, both size 6.
 stage 7
Stage 7 Hair
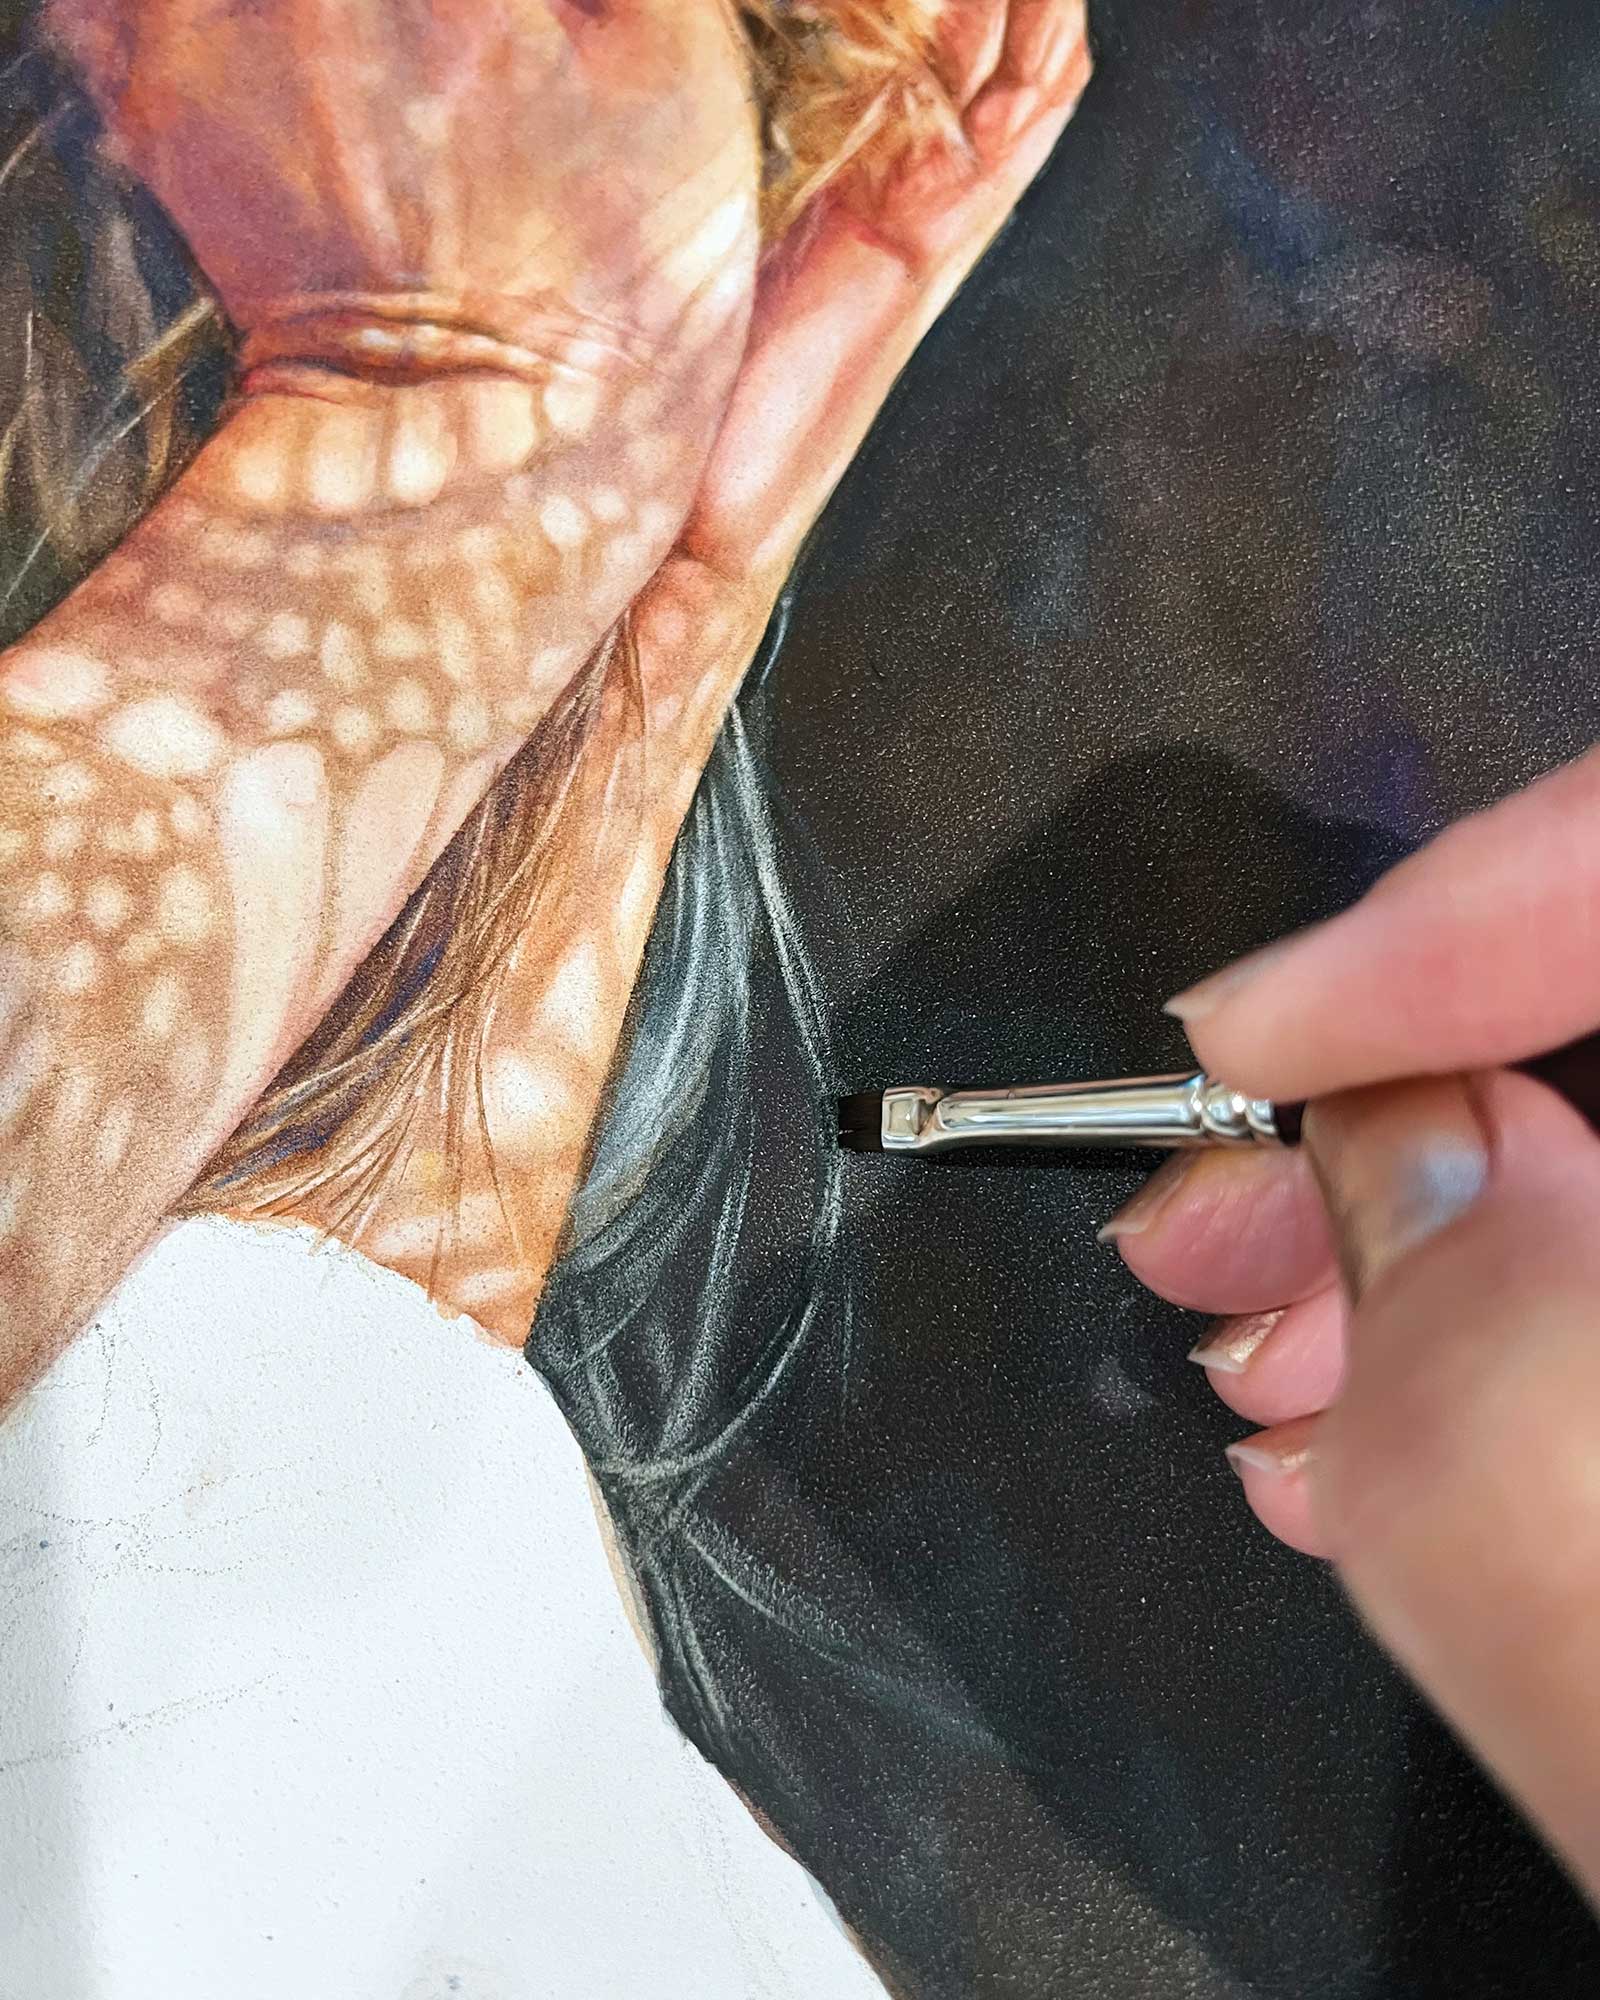
To create a small lock of hair that wasn’t in the photo and make the composition look more natural, I lifted the pigment from the background using a damp flat brush size 6 to create the hair’s texture.
 stage 8
Stage 8 Third Background Layer
Hard edges are simple, but soft edges require simultaneous handling to prevent unwanted “tide marks.” Using a large round brush, I added another layer of pigment on her hair, and also lifted pigment for the hair texture, creating more detail. Immediately after, while the area is still wet, I laid down another layer of the background using Payne’s gray and burnt umber, previously mixed, blending both areas. After this area dried, I repeated the process to get a deeper color.
 stage 9
Stage 9 Starting the Blanket
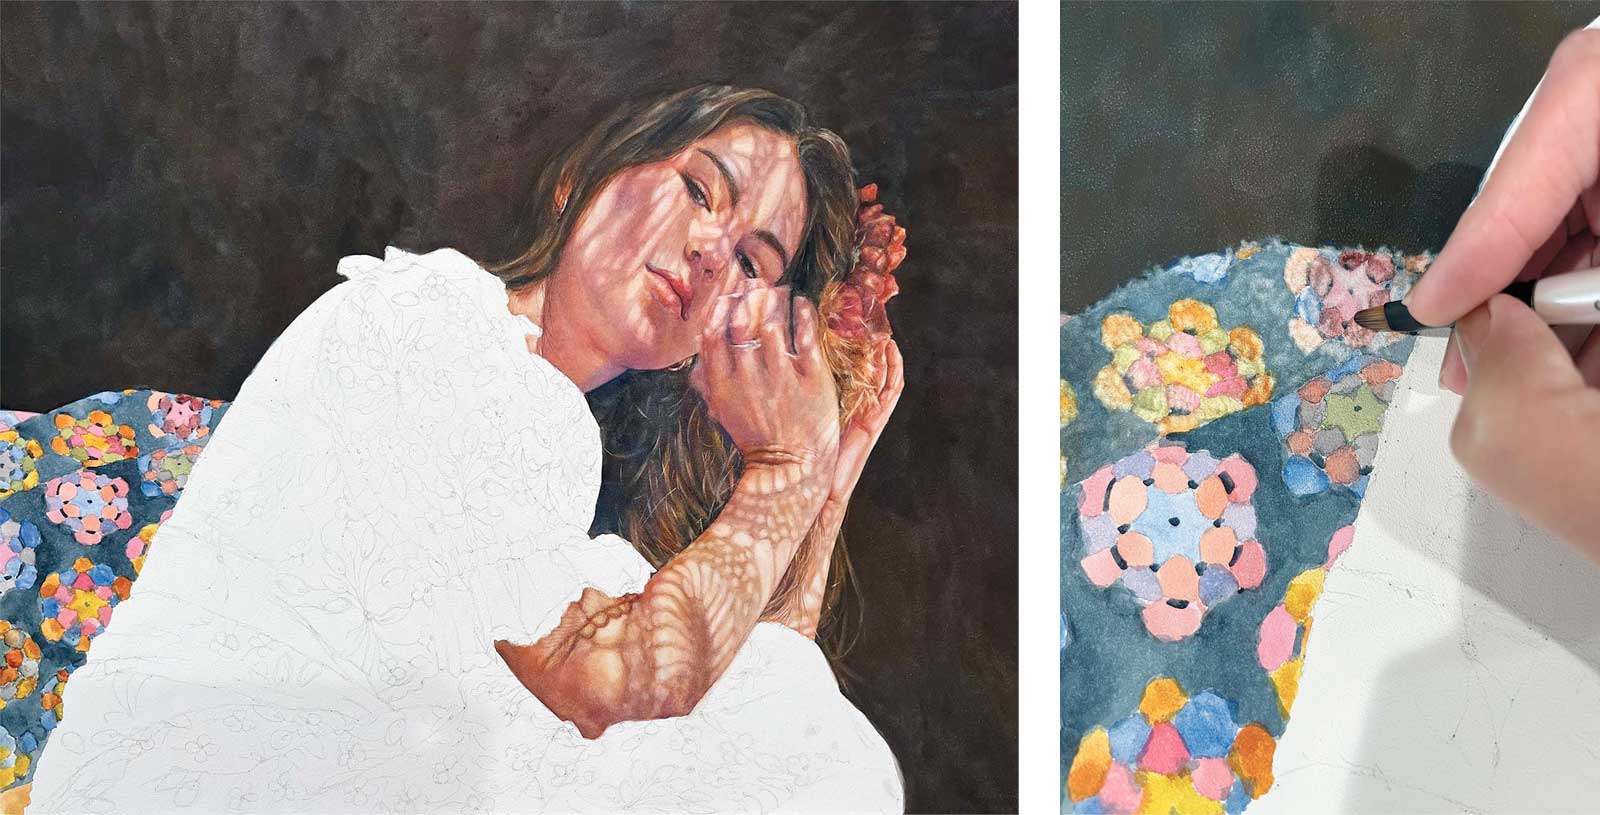
While I wait for the background and hair to dry, I start the first layers of the quilt. For this, I’ll use every color in my palette except white. After the first layer of color is down, I take the filbert brush to lift pigment and “carve out” the texture of the wool. Once that’s done, I go back over it with another layer of color to create depth and vibrancy.
 stage 10
Stage 10 First Layers of Dress
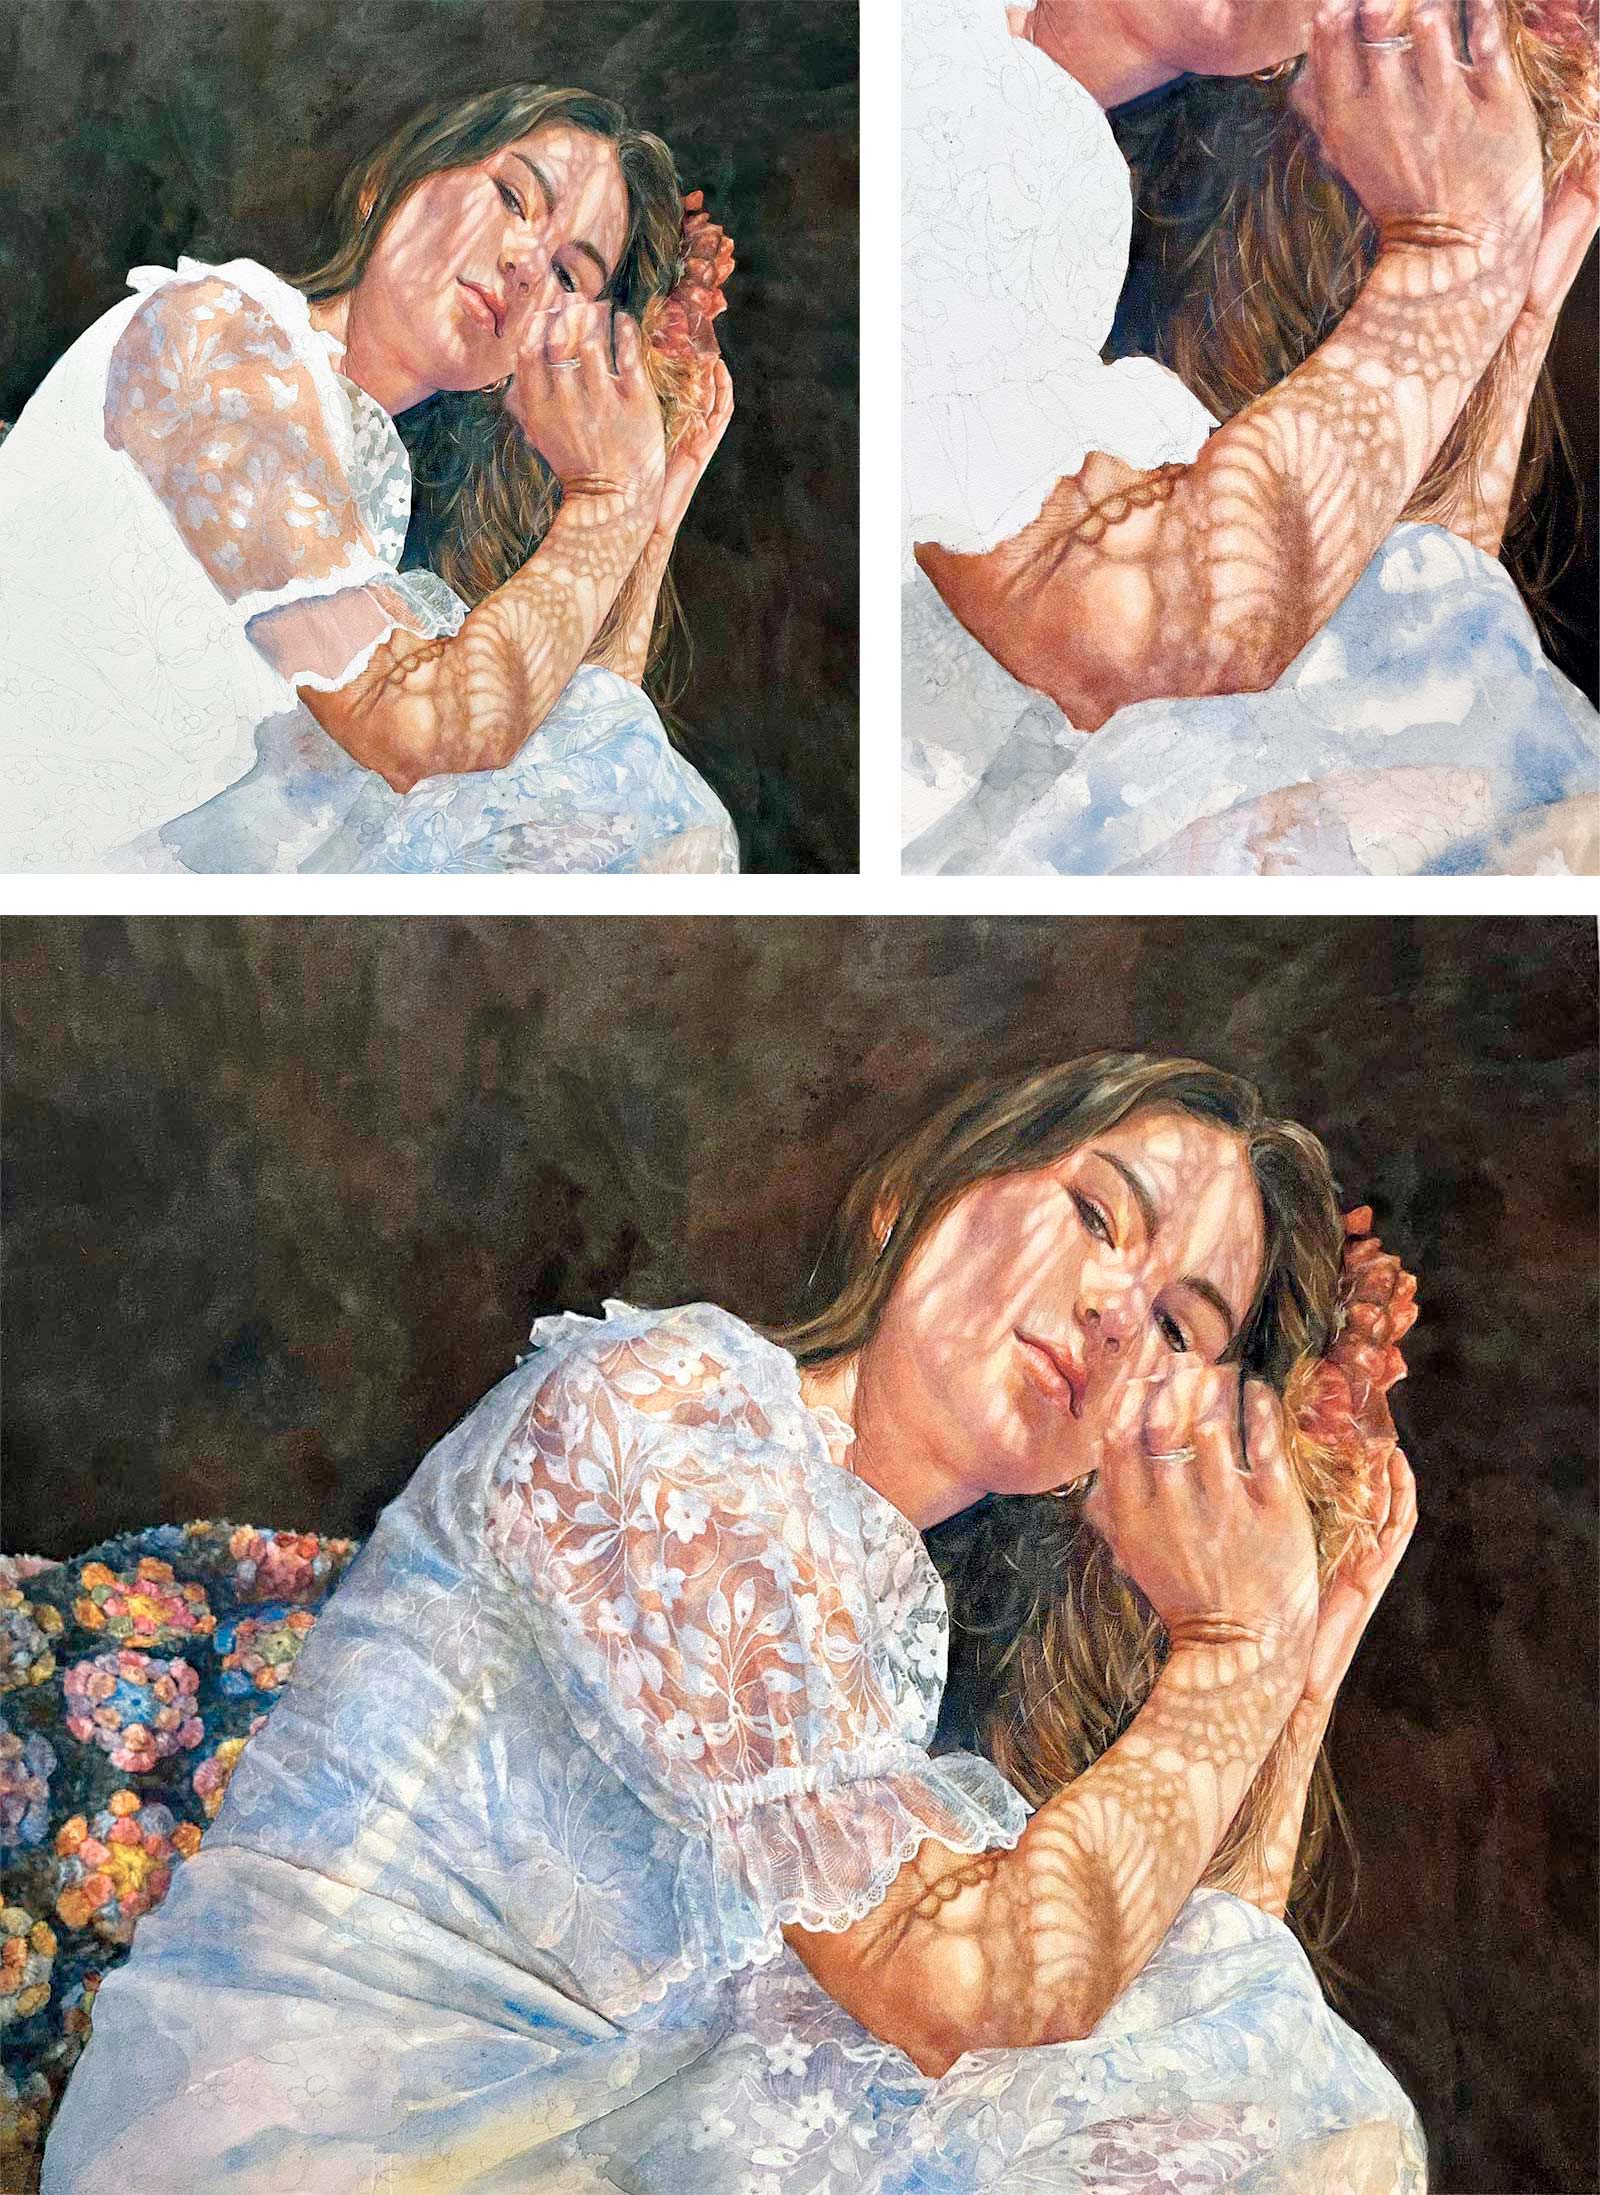
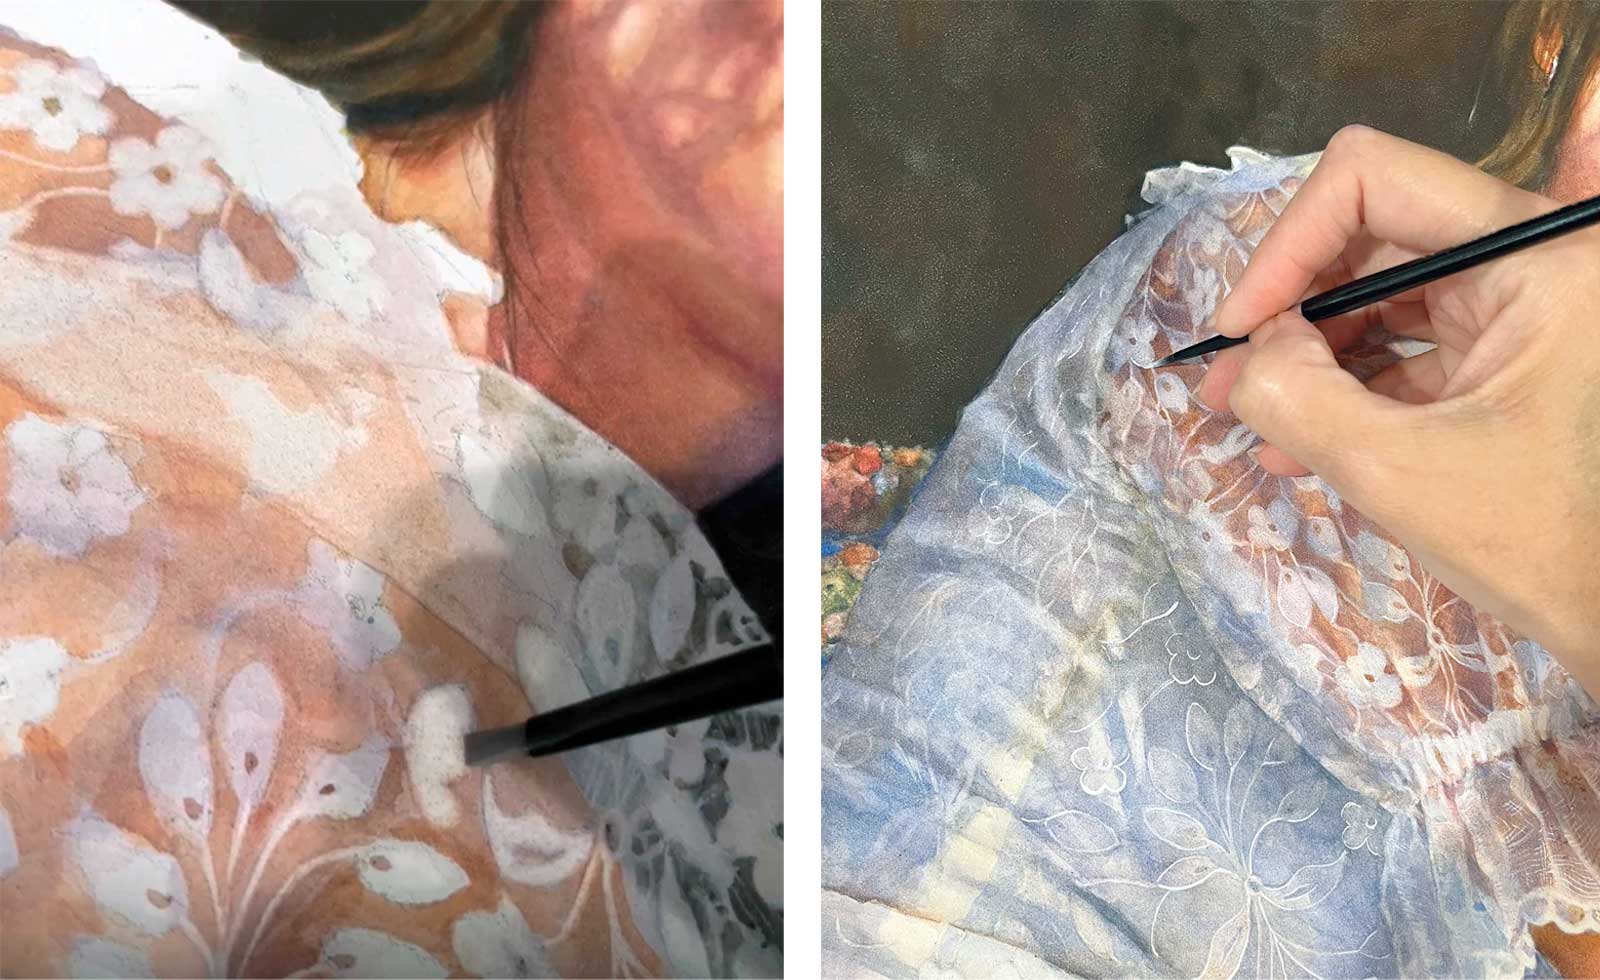
Now for the trickiest part of this painting: the dress. I divided it into four sections: the skirt area around the knees, the sleeve, the bodice (the upper part of a dress) and the rest of the skirt. Even though the dress is a single garment, I tackled it the same way I did the model—finishing each section completely, from the first layer to the final details, before moving on. (It also helps me not get lost in so many small details.) At the very end, I’ll unify the whole piece with the embroidery details and the shadows on the fabric. I alternated between round brushes to apply the pigment and flat brushes to lift the lace design.
 stage 11
Stage 11 Lace Details
I built these areas by laying down the shadows first, then gradually lifted the pigment onto the white areas of the embroidery. Next, I applied the shadow pigment again (blue or purple, made from mixed colors). And if necessary, I lifted to bring back the white. Then, in some areas I applied the skin tone pigments (a mix of quinacridone crimson and permanent gamboge) on the areas I can see the skin and lifted when necessary—for example, when the pigment gets on top of the embroidery area. I may repeat the process depending on the area.
Finally, I used white gouache for the highlights and some small lines of the lace embroidery using a fine-tip size 2 brush. Through this repetitive, multi-layered cycle of application and subtraction, I create volume and a naturalistic texture that feels more organic.
 stage 12
Stage 12 Finished Artwork
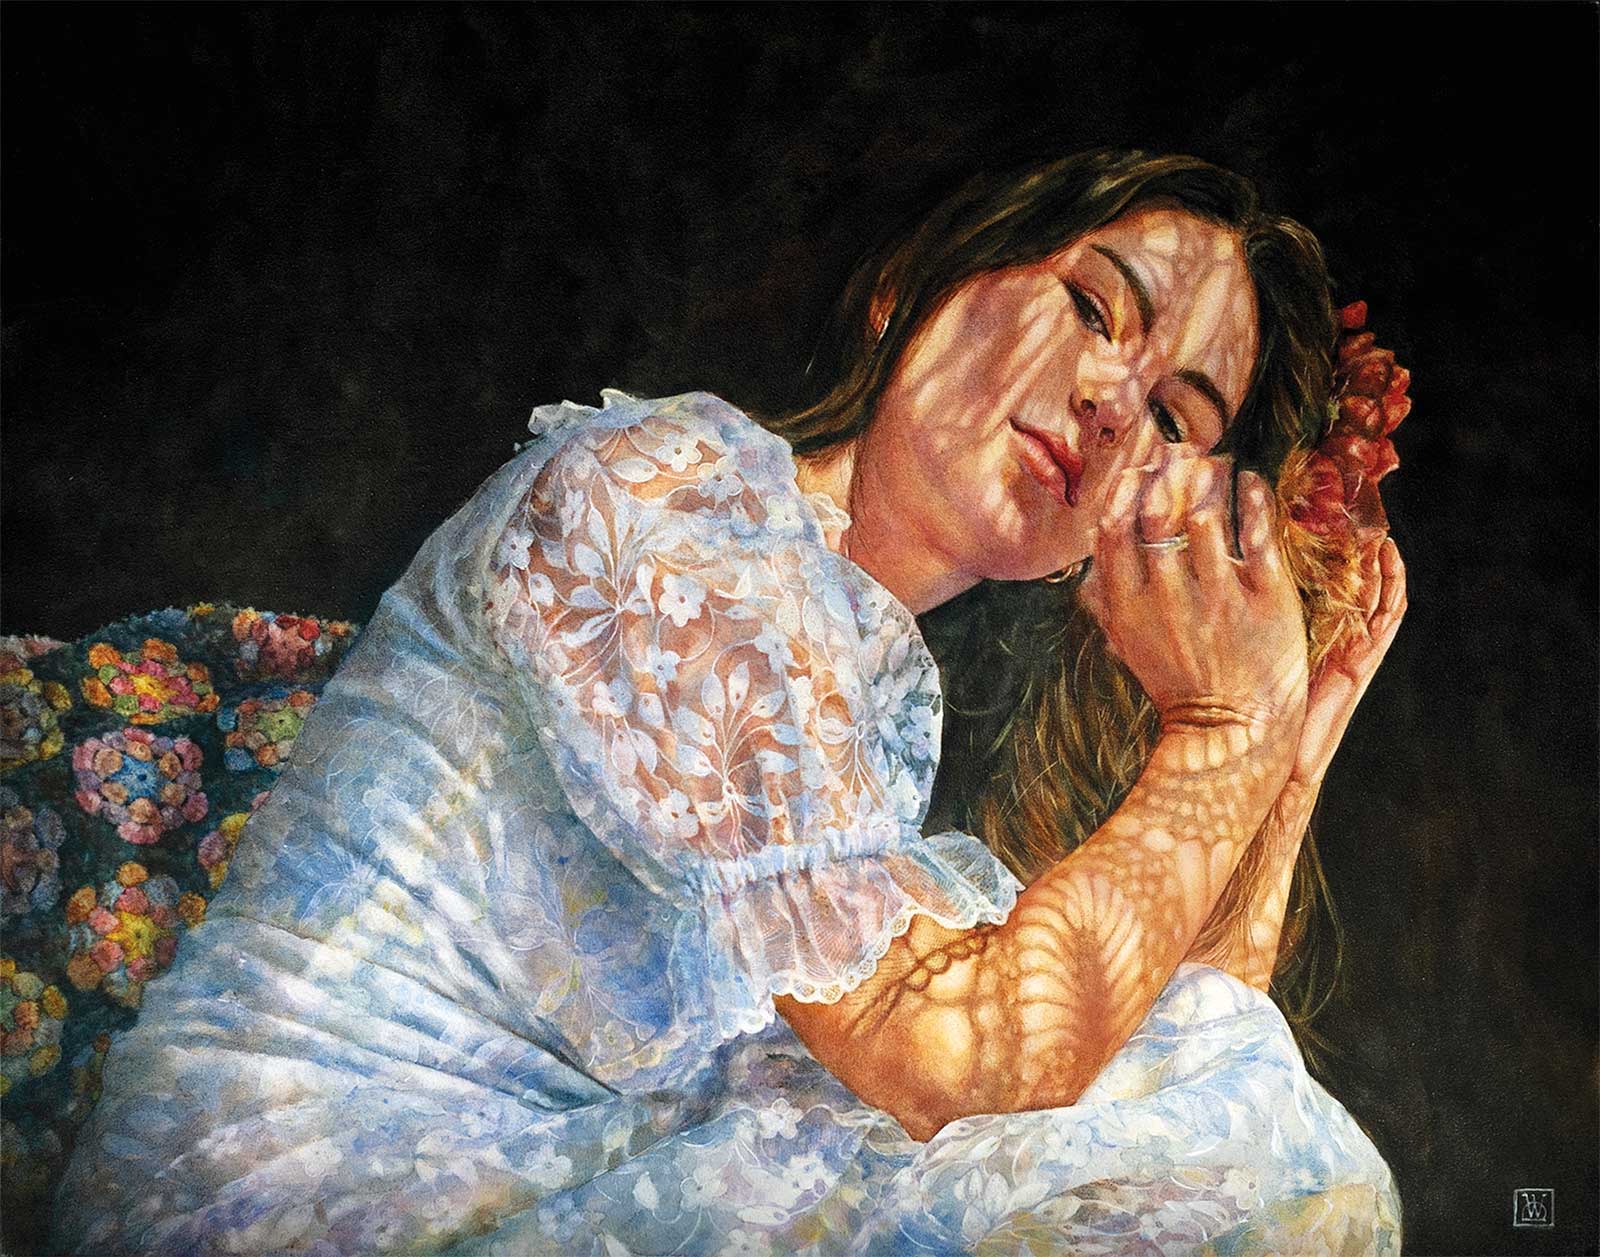
Listening to the Light, watercolor on Aquabord, 16 x 20" (40 x 50 cm)
To finish it off, I add just a few final brushstrokes of ultramarine blue, quinacridone crimson and permanent gamboge using a size 10 watercolor brush all around the dress area. Now all that’s left is to sign it, and the painting is ready for varnishing. To varnish, I start with a spray fixative, and once that’s dry, I apply the final coat of varnish over the top.
About the artist
 Daniela Werneck
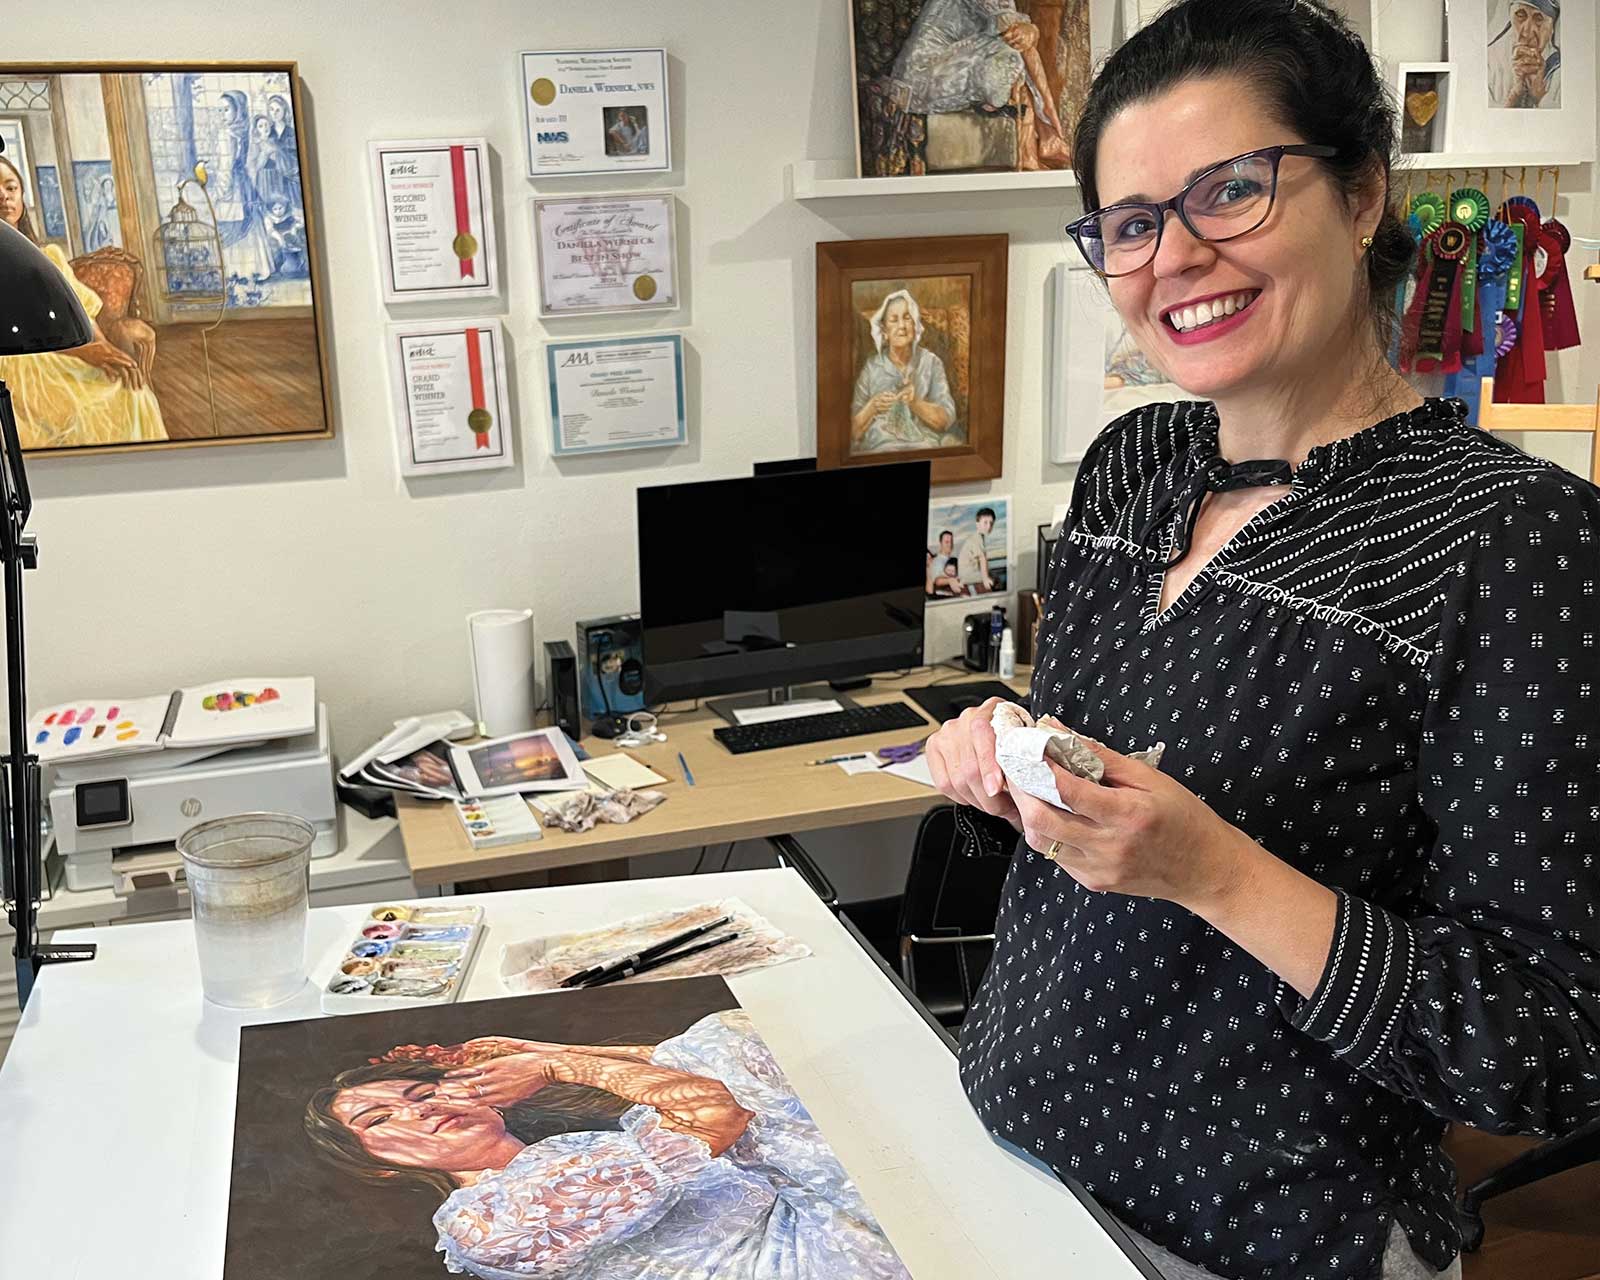
Daniela Werneck is a Brazilian-born watercolor artist based in Houston, Texas. After graduating with a degree in interior design in 1999, she began painting full time in 2015. Inspired by her roots and surroundings, she focuses on capturing light and the beauty of everyday life. She specializes in detailed, realistic figurative work that focuses on emotion, storytelling and nostalgia.
Werneck’s paintings have been featured in national and international exhibitions and appear in several magazines and books. Her work is also held in several private and public collections, including the Bennett Collection of Women Realists and Blick Art Materials.
Represented by
RJD Gallery, Michigan, USA, rjdgallery.com
Contact at
danielawerneck@live.com