



In the world of botanical art, plants are given the chance to tell their stories. Artists give plants voices through their careful descriptions of texture, color and form, as well as through meaningful compositions. Close observation of living subjects usually yields the best results.
Anything living and green will change over time or wither, so occasionally I take photo references to work from later.
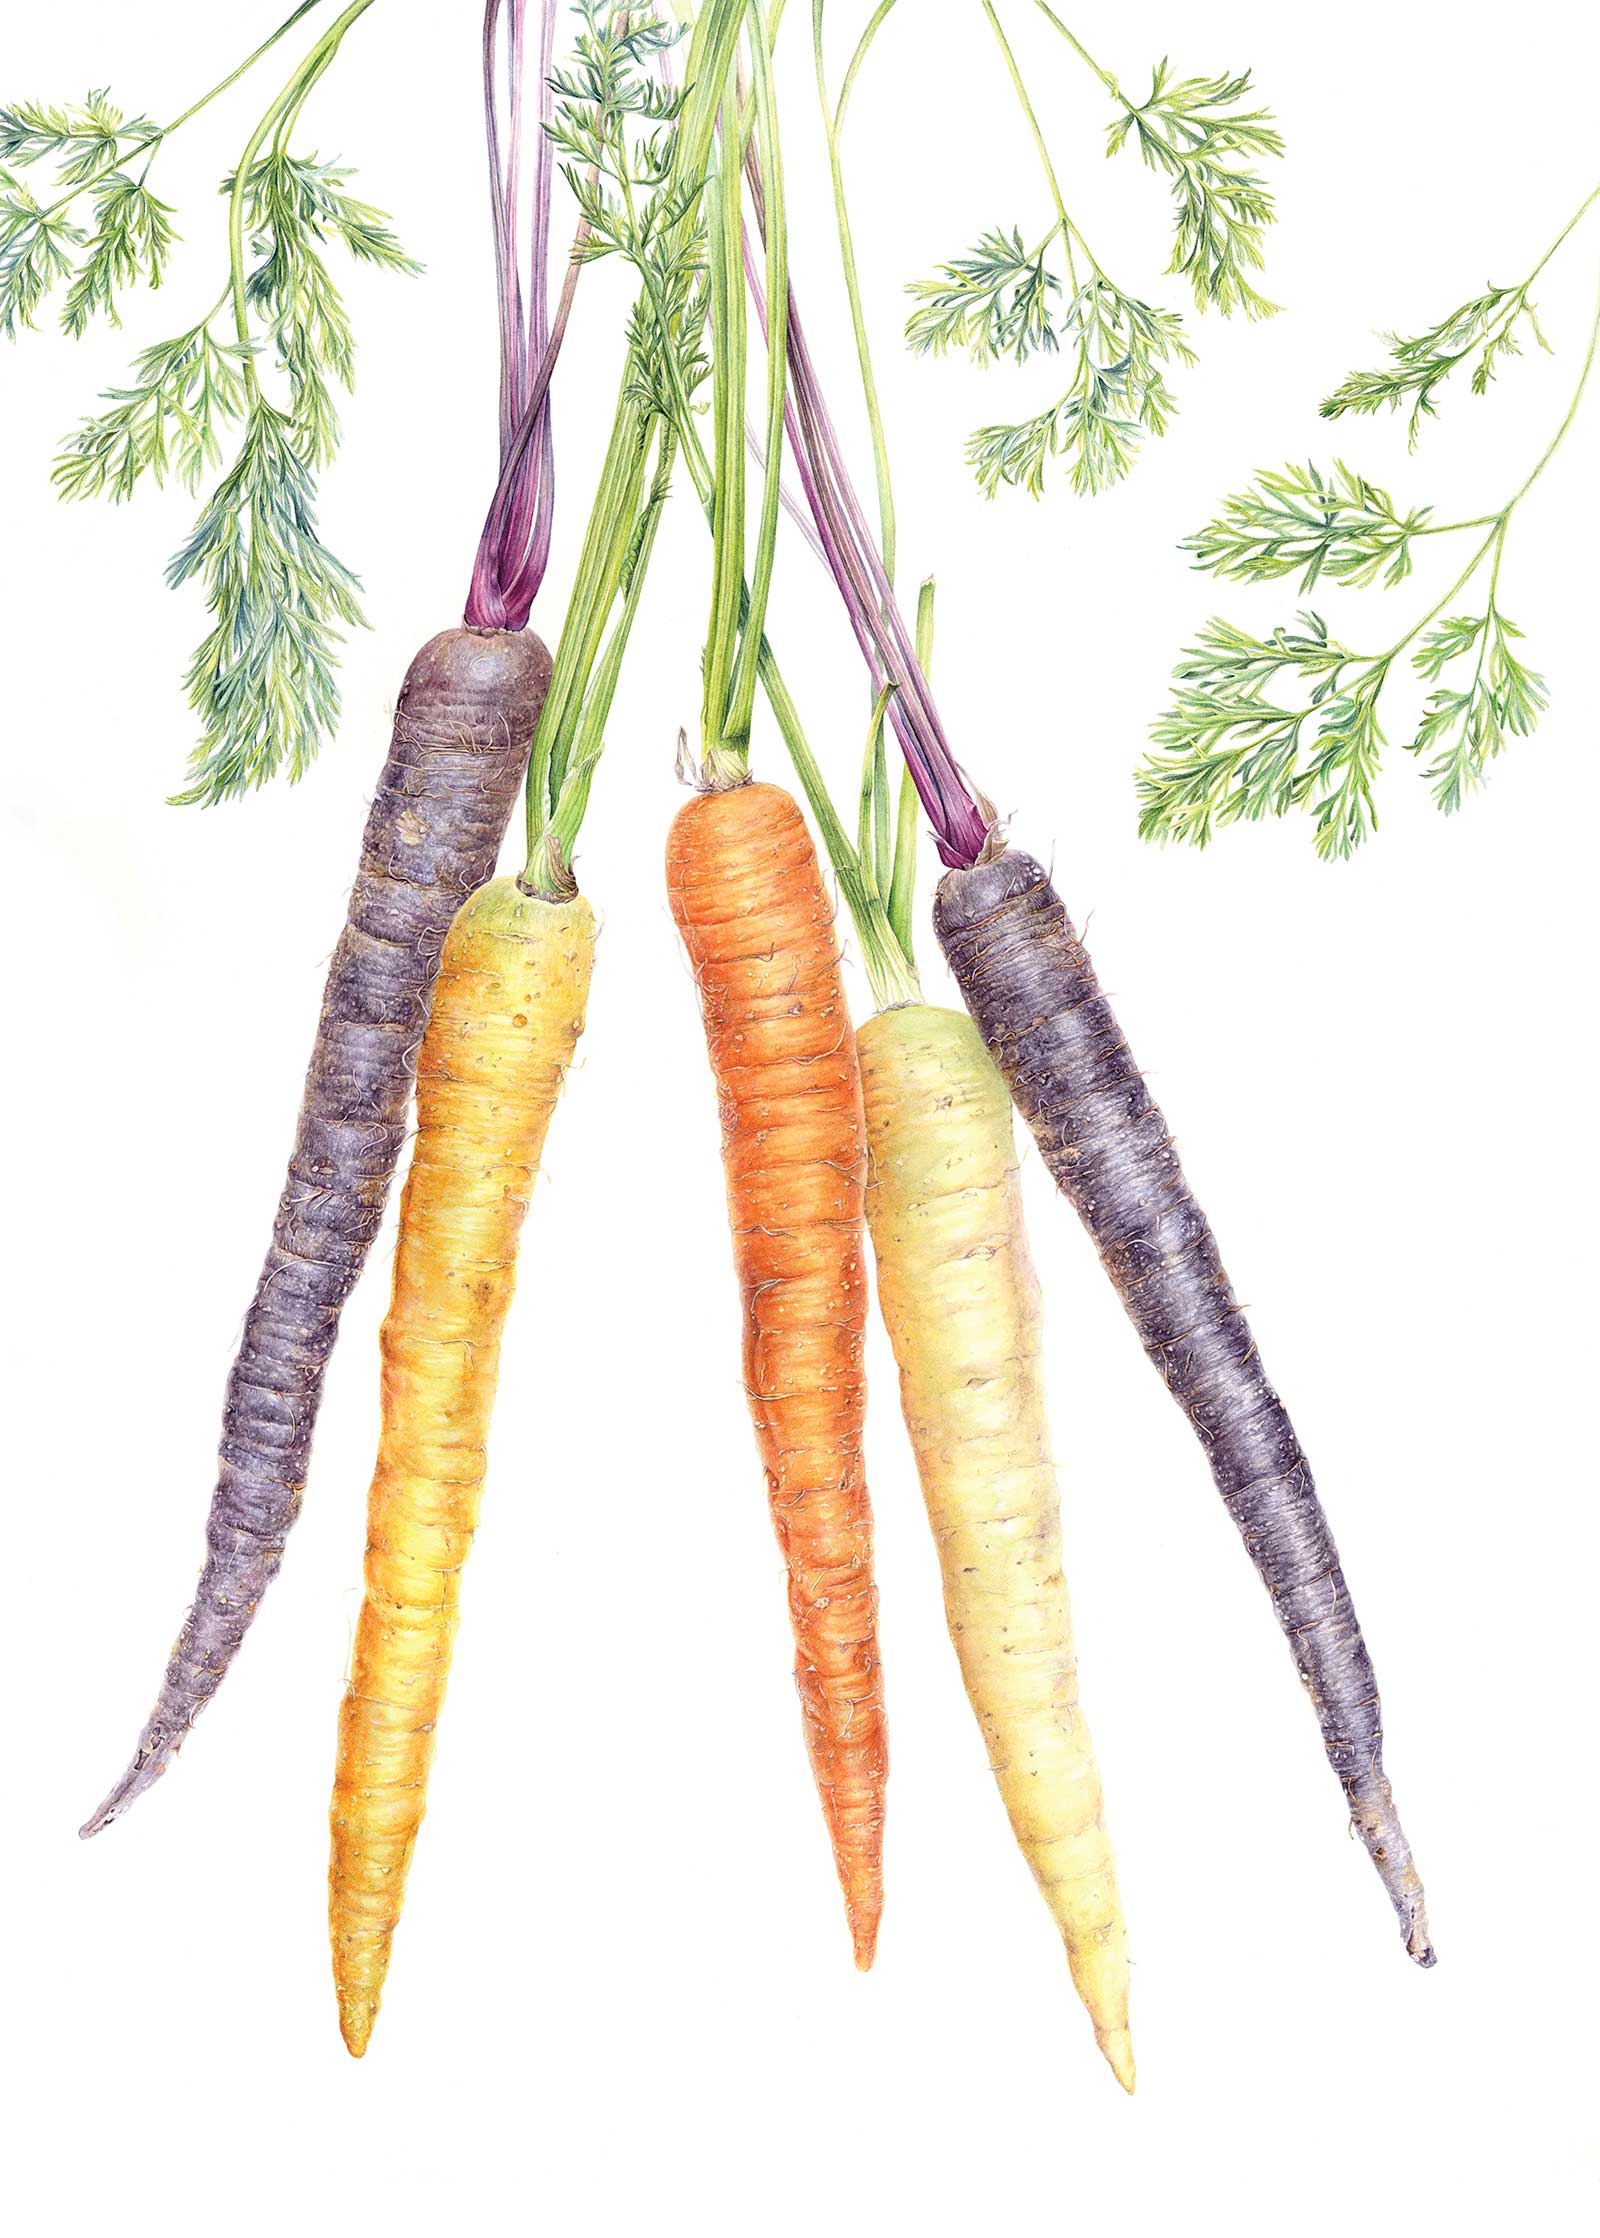
Heirloom Carrots, watercolor on paper, 30 x 21” (76 x 53 cm)
As a person who is very interested in plants and in painting them, it was only a matter of time before my own garden became the source of inspiration in my work. I’ve found immense joy in pulling vegetables, like treasures, out of the earth. As an artist and gardener, I get to write myself into their story.
I started this demonstration painting a year ago with a list of onion varieties and a couple of loose sketches. I planted onion seeds under grow lights in February and transplanted them into the garden in May. As they grew, I gained understanding and a connection that I could not buy at a grocery store. It took patience and time to care for them. I hope to instill that quiet attentiveness to nature in my artist practice.
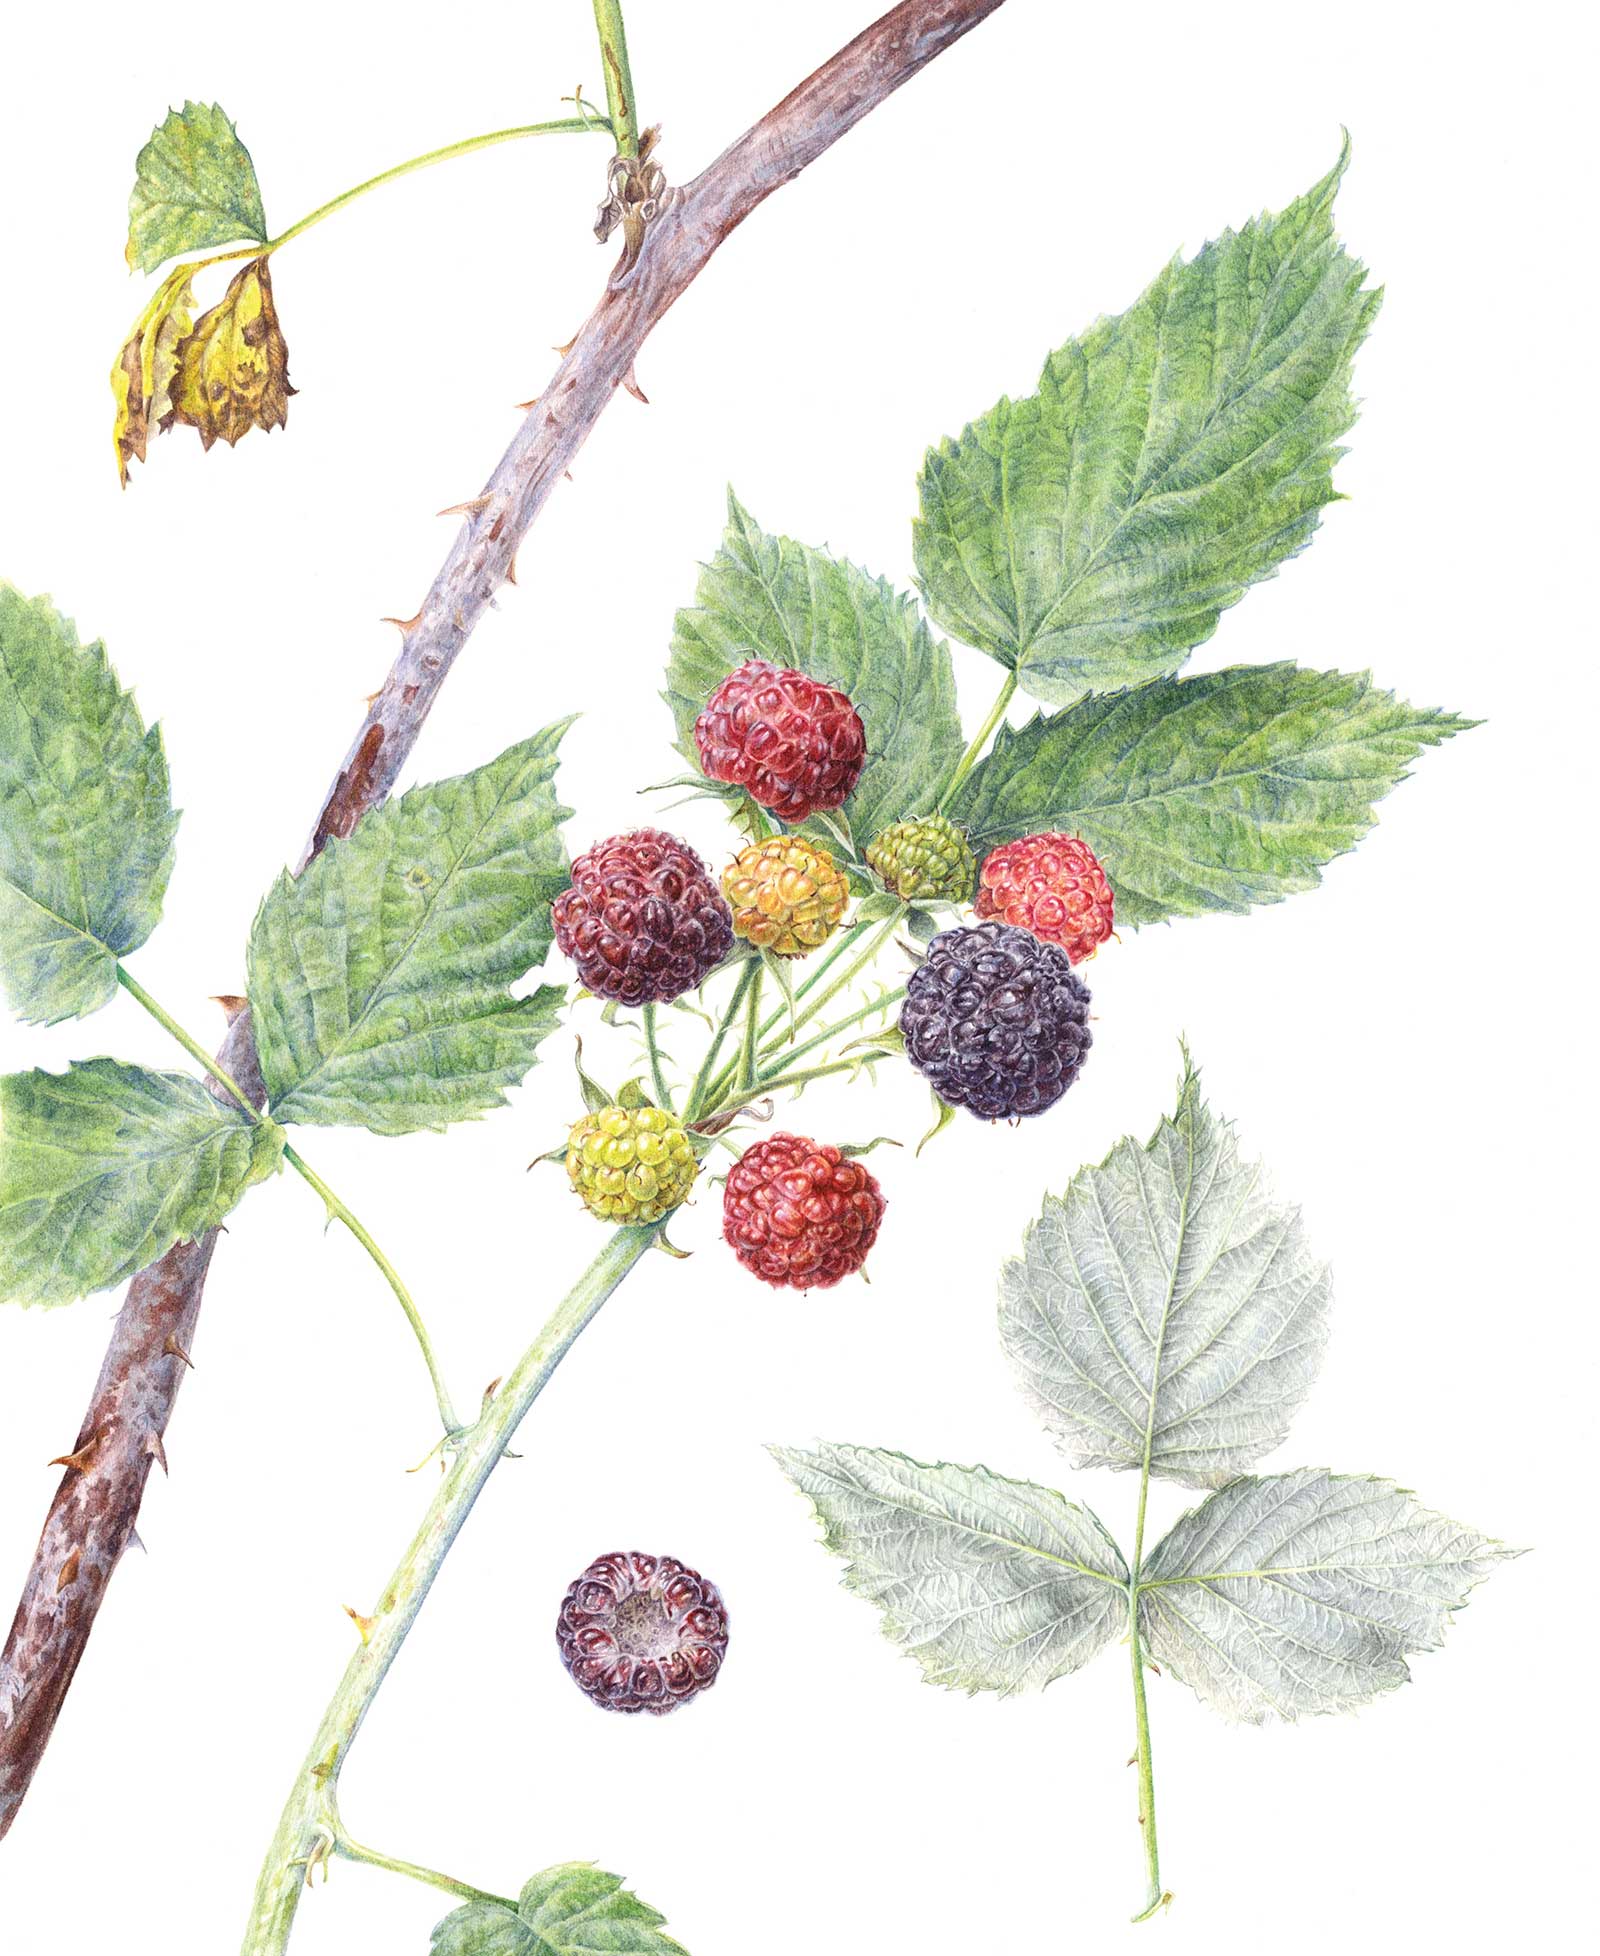
Black Raspberry, Rubus occidentalis, watercolor on paper, 10 x 8” (25 x 20 cm)
These five onions are far from perfect specimens of the three varieties I planted, but I find that their uniqueness grants them another level of beauty. Their individuality makes them interesting, for example, a tear in the papery skin where it split around the bulb as it was freed from the dirt, or the unpredictable angles the roots grew as they searched around in the dark for nutrients. Now in the finished painting, they are suspended in a kind of dance against the white of the paper. Even the browning leaves are part of the story as they indicated to me that it was time to harvest.
I paint in watercolor because of the medium’s transparency and versatility. Next, I’ll share a step-by-step demonstration and a description of techniques used in this painting.
My Art in the Making Red Gems
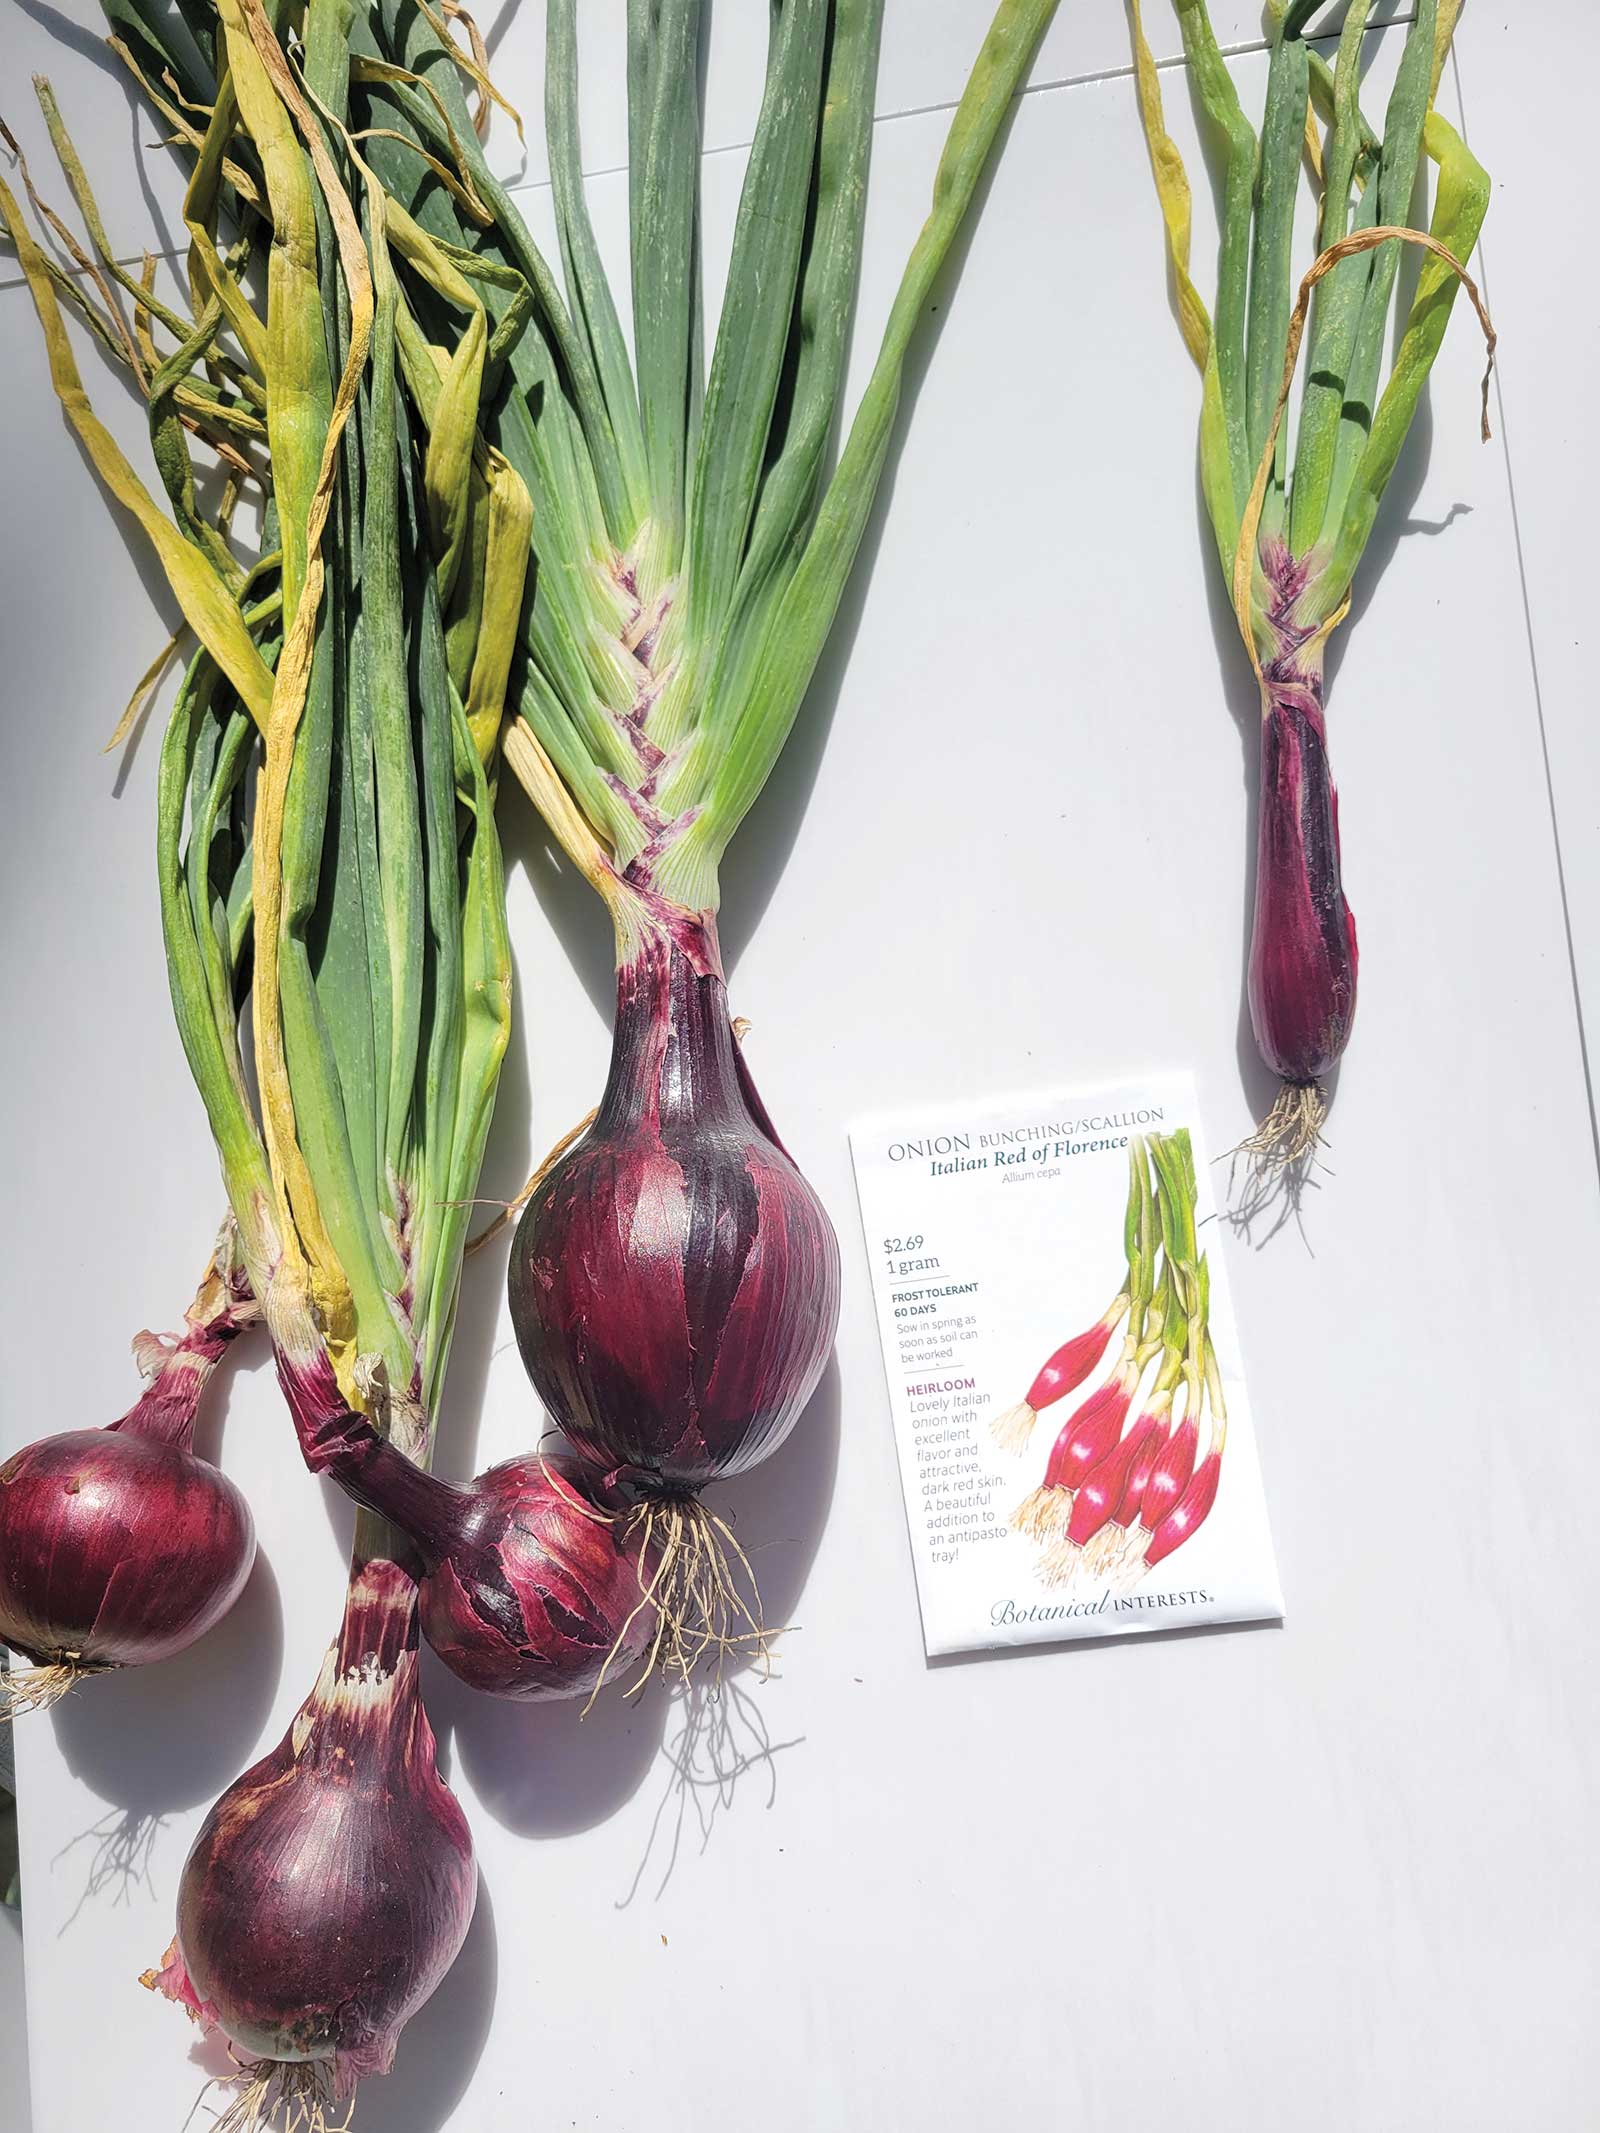
Reference Photo
This painting was recently accepted into the American Society of Botanical Artists’ 29th Annual Exhibition, which will be held at the Society of Illustrators in New York City from September 12, 2026, to January 9, 2027.
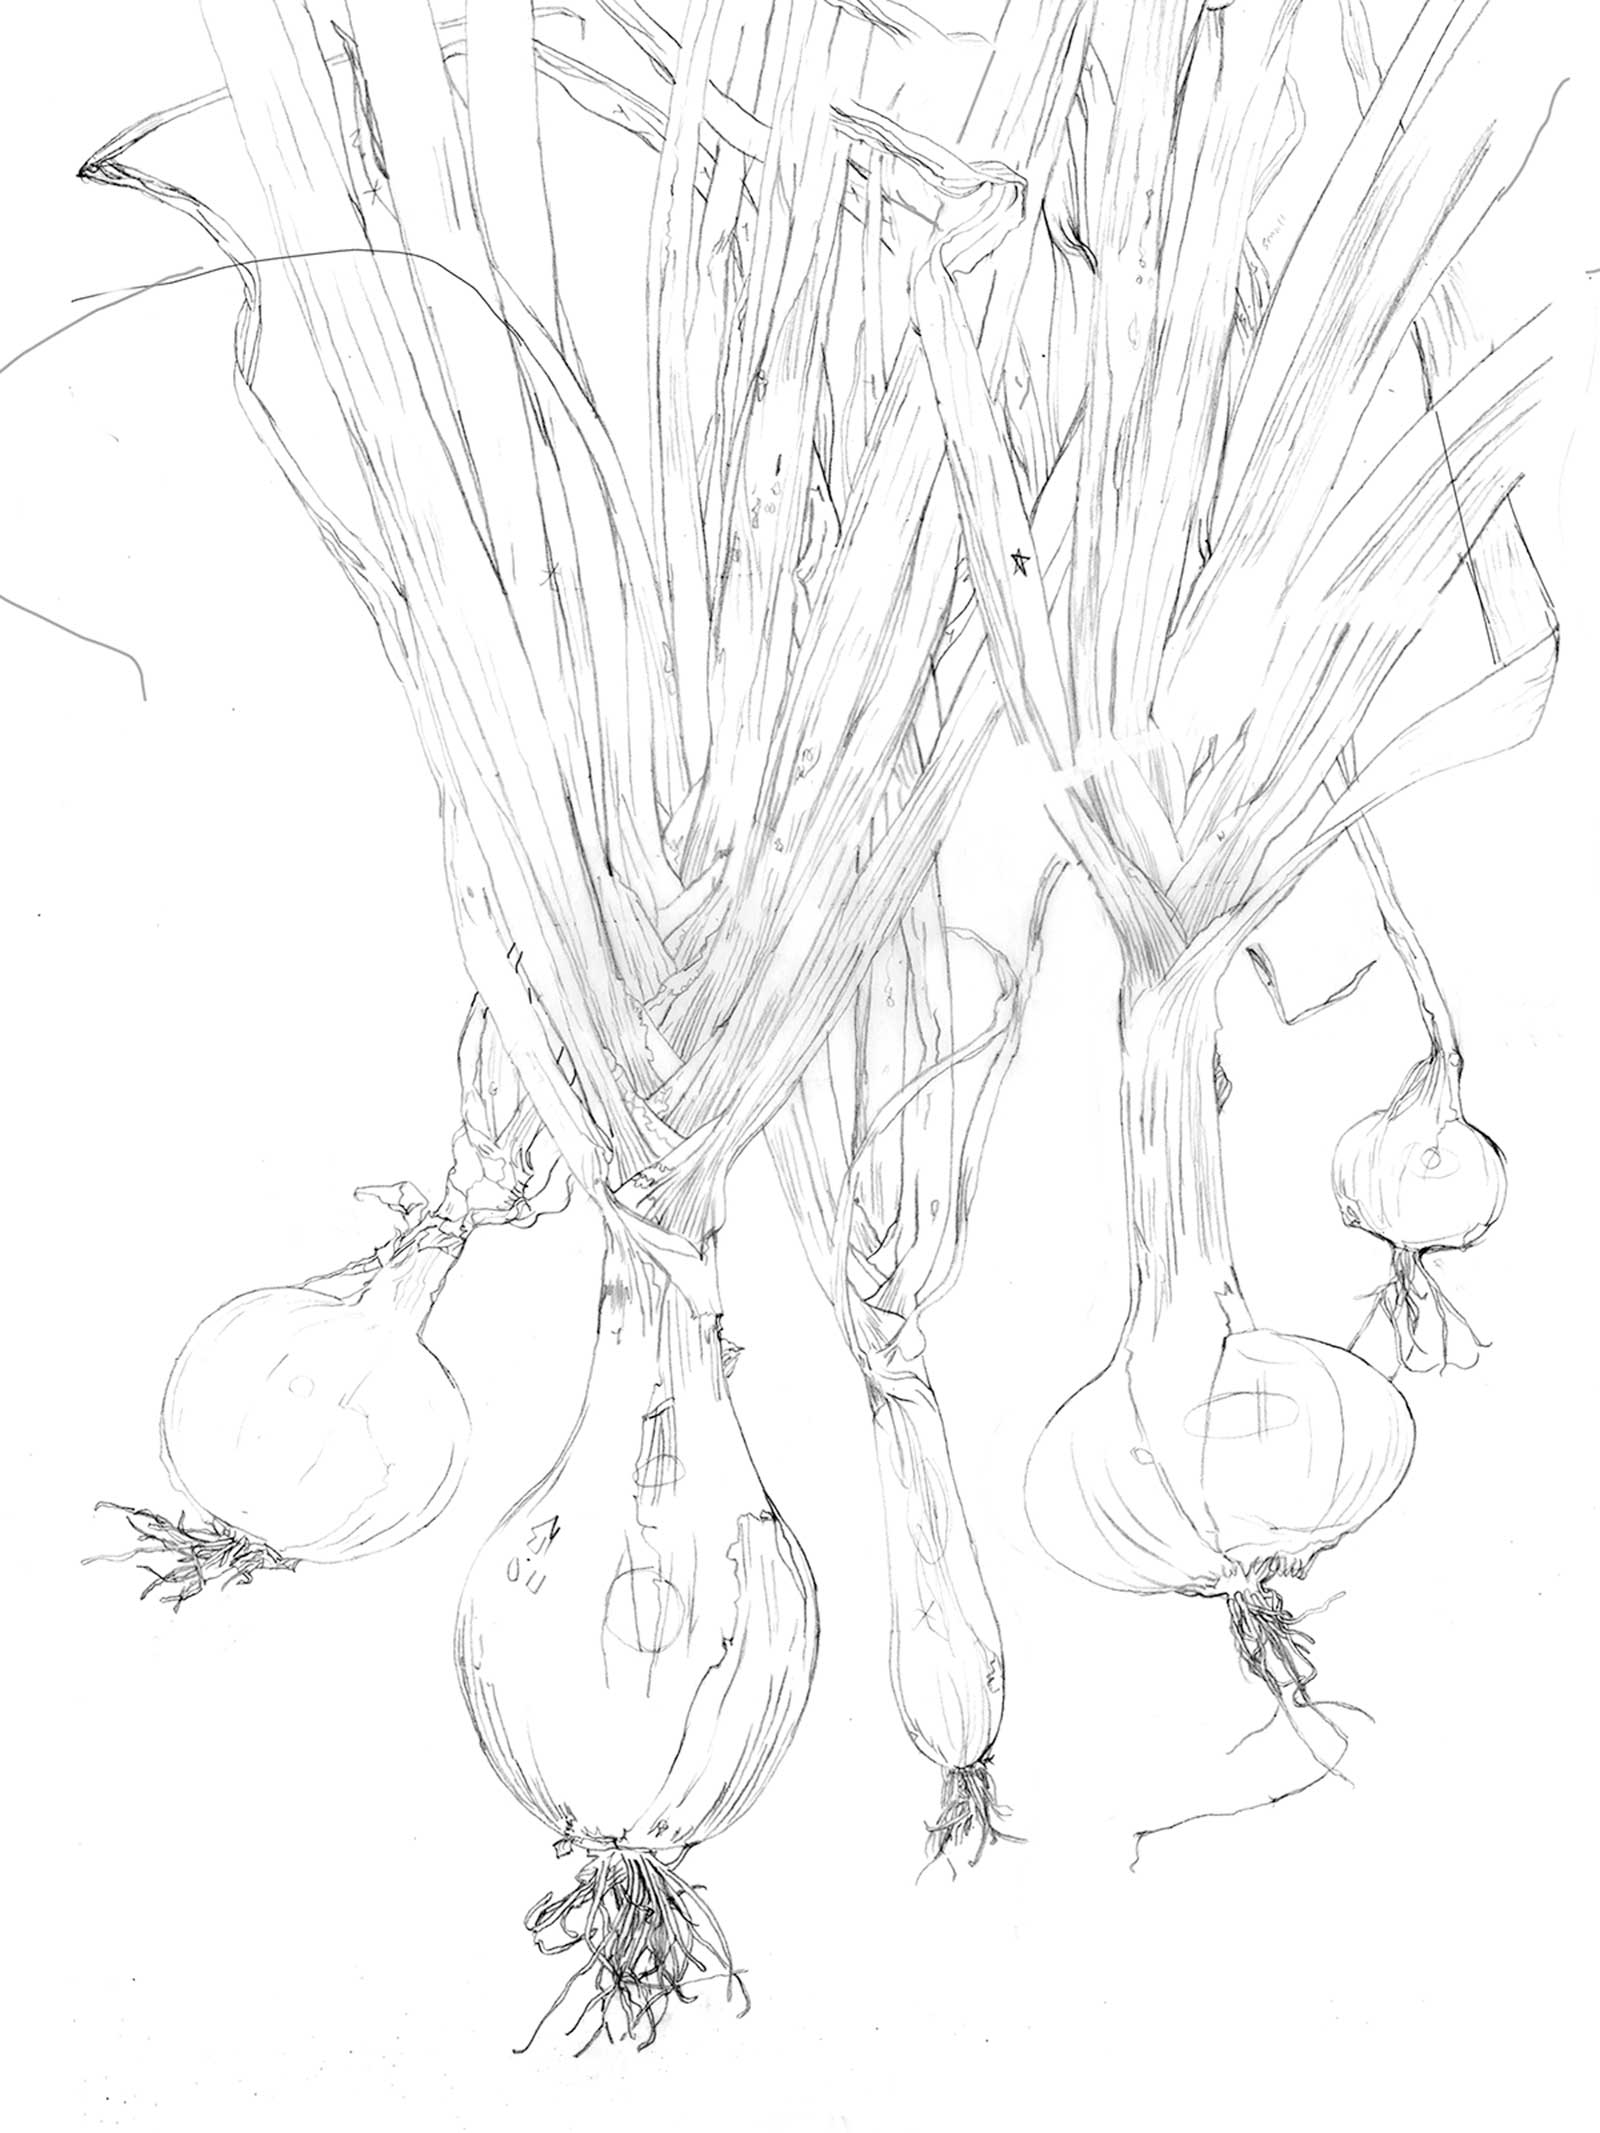
Stage 1 Drawing
For the drawing, I played around with arranging the onions, concentrating on positive and negative spaces. I paid particular attention to the angles from the leaves down to the roots. There was a lot of tweaking and simplifying.
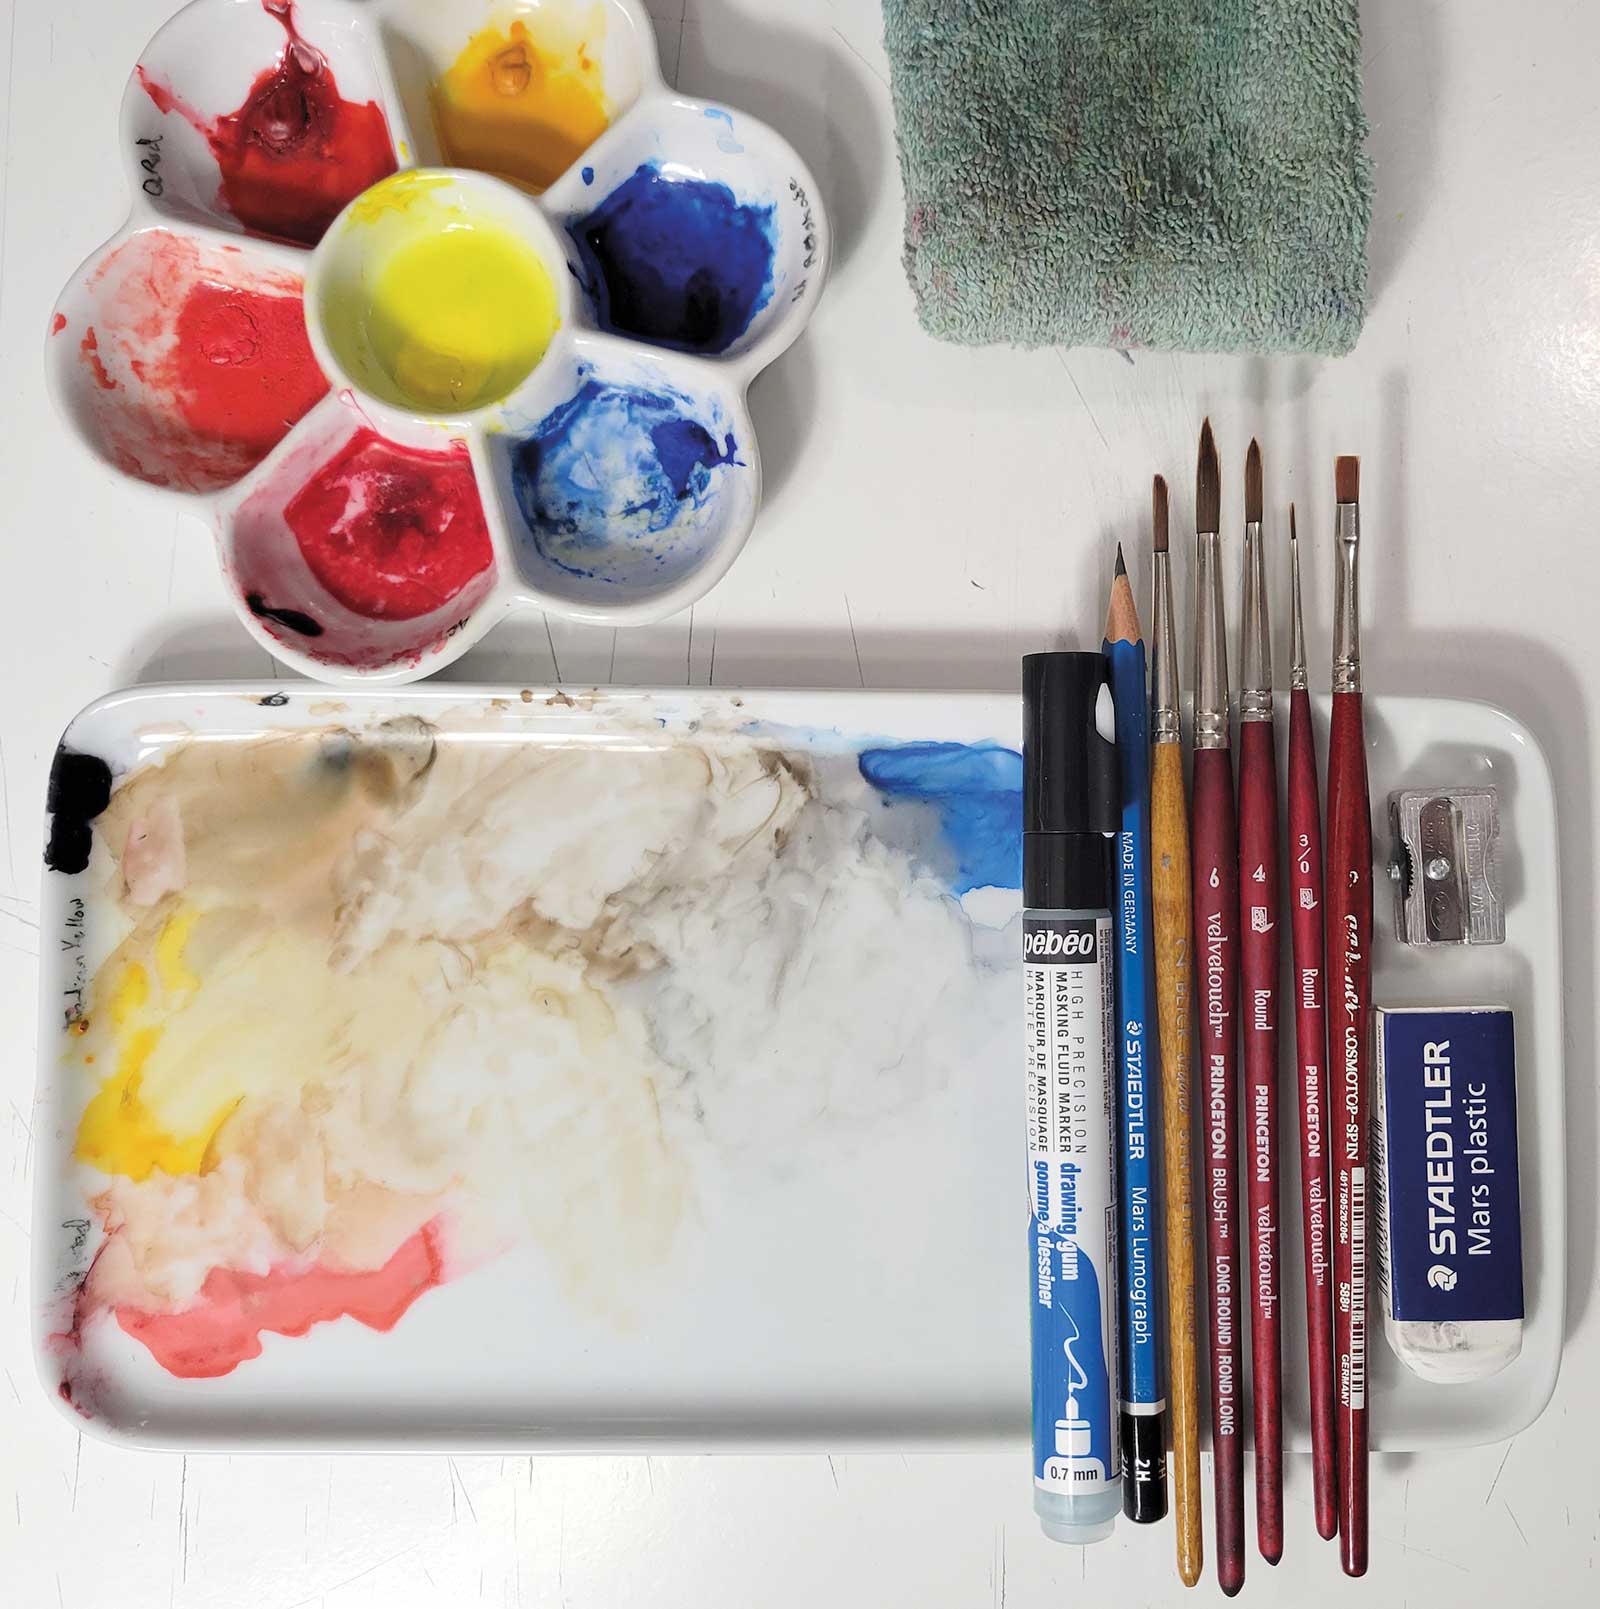
WHAT THE ARTIST USED
Watercolors
Winsor blue red shade, Winsor blue green shade, Indian yellow, Lemon yellow, Quinacridone red, Permanent rose
Brushes
Long round Princeton Velvet Touch, sizes 3/0, 4, 6, CosmoTop Spin Da Vinci, size 2
Additional Materials
Pébéo masking fluid marker, HB pencil, Staedtler Mars plastic eraser, Kneaded eraser, Sakura 7 pot palette, Large porcelain plate, Old washcloth, Fabriano hot-pressed watercolor paper
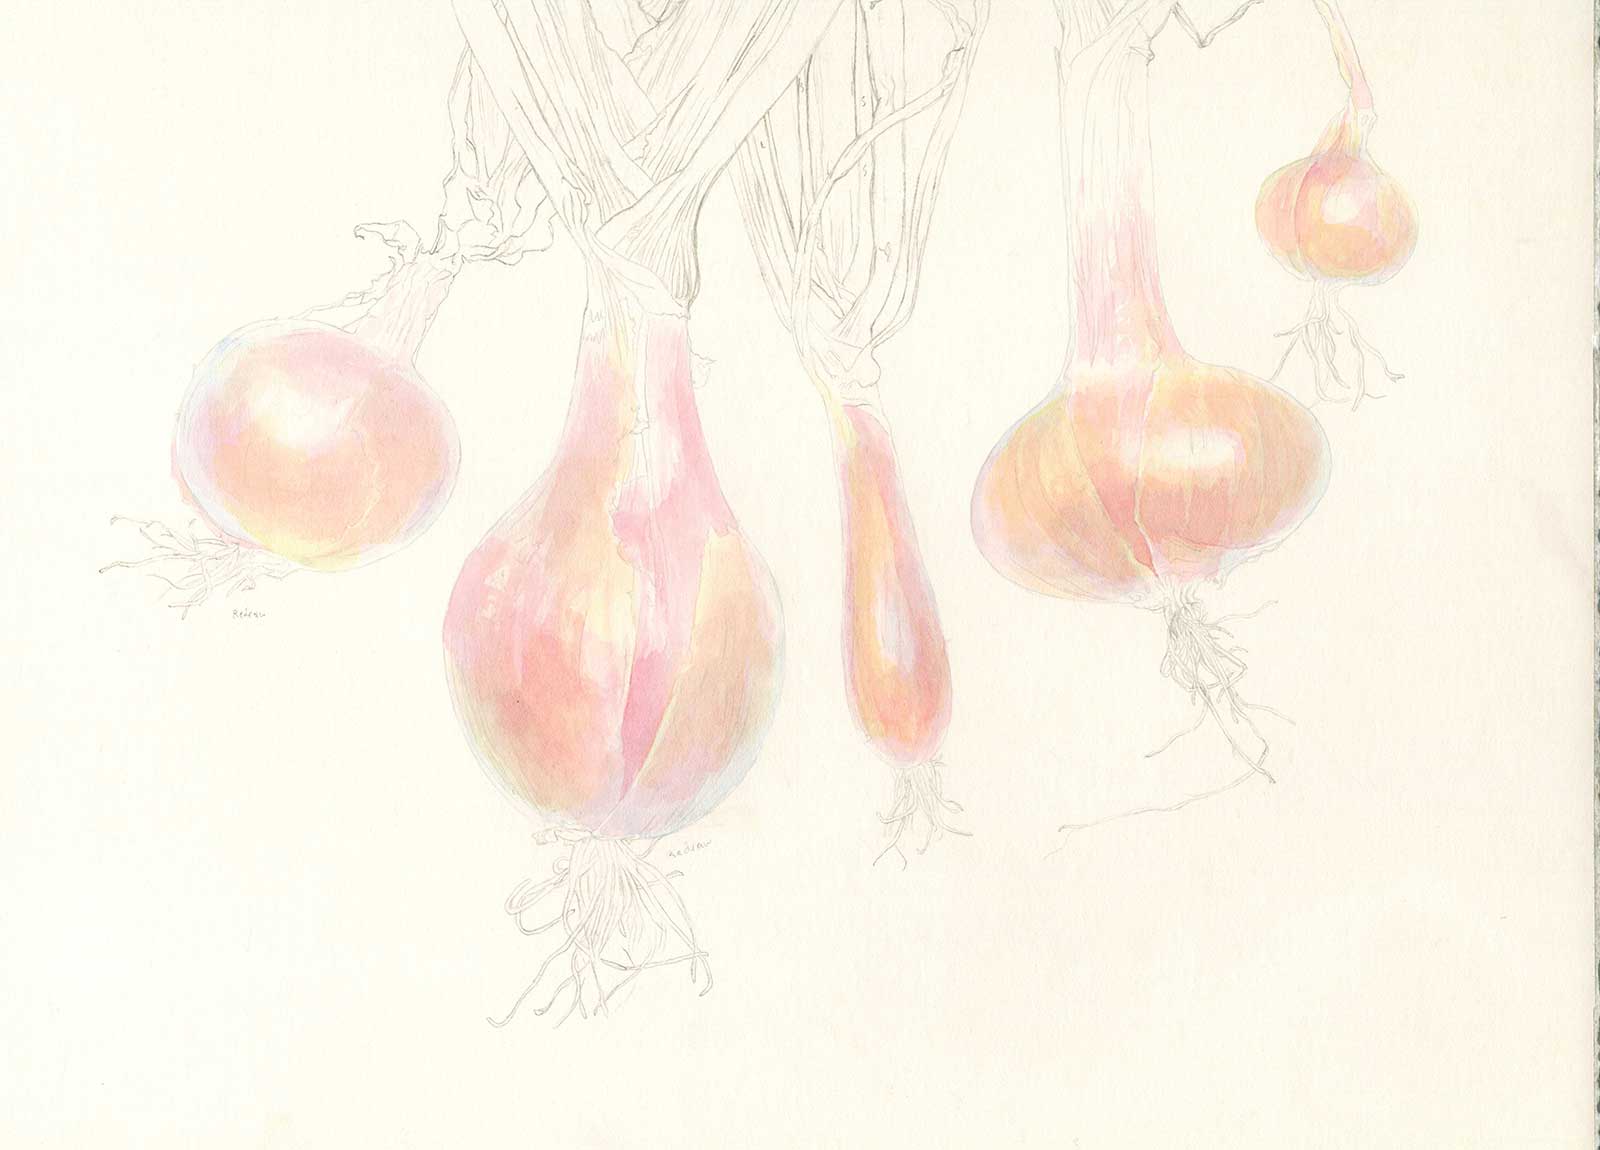
Stage 2 Initial Washes on Bulbs
After transferring the drawing and refining it with a 2H pencil, I laid in the initial washes. For this piece, I used a limited palette of primary colors that are all transparent pigments. Here I used Winsor blue red shade, Indian yellow and quinacridone red. Reserving the white of the paper for the highlights and building form even at this early stage is essential.
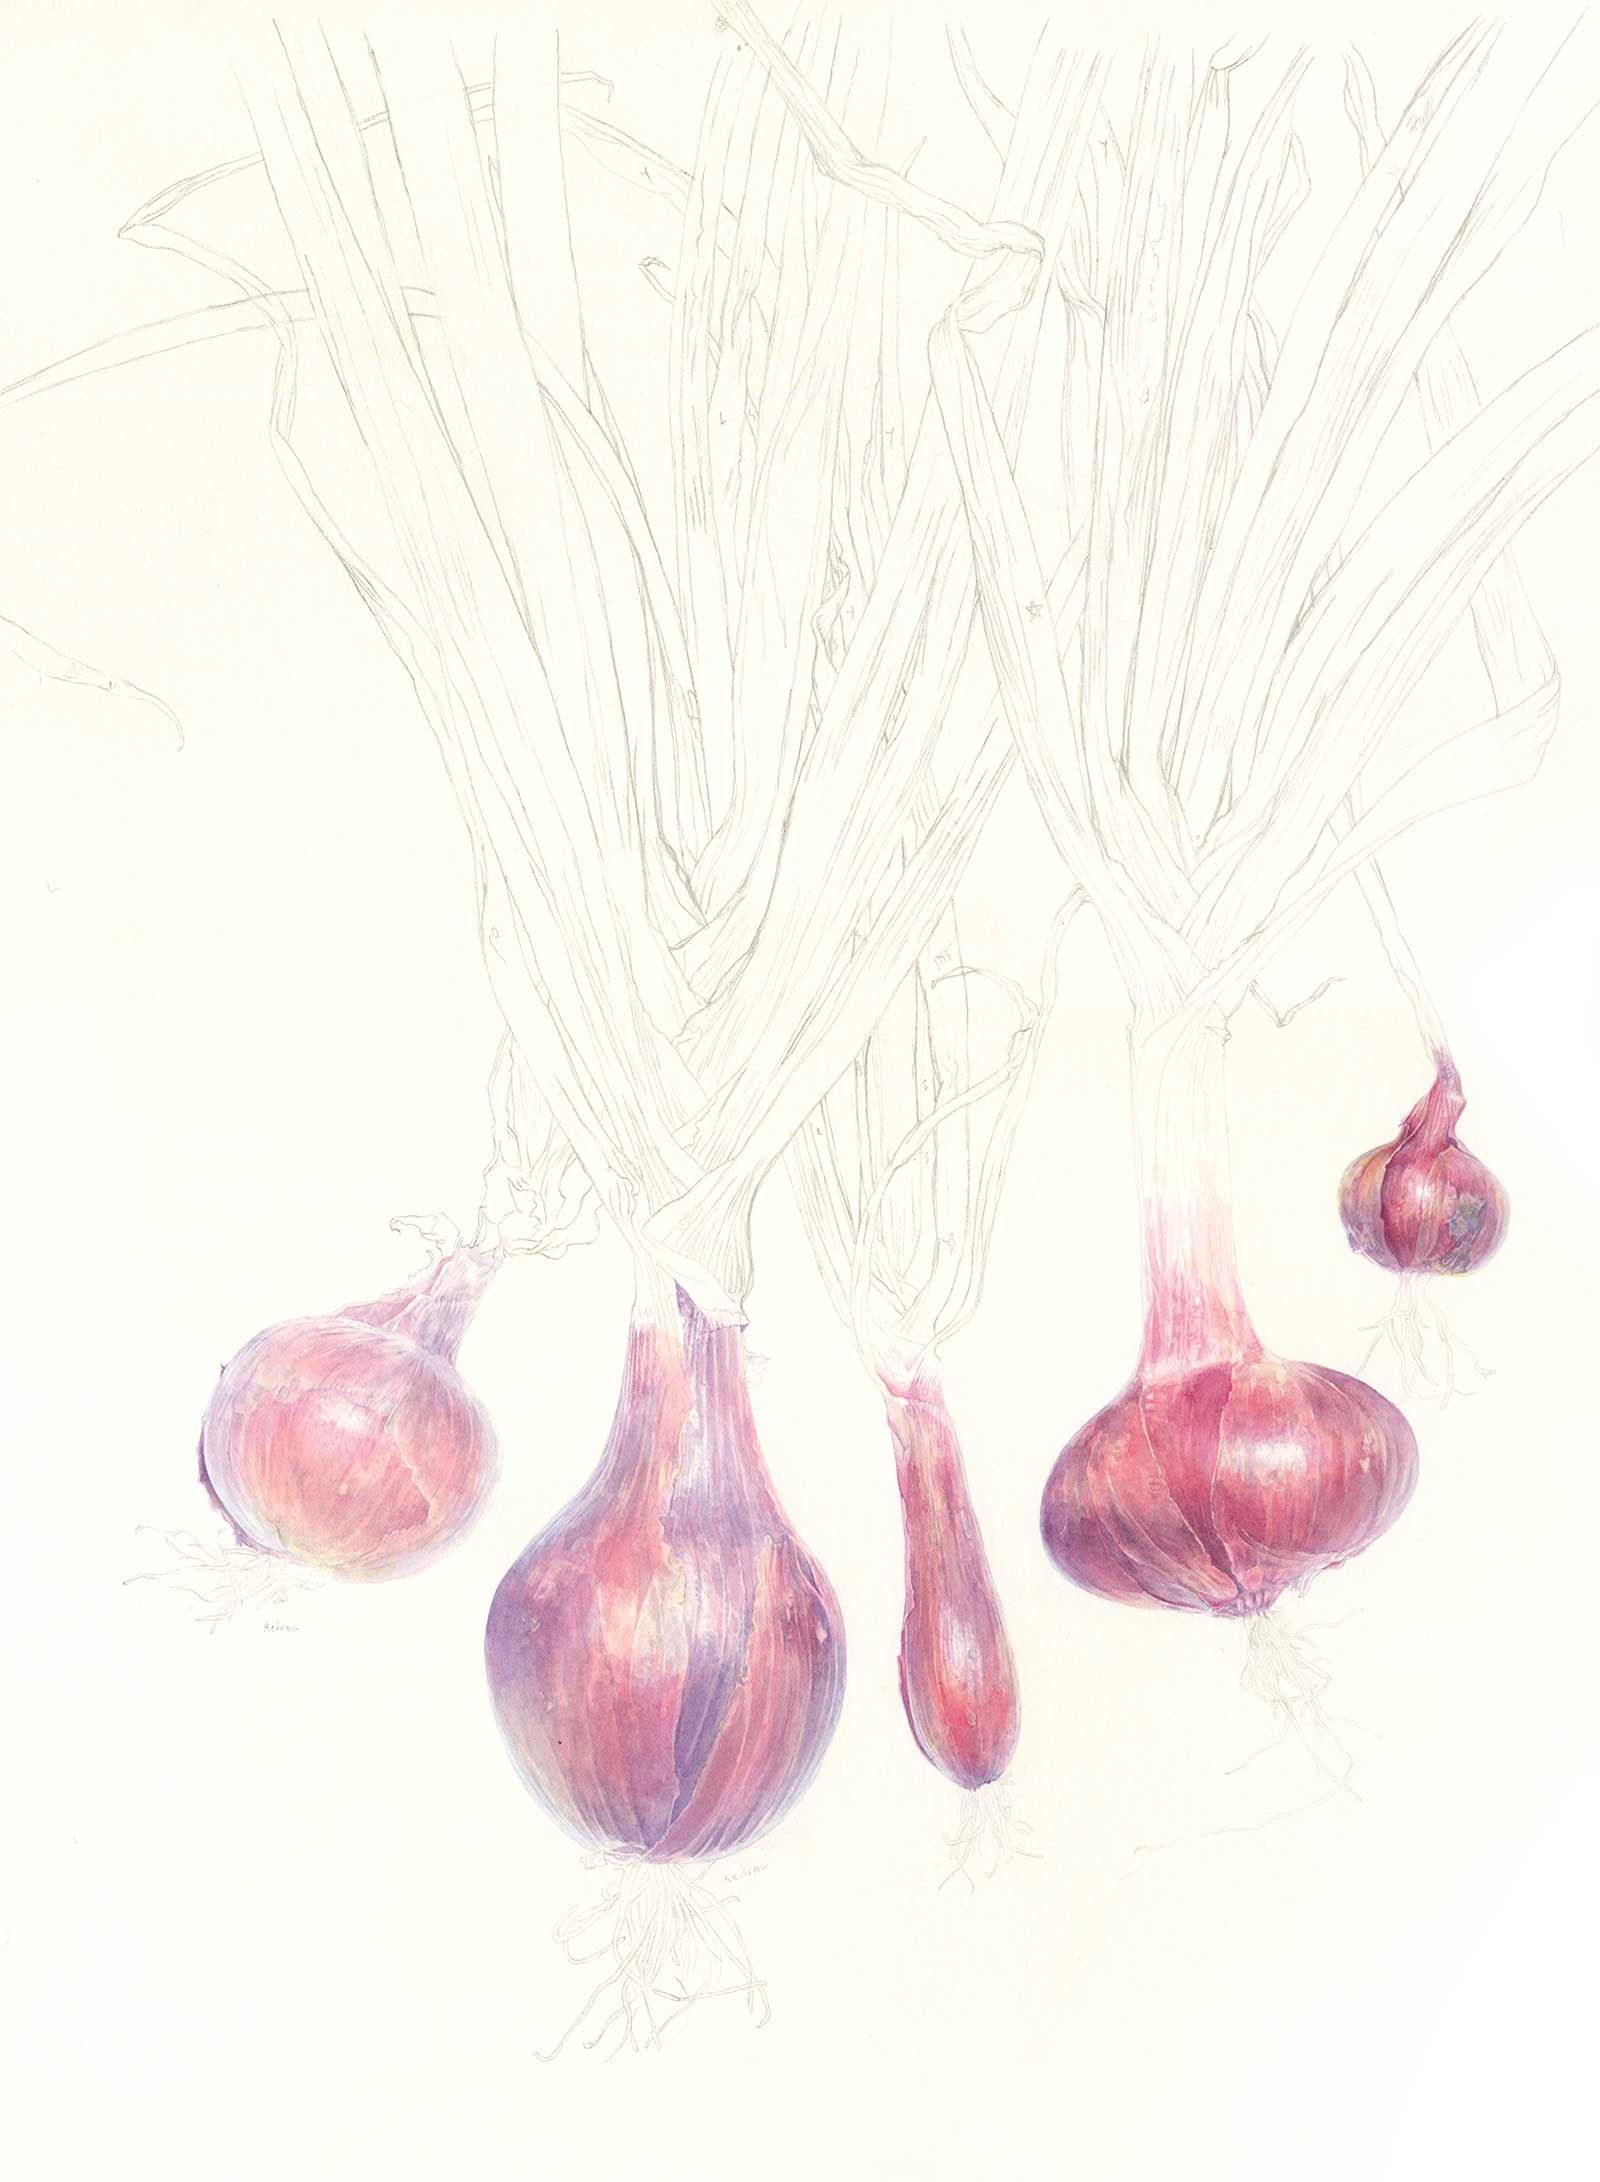
Stage 3 Details on Bulbs
I began sketching in details using a Princeton size 6 brush in a purple mixed with a cool blue, Winsor blue green shade and alternating quinacridone red and permanent rose. After, I unified colors with a thin wash of Indian yellow in the warmer parts. At this stage, I introduced a little dry brushing around the highlights and other places that needed some texture.
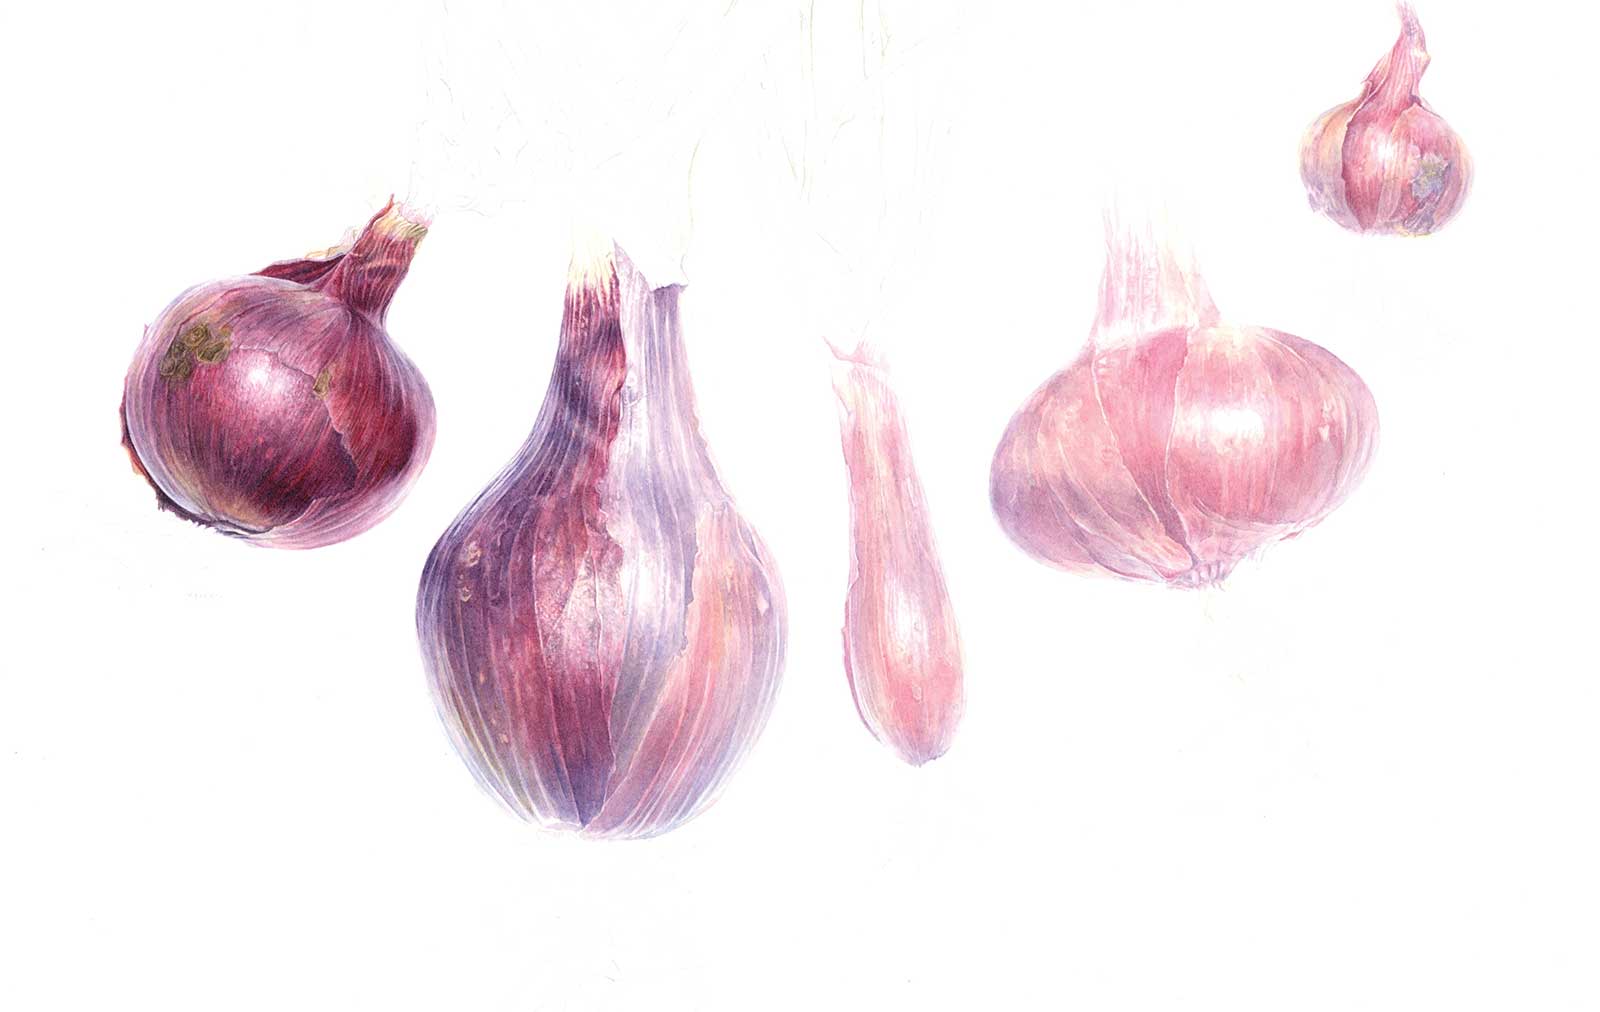
Stage 4 Darkest Values on Bulbs
Using less and less water in my paint mixtures, I approached the full value of the darks. I mixed a warm brown for the scars. There are touches of Daniel Smith’s lemon yellow in the papery parts. I find it helpful to always work from the darker areas to the lighter ones. As you load your brush, it naturally gets lighter the longer you use it before reloading. Using a Da Vinci size 2 Cosmotop Spin brush, I lift paint out of any areas that get a bit too dark.
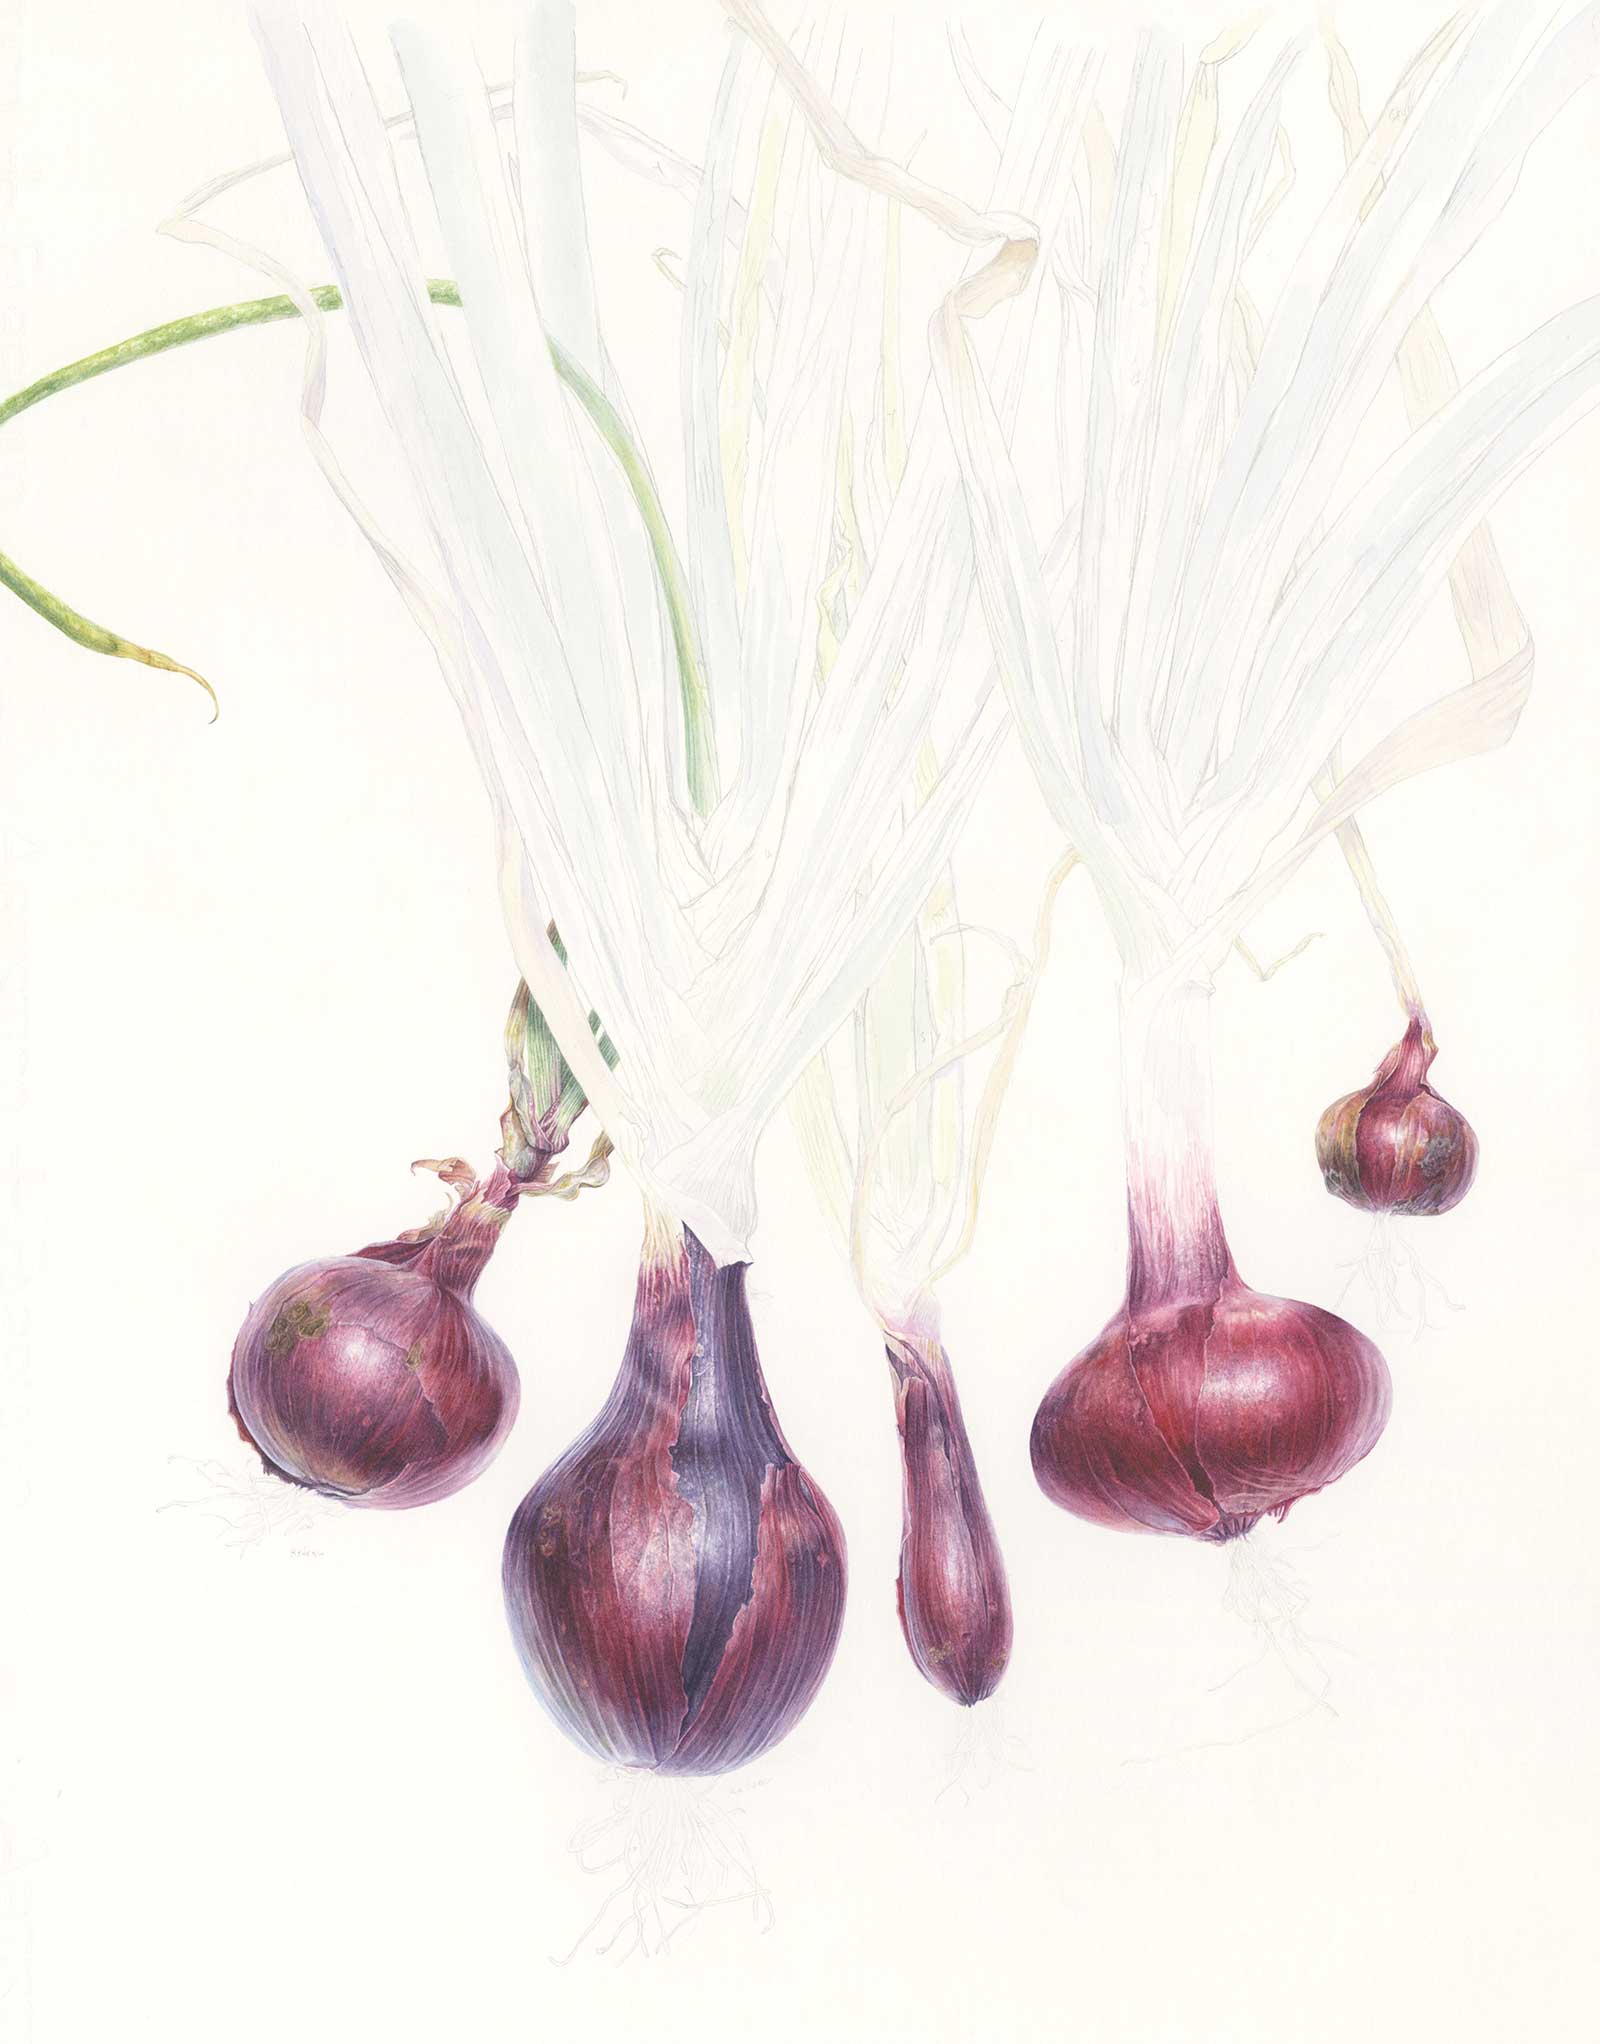
Stage 5 Starting on Leaves
Moving on to the greens, I began by laying in shadows with pale washes.
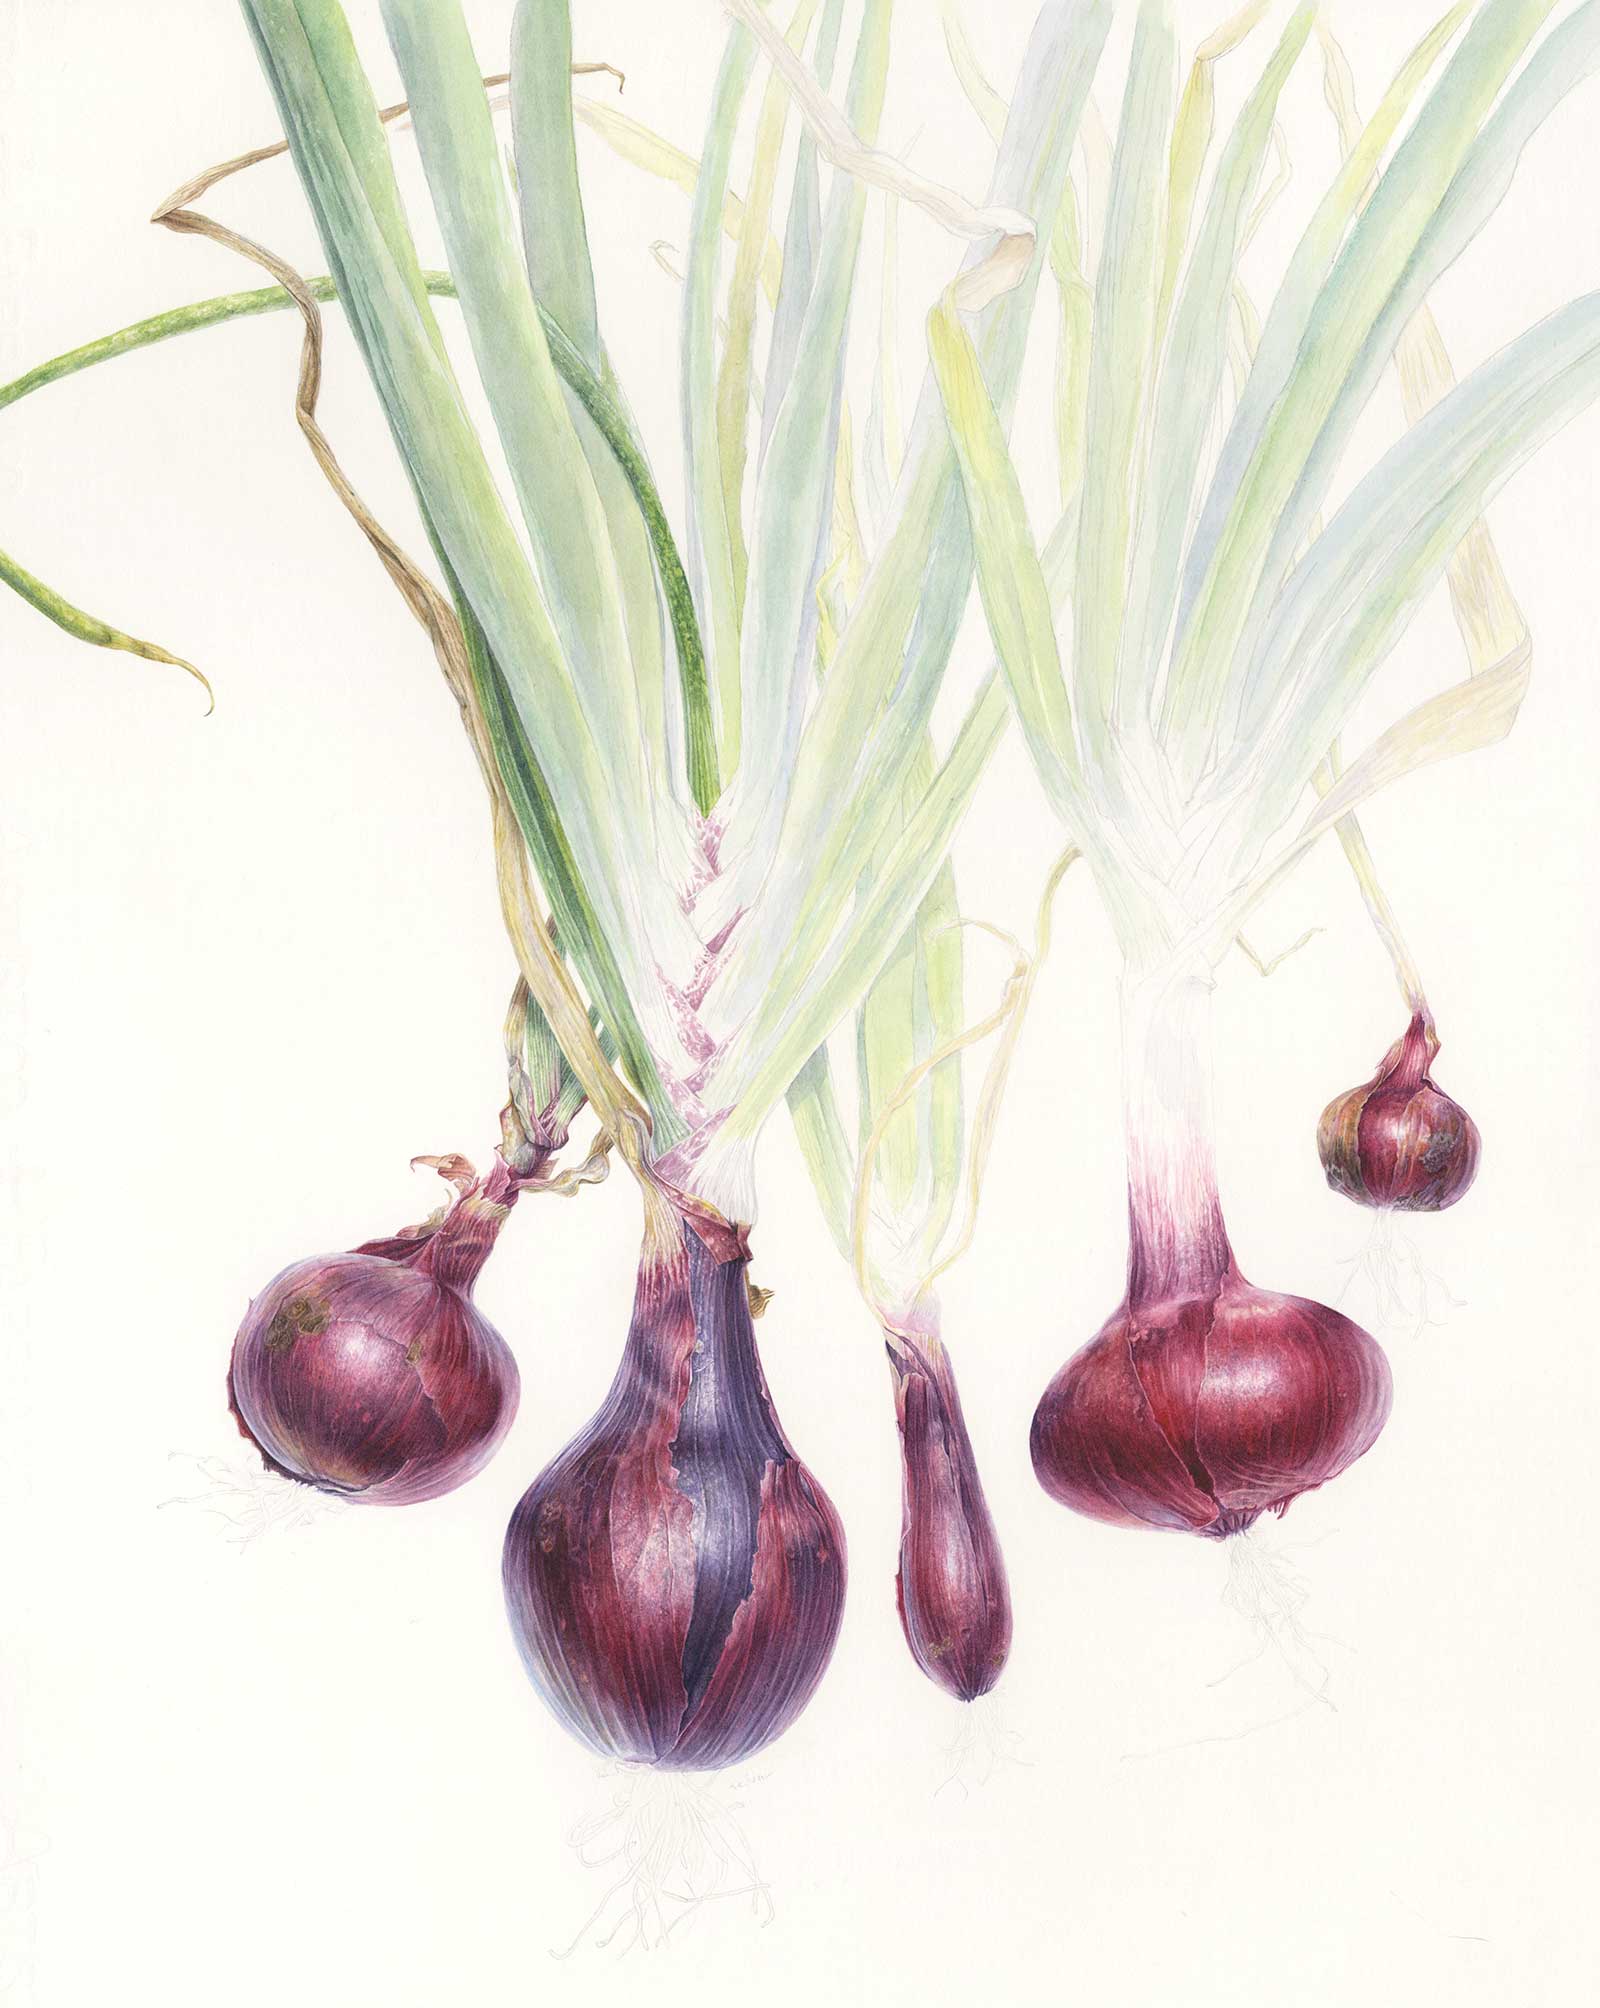
Stage 6 Building Up Color
Then thinking about the overall tones of each leaf, I shifted between a more blue mixture and a more yellow mixture of green. The tan color is a mixture of Indian yellow and quinacridone red with a touch of Winsor blue red shade.
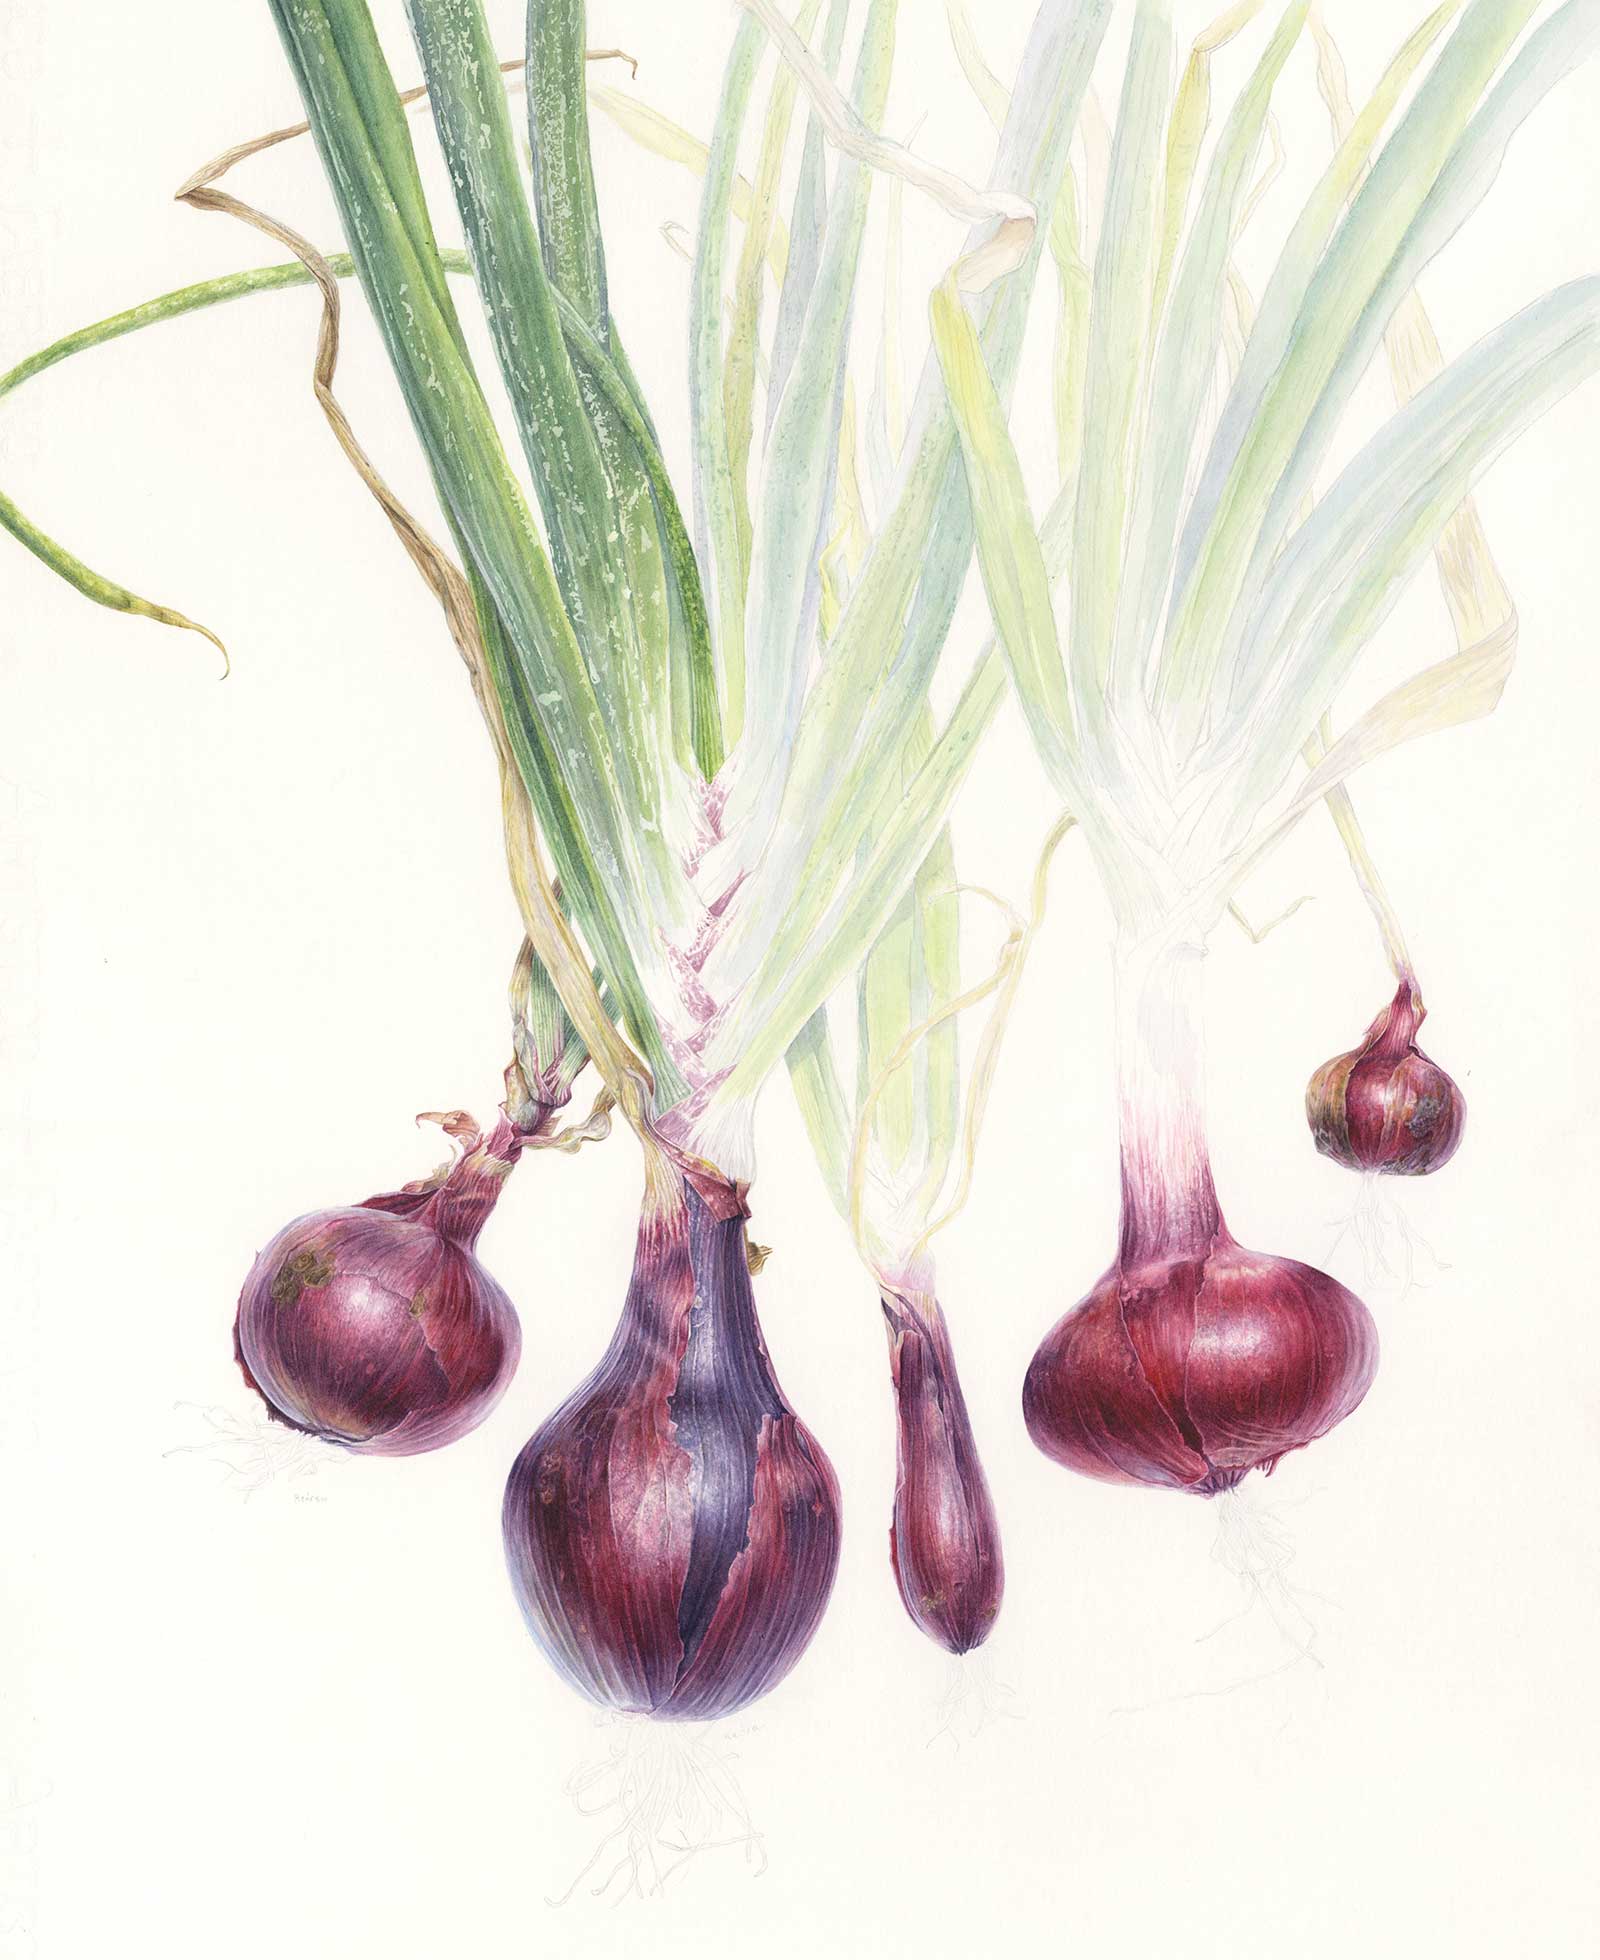
Stage 7 Masking Fluid on Leaves
I found that painting around the speckles in the first leaf took too long, so I opted to use a masking tool from Pébéo. It’s a drawing tool that allows for precise application of a bluish masking fluid that can be rubbed away with a finger or an eraser.
Color Swatches
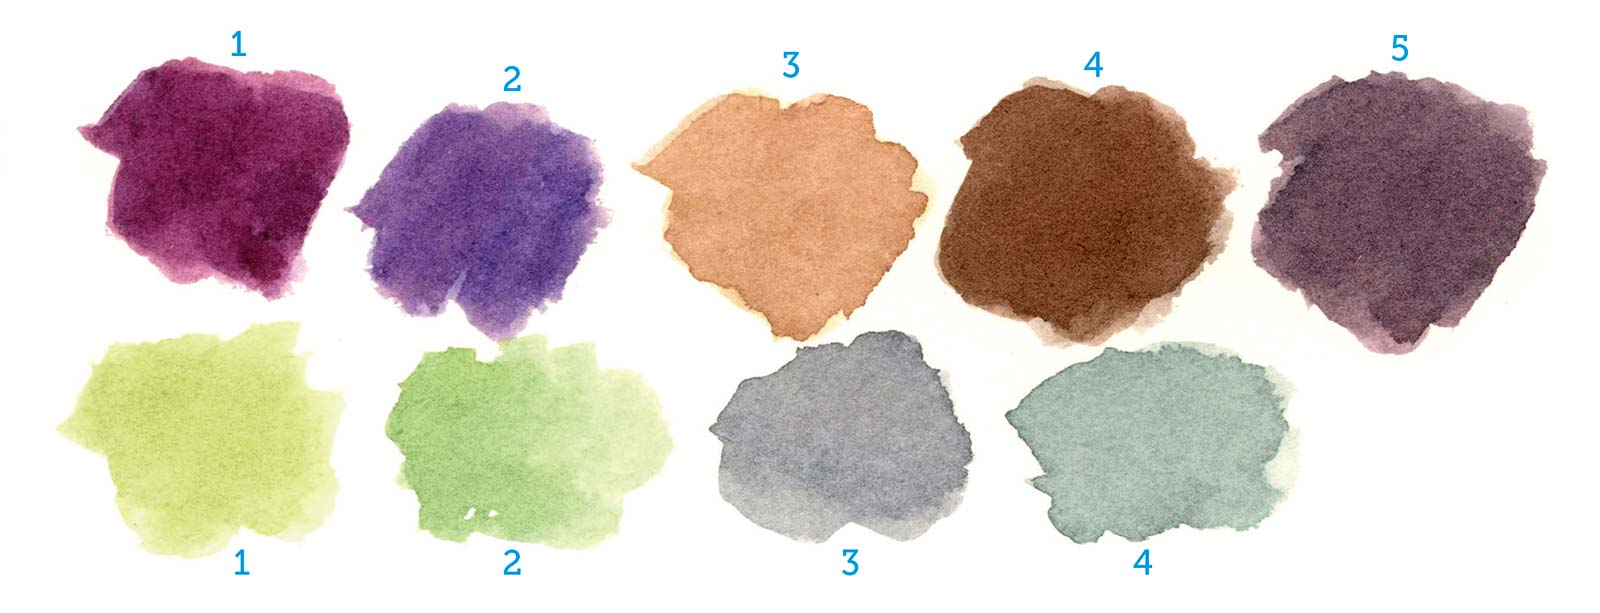
Top (from left): 1 and 2 (Winsor blue red shade and quinacridone red), 3, 4 and 5 (Indian yellow, Winsor blue red shade and quinacridone red).
Bottom (from left): 1 and 2 (Indian yellow and Winsor blue red shade), 3 and 4 (Indian yellow and Winsor blue red shade and quinacridone red).
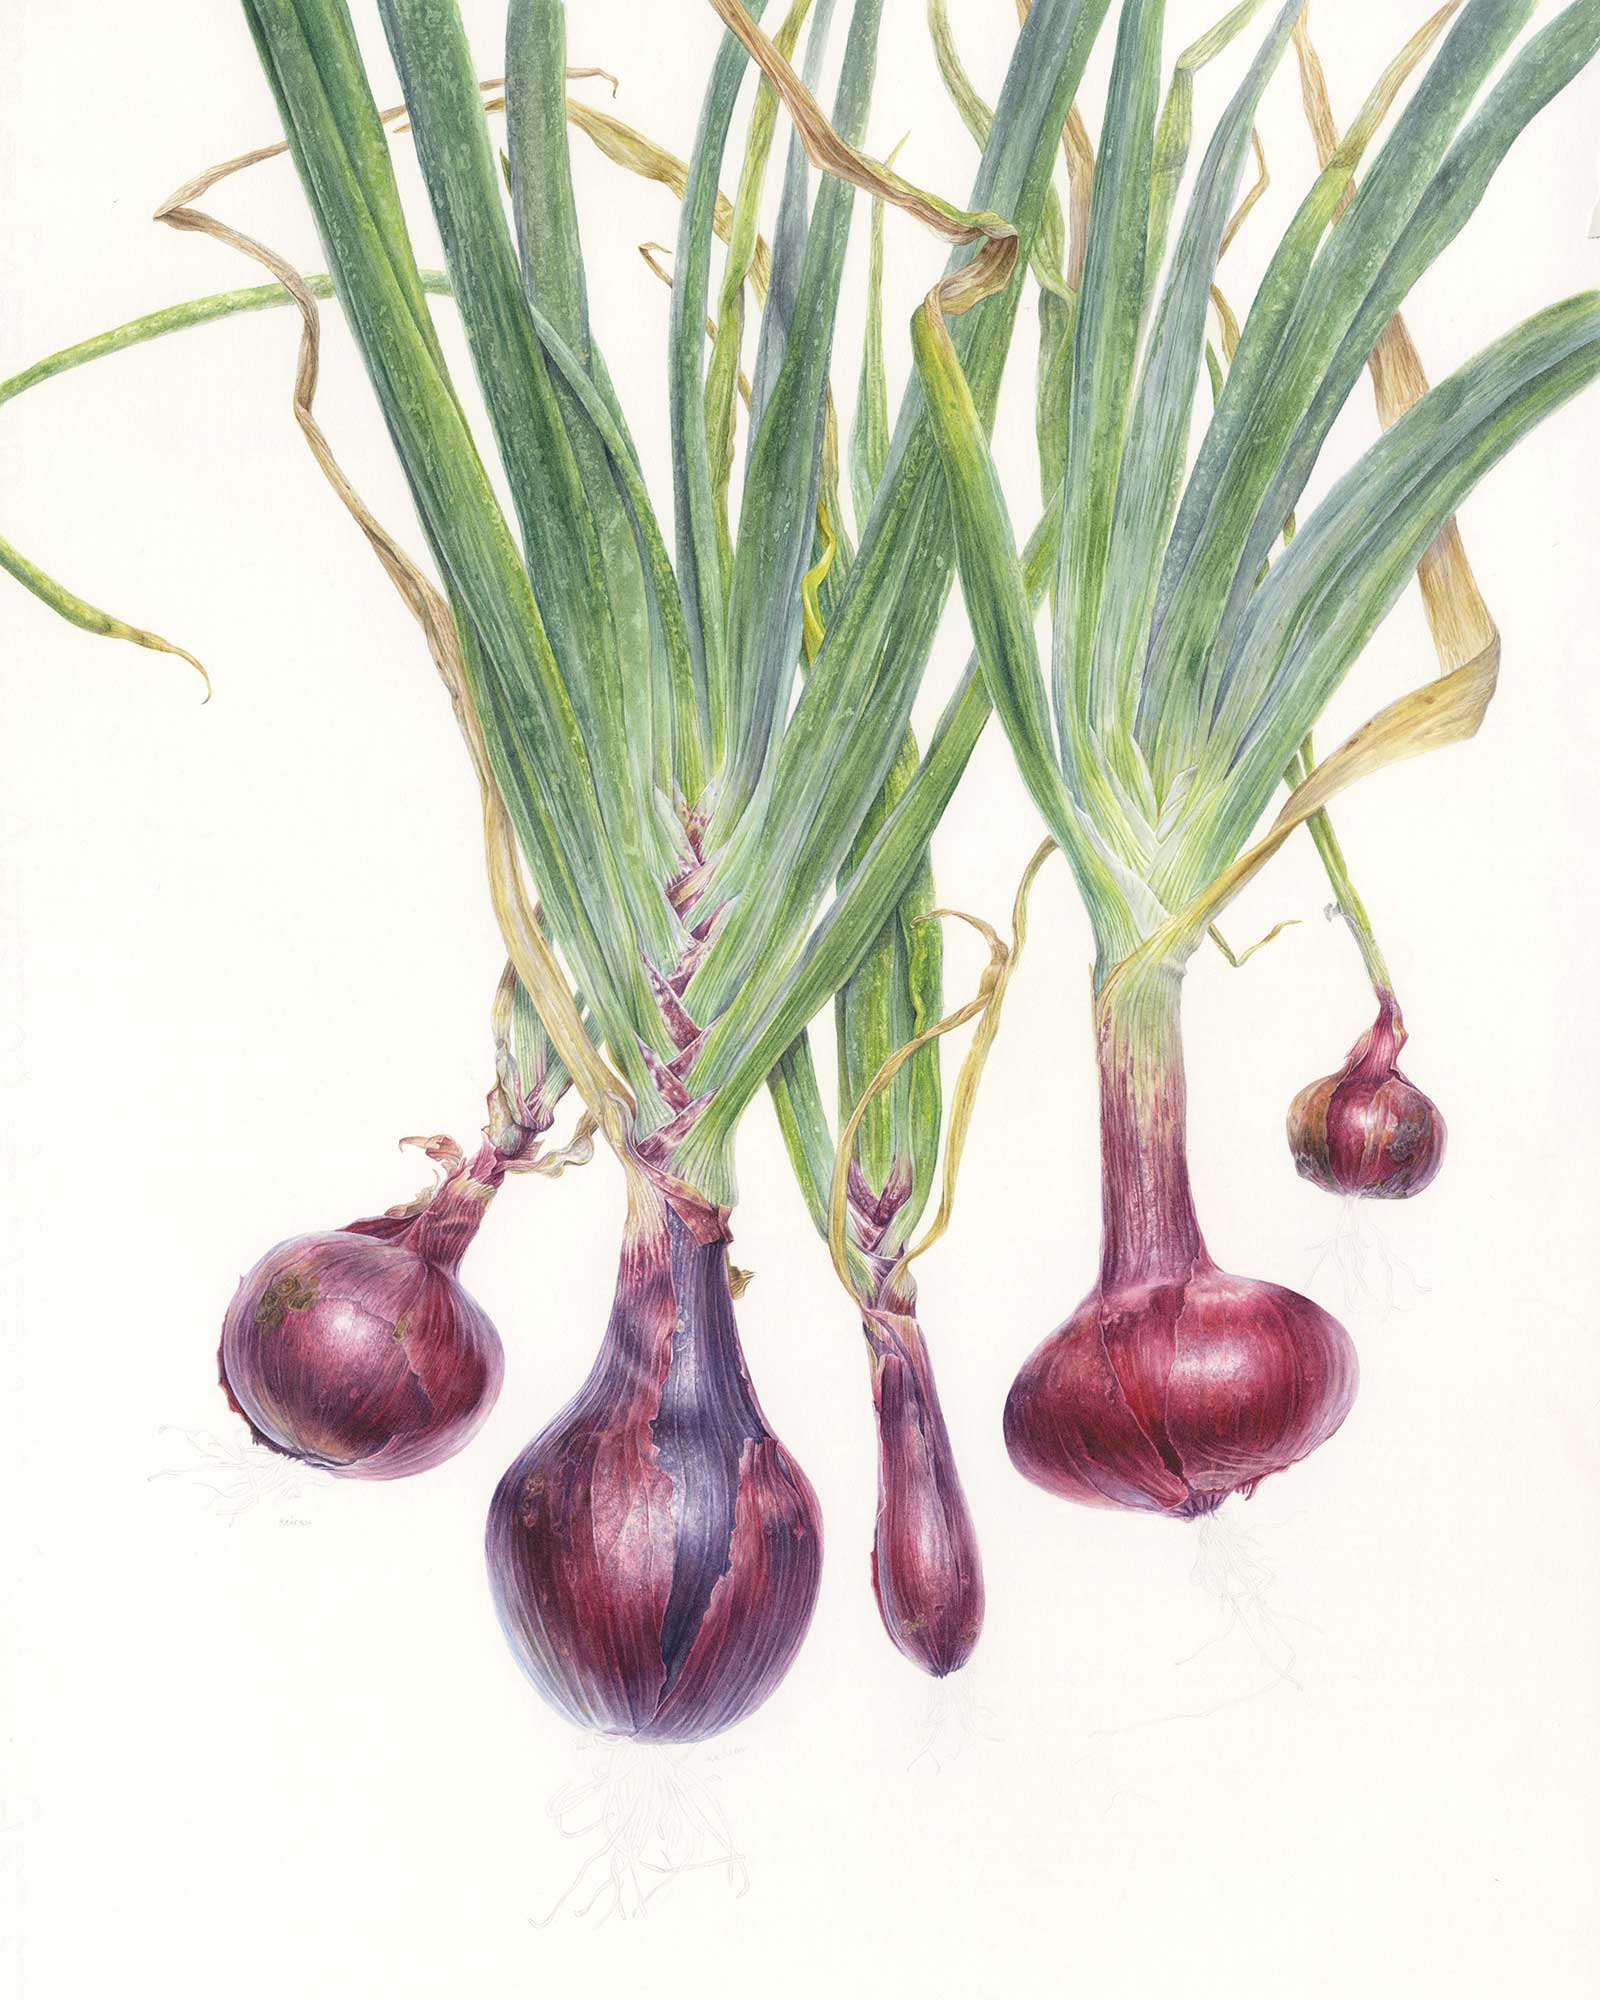
Stage 8 Finishing the Leaves
After removing the masking fluid, I softened the speckles with various green washes. I pumped up the shadows between the ribbing in the leaves and was very intentional about defining edges and overlapping areas.
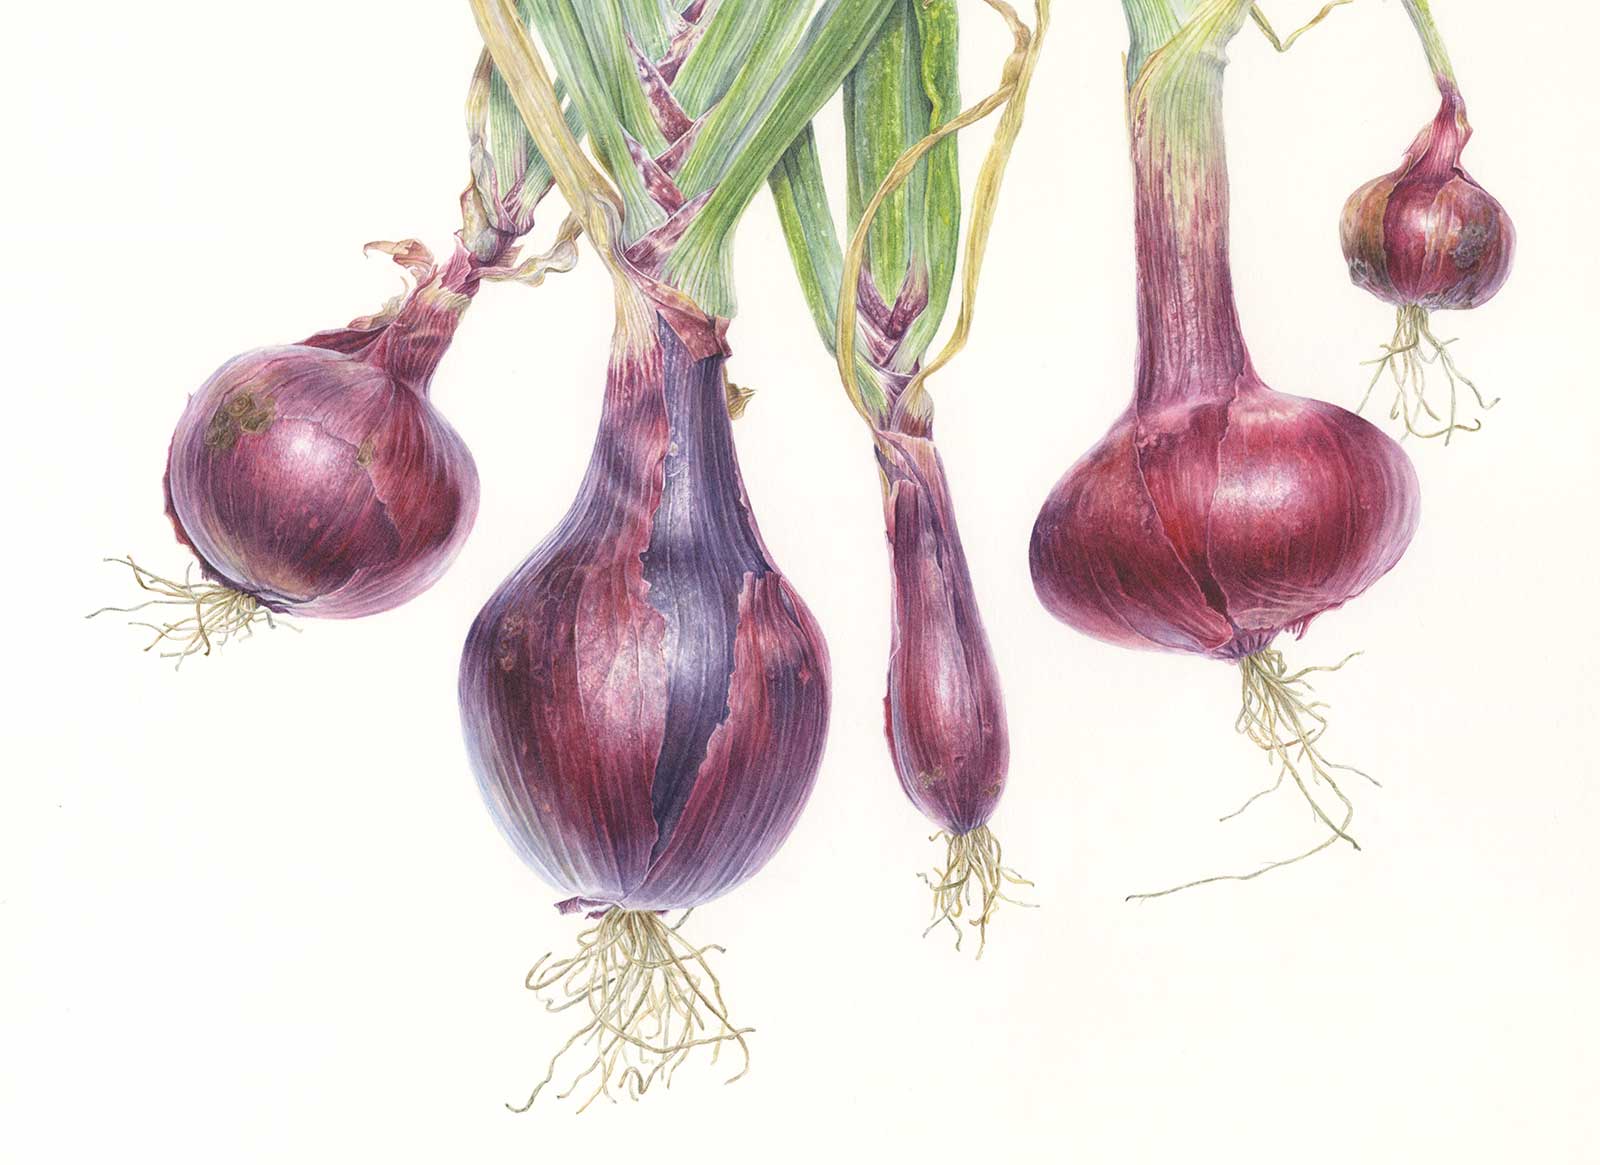
Stage 9 The Roots
For the roots I moved to a 3/0 Princeton Velvet Touch brush and traced my pencil lines with a mixed gray. I defined the details using warm and cool washes on each root and finally tiny touches of dark browns and grays for edges and spots.
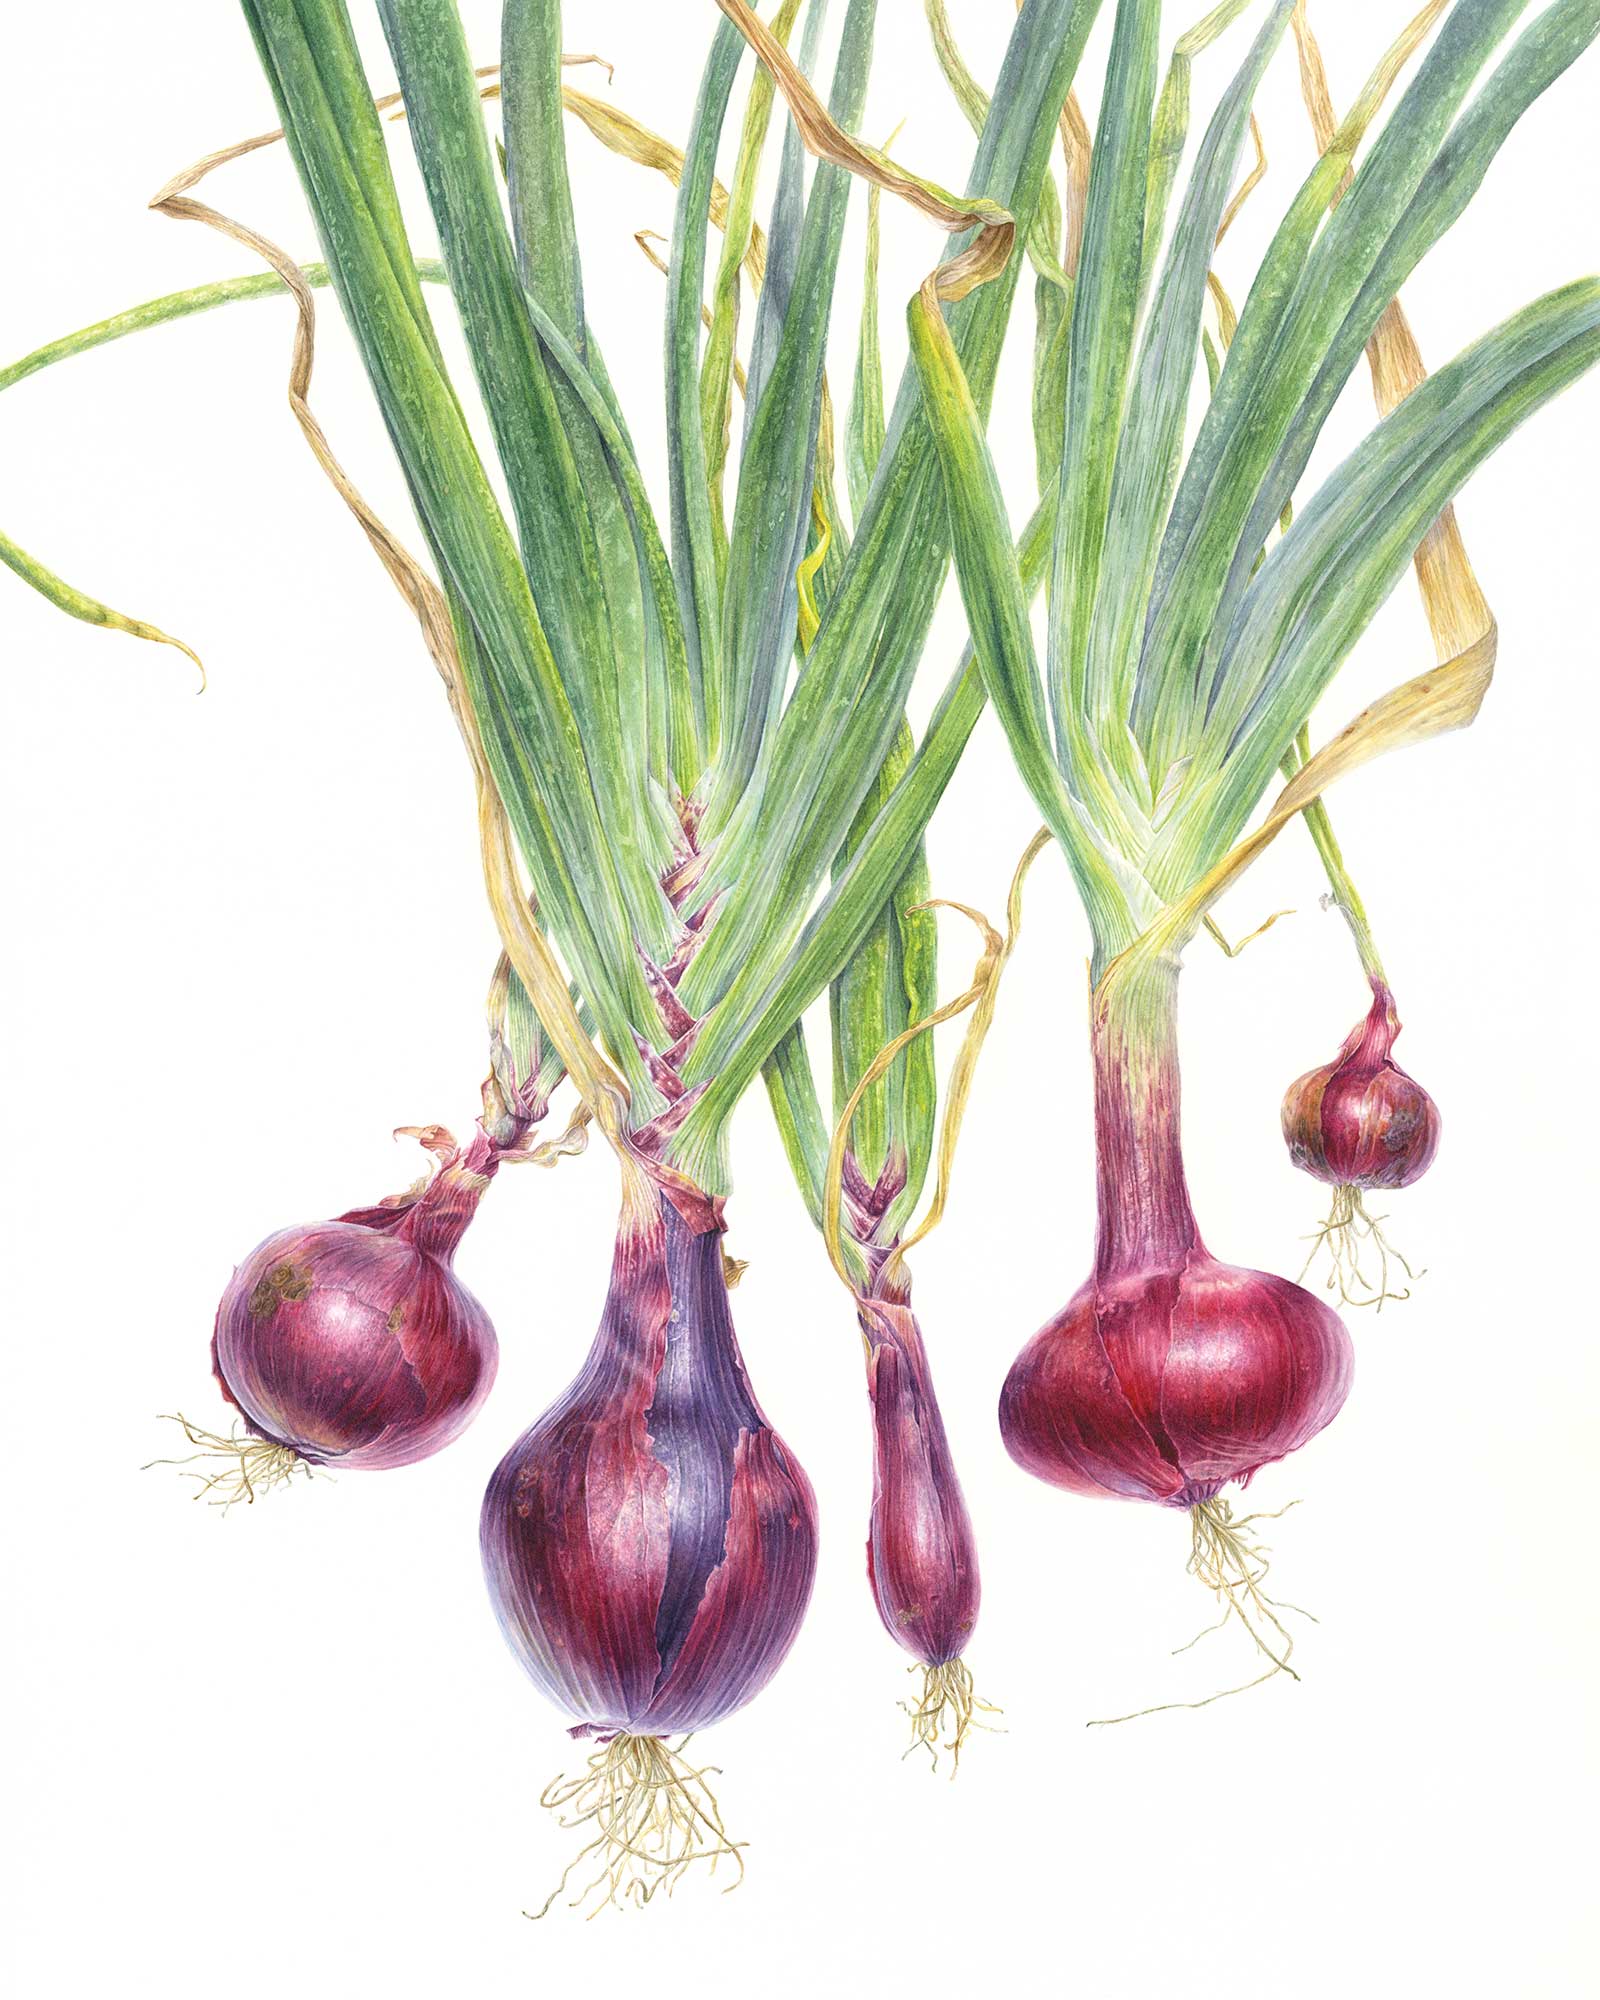
Stage 10 Finished Artwork
Red Gems, watercolor on paper, 20 x 16” (50 x 40 cm)
About the artist
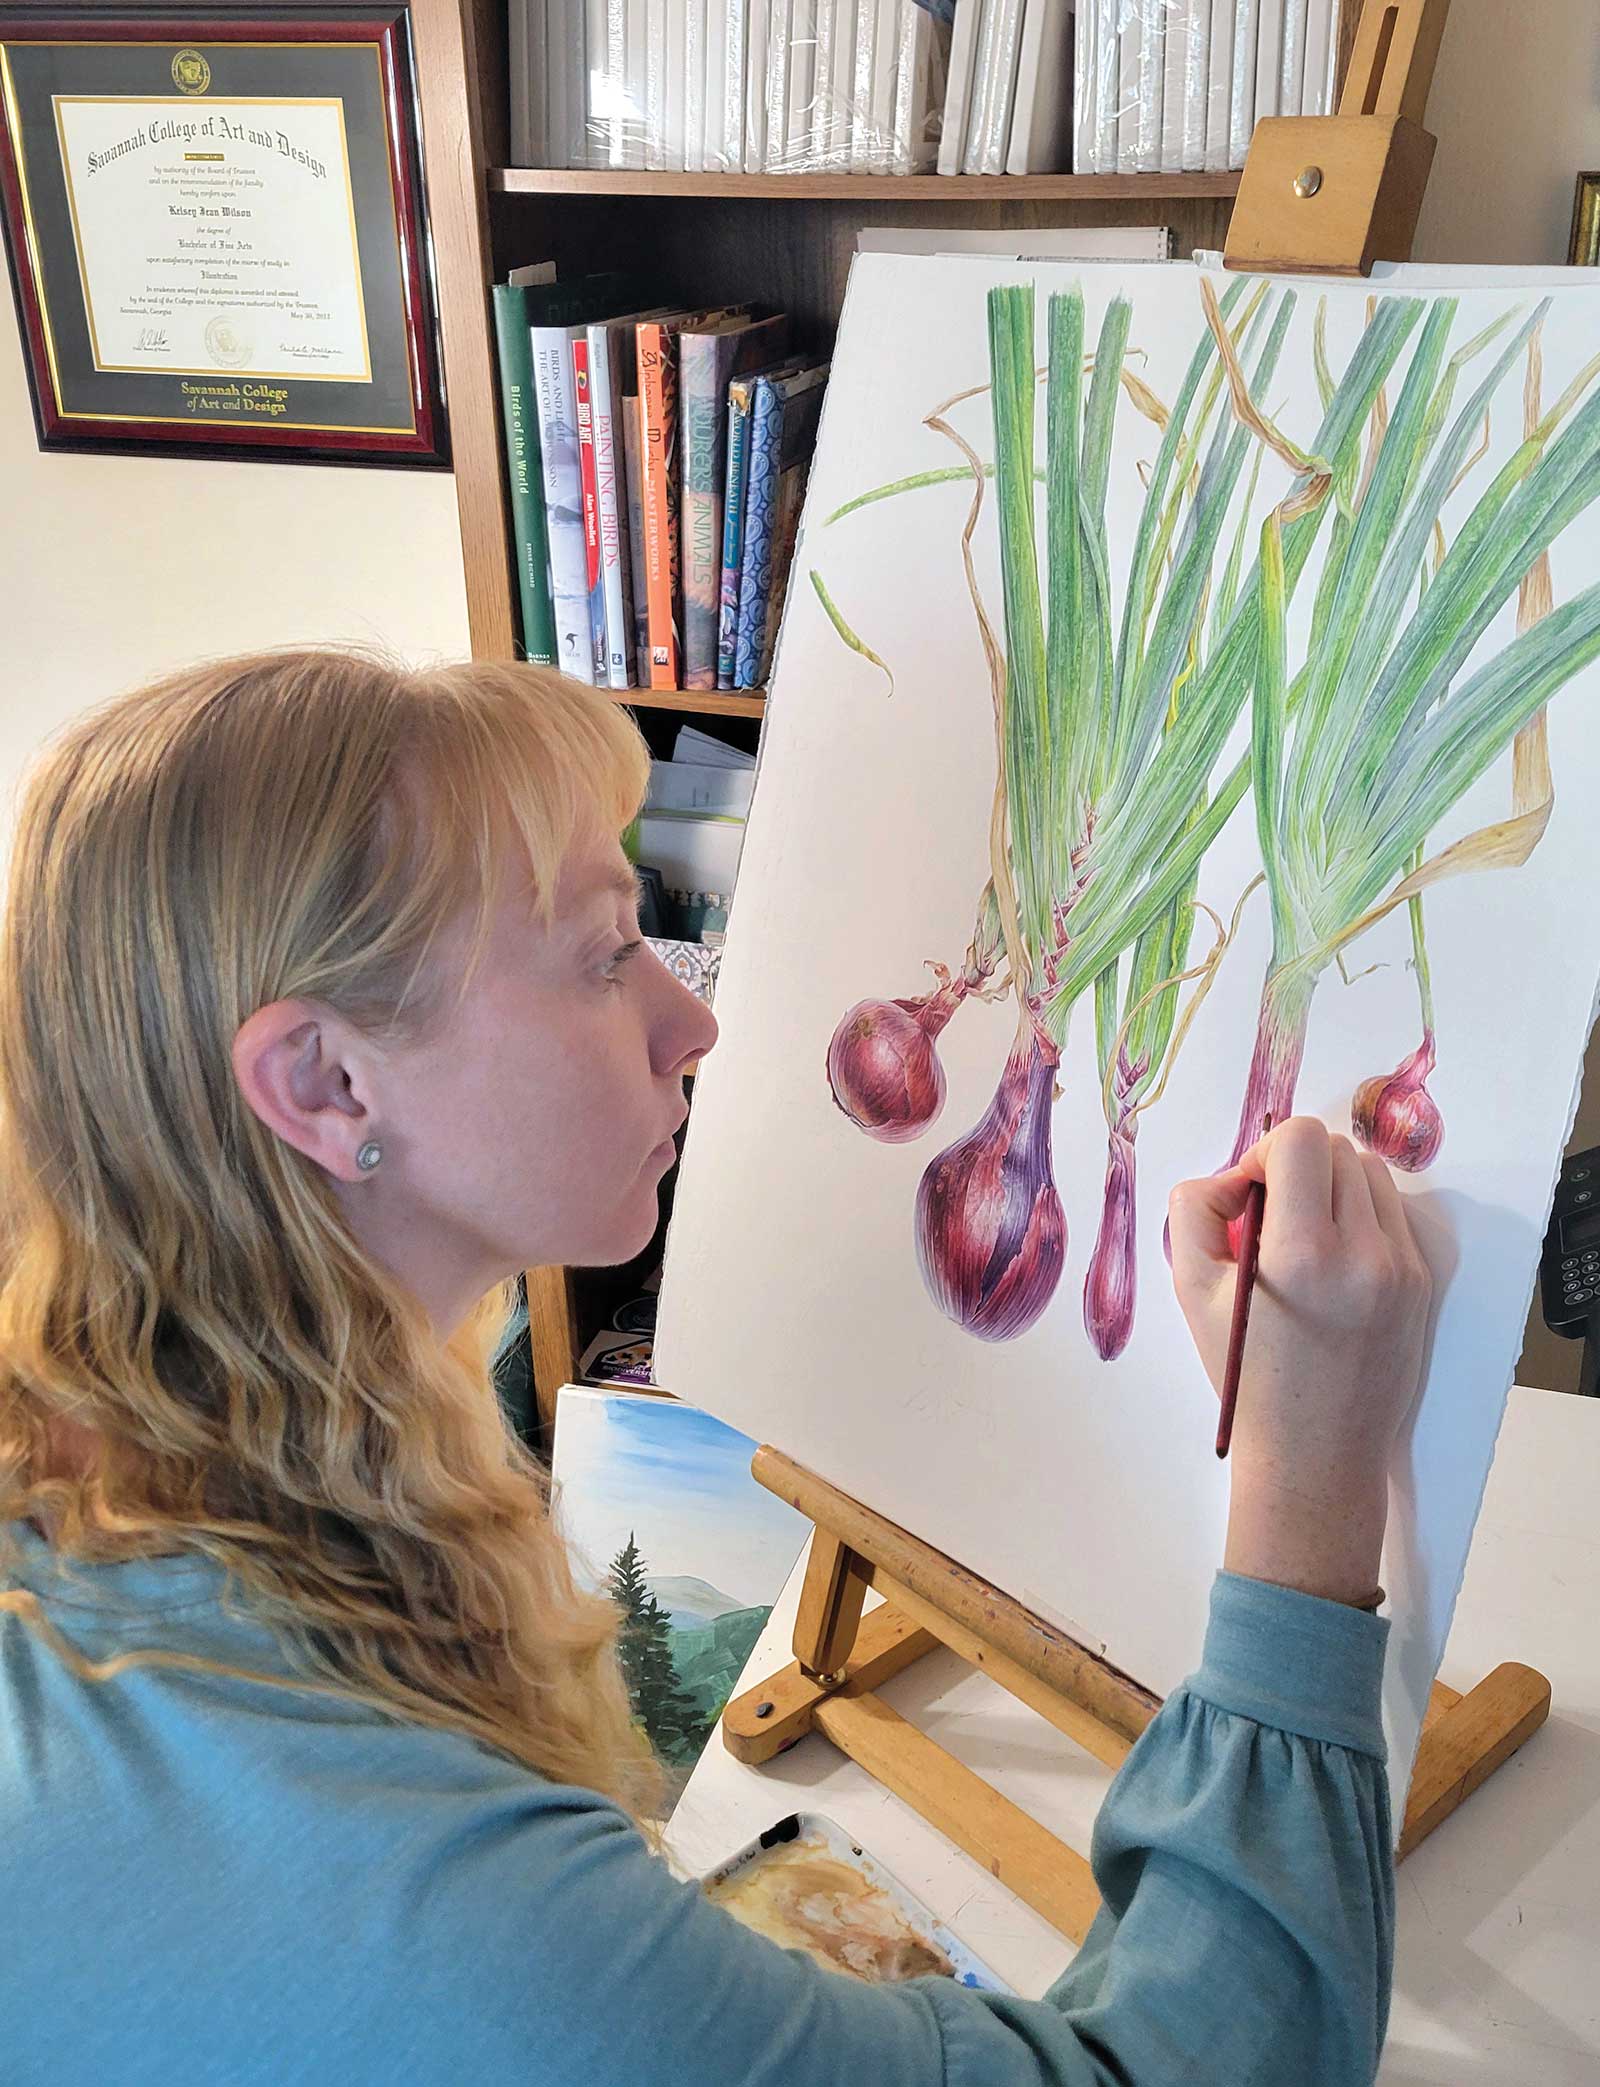 Kelsey Wilson
Kelsey Wilson works out of her home studio in Nevada, Iowa, where her studio mantra is “joy through art.” She has an MFA from Savannah College of Art and Design. She is a contributor to the Botanical Artist Journal, and her work was recently featured on the cover. In 2025 she was awarded an artist-in-residency at the Denver Botanic Gardens. View more of her artwork through her website and Instagram.
Contact at
kelseywilsonstudio.com