



I love painting eggs. They are universally known, yet so simple and so familiar that when I place one at the center of a composition, it almost demands a moment of stillness. Passersby often pause, lean in and let their eyes adjust to the quiet drama unfolding on the surface of something they thought they already understood. So next time when you’re frying an egg, I invite you to have a closer look at the entire process from pan to plate. You’ll see things you’ve never noticed before.
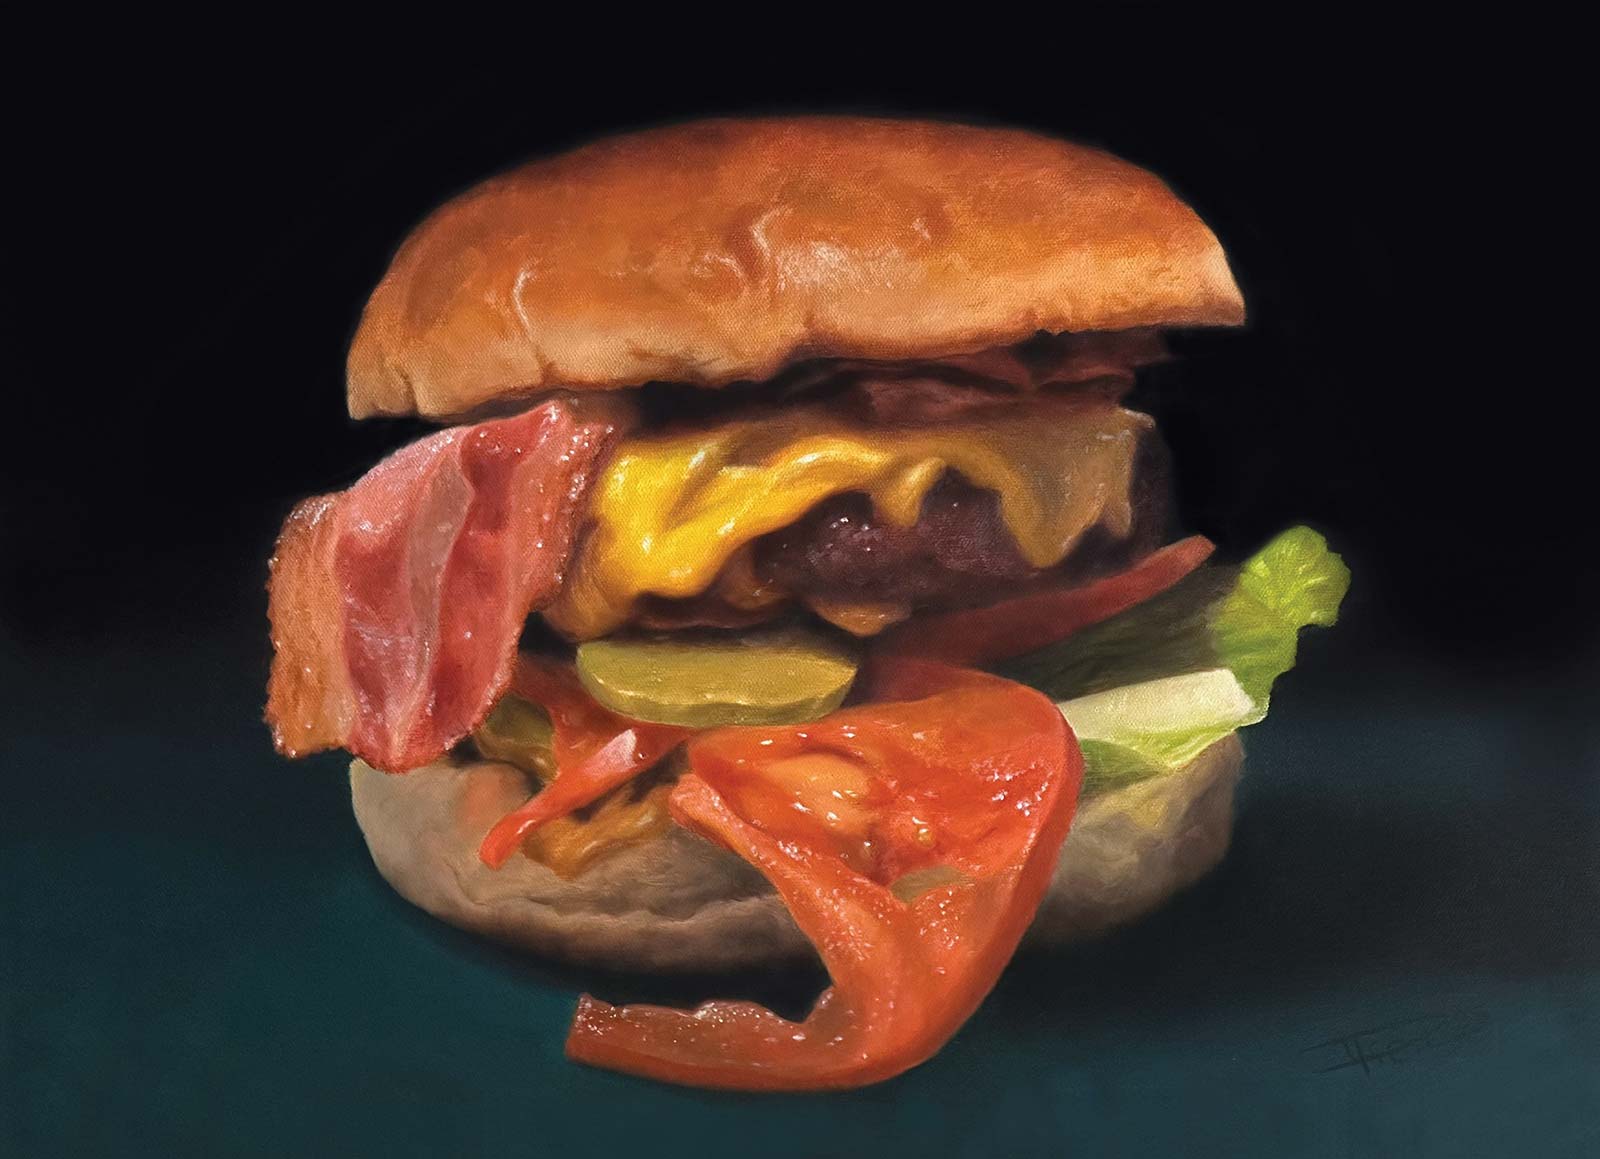
Burger, oil, 15¾ x 19½” (40 x 50 cm)
This demonstration piece is an alla prima study, painted in a single session, while the paint was still wet. That immediacy suits my smaller works, where precise yet expressive brushwork can transform an ordinary subject into an intimate, immersive experience. Creating such smaller studies provide me with a powerful way to build confidence and deepen my technical skill.
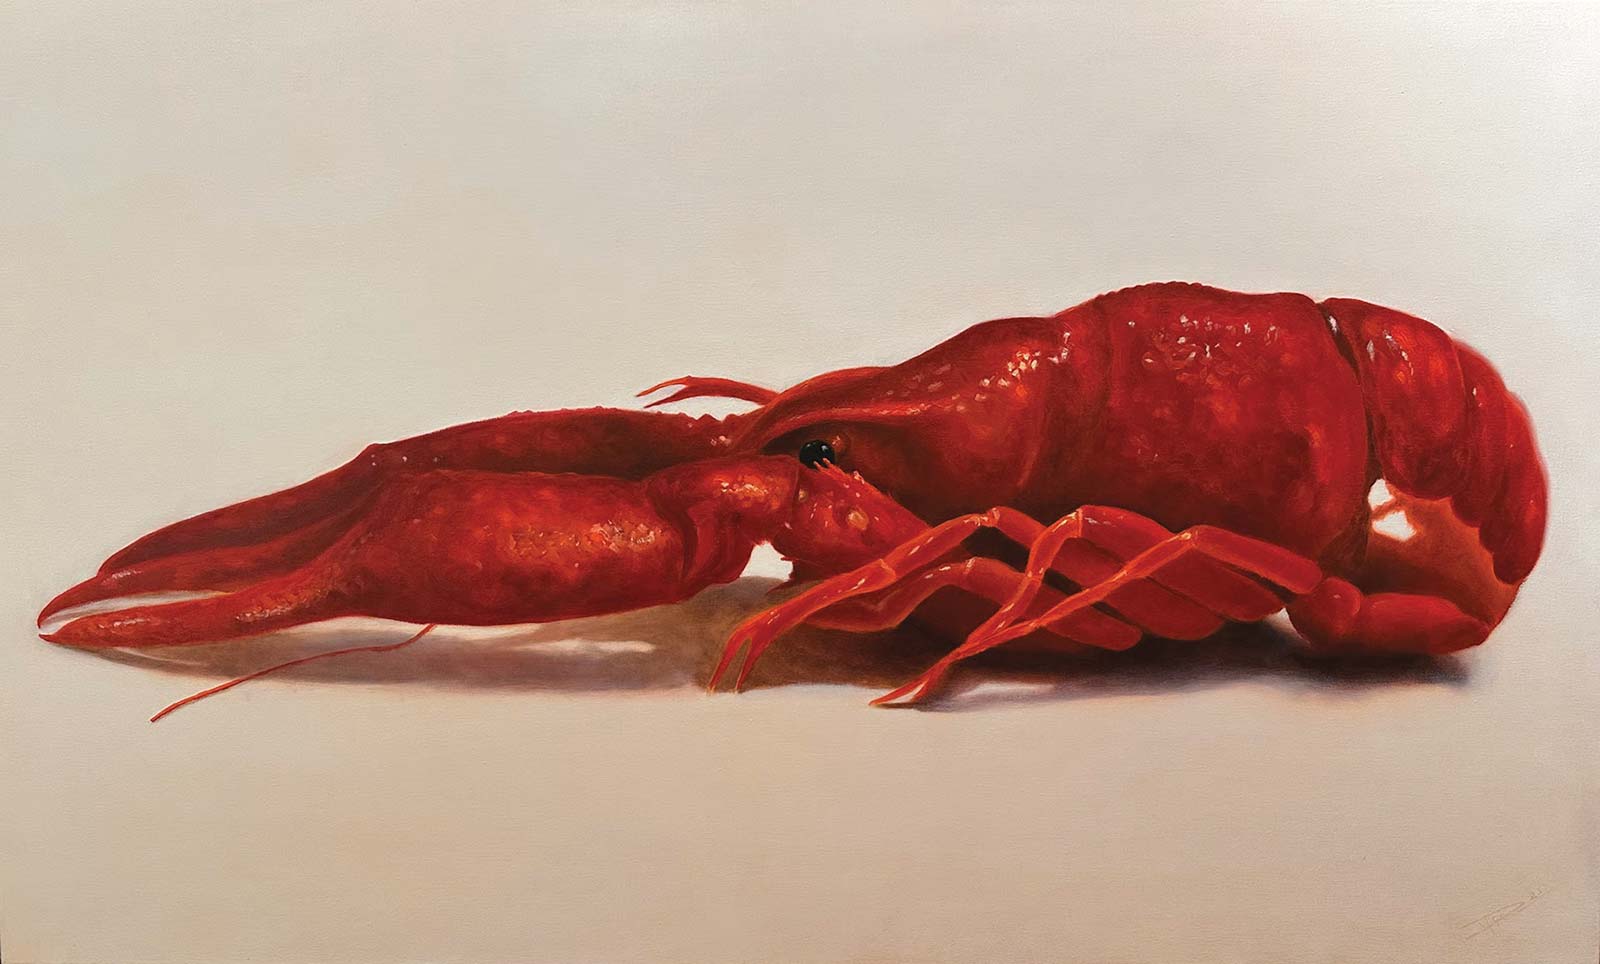
Claw & Order, 23½ x 39 1/3” (60 x 100 cm)
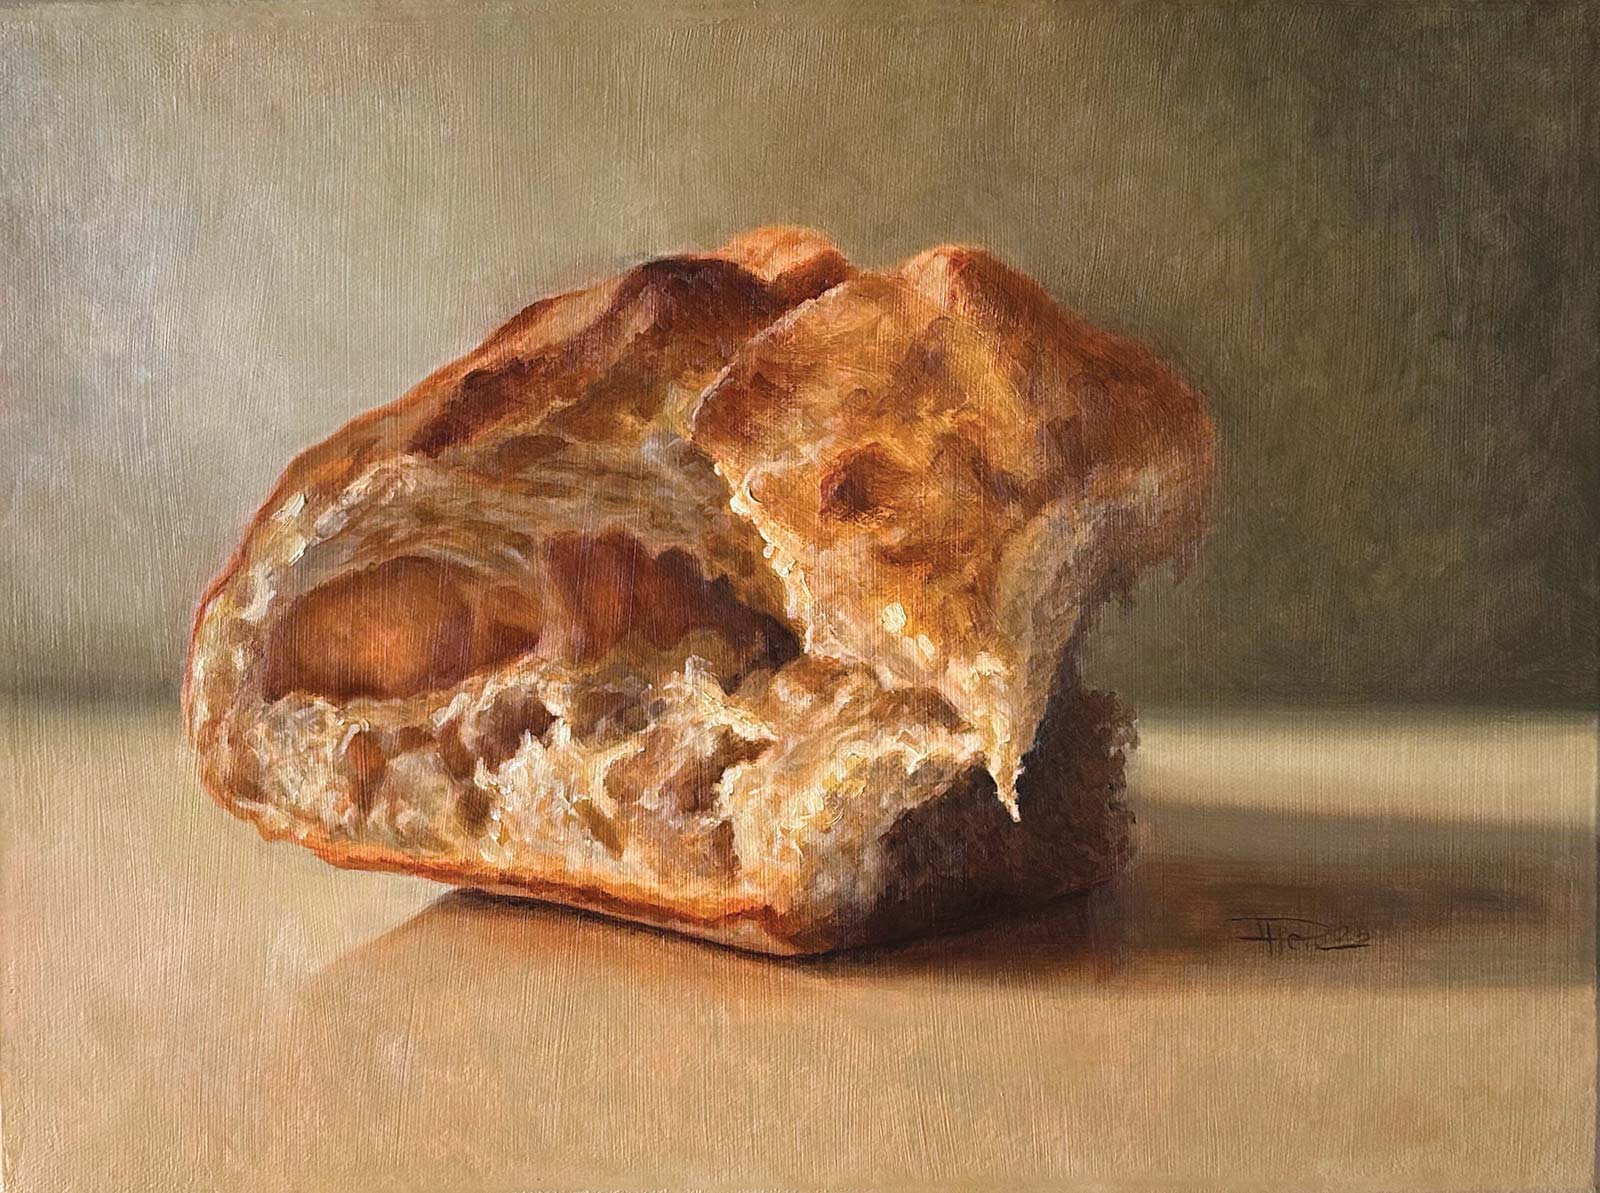
Pain Tradition, 12 x 15¾” (30 x 40 cm)
Larger pieces unfold more slowly, built over several sessions as I layer light, refine form and coax out the subtle textures that give my paintings their quiet intensity. But even in those bigger paintings, I follow the very same steps. The entire process of this painting can also be watched in a 14-minute video tutorial on my YouTube channel.
My Art in the Making Egg on Teal
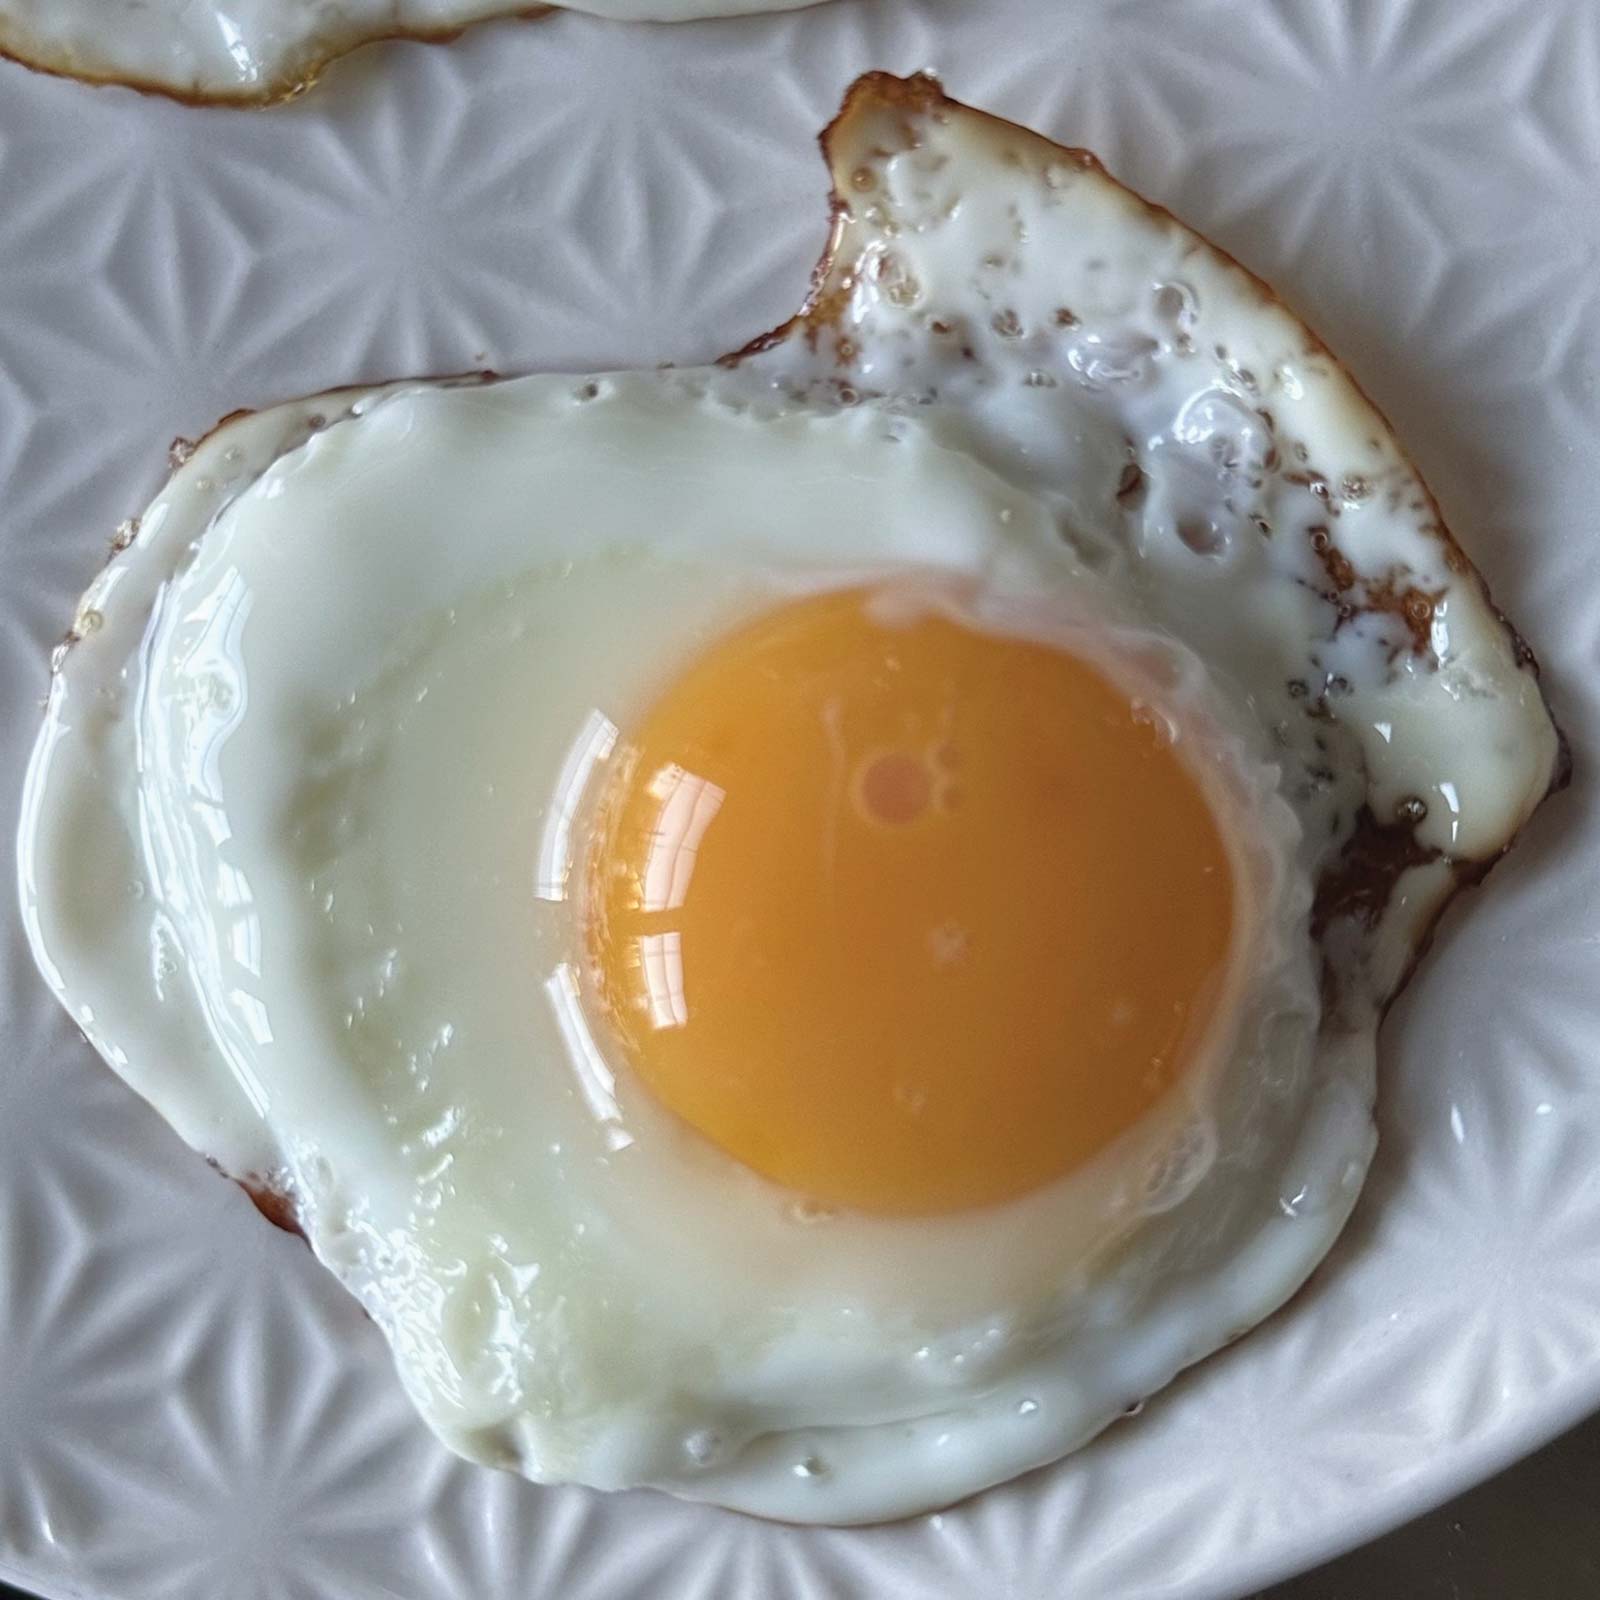
Reference Photo
Stage 1 Preparing the Surface
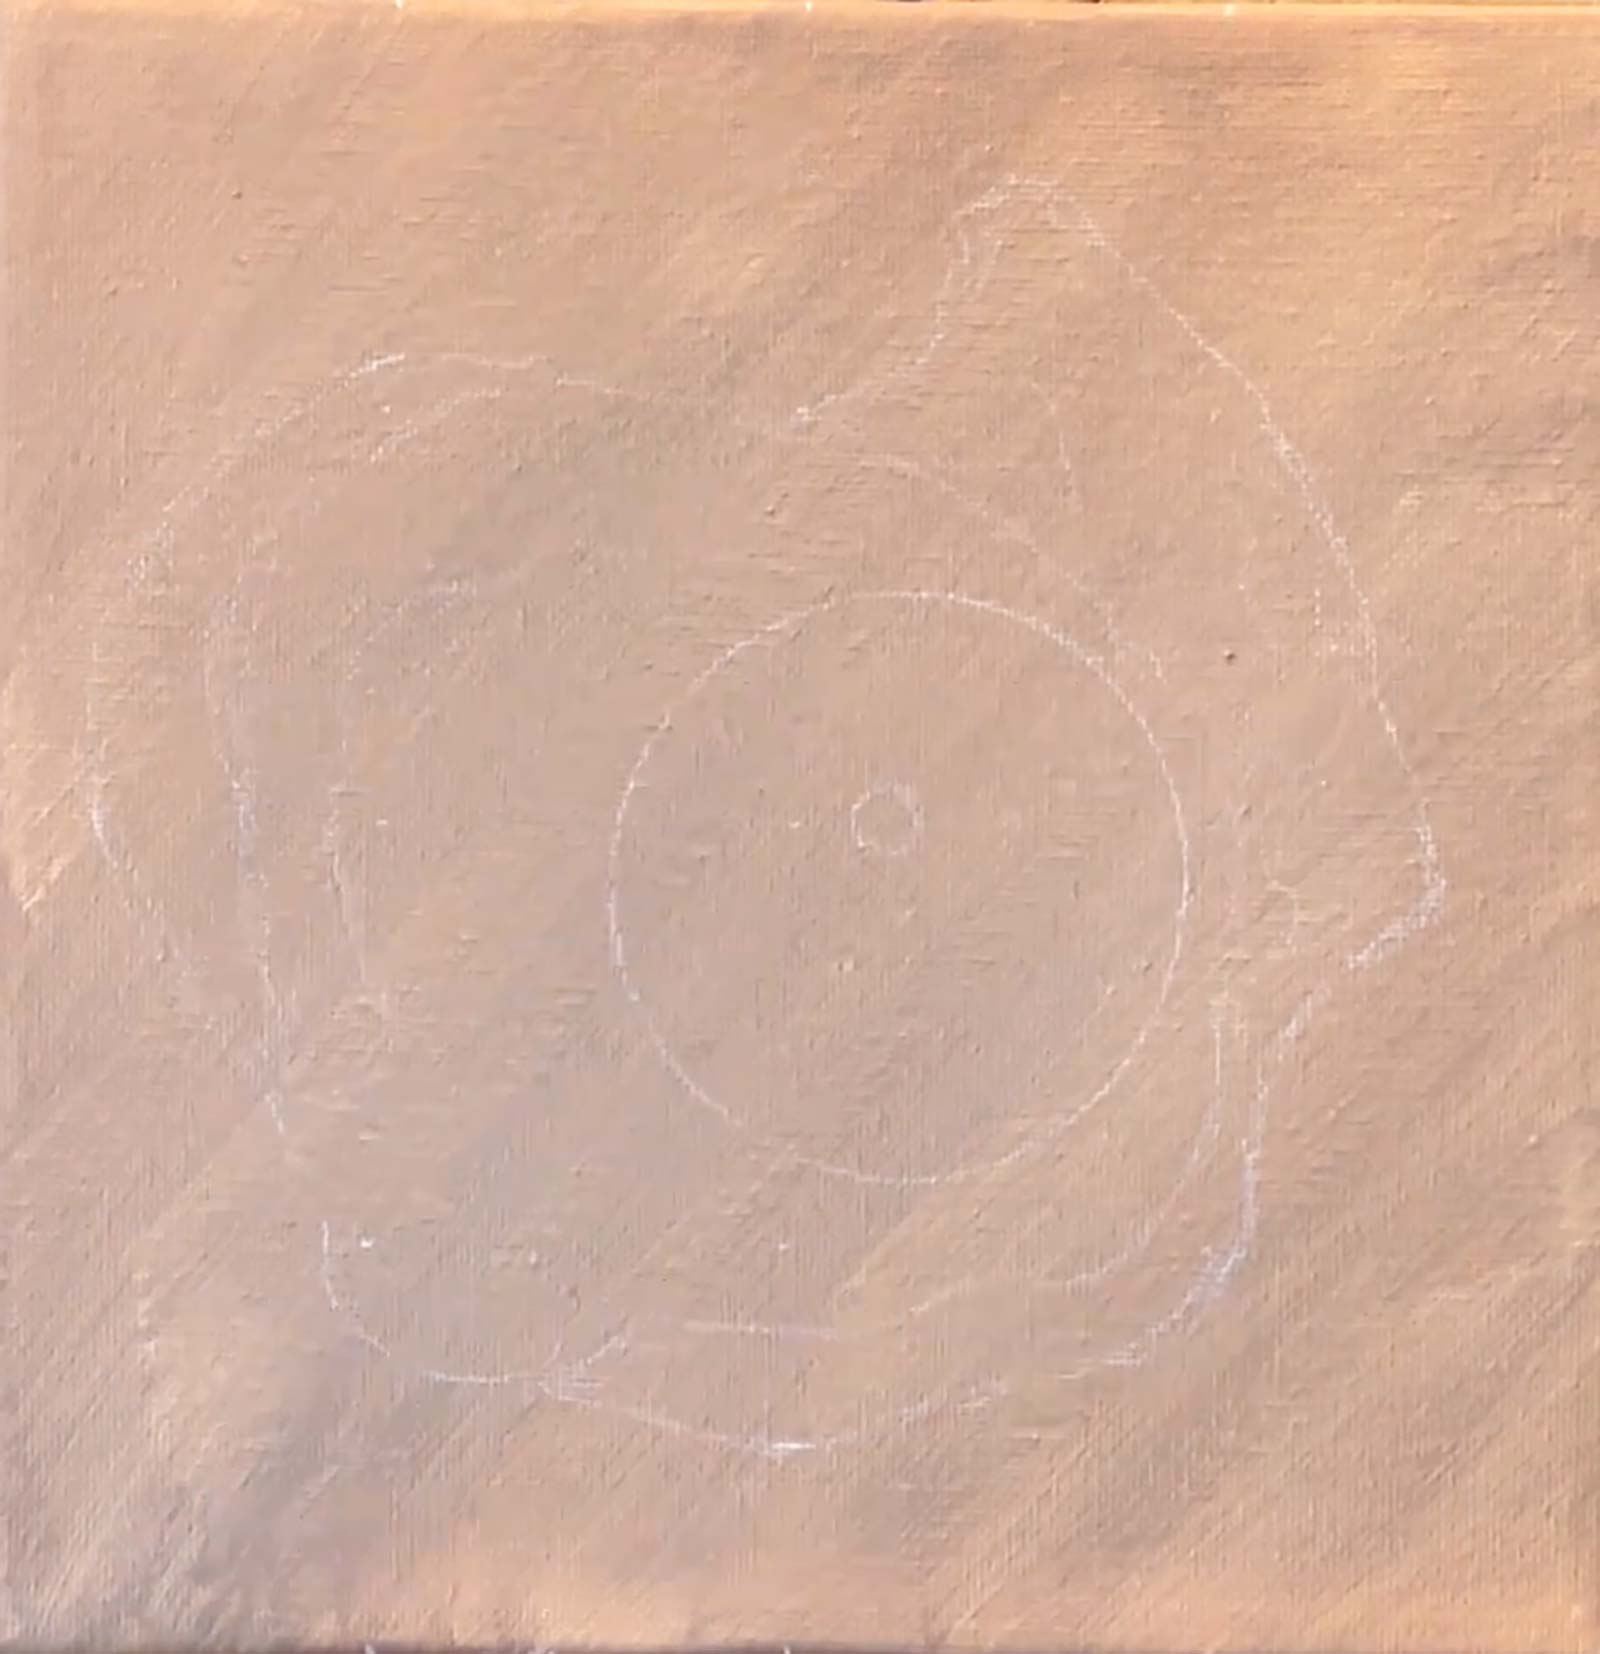
I always put a layer of gesso on my canvas or panel for some extra tooth and so the paint doesn’t get sucked into the surface too strongly. I like my canvas to have a warm undertone, but not too strong. Here I used a mix between burnt umber and white in acrylics. For my studies I often prepare my surfaces like this in bulk, so I always have a panel or canvas at the ready when inspiration strikes.
Stage 2 The Sketch
For these smaller studies I have the reference on my tablet at the same size next to my canvas. I first place dots to indicate a grid on my canvas, which matches with a grid on my reference that I have on my iPad (in Procreate). I use dots as opposed to lines to keep the focus on my drawing and to minimize distractions. For the grid and the drawing, I use a white pastel pencil so it doesn’t muddy the paint. For the lines of the yolk, I use the inside of a roll of painters’ tape to make a perfect circle.
Stage 3 Mixing the Basic Colors
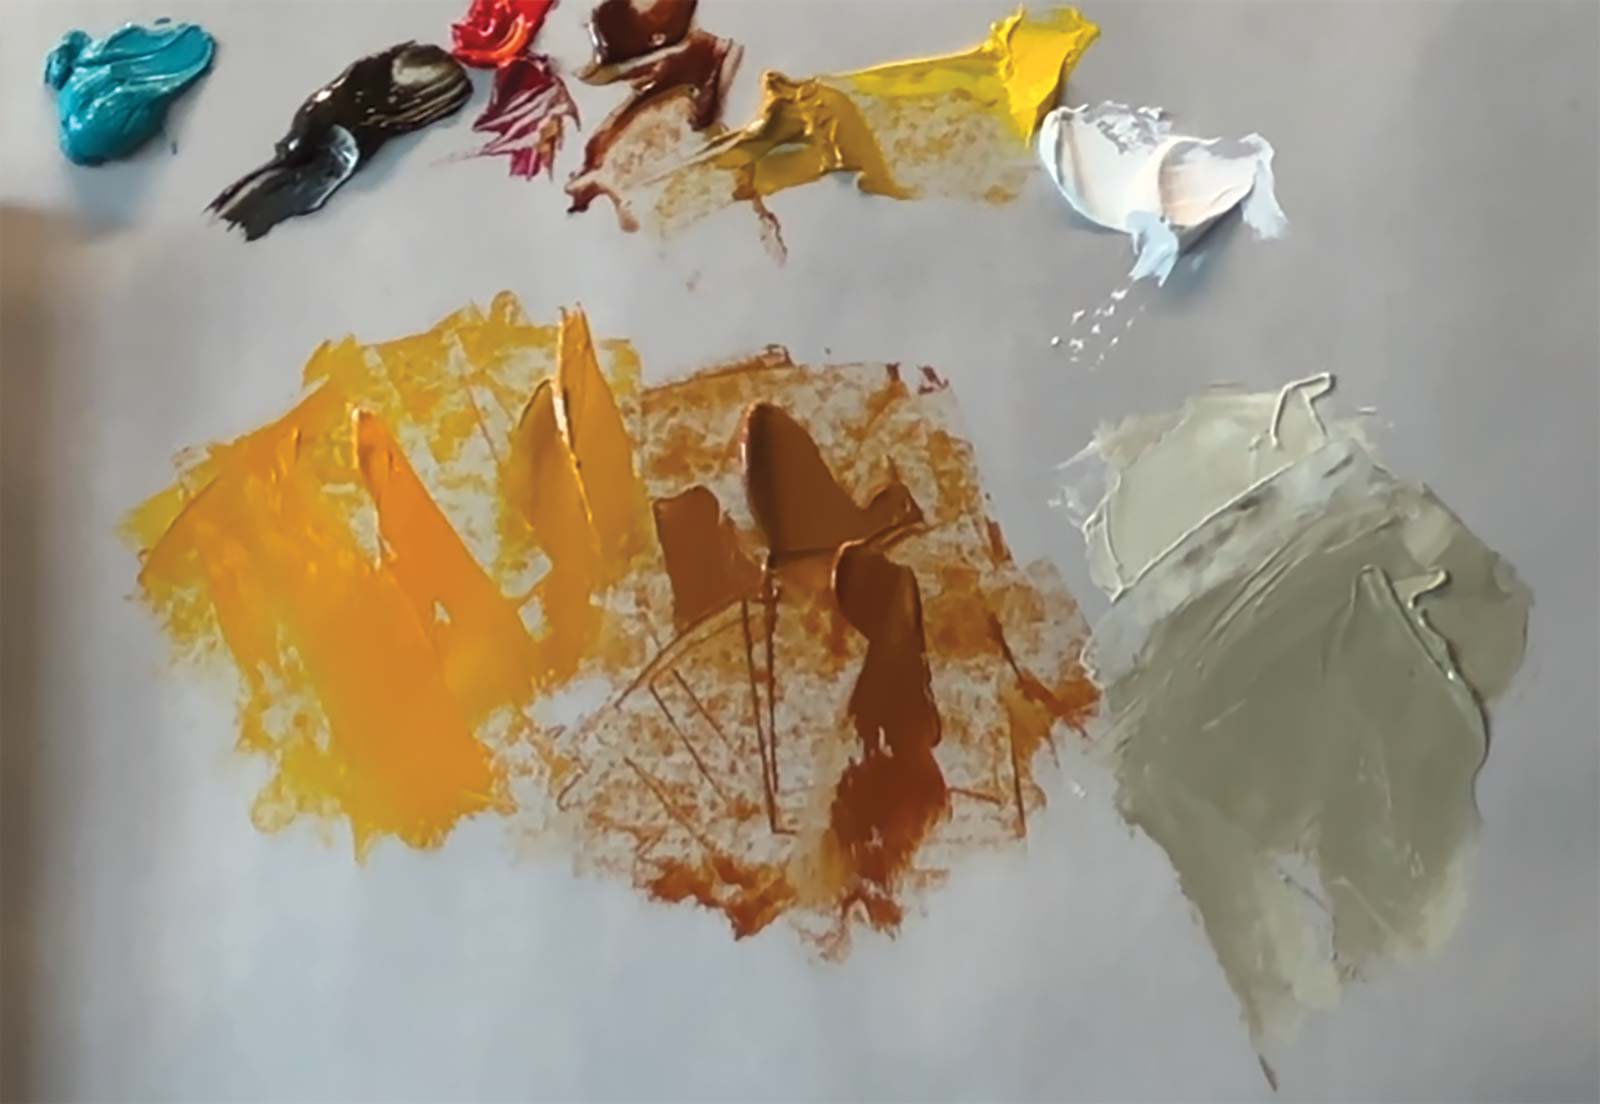
Before I touch the canvas with paint, I take a moment to settle into the process and think about the overall feel I want to achieve. My first practical step is mixing a basic range of colors. I prepare several yellows for the yolk and some cream tones for the egg white. I don’t aim for perfection here, just enough variation to give myself options once I start painting. In general, I tend to start with two to four color variations so I can easily block in the midtones and the darks. Since I’m working with water‑mixable oils, I know I can adjust easily as I go.
Stage 4 Blocking in the Yolk
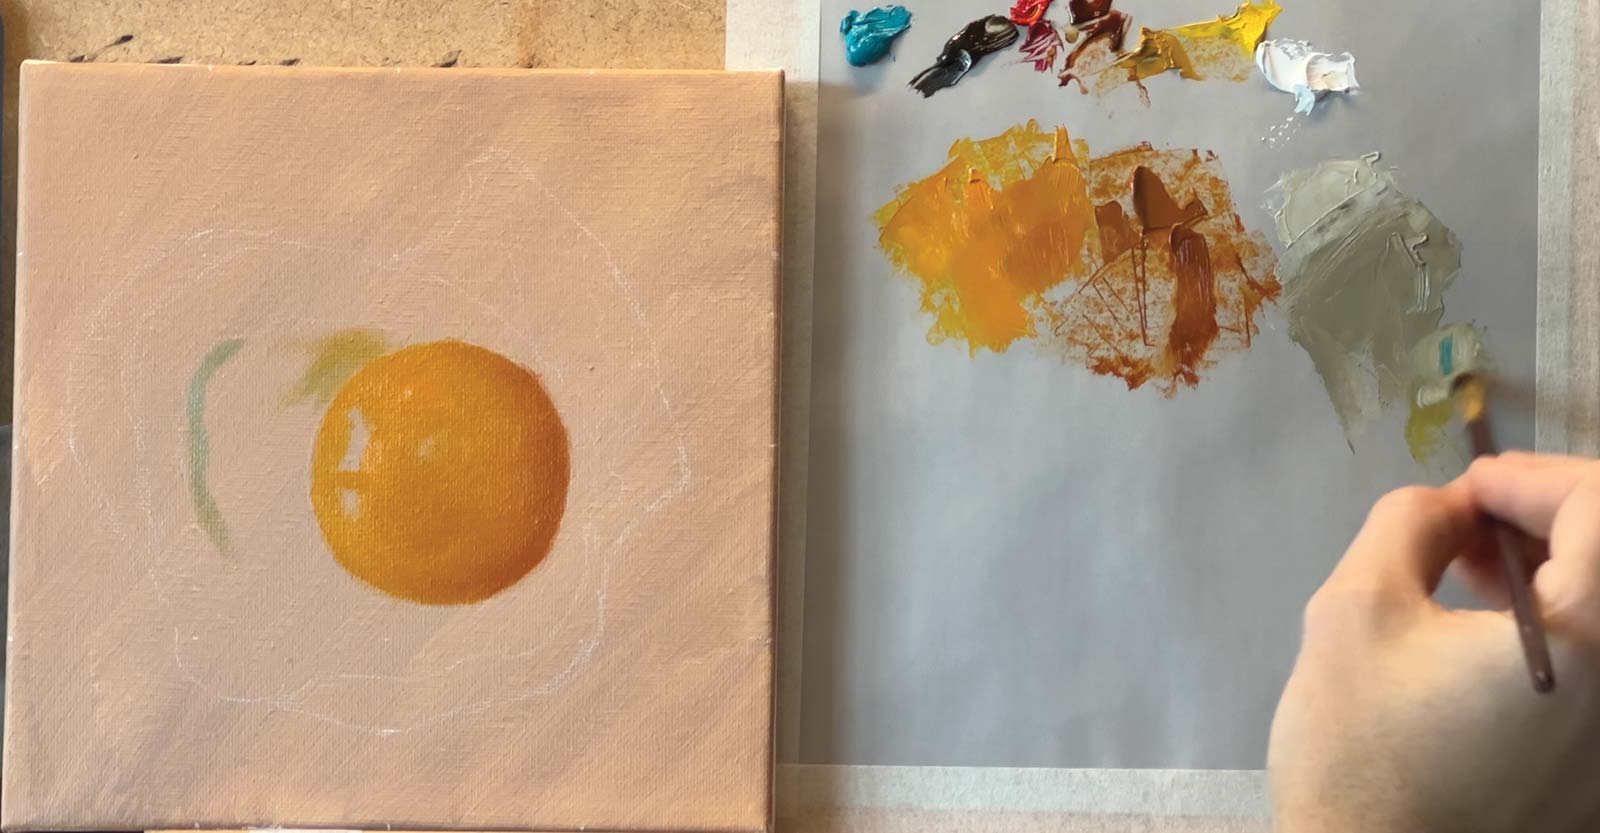
I start painting the darker areas of the yolk. Using a soft synthetic filbert brush and no mediums or water, I lay down the first shapes. I scumble them on by using very little paint on my brush. Burnt sienna and raw umber help me establish depth, and I add a touch of Caribbean blue to introduce a cooler note to the darker whites. That color will also come back later in the background.
Stage 5 Adjusting the Tones
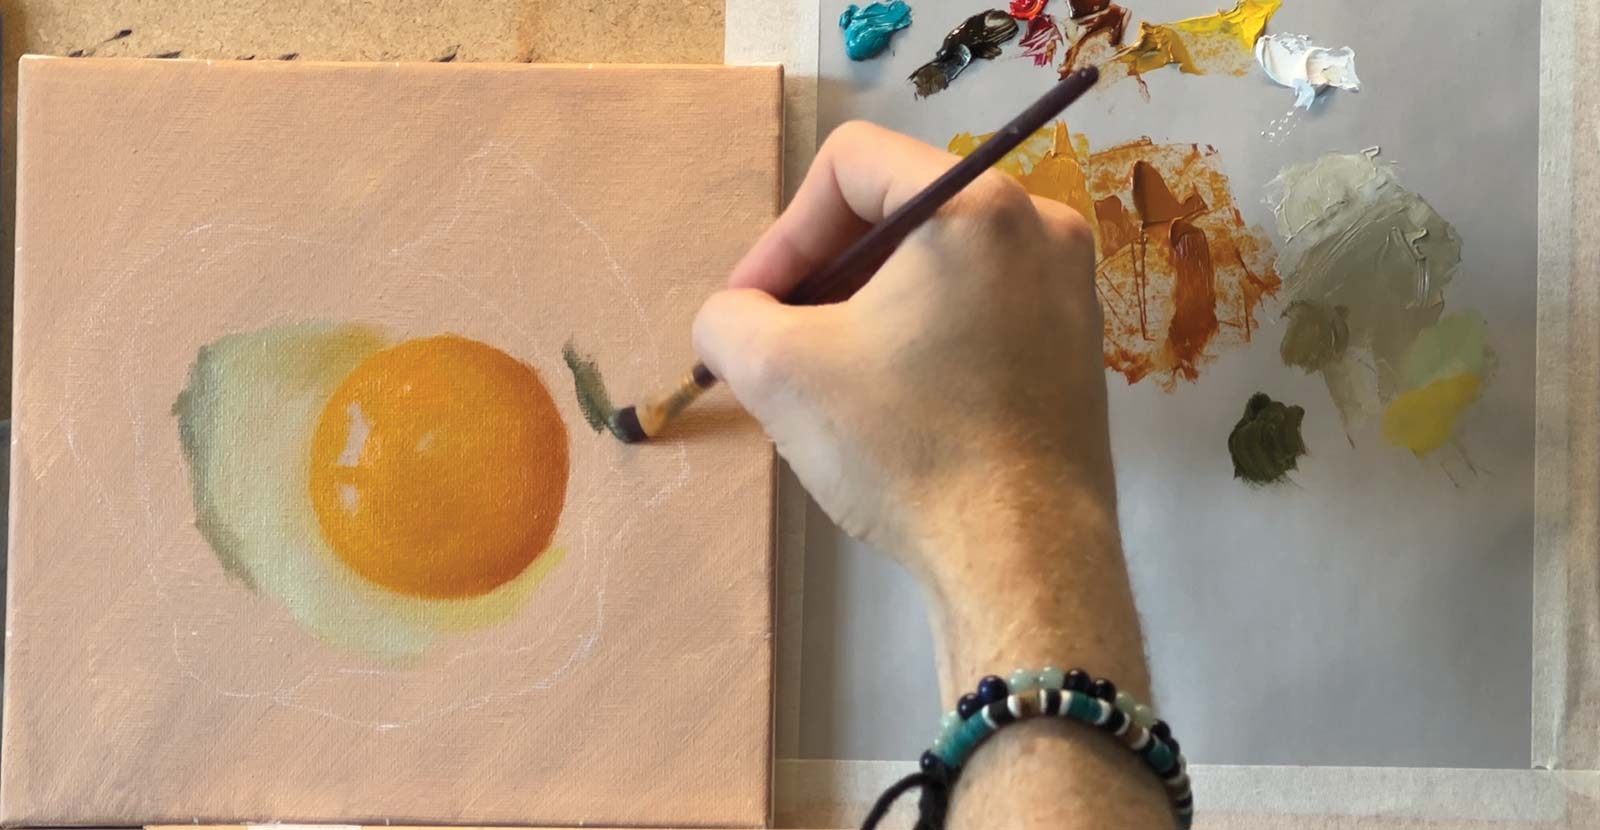
As I look more closely at the reference, I notice subtle shifts: slightly greenish areas, warmer yellows and places where the yolk leans more orange. I scumble these tones in thinly, building up the form without committing to heavy layers too early. I leave the heavy marks for the end.
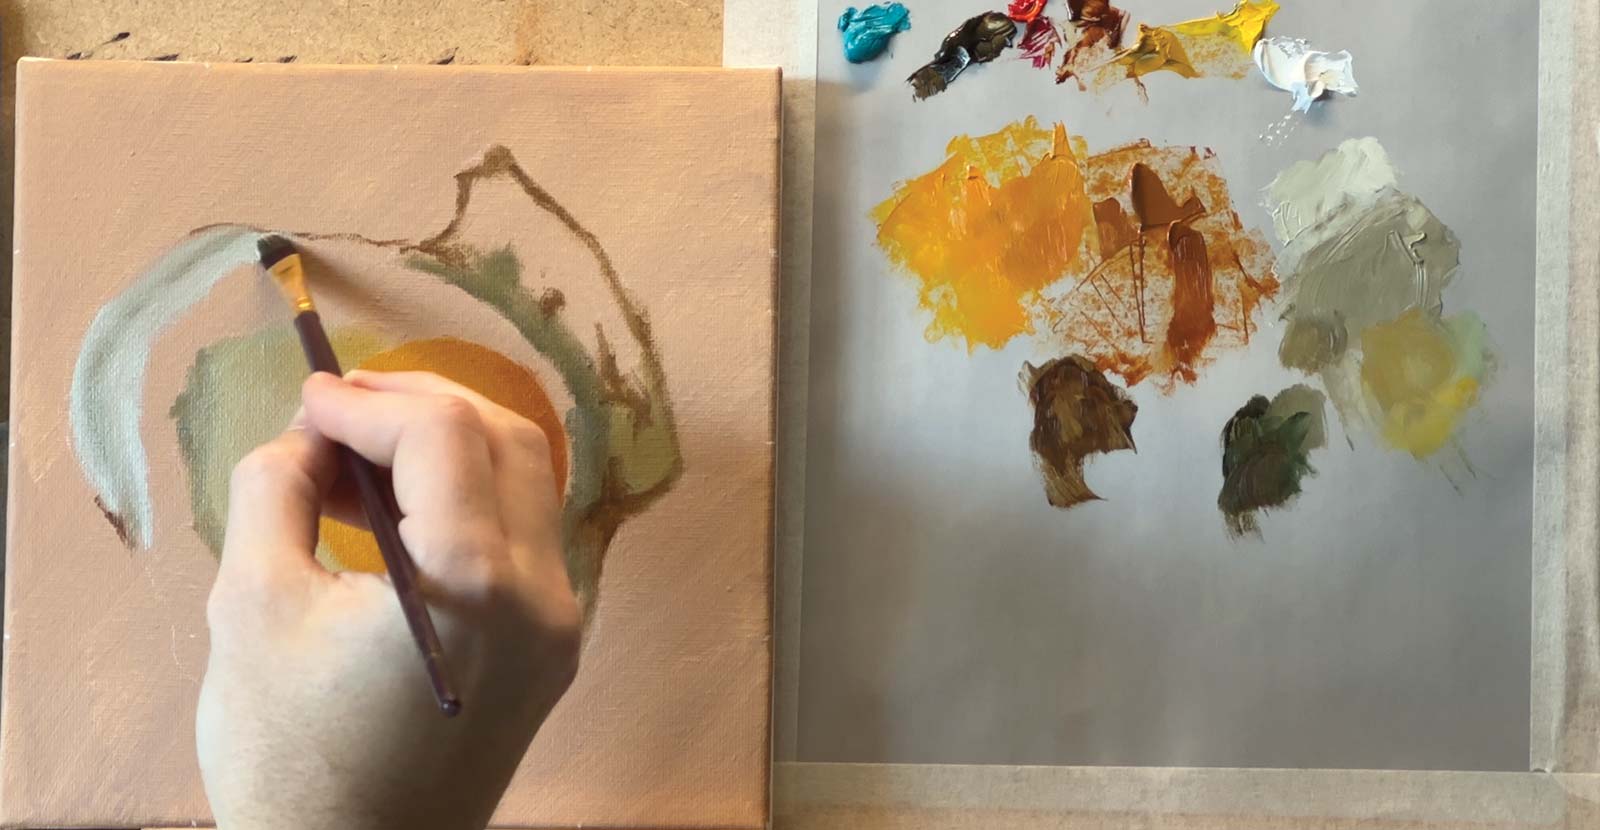
Stage 6 Developing the Egg White
Next, I move to the egg white. I use a cream color rather than pure white, rubbing it out across the surface to keep it soft. Also, by rubbing the paint on, the color intensity is reduced even more. This allows me to gradually build up the intensity. Most of the egg white has very gentle transitions, so I avoid hard edges except where the yolk meets the liquid part or where the crispy patches appear. With this approach it’s very easy to gradually blend the tones together on the canvas.
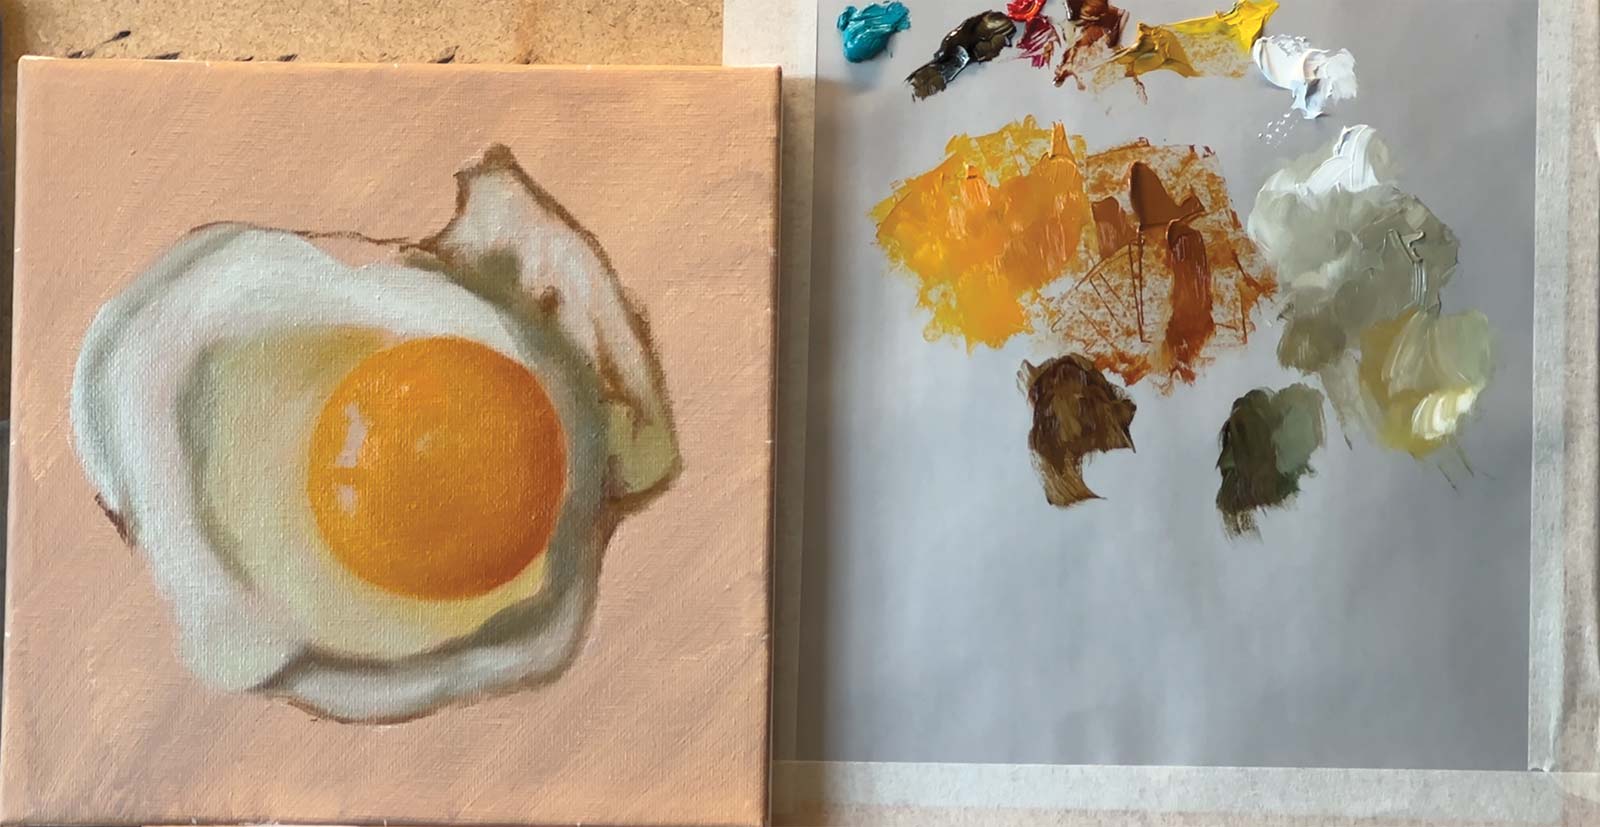
Stage 7 Adding Shadows And Texture
To suggest the cooked and crispy texture around the edges, I use a mix of burnt sienna and raw umber. Applied thinly, it gives me the darker areas I need without overpowering the painting. I know this mixture can go nearly black if applied thickly, so I save that strength for later accents. On the left of the yolk there’s this not-fully-cooked part of egg white. To accentuate that rawness, I add a bit of my yellow mixtures to those whites.
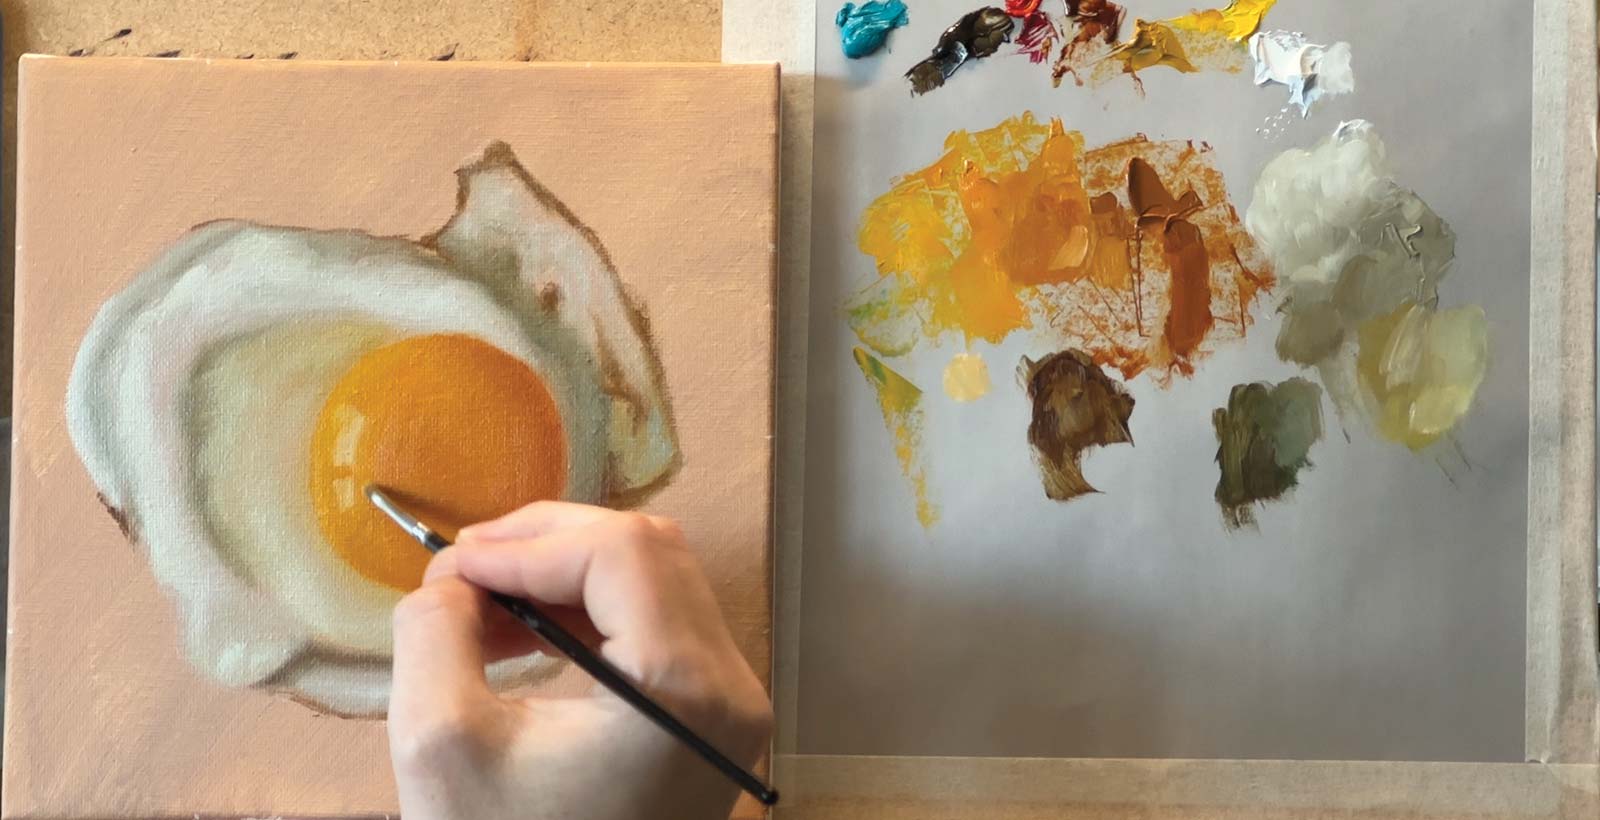
Stage 8 Refining Light and Form
With the main structure in place, I switch to a smaller brush and refine the lighting. I add more yellow where the light hits the yolk and deepen the shadows to give the form more presence. This is where the painting starts to gain dimension.
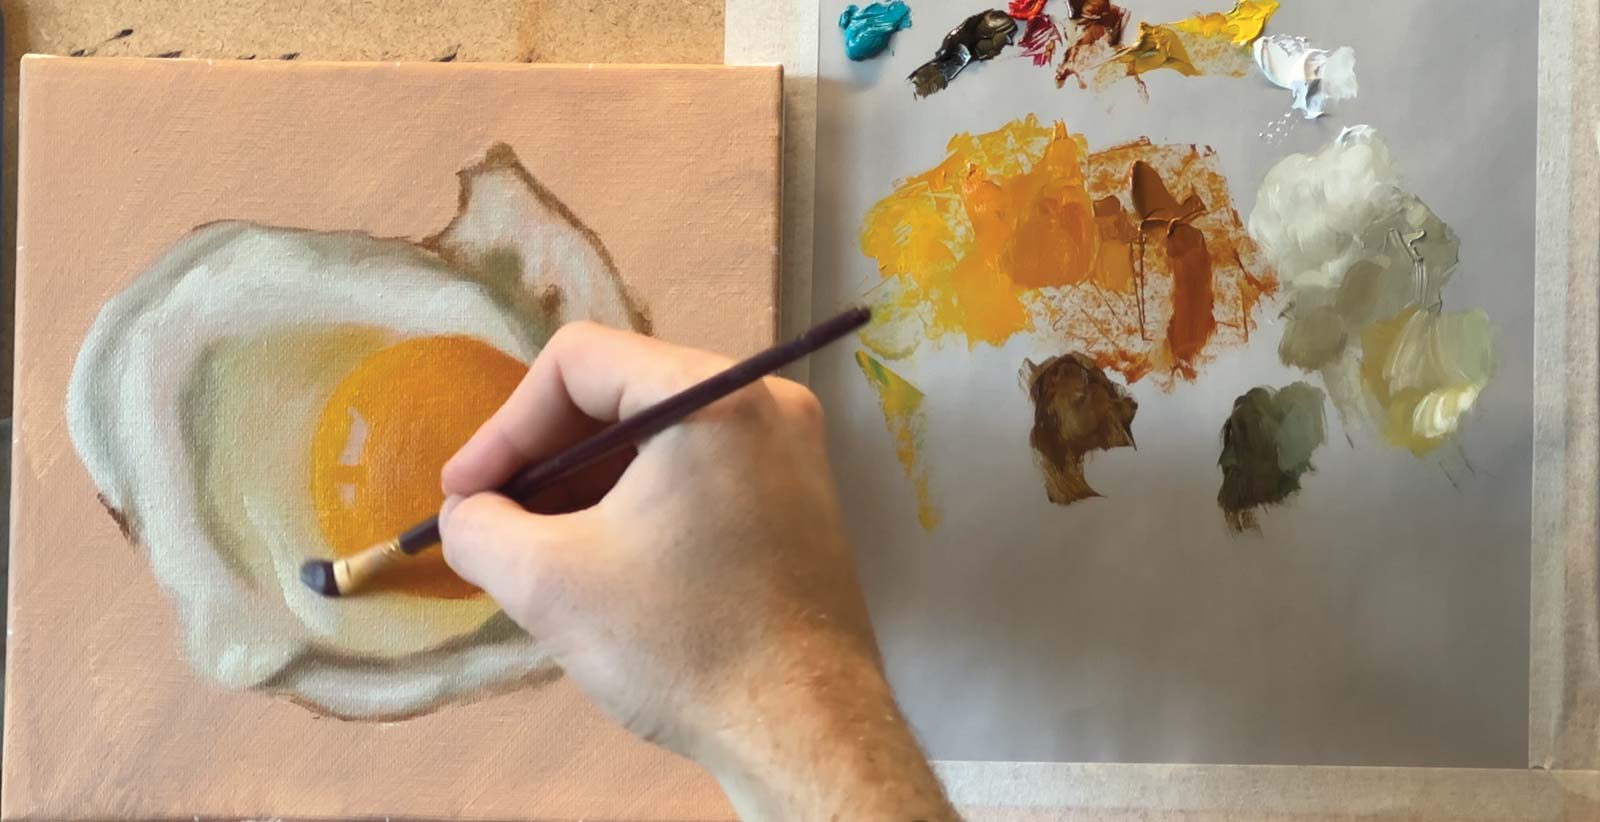
Stage 9 Softening and Blending
With everything roughly blocked in, I soften transitions with a clean brush, blending edges until they feel natural. The egg white especially needs a gentle touch. I try not to overwork it, just enough blending to keep the surface believable and consistent with the reference. At this stage, I am not using any pure whites yet.
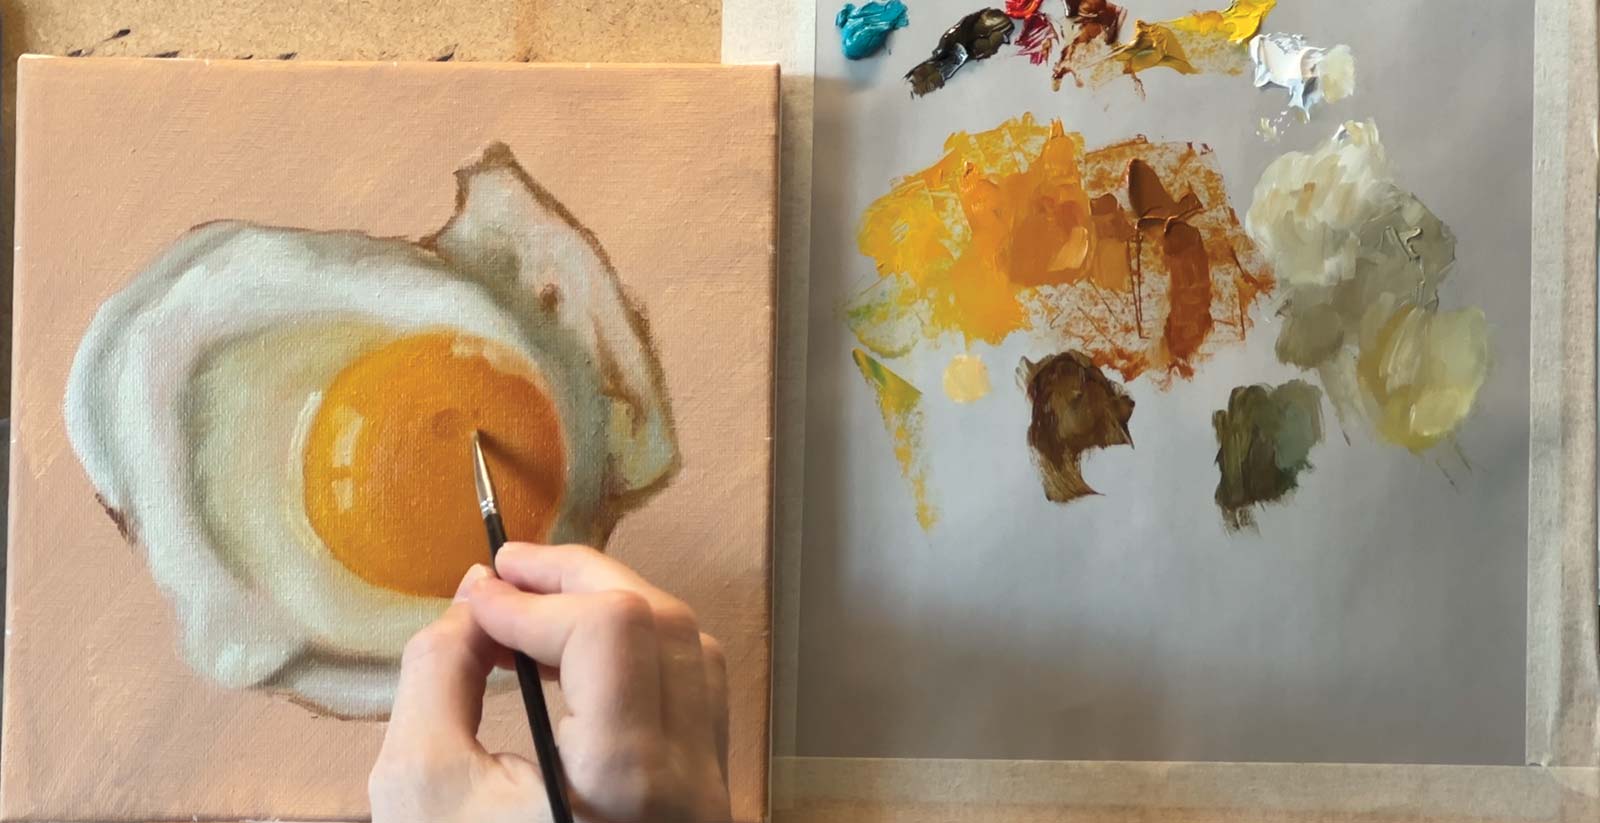
Stage 10 Soft Highlights and Details
Now I bring in the details that make the egg feel real. I paint the shiny thin wet rim around the yolk, add the small bubbles that form during cooking and introduce some soft highlights to accentuate the form. These highlights are placed carefully and are still not a pure white.
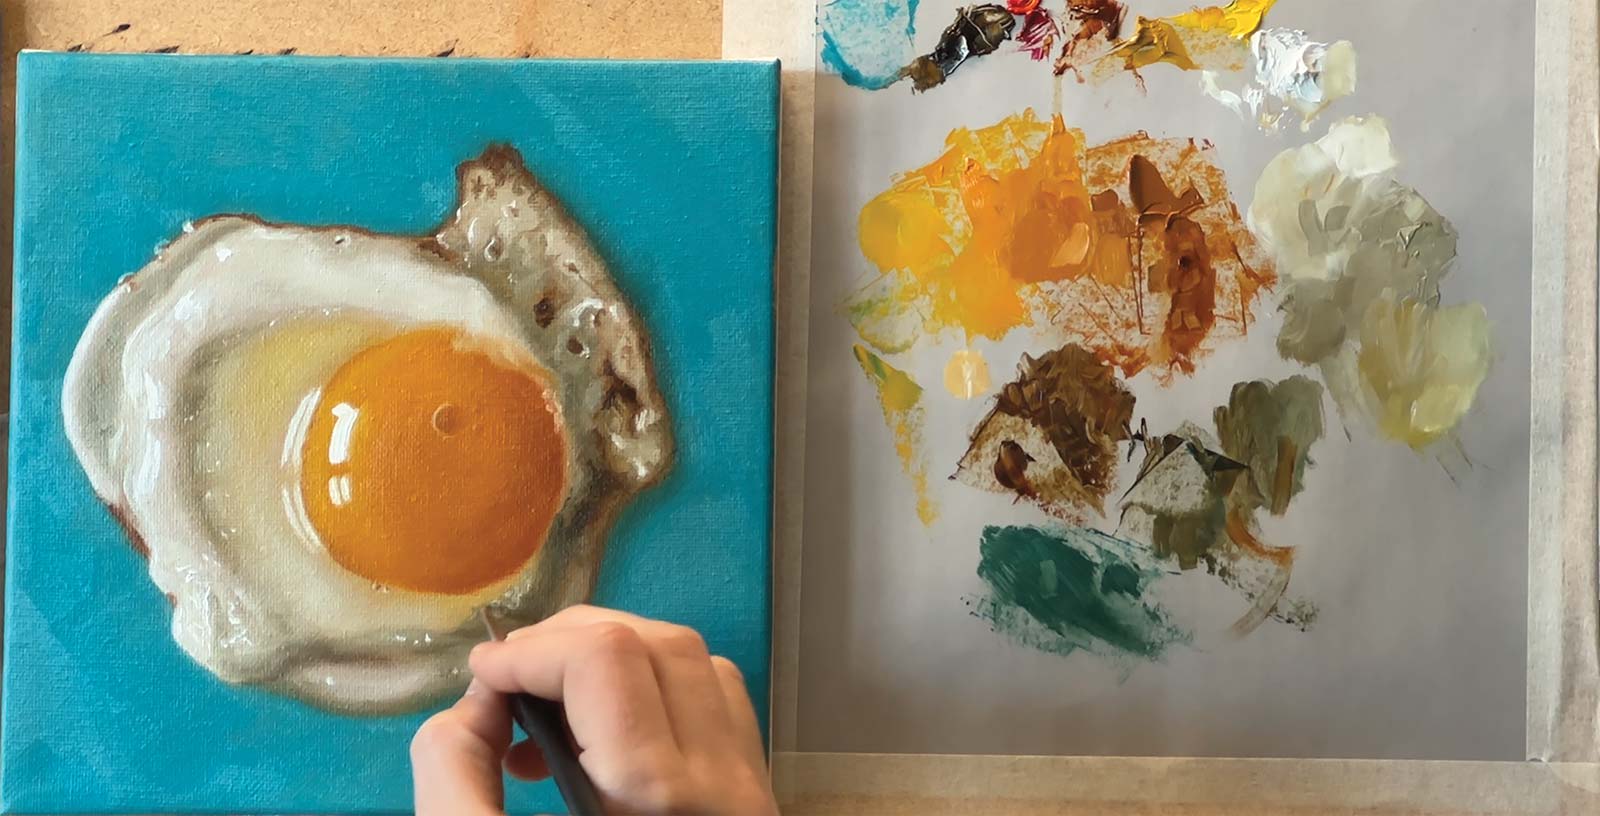
Stage 11 Background and Final Touches
I finish by adding the Caribbean blue background with a dedicated big flat brush. I also add a subtle shadow where the right side of the egg meets the background so it doesn’t appear to float in space. The background ties back to the earlier cooler color notes. In the very last stage, I slow down and place the final highlights and accents. At this stage, I finally introduce the brightest whites. These shimmers are placed carefully, since they can easily become too strong (less is more!). Also, at this stage I add thick strokes to make my mark. Take a look at the finished painting, and you’ll see them clearly. These small adjustments help the painting come together and give it a clean, finished look.
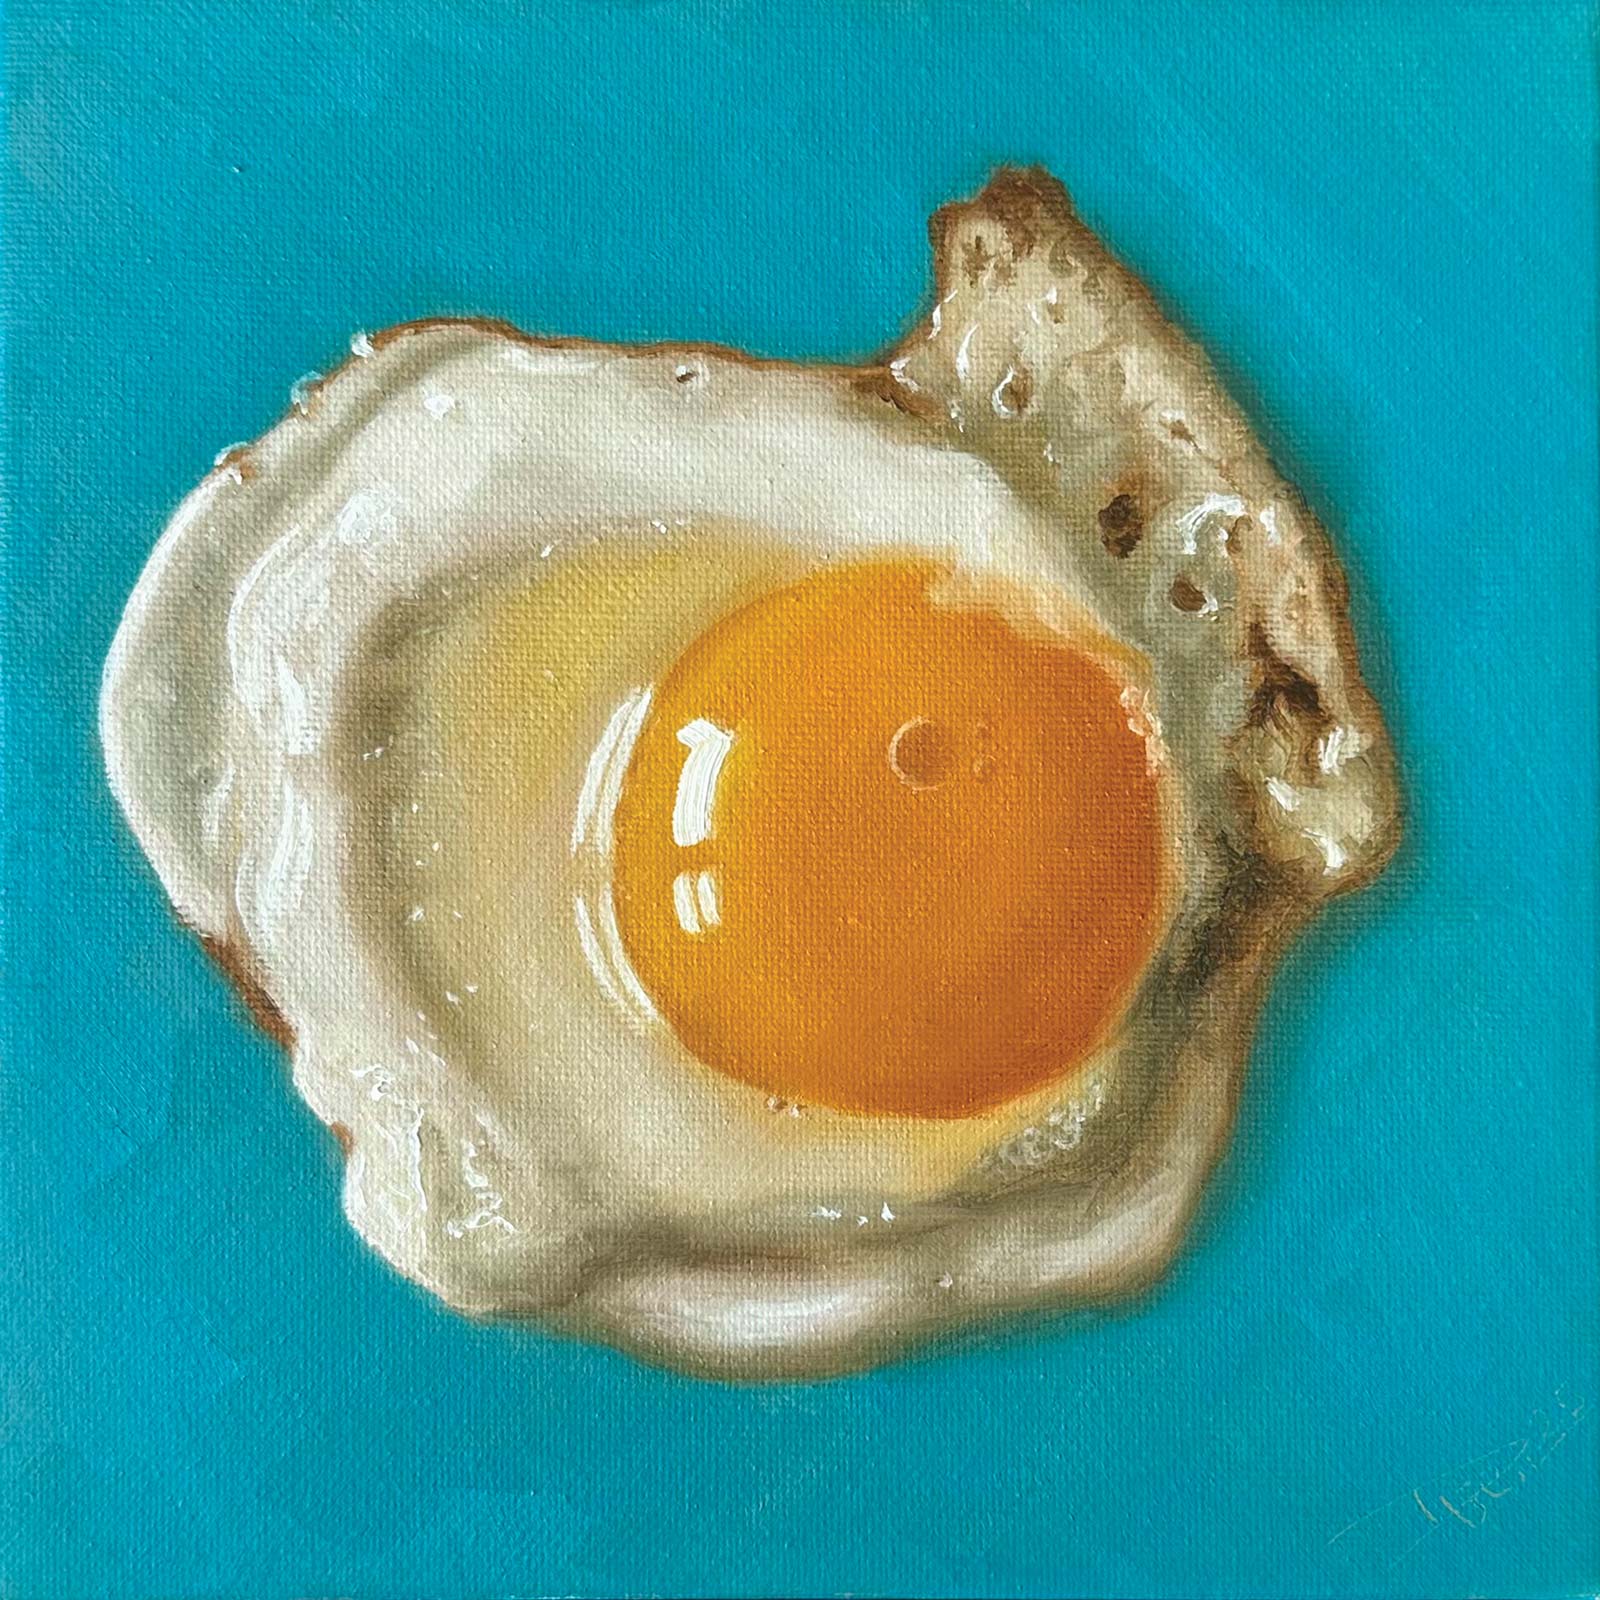
Stage 12 Finished Artwork
Egg on Teal, oil on canvas, 8 x 8” (20 x 20 cm)
About the artist
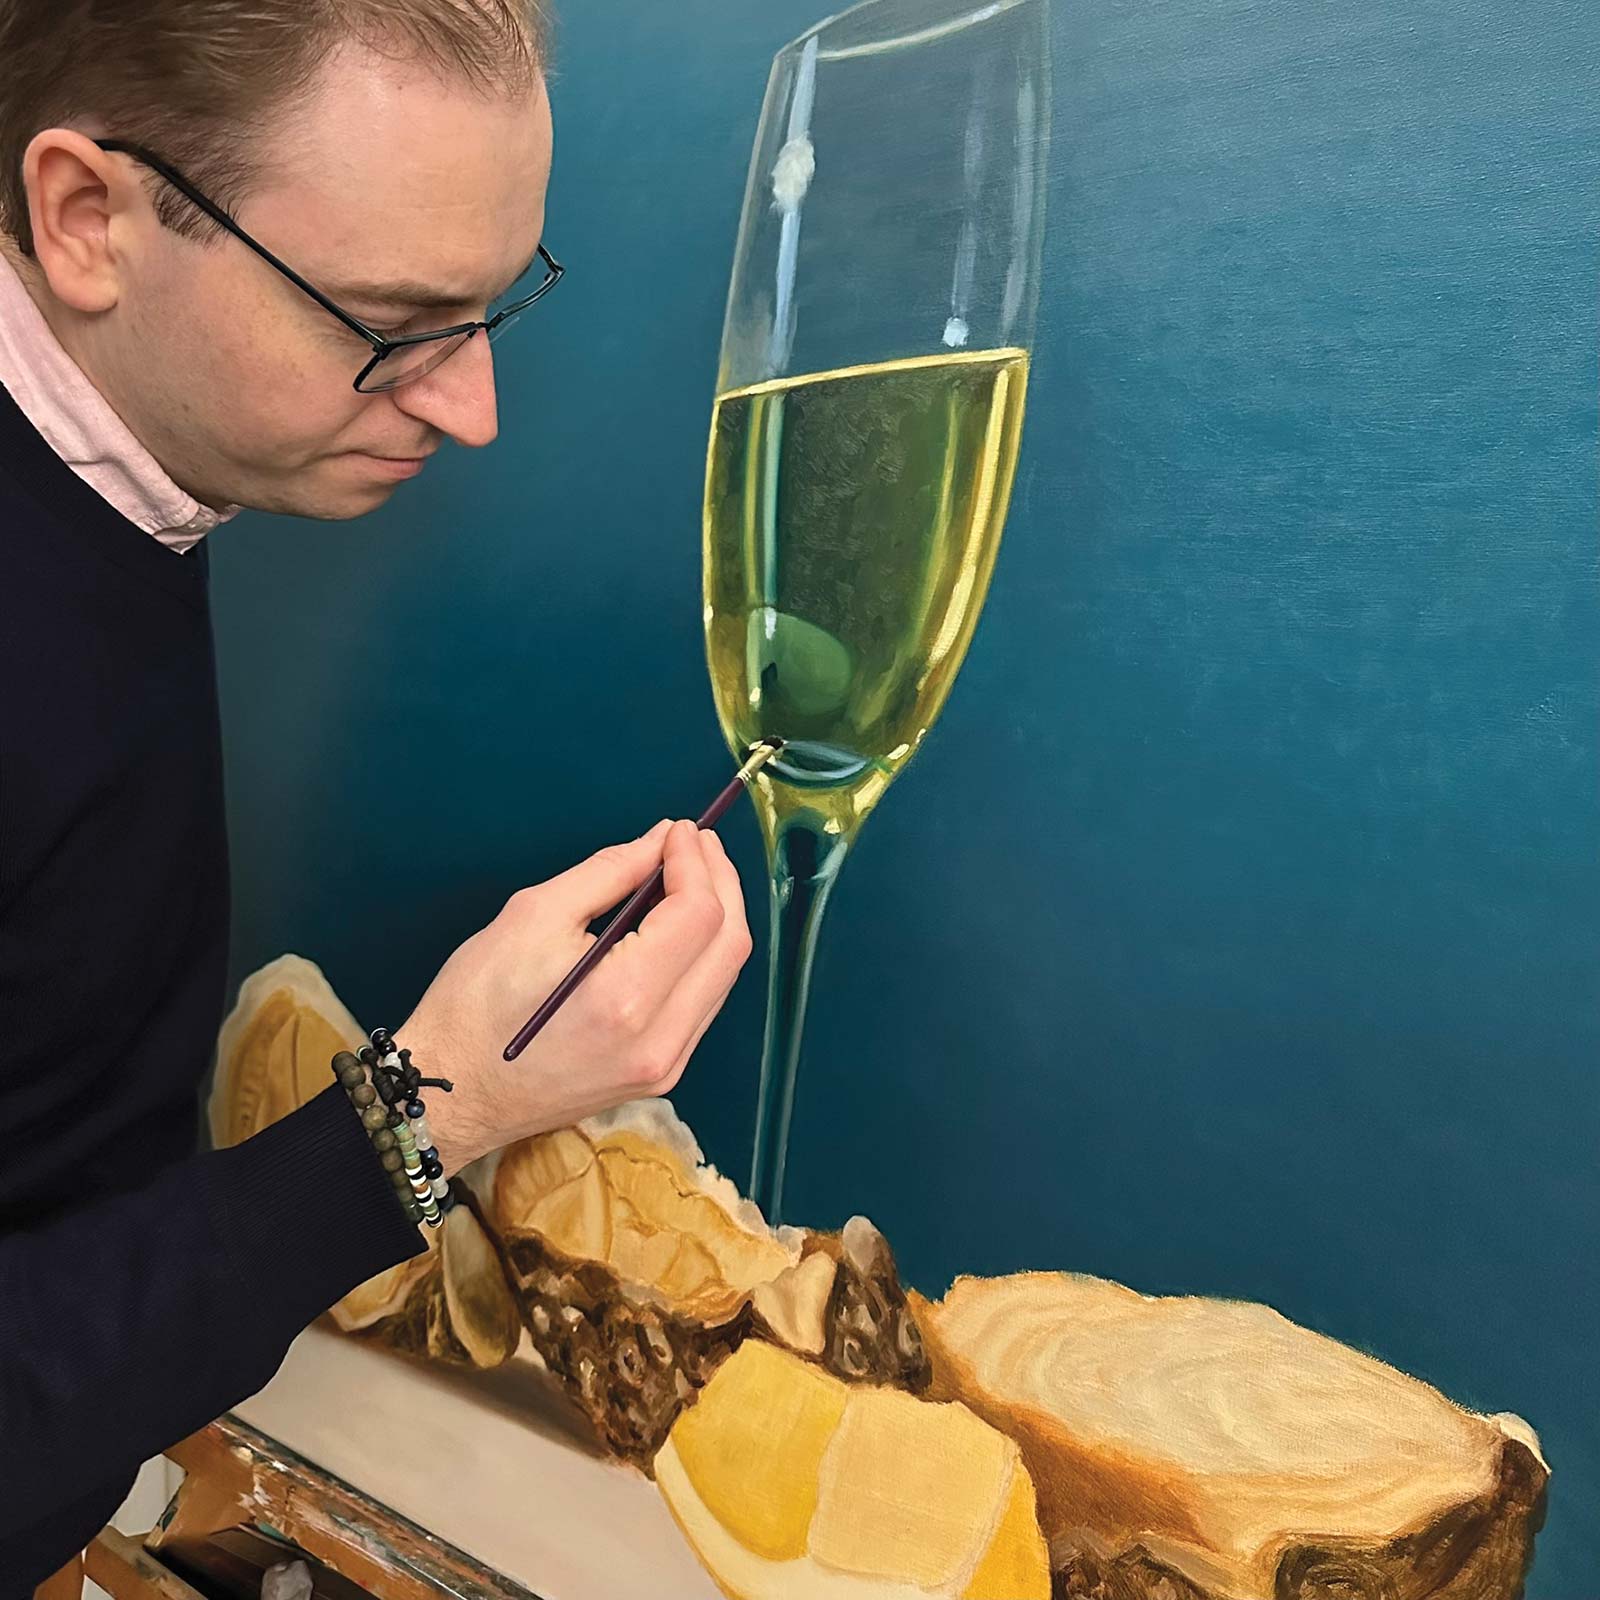 Dennis Pfeil
Dennis Pfeil is a self-taught Dutch painter known for his refined realism and his ability to transform everyday objects into compelling visual experiences. Working from his studio in the greater Amsterdam region, he focuses primarily on still life subjects, especially food and drink, capturing them with meticulous detail and a masterful sense of light.
Inspired by Rembrandt and the Dutch masters, he studies classical techniques and reinterprets them through a contemporary lens. This blend of tradition and modernity gives his paintings a grounded yet subtly uncanny quality, inviting viewers to look closer and question the boundary between reality and illusion.
His work has been featured in various art publications and media outlets, and exhibited across Europe, steadily building a growing audience of collectors drawn to the emotional depth and technical precision of his approach to realism.
Contact at
info@dennispfeil.com
dennispfeil.com