


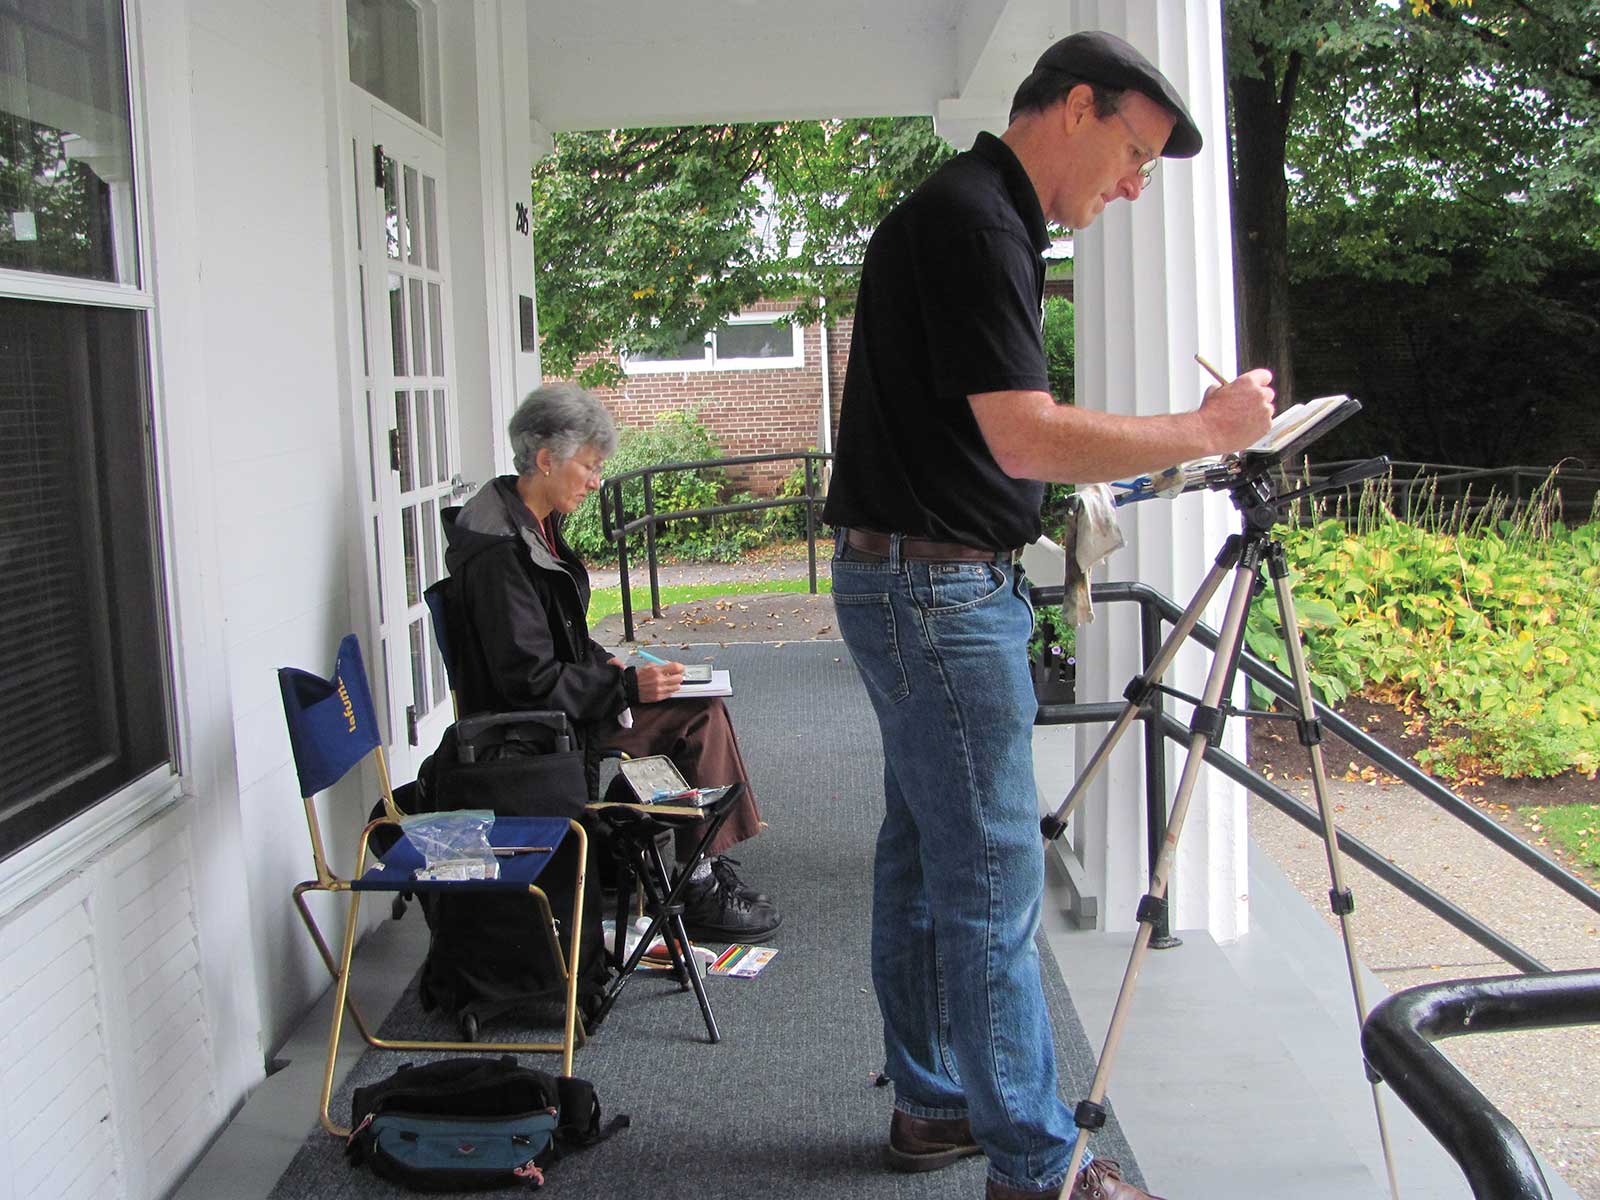
We’re in Bennington, Vermont. Light rain and mist, 100 percent humidity, and more on the way. Bad weather for watercolor, right? Hold on, though—there’s an opportunity here. It’s actually perfect for what I call the “chowder technique,” named after that New England soup with a milky broth that unifies chunks of flavor.
 In painting, the idea is to lay down a damp layer of white gouache and drop colors into it. In the following pages, I’ll take you through the steps for painting with the chowder technique.
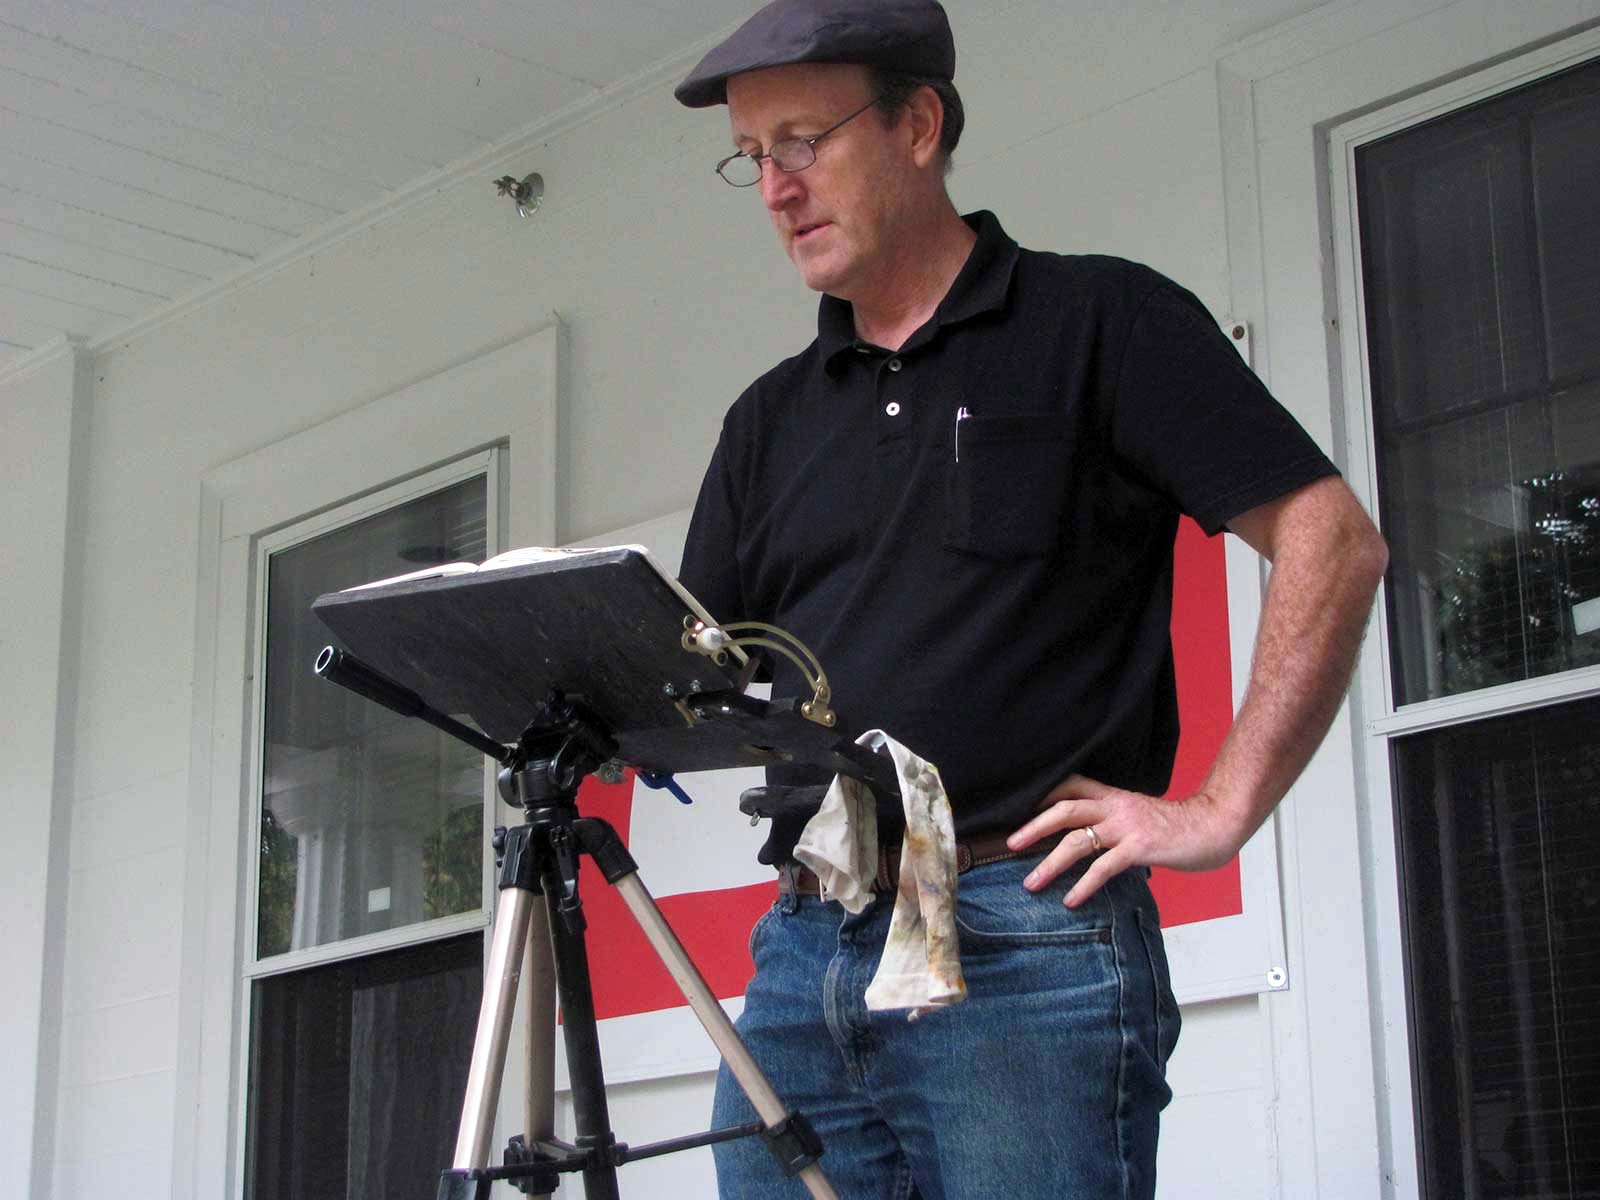
Stage 1 Setup
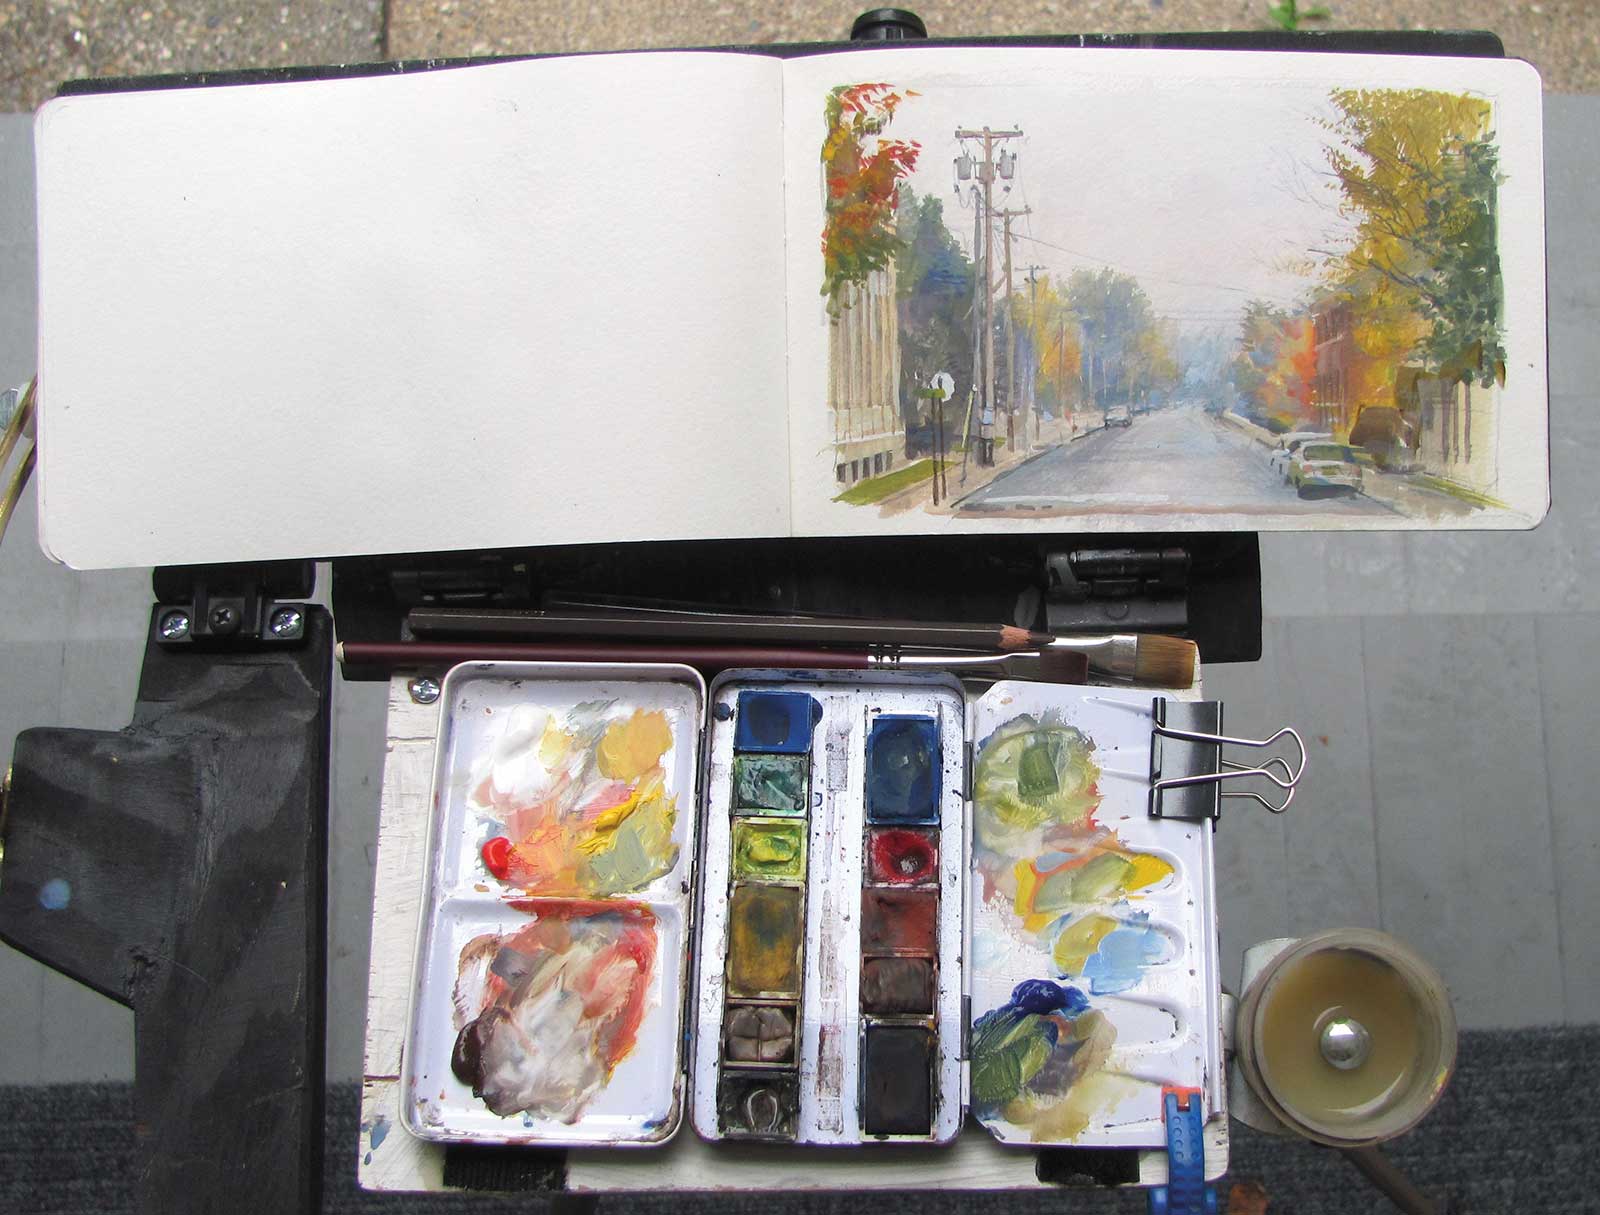
I set up my tripod easel next to my wife, under the porch of a public building that’s closed today. We’re sheltered from direct rain, but with this humidity everything will take ages to dry. Here’s the palette: a pan set of transparent watercolors from various manufacturers, plus a few squeezes of gouache colors (just white, cadmium red, cadmium yellow and Prussian blue). The gouache sits on the metal side panels of the watercolor set.
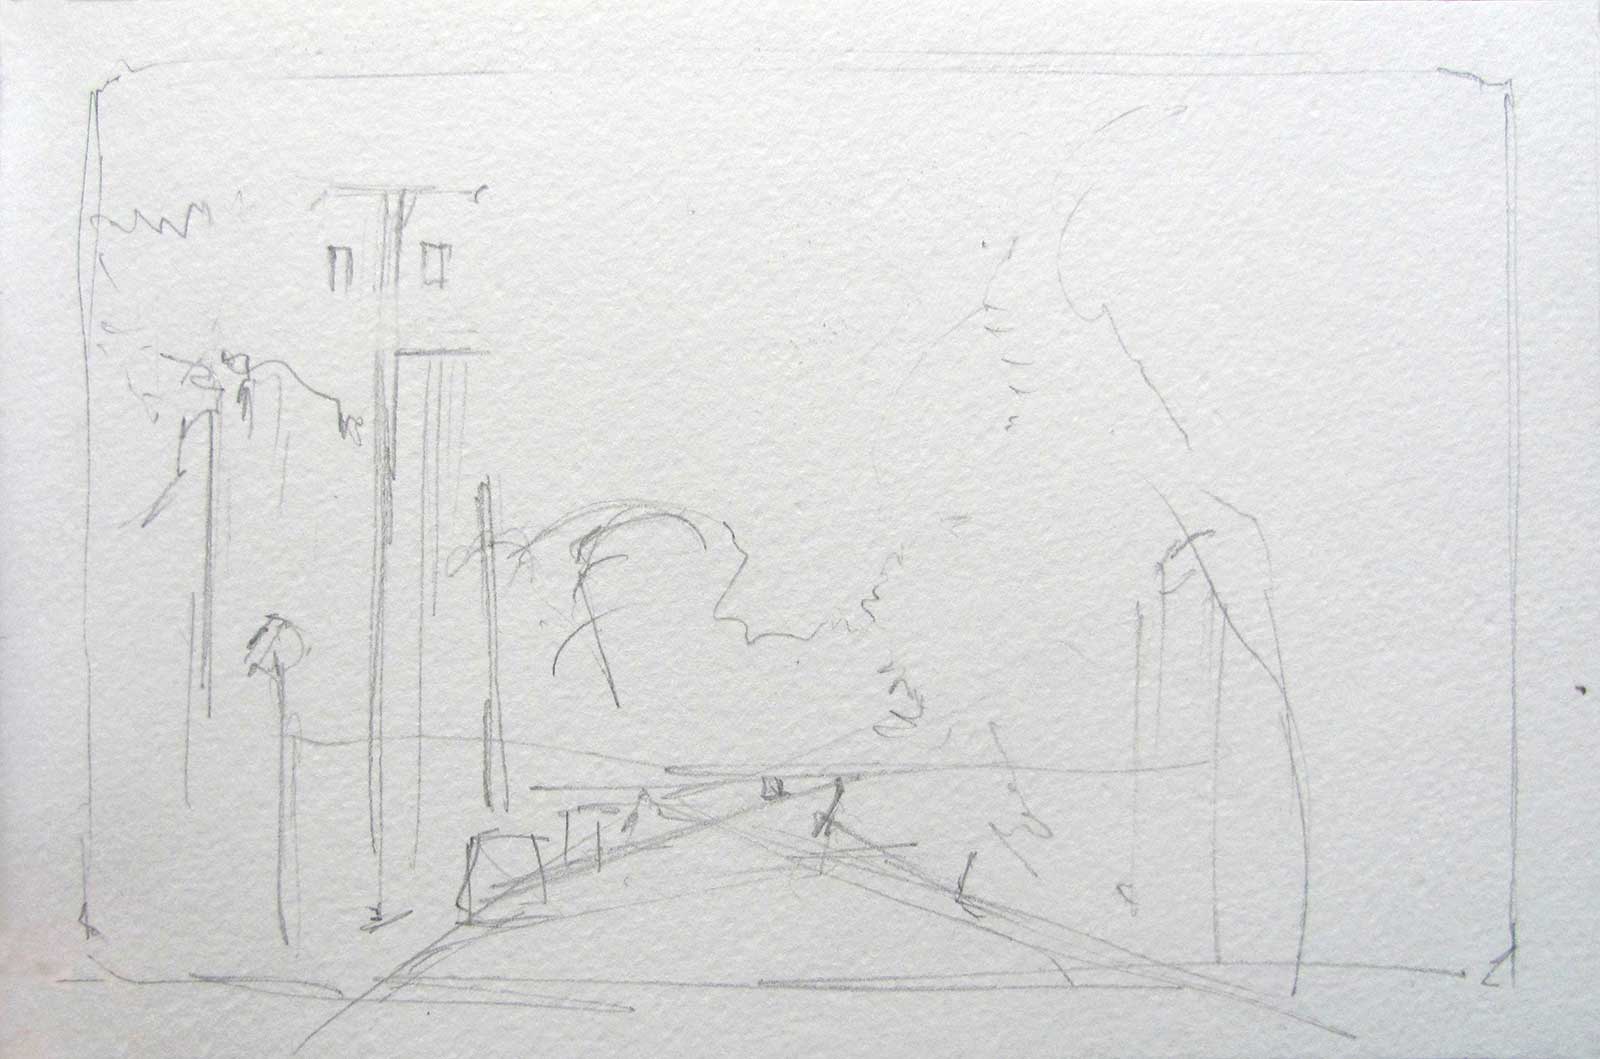
Stage 2 Underdrawing
I open my watercolor sketchbook and scratch in a quick pencil underdrawing, placing the trees and utility poles. Then I mix up a small amount of chowder: titanium white gouache, slightly lowered from pure white with a touch of blue, yellow and red gouache. I’m aiming for the consistency of cream, neither too watery nor too thick. Using a big brush, I spread a thin layer of chowder over the whole page, including the sky and the far end of the street, tapering it down as I go past the treetops toward the street and the foreground. With 100 percent humidity, the chowder stays damp for quite a while, influencing the way the colors blend when I drop them in.
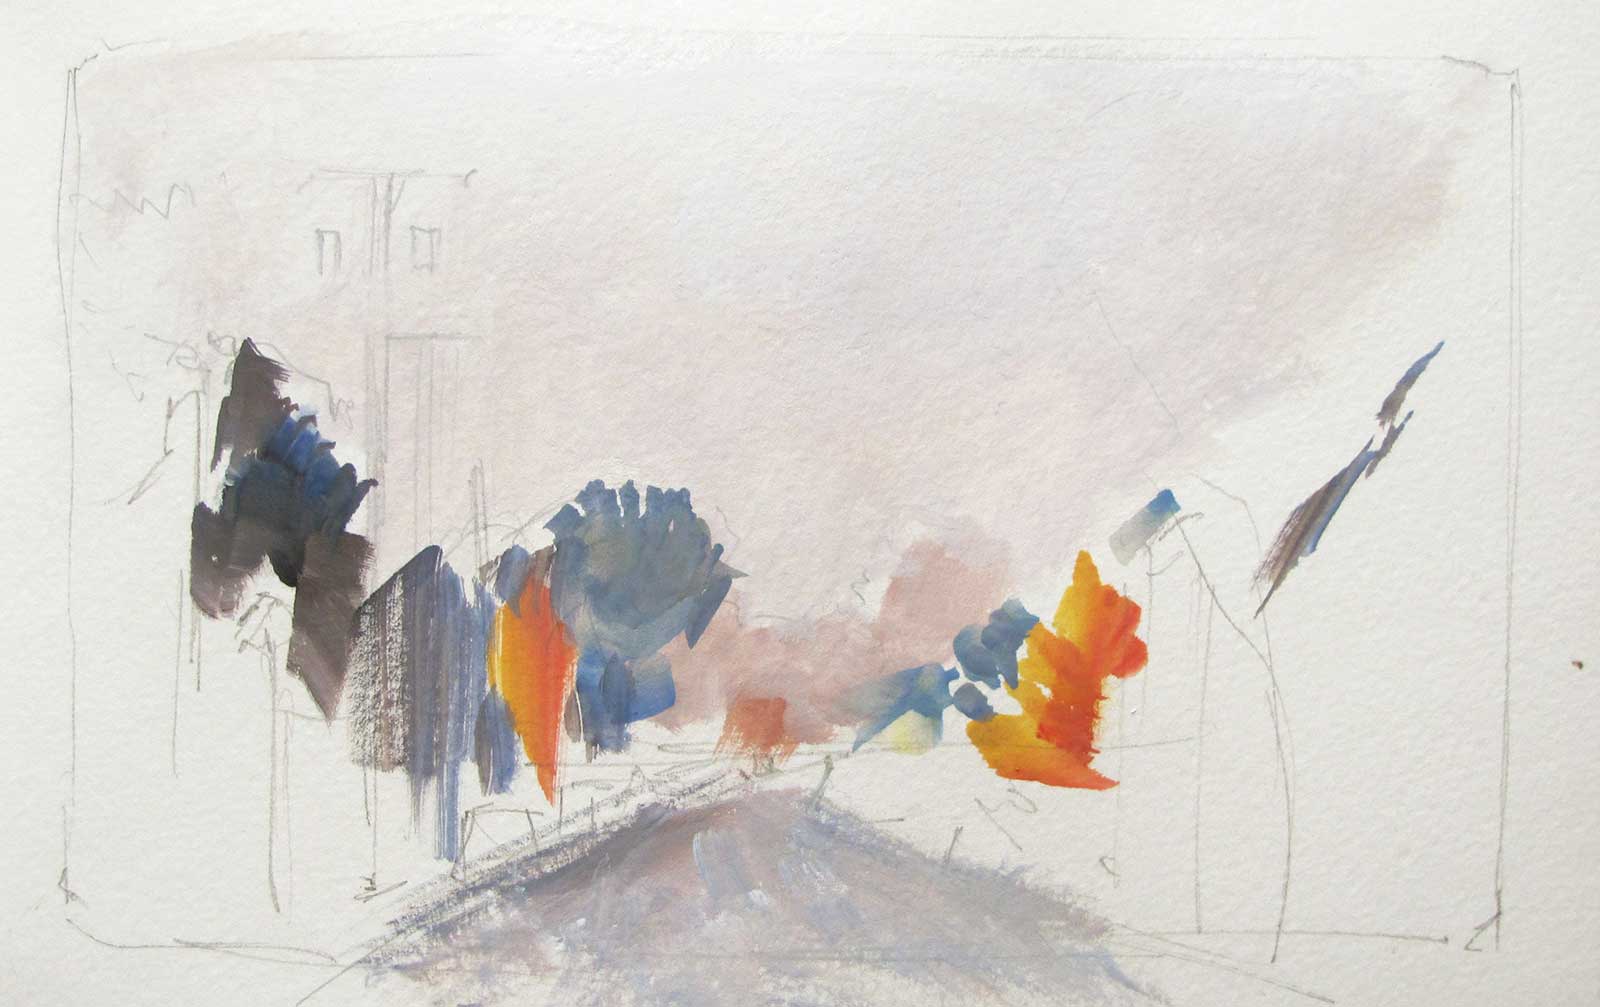
Stage 3 Bring on Chunkiness
I like to think of the trees as chunks of potatoes, carrots or peas dropped into the chowder. Sometimes it helps to have several brushes going at once, each loaded with a different color. Even if it’s all green foliage, there are plenty of subtle variations you’ll want to keep in play.
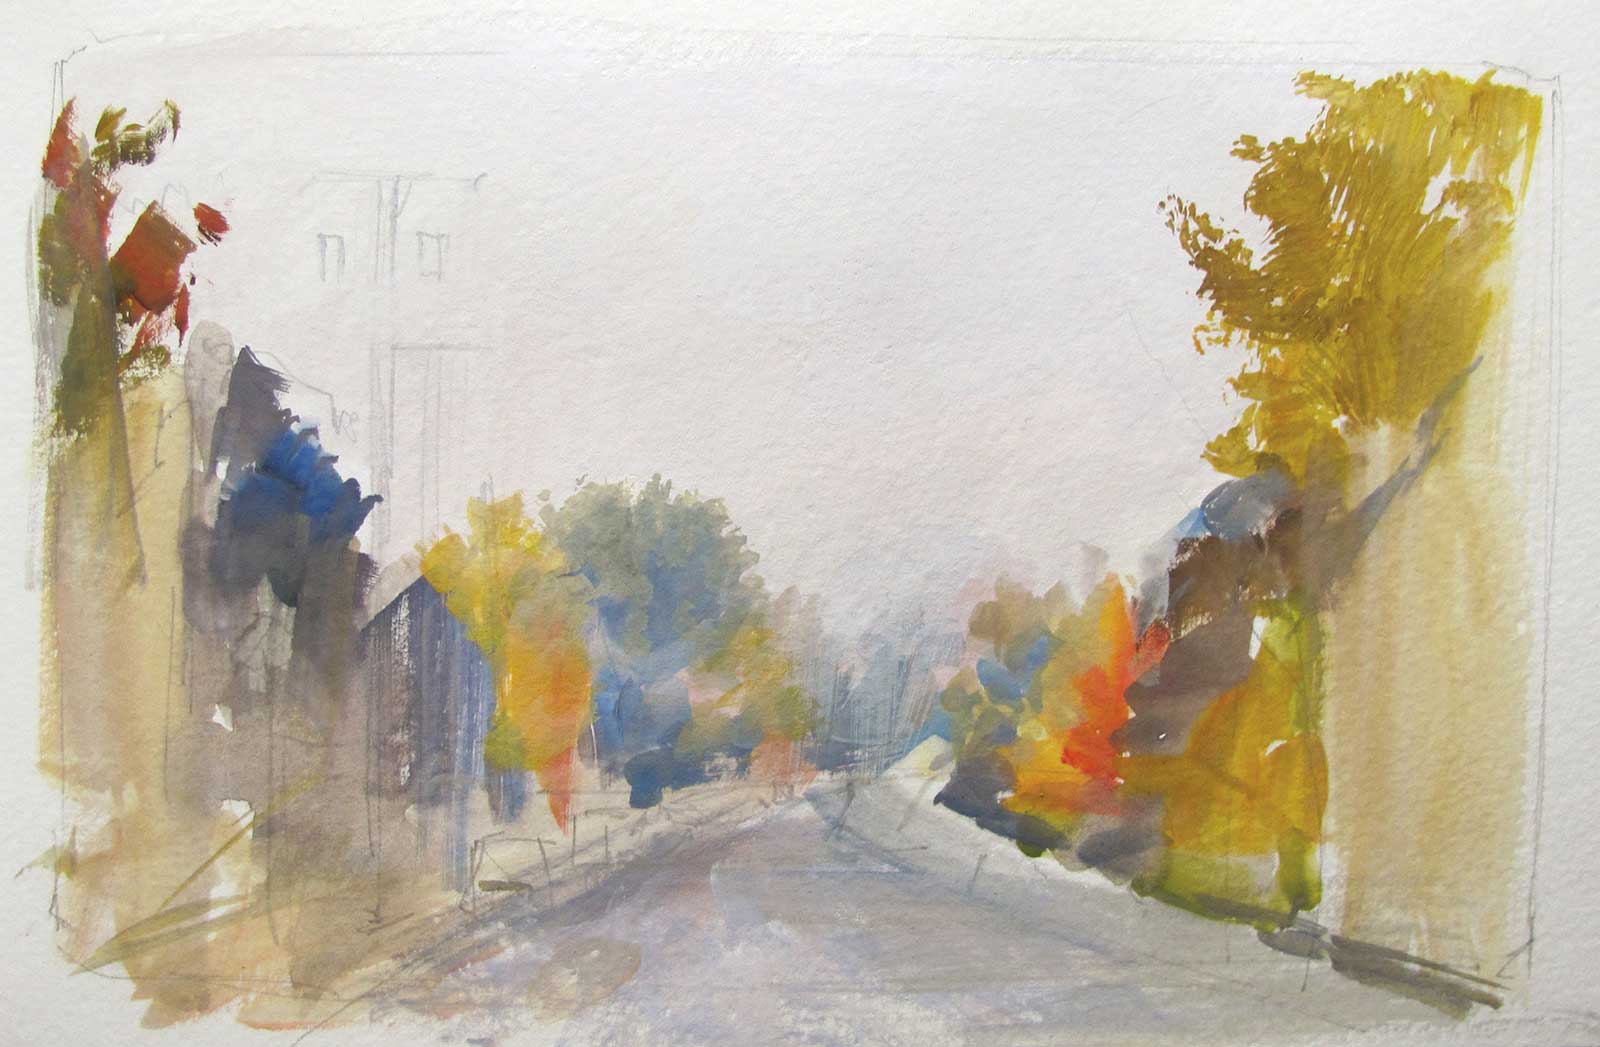
Stage 4 Finesse the Chunks
One by one, I drop in the rest of the chunks of color, encouraging them to mingle. I adjust their edges with a clean, dry, soft synthetic flat brush. The surface stays damp, but not too wet, for quite a long time.
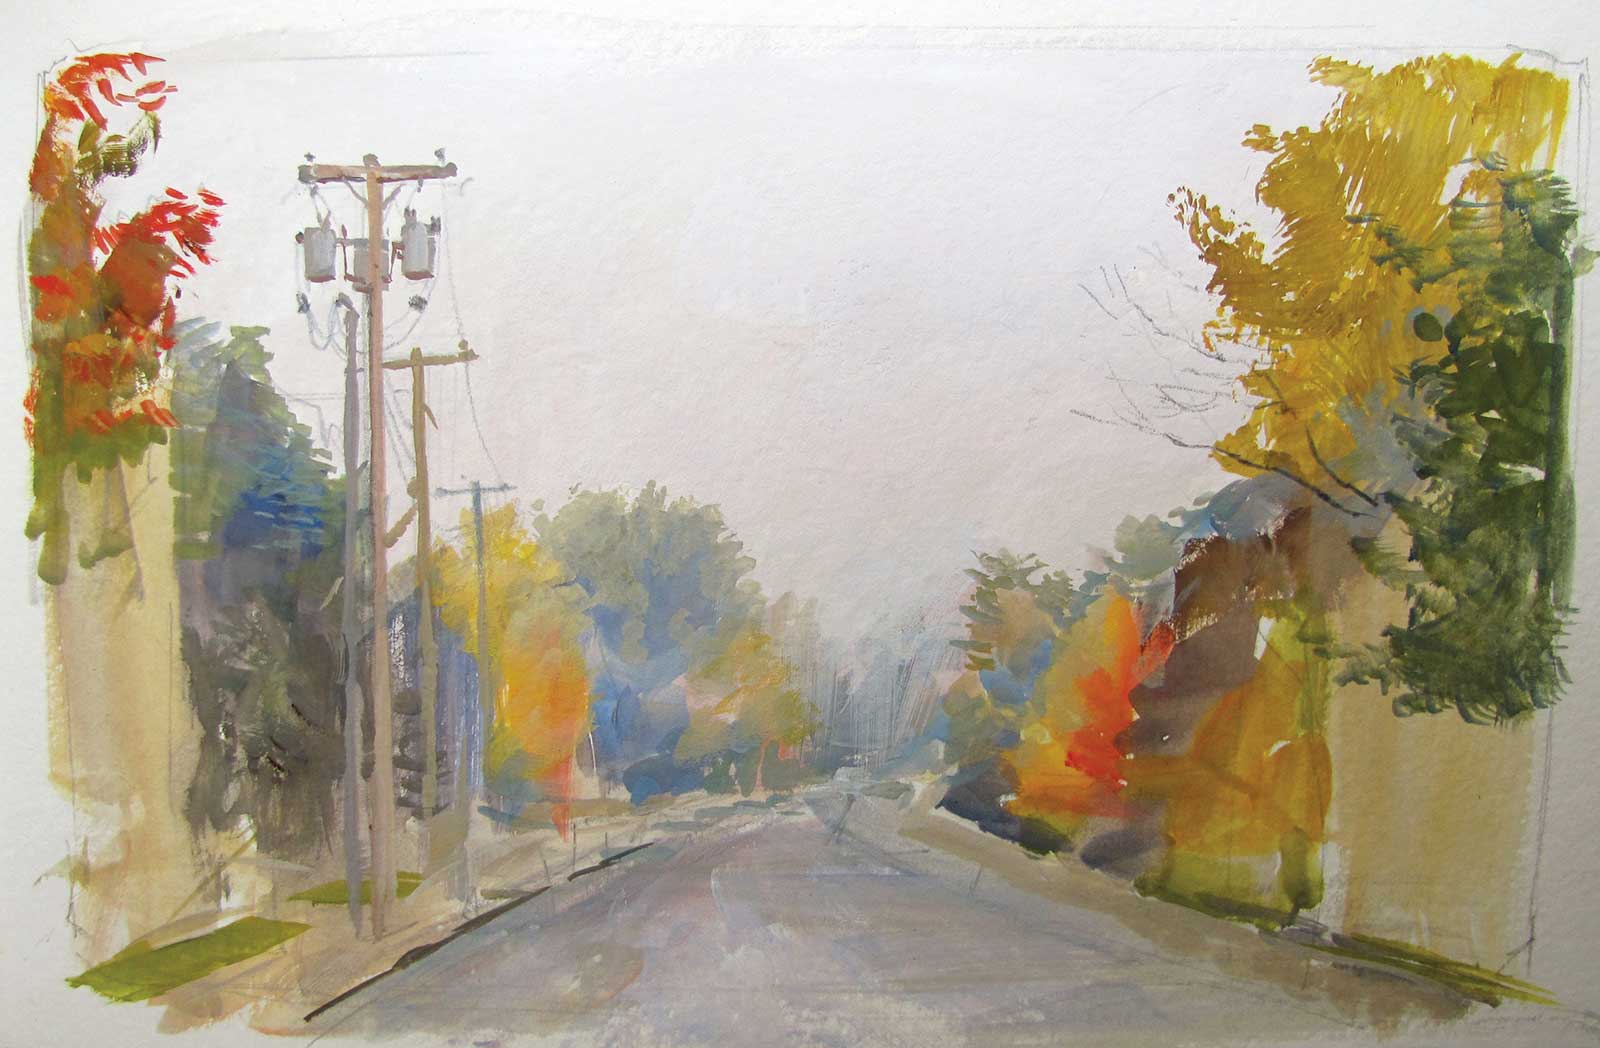
Stage 5 Clustered Details
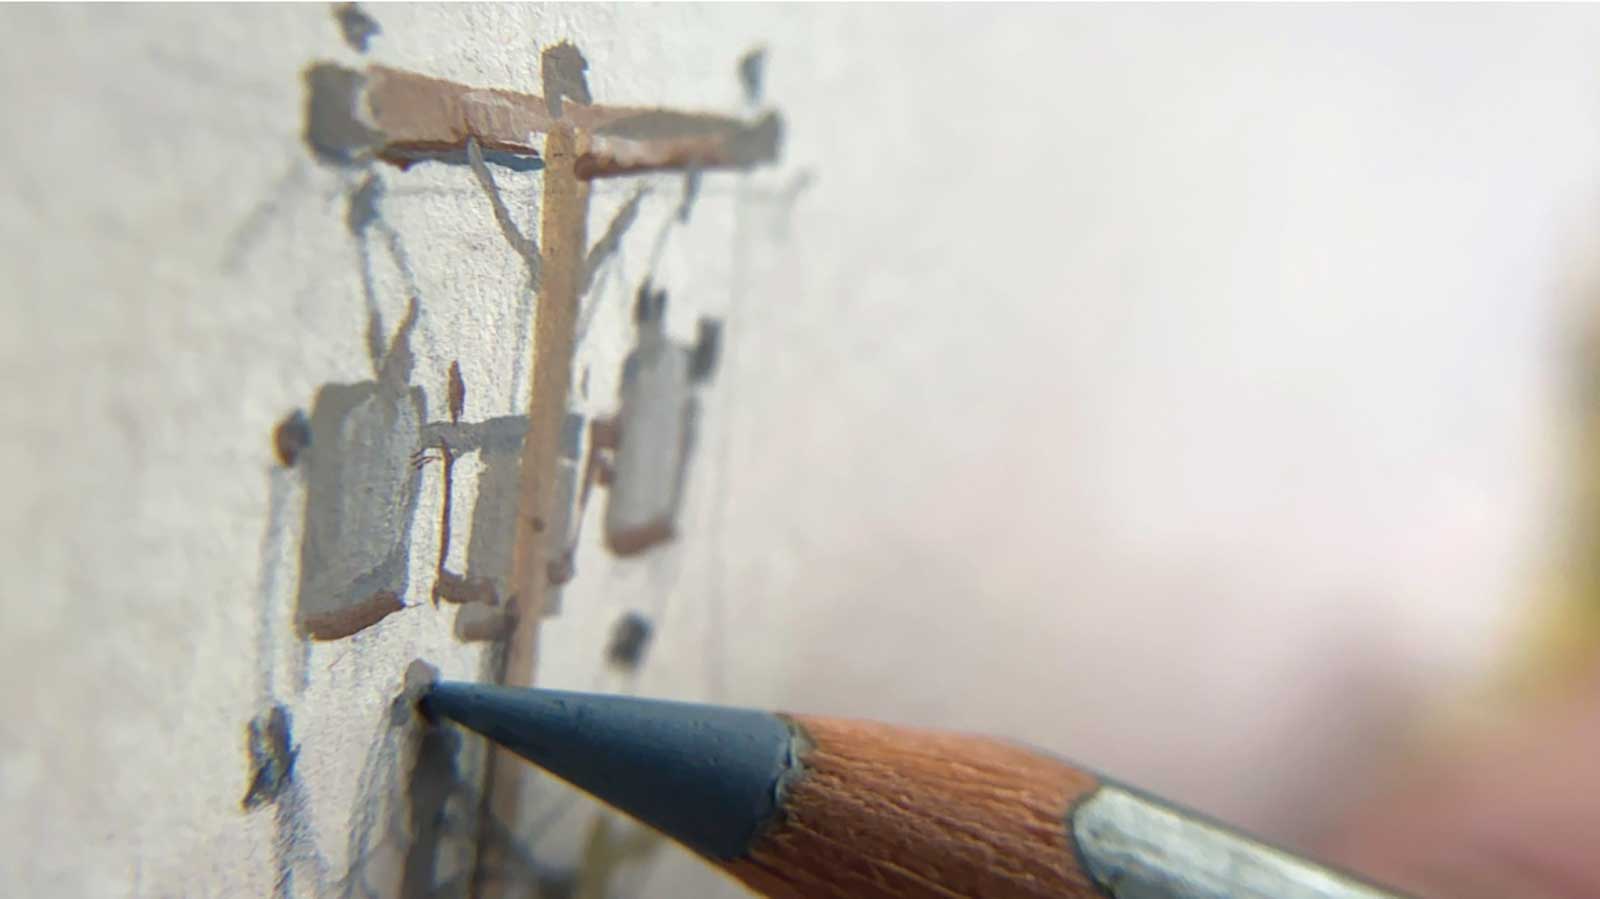
Eventually, the chowder sets up enough for the fine details: individual leaves, utility poles and other small shapes. I love the way the poles cluster in a tight area. The darks on those poles may look sharp and dark against the sky, but they’re softened and lightened by the surrounding mist.
As I search for definitive details, I’m looking for ways to melt forms together. I blend them into the broth and lighten them by floating them in the chowder. The darkest darks lie at the bases of the trees, but even those are lifted by the mist, hovering well above true black.
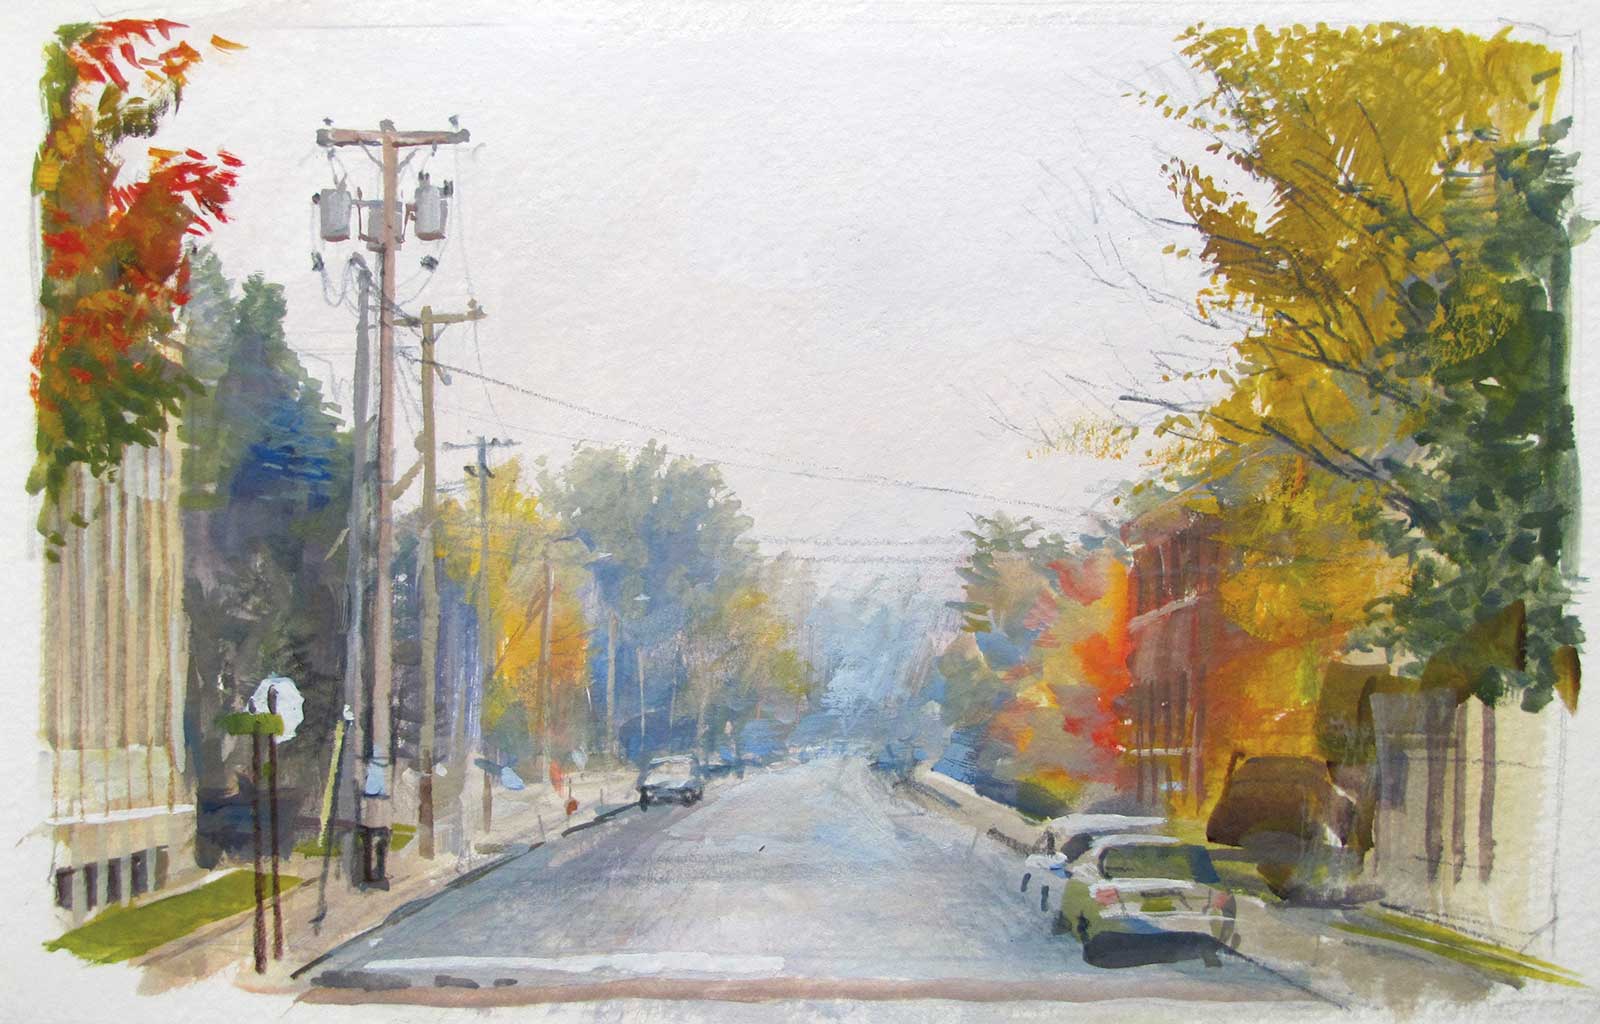
Stage 6 Dry Touches and It’s Done
Finally, I add the parked cars, the stop sign and other small touches. By this stage, the surface takes colored pencil nicely (I use two gray values), allowing me to define sensitive details like insulators, power lines and wires. There’s no going back now to broad wet washes, just as you can’t go back to washing the vegetables once the soup’s simmering. We’ve moved from big, wet, brothy gestures to dry, crunchy details. When the chowder dries completely, it accepts the pencil almost like gesso.
Final Thoughts
This idea of painting into gouache “chowder” goes back to masters such as J.M.W. Turner and William Trost Richards. You can adapt the method to oils, though oil never feels quite as alive on the surface as watercolor and gouache. Chowder doesn’t have to be white; it can be tinted red-brown or blue to influence your overall color scheme. As with any new technique, try it first on a scrap until you’re comfortable with the chowder’s consistency and how it interacts with your colors.
About the Artist
James Gurney sometimes watches cooking shows to get ideas for his art videos, but he’s not much of a cook. His wife Jeanette, who is a skilled home cook, says she only lets him make granola, coffee and sandwiches. Luckily, she’s an artist too, so when the conversation turns to light effects or visual perception, she’s right there with him. You can join the fun by commenting on his Substack page, chiming in on YouTube or picking up a signed book at jamesgurney.com.