


As a landscape painter in Oregon, I am surrounded by endless inspiration. With the Columbia River Gorge and the vast Pacific Ocean just a short drive away, I have hiked through some of the most breathtaking places in the Pacific Northwest. These landscapes fuel my creativity, shaping the way I approach painting.
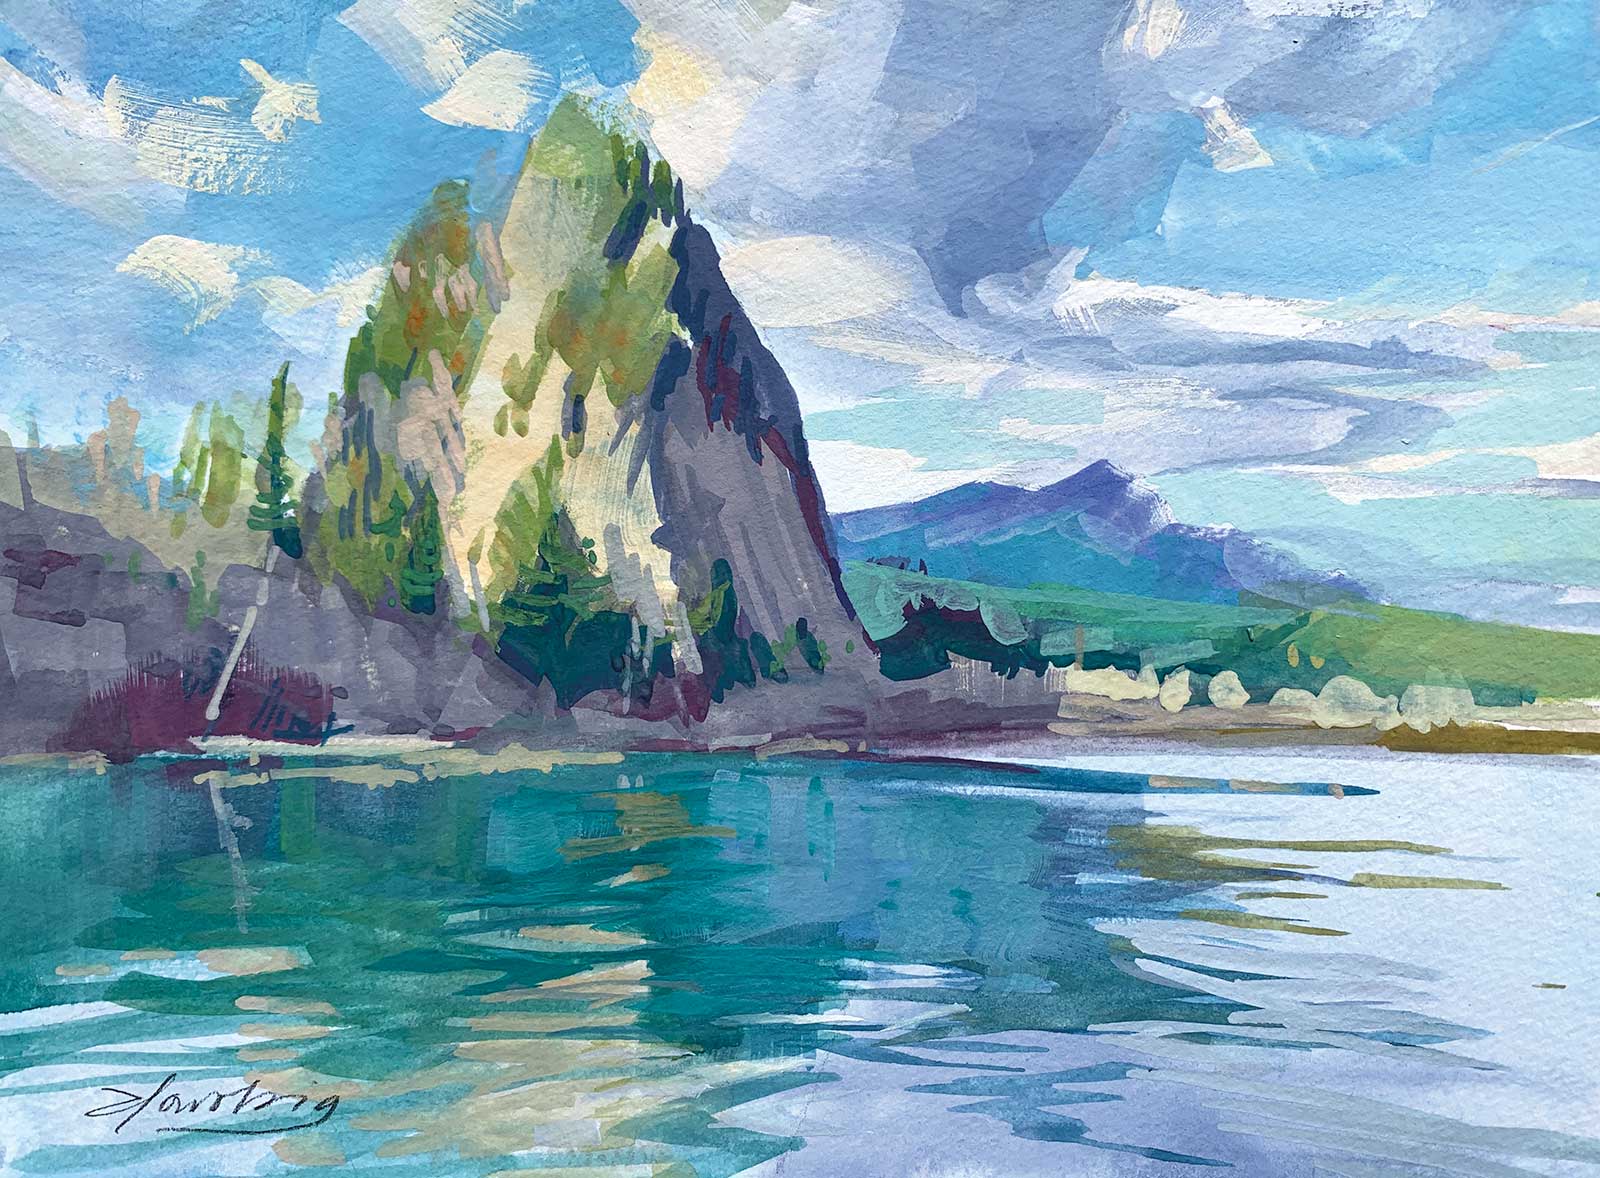 Beacon Rock, gouache, 6 x 8" (15 x 20 cm)
Water’s connection to land is a recurring theme in my work. Whether it’s the glow of a sunset reflected on still water, a blue river mirroring the sky as it winds through land, or mist softening the edges of coastal rocks, these transitional spaces captivate me. Water is a universal experience—it sustains life, invites play, soothes the soul and is teeming with movement and energy. There’s something exhilarating about encountering a crystal clear lake where submerged rocks and branches are visible beneath the surface. Not only does the water reflect the landscape, but its clarity conveys a sense of purity and renewal. That is why it is my muse.
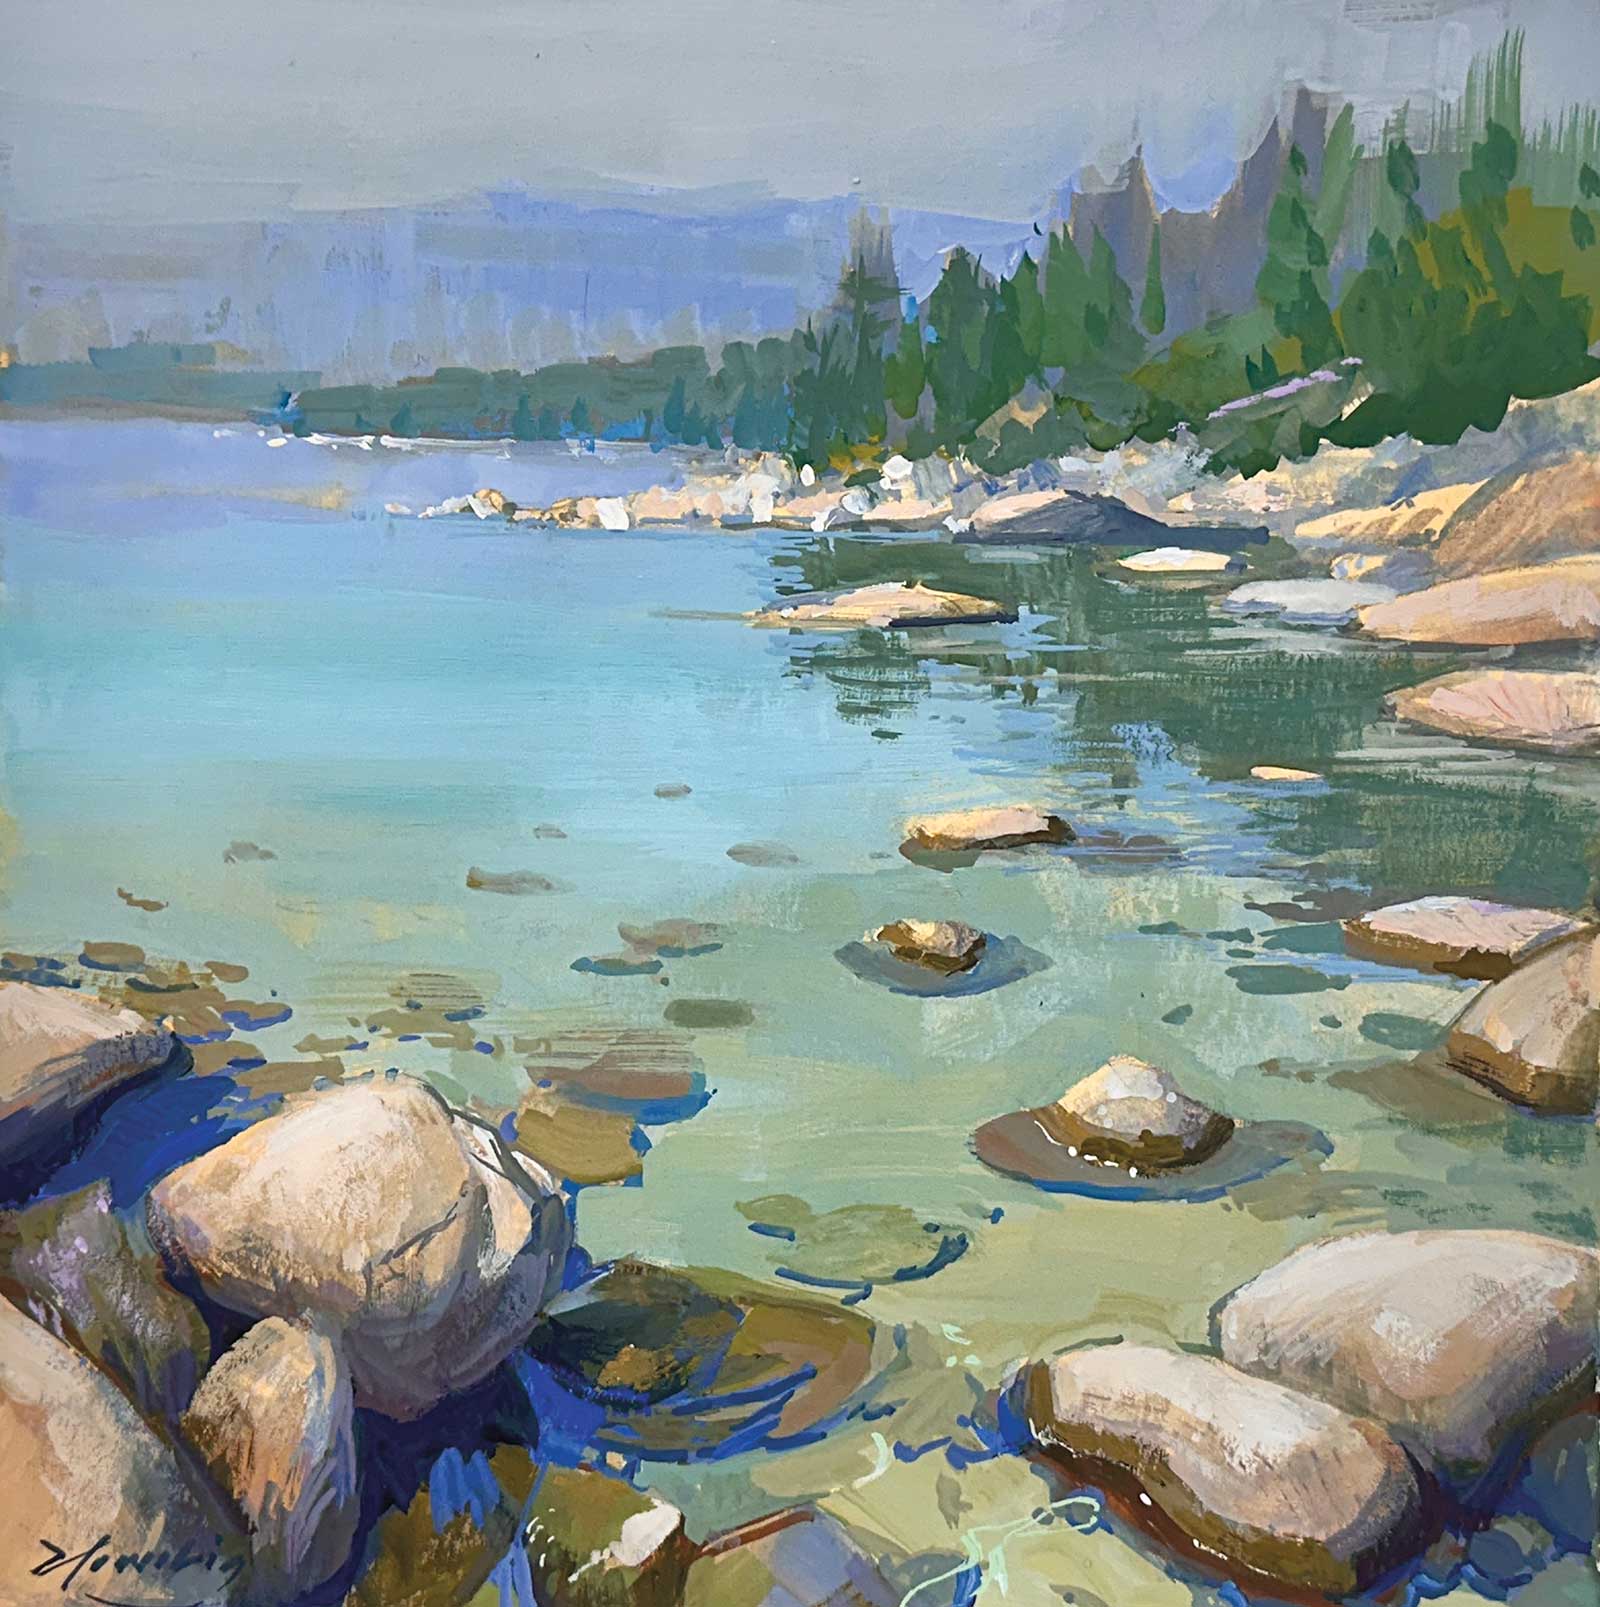 Lake Tahoe Shore, gouache, 8 x 8" (20 x 20 cm)
I am drawn to panoramic views that immerse the viewer in the scene. When painting on location, I seek out foreground elements unique to the geography. My goal is to preserve enough realism so that those familiar with the place will recognize it while allowing myself the freedom to shape the design to fit my artistic vision.
While oil paint is one of my primary mediums, gouache has become an essential tool in my creative process. I use it for travel and sketchbook work, painting on location or creating quick studies from travel photos to capture ideas. These gouache sketches might remain hidden in my sketchbook, serve as stand-alone pieces or become the foundation for a larger oil painting. Its portability allows me to paint anywhere, whether in plein air or in the studio.
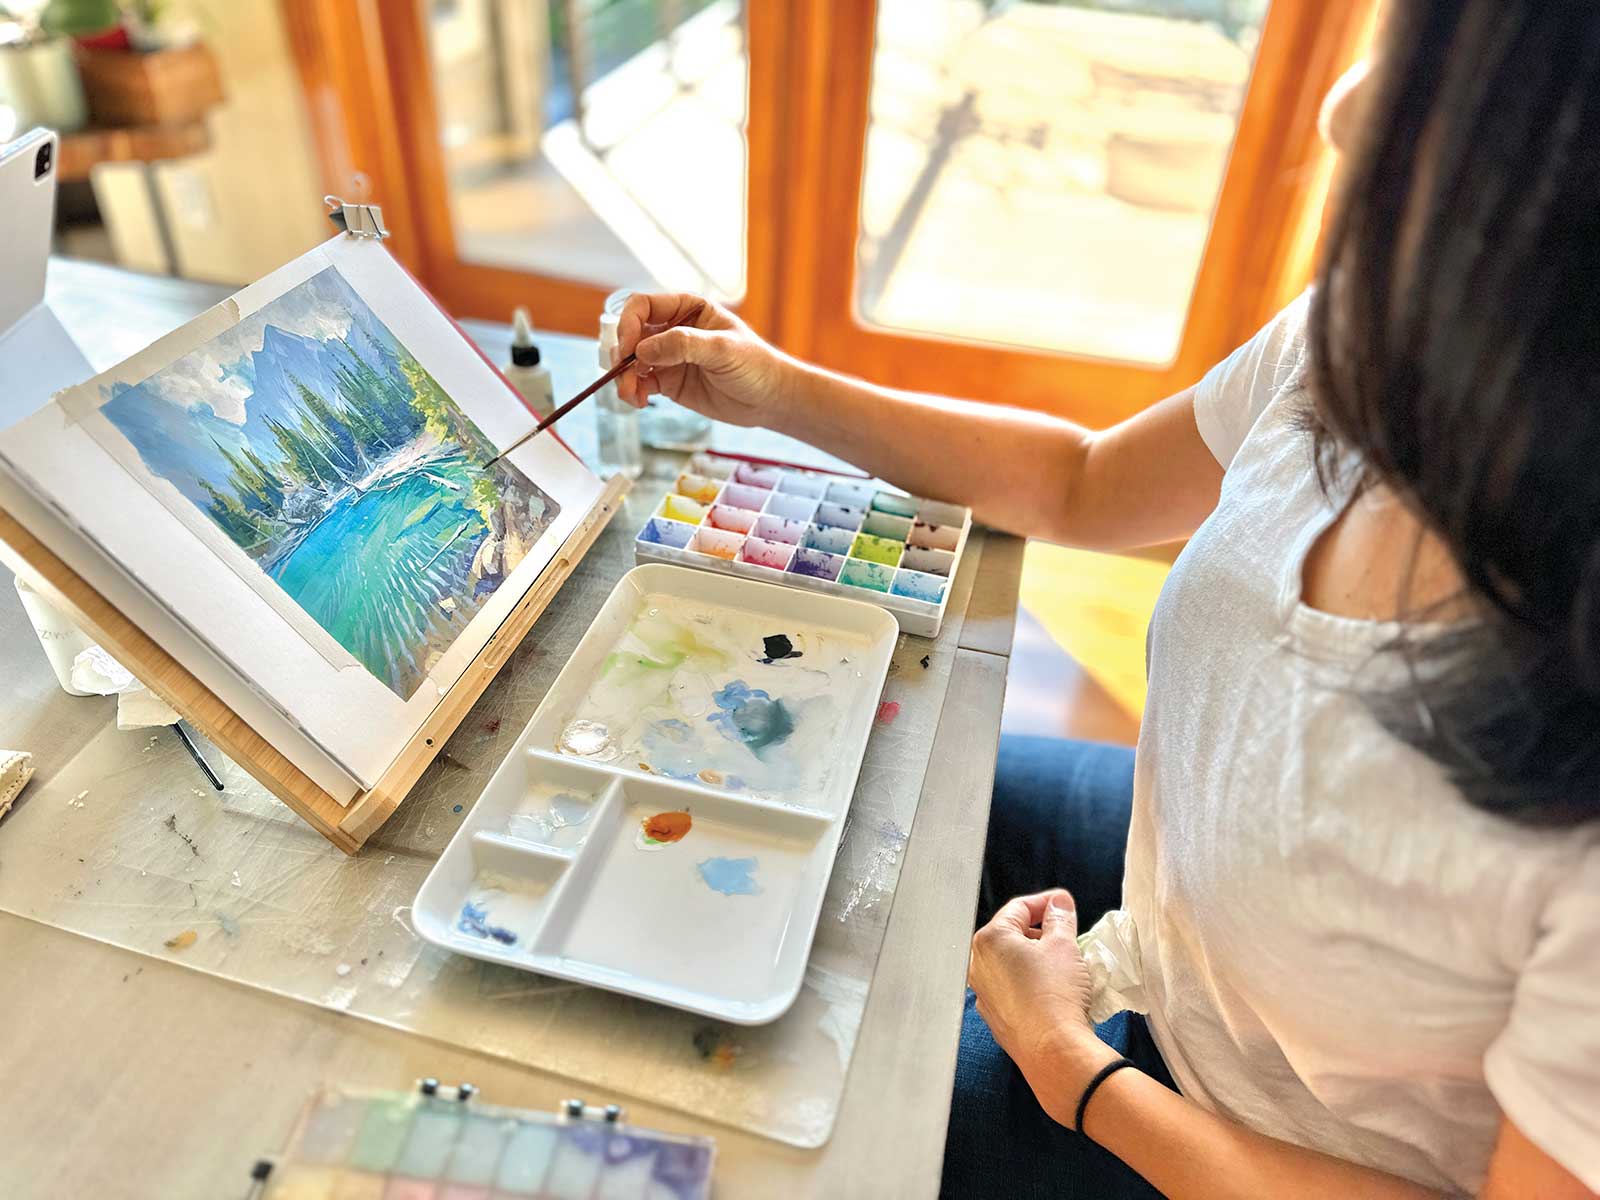
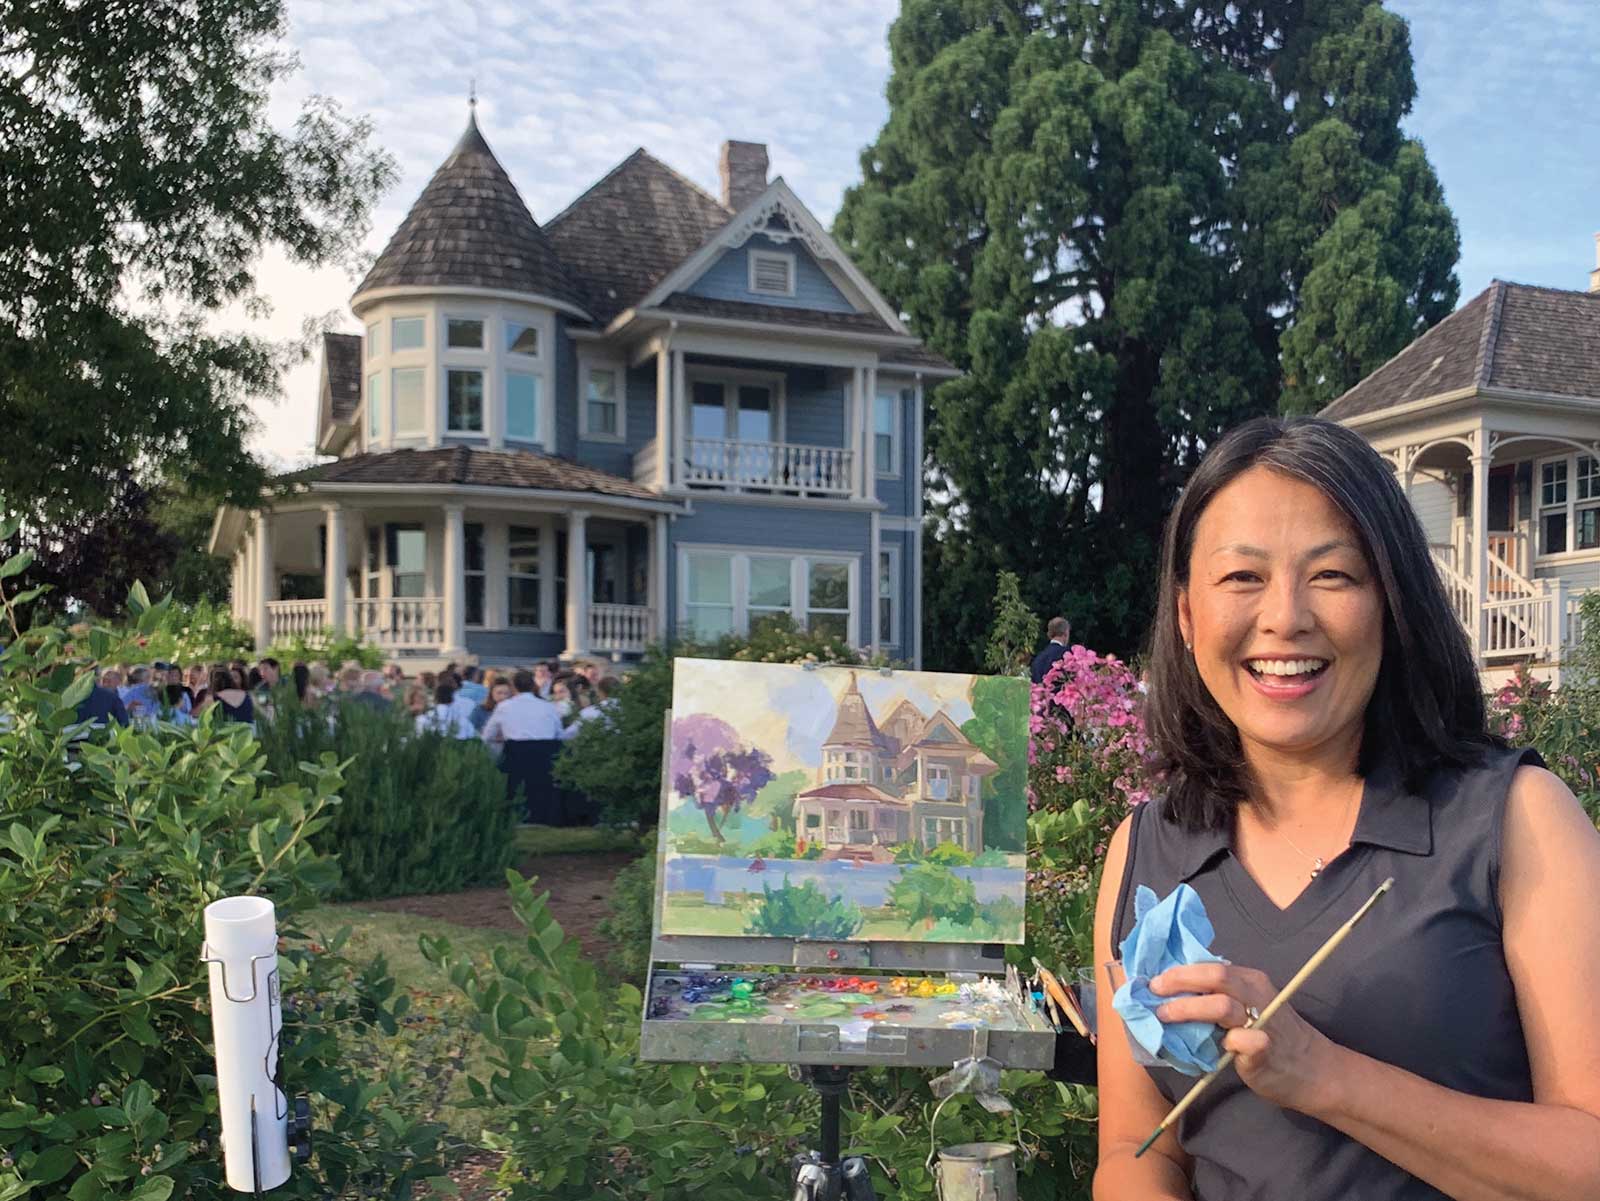
Elo Wobig works on her demo painting.
Water presents unique challenges, from reflections and refractions to movement and prismatic effects. In this demonstration, I will focus on translucency—how objects appear submerged beneath the surface. Understanding the visual cues that convey these elements will enhance the illusion of depth and realism in our paintings.
My Art in the Making: Old Timber Colchuck Lake
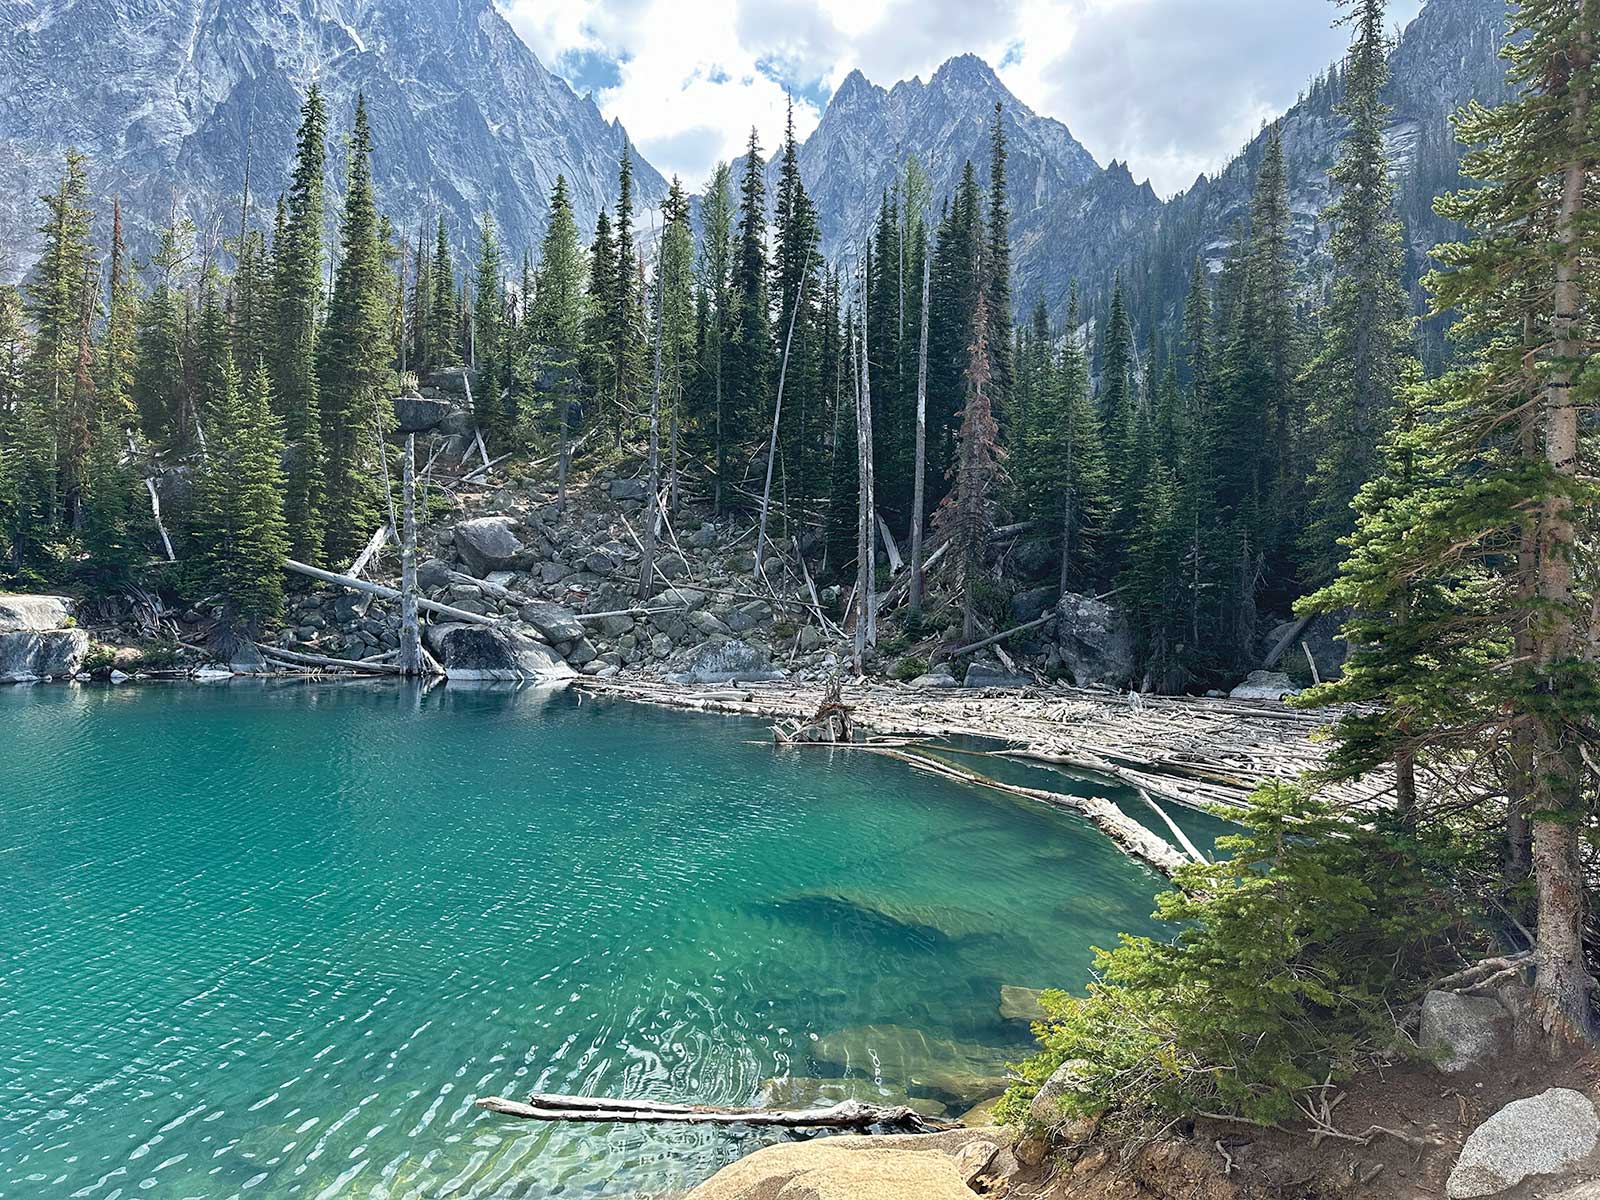
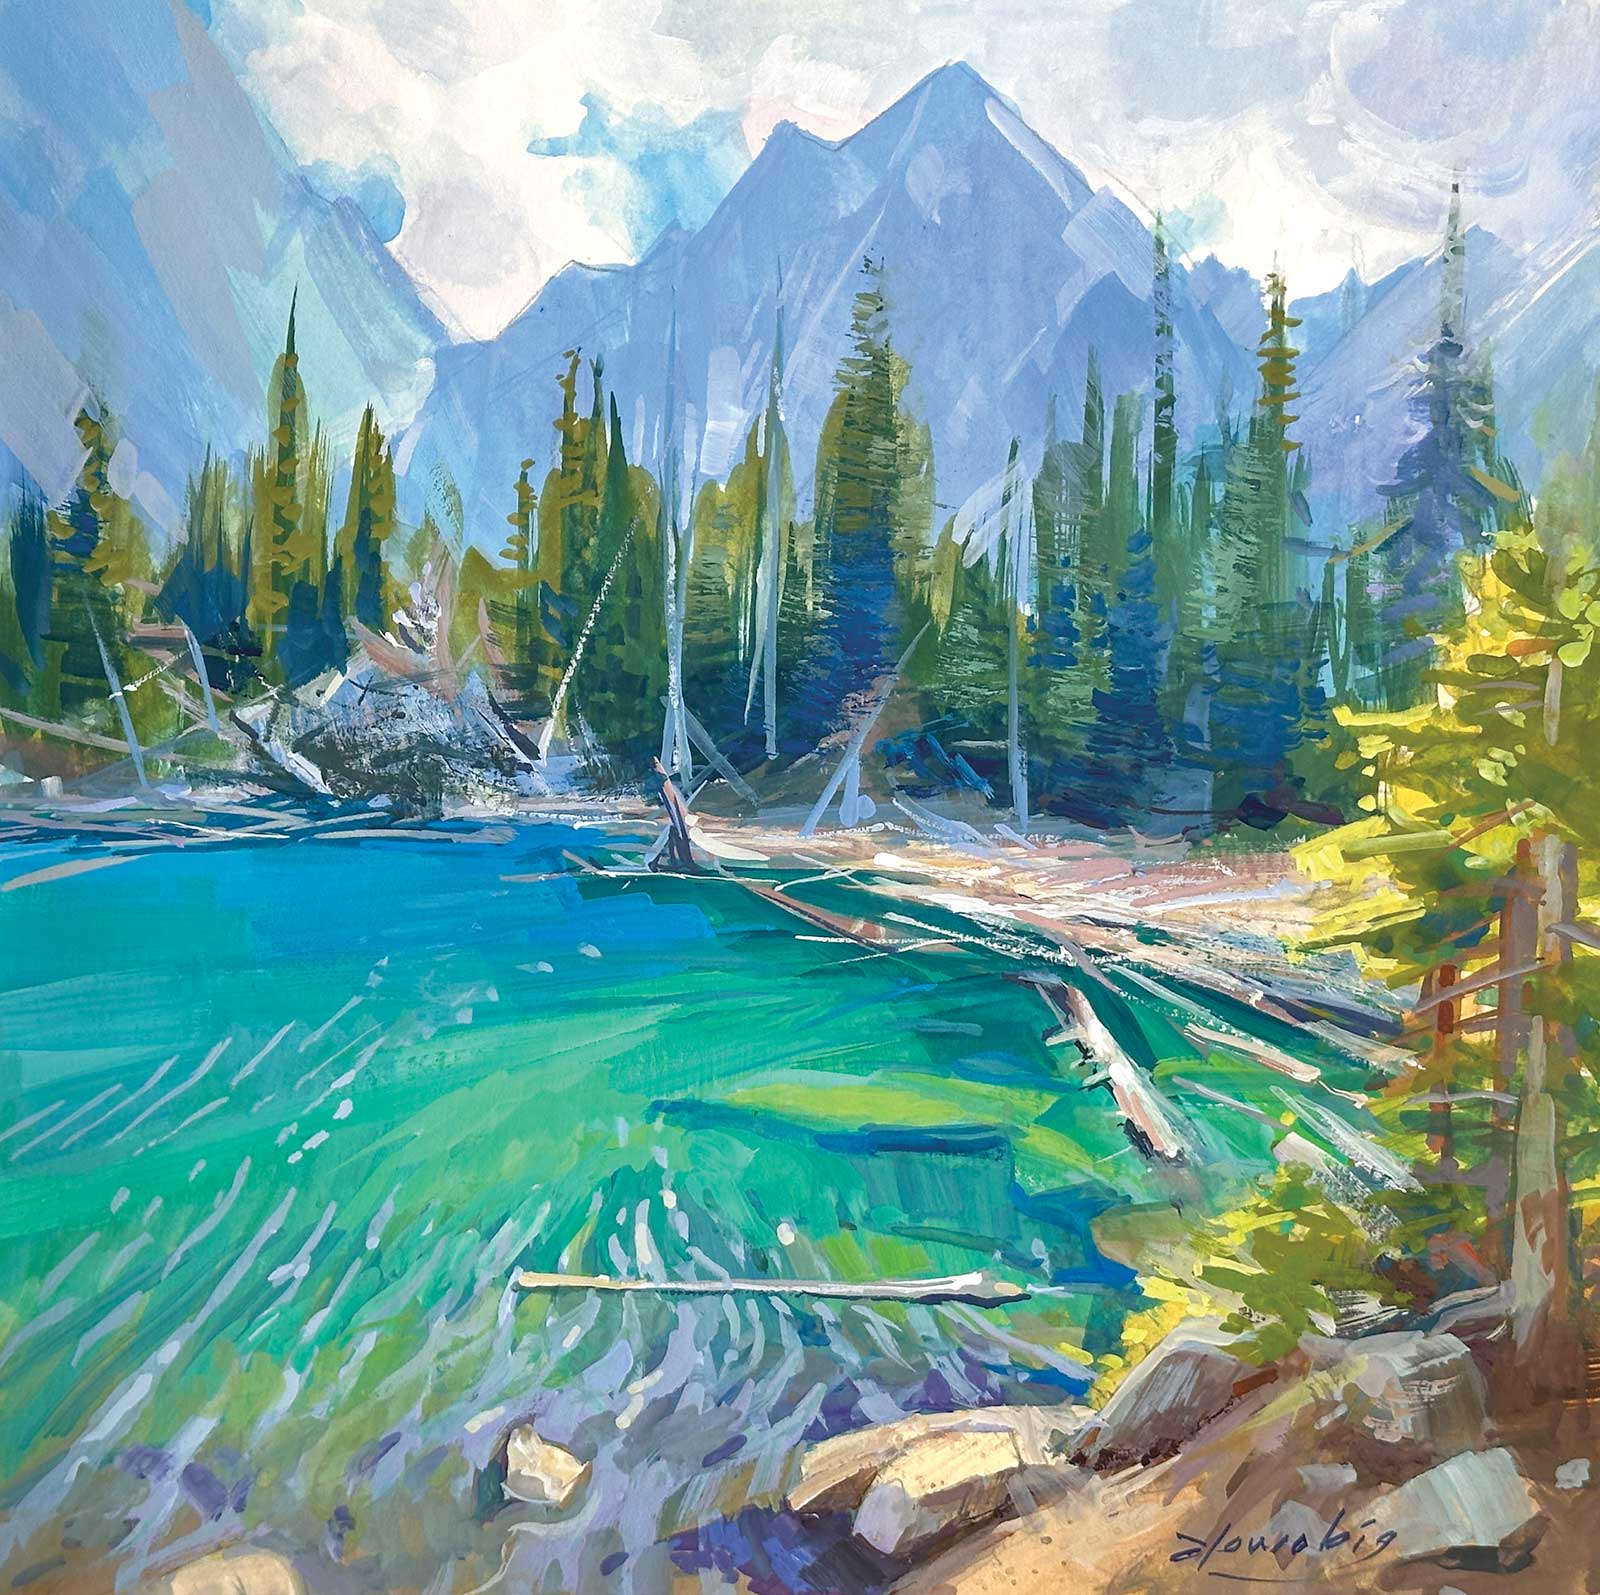
Reference Photo
I took this photo from a high vantage point, as I was struck by the color and clarity of the water. The logs that encircled the lake created a visual path (C-shape) leading to the mountain in the distance. Note the absence of reflection due to several factors: the overcast light, the angle of view from the top down, the turbulence of the water itself, and the far distance from which things cannot be seen.
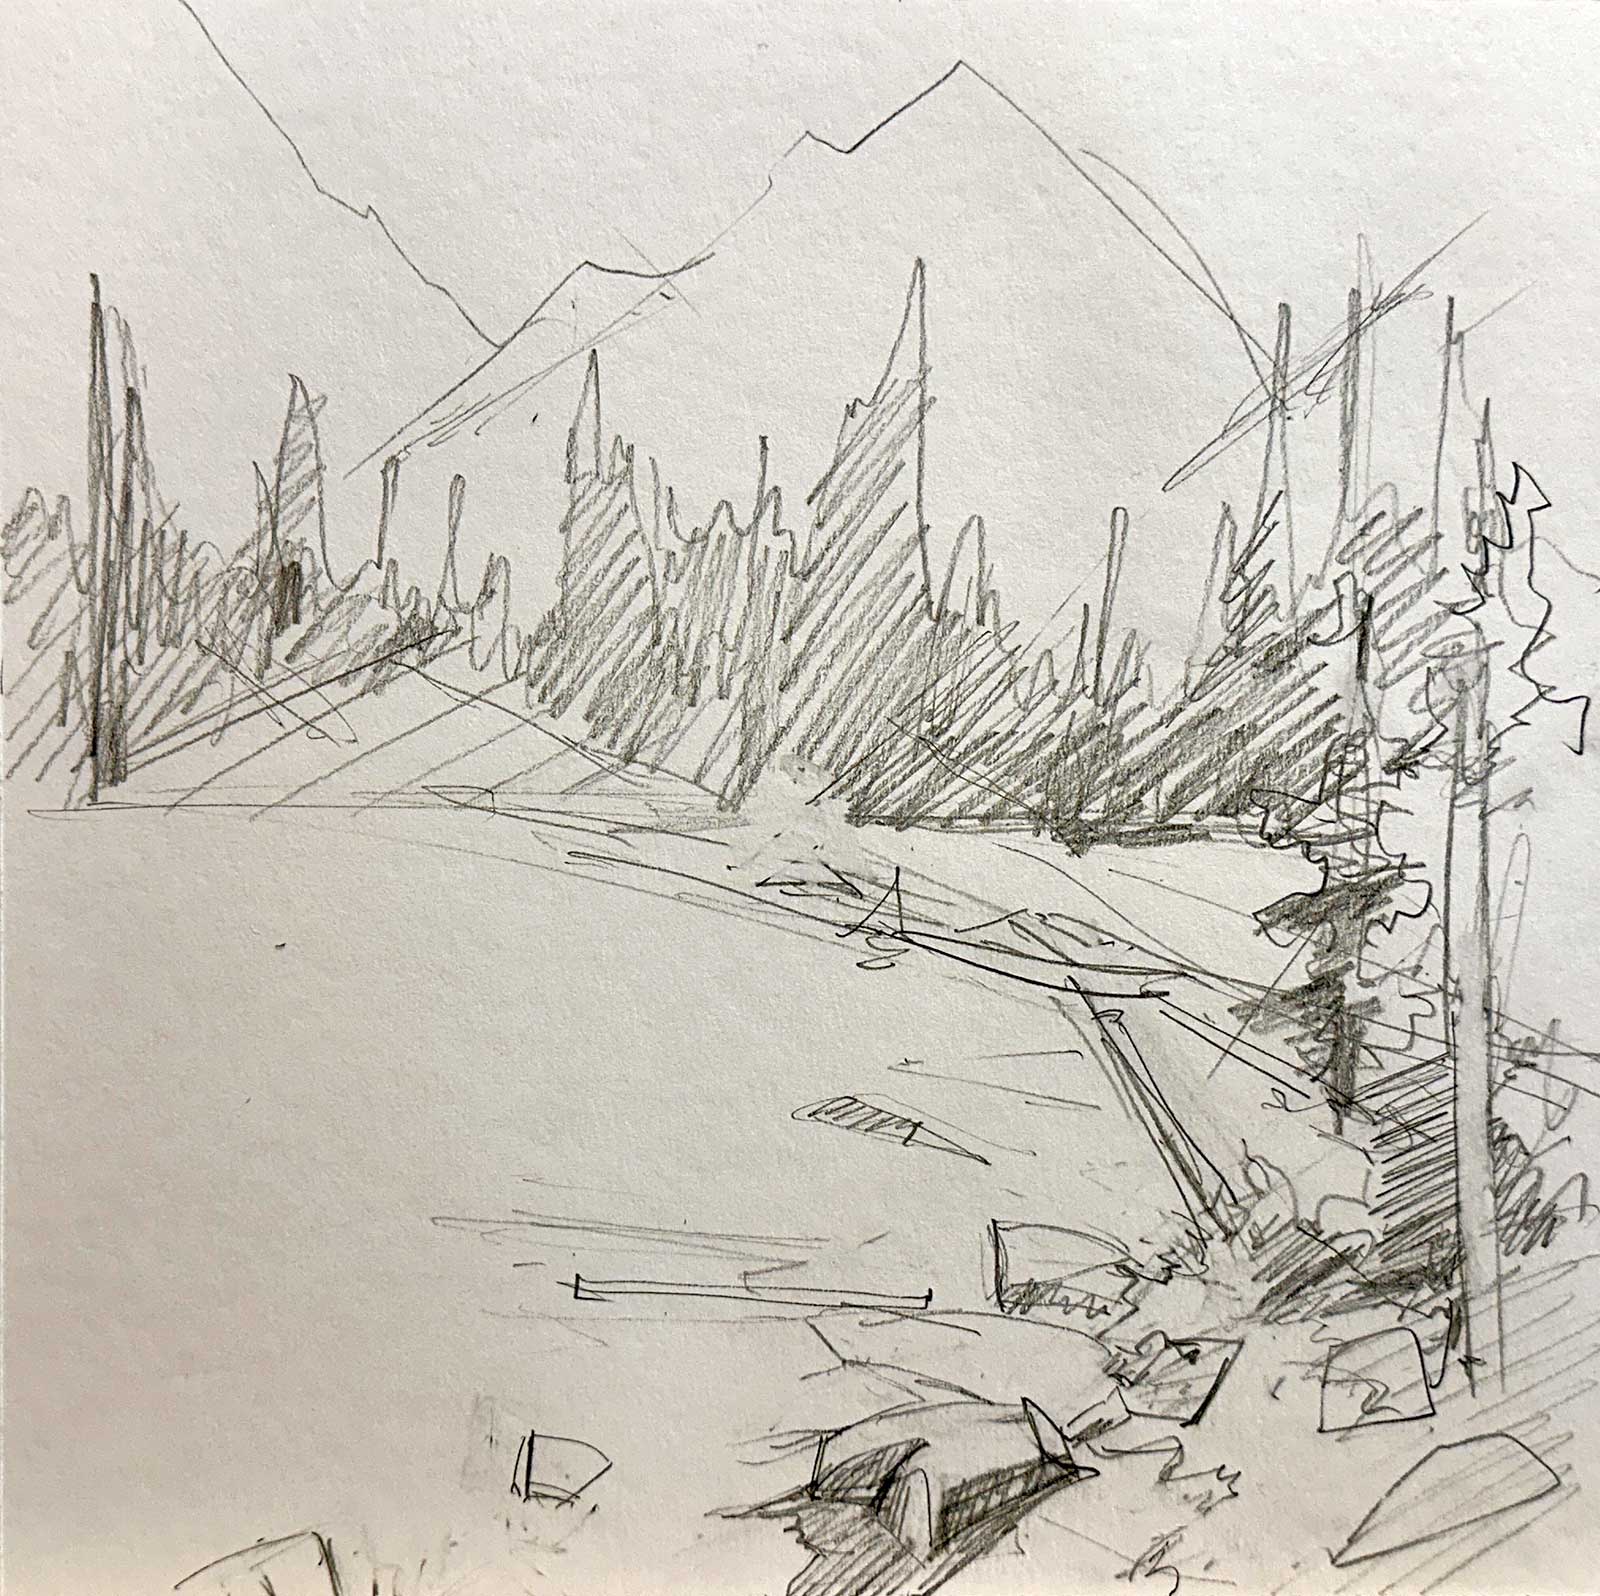
Stage 1 Initial Sketch
With a number 2 pencil, I loosely sketch out a composition. There is too much symmetry in the peaks so I decide to obliterate the edge of the right peak. I adjust the relative sizes of the shapes intuitively. The pile of logs in the distance is less interesting than the floating ones on the right, so I have reduced its relative size. I’ve also adjusted my vantage point to make the C-shape fit the square format. The pencil lines have been enhanced for you to see the drawing, but the opacity of gouache allows me to cover the graphite well. And, I don’t mind if some of the drawing pokes through.
WHAT THE ARTIST USED
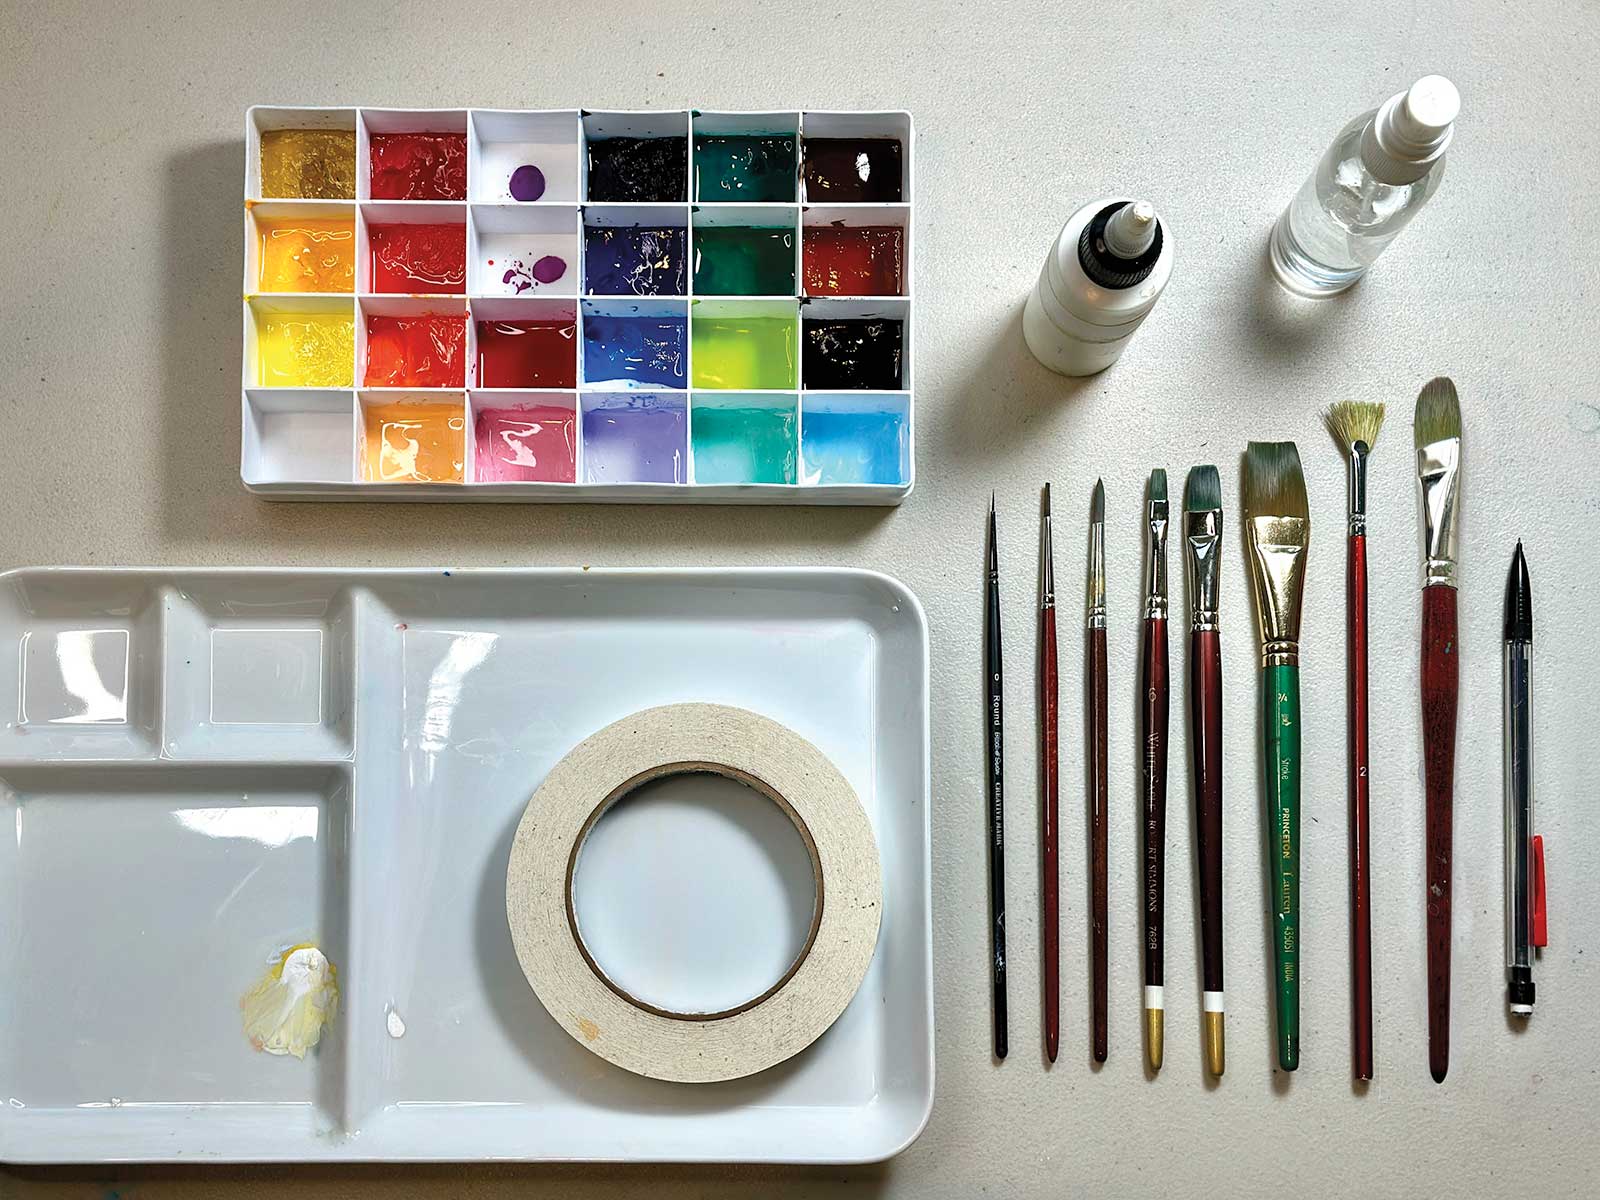
Holbein Gouache
Lemon yellow (G526), Permanent yellow deep (G5210), Yellow ochre (G527), Carmine (G502), Flame red (G507), Leaf green (G540), Emerald green (G545), Permanent green deep (G542), Ultramarine deep (G565), Turquoise blue (G561), Prussian blue (G566), Burnt sienna (G603), Burnt umber (G604), Ivory black (G606)
Turner Design Gouache
Cobalt blue
Winsor & Newton Gouache
Permanent white
Additional Materials
Winsor & Newton watercolor medium, Hot-pressed 140 lb watercolor paper, Painter’s tape
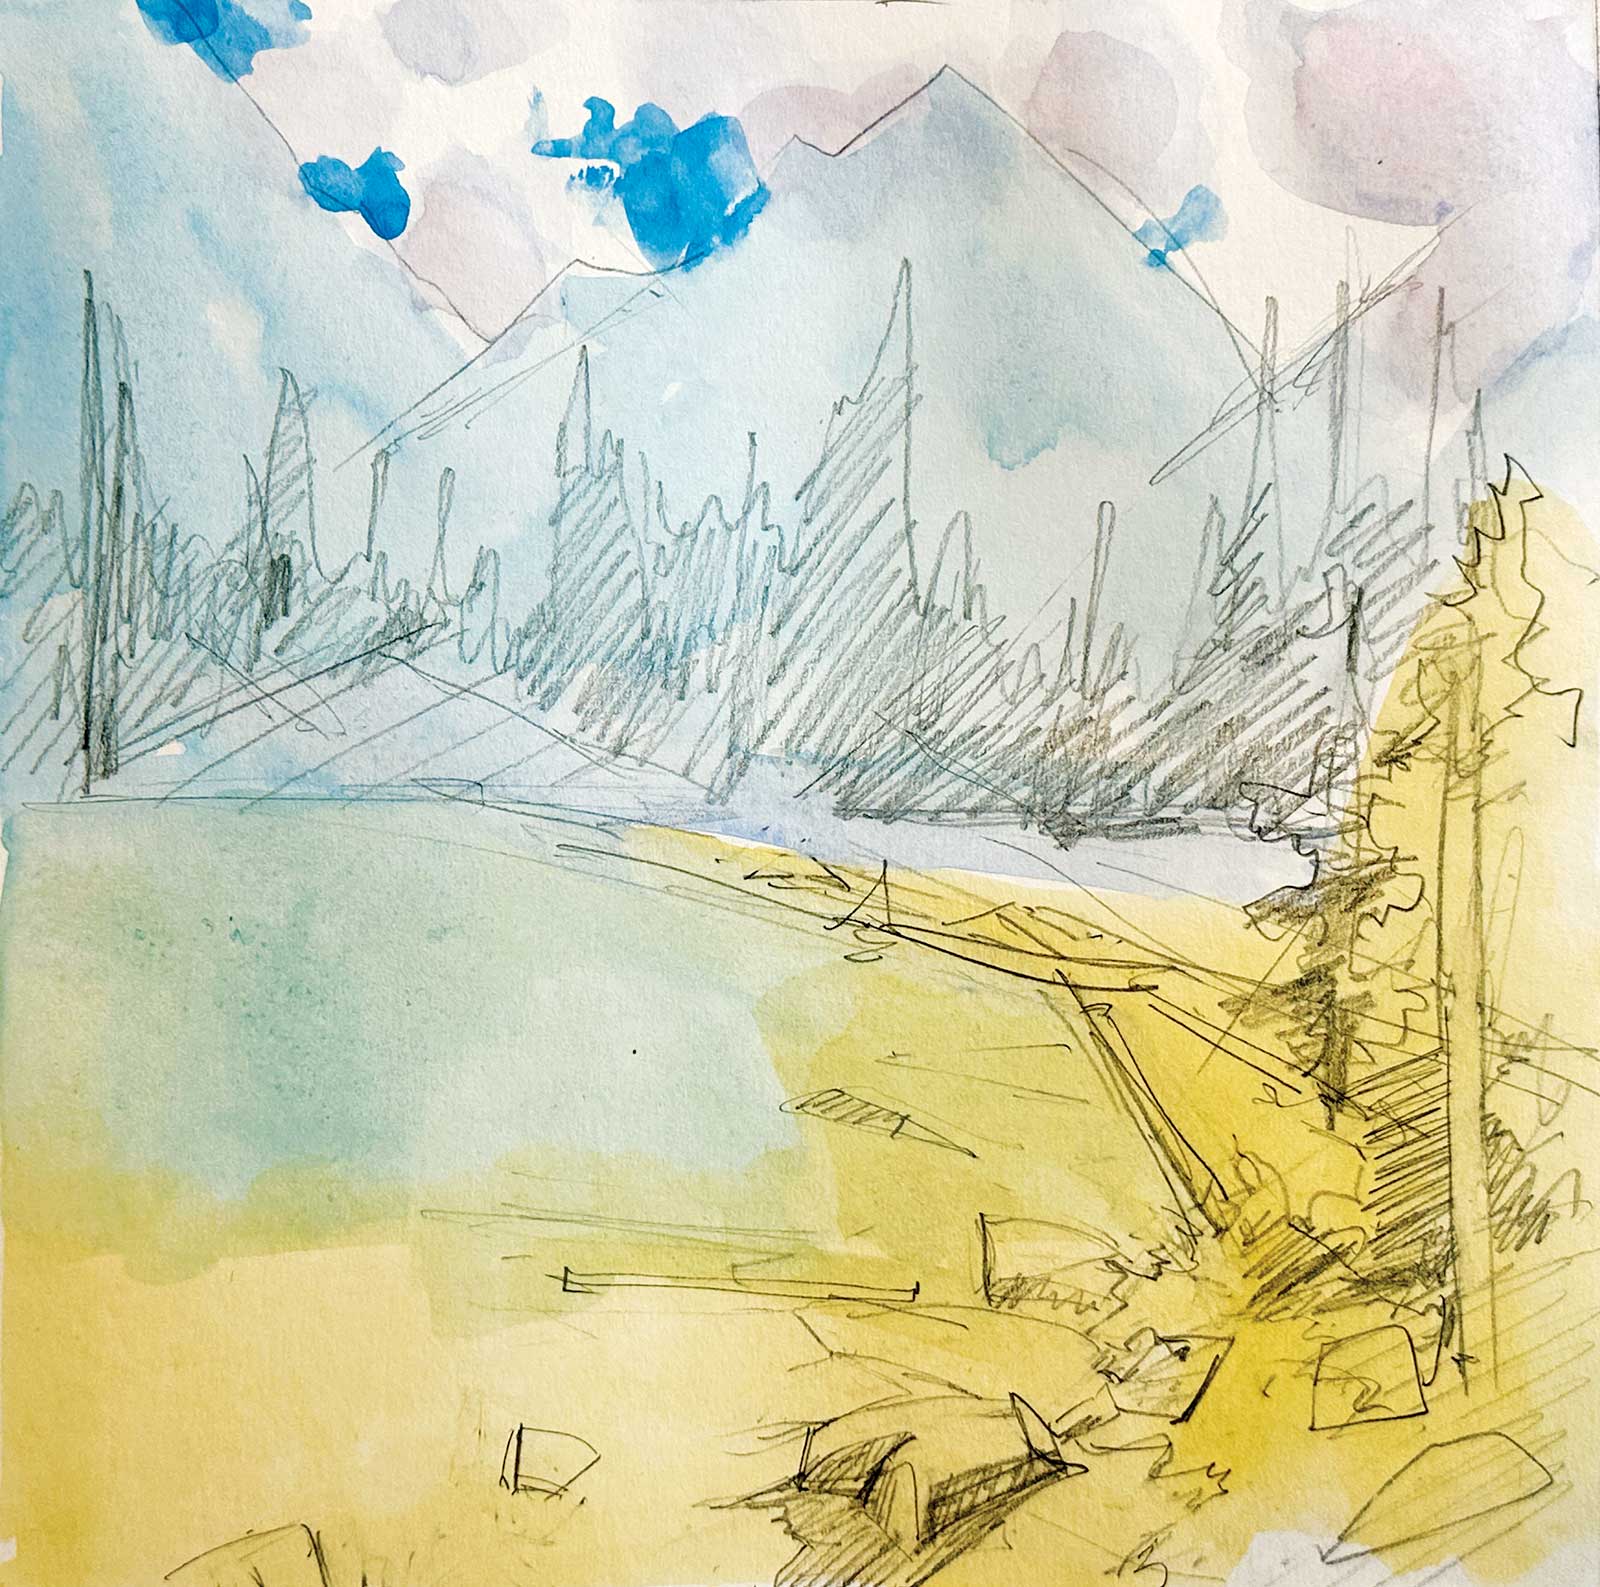
Stage 2 Transparent Color Wash
With very diluted paint, I create a light underpainting. Using transparent color allows me to preserve the highest value with enough chroma, which is difficult, if not impossible, to achieve when mixing white gouache with color. In the final painting, the whitest white is bare paper with a few pure white touch-ups. The blue is a mixture of turquoise and ultramarine, and the yellow is yellow ochre.
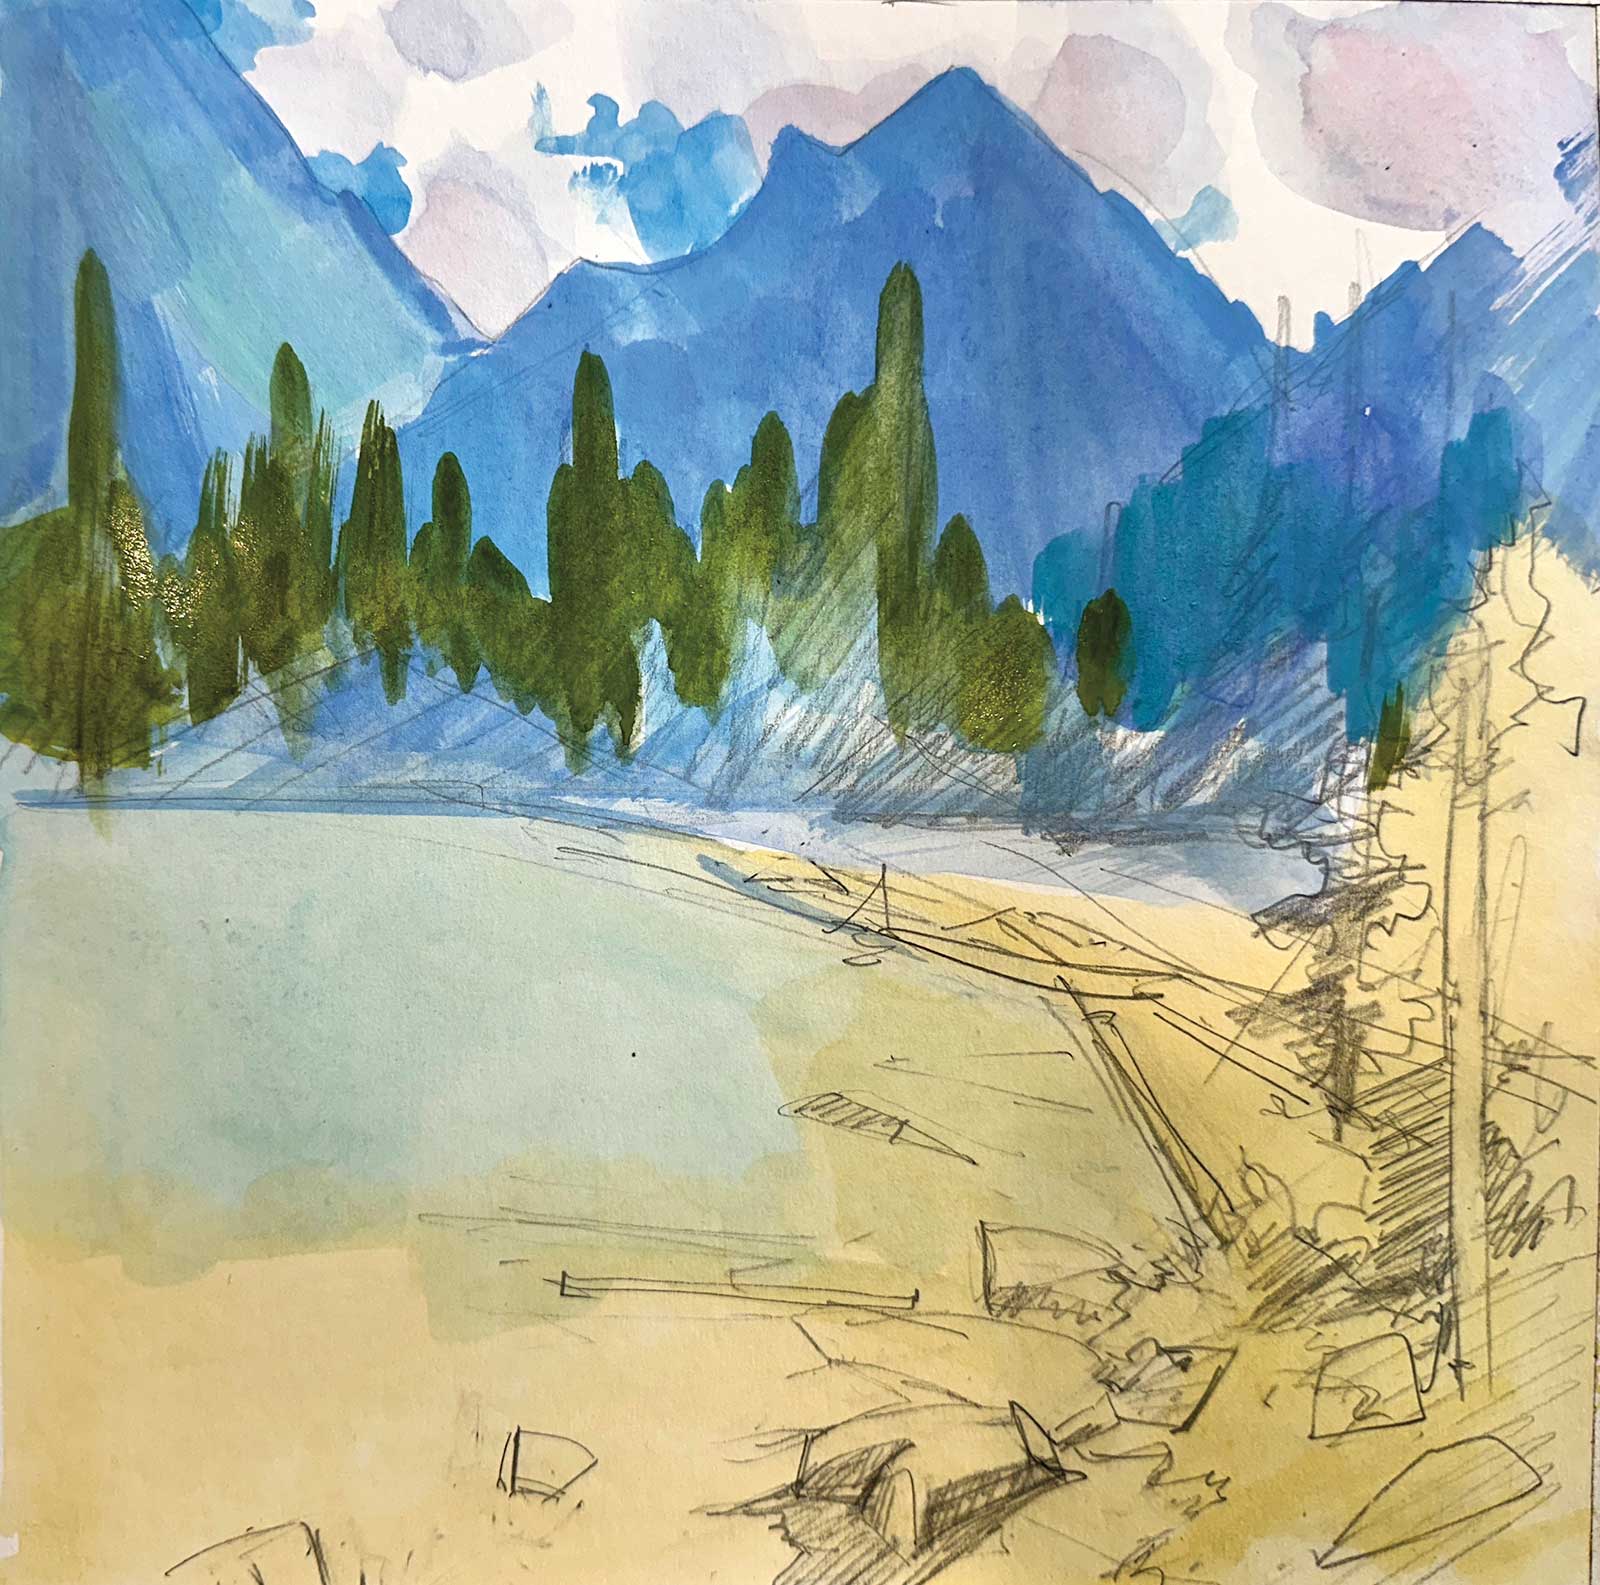
Stage 3 Blocking In Mountains
Beginning from the back, using the same blues muted with some carmine, I paint the mid-value mountain shape. This time, I am using thicker paint and adding in small variations of color for interest while keeping the values roughly the same. Keeping the sky to the mountain edge the same value, I can soften this transition. This is a rough block in, which helps me to see the large shape relationships in value and color. I am using the largest filbert brush, which can be very broad or relatively thin (see the trees) when painted on its edge.
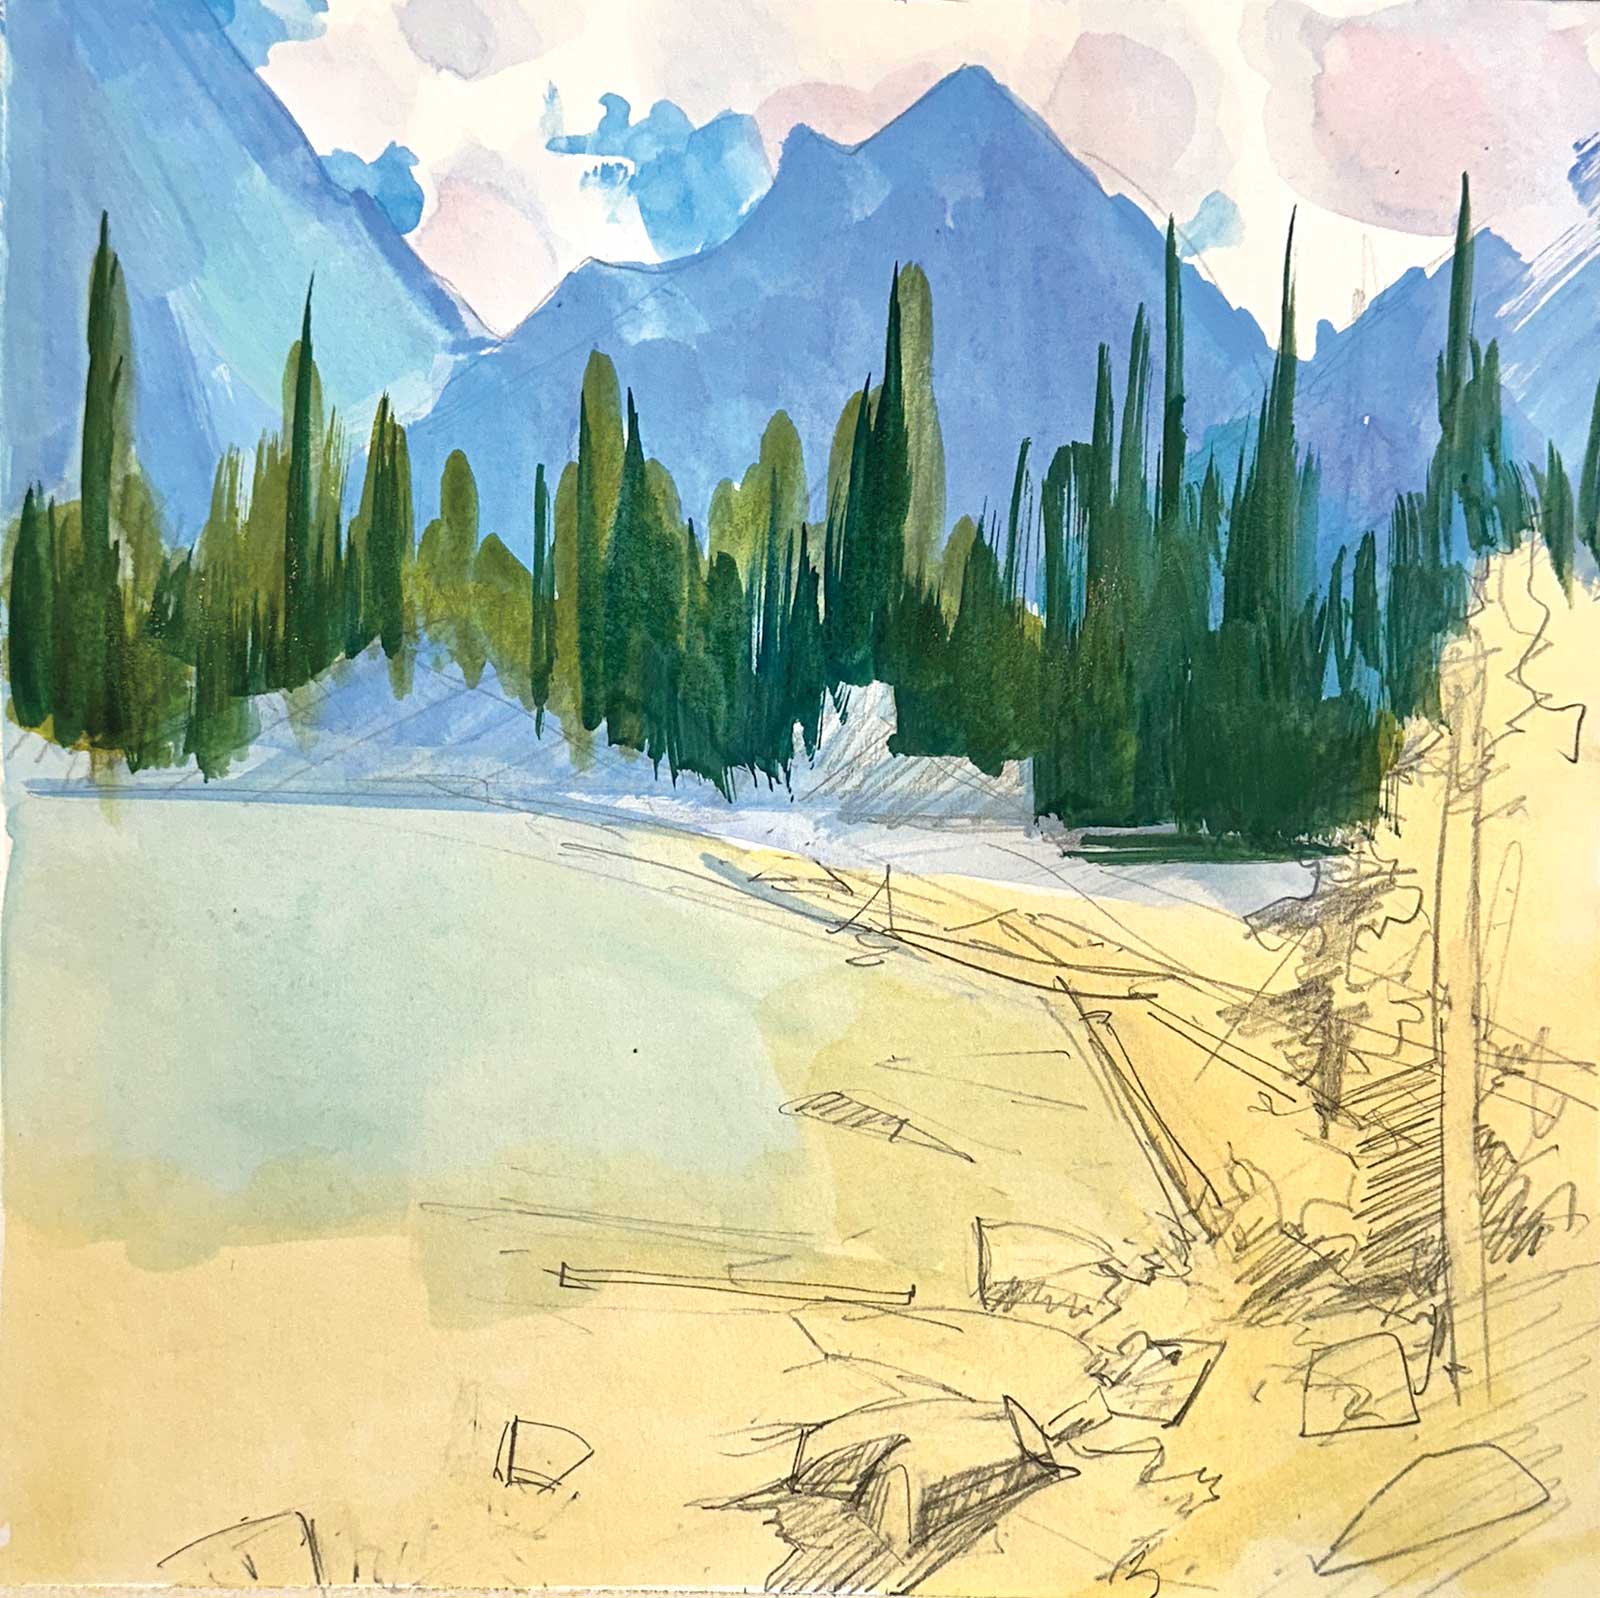
Stage 4 Dark Values
Still using the large filbert brush, I block in the darkest value tree line.
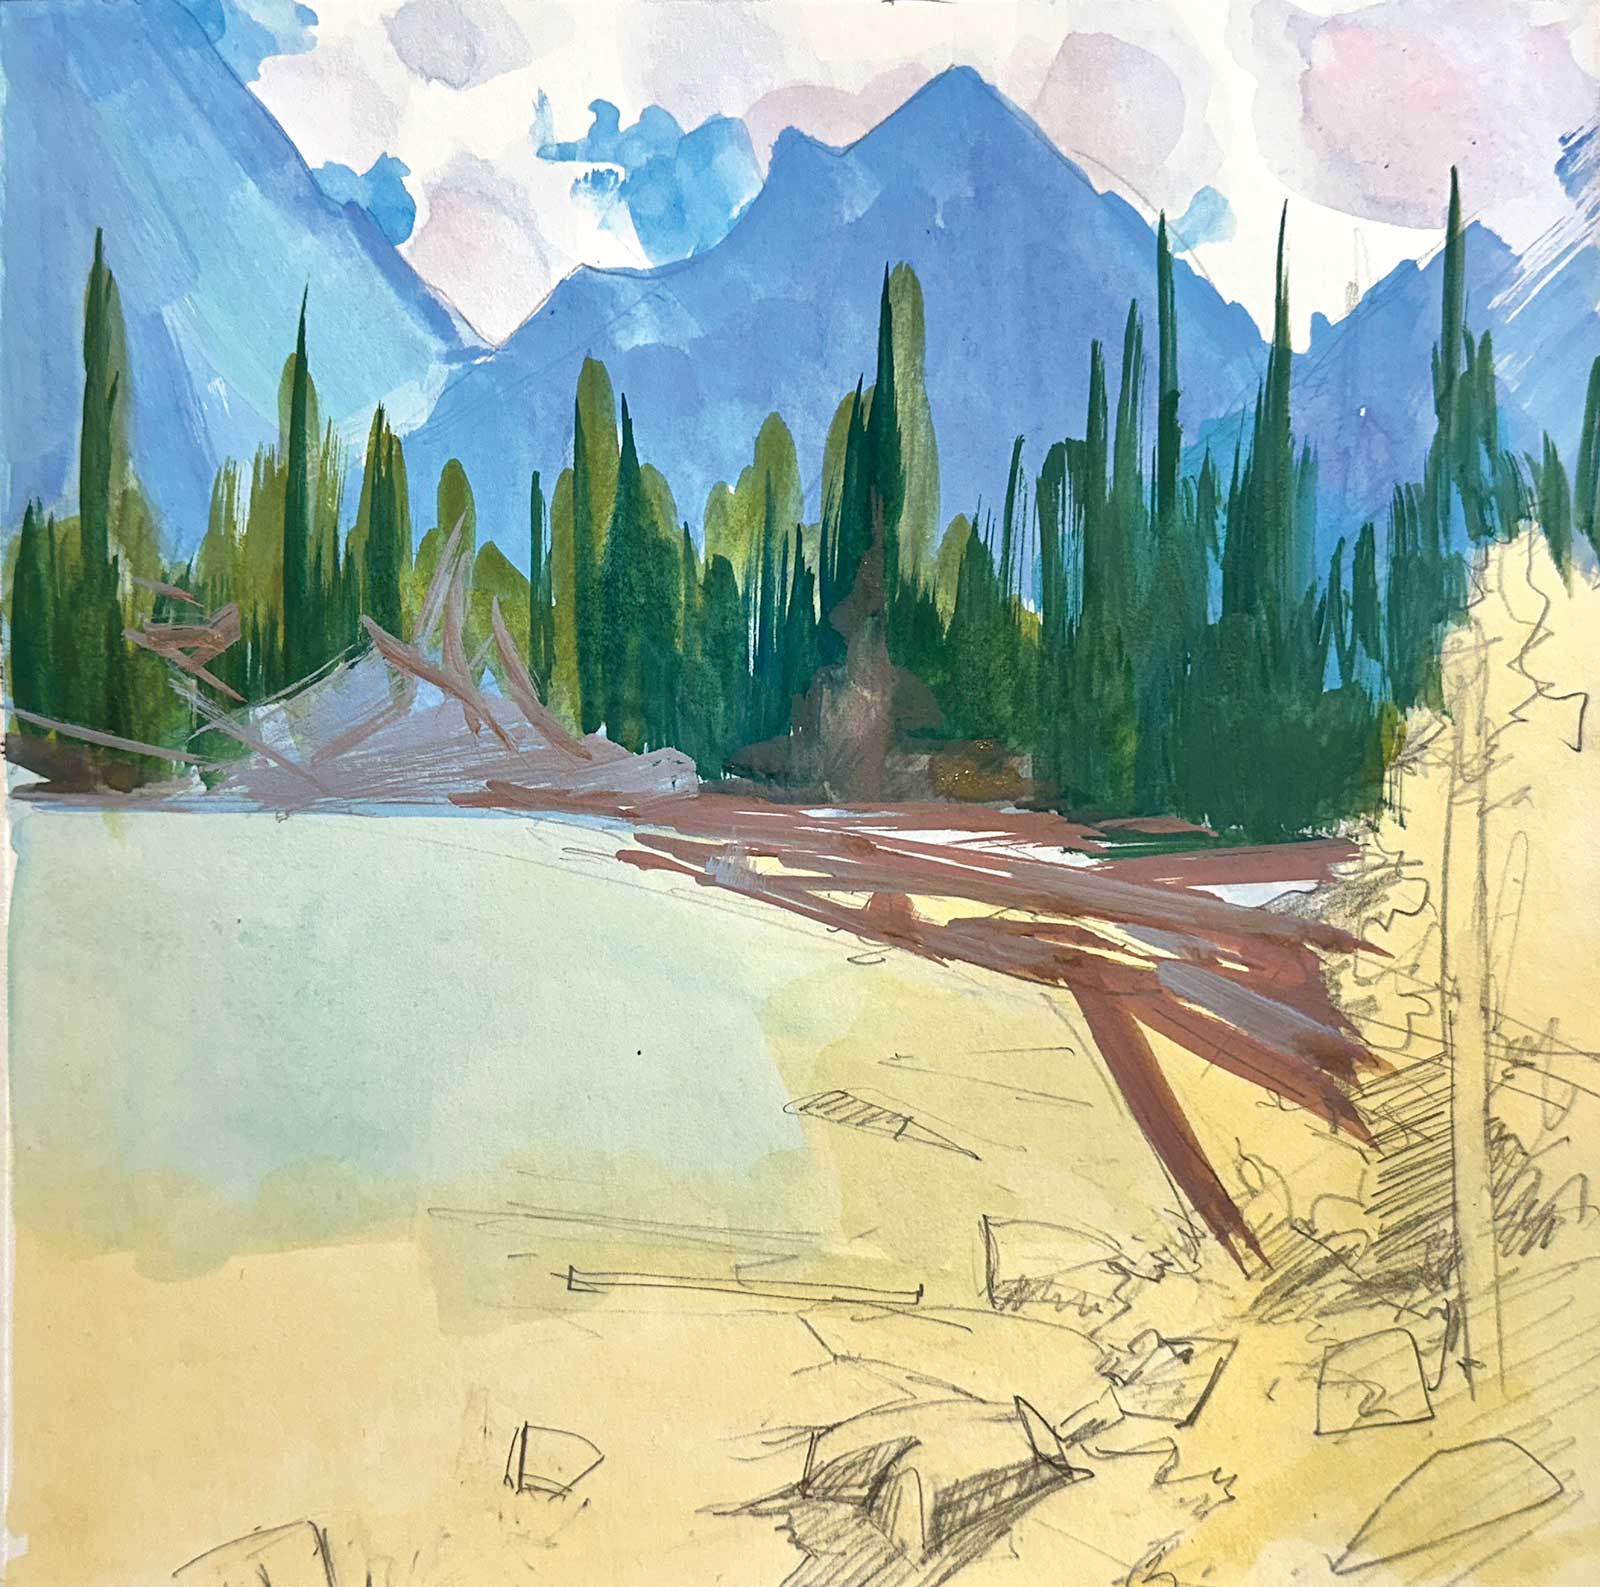
Stage 5 Long Shadows
The piles of logs are roughly painted. The dead logs in the distance are cooler and bluer. In reality, they are nearly white or very pale gray. However, the logs are in shadow, and therefore, they reflect the sky color. The nearer logs are warmer in temperature and show more of the dusty brown of their trunks. This will be the foundation over which I can add lighter value and texture to suggest countless logs.
Stage 6 Cool to Warm
Now I quickly block in the lake. To make smooth transitions, I must work fast to keep the edge of my paint wet. This is a little more challenging with thinned gouache because it tends to streak when thinned compared to watercolor. I observe that the water in the distance is bluer (cooler), and as it comes forward, the color warms toward yellow. This is related to the atmospheric perspective but mostly due to the shallow lake in the foreground, which is also indicated by visibly submerged rocks.
Stage 7 Adjusting Value & Color of Lake
It’s apparent that I’ve made the lake too light in value, so I’ve added a second layer, while preserving the translucency of the middle. Meanwhile, my brushstrokes are vertical to indicate the ripples of water as I see them in the photo reference. These ripples add to the feeling of going back into the distance. What I have not repainted in this second layer is the tops of the rocks not jutting above the water surface. These will have the most contrast in value (light and dark). I’ve now taken out a smaller brush to add some texture to the logs and darken the bases of the trees using a smaller brush.
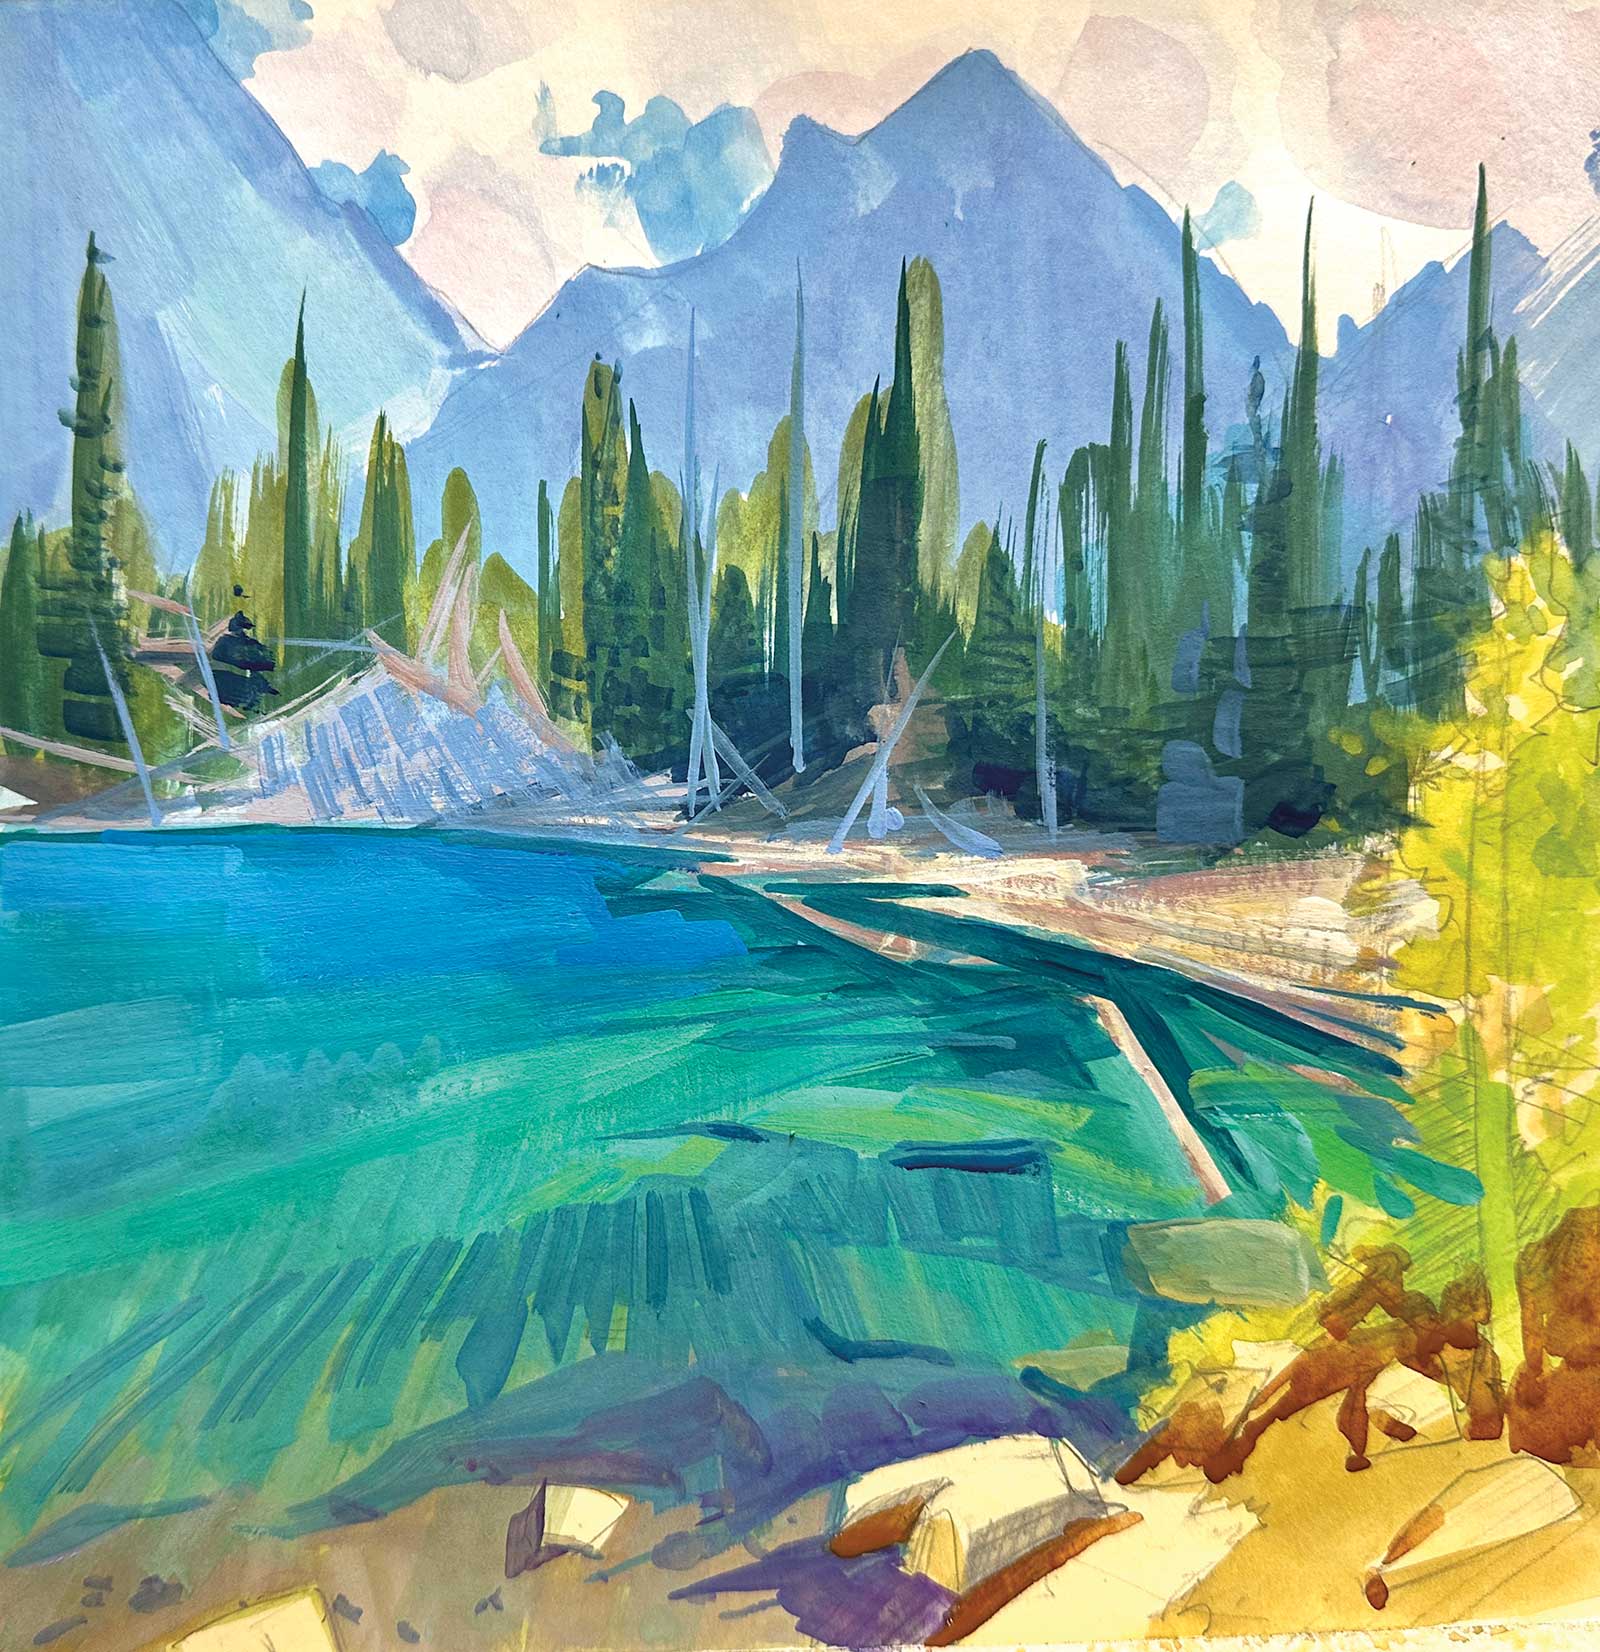
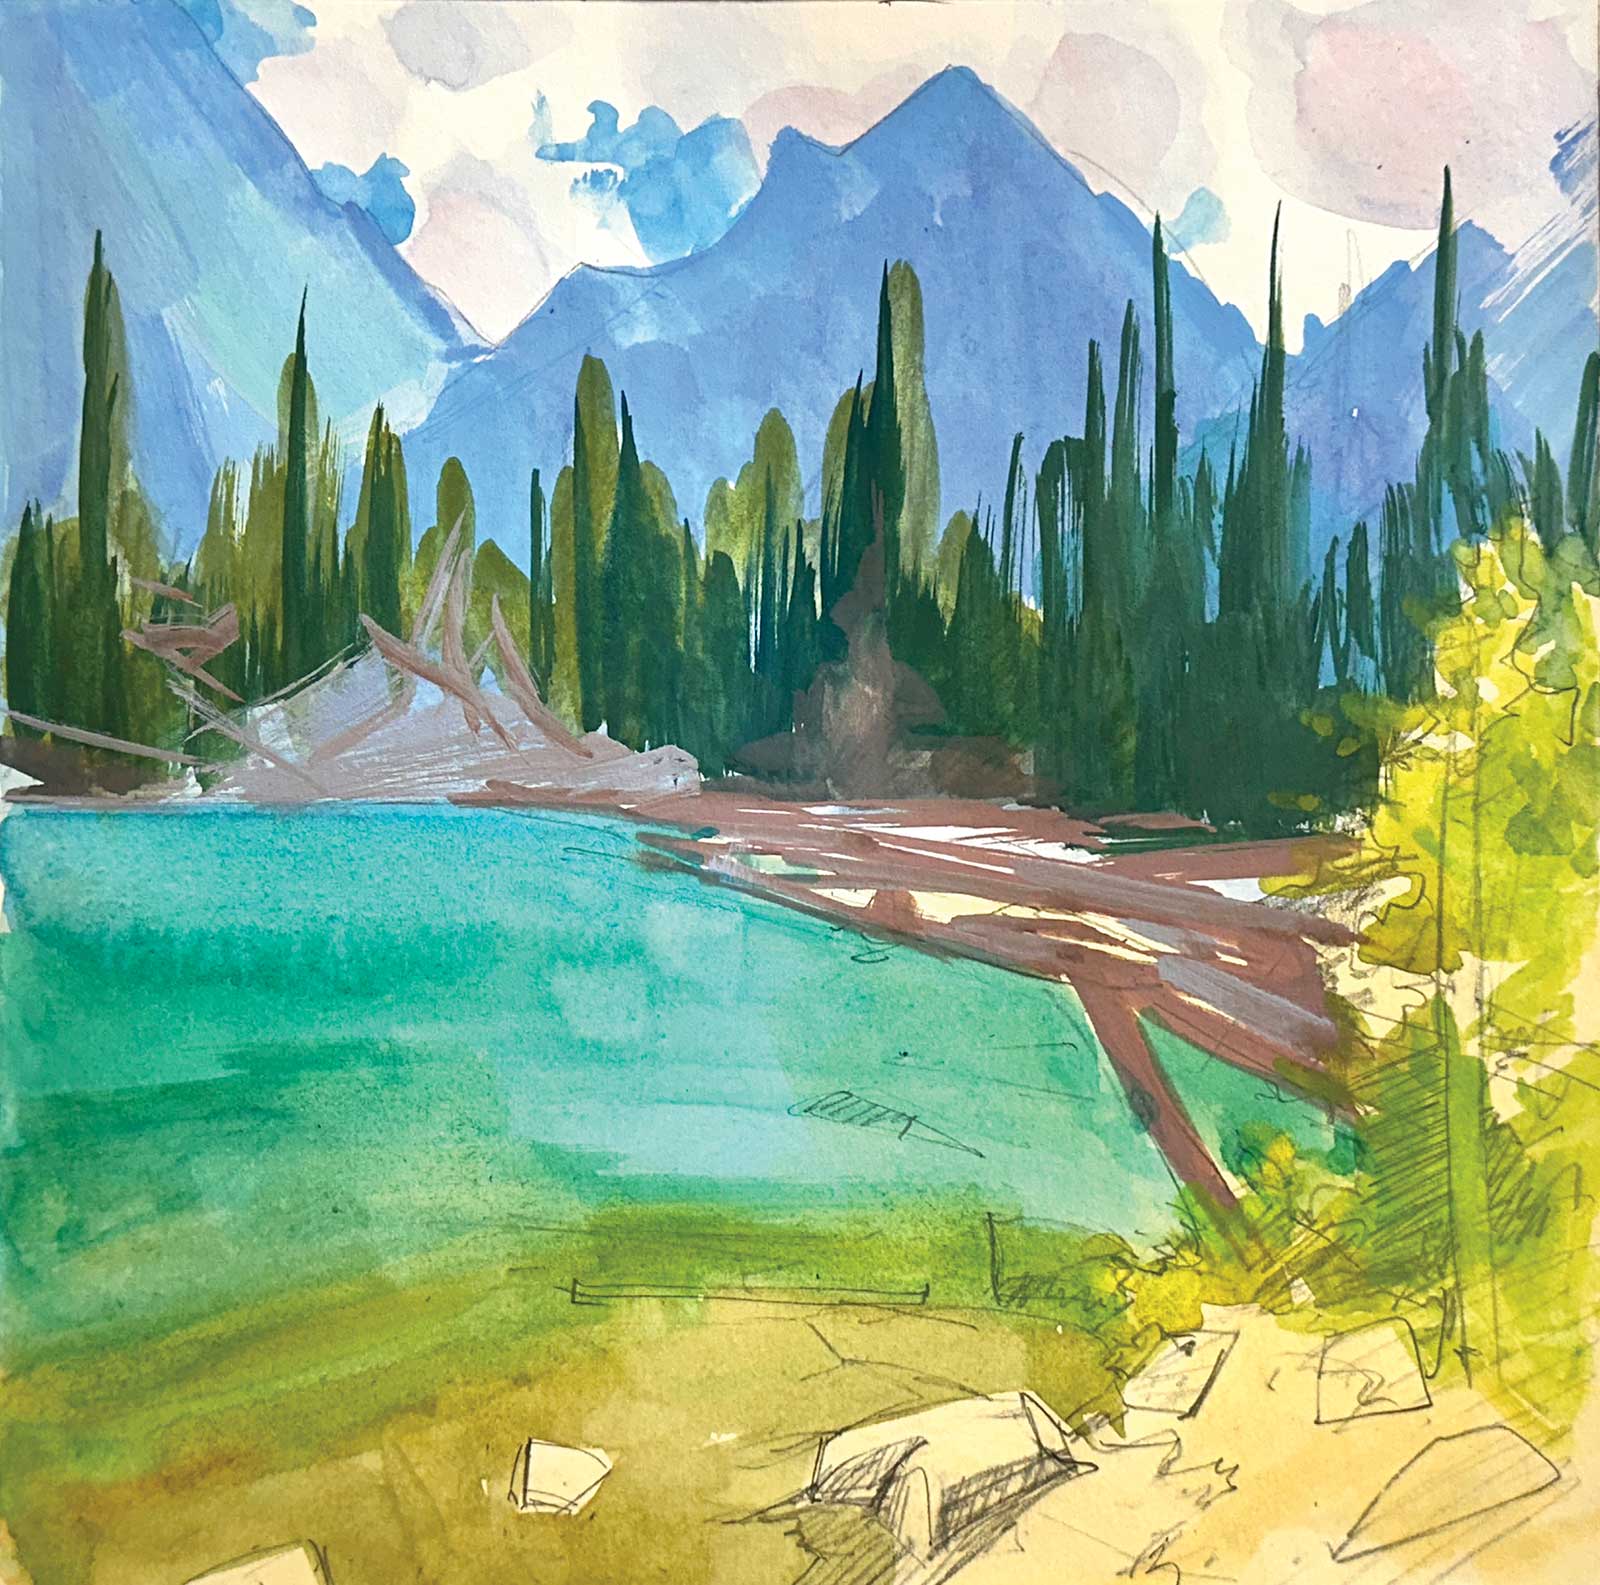
Stage 8 Underwater Shadows
Adding in shadows under and around the rocks gives more definition. Note the shadows of the rocks on land are redder (browns and purples), and the shadows under the floating logs and submerged rocks tend toward a bluish green. This is because water filters out the red and yellow wavelengths, so submerged objects have shadows that appear blue.
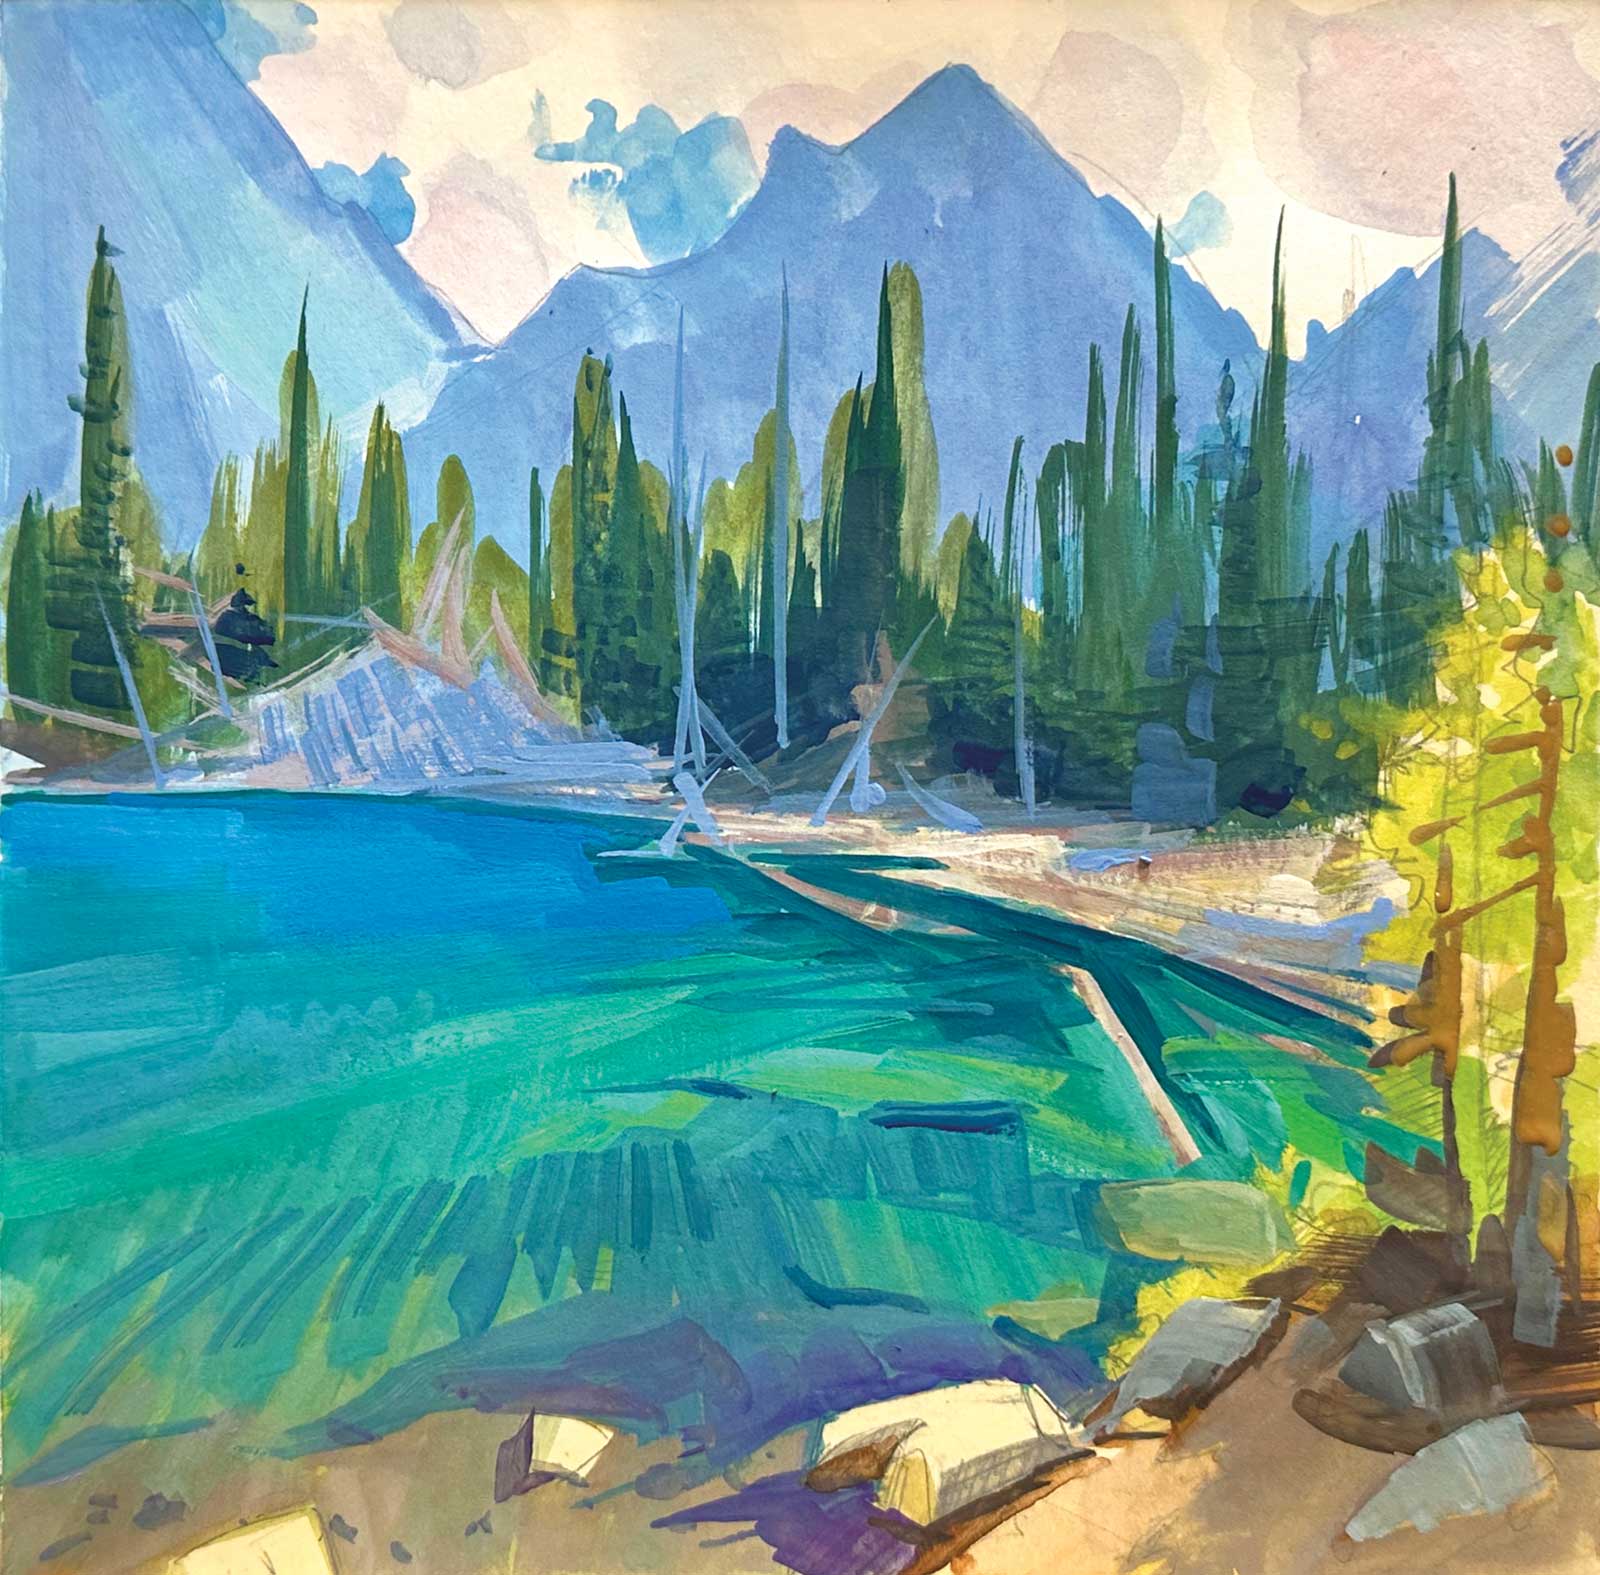
Stage 9 Foreground Definition
Darkening the foreground de-emphasizes these elements a little so they do not draw too much attention. Using a dry brush technique, I try to create some texture to indicate the hard graveled texture of rocks. Note, rocks underwater are less defined, less detailed and only have two values.
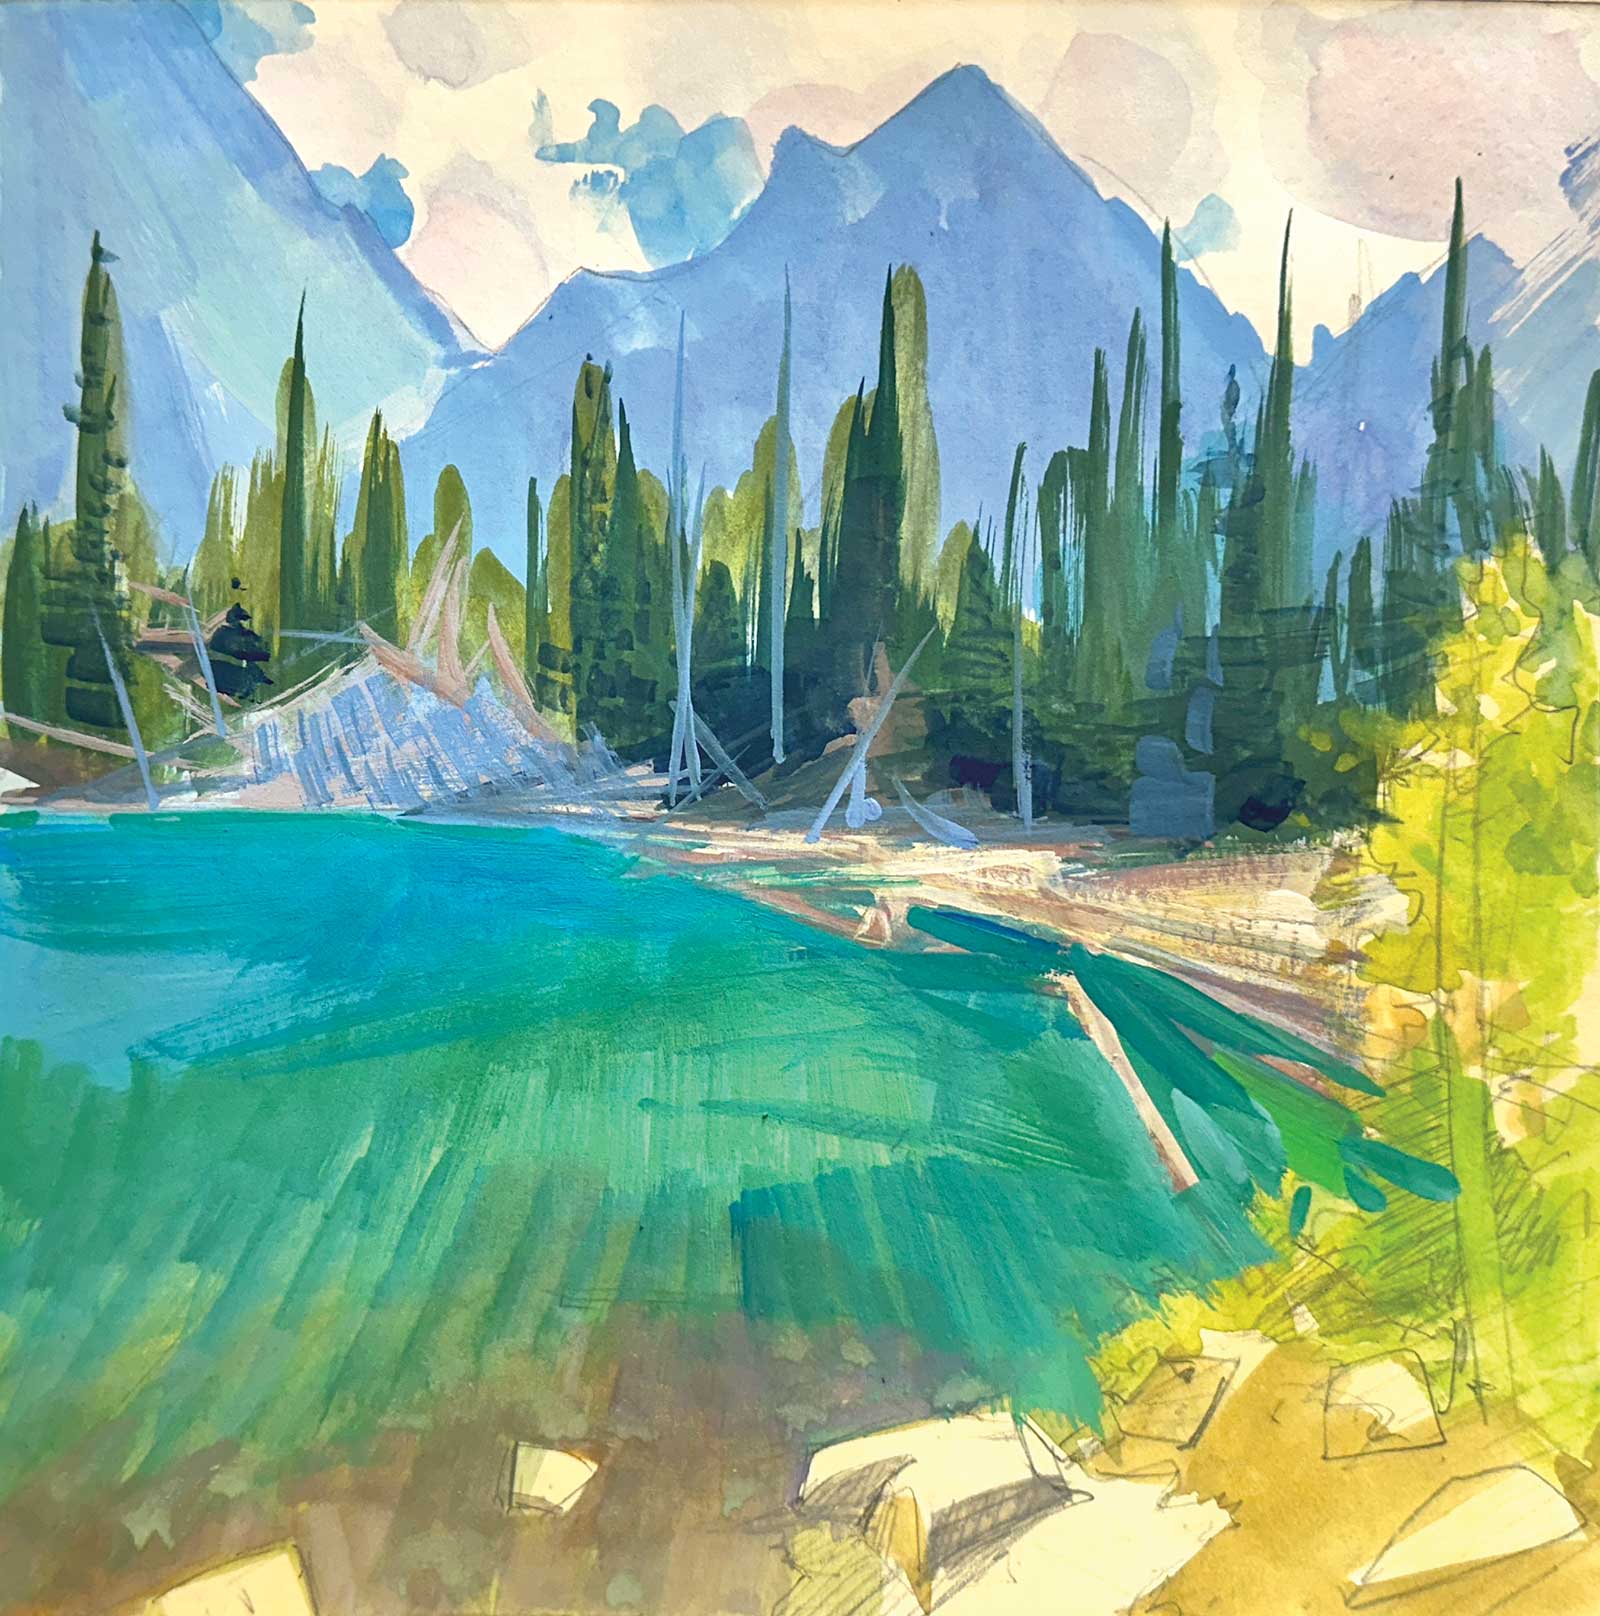
Stage 10 Final Adjustments
I worked a little more on the foreground corner trees and added texture and random logs along the edge of the lake. Adding another horizontal log enhances the feeling of depth to the lake. The shadows at the edges of the logs and rocks give form and suggest a wet edge.
 Old Timber Colchuck Lake, gouache, 8 x 8" (20 x 20 cm)
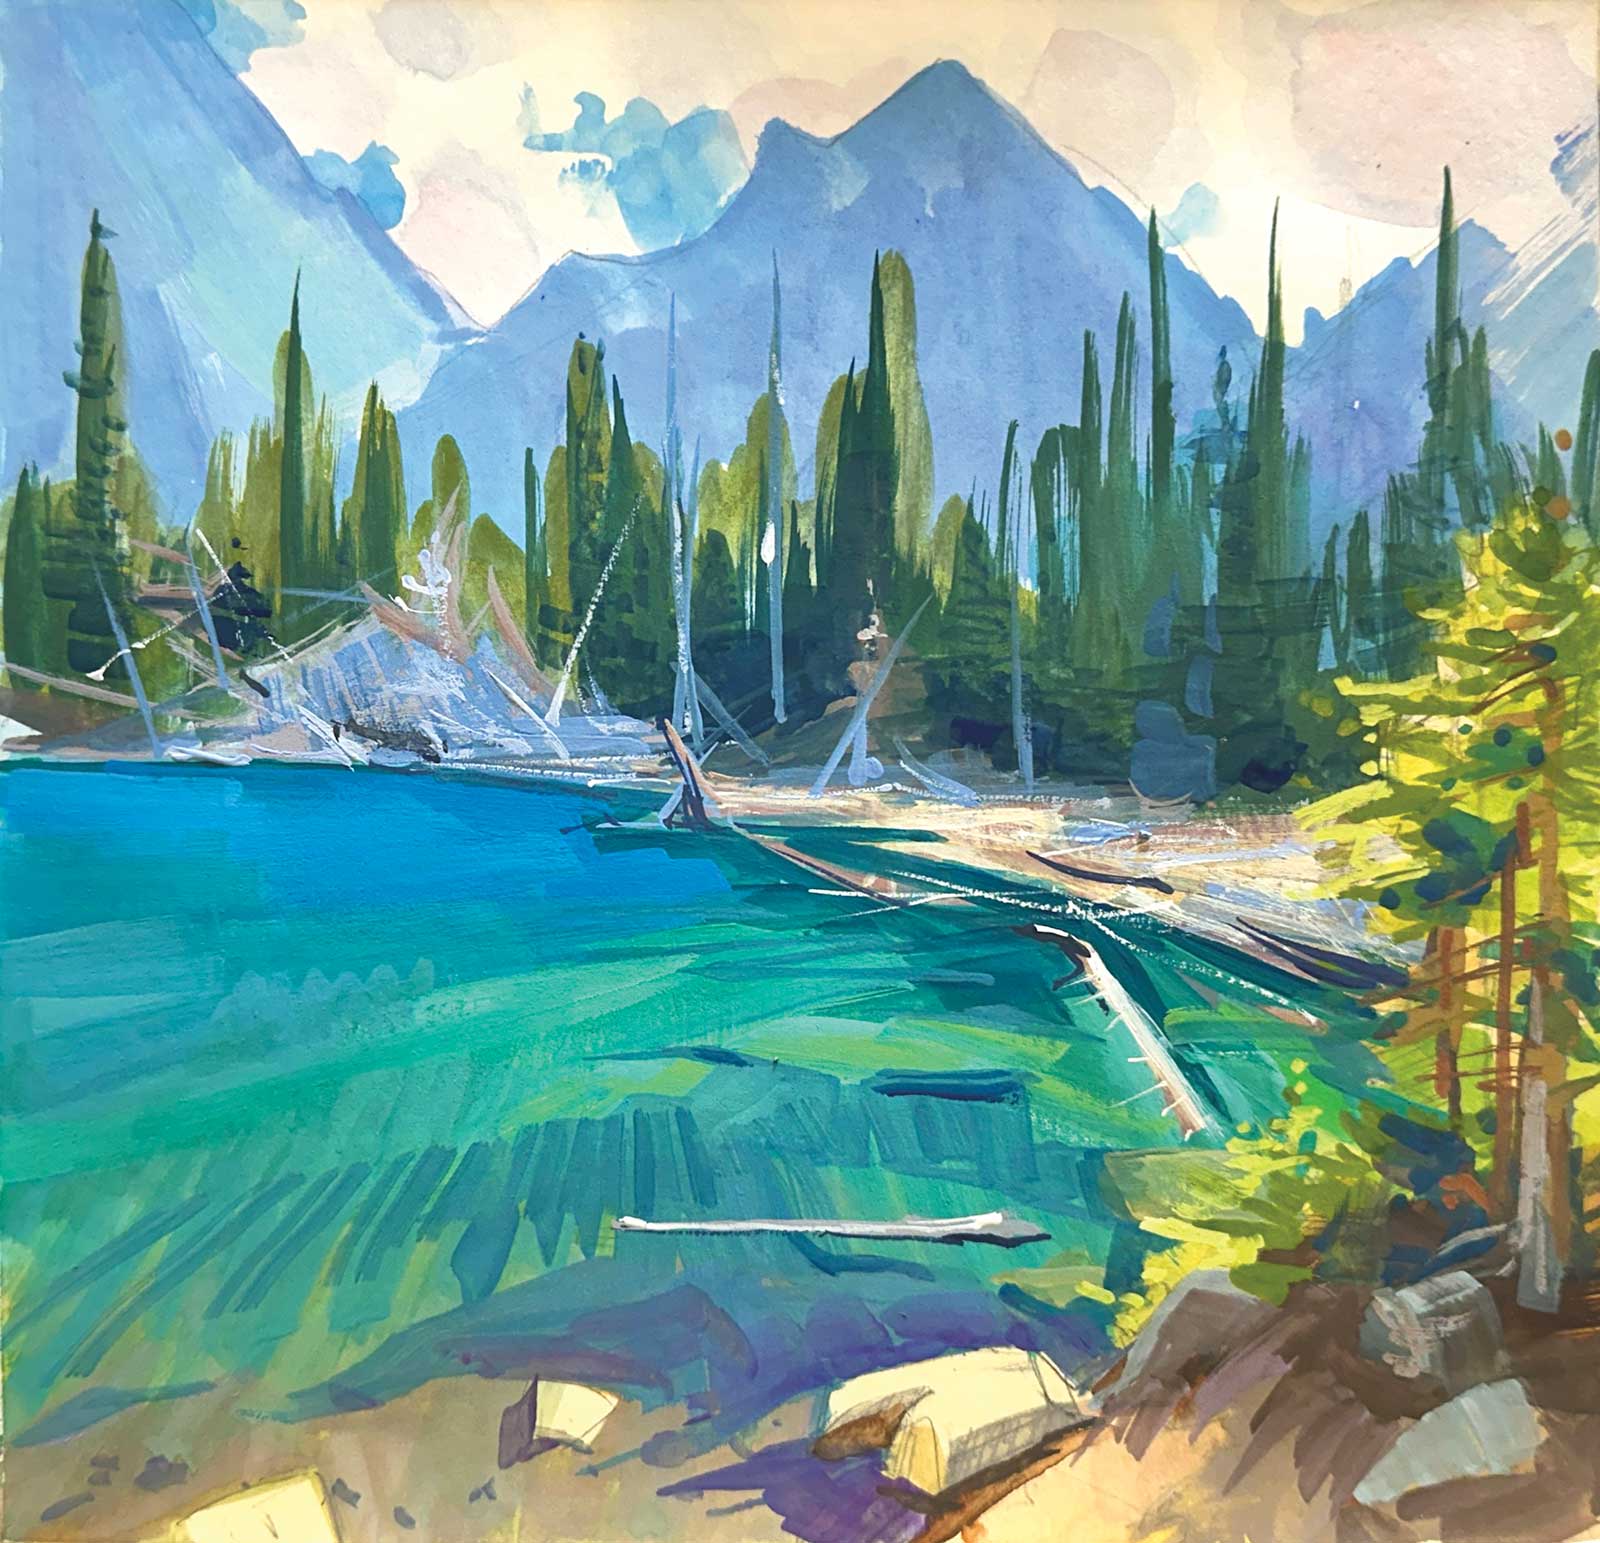
Stage 11 Finished Artwork
Here I add the final touches. Most notably, the ripples on the water leading into the background. I reshape the mountains, add bits of lighter accents, and soften and darken the clouds to reduce the contrast. Using a fan brush, I suggest more texture in the trees. There is also more modeling of the foreground rocks above the water. How much detail to add depends on the size of the final painting and personal taste.
About the artist
Elo Wobig is a landscape painter who has had a lifelong passion for the natural world. She honed her artistic skills alongside her previous career as an emergency physician, continuing to sketch and use her creative skills in projects serving her community. These endeavors eventually led to commissioned artwork, reigniting her desire to become a full-time painter. Her love of hiking with her family inspires her to create art that captures the beauty of sweeping landscapes.
Wobig’s dedication to her craft has earned her many awards in local and national competitions, as well as signature member status in the American Impressionist Society. Her work has been included in the permanent collections of esteemed institutions like the Maryhill Museum of Art and the Museum of the Oregon Territory. Through her art, Wobig hopes to inspire others to connect with the beauty and wonder of the natural world, to find joy and meaning in their own lives.
Contact at
elo@elowobig.com
elowobig.com