


The following step-by-step offers a look into my painting process, from the earliest stages of composition through to the final details. While each work may unfold a little differently, these stages outline one of the approaches I often take in bringing a subject to life.
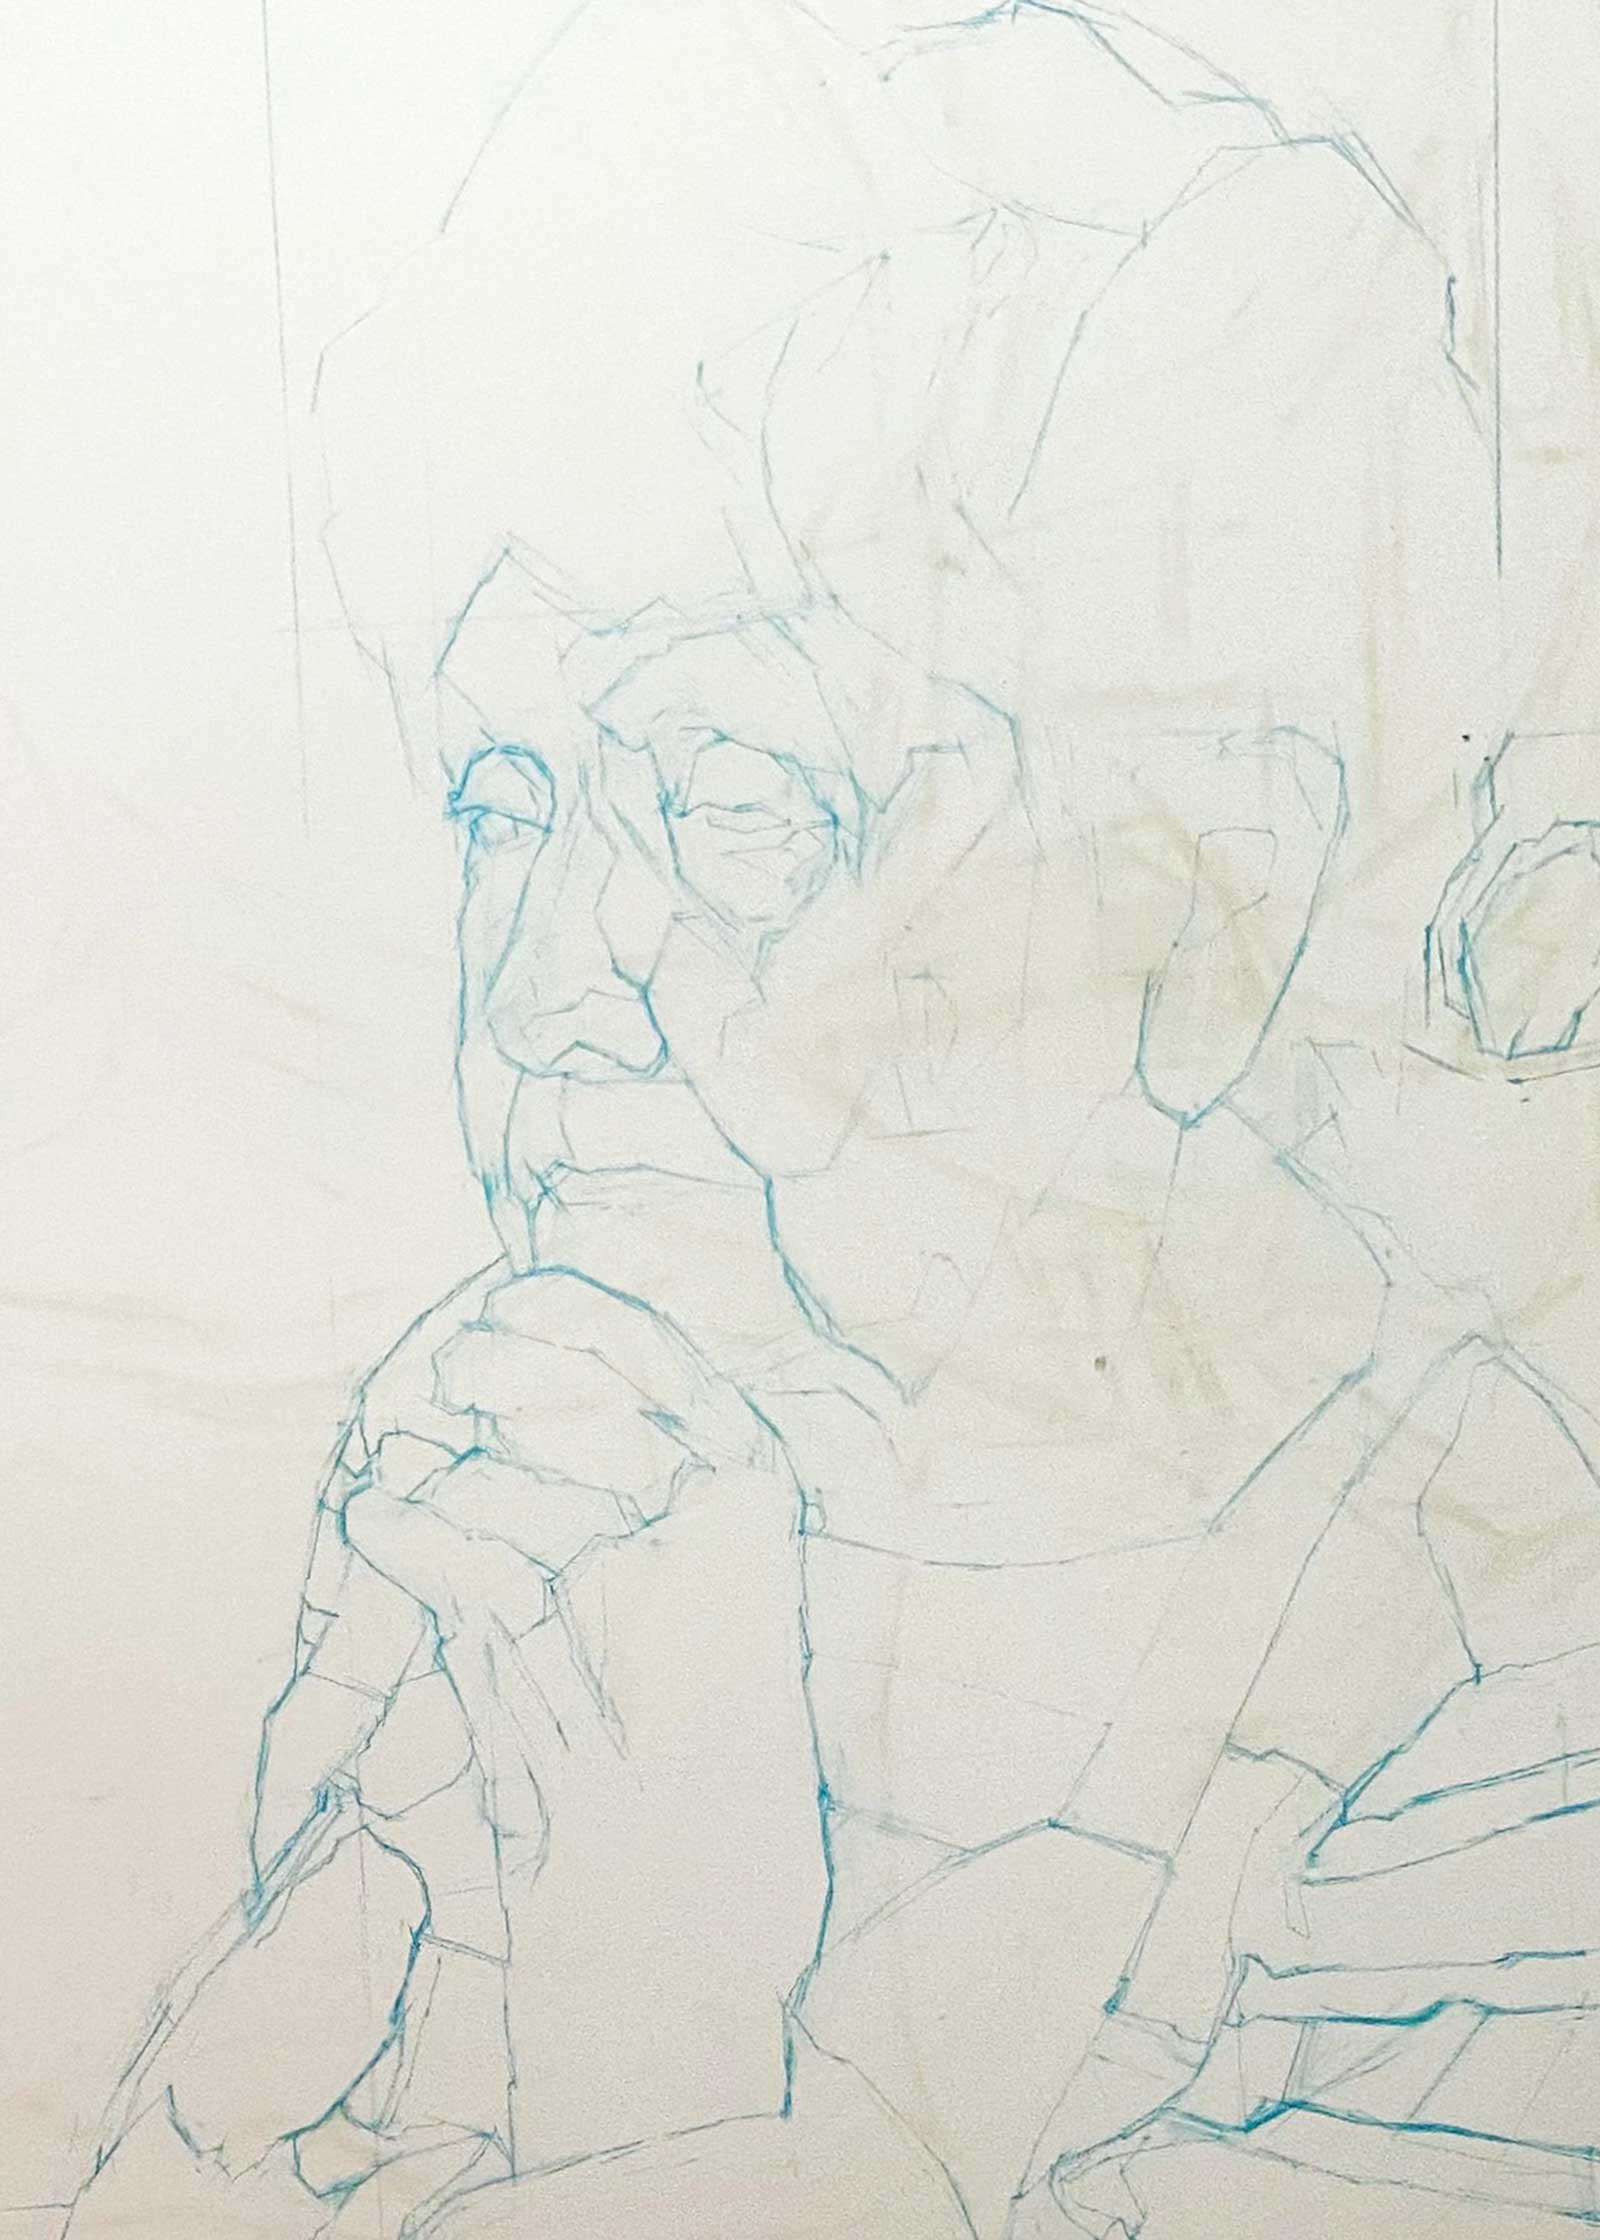
Stage 1 Planning the Composition
After selecting my image, I begin by laying out the painting in Photoshop to develop my composition. Because I typically build the panels I paint on, this stage is especially important—it allows me to adjust the composition freely rather than being limited to a standard size. I prefer working on a smooth surface, as I find the texture of canvas or linen distracting. With my panel built and the composition settled, I’m ready to start. I begin my paintings in a variety of ways, but for this one I drew directly on the panel using an erasable colored pencil. This drawing phase helps me establish the layout and become familiar with the larger shapes and angles.
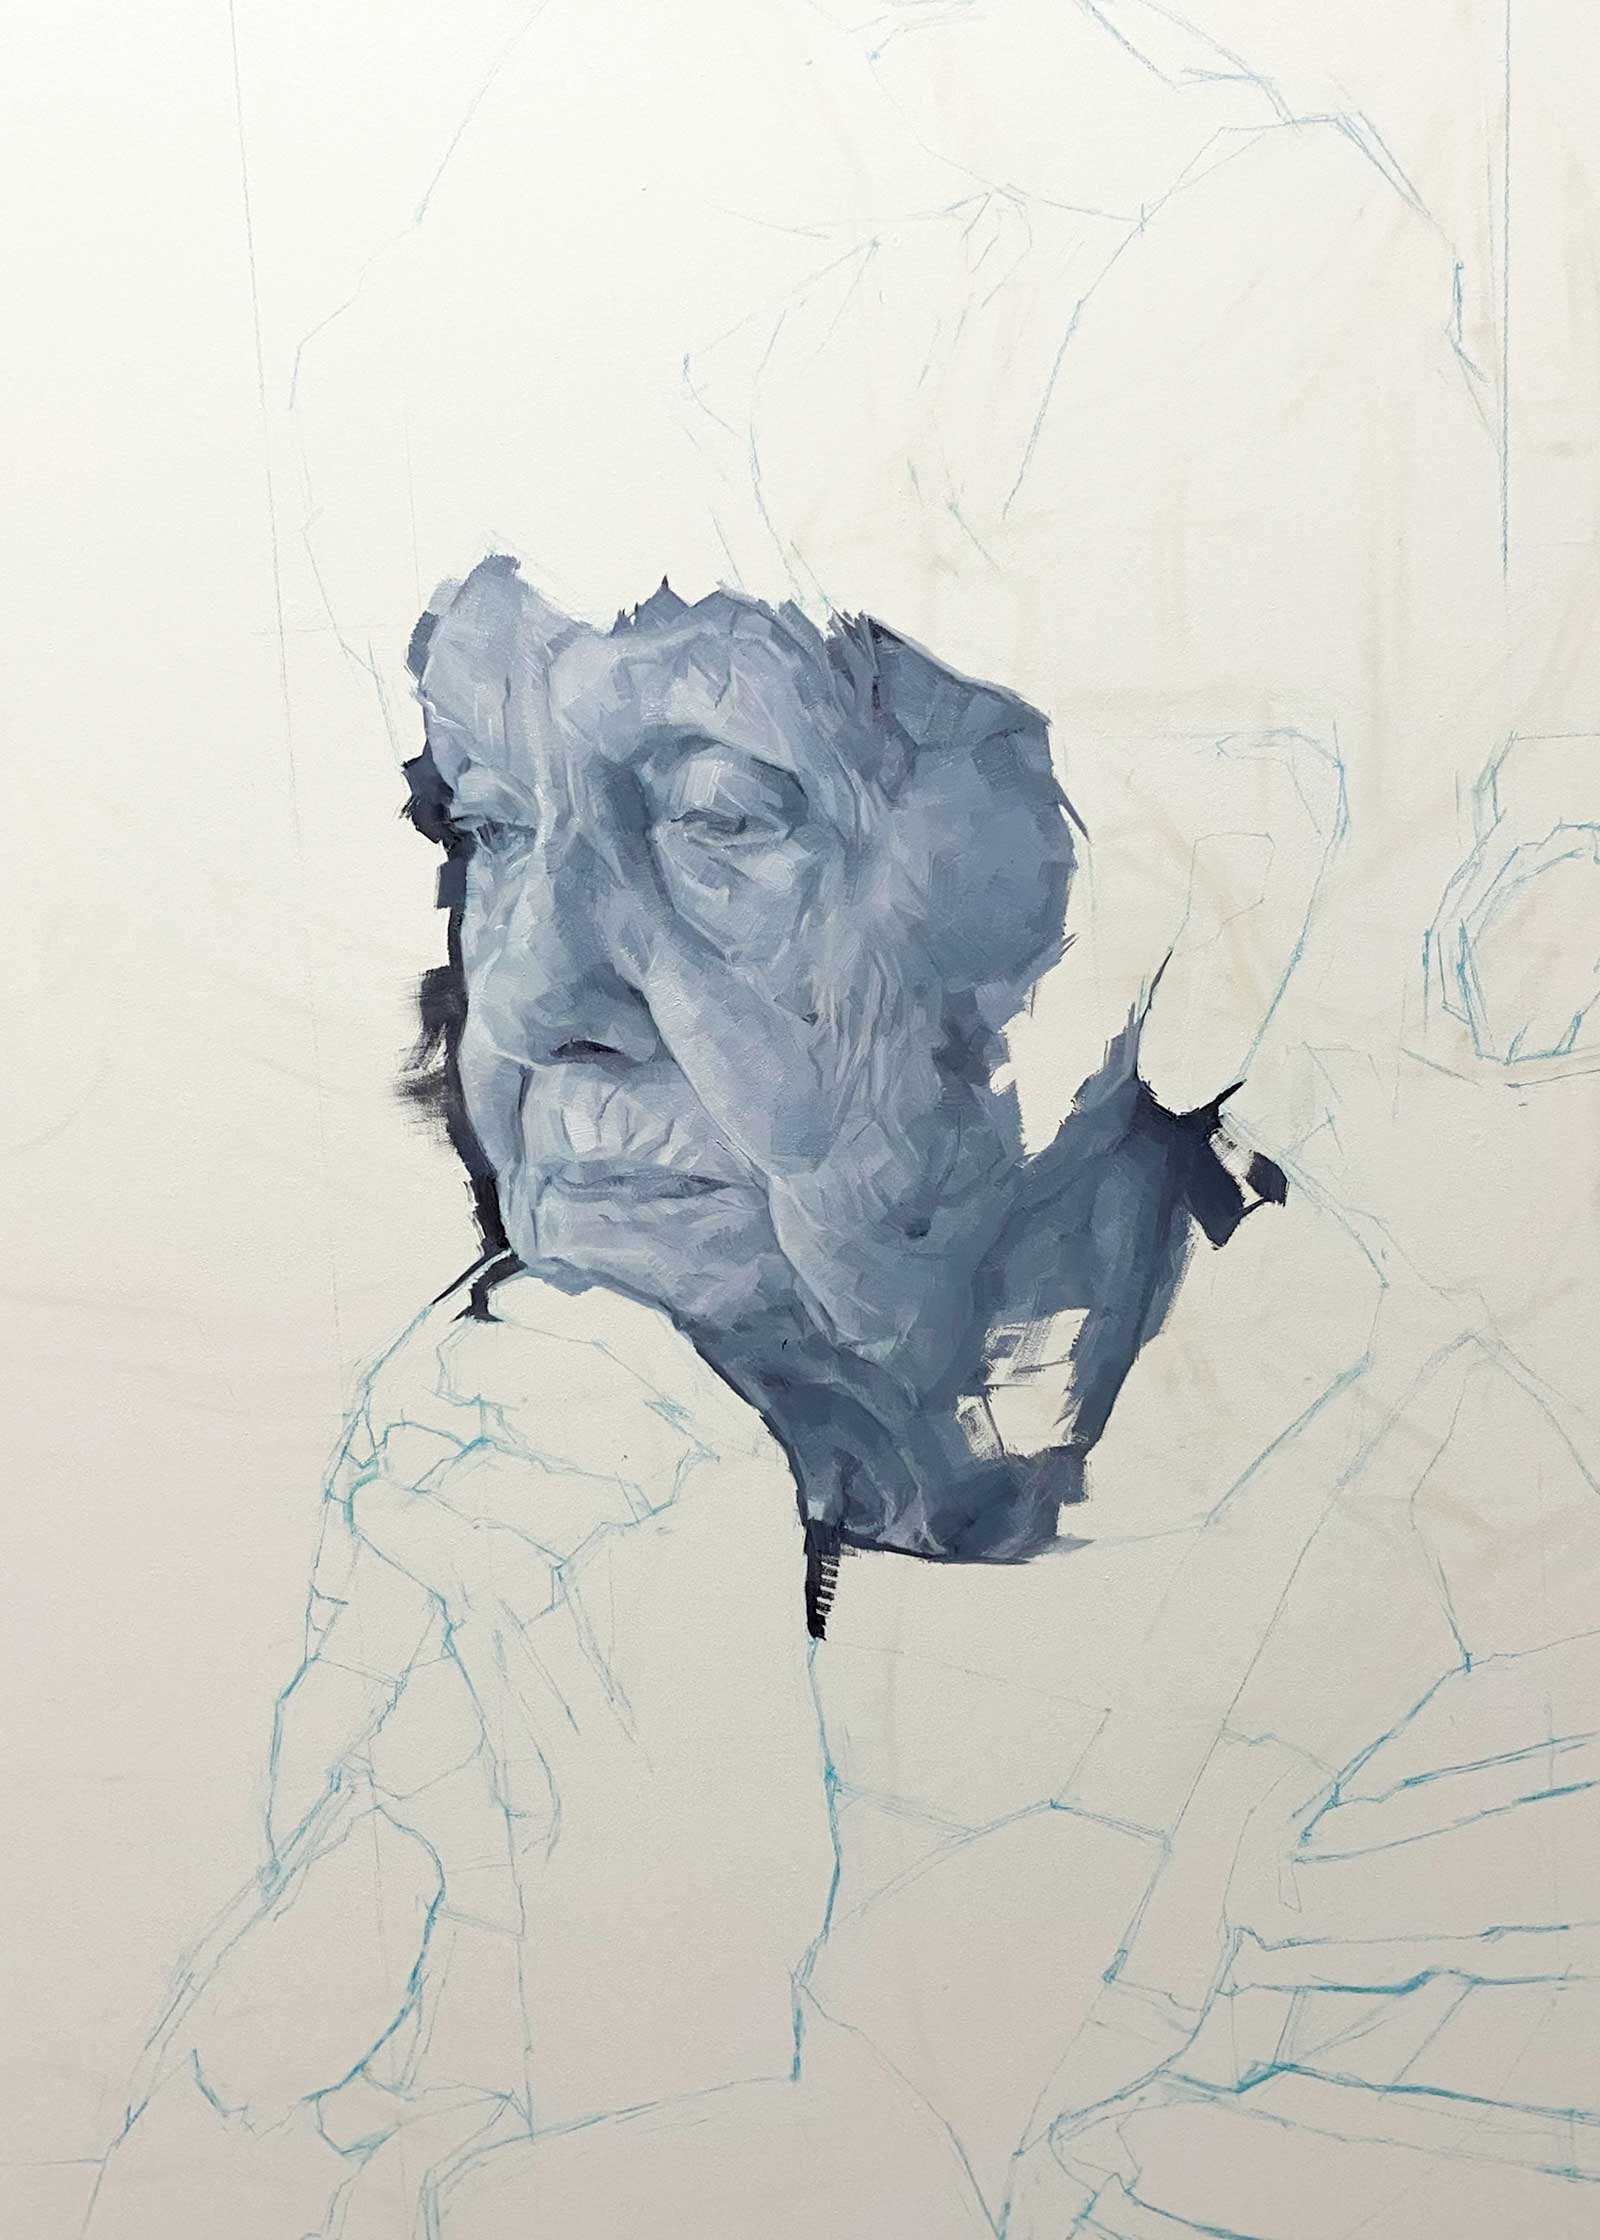
Stage 2 Establishing the Underpainting
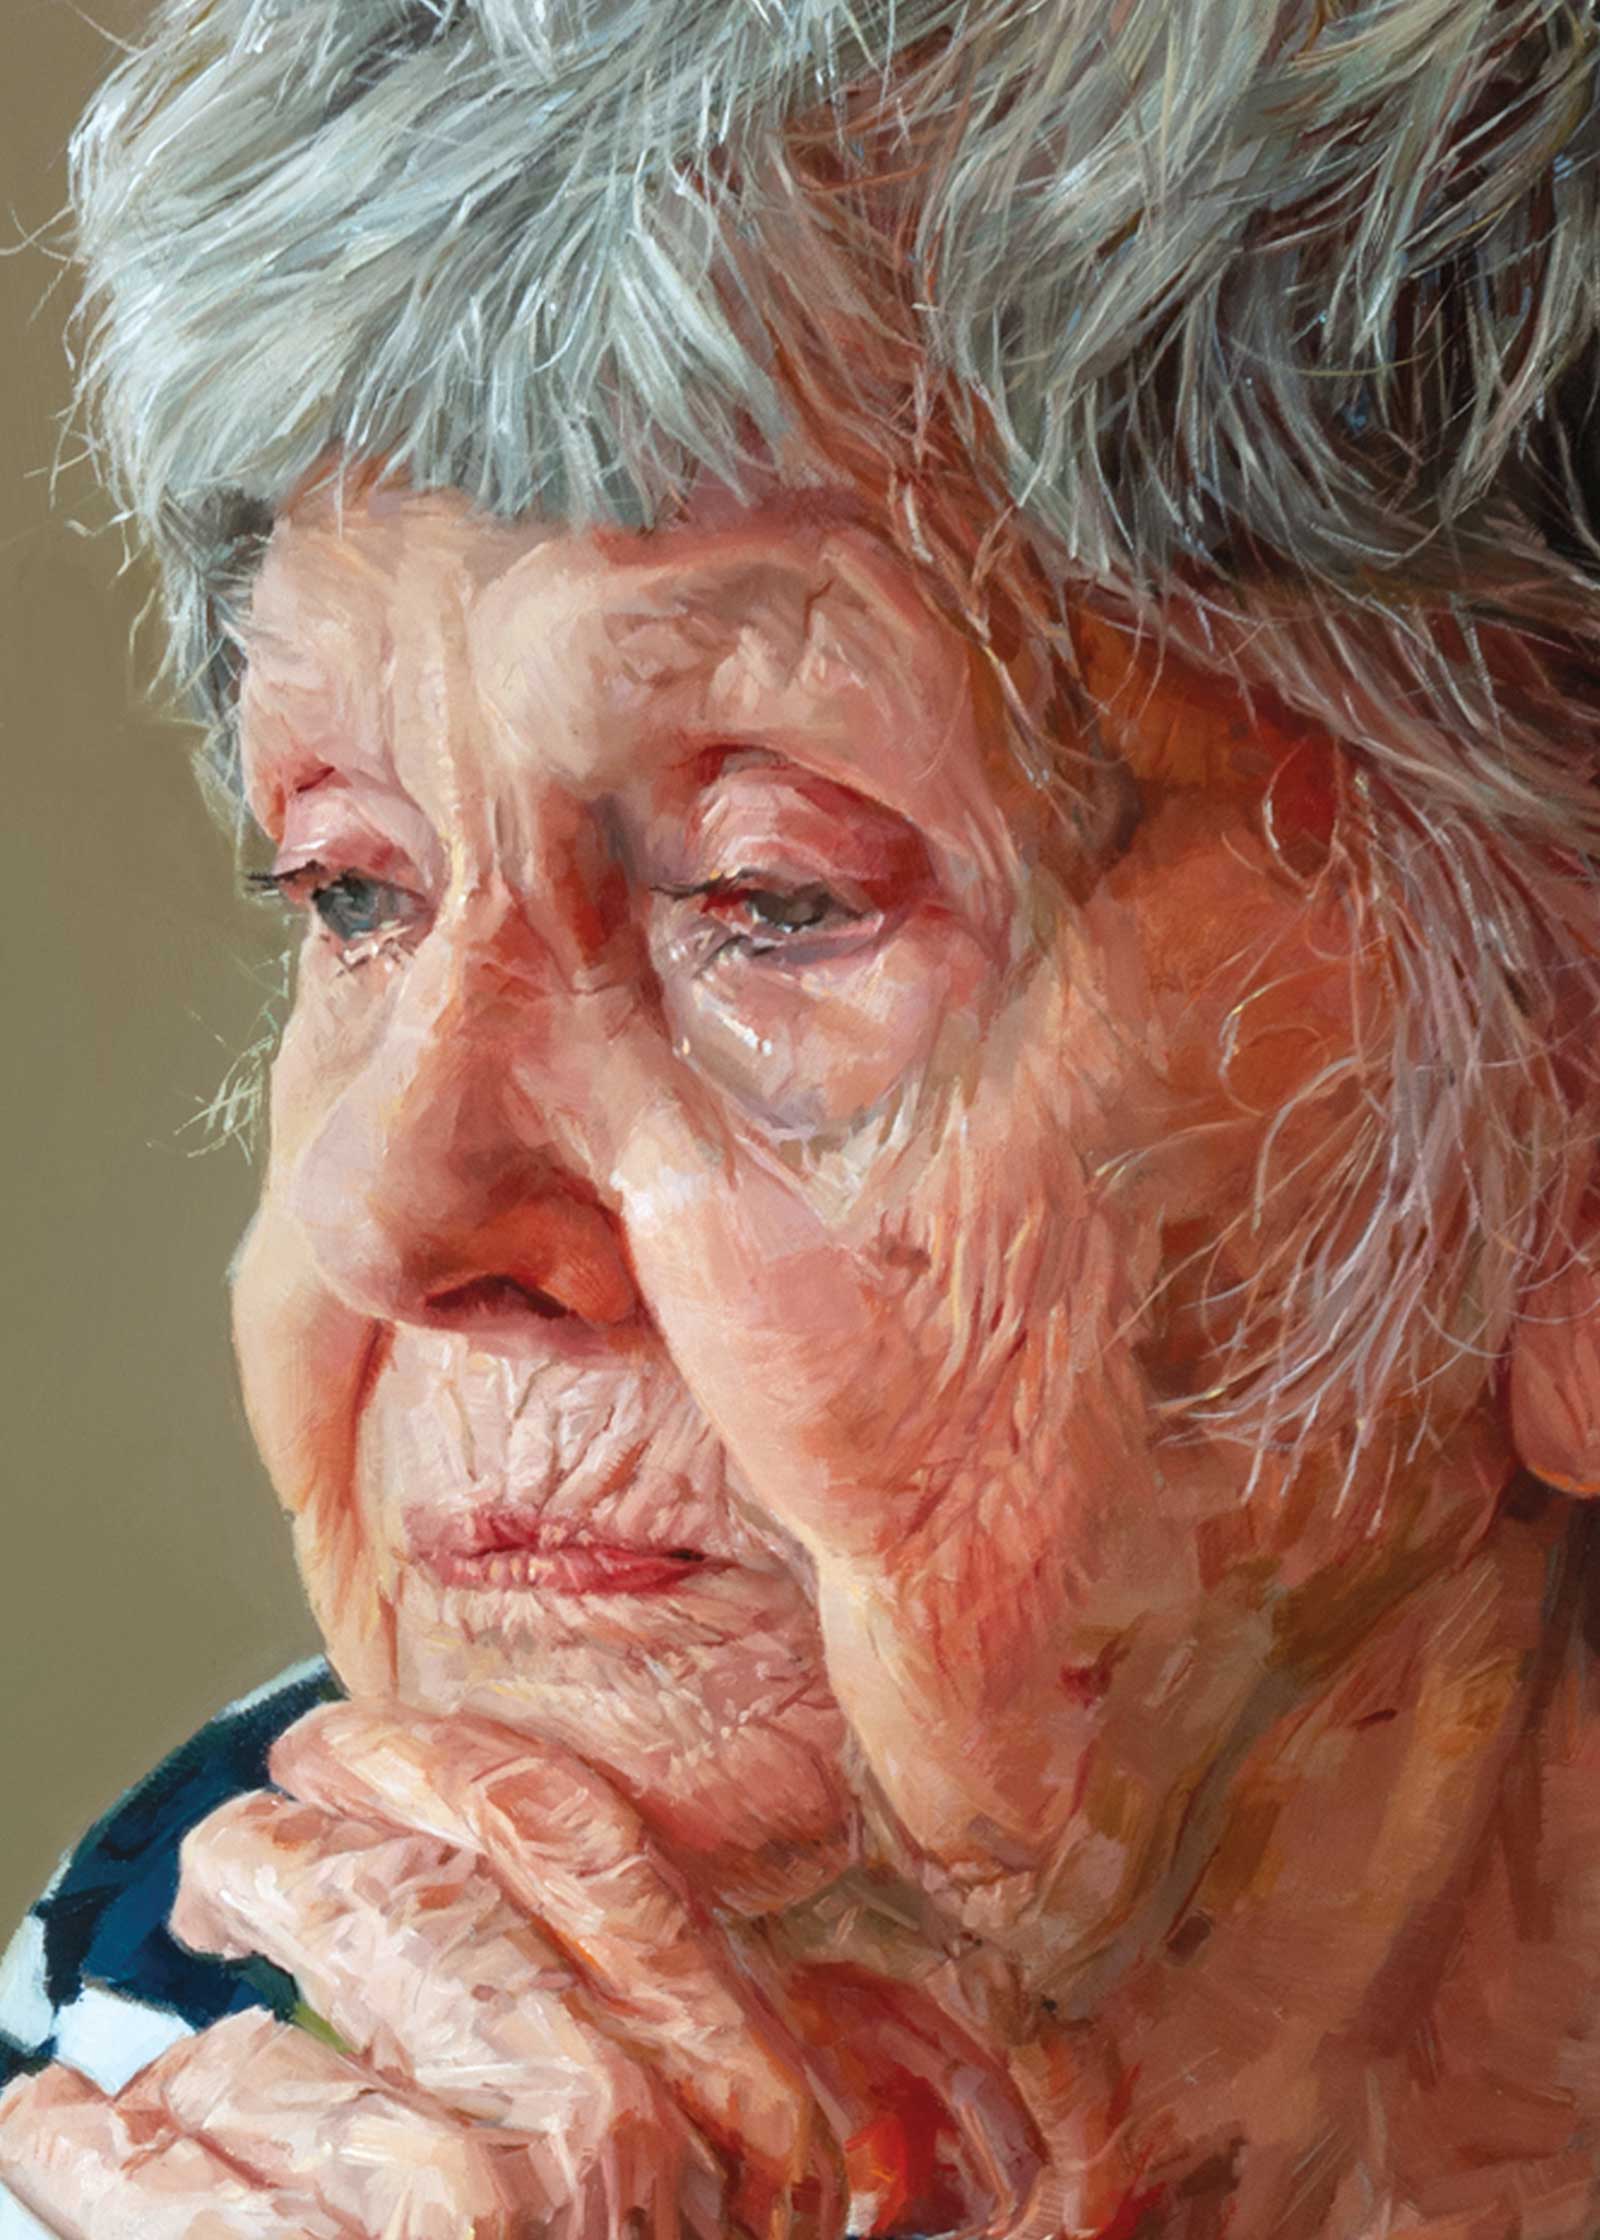
For this painting, I created a very cool-toned underpainting. I don’t always use a monochromatic approach, but I find it helpful because it lets me focus purely on shapes and values before introducing color. My brushes are primarily flats and brights, which create a tiled look I enjoy. Their straight edges also suit how I tend to see forms—more through angles than curves.
Stage 3 Building the First Color Layer
Once the underpainting was complete and dry, I began applying color. I oil out between layers using Liquin, and while I don’t thin my paints, I do apply them thinly so the underpainting can influence the first color pass. This stage is often tricky because the cool undertone shifts how the next colors appear. I have to trust that if a mixture looks right on the palette, it will read accurately on the painting.
I rarely premix colors except for large areas like the background. Instead, I mix with each brushstroke, starting with a broad name for the color—say, “pink”—and then refining to something more specific. That initial naming helps me find the nuance. With each mark, I ask myself: is it lighter or darker, warmer or cooler than the last? This ongoing comparison guides the subtle transitions, especially in skin tones.
Stage 4 Refining and Adjusting
After the first color pass, I step back to assess drawing accuracy and color relationships. Here, I noticed I had flattened the curve of the cheek, and made corrections. I then refine the painting by softening edges, adjusting transitions and adding detail. Highlights and small touches, like wispy hairs, are what finally bring the subject to life. Depending on the piece, I’ll build one to three color layers, adding as needed.
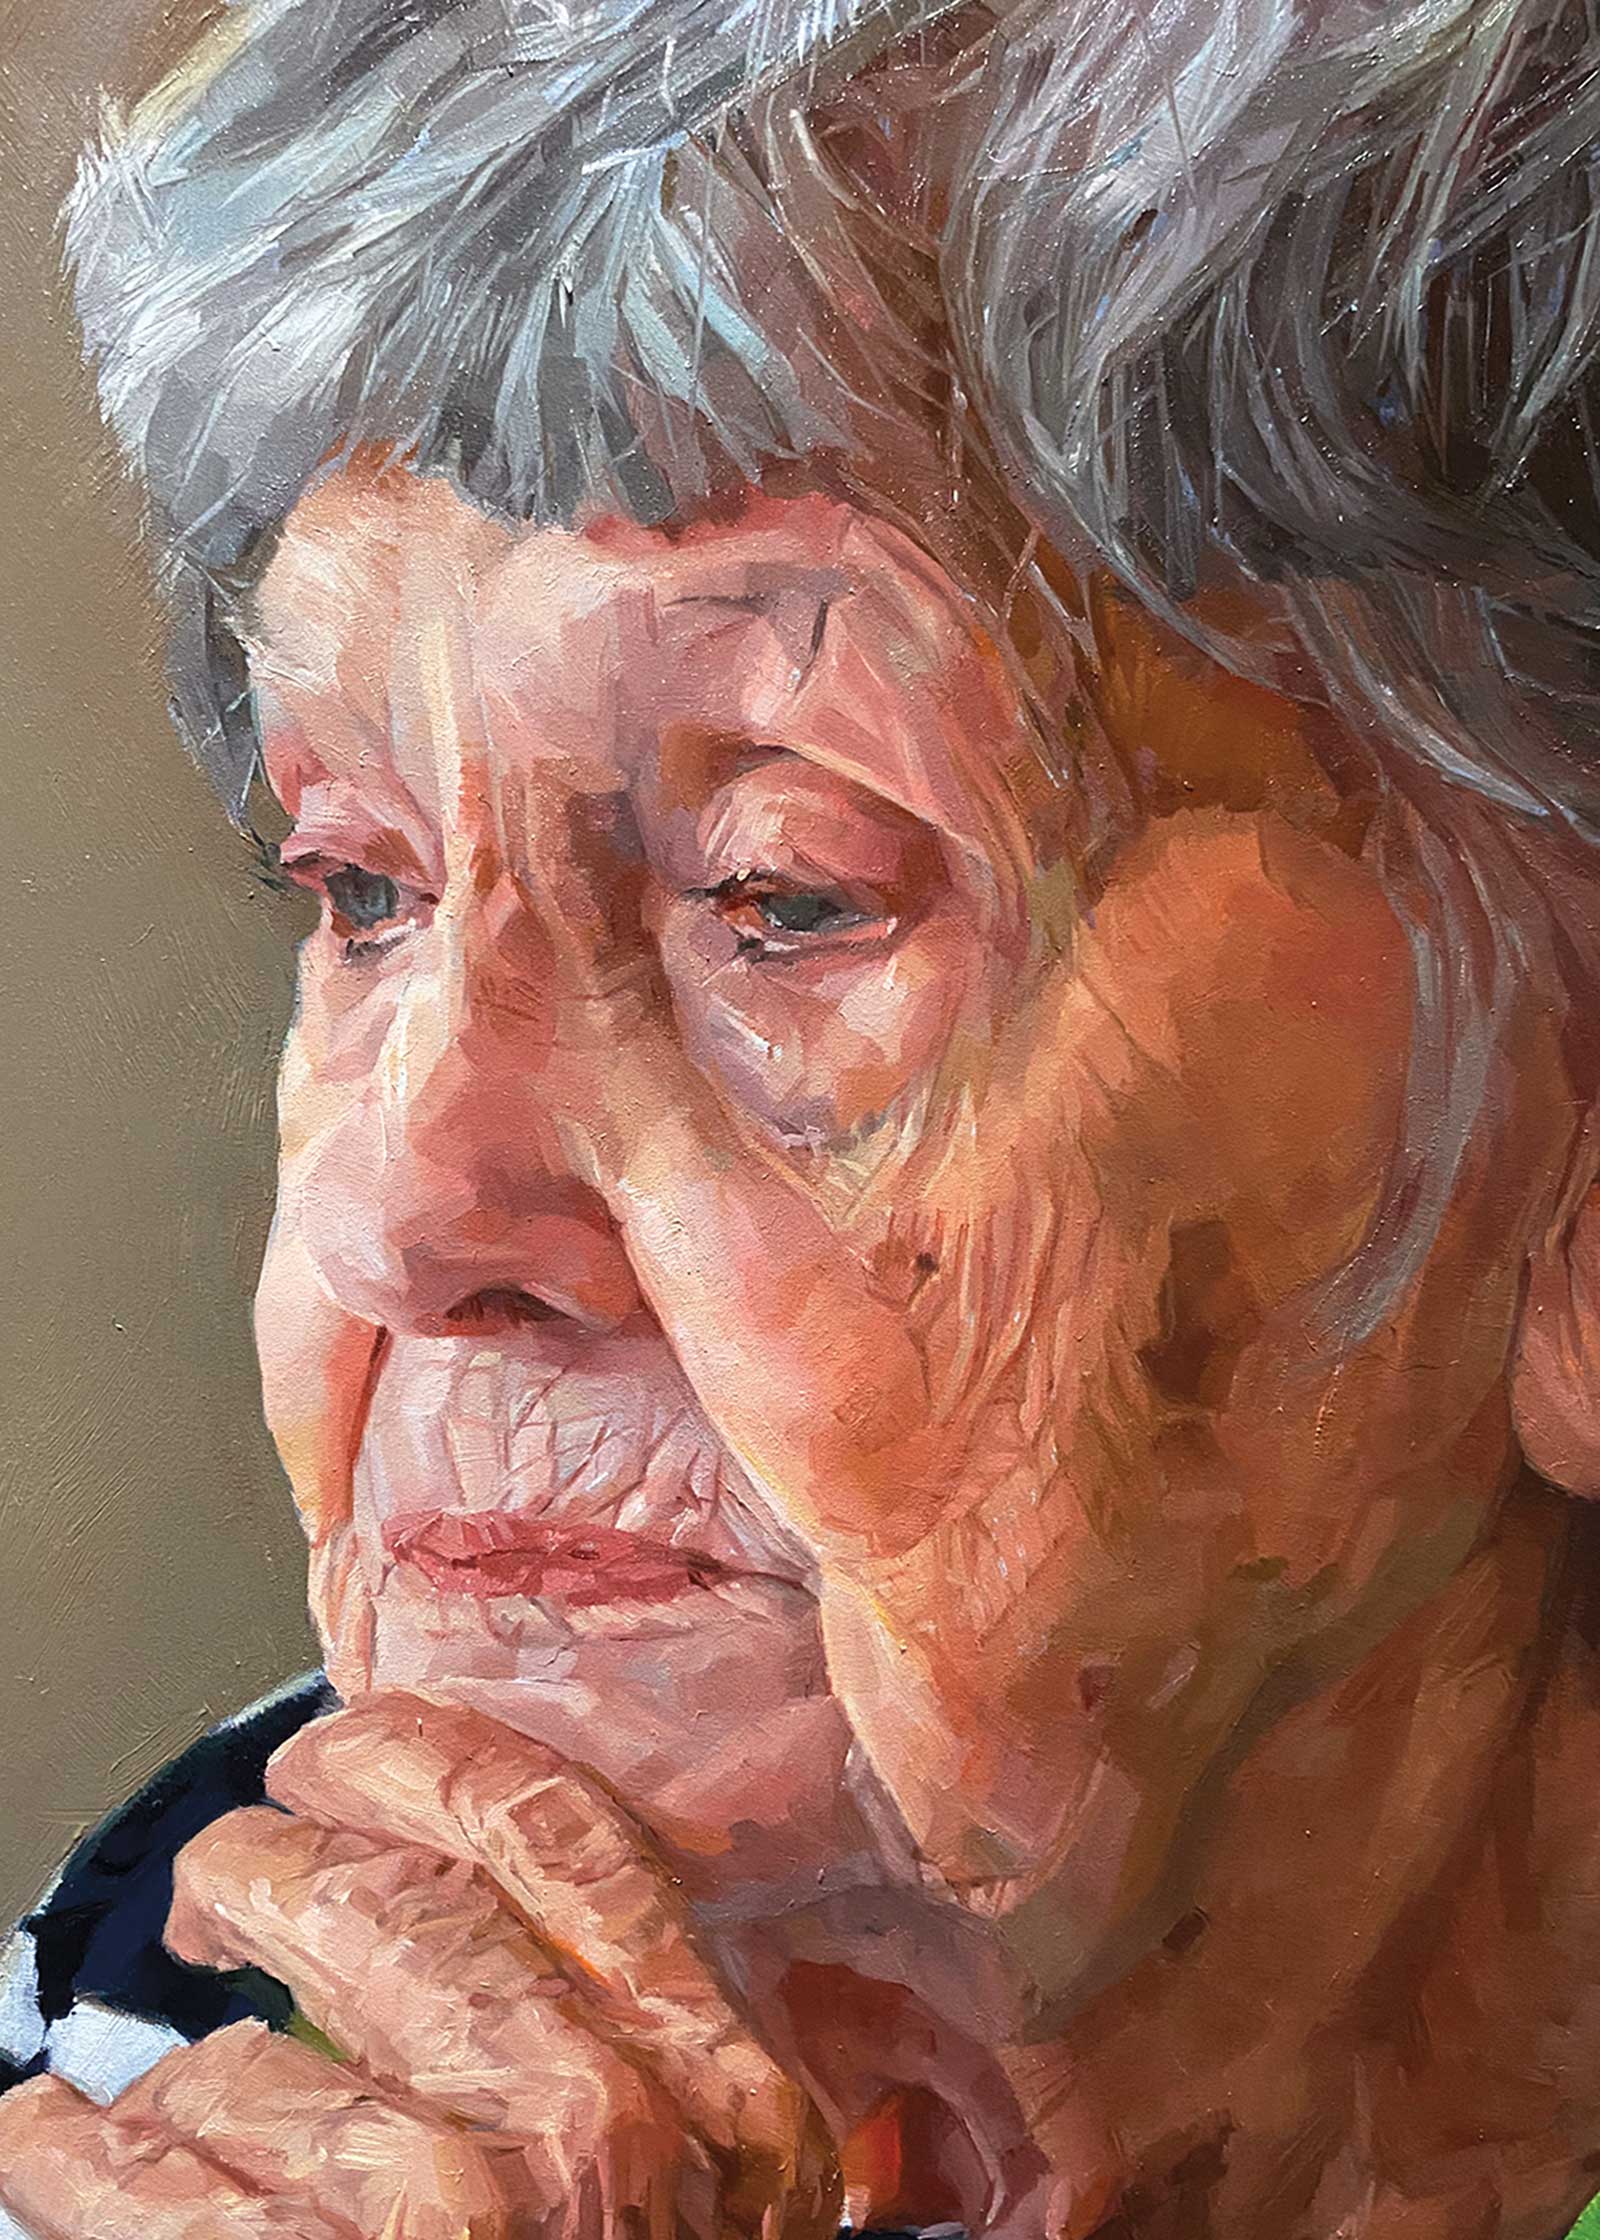
Stage 5 Finishing Touches
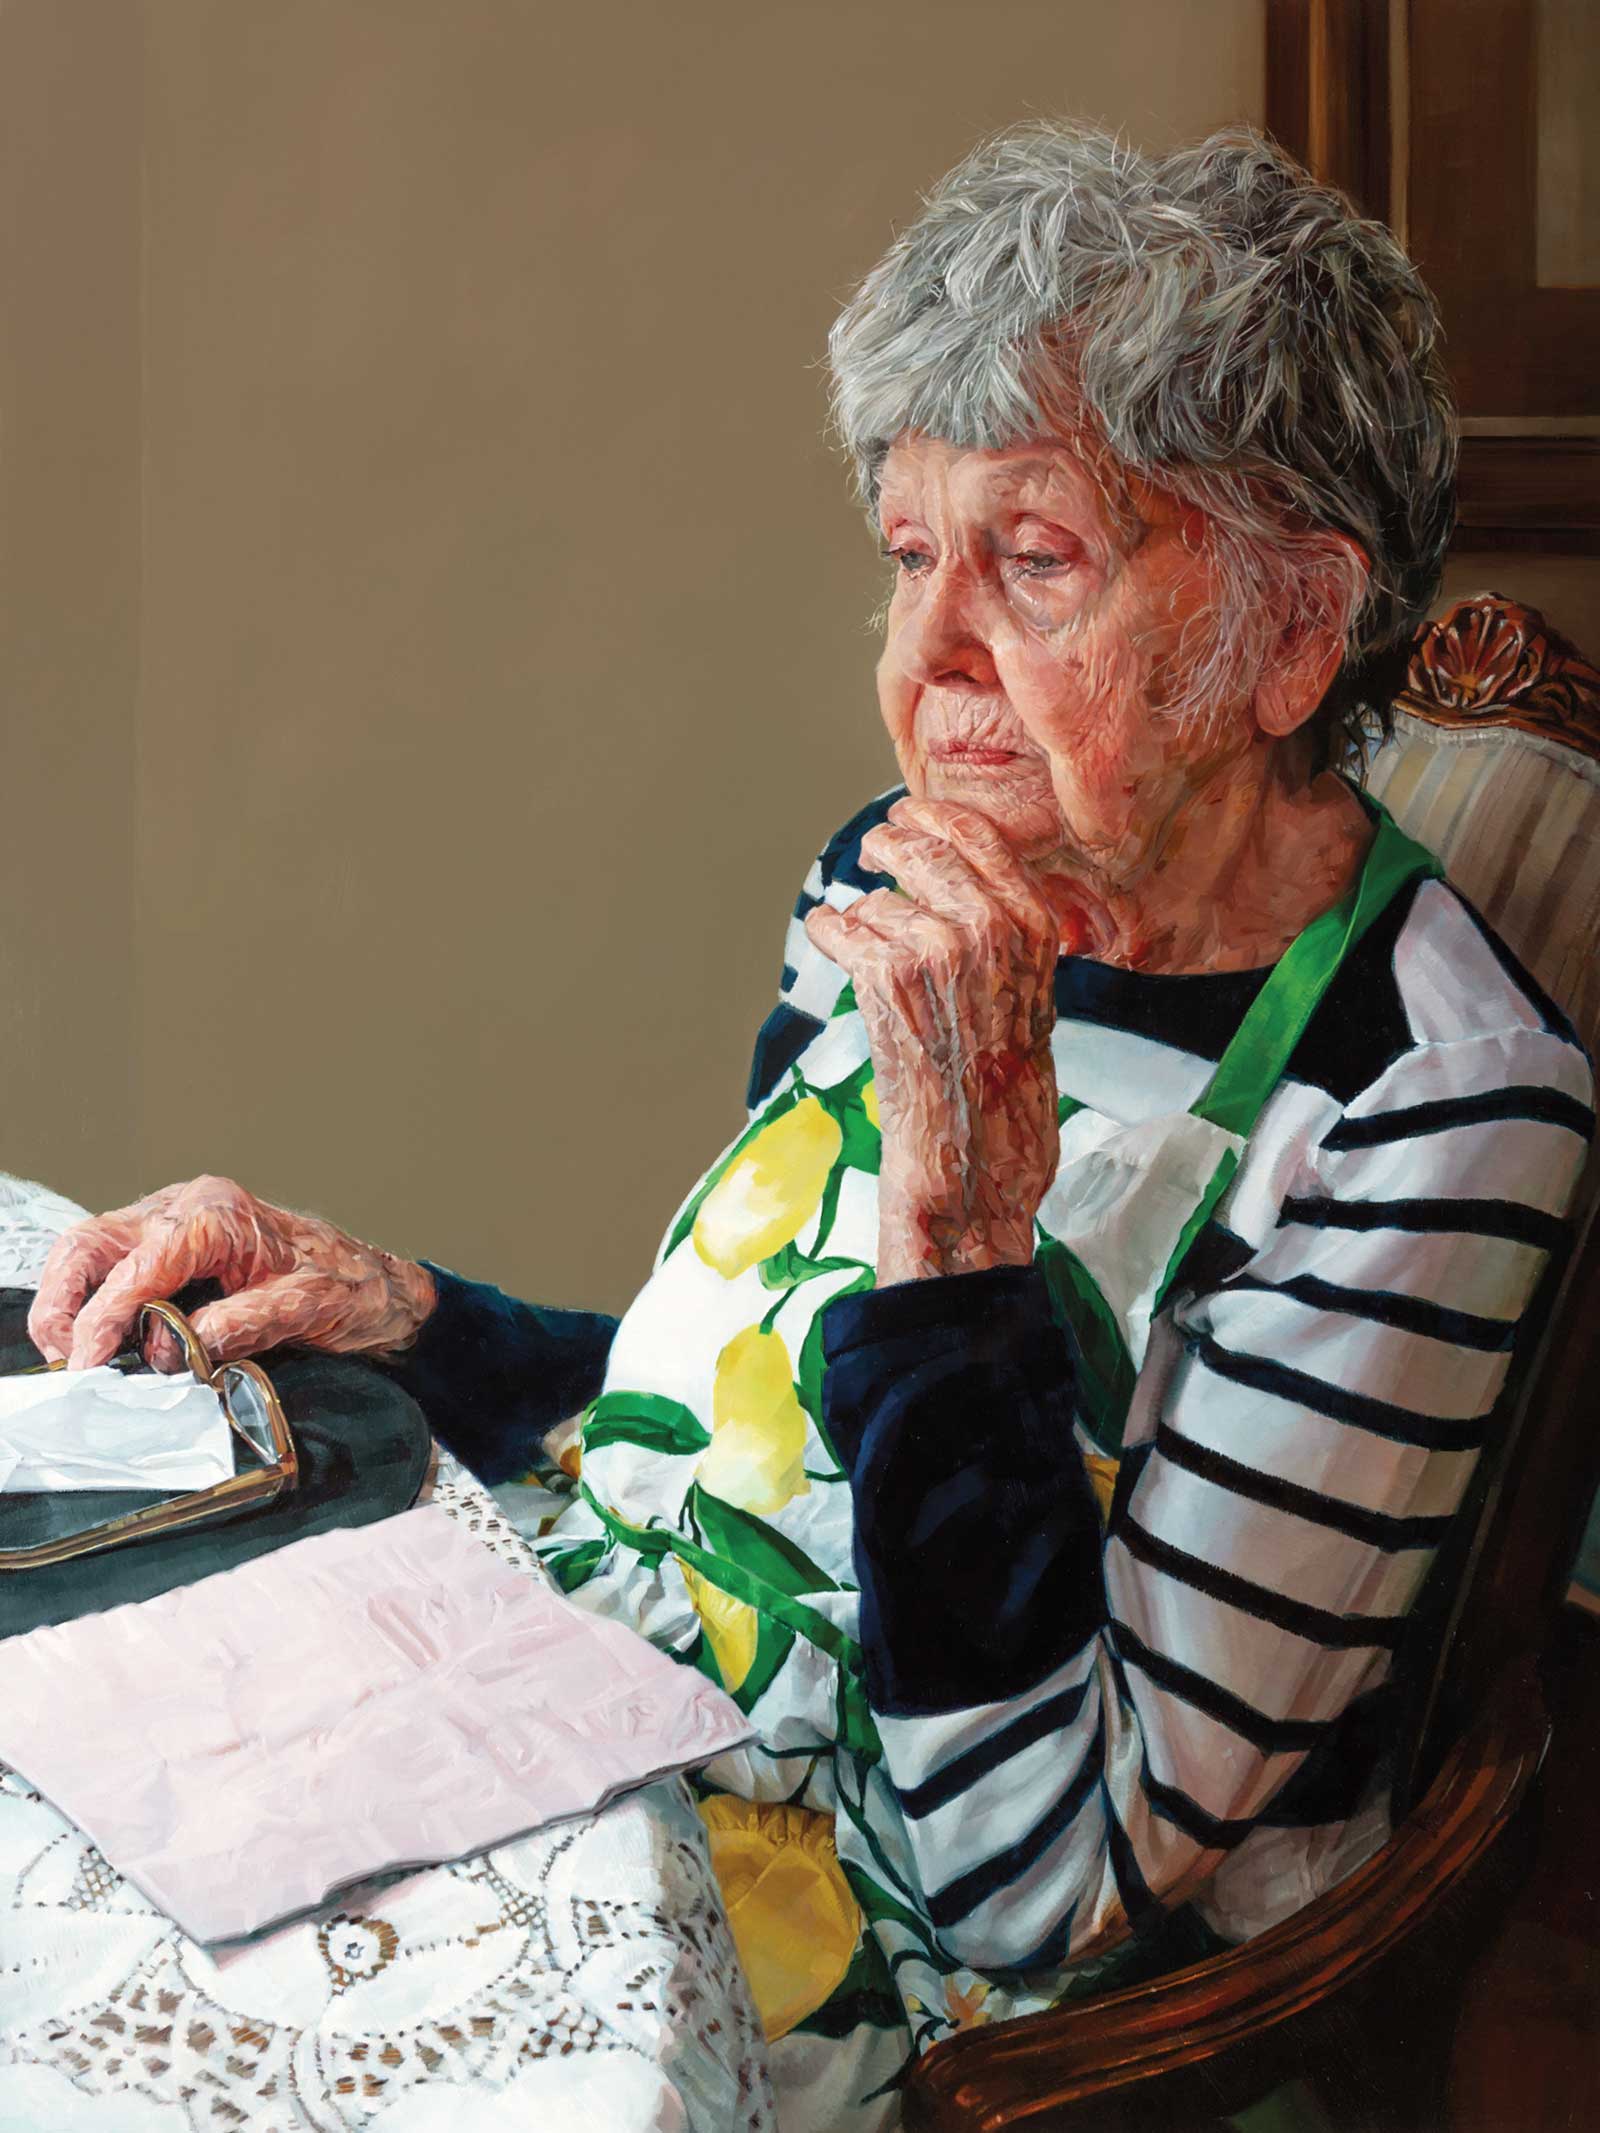
Even in the finished painting, the tiled effect remains visible. My strokes are not overly blended, allowing the paint itself to stay active. The level of detail depends on my goal: I want viewers to feel they’ve encountered the subject, not just looked at a picture. When I sense that connection has been achieved to the best of my ability, the painting is complete.
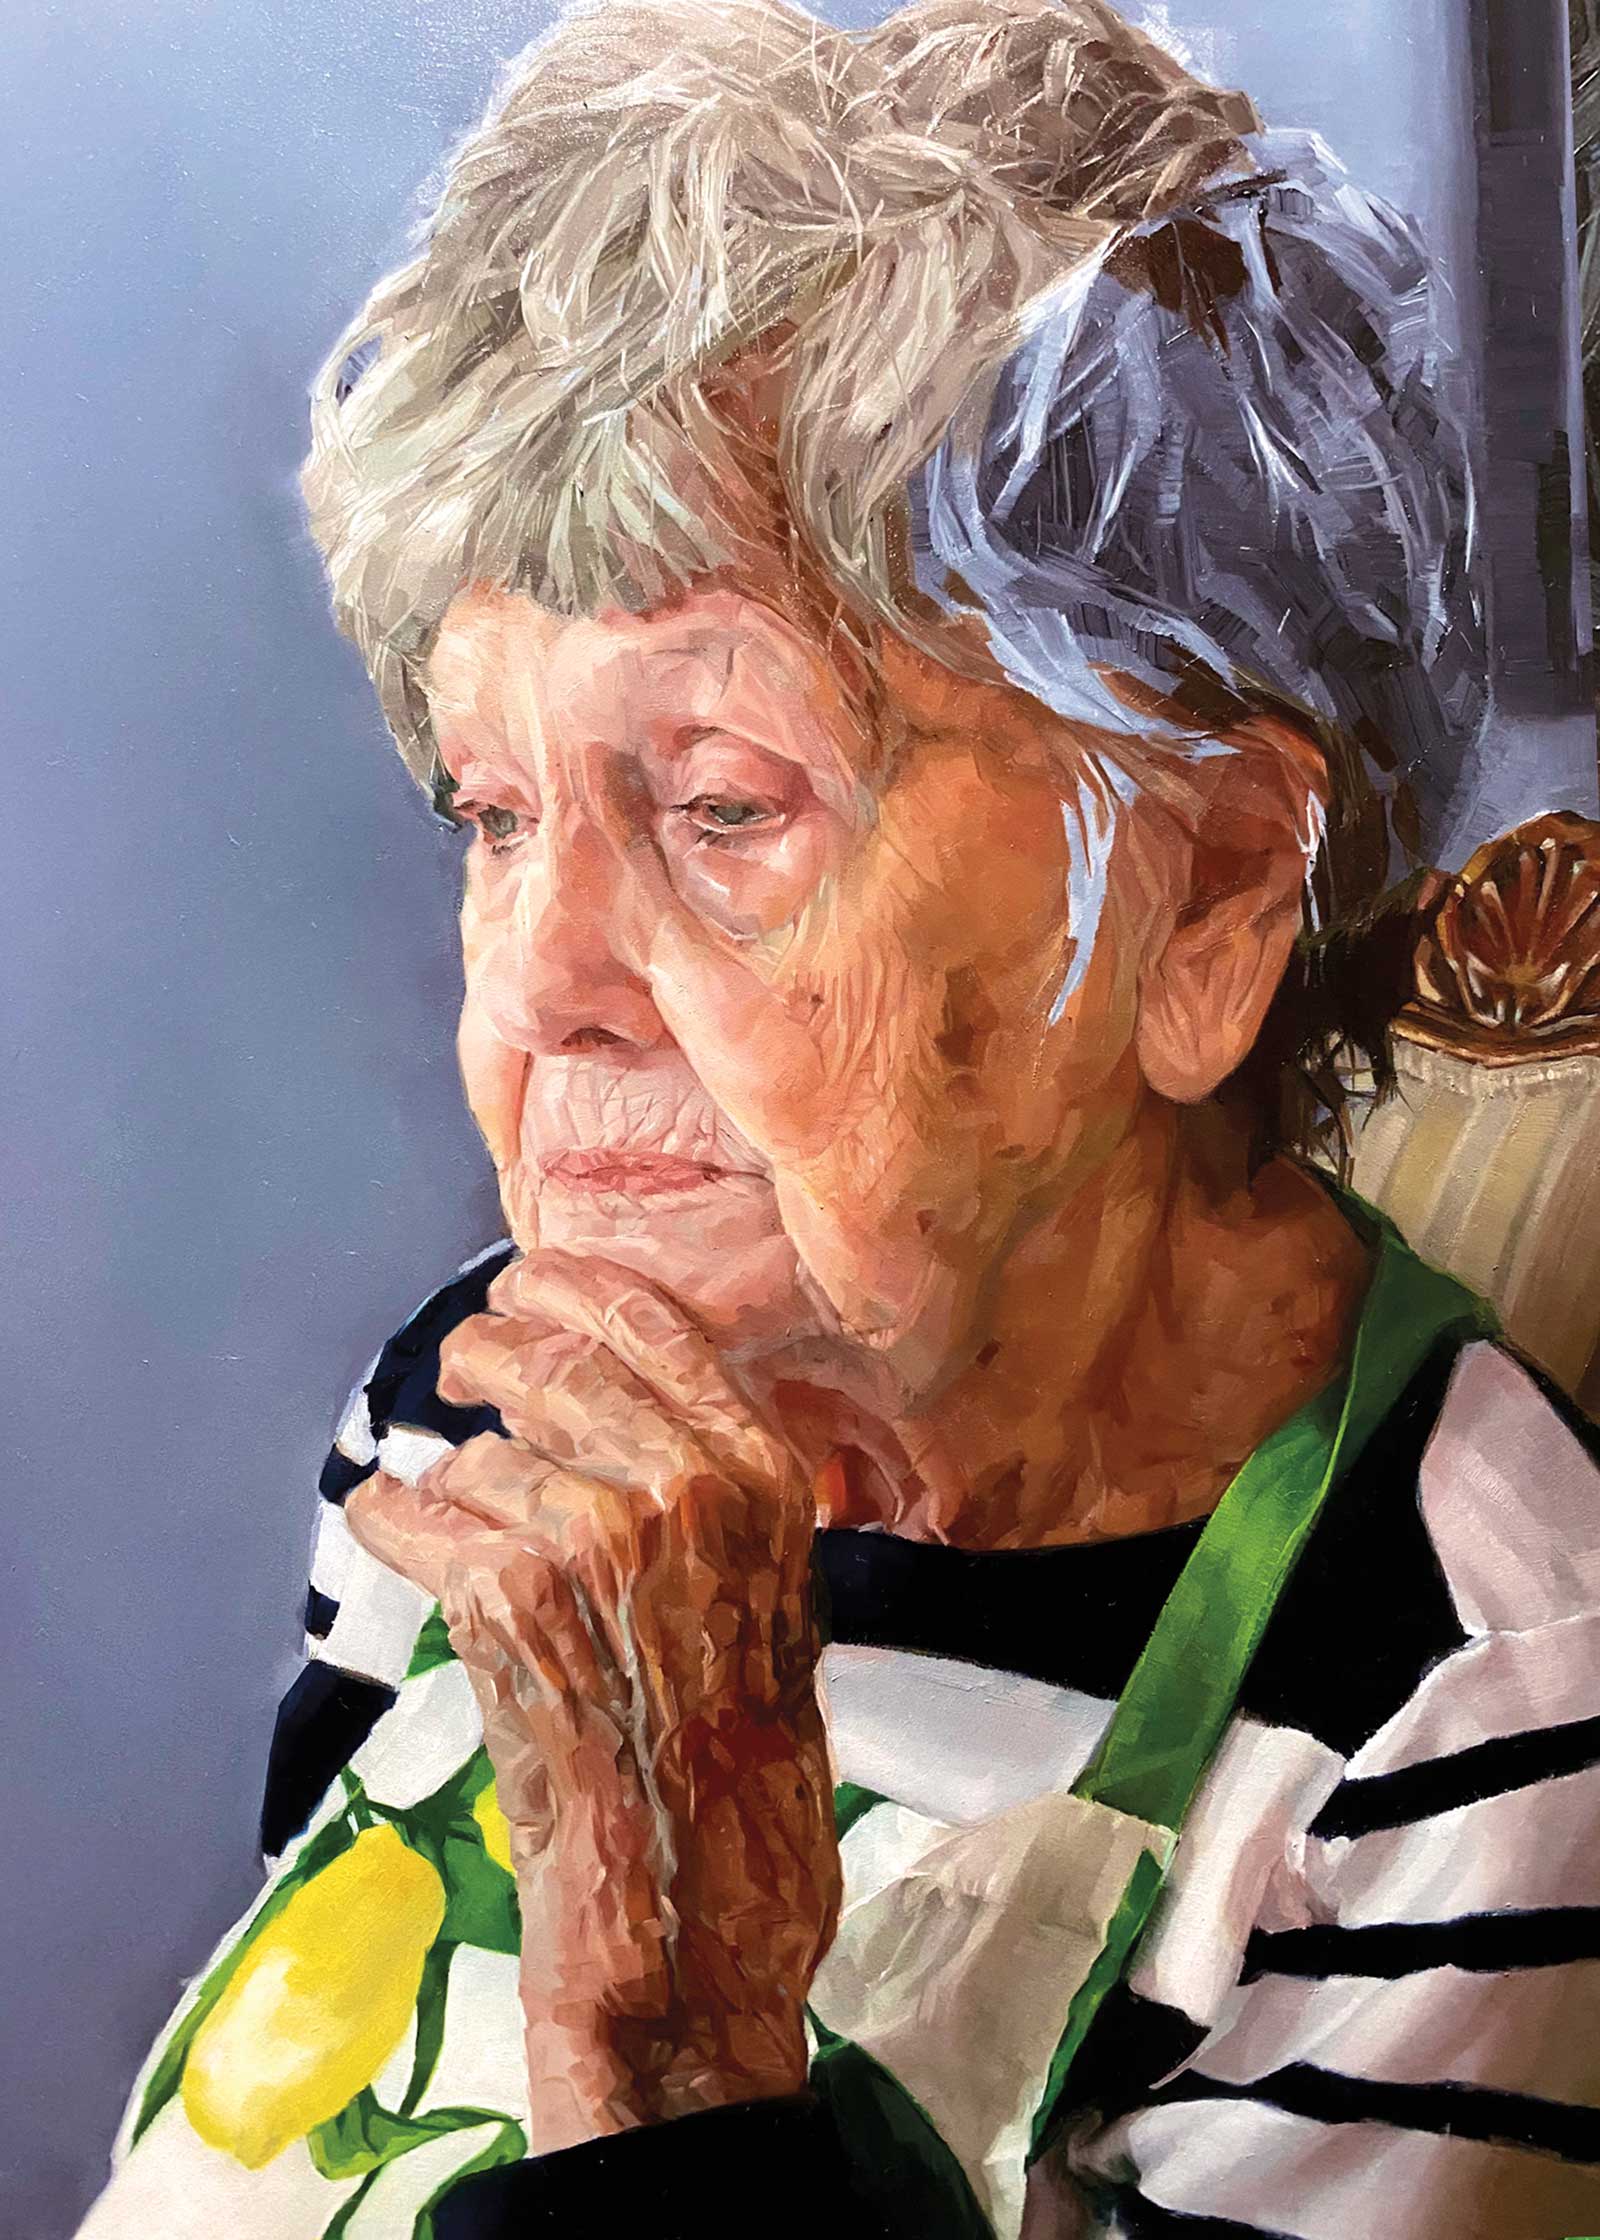
Stage 6 Finished Artwork
Carlyla, oil on panel, 24 x 18" (60 x 45 cm)
Amy Werntz is a Dallas, Texas-based realist painter whose work honors ordinary moments and highlights the beauty of aging. A self-taught artist with a background in interior design, she creates intimate portraits that explore posture, expression and memory. In 2025, she won The Bennett Prize, a prestigious national award for women figurative realist painters. She is represented by Valley House Gallery in Dallas.