


I’ve learned to start each painting by asking, “What do I want to say?” Over the years, I’ve found that my most compelling work isn’t just about observation, it’s about storytelling. The painting featured in this demonstration, Another Farewell, captures a winter sunset in Vermont’s Champlain Valley, glowing in the final light of day. But beneath the surface, it speaks to something deeper—change, nostalgia and the quiet disappearance of the familiar.
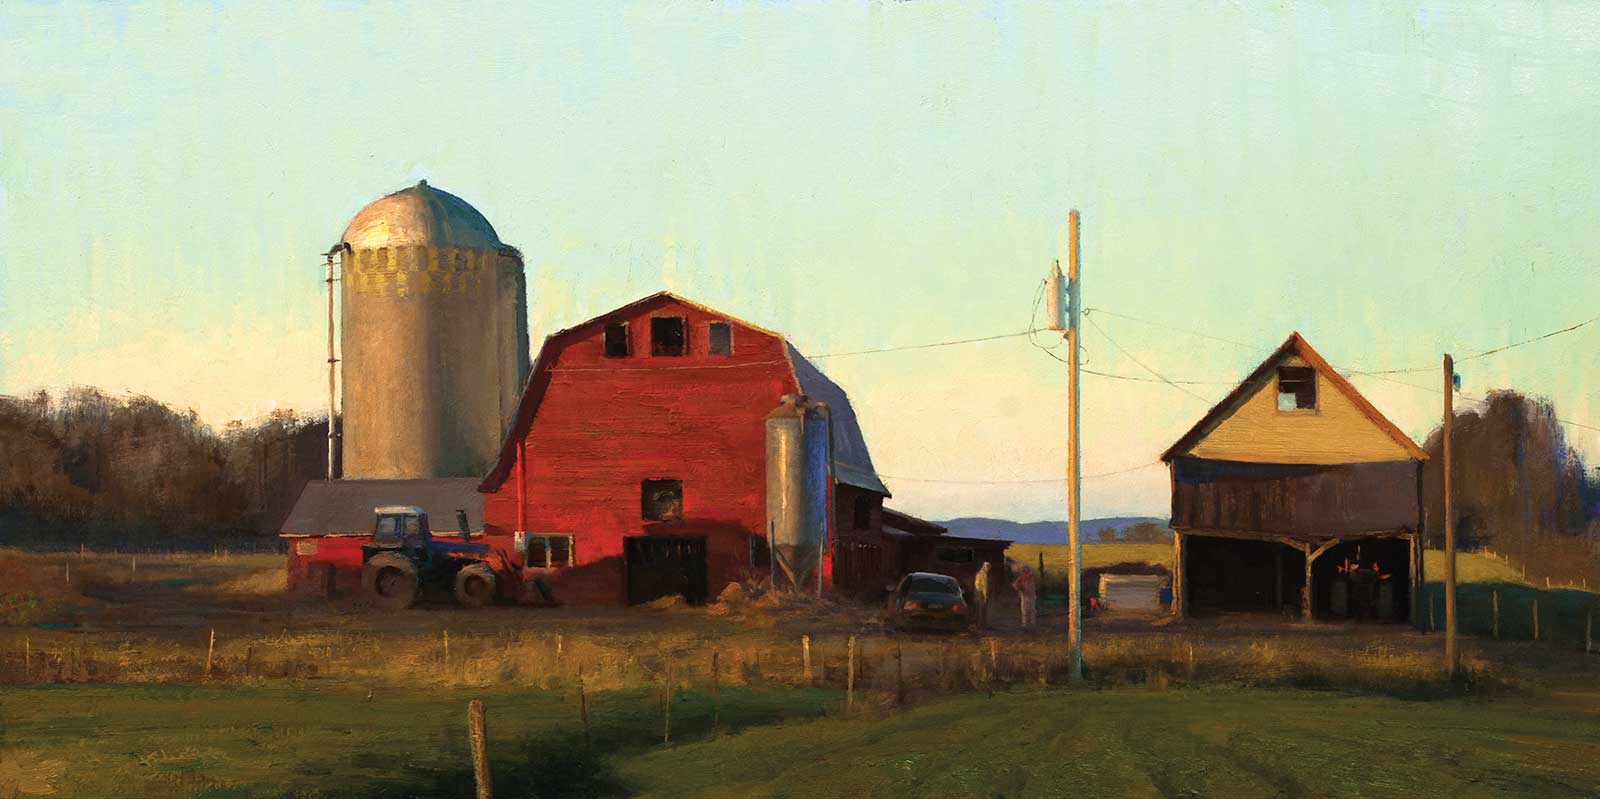
From Nortontown, oil on panel, 15 x 30” (38 x 76 cm)
Oil painting is often seen as an intuitive process, but structure plays a vital role in translating vision into reality. Rather than improvising, I work in deliberate stages, ensuring both technical precision and artistic expression.
Ideally, the process begins with direct observation. A small plein air sketch captures the fleeting light and atmosphere, revealing nuances a photograph might miss. Back in the studio, I refine the composition through thumbnail sketches, ensuring that shapes and values guide the viewer’s eye naturally. The painting starts with an underpainting of transparent earth red, thinned with Gamsol, to establish structure and proportions. Working in thin layers allows me to make adjustments before committing to opaque paint. The block-in stage then covers the canvas with tube-consistency paint, prioritizing values over details.
8000 Days, oil on panel, 12 x 12” (30 x 30 cm)
As the piece develops, I employ glazing (thin, transparent layers) to build depth and atmosphere. This technique allows light to pass through, creating a luminous effect that’s difficult to achieve with opaque paint alone. Throughout the process, I continually ask myself: What bothers me the most? This question keeps me focused, helping me refine edges, values and shapes to strengthen the composition. My goal isn’t perfection, it’s clarity.

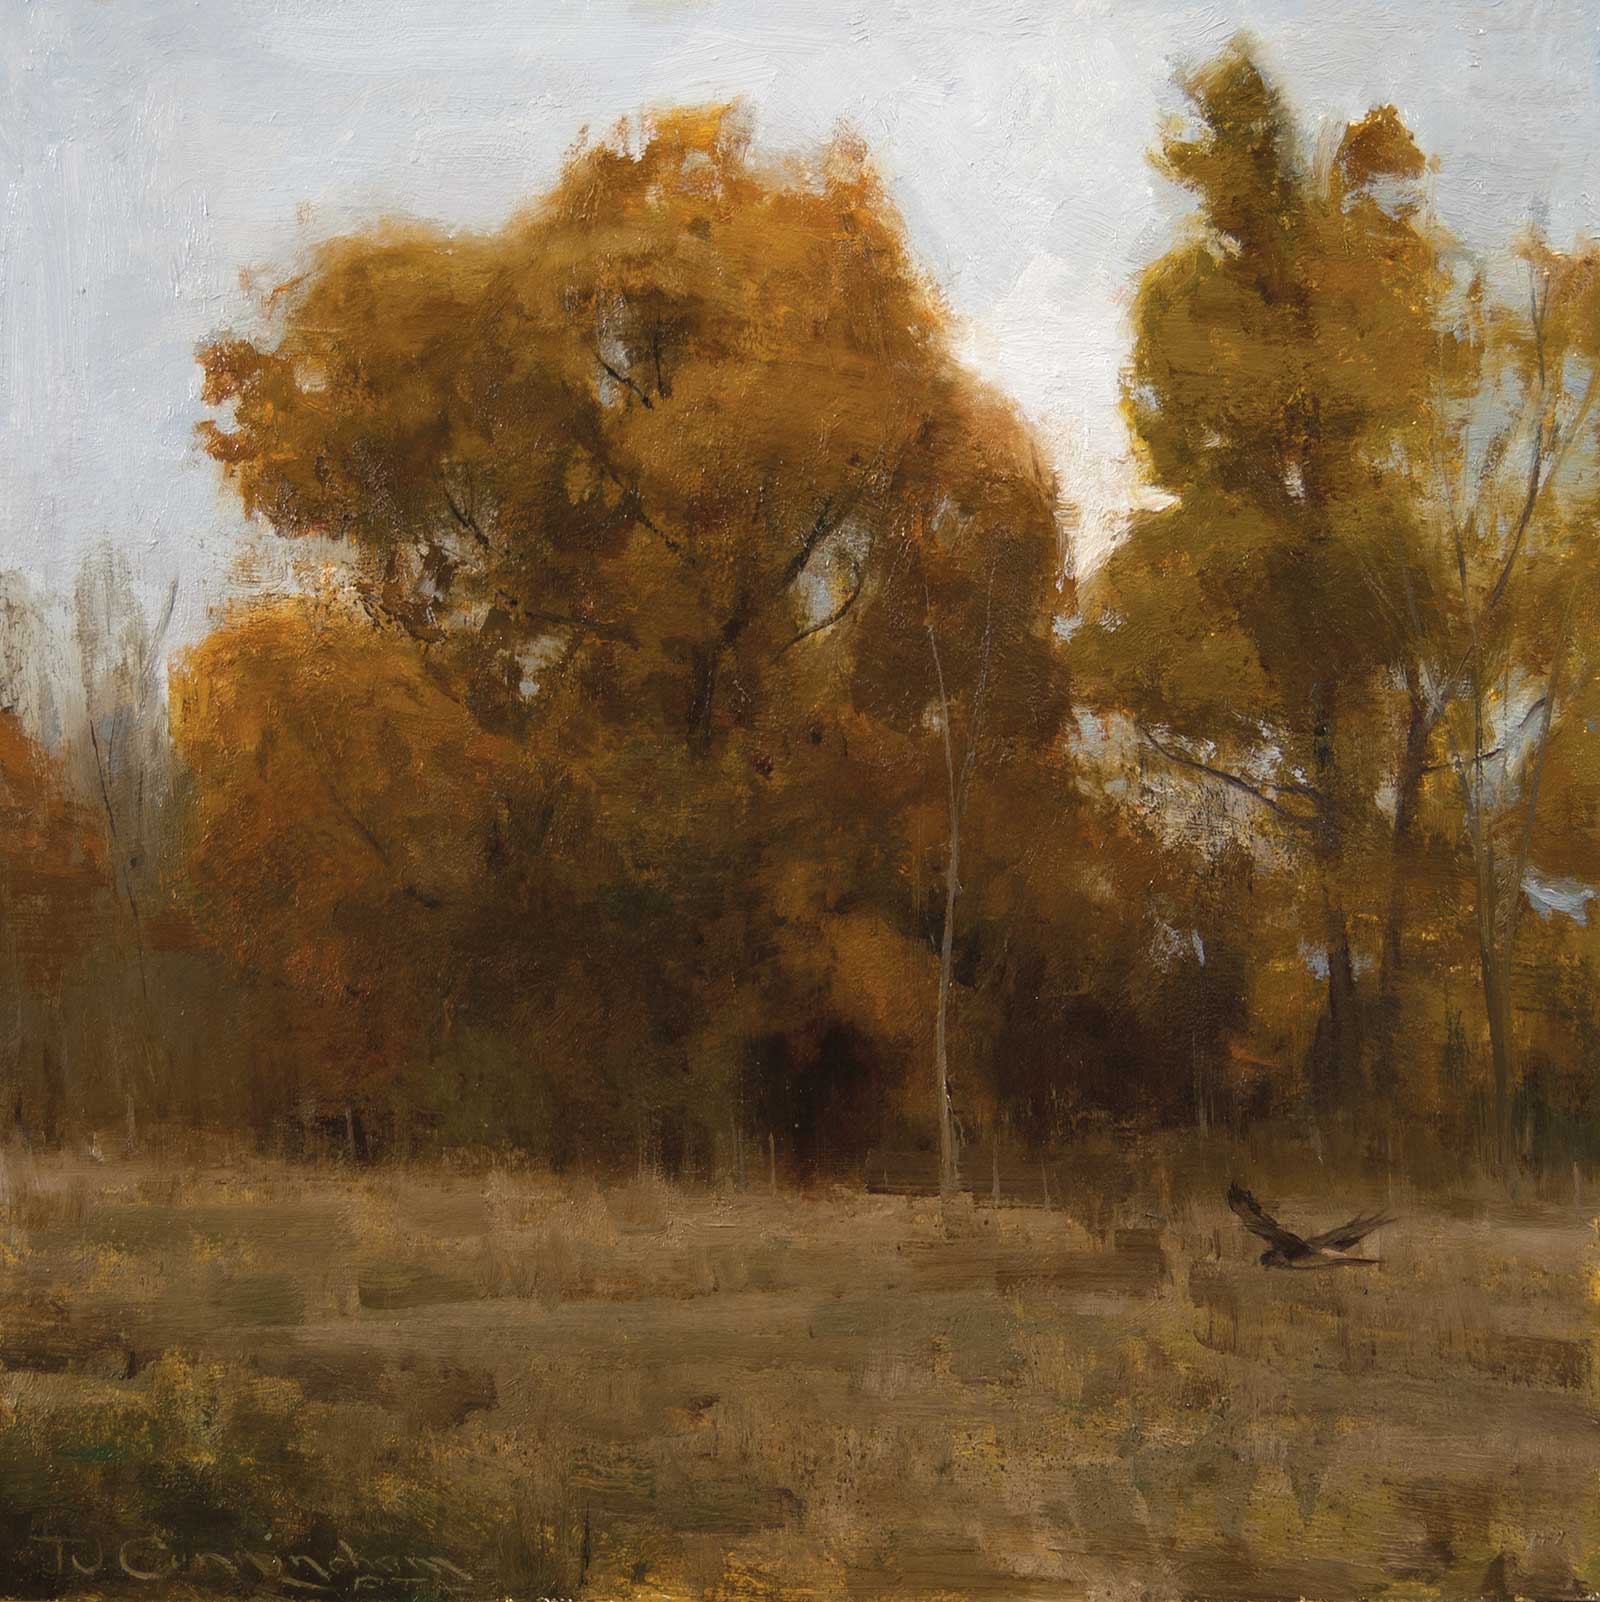
Snow in the Cove, oil on panel, 18 x 24” (45 x 60 cm)
The barn in this painting once stood as part of Vermont’s working landscape. Now, it’s gone. As I build layers, I reflect on the farmers who worked this land, the quiet rhythm of their days, and the way history lingers in the landscape. Ultimately, I don’t just want to depict a scene, I want to invite the viewer into its story. To share a moment, a memory, a farewell.
My Art in the Making Another Farewell
The Primary Source
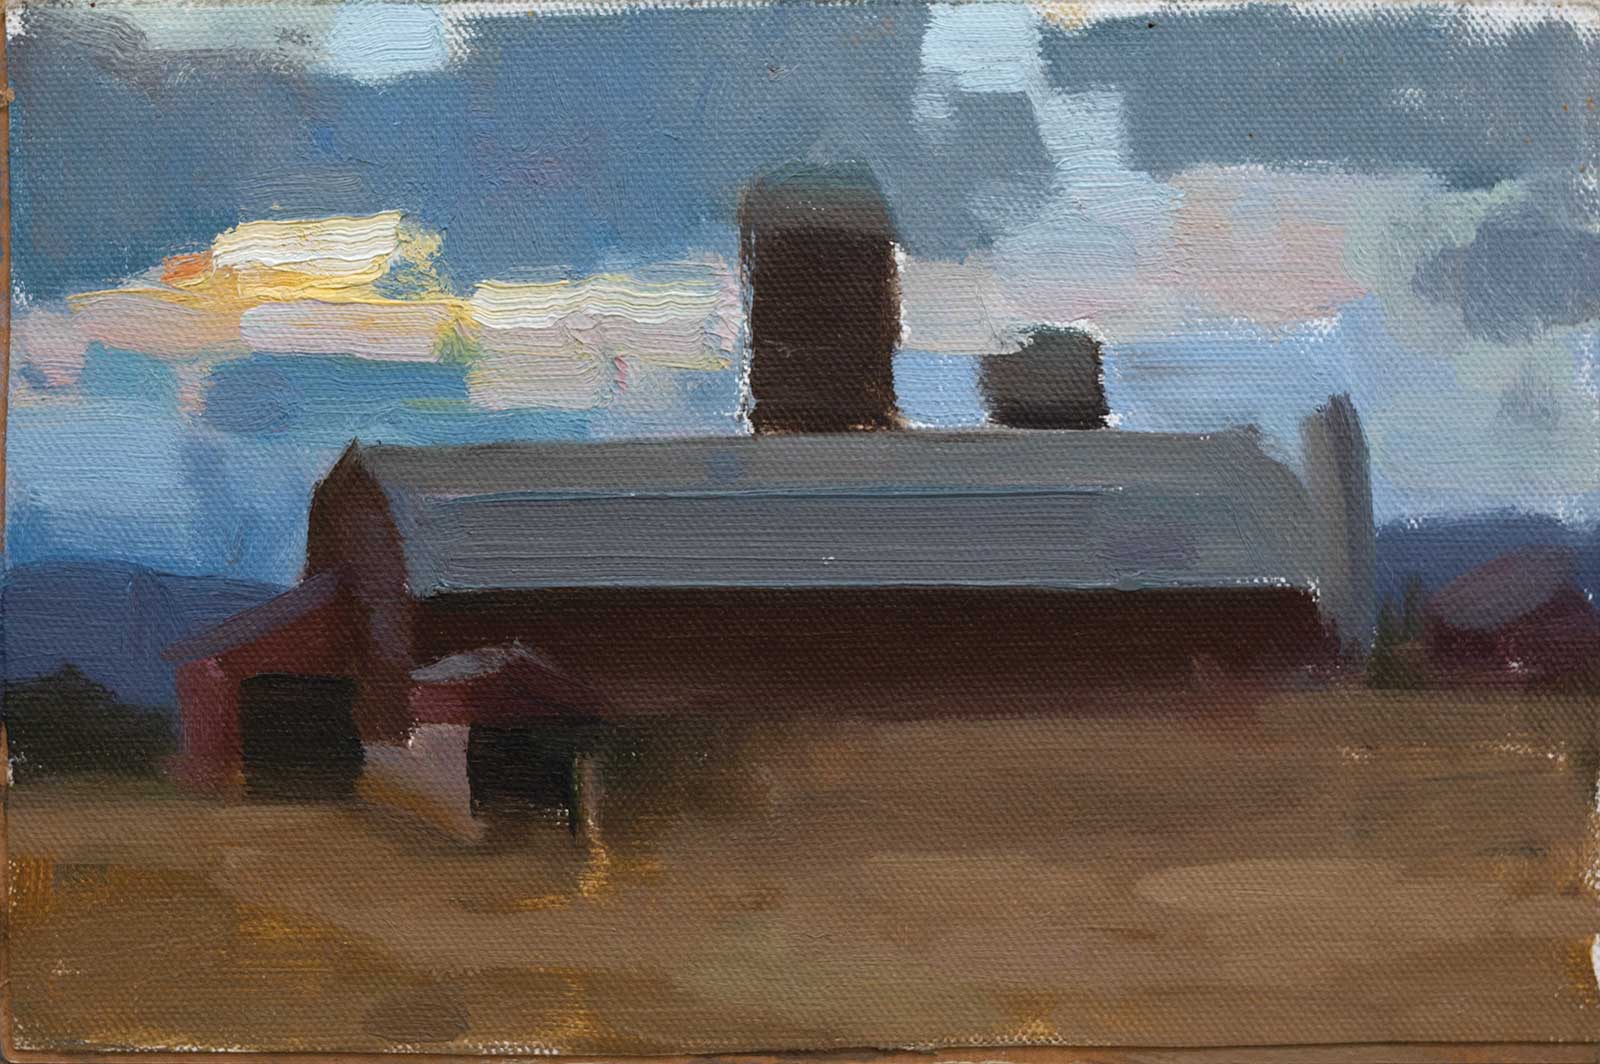
The foundation of this painting is a 6 x 9” plein air study. I have stacks of these small sketches, which I often revisit for reference and inspiration. Painting from life is always preferable because it captures colors and contrasts more accurately than a photograph. My goal in plein air painting is not just to record a scene but to train my eye, building a visual library of forms, textures, light and color.
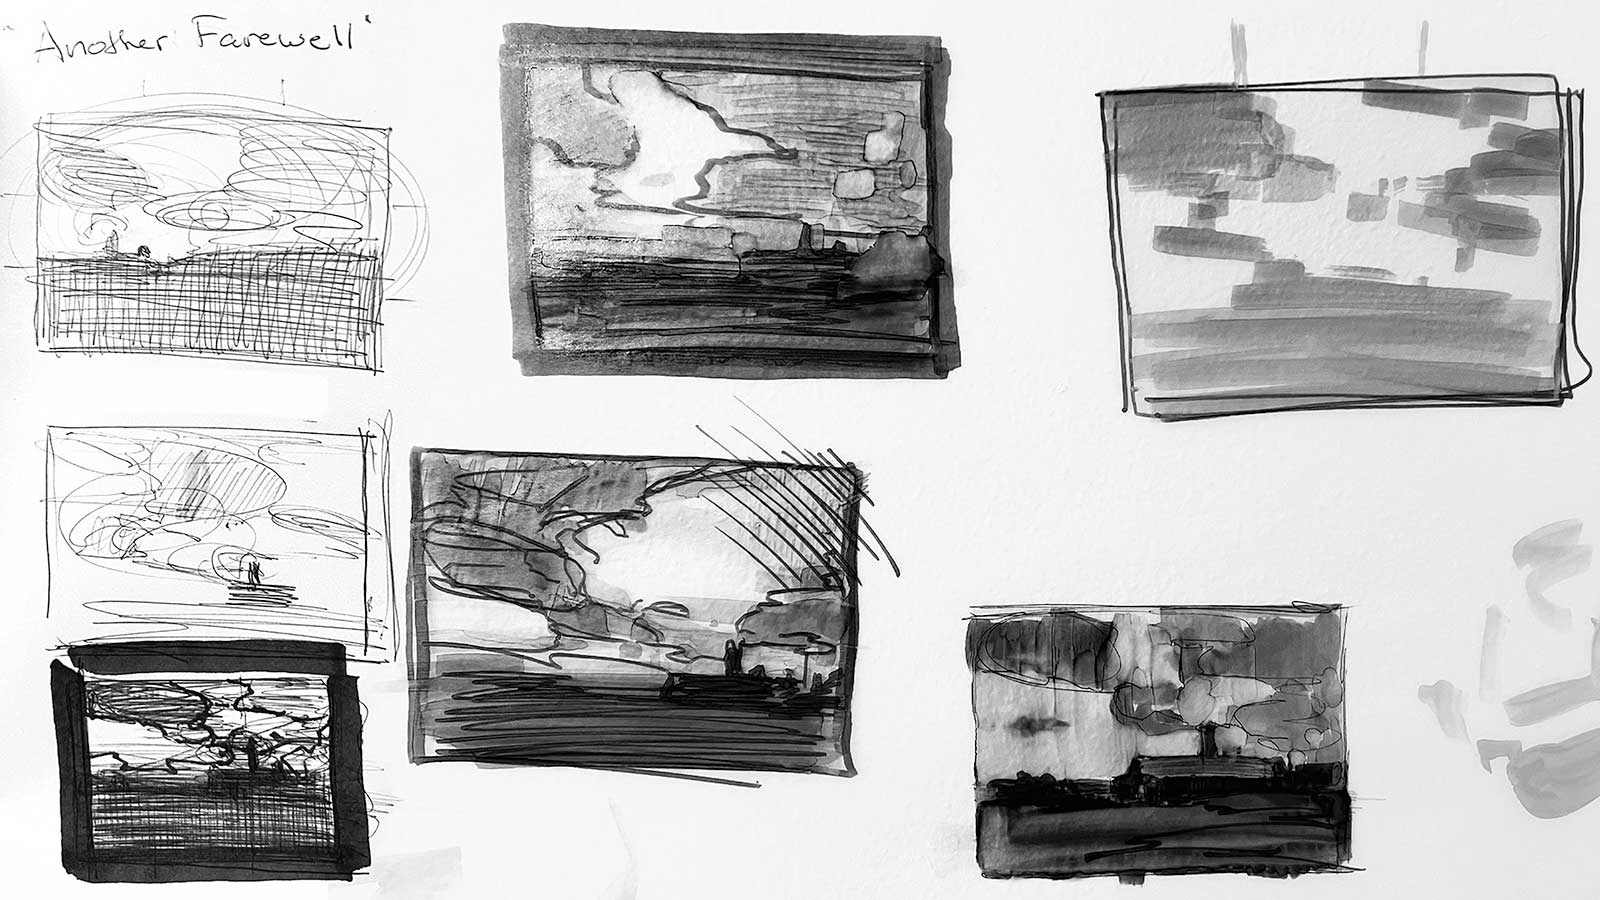
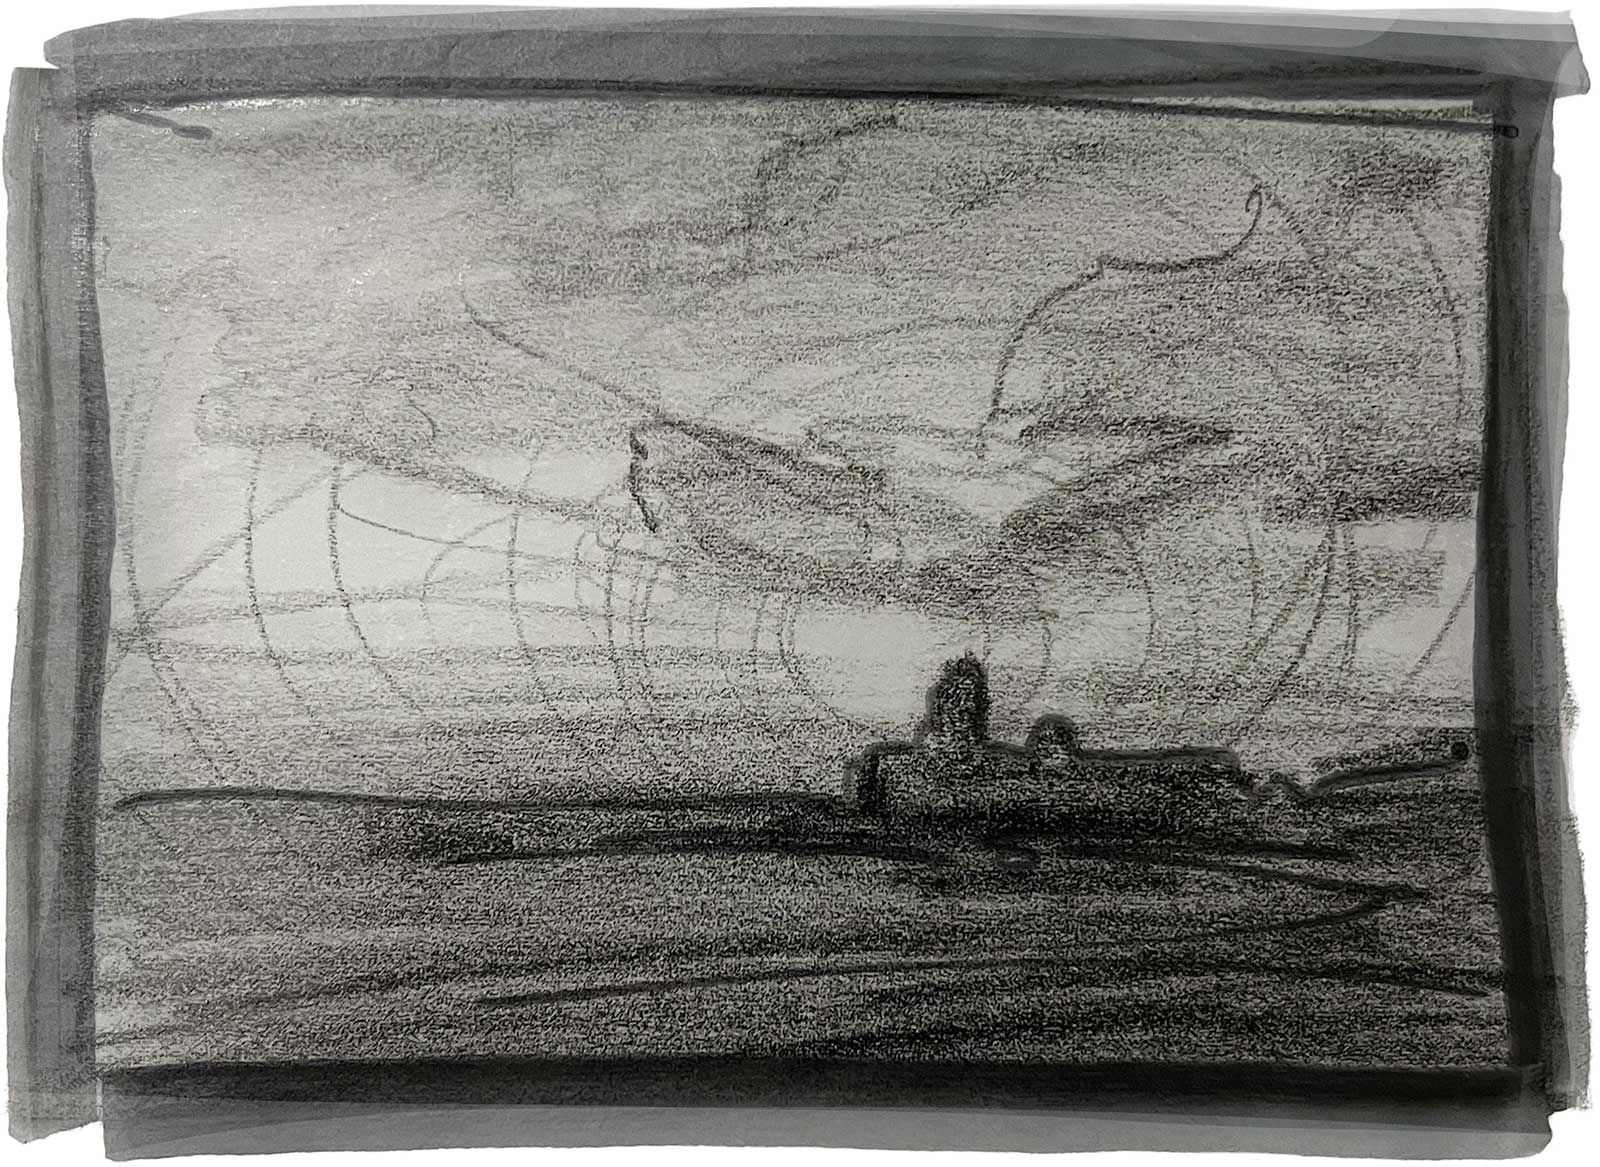
Thumbnail Sketches
Thumbnail sketches serve as the blueprint for a painting. I create at least three variations to explore different compositions and refine my vision. In this painting, I experimented with the placement of the barn and the mood of the sky, deciding between a dark sky with a light path or a light sky with dramatic clouds. The final choice, a barn on the right framed by dark clouds, felt the most compelling.
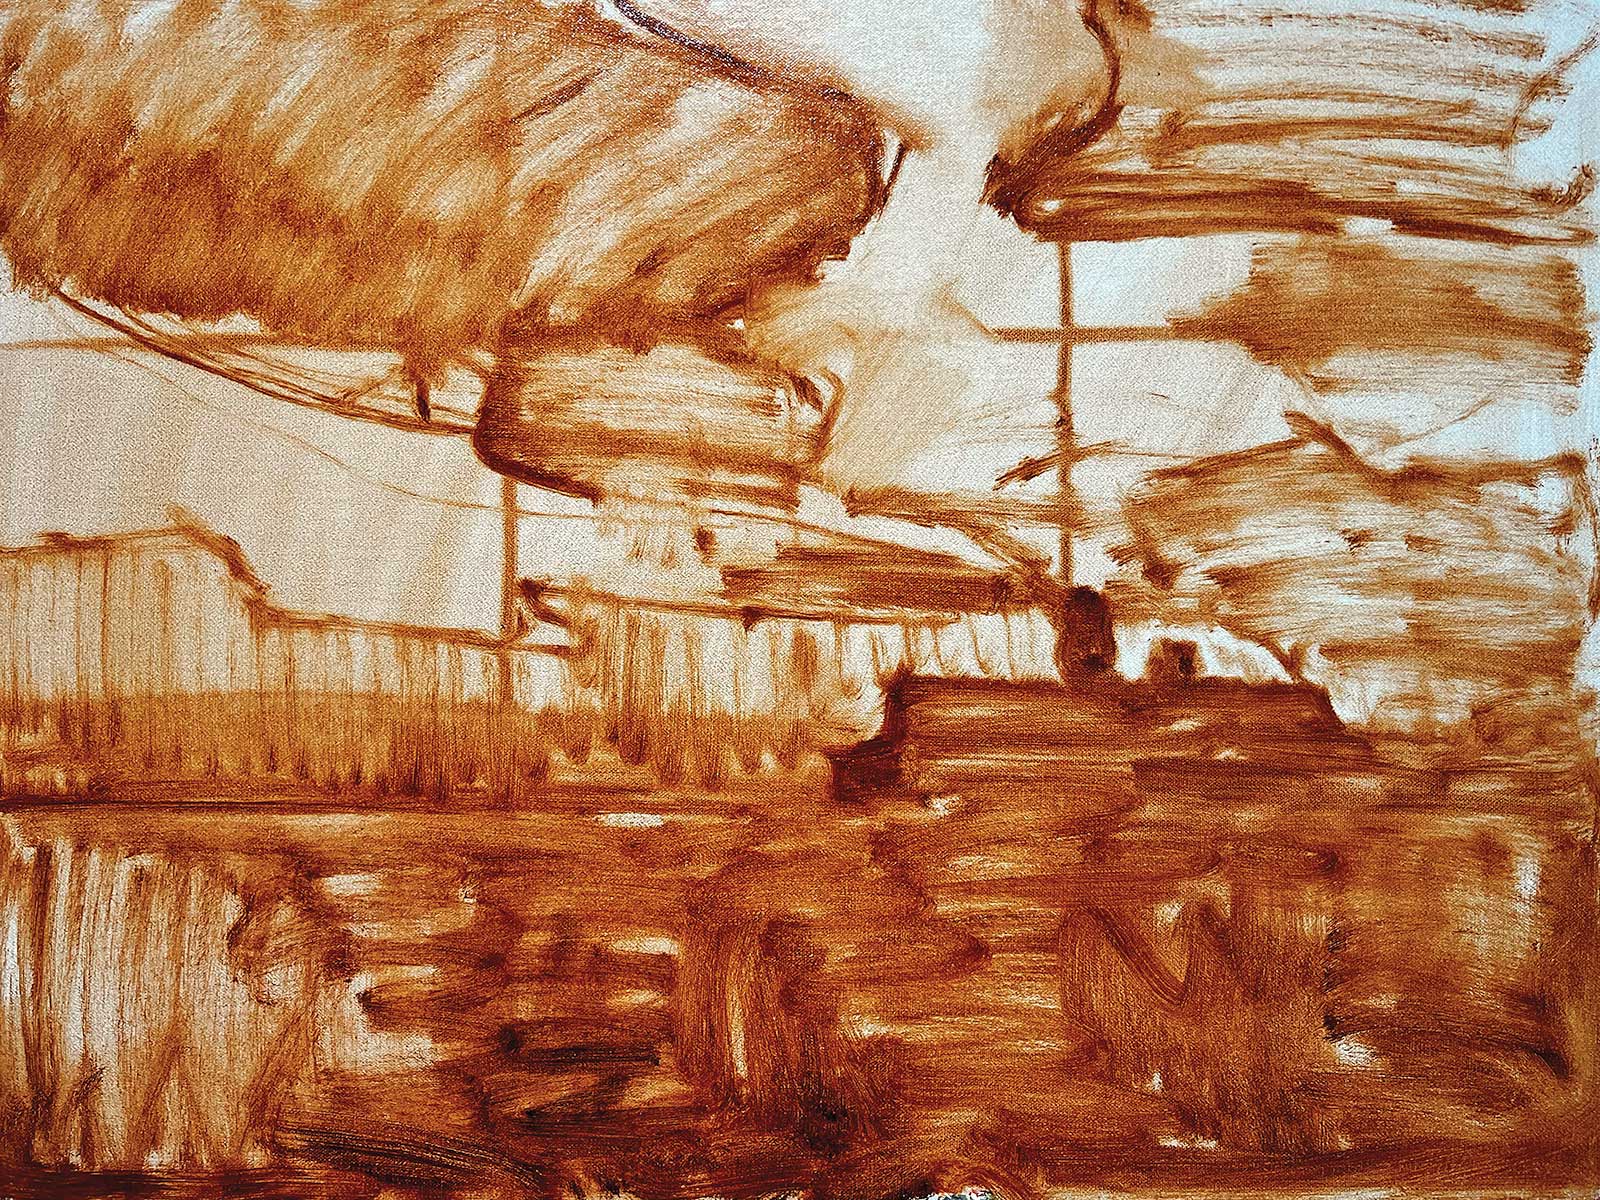
Stage 1 The Underpainting
The underpainting sets the structure of the piece, laying the groundwork for subsequent layers. Using a transparent earth tone, I sketch the composition directly onto the canvas. This step is crucial because it preserves depth in the shadows and mid-tones, allows for easy adjustments before adding opaque layers and creates a harmonious foundation for later color applications.
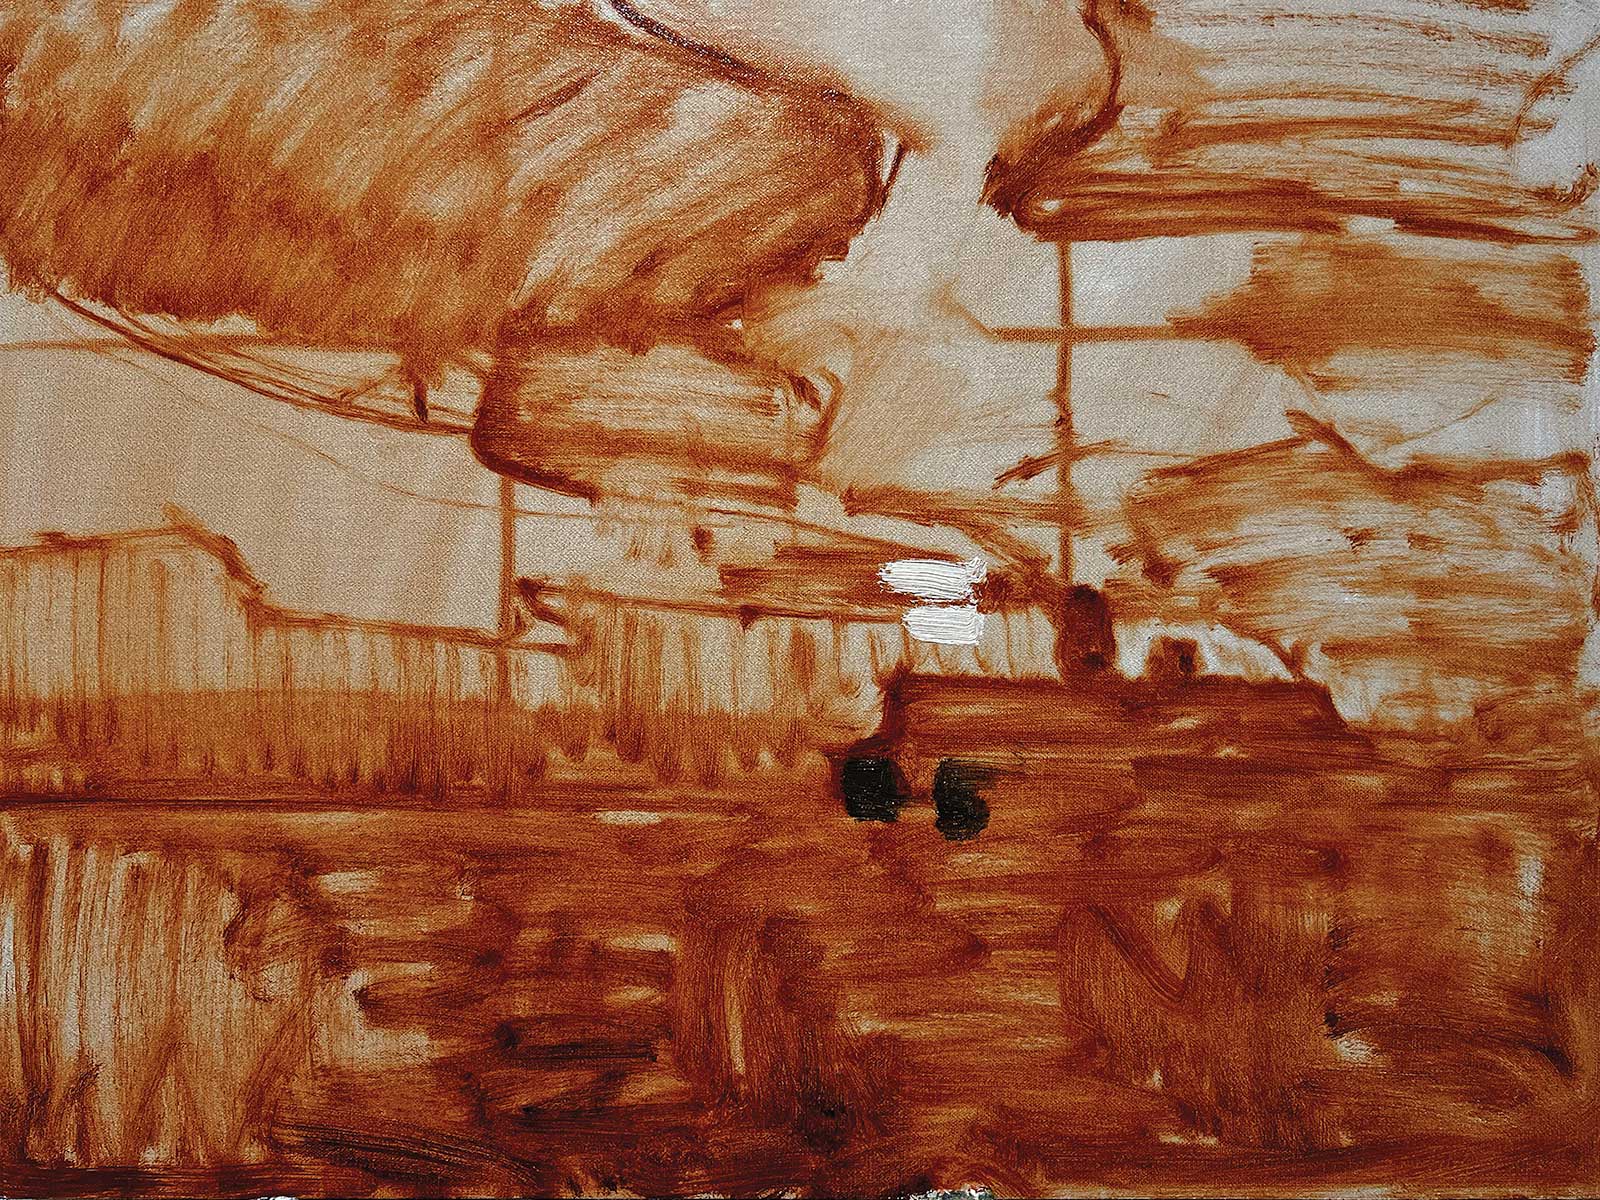
Stage 2 Lightest Light & Darkest Dark
A strong painting relies on accurate values. At this stage, I establish the two extremes: the lightest light and darkest dark in the composition. Tip: squinting at your reference simplifies the scene, making it easier to identify and compare values. Placing these extremes early on serves as a guide for balancing the entire value range.

Stage 3 Block-In
The block-in covers the canvas with tube-consistency paint, ensuring every area has its correct value. Guiding questions during this step: What is the easiest thing to see next? How does each new value compare to my established lightest and darkest areas? For color, I focus on generalized averages rather than getting lost in subtle variations too soon.
Stage 4 Surface Mystery
This term describes the quality of a painting where the technique is not obvious, leaving an element of intrigue in the finished work. One of my favorite tools for achieving this is glazing—applying thin, transparent layers of paint over a dry surface to adjust color, tone and luminosity. Glazing creates a luminous, layered effect that enhances depth and atmosphere.
Quick Guide to Glazing
Glazing is the process of applying thin, transparent layers of paint over a dry base layer to adjust color, enhance depth and create a luminous effect. It is particularly useful for fine-tuning color relationships, softening transitions and enriching atmosphere without disturbing the underlying structure.
Key Steps
• Ensure the painting is dry to the touch before glazing. Applying a glaze too soon can lift or blur the layers beneath. A fully cured surface allows the glaze to sit cleanly on top, maintaining separation between layers.
• Mix one part solvent (Gamsol) with one part medium (Galkyd gel), then add a small amount of color. This creates a balanced, fluid consistency that spreads evenly without streaks, unless you want them. The medium increases transparency and adhesion, while the solvent keeps the mixture workable and quick-drying.
• Do not use white to lighten the glaze—adjust the thickness of the layer instead. White is opaque and can reduce the vibrancy of a glaze, blocking the light from passing through. Instead, use thinner layers for a subtle effect or build up multiple glazes gradually for richer color shifts.
• I often prefer streaky glazing because of the texture it adds, breaking up smooth passages with subtle variation and movement. This technique gives the surface more character, allowing light to catch in unexpected ways while preserving the underlying depth of the painting.

Stage 5 “What Bothers Me Most?”
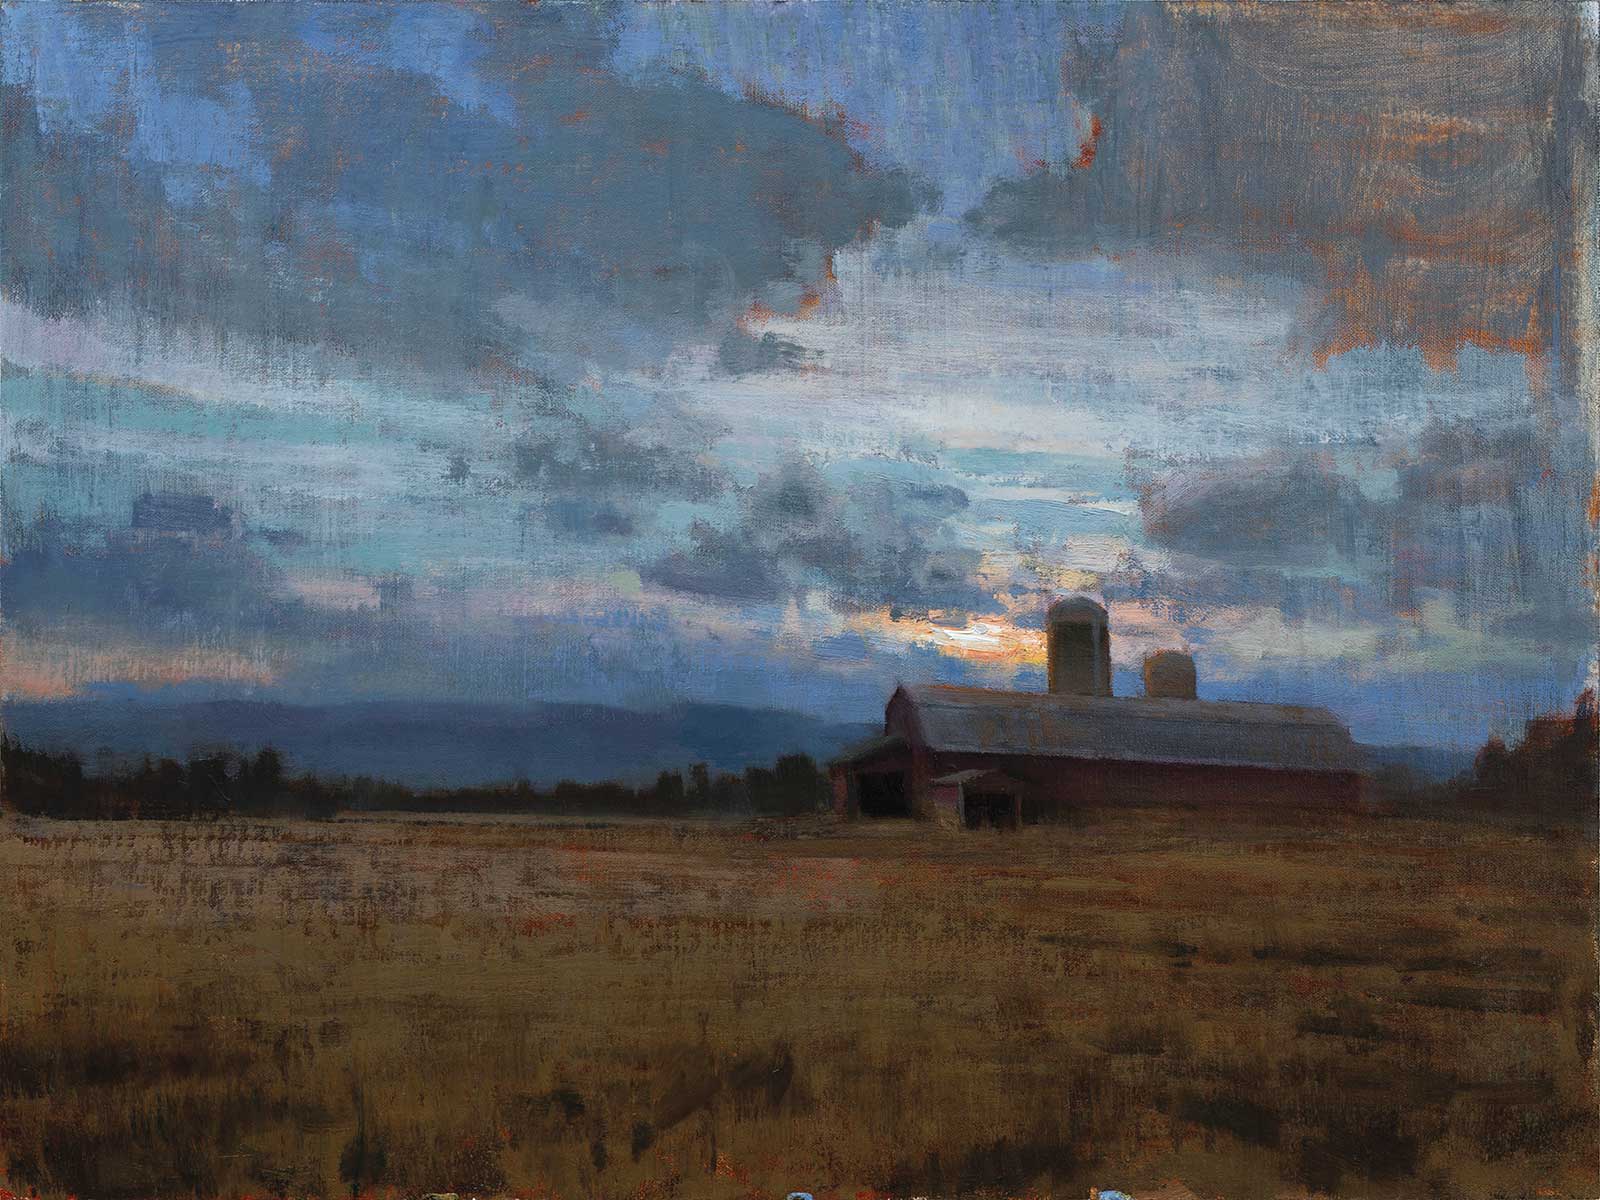
This self-assessment question helps me refine the painting. By systematically addressing problem areas, I guide the painting toward completion. For this piece, I noticed I had lost my lightest light, so restoring it became my priority.
Stage 6 Refining the Barn
At this stage, I focused on clarifying the architecture of the barn while maintaining the atmospheric softness of the scene. Using more defined edges and subtle value shifts, I reinforced the structure without making it feel rigid or overly detailed.
Stage 7 Refining Edges
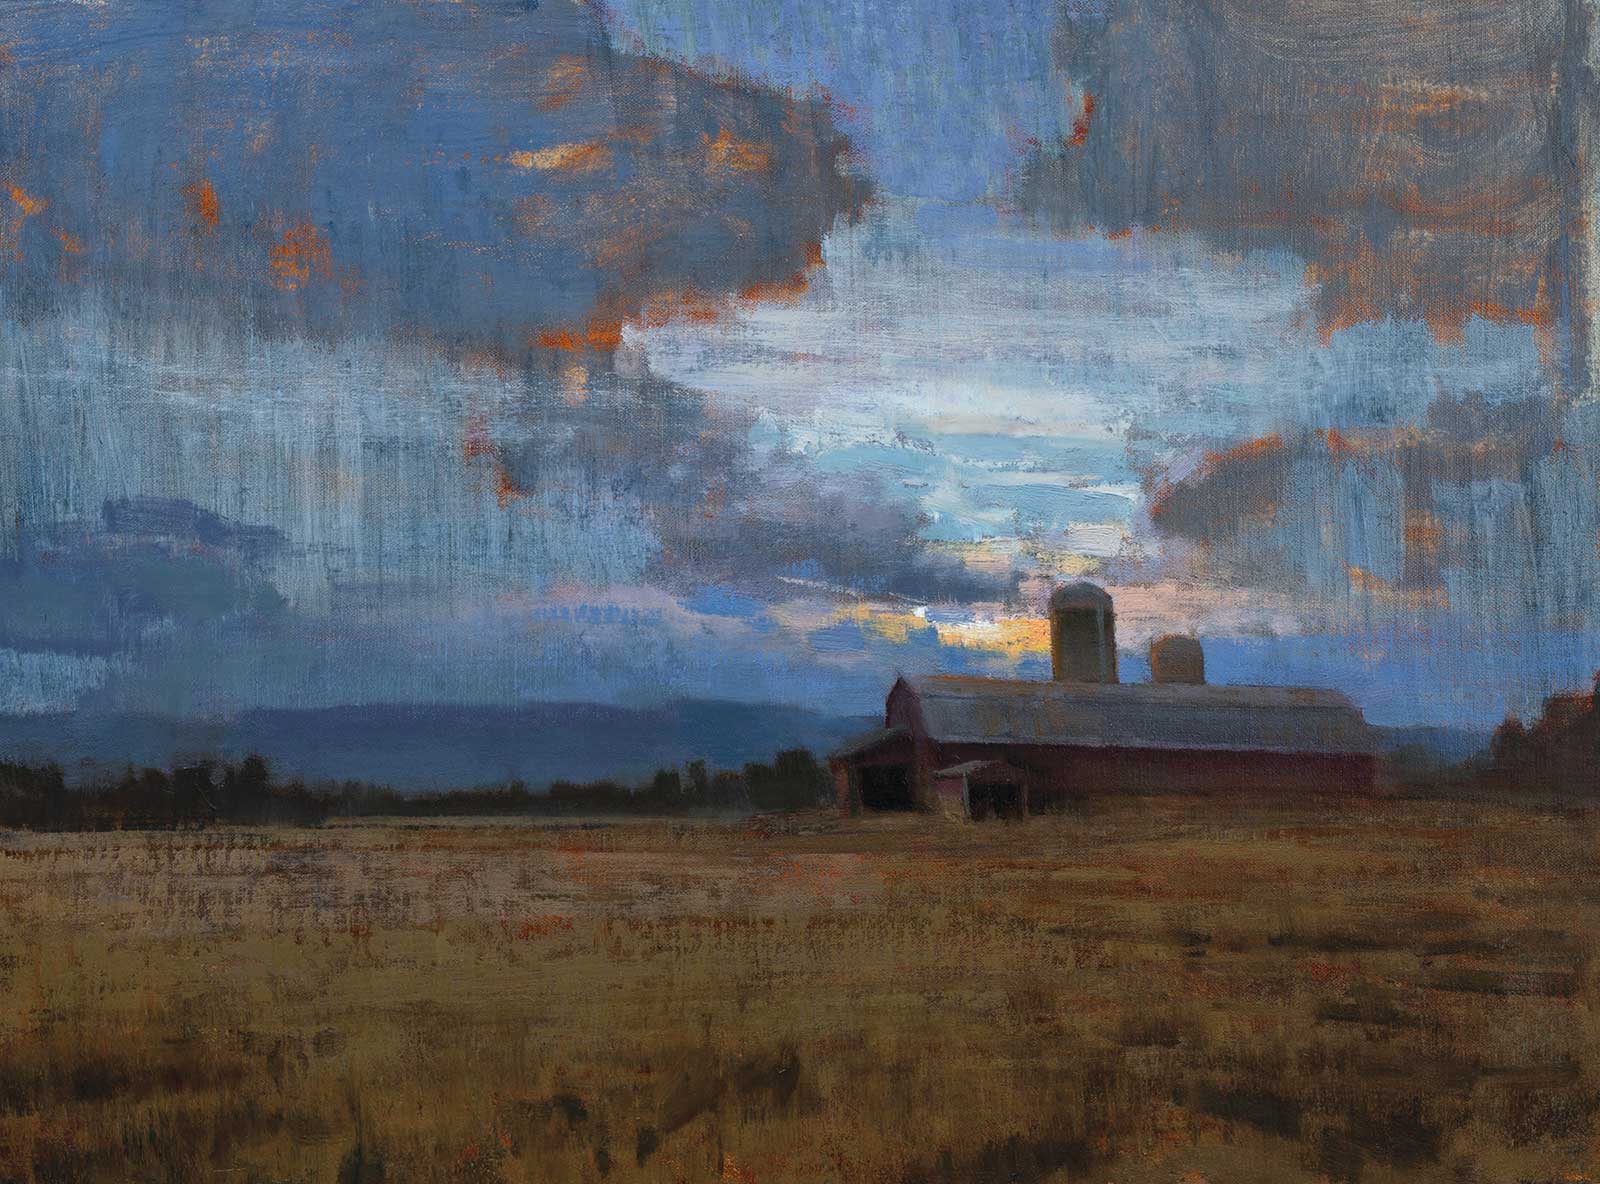
Edges play a crucial role in creating realism and atmosphere. However, in the early stages, I leave them loose, refining them later in response to the painting’s development. For example, compare the early clouds in this piece (left) to the finished version, and notice how the softened edges bring the scene to life.
The Master Copy
The master copy is the refined transfer of my thumbnail sketch onto the final painting surface, serving as the authoritative guide for the rest of the painting process. This step ensures that the composition and proportions are well established before introducing values and color. I refer to it as the master copy because it acts as the definitive reference, reducing the need for major adjustments later. It also promotes a controlled, intentional approach, rather than a loose or improvised start, and it preserves the strengths of the original thumbnail, maintaining its structure as the painting develops. At this stage, I use a transparent earth tone, such as transparent earth red, to sketch the composition directly onto the canvas.
Key Considerations
• No white should be mixed into this initial layer. Keeping it transparent allows for natural depth and maintains flexibility in later stages.
• I thin the paint with Gamsol to speed up drying. This helps keep the lines crisp and prevents excessive blending with subsequent layers.
• Avoid using slow-drying bio thinners at this stage. Faster drying times ensure a stable foundation without long waiting periods.
• This step serves as the structural blueprint for the painting, ensuring that the composition is sound before advancing to values and color.
Stage 8 Repetitive Shapes
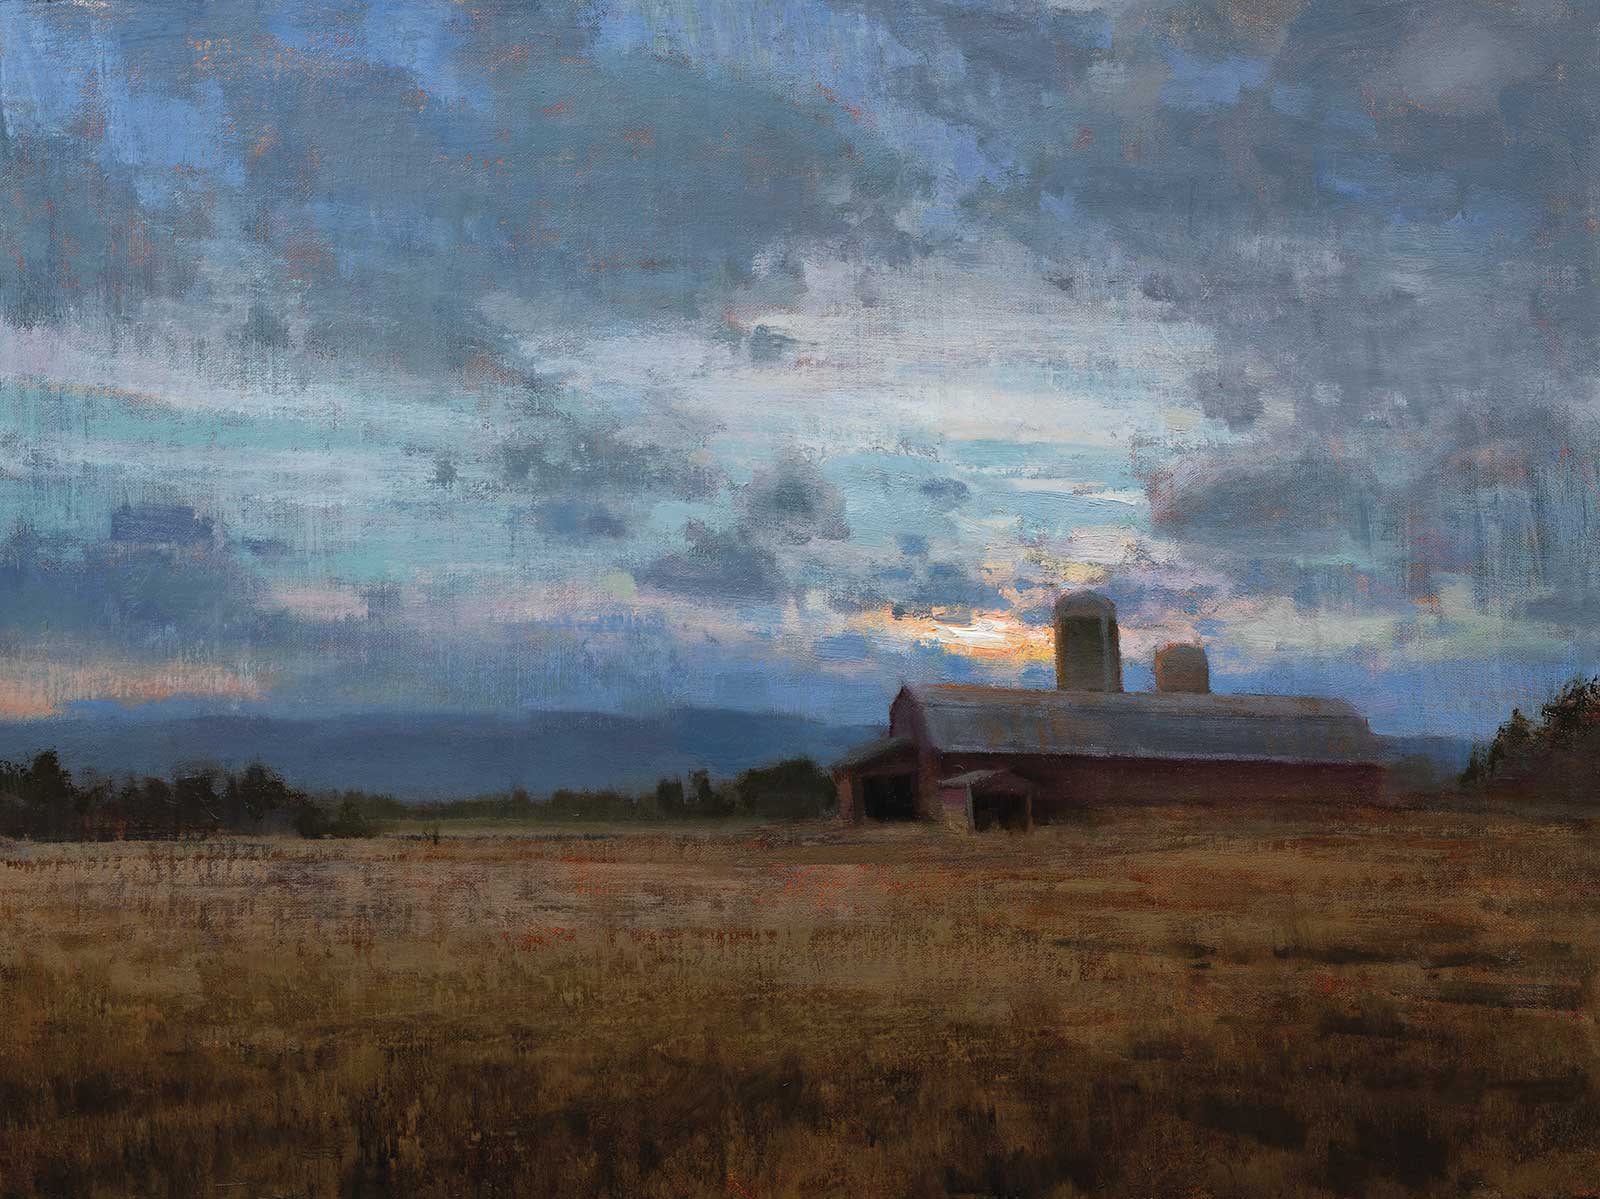
Unintentional repetitive shapes can weaken a composition. Initially, I noticed a diamond shape in the sky above the barn. As the painting progressed, it transformed into an hourglass shape, which was equally distracting. Careful adjustments ensured a natural, visually engaging flow.
Final Inspection Checklist
• Upside-down Check Flipping the painting helps reveal imbalances.
• Mirror Test Viewing it in a mirror provides a fresh perspective.
• Distance Viewing Stepping back ensures the composition holds together.
• Miniature Scale A quick photo on your phone highlights any weak areas.
• Ask for Feedback A fresh pair of eyes can spot things you might miss.
By following these steps, I ensure that the painting is fully realized, balanced and ready for its final signature.
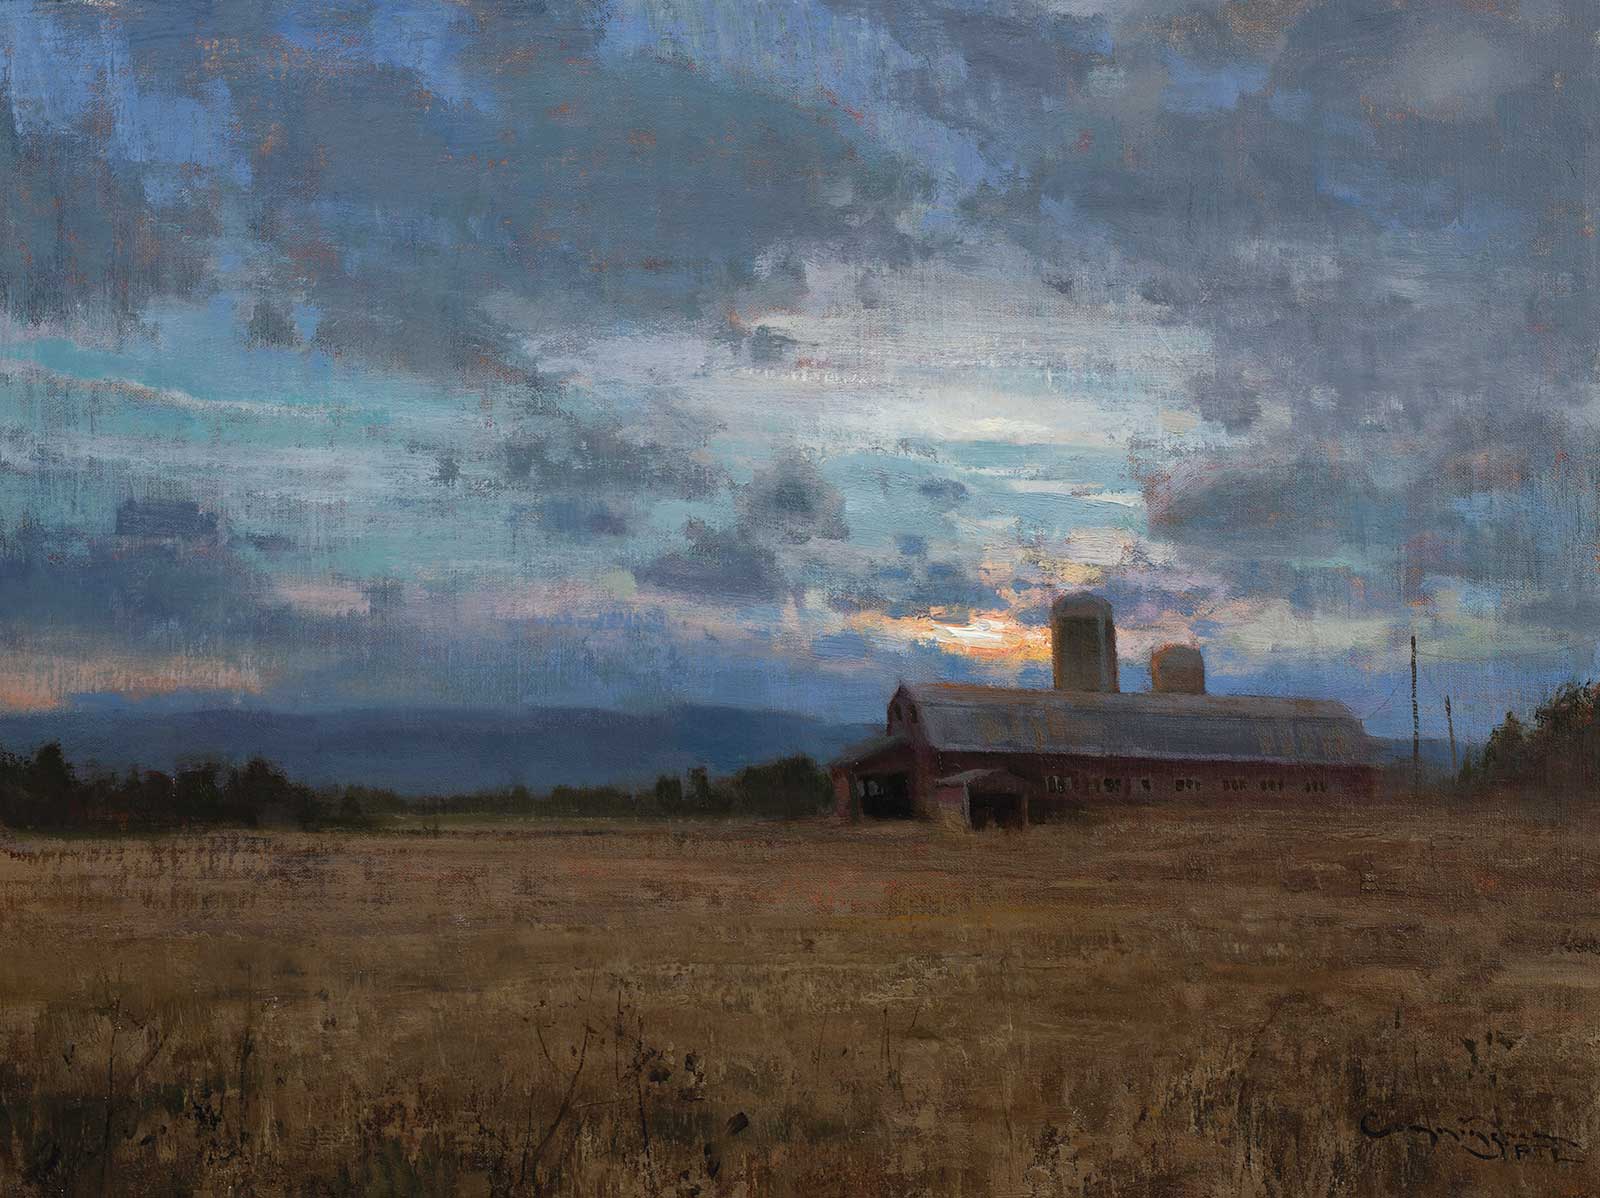
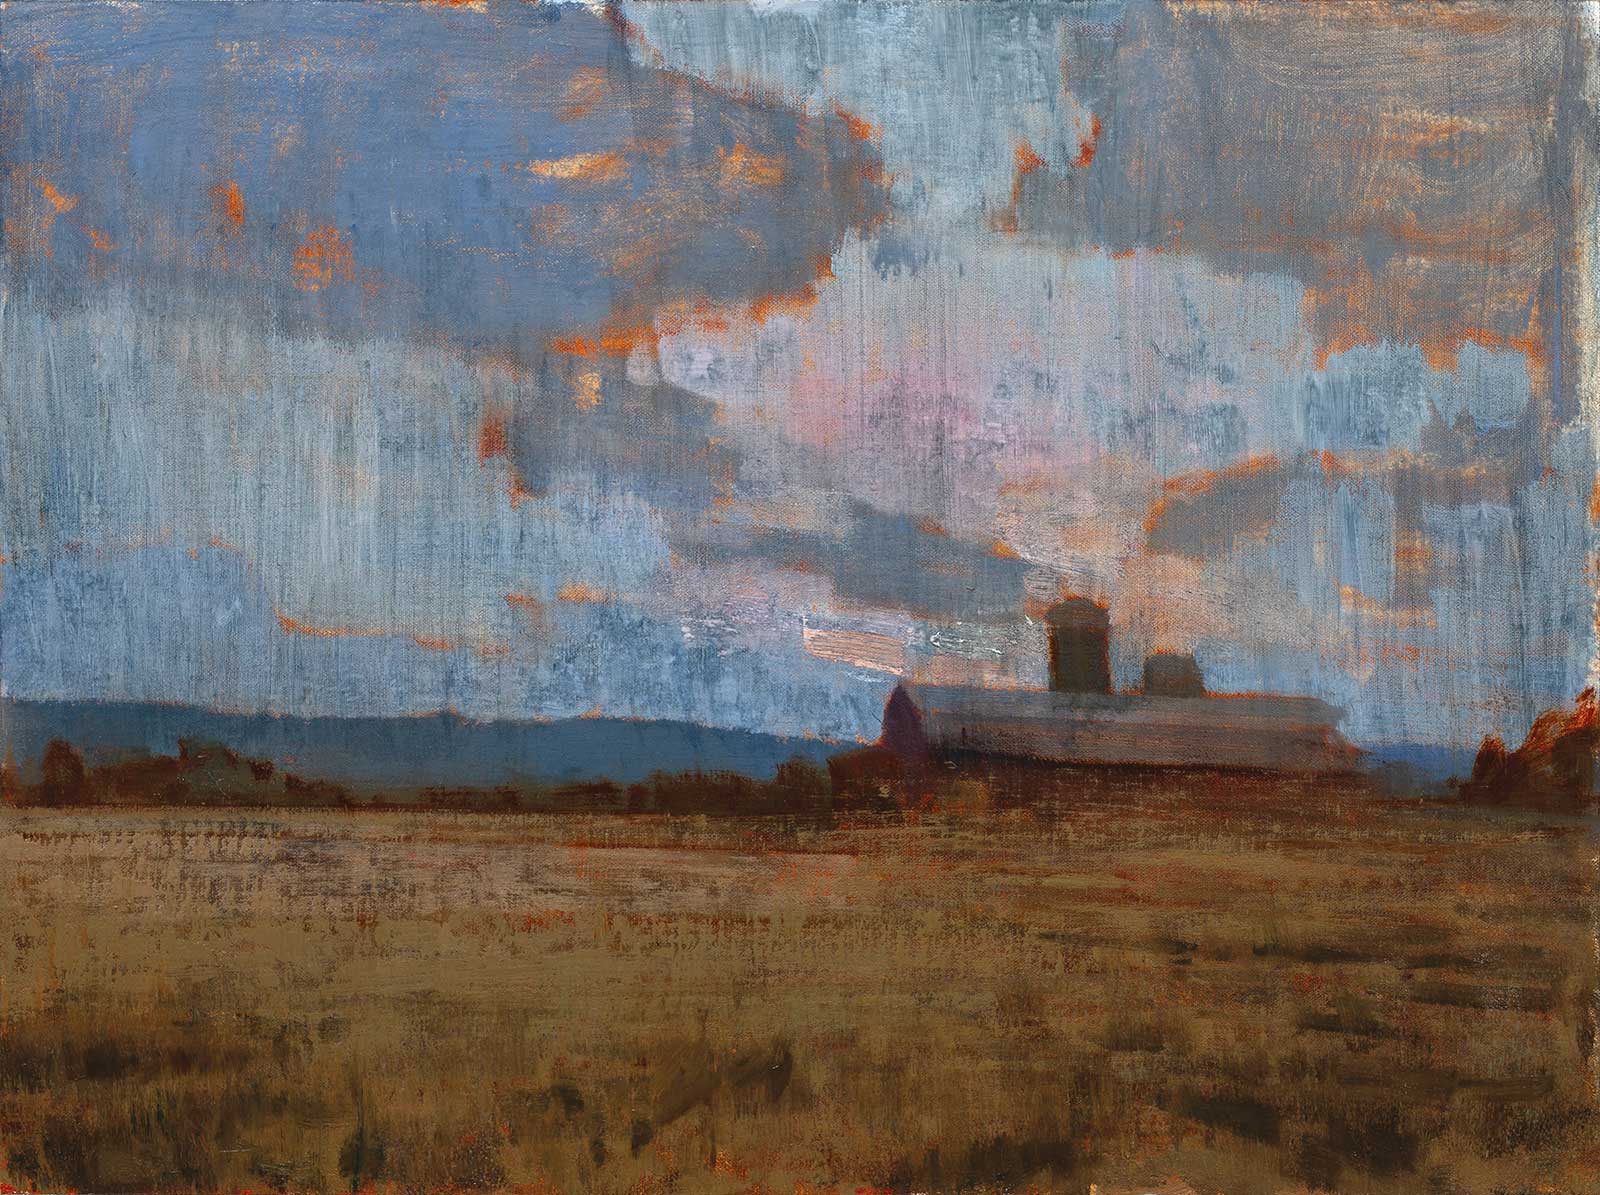
Stage 9 The Finishing Touches
Another Farewell, oil on Raymar linen panel, 18 x 24” (45 x 60 cm)
The final steps are slow and deliberate. Each new stroke should enhance the piece rather than distract from it. Key considerations:
Details should support the overall design rather than overwhelm it. Perspective and atmospheric effects should remain consistent. Texture matters—use thicker paint in foreground elements and thinner applications in the background to create depth.
About the artist
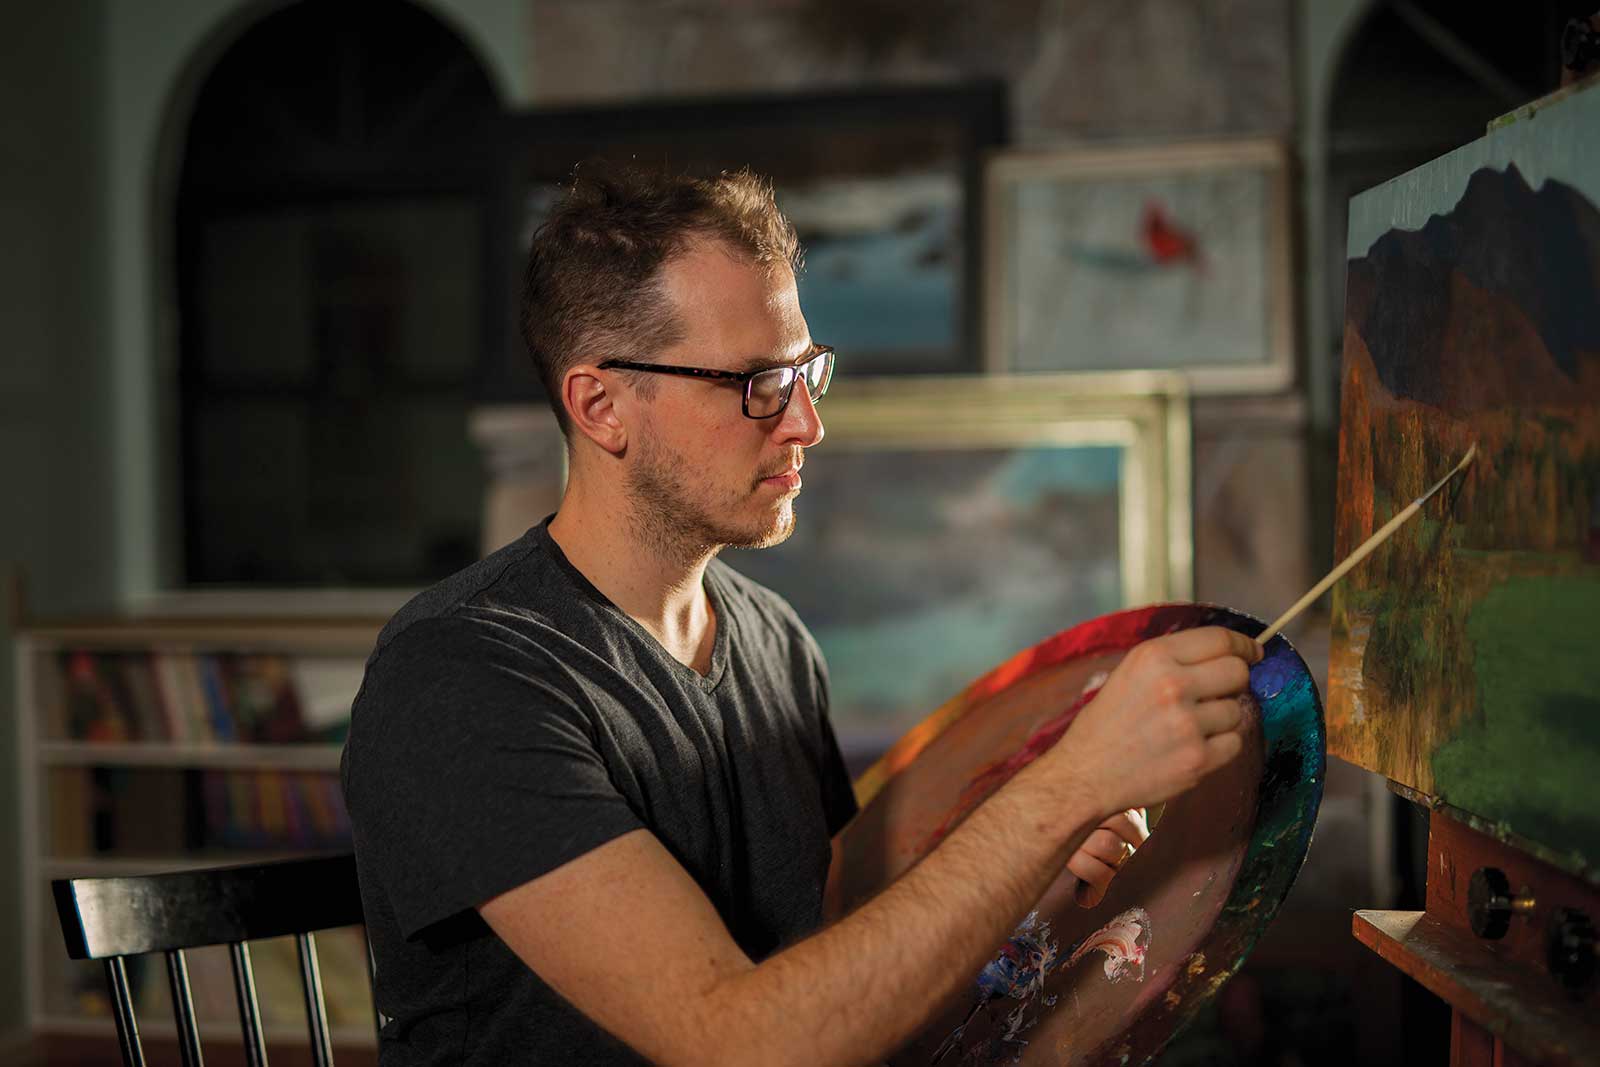 T.J. Cunningham
T.J. Cunningham is an American oil painter whose work is deeply rooted in the landscapes, farms and traditions of rural America. His paintings capture not only the visual beauty of barns, pastures and livestock but also the passing of time, the resilience of the land and the quiet dignity of working farms. Raised in Cambridge, Vermont, he grew up surrounded by the same hills and valleys that inspired Aldro Hibbard and Emile Gruppe. His connection to this landscape, along with a family legacy that includes painters William Trost Richards, Francis Davis Millet and Kathleen McEnery, shaped his path as an artist.
Cunningham received his early training from accomplished oil painter and illustrator Brian Jekel, who instilled in him a passion for representational painting and a commitment to process-driven work. Since beginning his professional career, his paintings have garnered national recognition, earning awards from the PleinAir Salon, the Portrait Society of America, the Art Renewal Center and Oil Painters of America. His work has been exhibited at Arcadia Contemporary, Booth Western Art Museum, Steamboat Art Museum and other notable venues.
In addition to painting, Cunningham is a dedicated teacher and mentor. He founded The Art Journey, an online learning platform where he shares his structured approach to oil painting through courses, live demonstrations, and personal feedback sessions. His focus is on building strong fundamentals, developing an artist’s intuition and learning to paint with confidence. Cunningham is currently working on a new series exploring seasonal changes and rural narratives, as well as four new live courses on painting snow, water, barns and sheep portraits. His original paintings and limited edition prints are available through his website. View his online courses at artjourney.store.
Contact at
cunninghamfineart.com