


My artistic style is a fusion of abstract and natural forms, full of hidden layers where fantasy meets reality. I strive to create dreamlike landscapes caught between imagination and reality, so that viewers can step in and continue the story themselves, letting my art be the start of their own fantasy worlds.
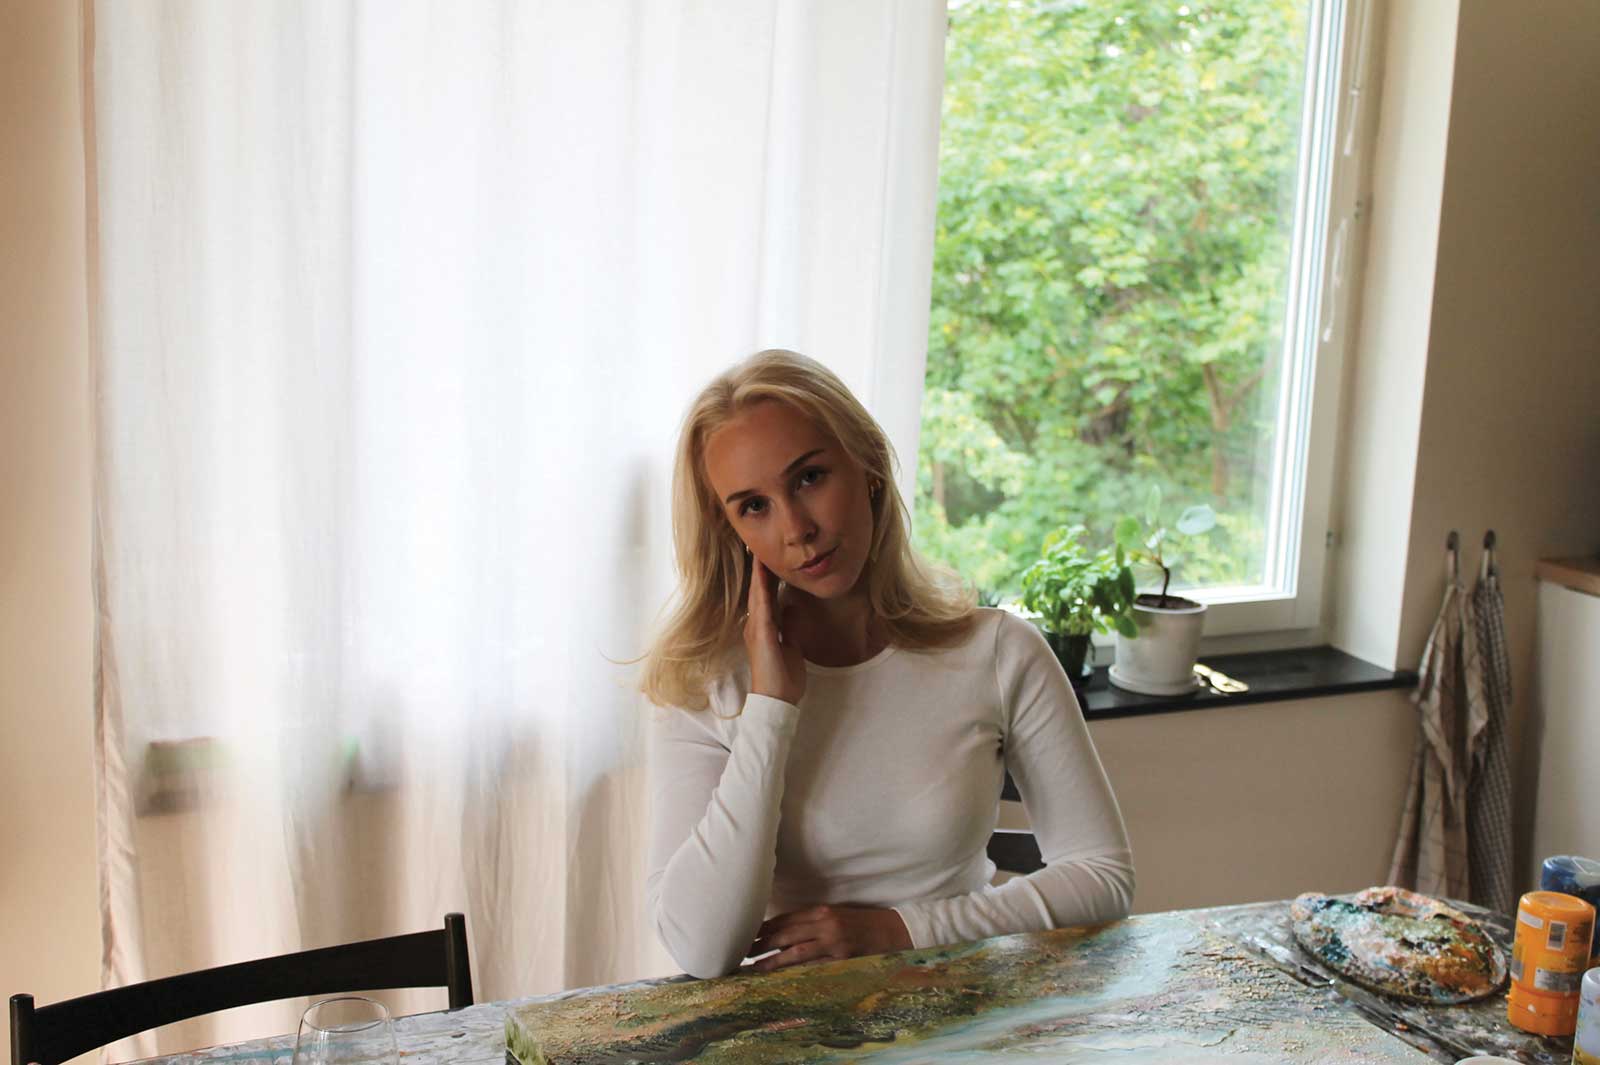
The artist in her studio.
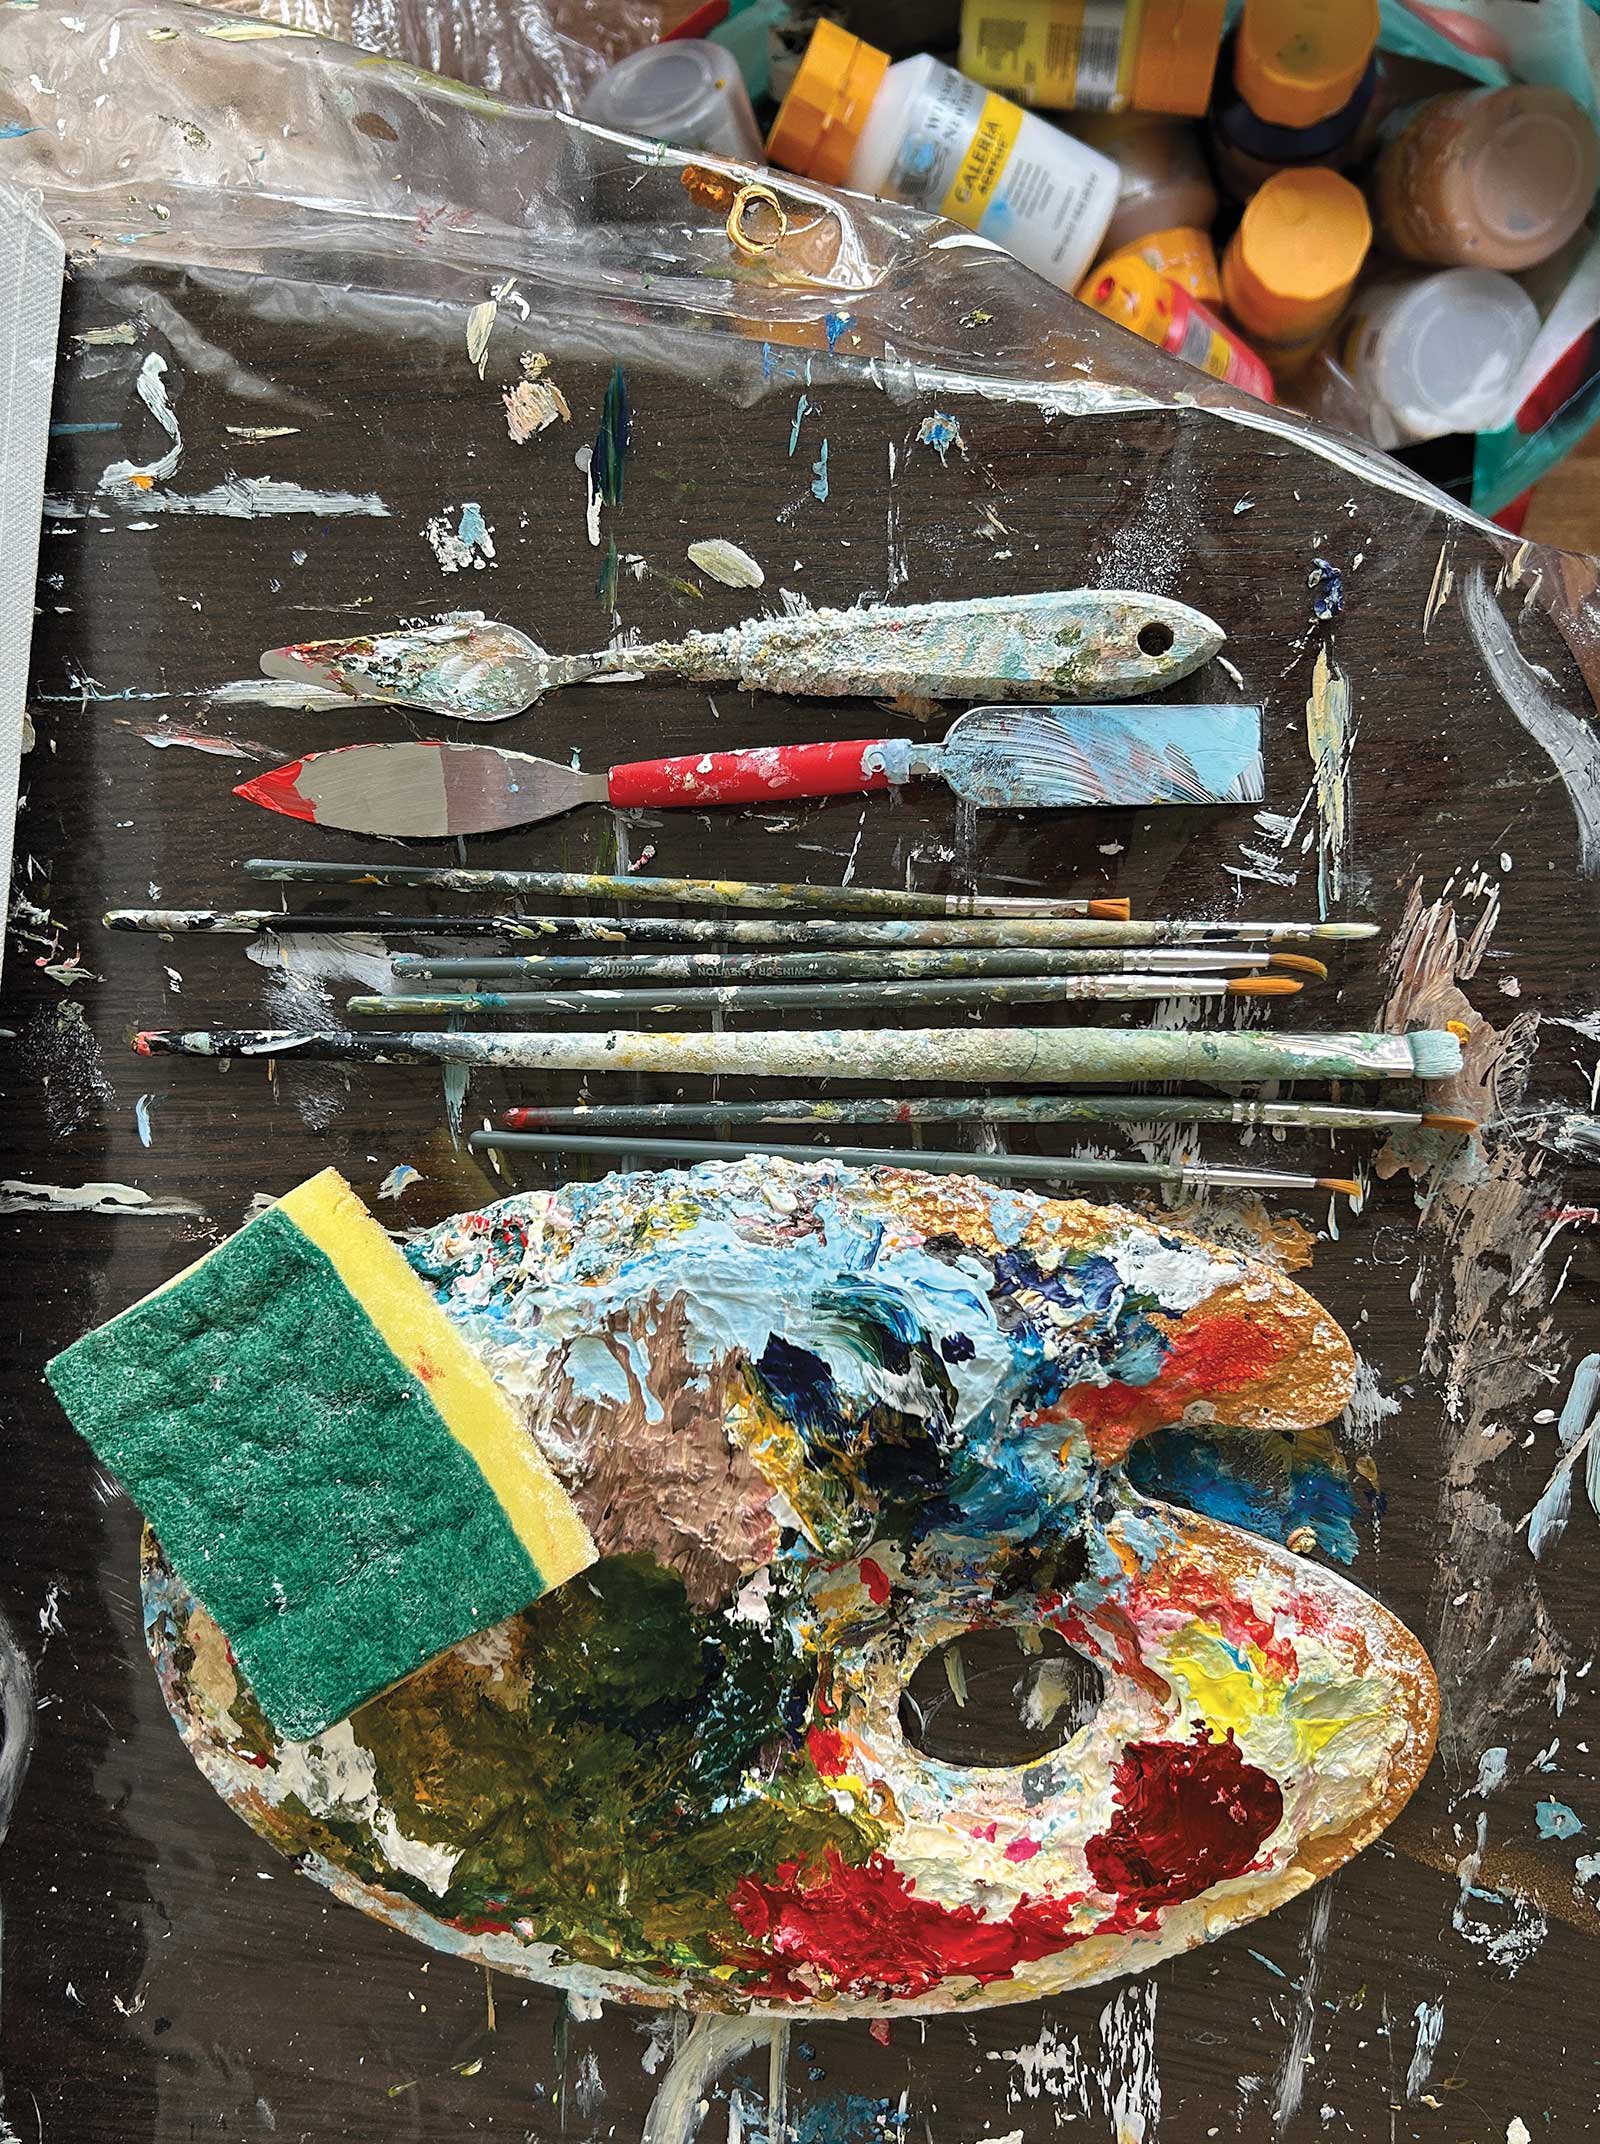
To create a sense of movement and depth, I use a variety of techniques. Brushstrokes, palette knives, sponges and my hands all come into play. These motions help the painting feel tactile and alive. I work exclusively with acrylics and water, which dry quickly and allow me to build layers. The drying time is a big part of the process, helping to shape how the paint settles. In the final stages, I add smaller, intricate details placed with care, but never too obviously, so the viewer can discover them gradually. Some paintings lean more toward an abstract landscape and some set a stronger realistic environment.
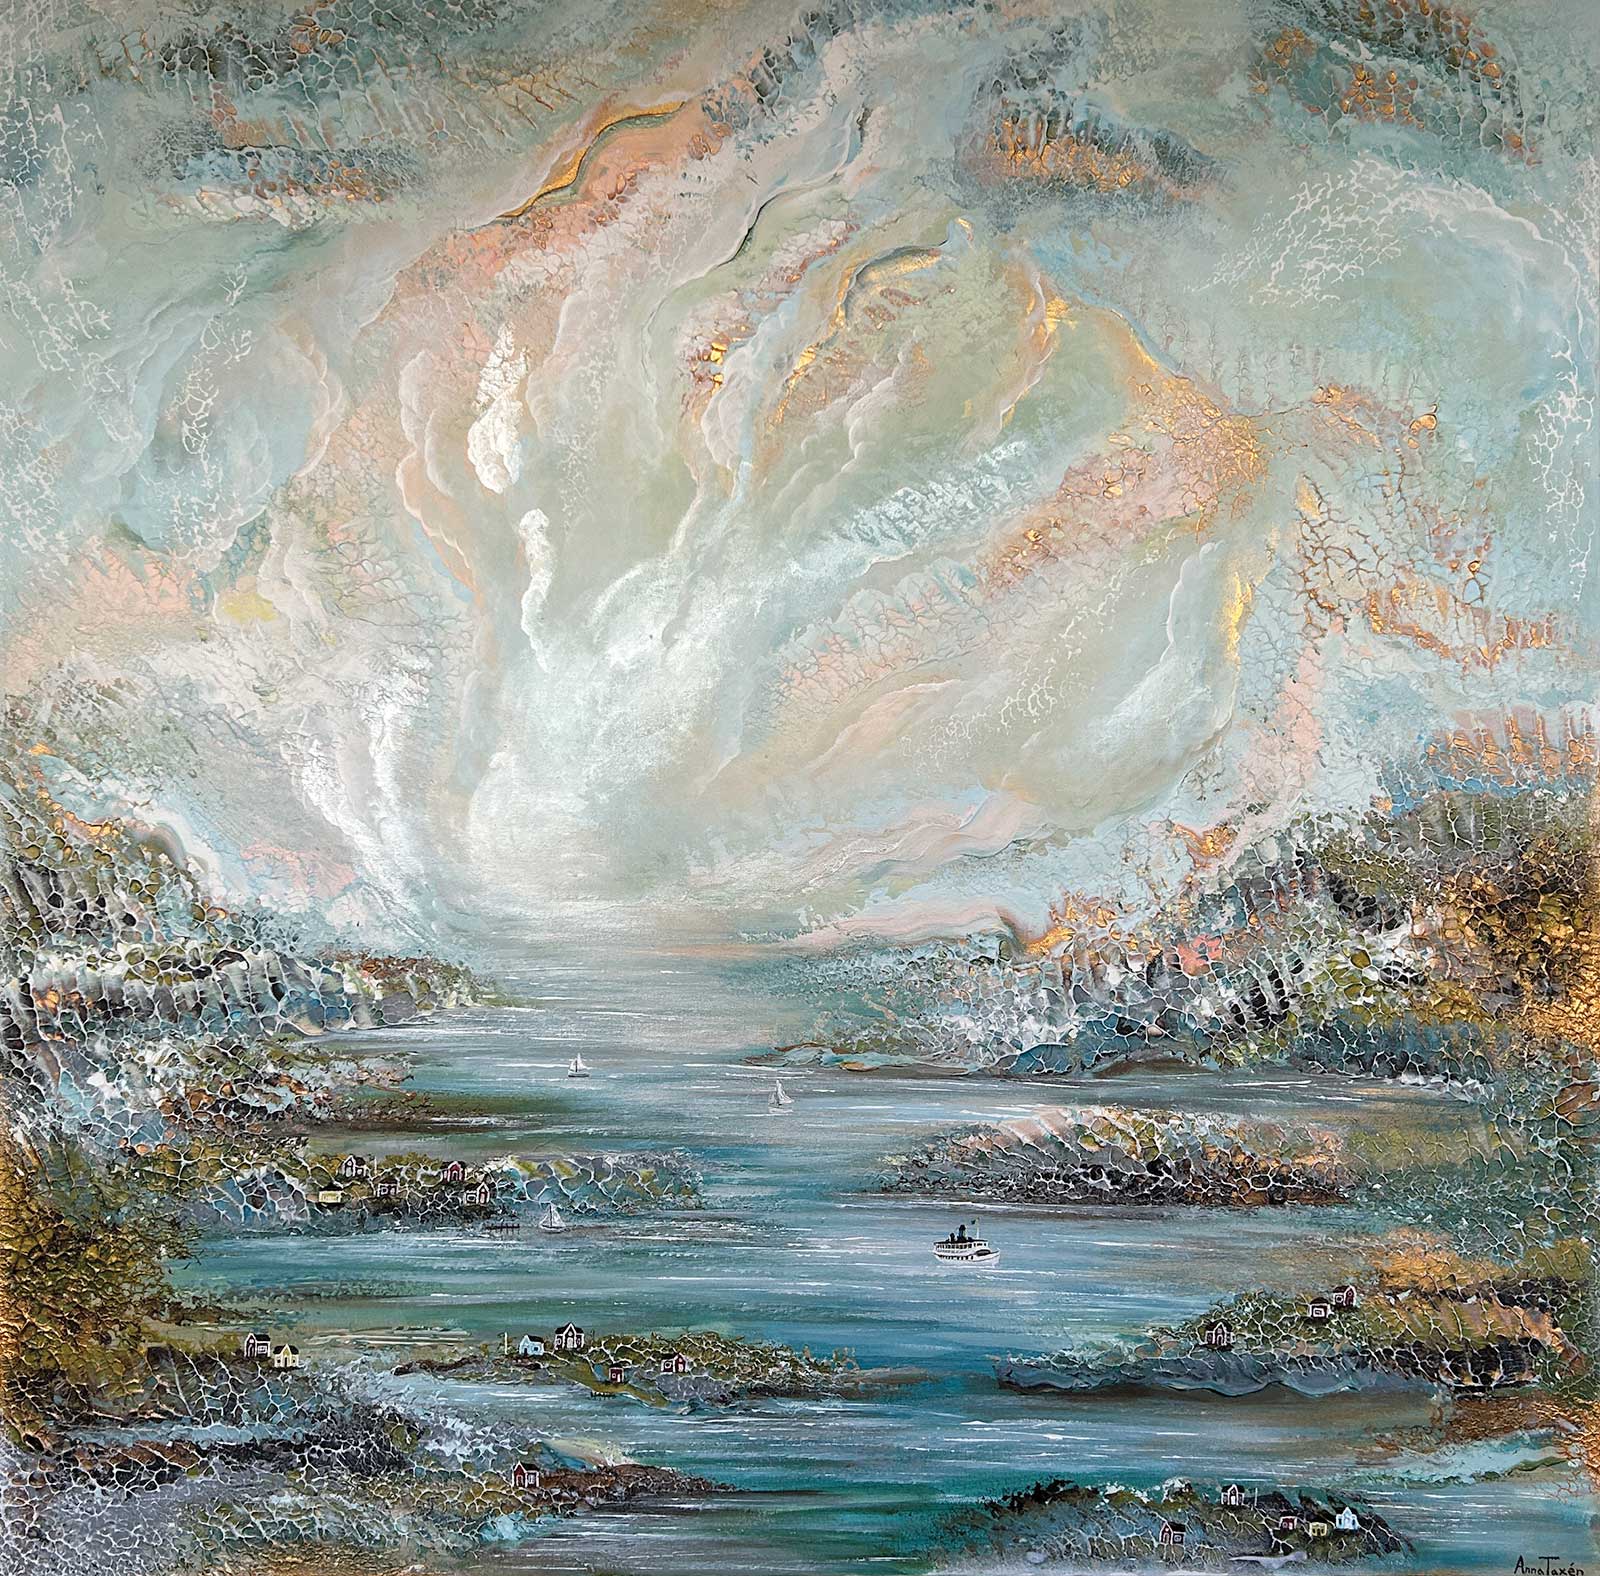
Archipelago Strait, acrylic on cotton canvas, 391/3 x 391/3” (100 x 100 cm)
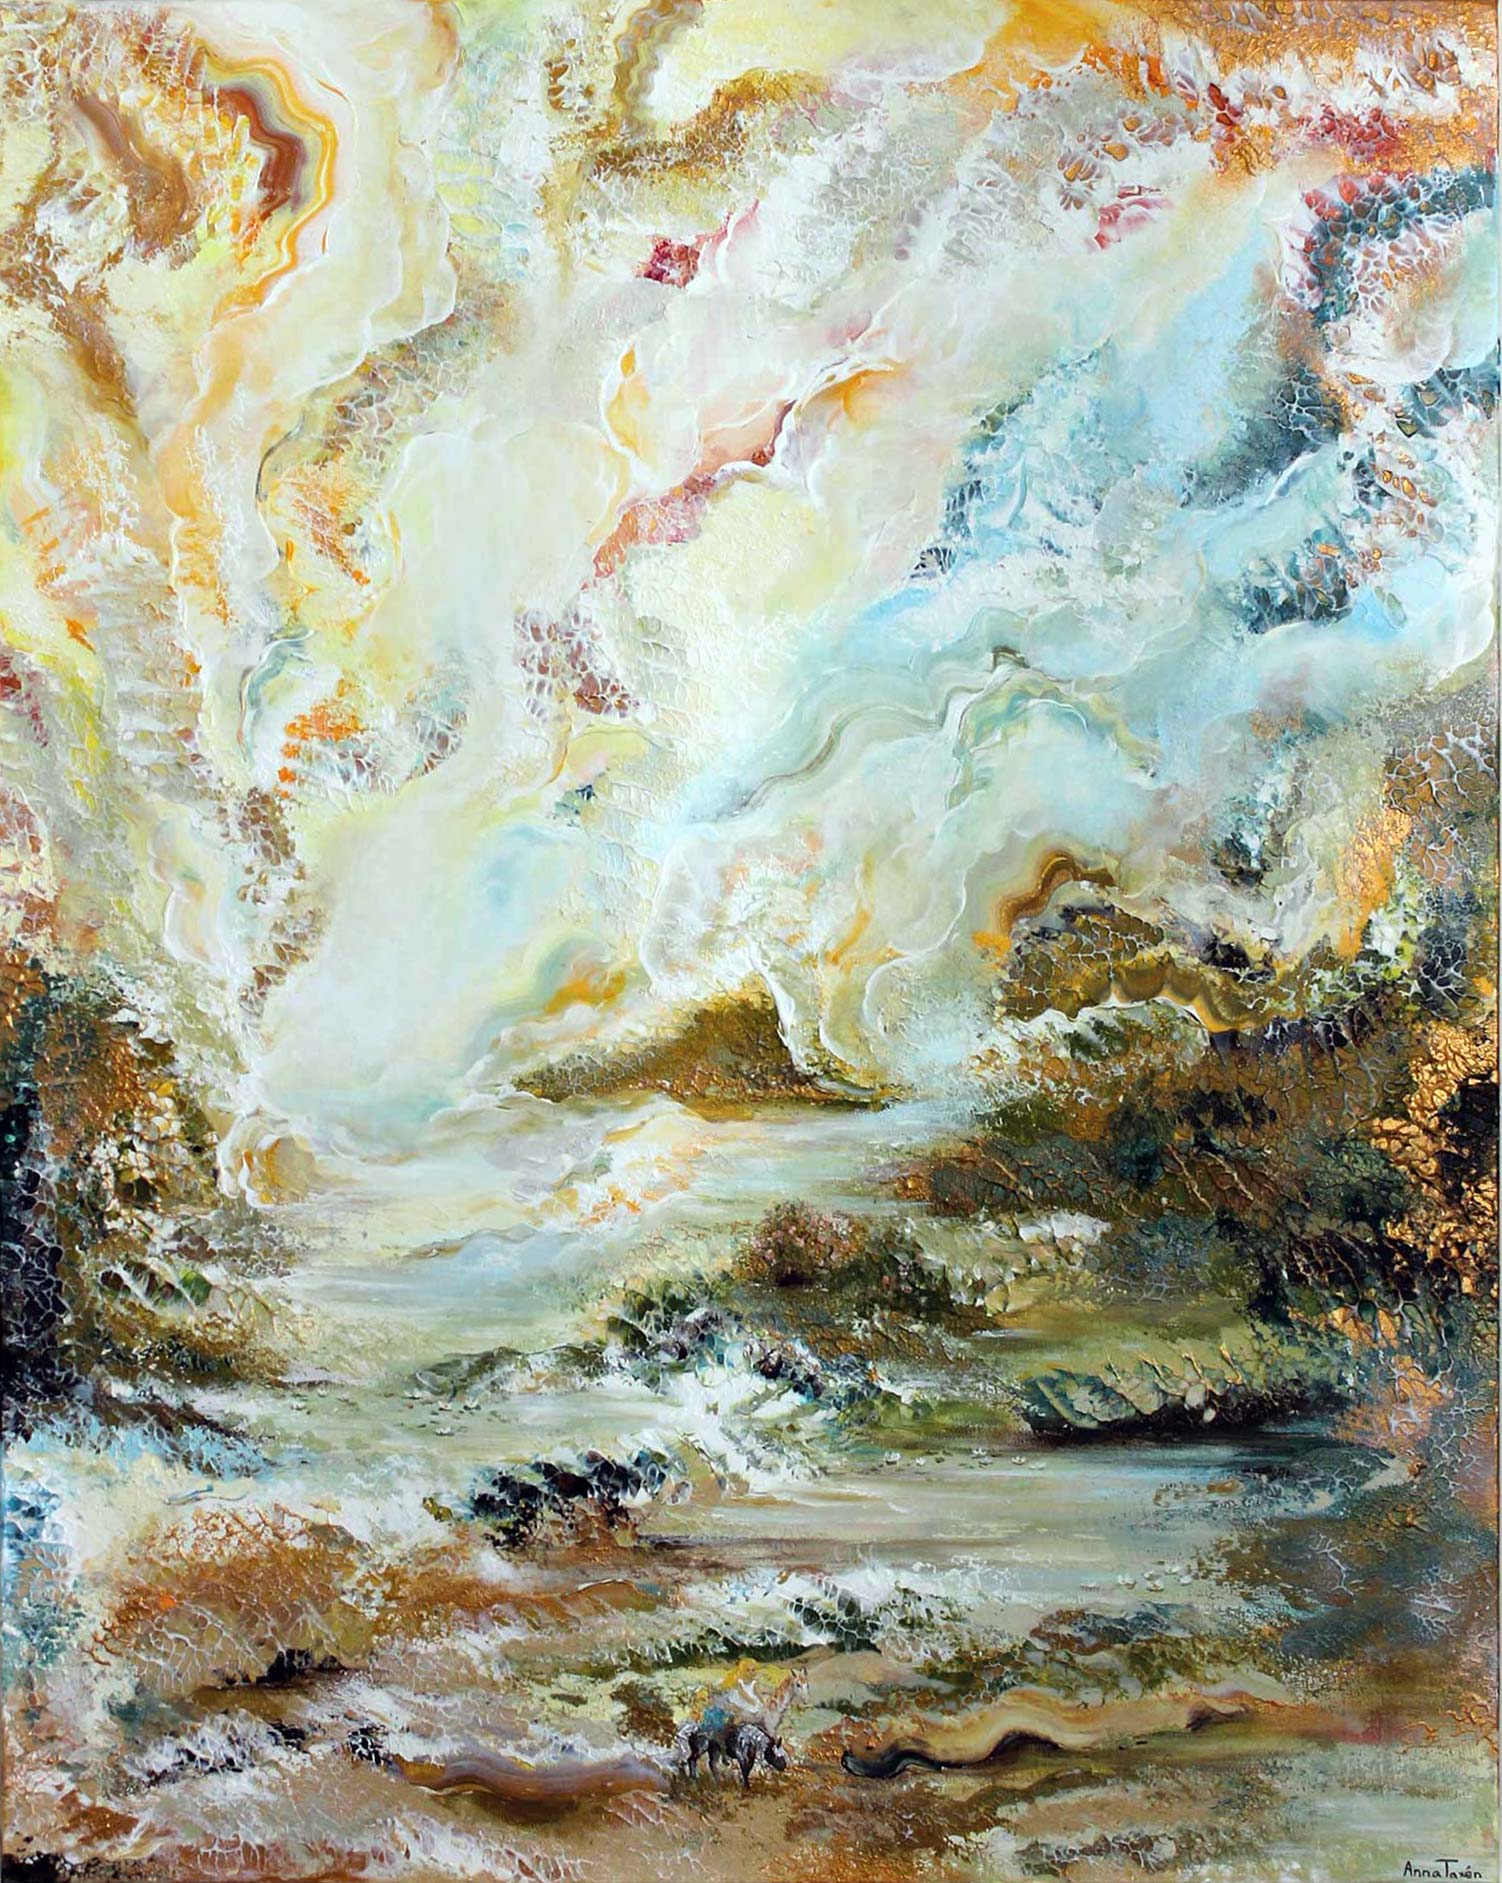
The piece I’m showcasing in this demo is part of a series inspired by my favorite childhood stories. This one, titled My Beloved Brother, draws inspiration from Astrid Lindgren’s novel My Beloved Sister. In the story, a girl named Barbro escapes into a magical world through a hole beneath a rosebush, where she meets her secret twin sister. They share many adventures together, but when the rose bush dies in the winter she has to say goodbye forever to her beloved sister.
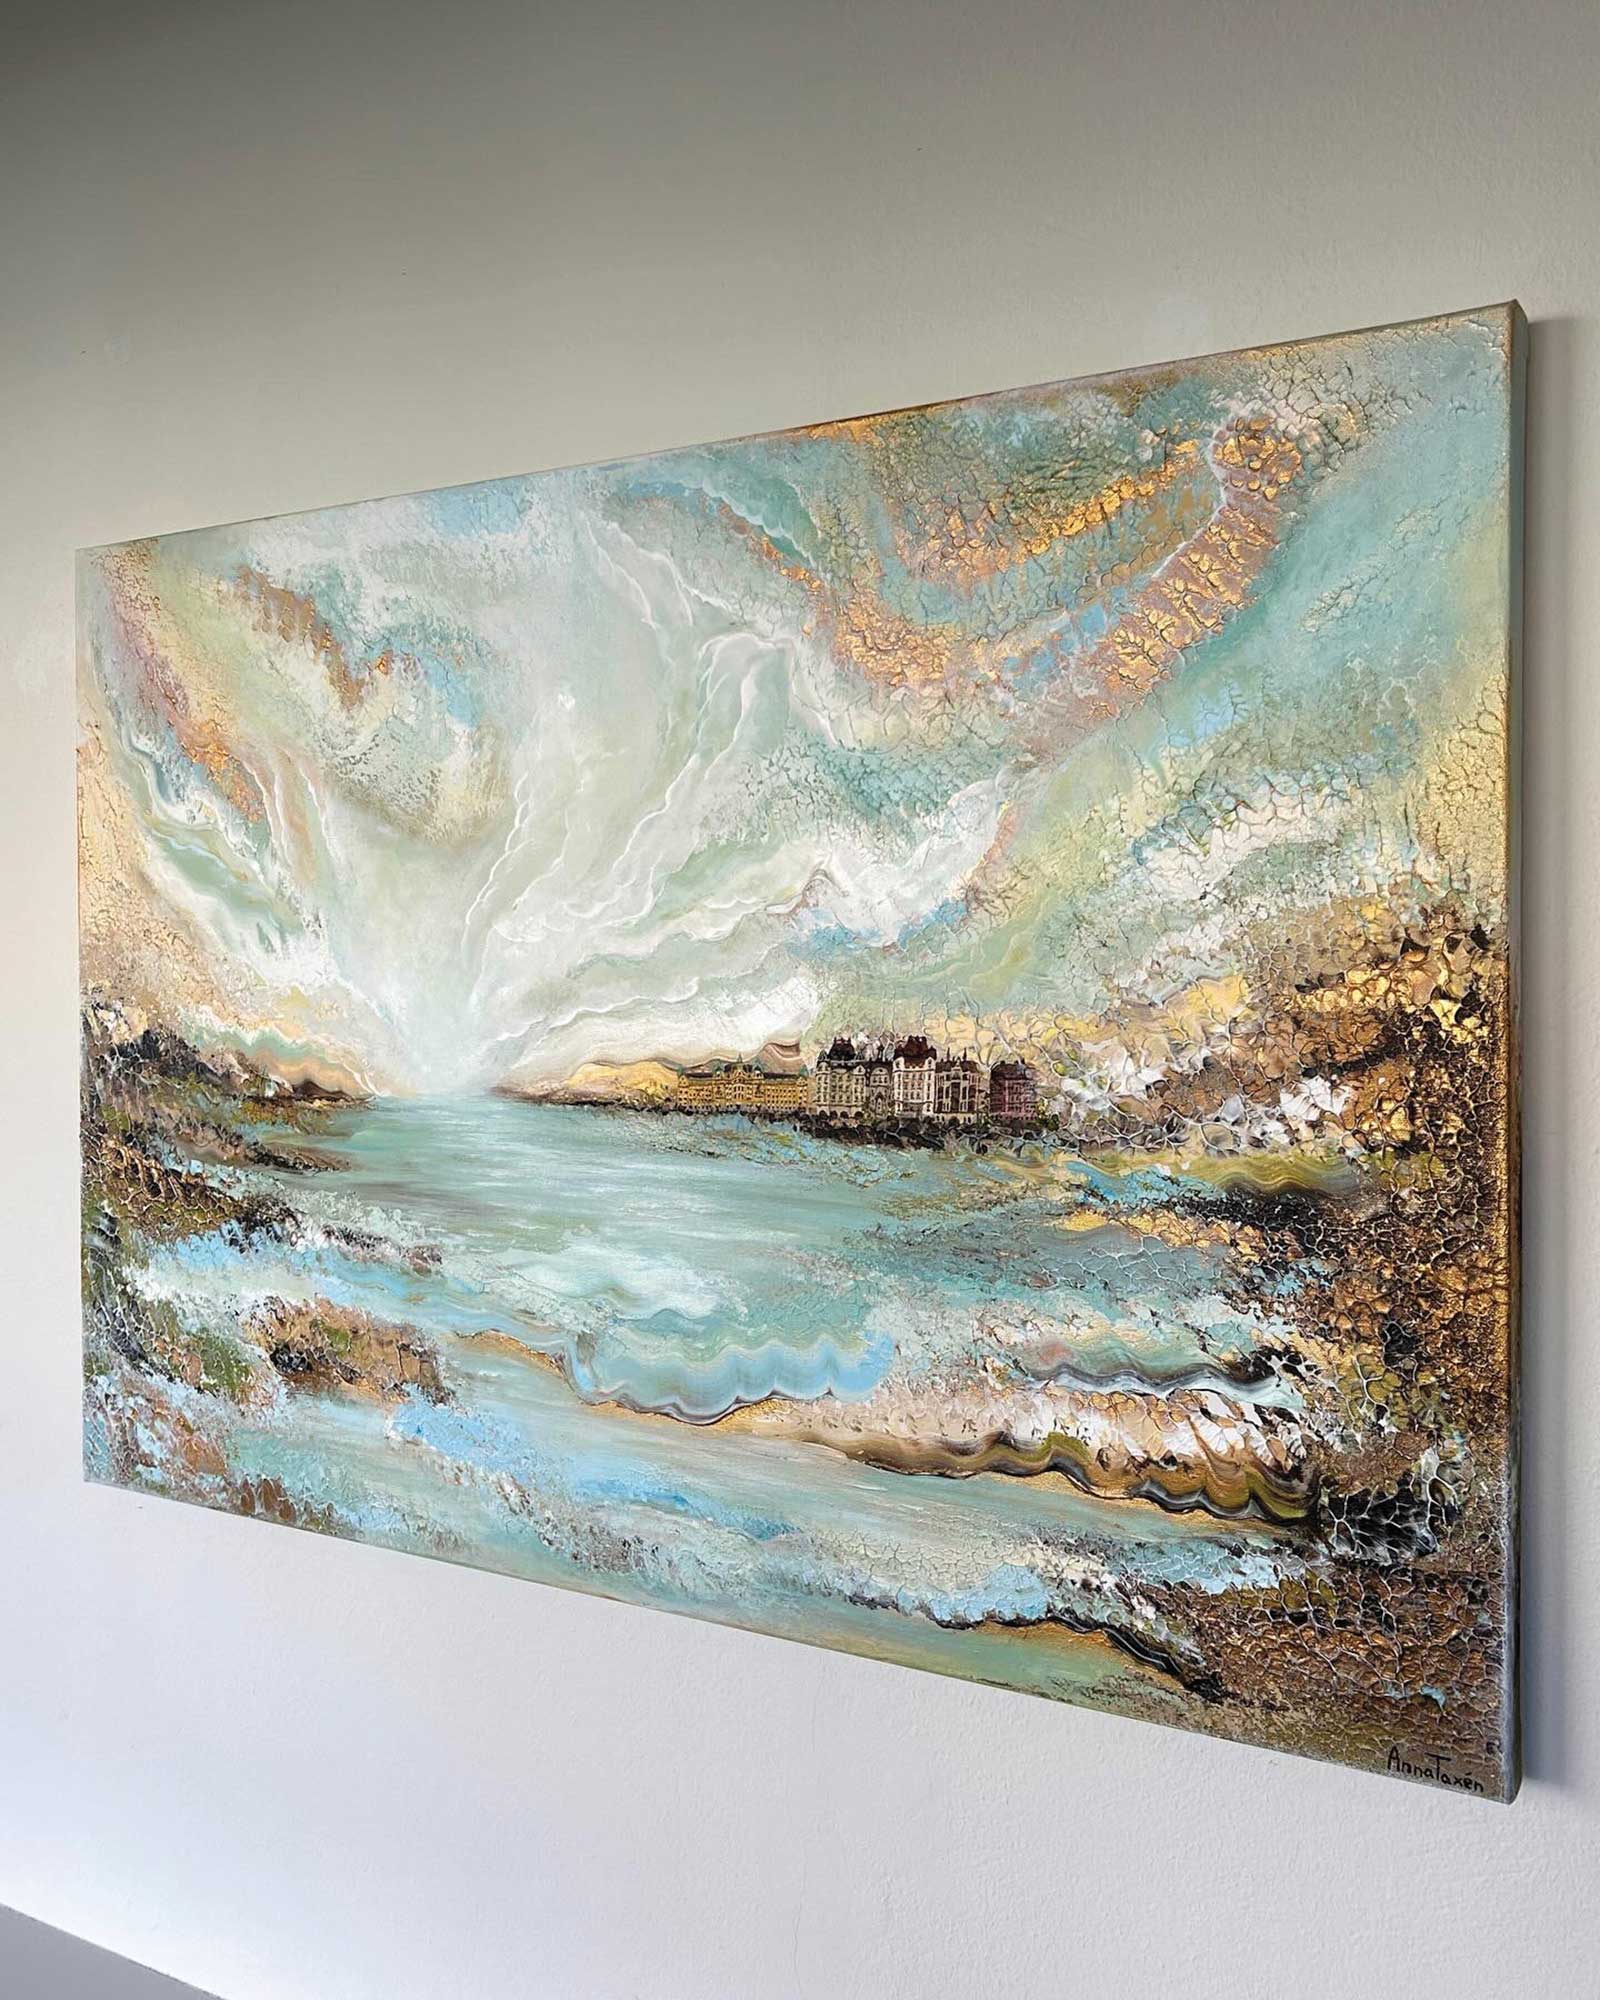
Strandvägen, acrylic on cotton canvas, 391/3 x 27½” (100 x 70 cm)
In my painting, I reimagine this tale through my own childhood and relationship with my brother. The piece blends flowing pigments with organic forms, forest shapes, water elements and hidden details that reveal themselves over time. Though inspired by Lindgren, the narrative becomes personal, reflecting my own bond and memories. Yet it remains open, inviting the viewer to enter the world and create their own version of the story.
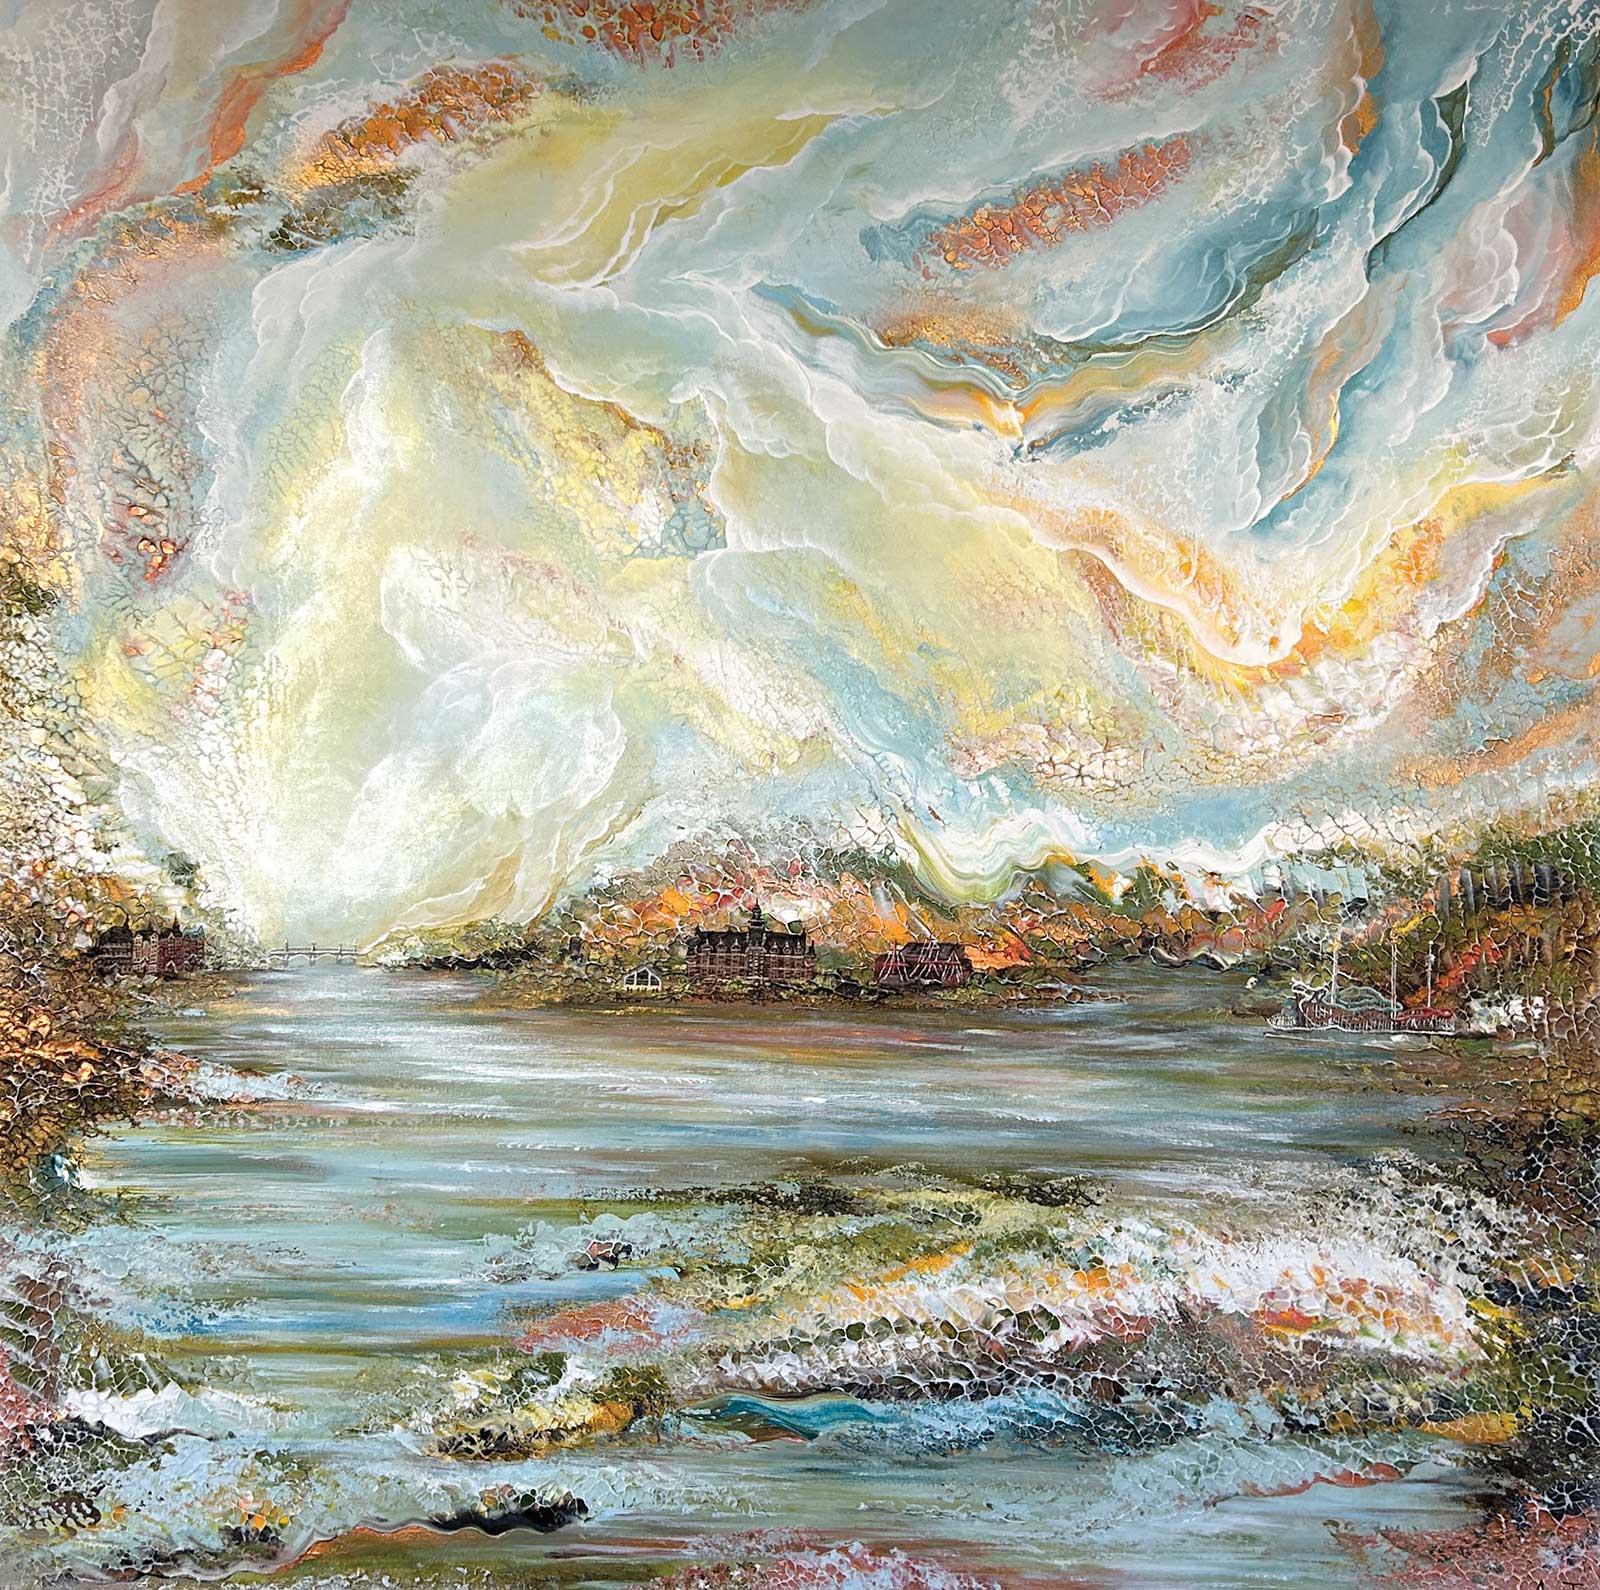
An Autumn Day Around Djurgården, acrylic on cotton canvas, 391/3 x 391/3” (100 x 100 cm)
In the following demonstration, I’ll walk through my process and show how I build these layered, imaginative worlds.
My Art in the Making My Beloved Brother
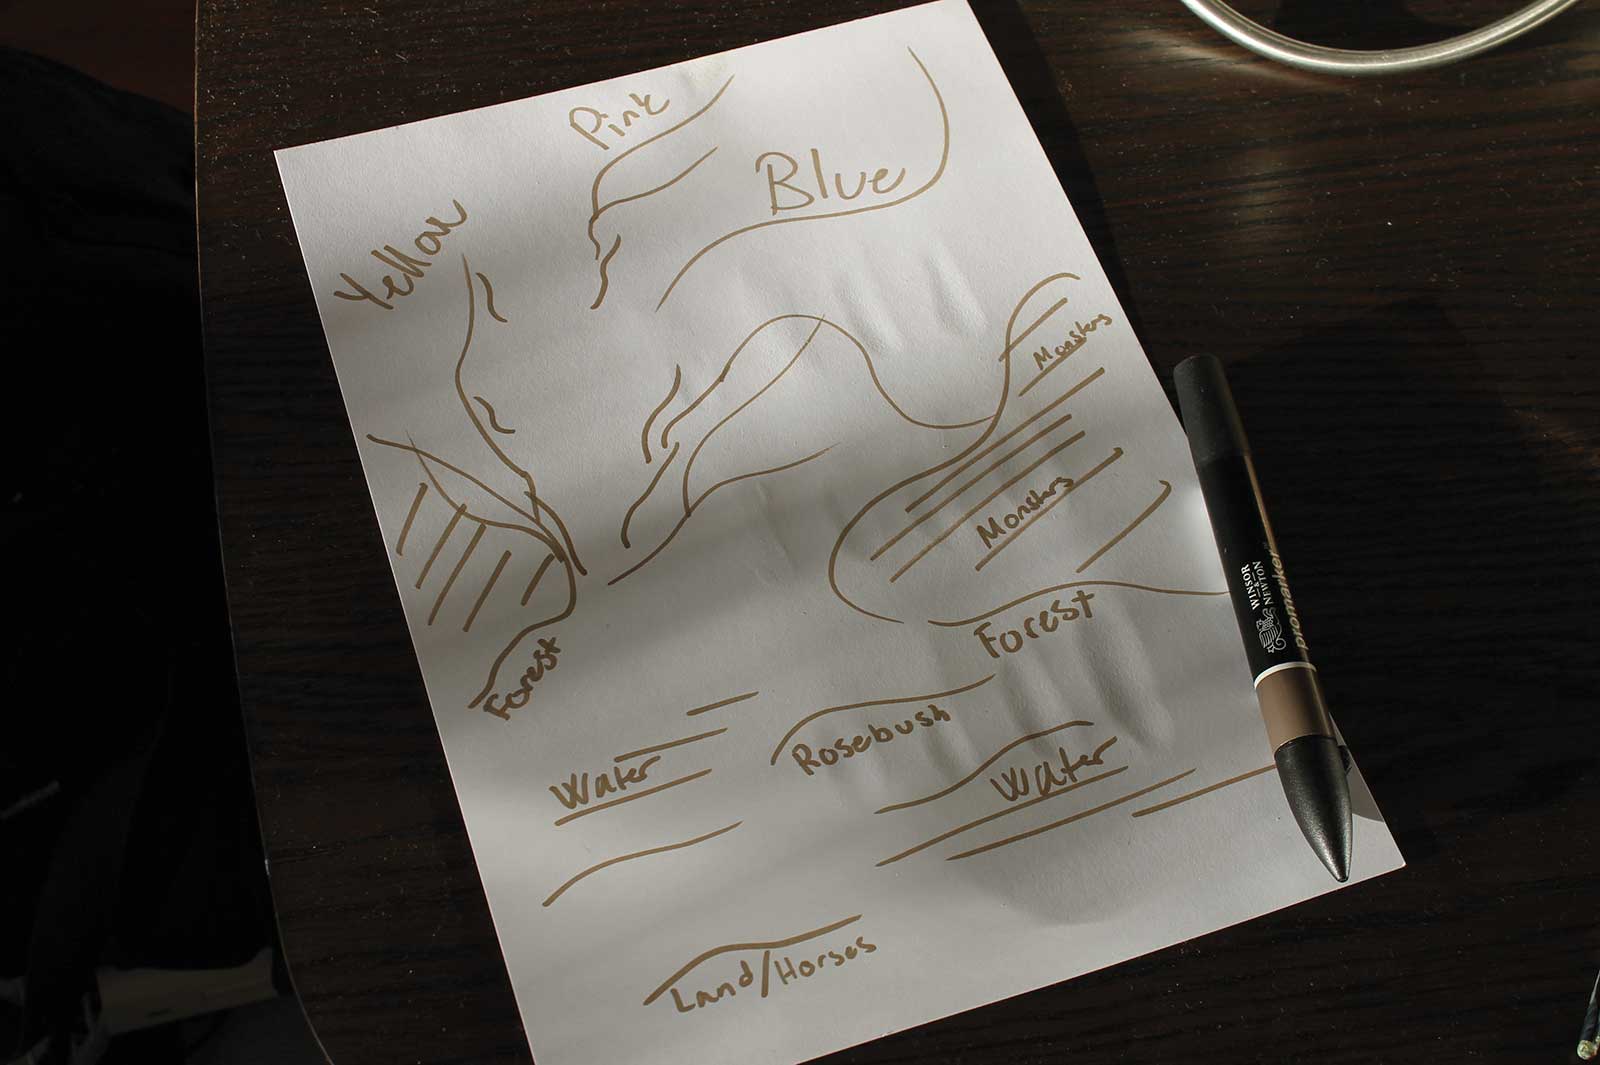
Stage 1 Initial Sketch & Composition
I begin with a light sketch to map out the composition of my idea. Sometimes I sketch directly onto the canvas, and other times I do it on a separate sheet of paper beside me. This helps me mentally organize the layout before diving into the color work.
WHAT THE ARTIST USED
Winsor & Newton Acrylics
Titanium white, Ultramarine blue, Crimson, Lemon yellow, Cobalt blue deep, Buff titanium, Cadmium yellow, Burnt umber, Gold, Iridescent white, Quinacridone magenta
Winsor & Newton Synthetic Gold Filament Brushes
Round, sizes 1, 5, and 6, Flat, sizes 3 and 4, Filbert, size 2
Additional Materials
Winsor & Newton cotton-stretched canvas, Winsor & Newton palette knife, size 23 (82 mm blade), Putty knife (used for broad texture work), Standard kitchen sponge pieces used for highlight blending, Hands (for blending, soft transitions and final glazes)
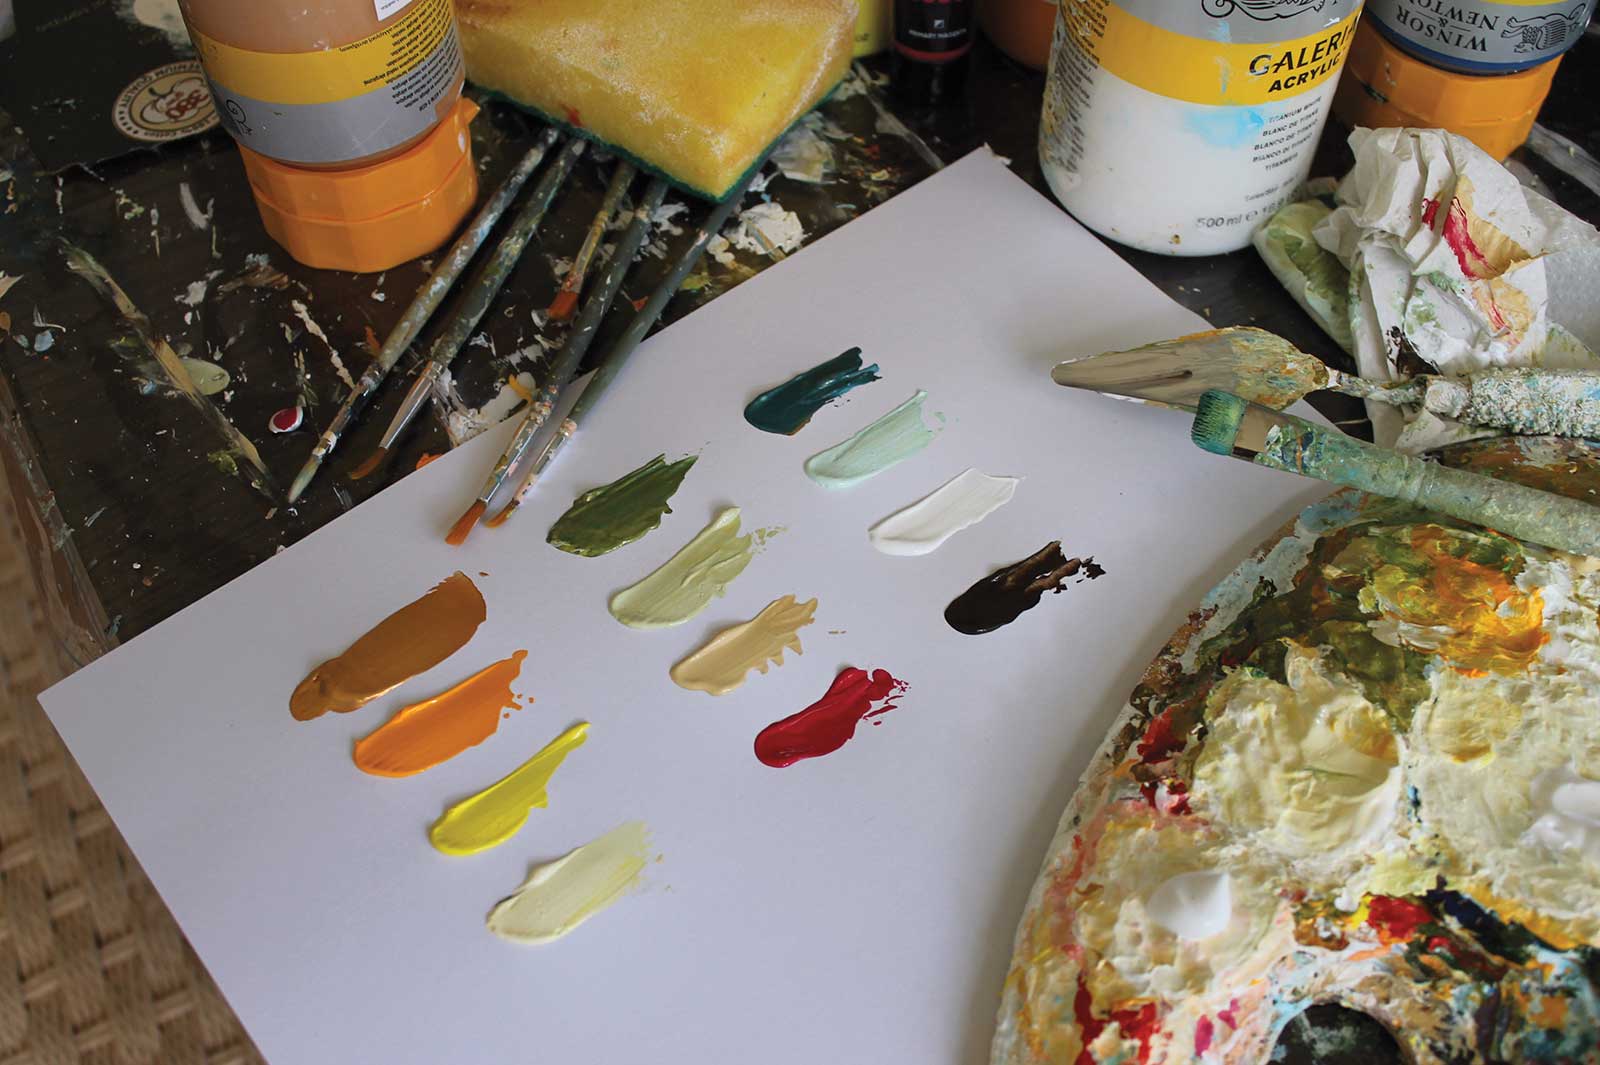
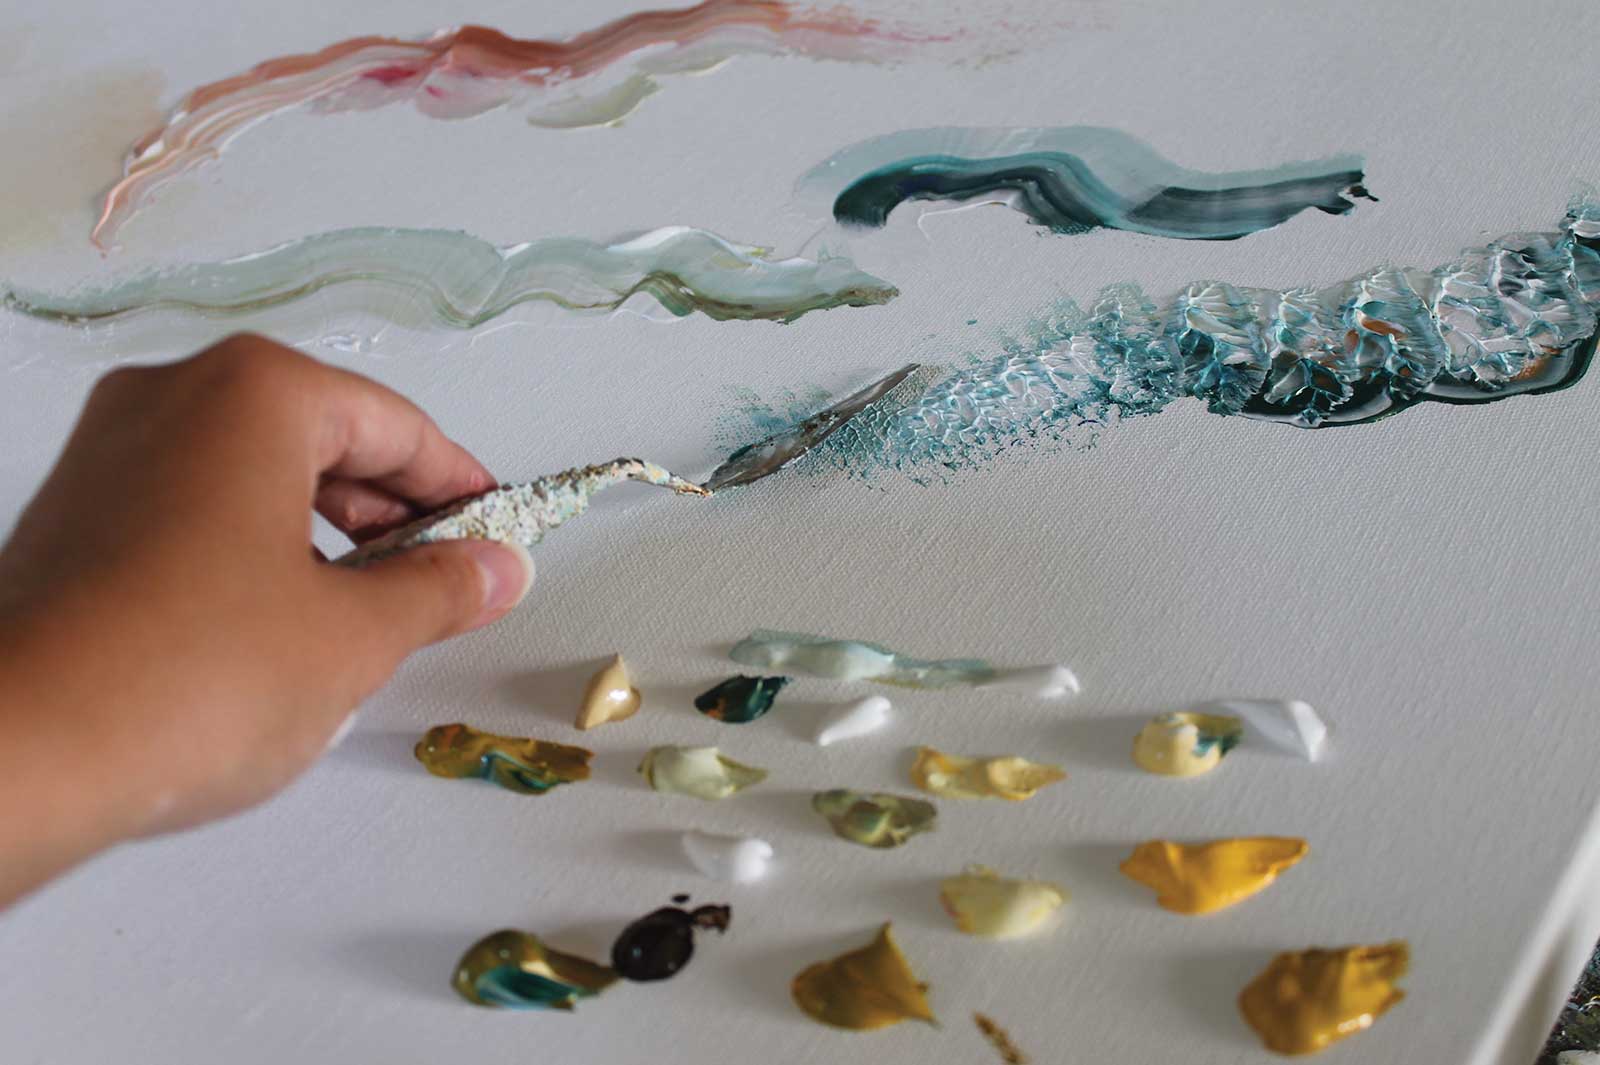
Stage 2 Color Palette Preparation
Next, I mix a set color palette. I spend a lot of time here to get the right shades and create large amounts of each tone. I work across the whole canvas simultaneously, so I need to have my wooden palette ready with blended colors throughout the process. You can see some of my color swatches in this image.
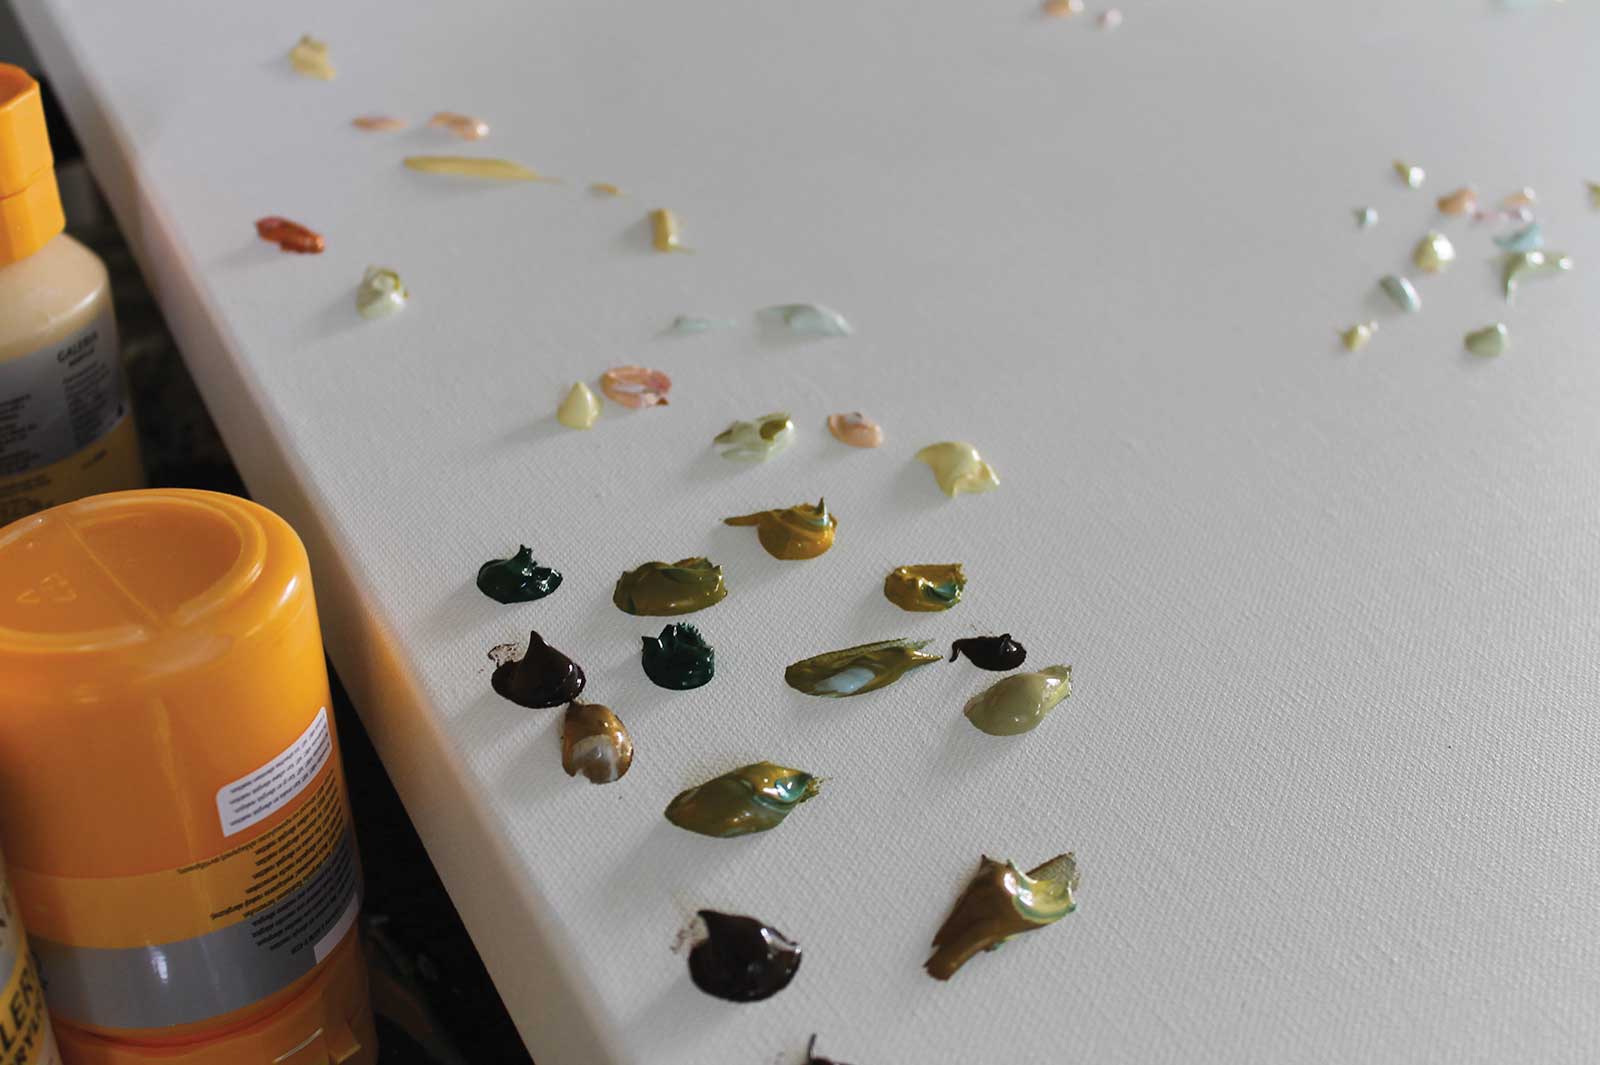
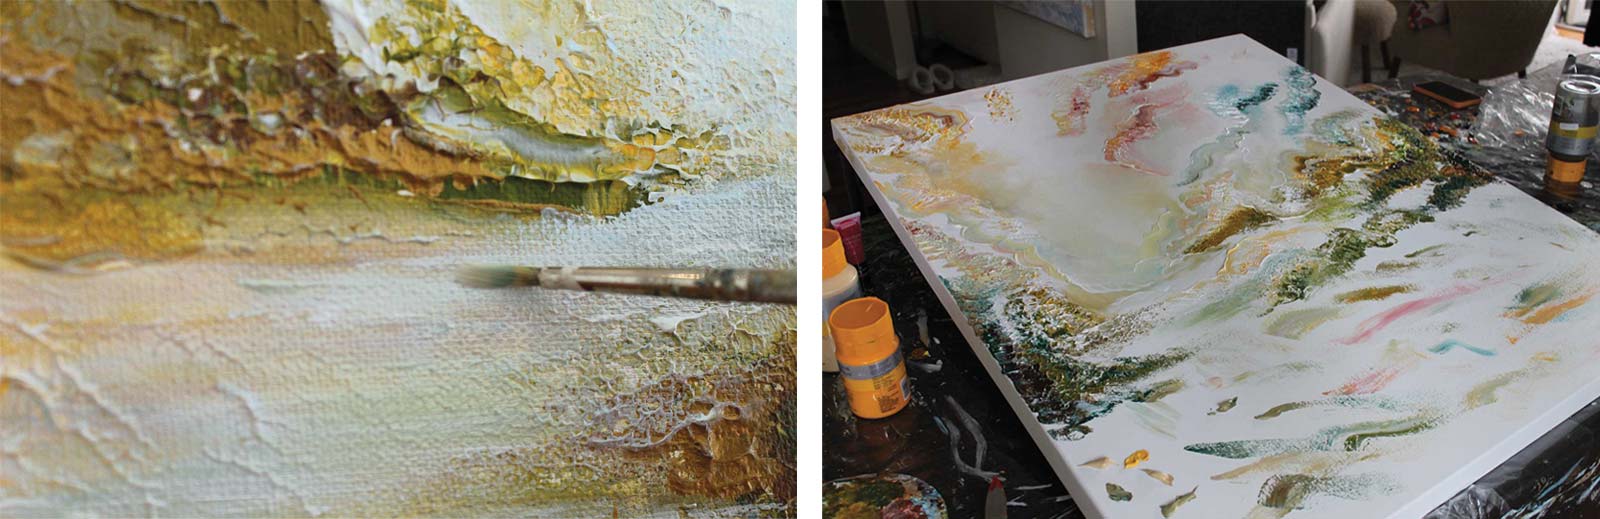
Stage 3 Placing Paint Dabs
With colors prepared, I begin placing various-sized dabs of paint onto the canvas. I use smaller dabs for distant areas and larger ones in places meant to appear closer or more abstract. This sets the groundwork for depth.
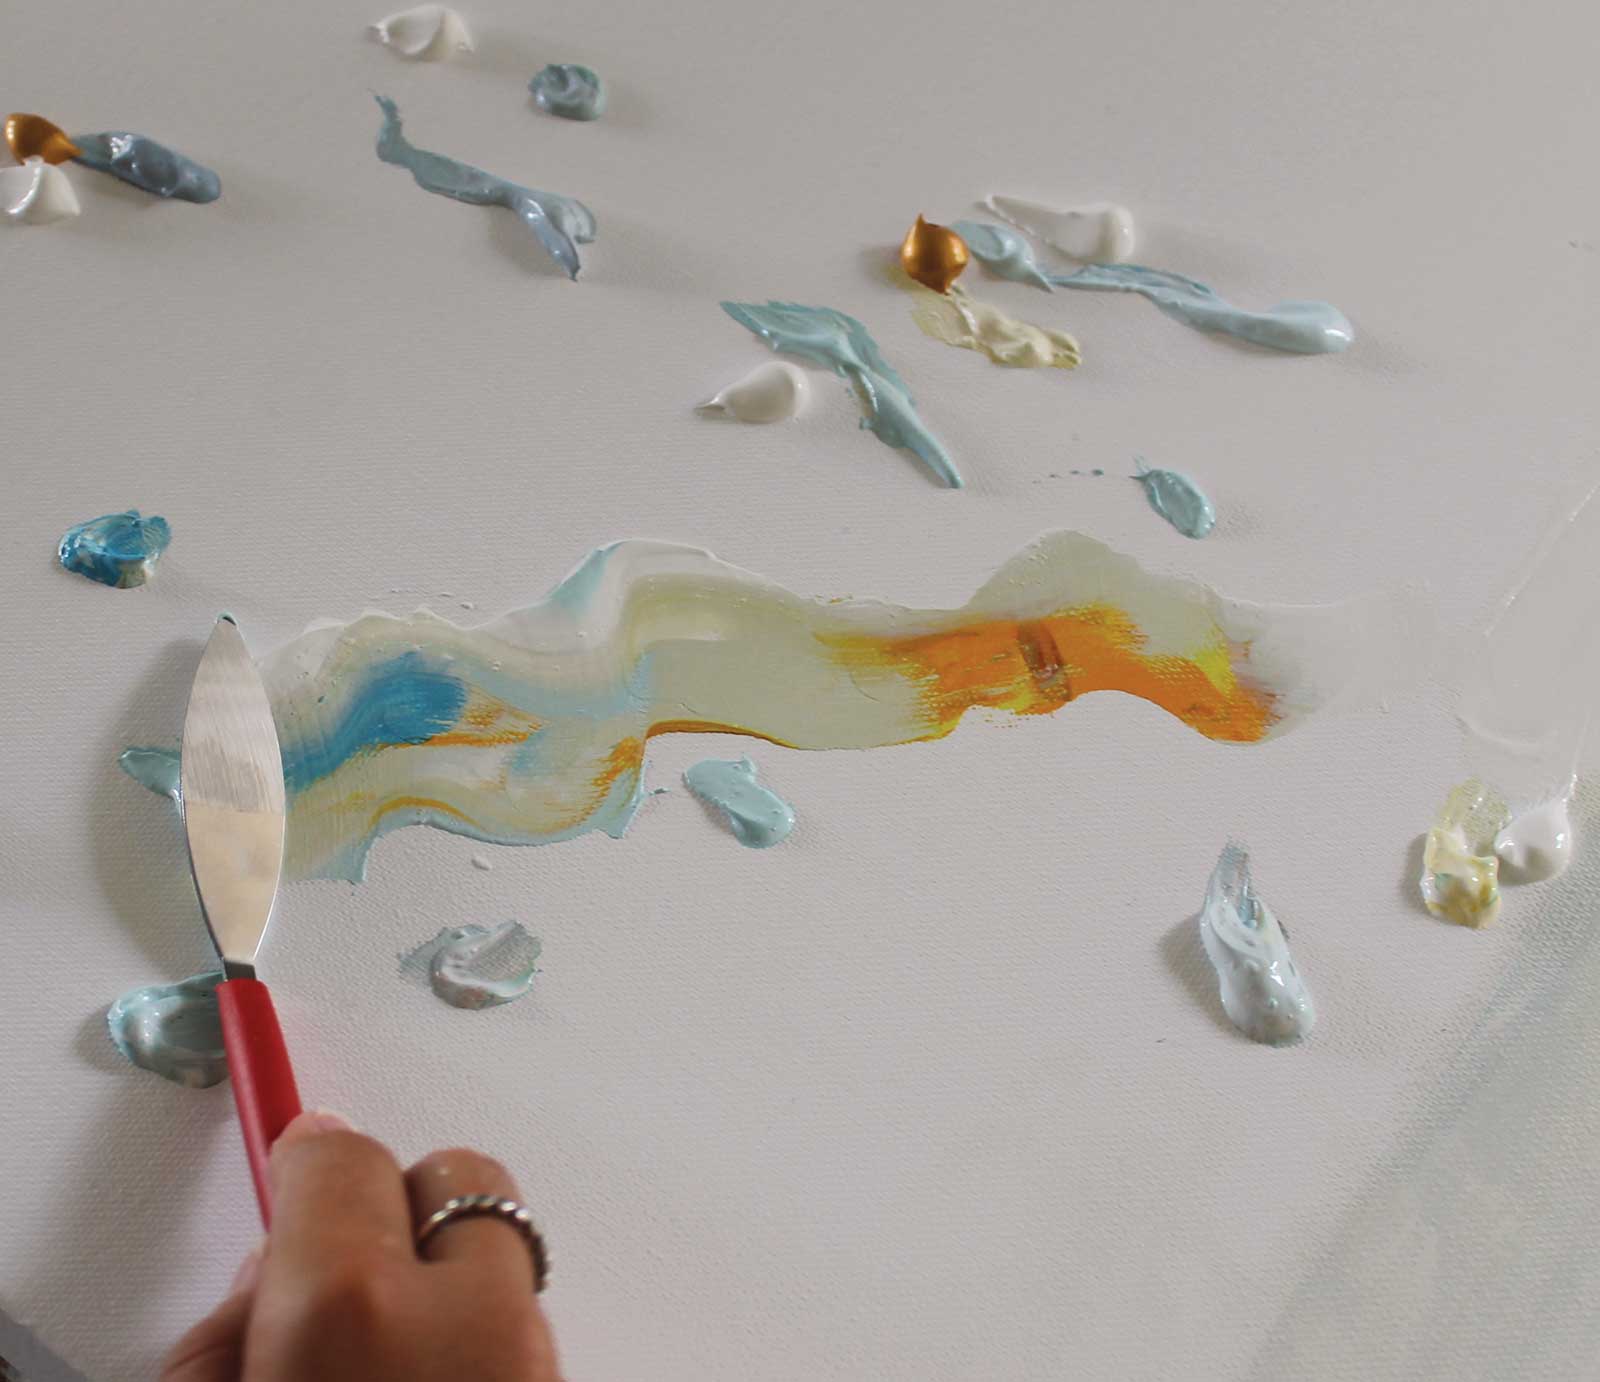
Stage 4 KnifeWork, Creating Flow
When I have a fair amount of paint clicks on the canvas, I start to use a palette knife to create a flow and mixture of the different colors. I drag the knife with a light hand over the colors and bend it in my favor to create waves of paint.
An Emotional Narrative
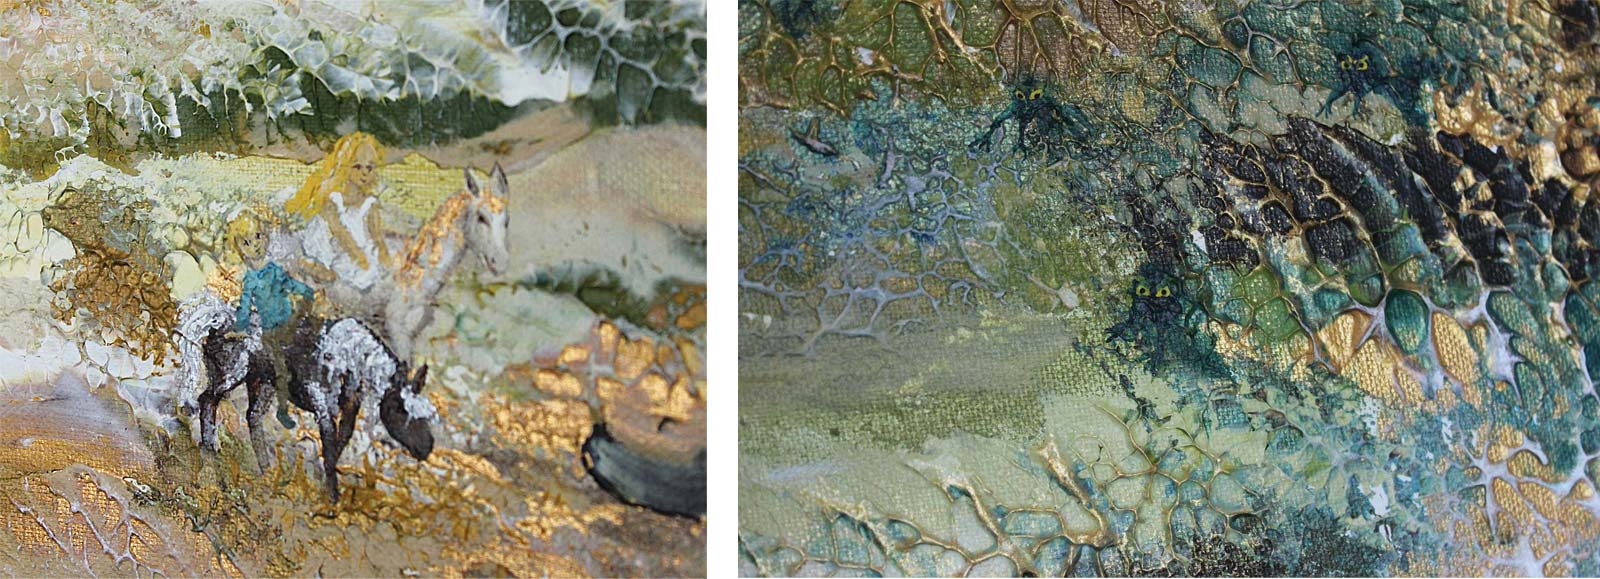
In the story My Beloved Sister, the siblings ride through the forest of the wicked on their horses. One is called Gold Spark and his coat gleams like pure gold in the sunlight. His mane and tail shimmer with gold and ripples of light when he runs. The other horse is black with a silver tail and mane; he is called Silver Spark and a cascade of silver catches every hint of starlight when he runs. In the painting you can see me and my brother on each horse. I reinterpreted it through my own childhood memories and bond with my brother. The forest of the wicked is dense and shadowy. The trees are so close that they block out most of the sunlight. If you look really closely, you might see some yellow cold eyes staring behind the tall trees and claw-like branches stretching and reaching out to get you. The way I layered color, texture and light reflects how memories work—blurry at the edges, clear in fragments, sometimes vivid and sometimes fading.
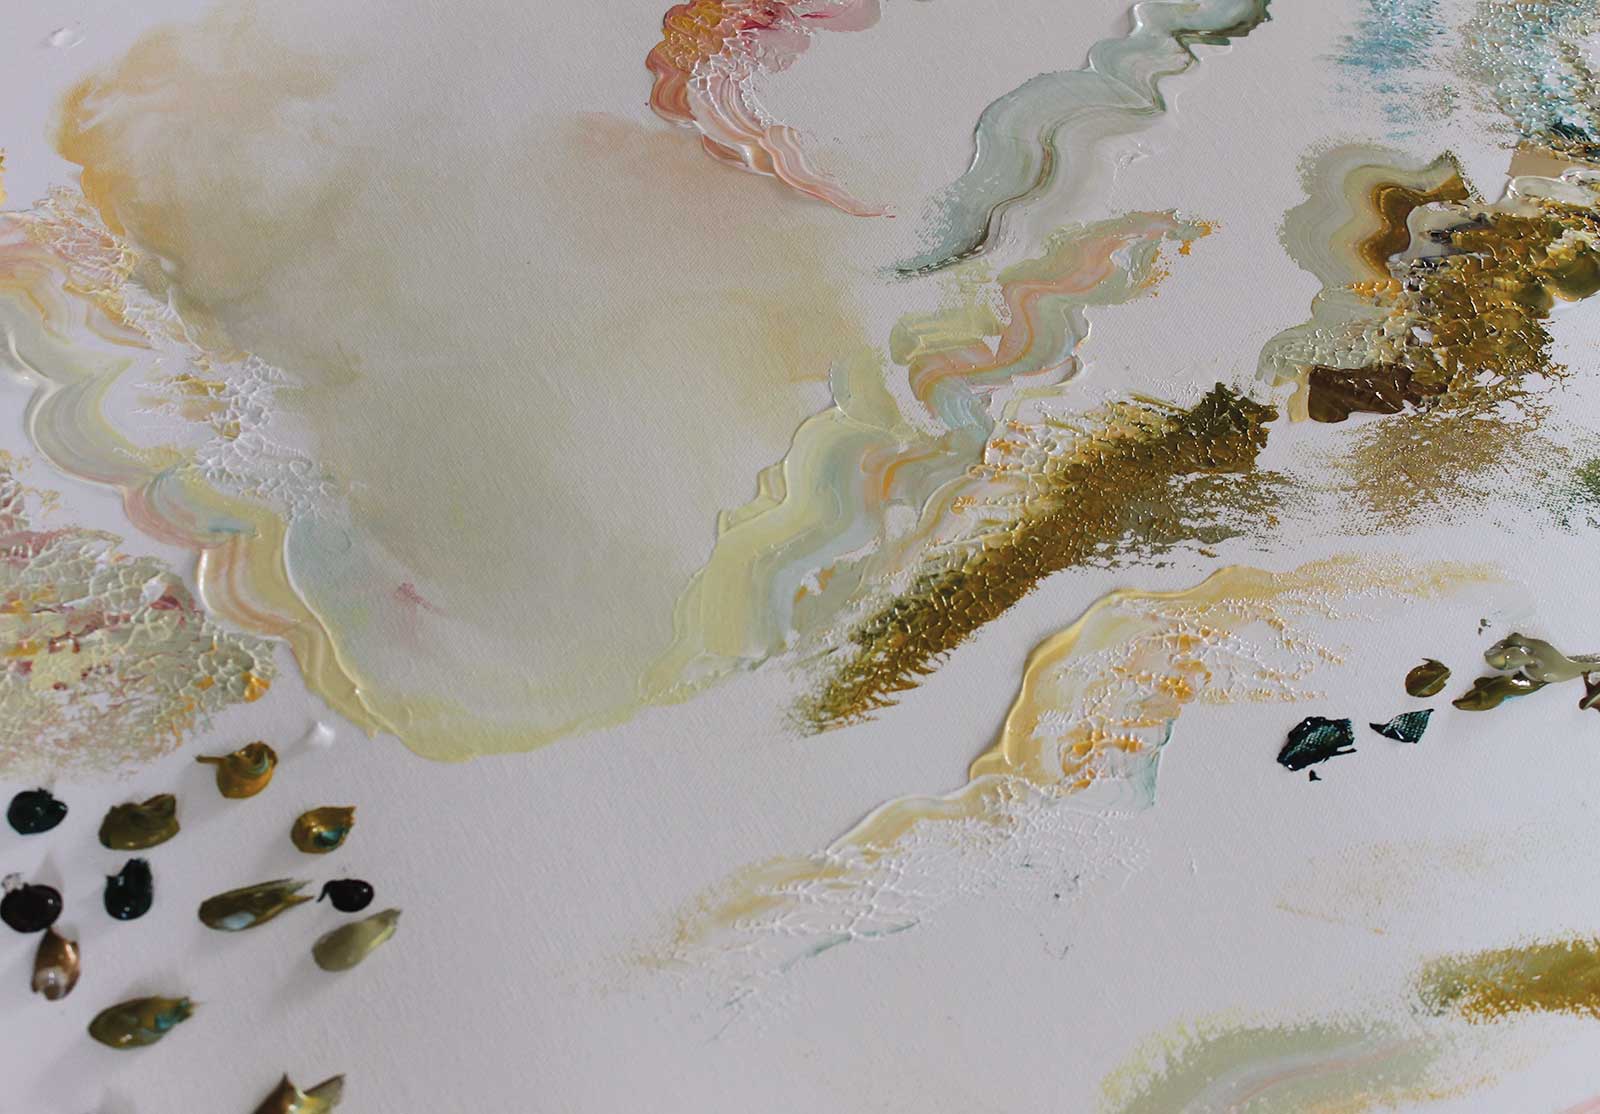
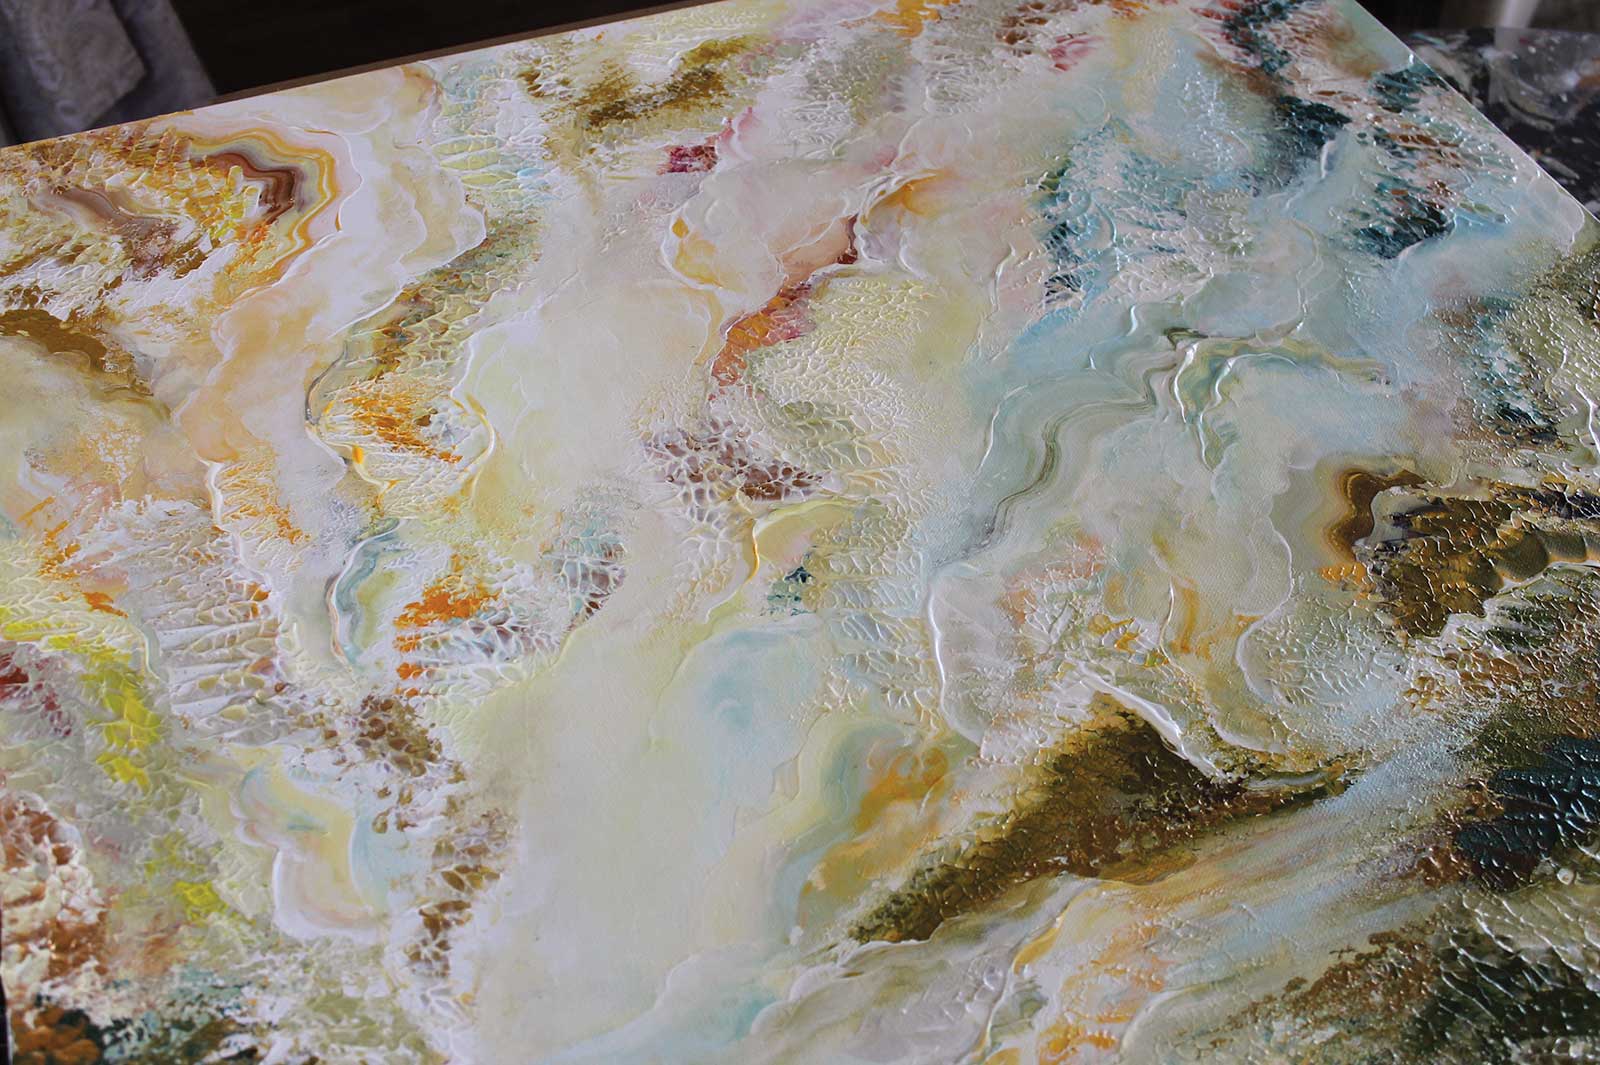
Stage 5 Texture & Light Effects
Some areas and waves I leave as they are, while others I press into with the knife to create texture. In the sky, I often layer a gold shimmer underneath matte paint. When I press through with the knife, it allows the gold to peek through, evoking a feeling of sunlight breaking through clouds.
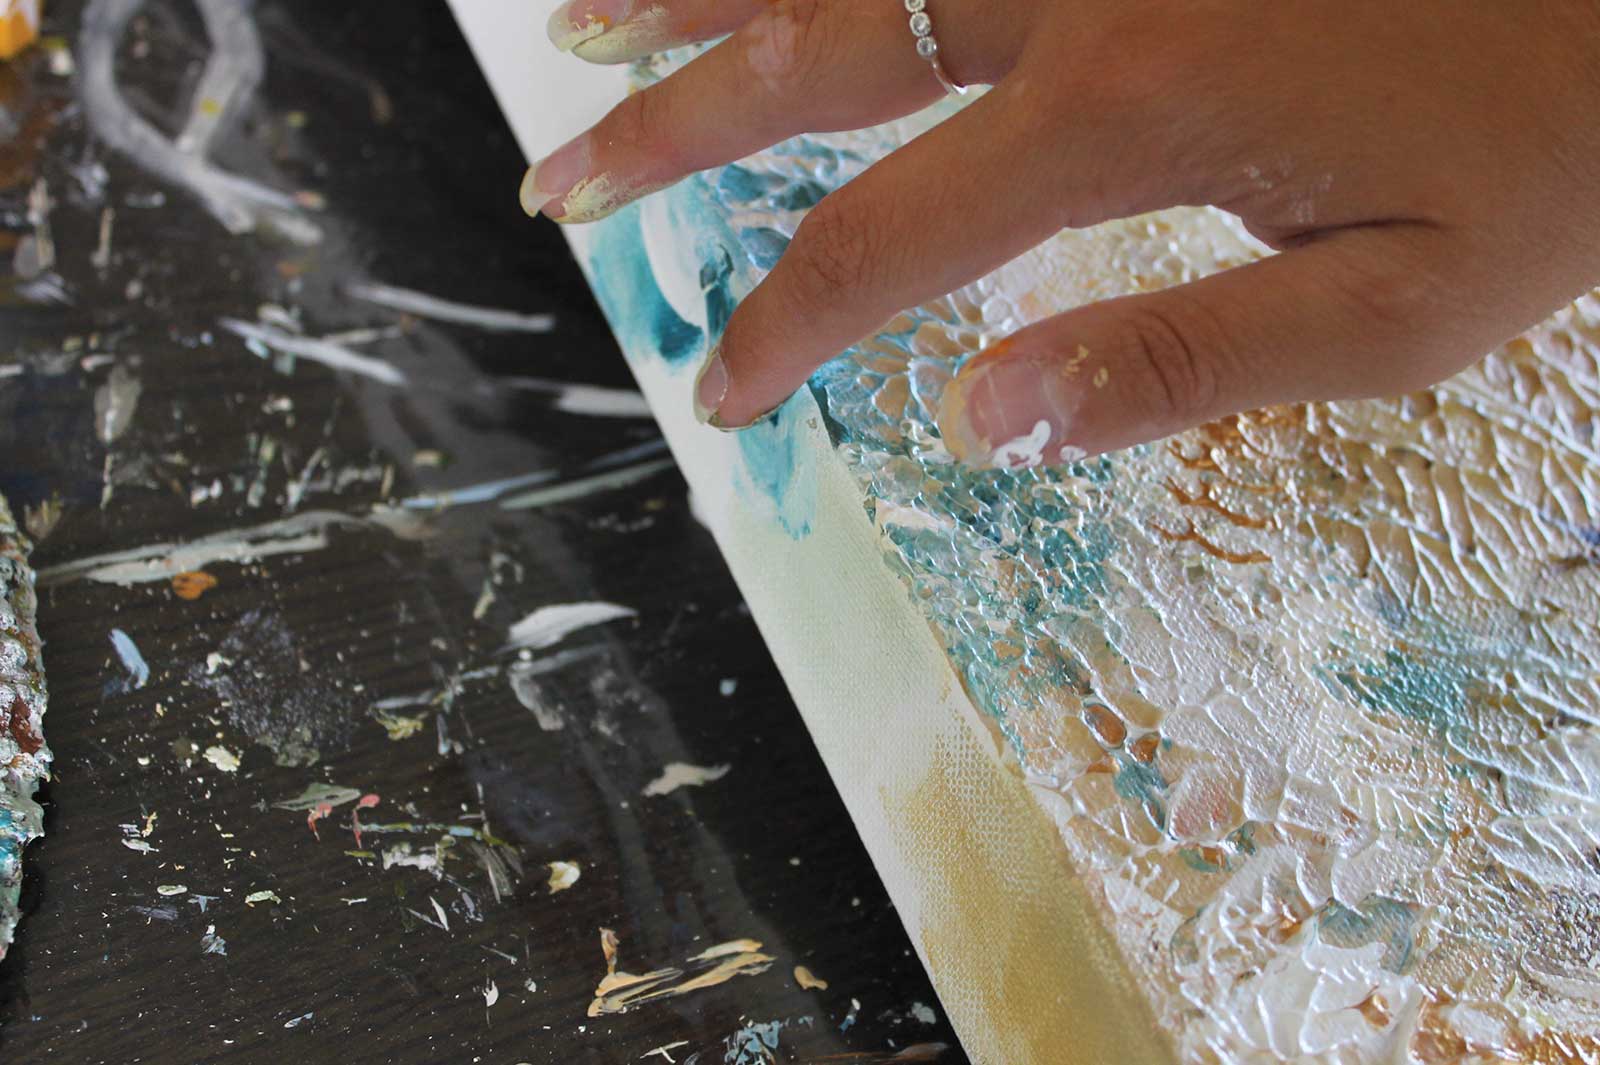
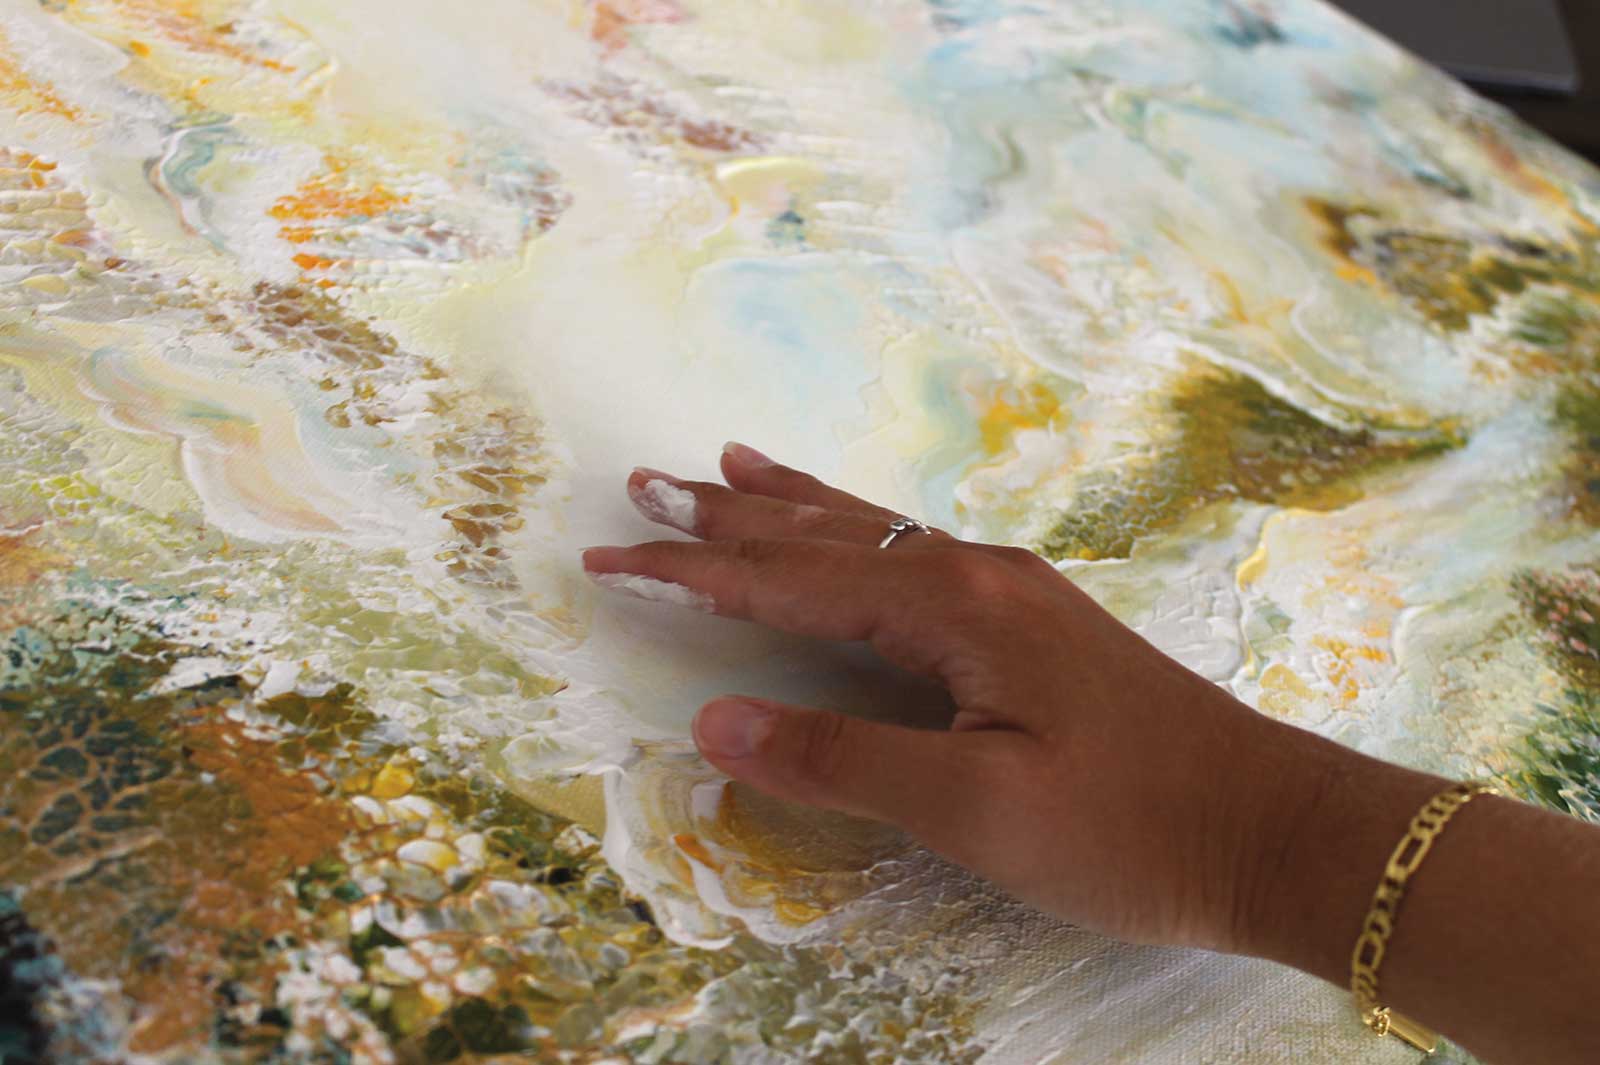
Stage 6 Blending by Hand
After establishing texture and paint waves, I begin blending the parts together with my hands. This helps unify the surface and lets me add new colors in empty spaces. In the sky, I use my fingers dipped in white to bring out light sources even more, softening transitions and creating a more cloud-like feeling.
Stage 7 Water Elements & Brushwork
For the lower part of the painting, I use the leftover paint on my knife and a brush to create water-like strokes. Unlike the sky, this section is meant to feel calmer and not as wild, so I avoid too much wave-like motion here.
Stage 8 Drying Time
Once I’m happy with the color balance and texture, I let the painting dry, usually overnight. This ensures the thicker textures are set completely before I continue with the next step.
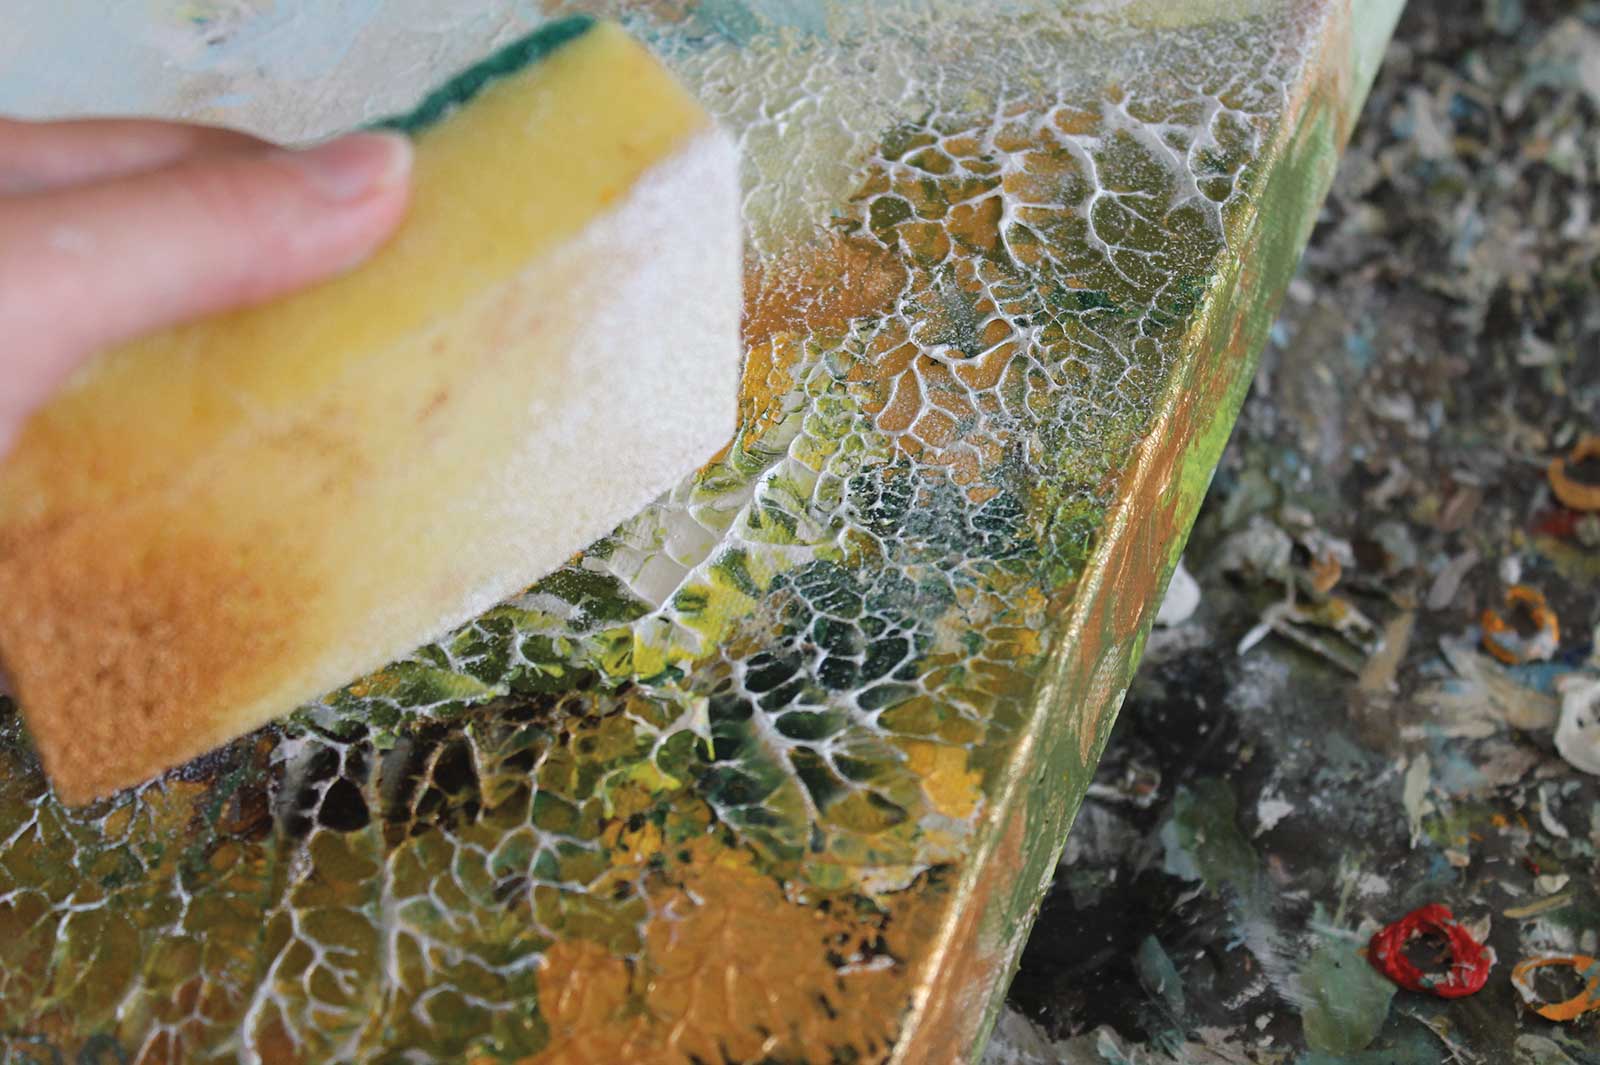
Stage 9 Sponge Highlights
With the canvas dry, I use a sponge dipped in white and gold paint to highlight textured areas. I gently press the white side on sections needing more light and the gold side on deeper parts where I want to keep the richness.
Stage 10 Painting the Edges
I always paint the sides of my canvas so the artwork can be displayed without a frame. These sides are color matched to the main painting.
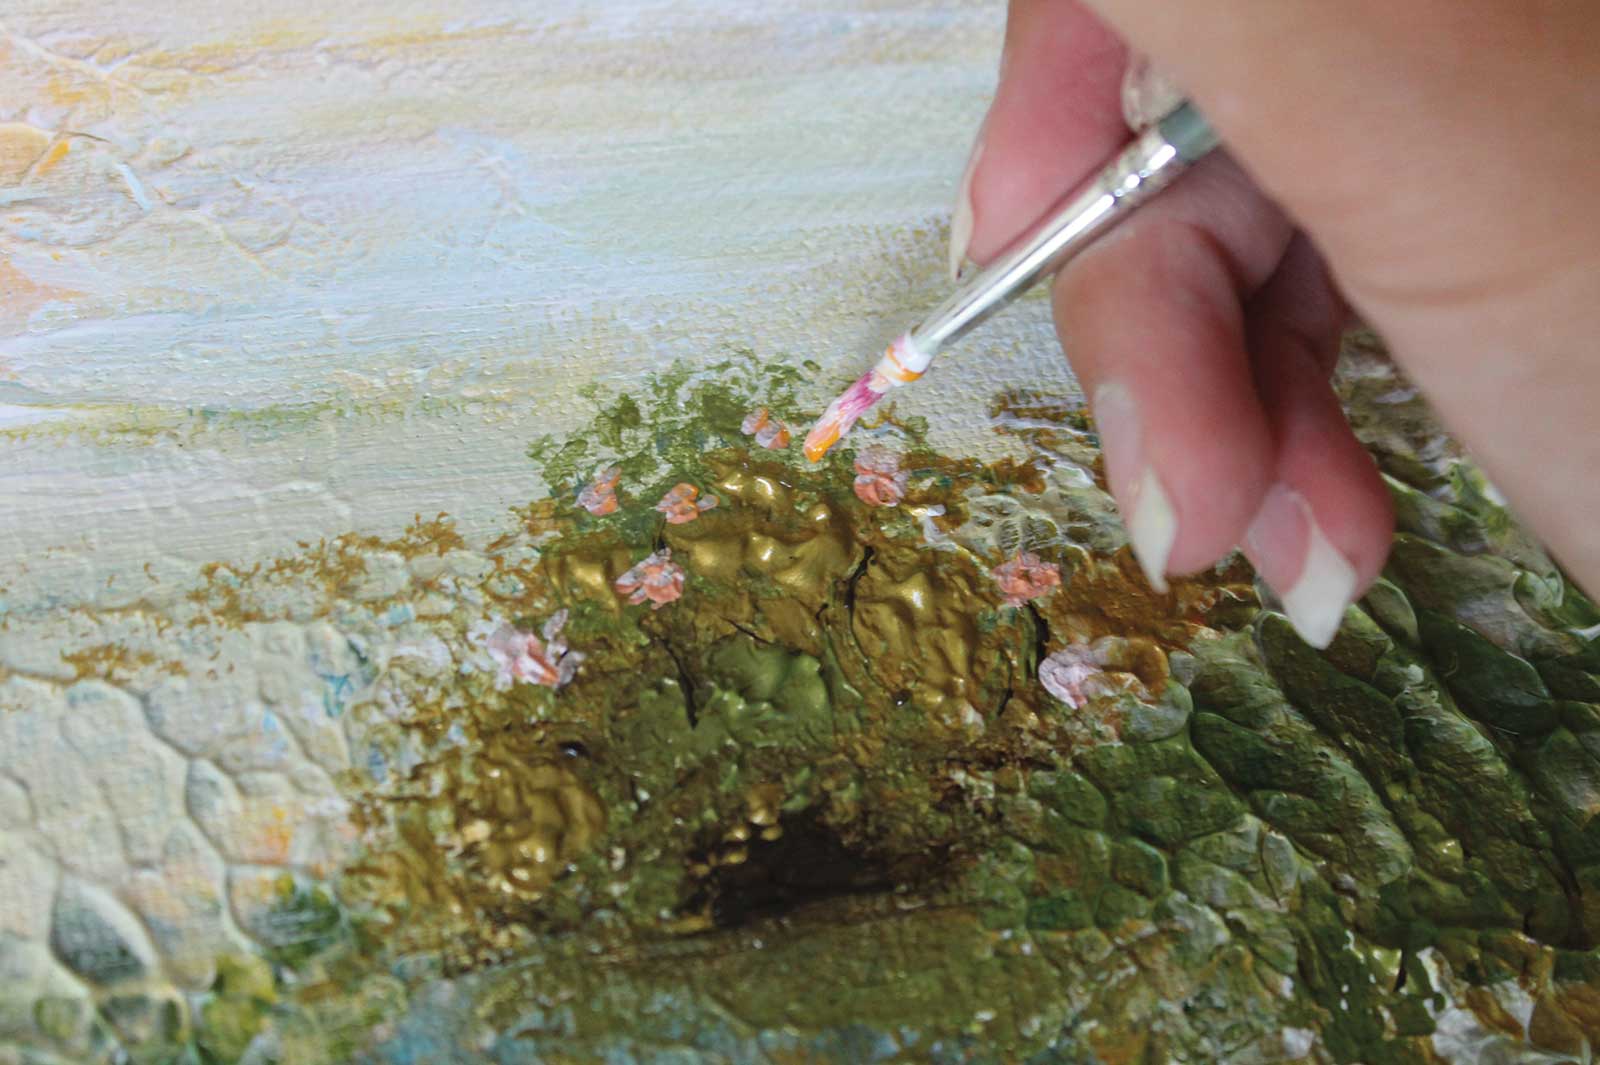
Stage 11 Details
I add the fine details as one of the last steps, tiny elements that bring the story to life. I do this last so they’re not accidentally covered during earlier steps. Here, I’m showcasing the details of the rosebush. I also add the horses, my brother and me, the monsters and more, such as the lily pads, etc.
Stage 12 Gloss
Final touches include a gloss white mix (one part water, two parts paint), which I apply with my fingers to the brightest sky areas and to the waterline where sky and water meet. This creates more life and adds a nice finishing touch.
Stage 13 Finished Artwork
My Beloved Brother, acrylic on cotton canvas, 391⁄3 x 311⁄2” (100 x 80 cm)
About the Artist
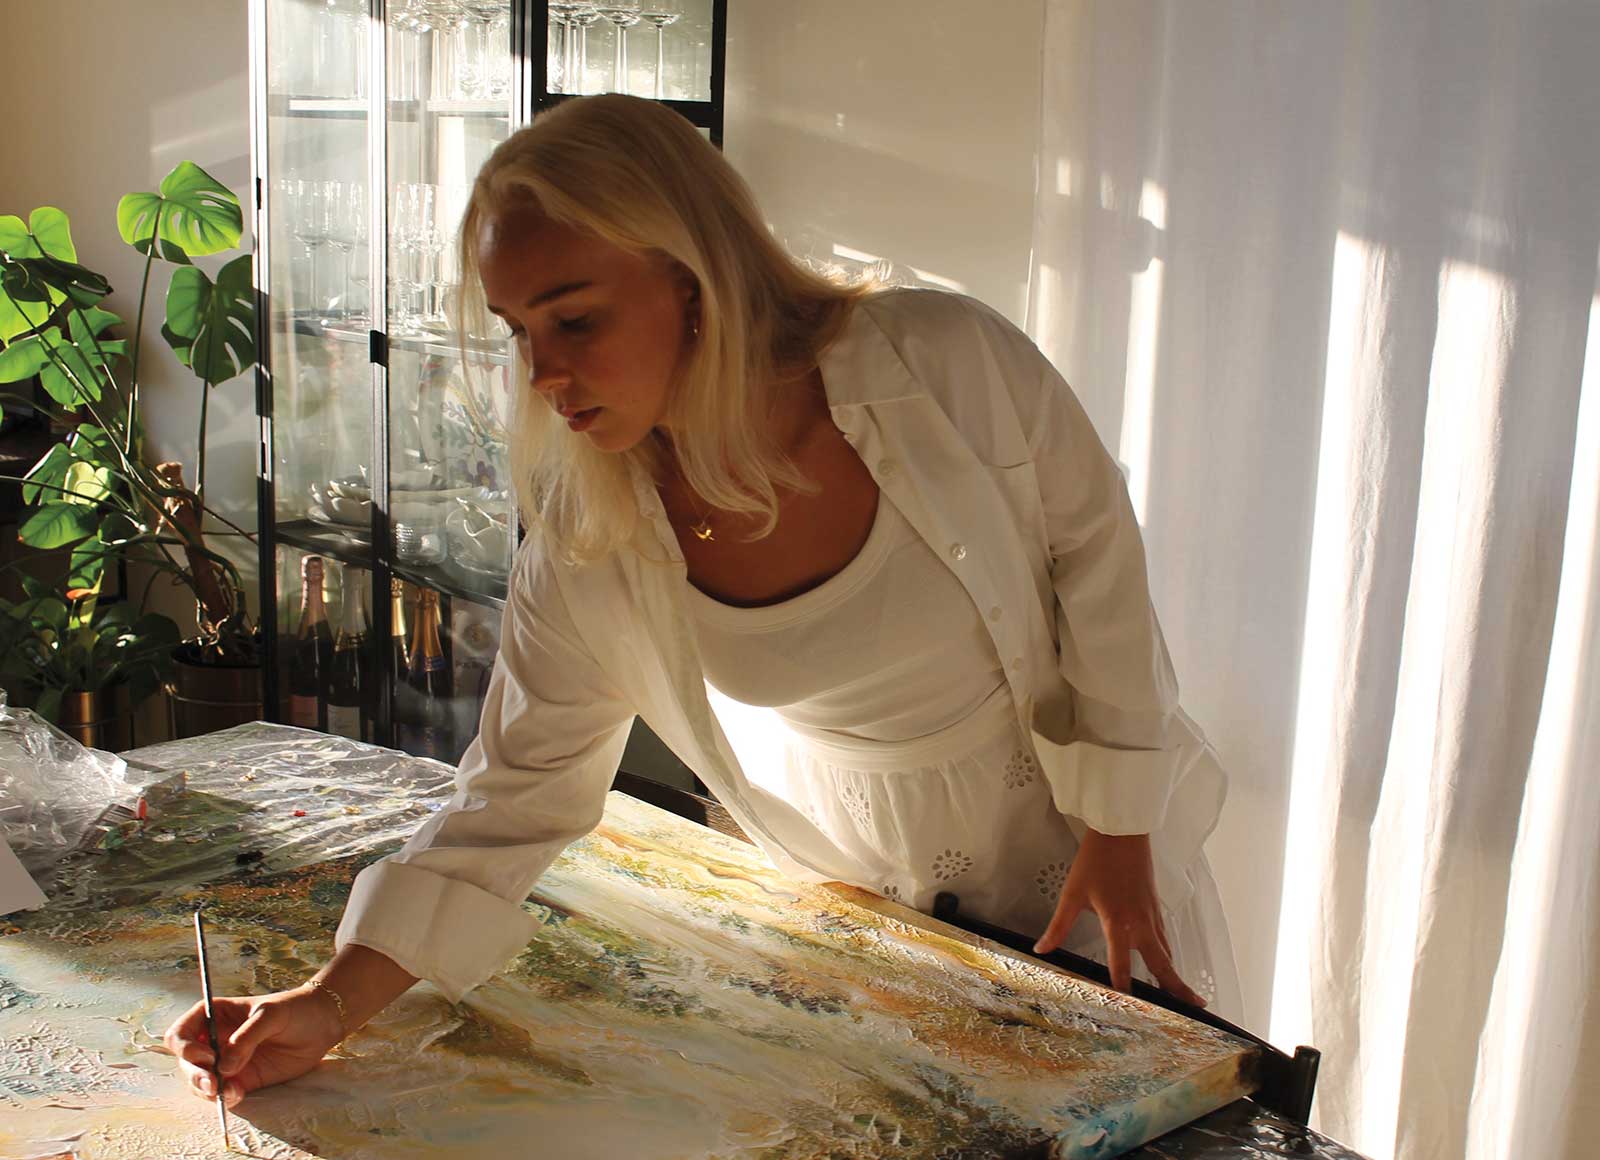 The artist in her studio.
 Disappearing into new worlds and creating meaningful art that leaves a lasting imprint is what drives Anna Taxén and defines who she is. Now 25 years old, Taxén grew up with a deep love for crafting realms where fantasy and reality intertwine, shaping her unique artistic style. Her abstract interpretations, infused with real life motifs, consistently reflect her upbringing and her surroundings, both significant sources of inspiration throughout her work.
Taxén frequently draws creative energy from her country retreats in Uppsala and Dalarna, Sweden, places filled with memories that serve as the foundation for many of her creations. Her formal education in Sweden includes studies in sculpture at Folkhögskola General, narrative design at Malmö University, and most recently, a degree in visual communication from the prestigious Beckmans College of Design in 2023. The artist has exhibited her work extensively around Stockholm and across Sweden and is eager to make her mark on new international markets. She also accepts commissioned work and enjoys the creative challenge of fulfilling unique requests, always ensuring a personal connection to the source of inspiration.
For inquiries and commissions, she welcomes contact via email or her social media channels.