



I love watermedia—watercolor, ink and gouache—and I always feel a euphoric sense of wonder when observing the way pigments move through water, how they travel and develop on the paper while they are drying.
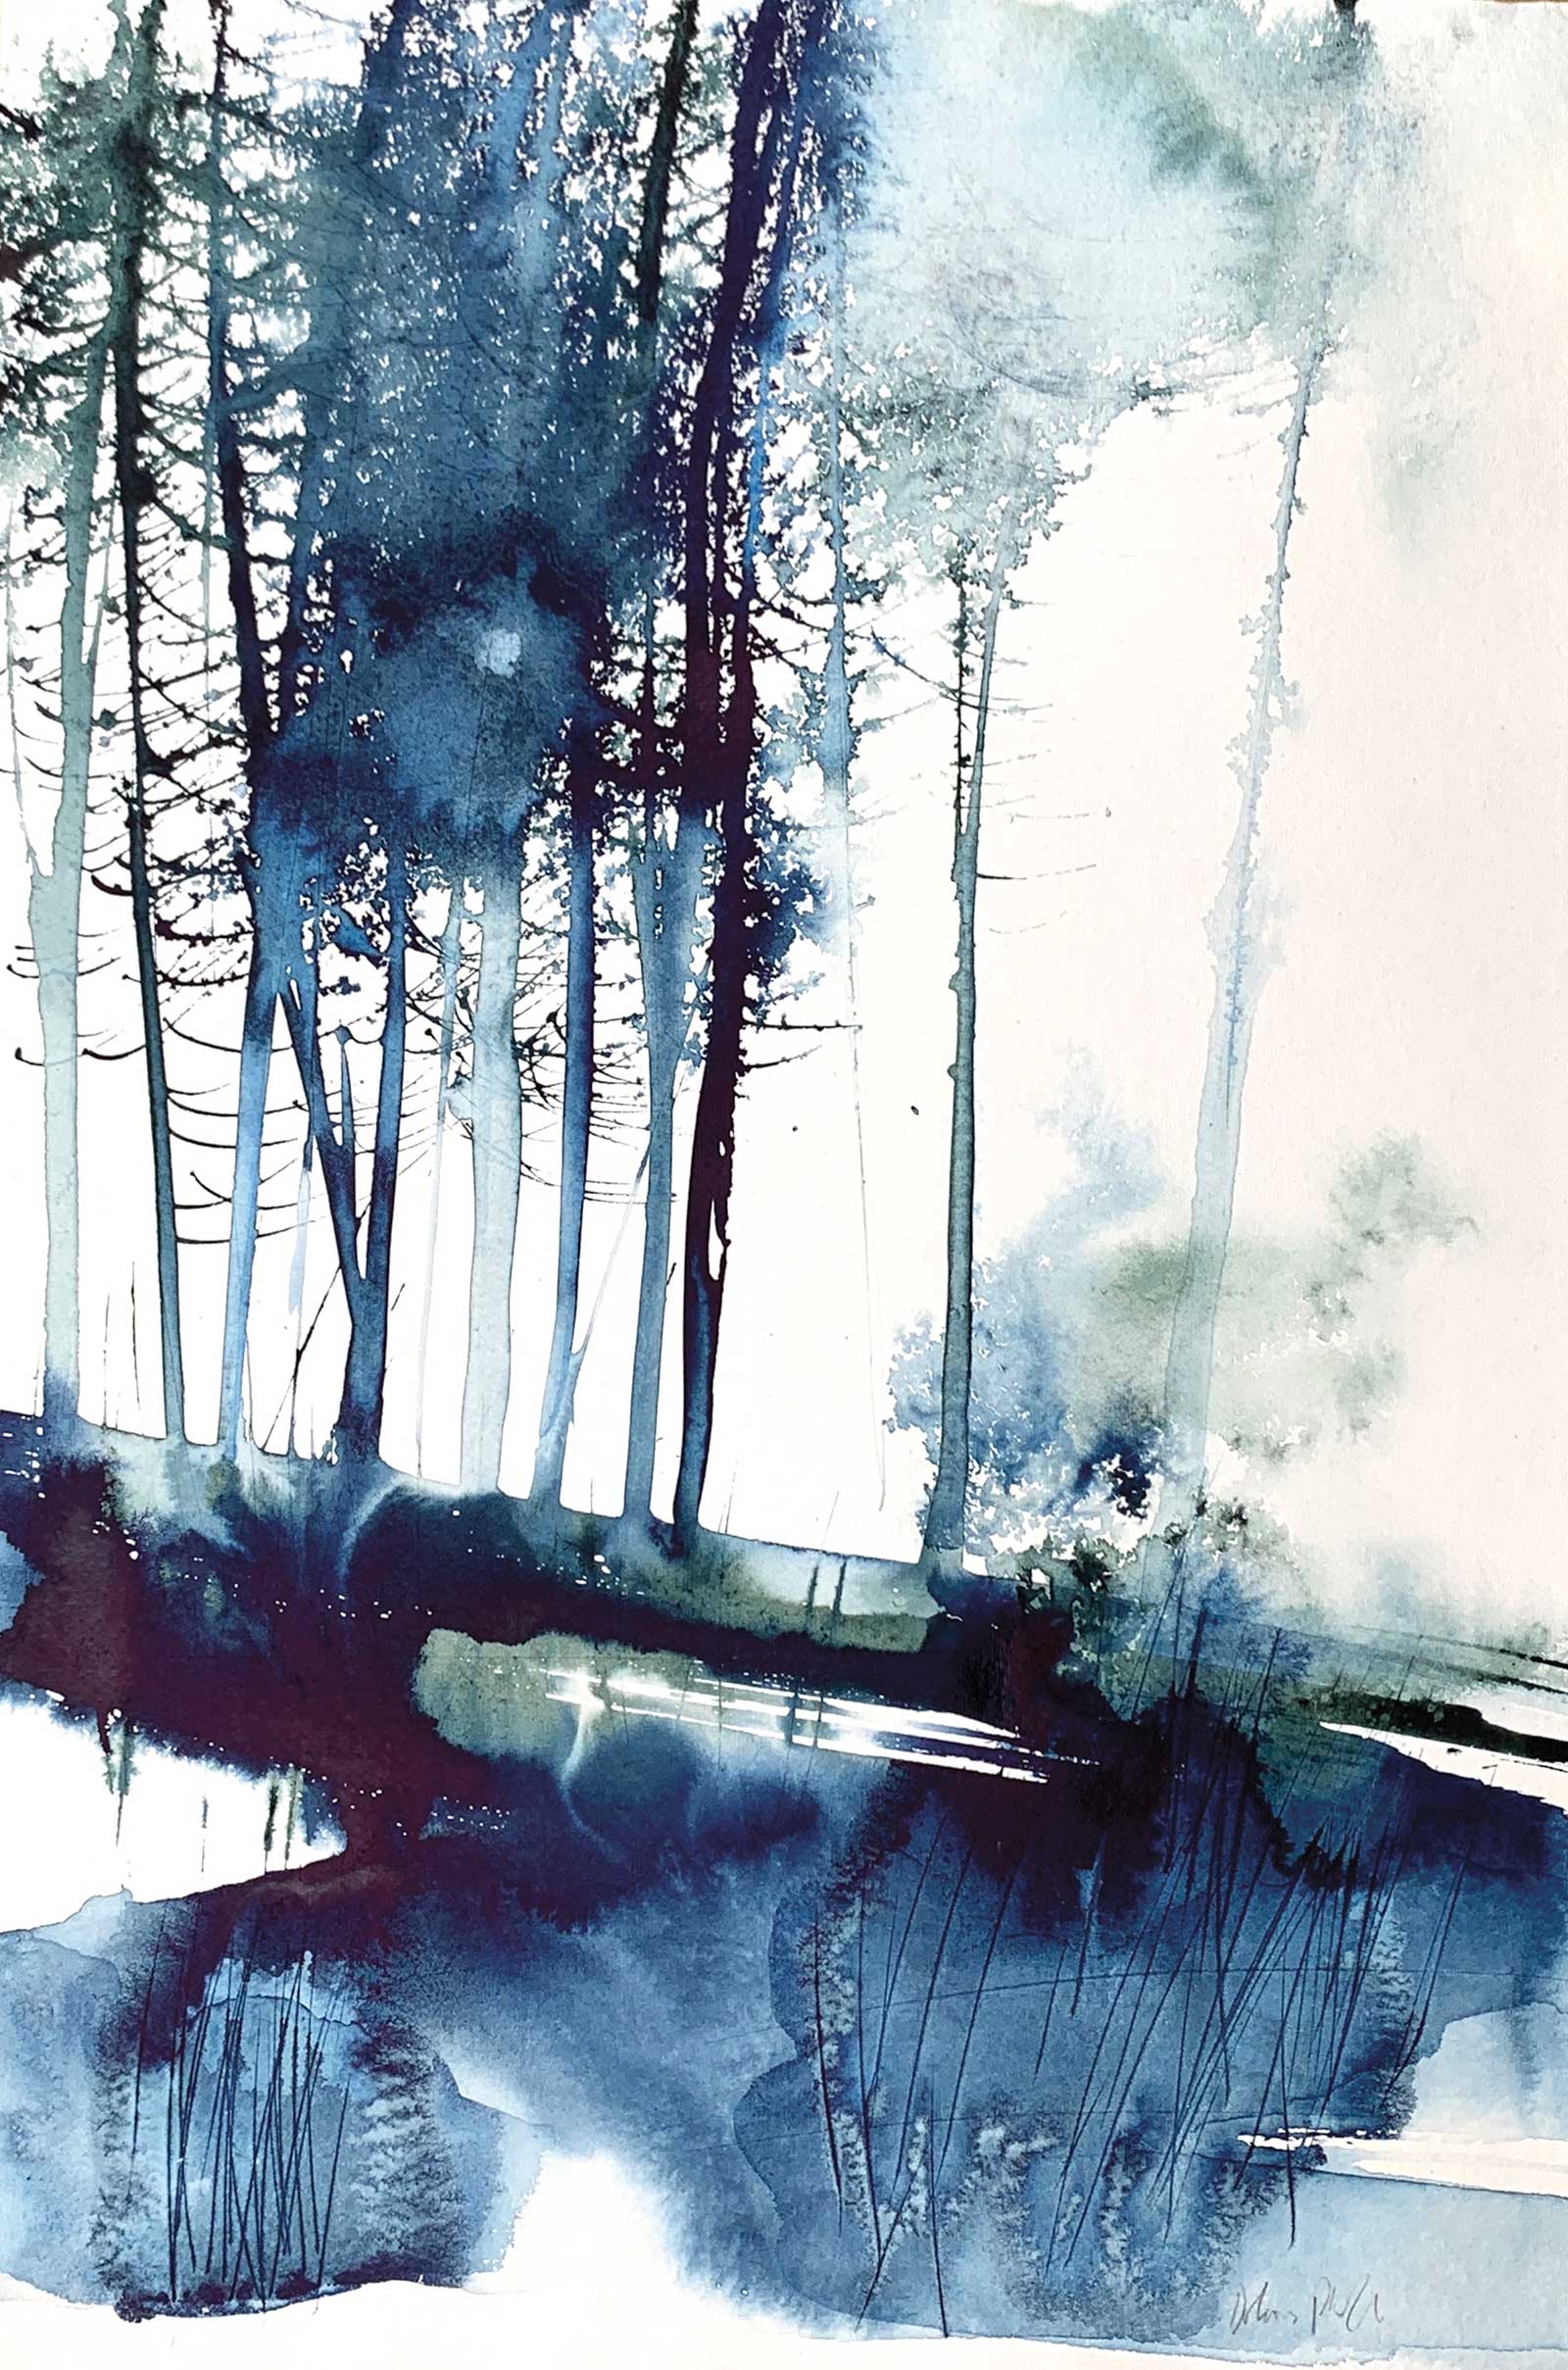
Pines I, watercolor and ink and smooth Khadi paper, 22 x 15” (55 x 38 cm)
I aim for naturalism in my work, but I don’t aim for a photographic emulation of nature. Instead, I strive for what Buddhists describe as “right action,” the natural distribution and settling of pigments that reveal a sense of light and atmosphere with as little interference from the brush as possible. I live in a forest in the West of England, and every day I observe the changing light and seasons—spring’s transparencies, summer sunlight glancing through the oaks, autumn colors, winter’s gnarled and twisted branches. Inspiration is everywhere.
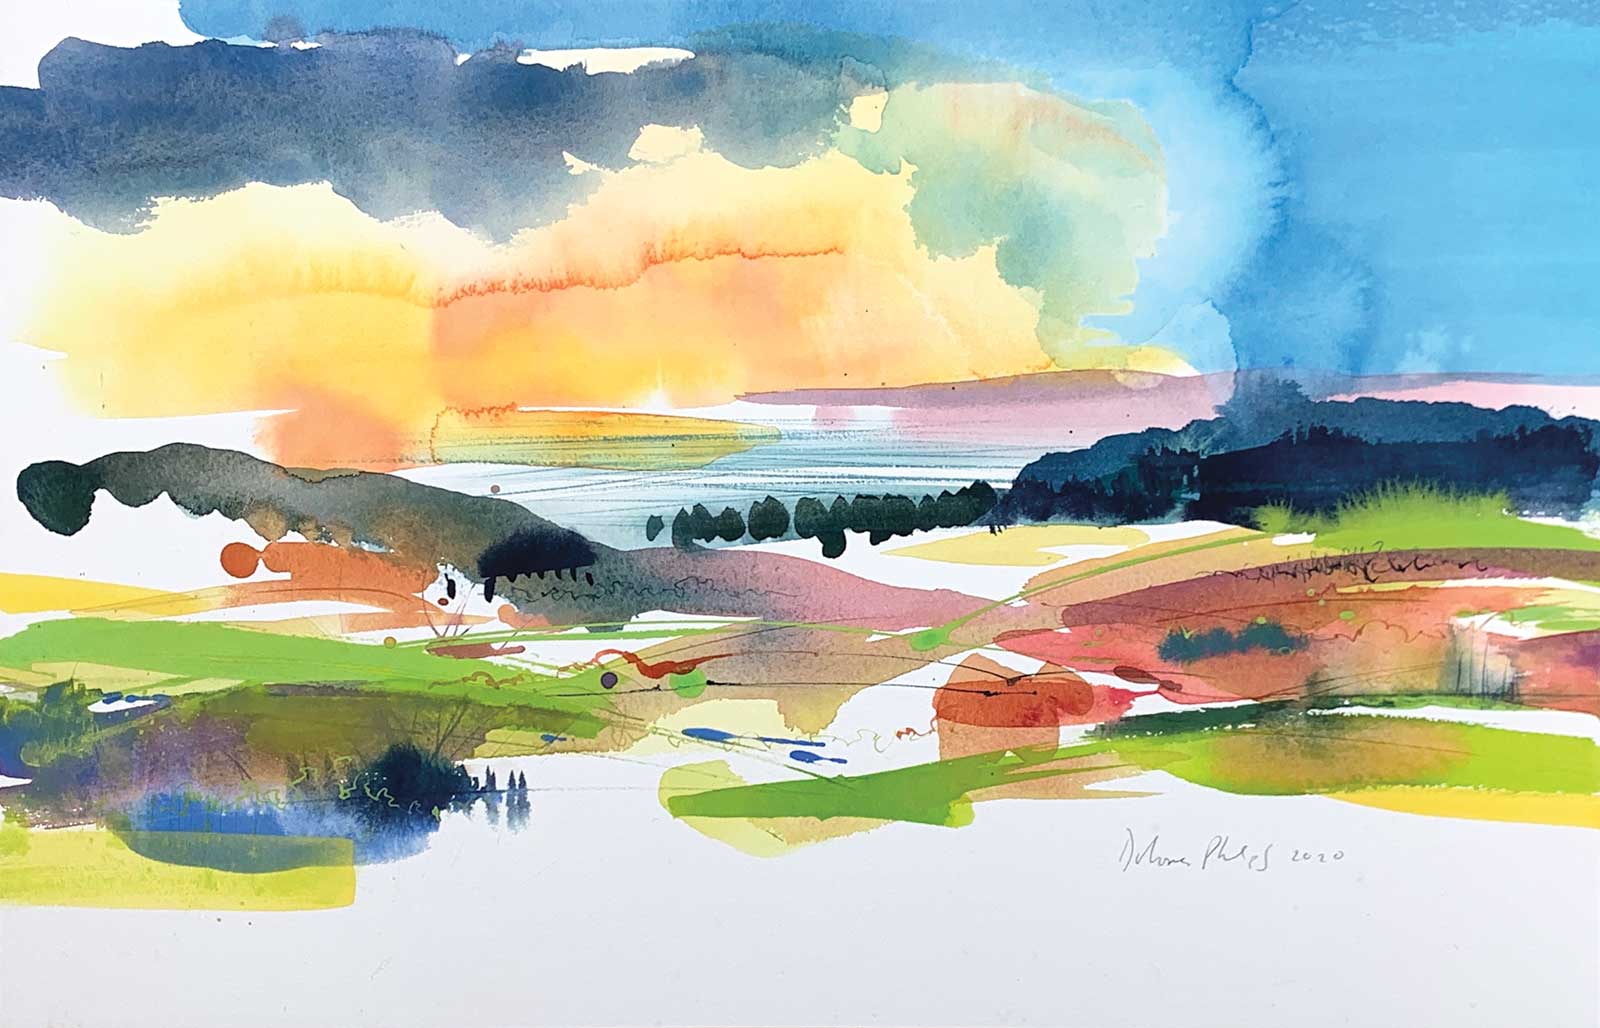
View from the Plump, watercolor on Saunders Waterford hot-pressed paper, 15 x 22” (38 x 55 cm)
In my tree and landscape paintings, I strive for a minimum or even an absence of brushstrokes in favor of mixing color on the paper, aided by gravity, momentum and the flow of water. I draw basic shapes quickly and lightly often with plain water, using tools such as a dropper or spray bottle. The pigment is then added, again with a dropper or pipette, avoiding touching the paper at all. The techniques are dynamic and quite messy, necessitating a very absorbent work surface, plenty of paper tissues and towels. The painting needs to be attached firmly to a rigid board, so that it may be tipped from side to side and sometimes propped up at an angle to allow the colors to mingle and develop using the magic ingredient, gravity.
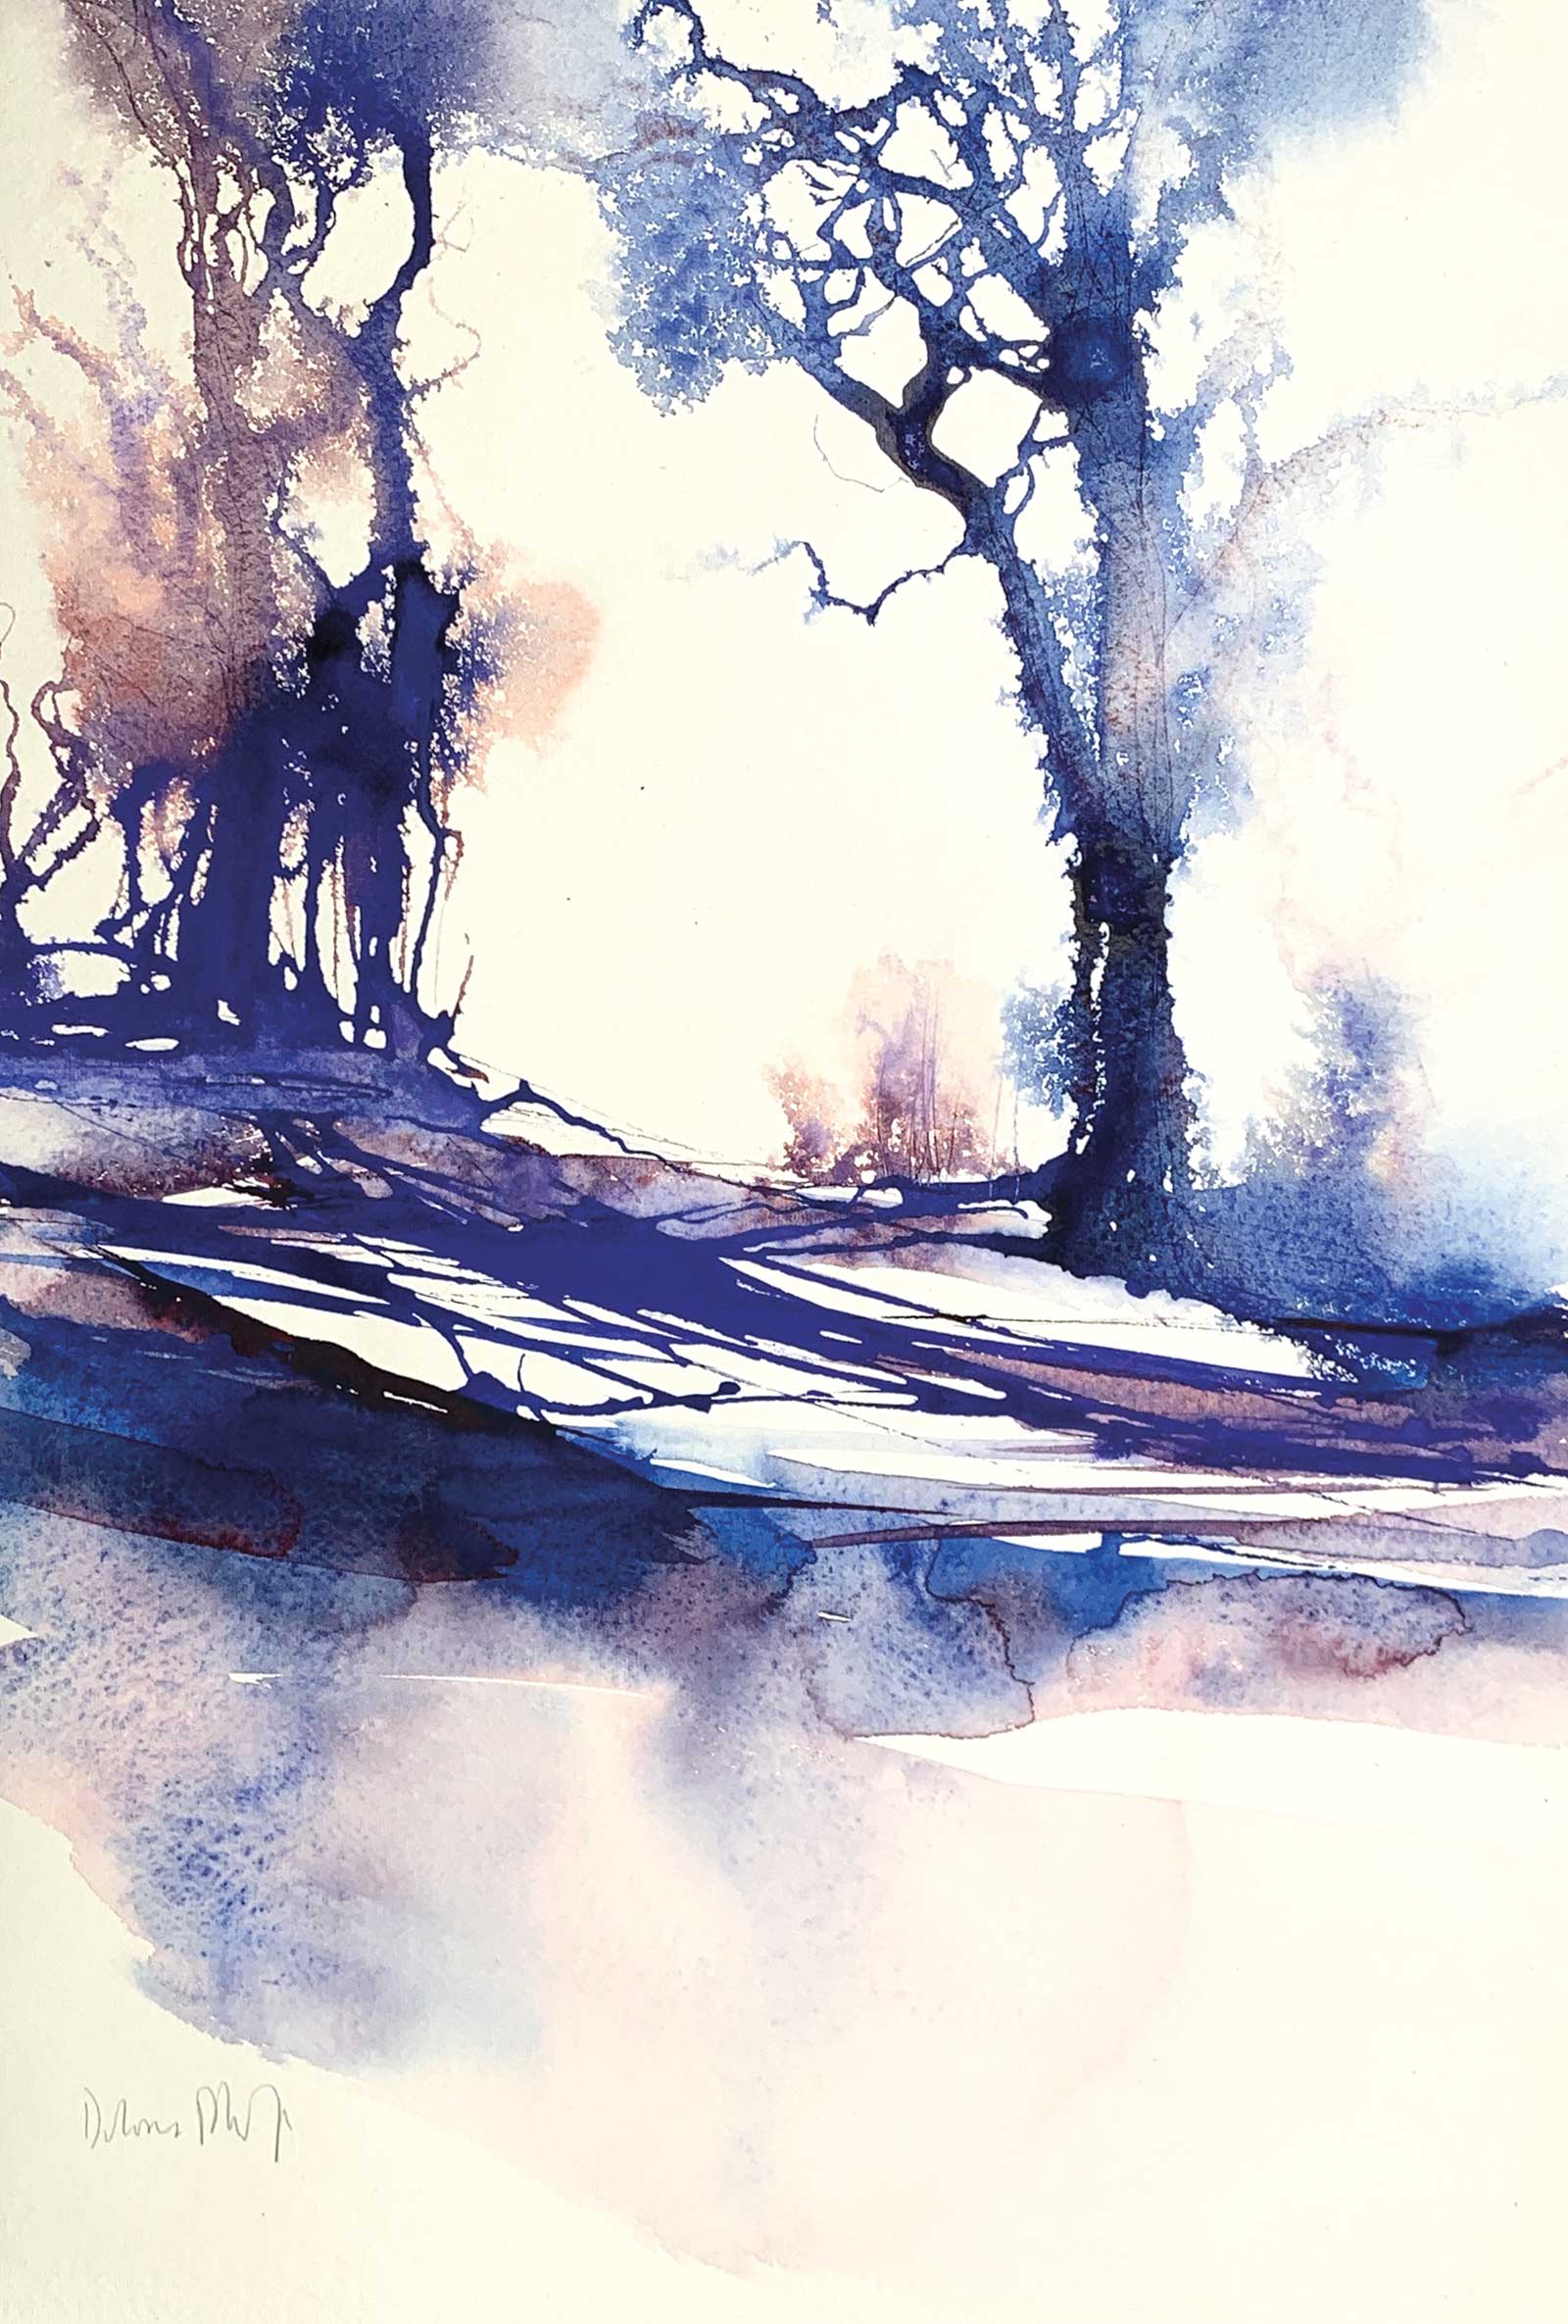
Tree Charms VII, watercolor on Winsor & Newton cold-pressed paper, 22 x 15” (55 x 38 cm)
I particularly love colors that separate and granulate, which enhance my techniques and processes, such as those made by RockWell of Canada, Schmincke “supergranulating” watercolors or Daniel Smith “PrimaTek.” In this demonstration I am using three of my favorite RockWell colors.
My Art in the Making Forest Light I
 Stage 1
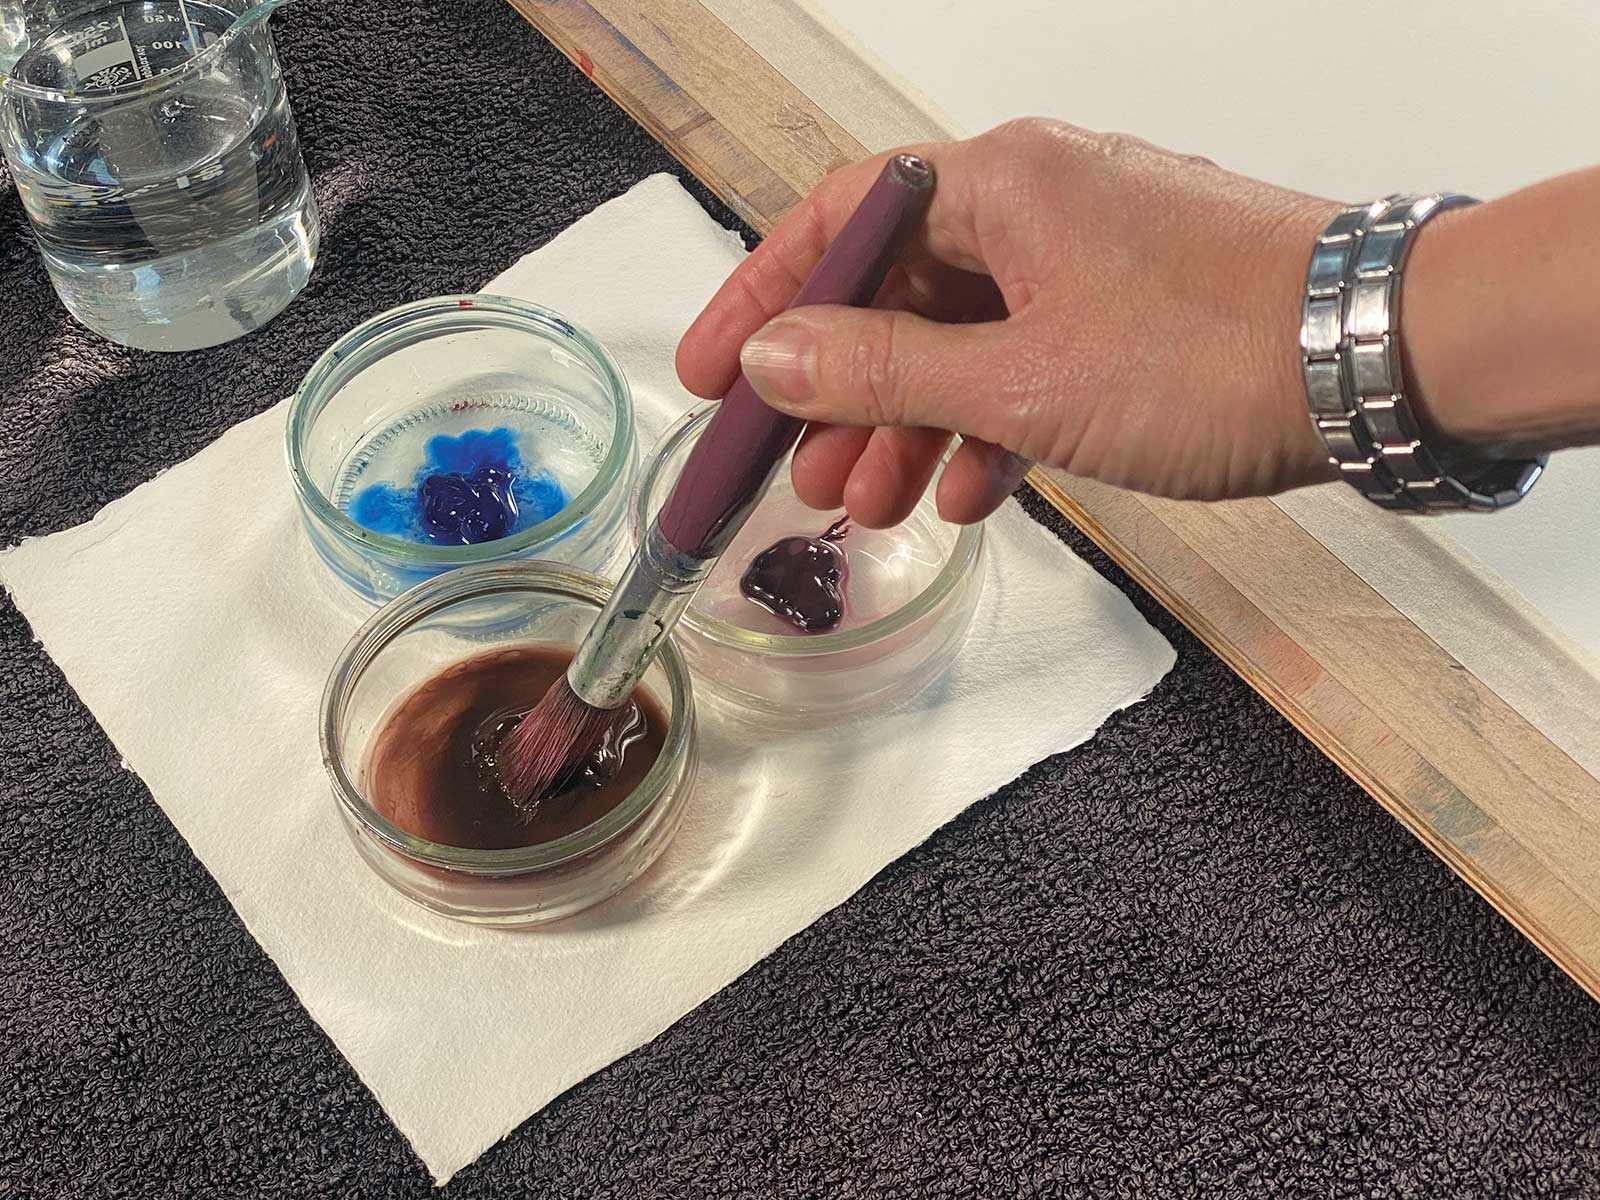
Stage 1 Mixing a Strong Wash
An essential part of my way of working is to mix tube watercolor paint into a very intense solution with water to the maximum tinting strength while remaining liquid. I collect small glass ramekin dishes for this purpose. I let the dishes dry out if I can’t use it all straight away, and it can be reactivated of course. I also use ink and gouache in my work but not for this demonstration. You could use bottled “liquid watercolor” or ink in the same way.
WHAT THE ARTIST USED
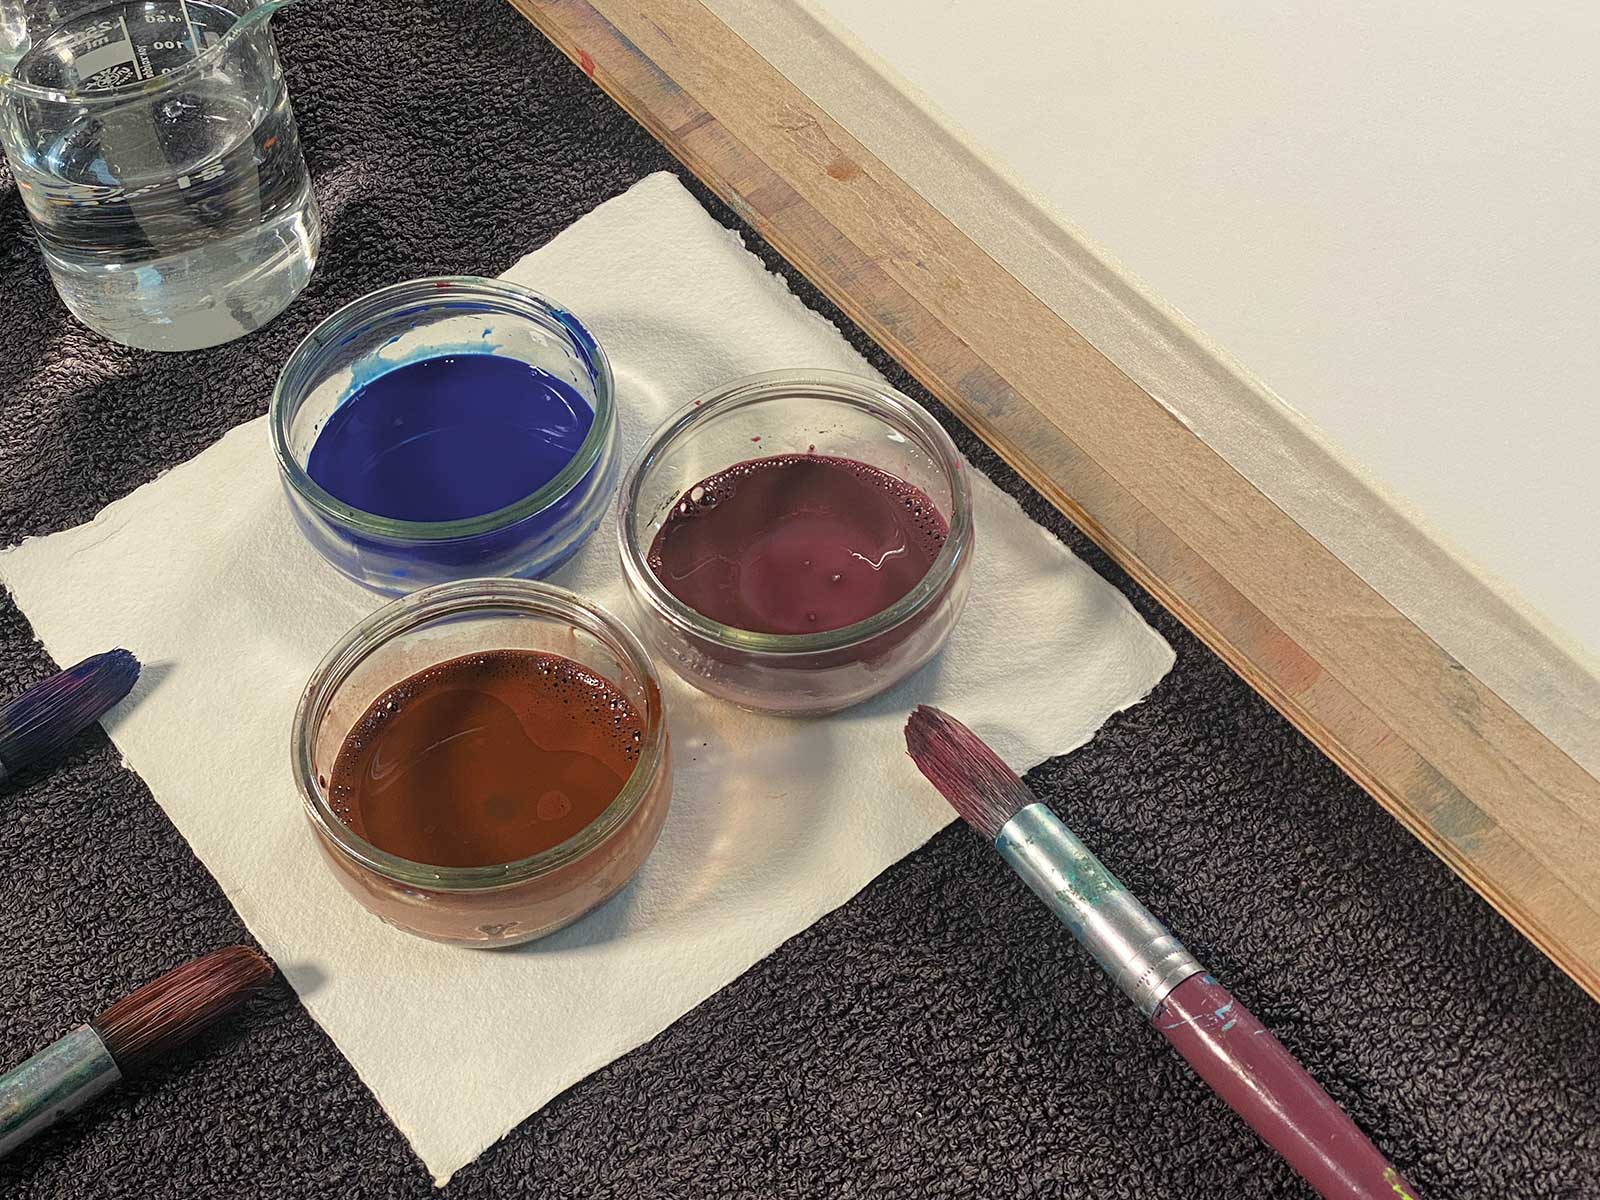
RockWell Watercolors
Peach fairy EM707, Elf Wings EM701, Blue Enchantress 710
Brushes
Daler-Rowney “Graduate” oval wash brush, 1”, Chinese painting pointed quill brush, large
Additional Supplies
640gsm Saunders Waterford watercolor paper, half-sheet, Plastic pasteur pipette, 3ml, Spray bottle, Kitchen paper, Masking tape, Wooden board to fix paper to when tilting
 Stage 2
Stage 2 Creating a Loose Structure
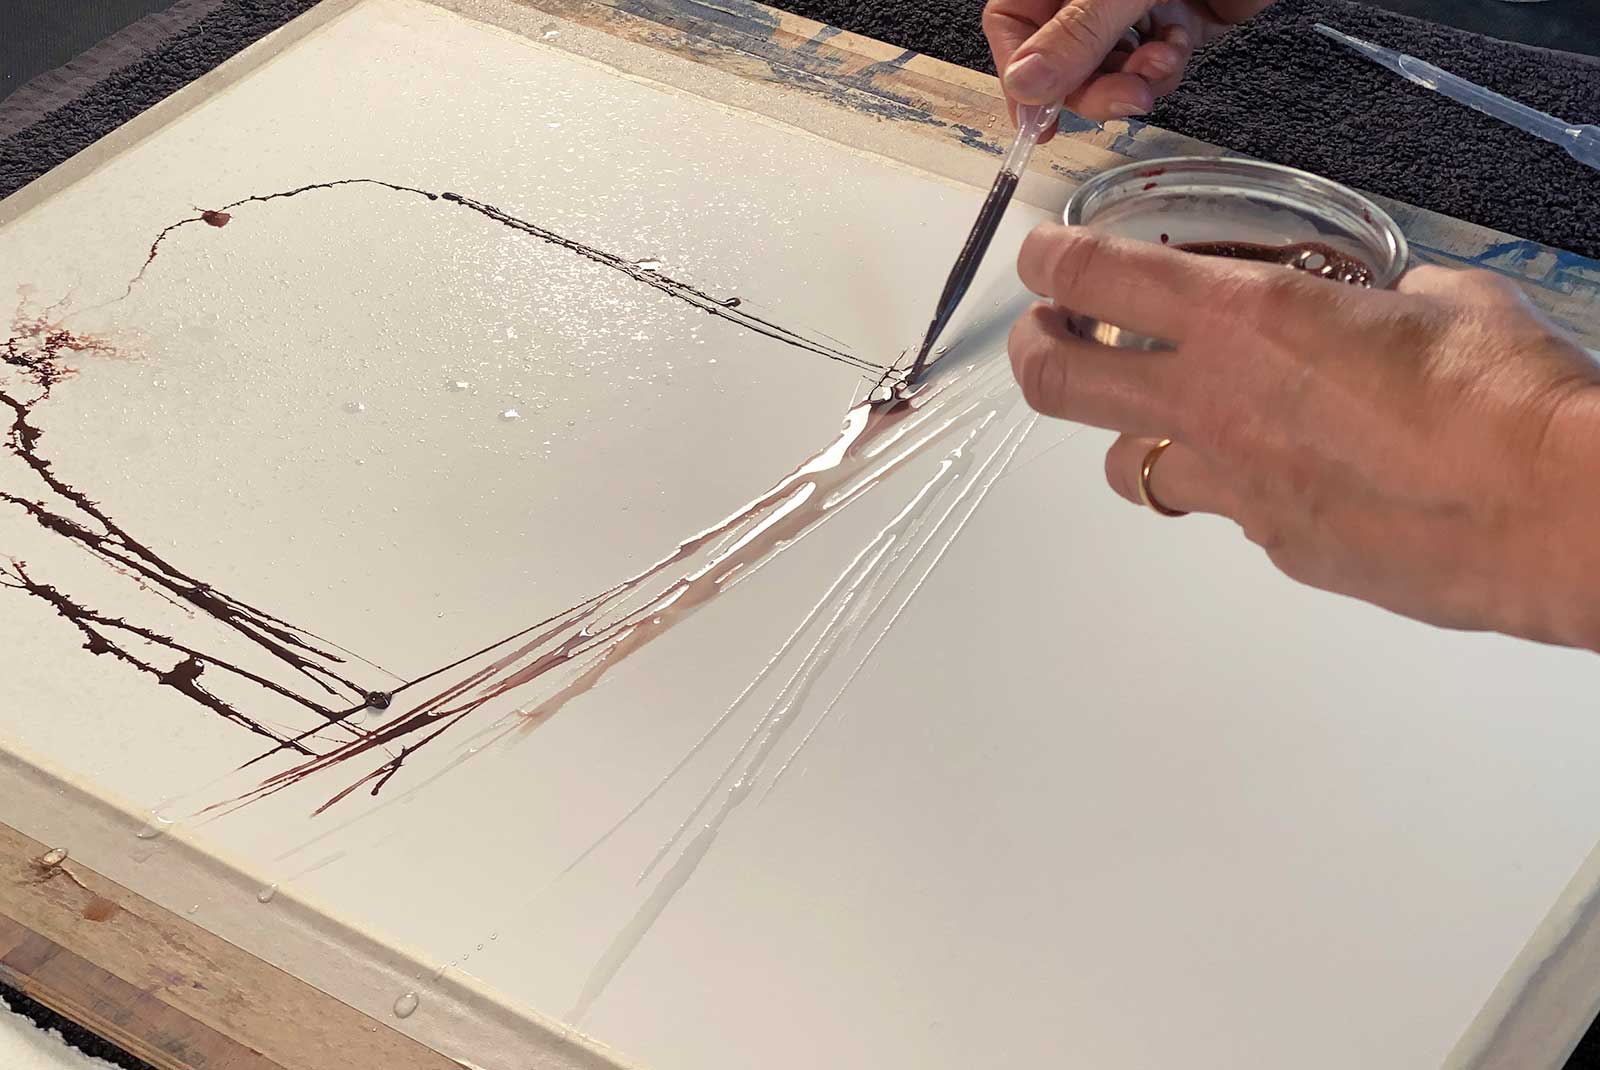
First I spray the paper with water to create a dappled effect. Using a pipette full of water, I “draw” some very loose upright lines and branch shapes to establish the rough composition and some more horizontal strokes that roughly define a base or horizon line. The creation of a loose structure of water-filled areas and dry white paper areas are what gives the painting its contrast and drama.
 Stage 3
Stage 3 Tree Trunks
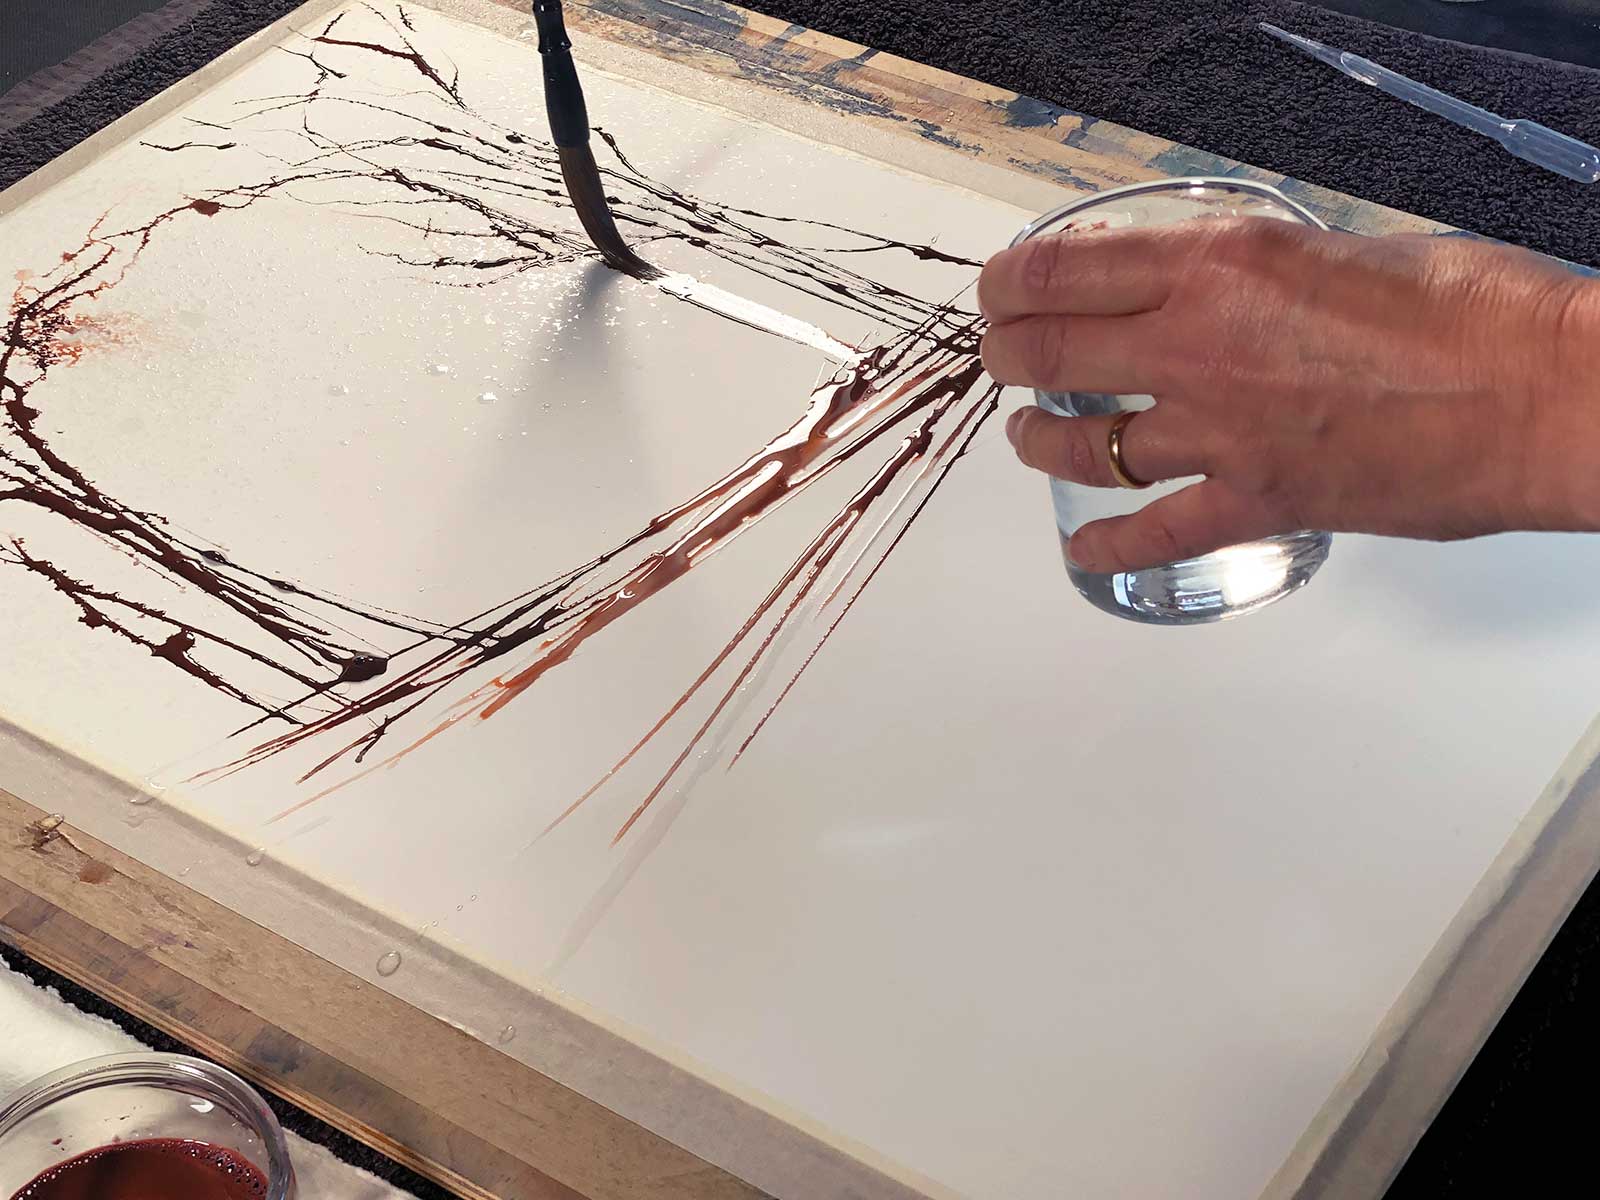
Using a quill Chinese brush dipped in water, I quickly draw the trunks of the trees and smaller branches, which join with the sprayed water areas to create a dappled leaf effect. I need to work very quickly to stay within the wet paper’s drying time.
 Stage 4
Stage 4 Thickening the Trunks
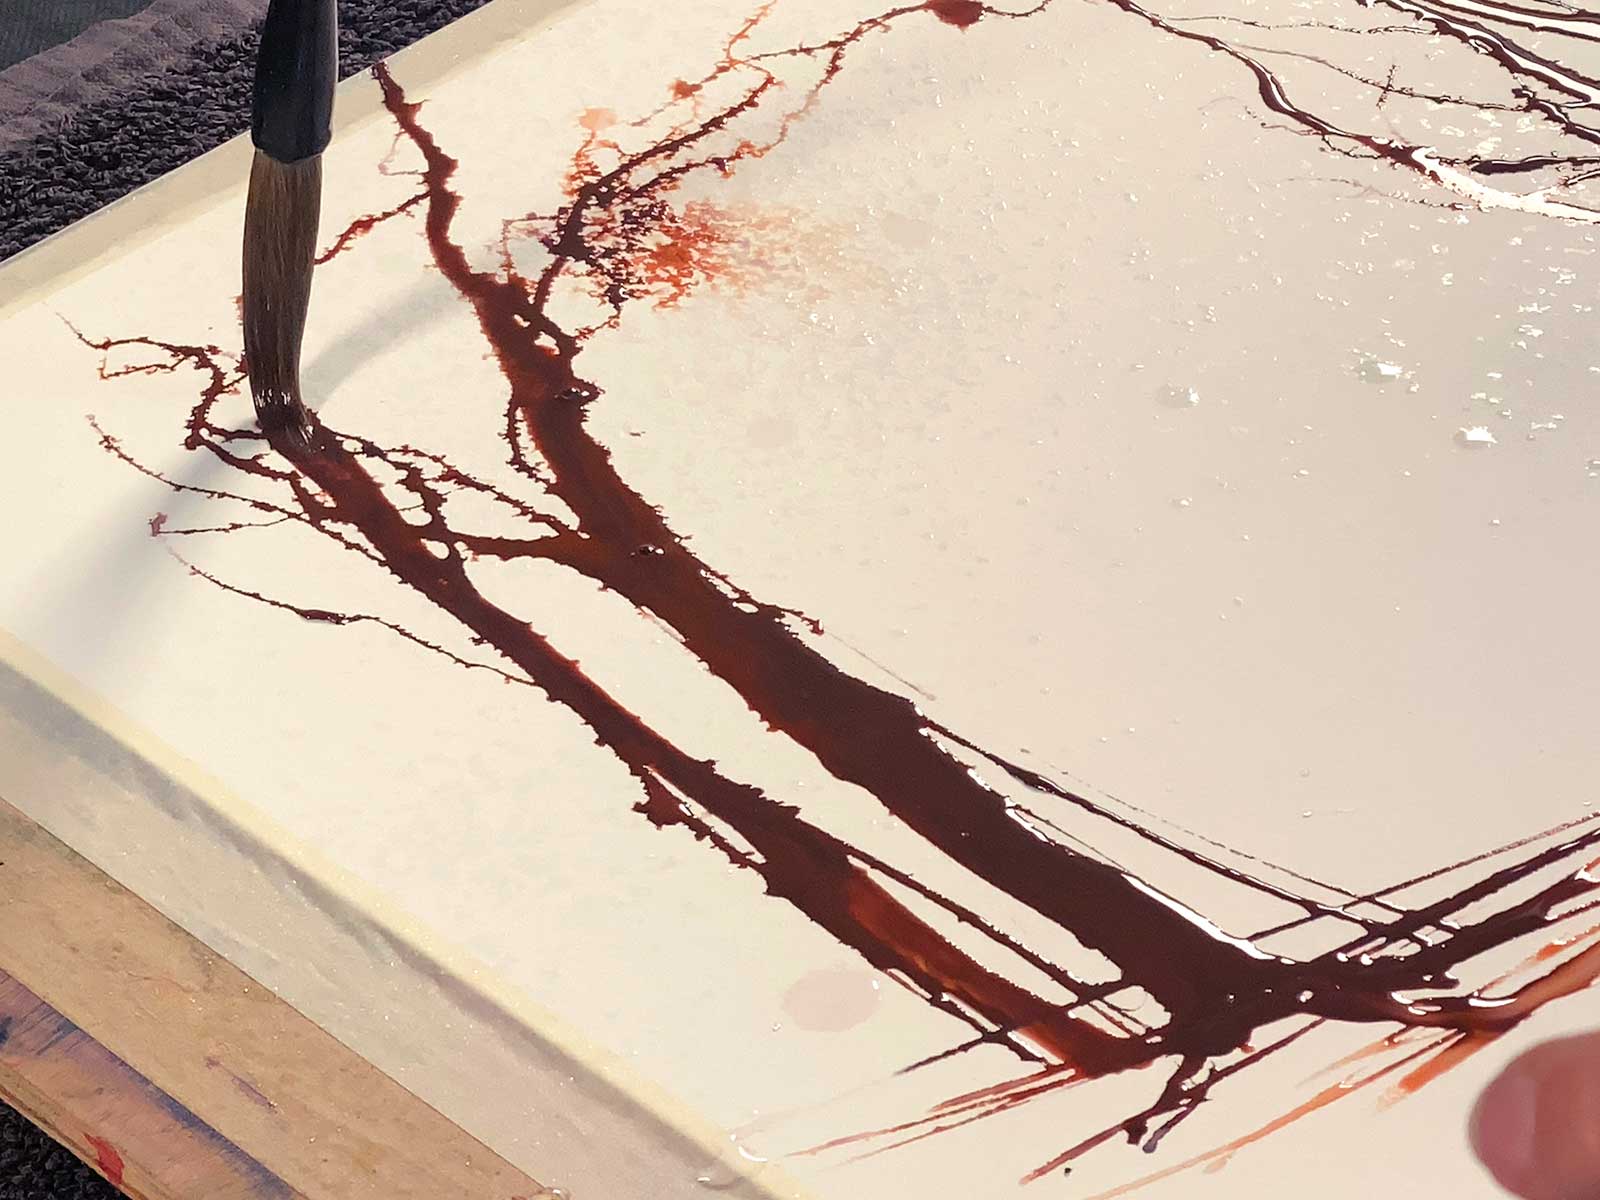
Now I’m using the Chinese quill ink painting brush dipped in peach fairy colored paint to thicken the trunks of the trees and extend them to run off the top of the paper. This is to allow excess paint and water to run off the painting without causing unsightly drips when the board is tipped.
 Stage 5
Stage 5 Developing the Colors
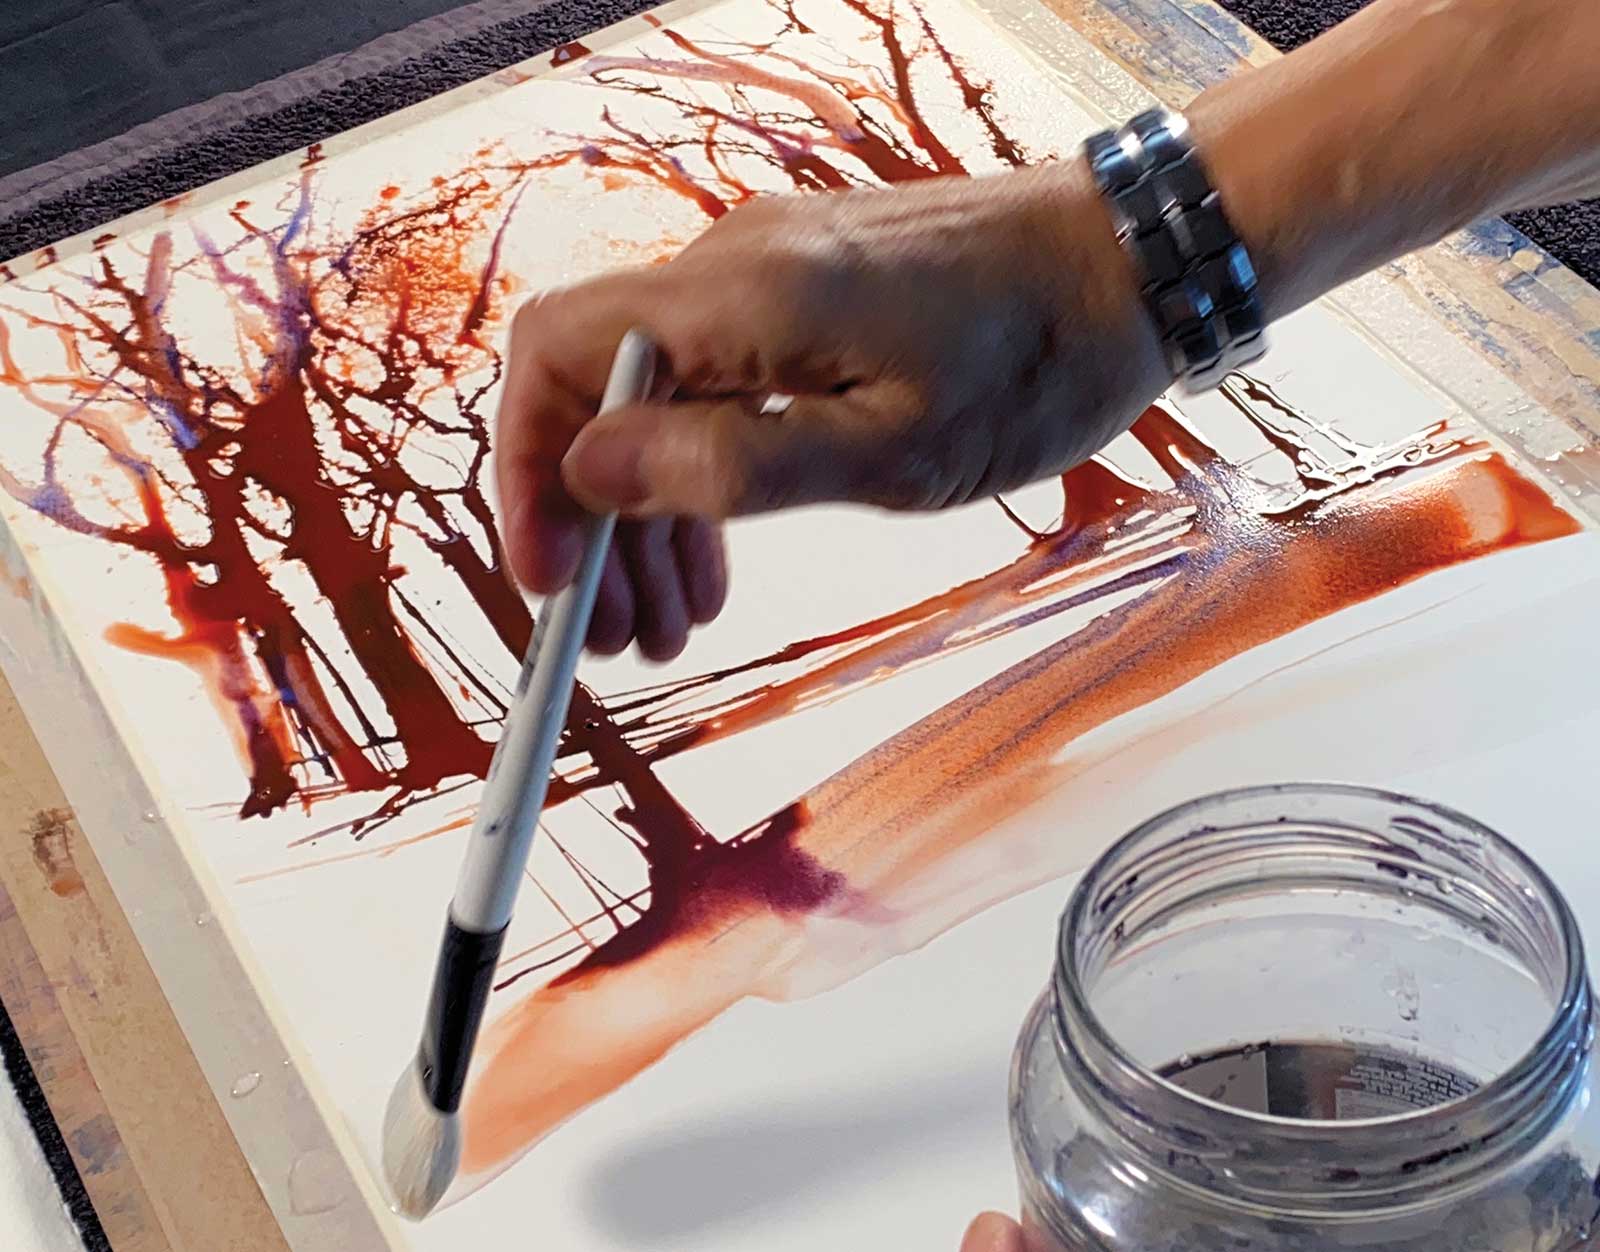
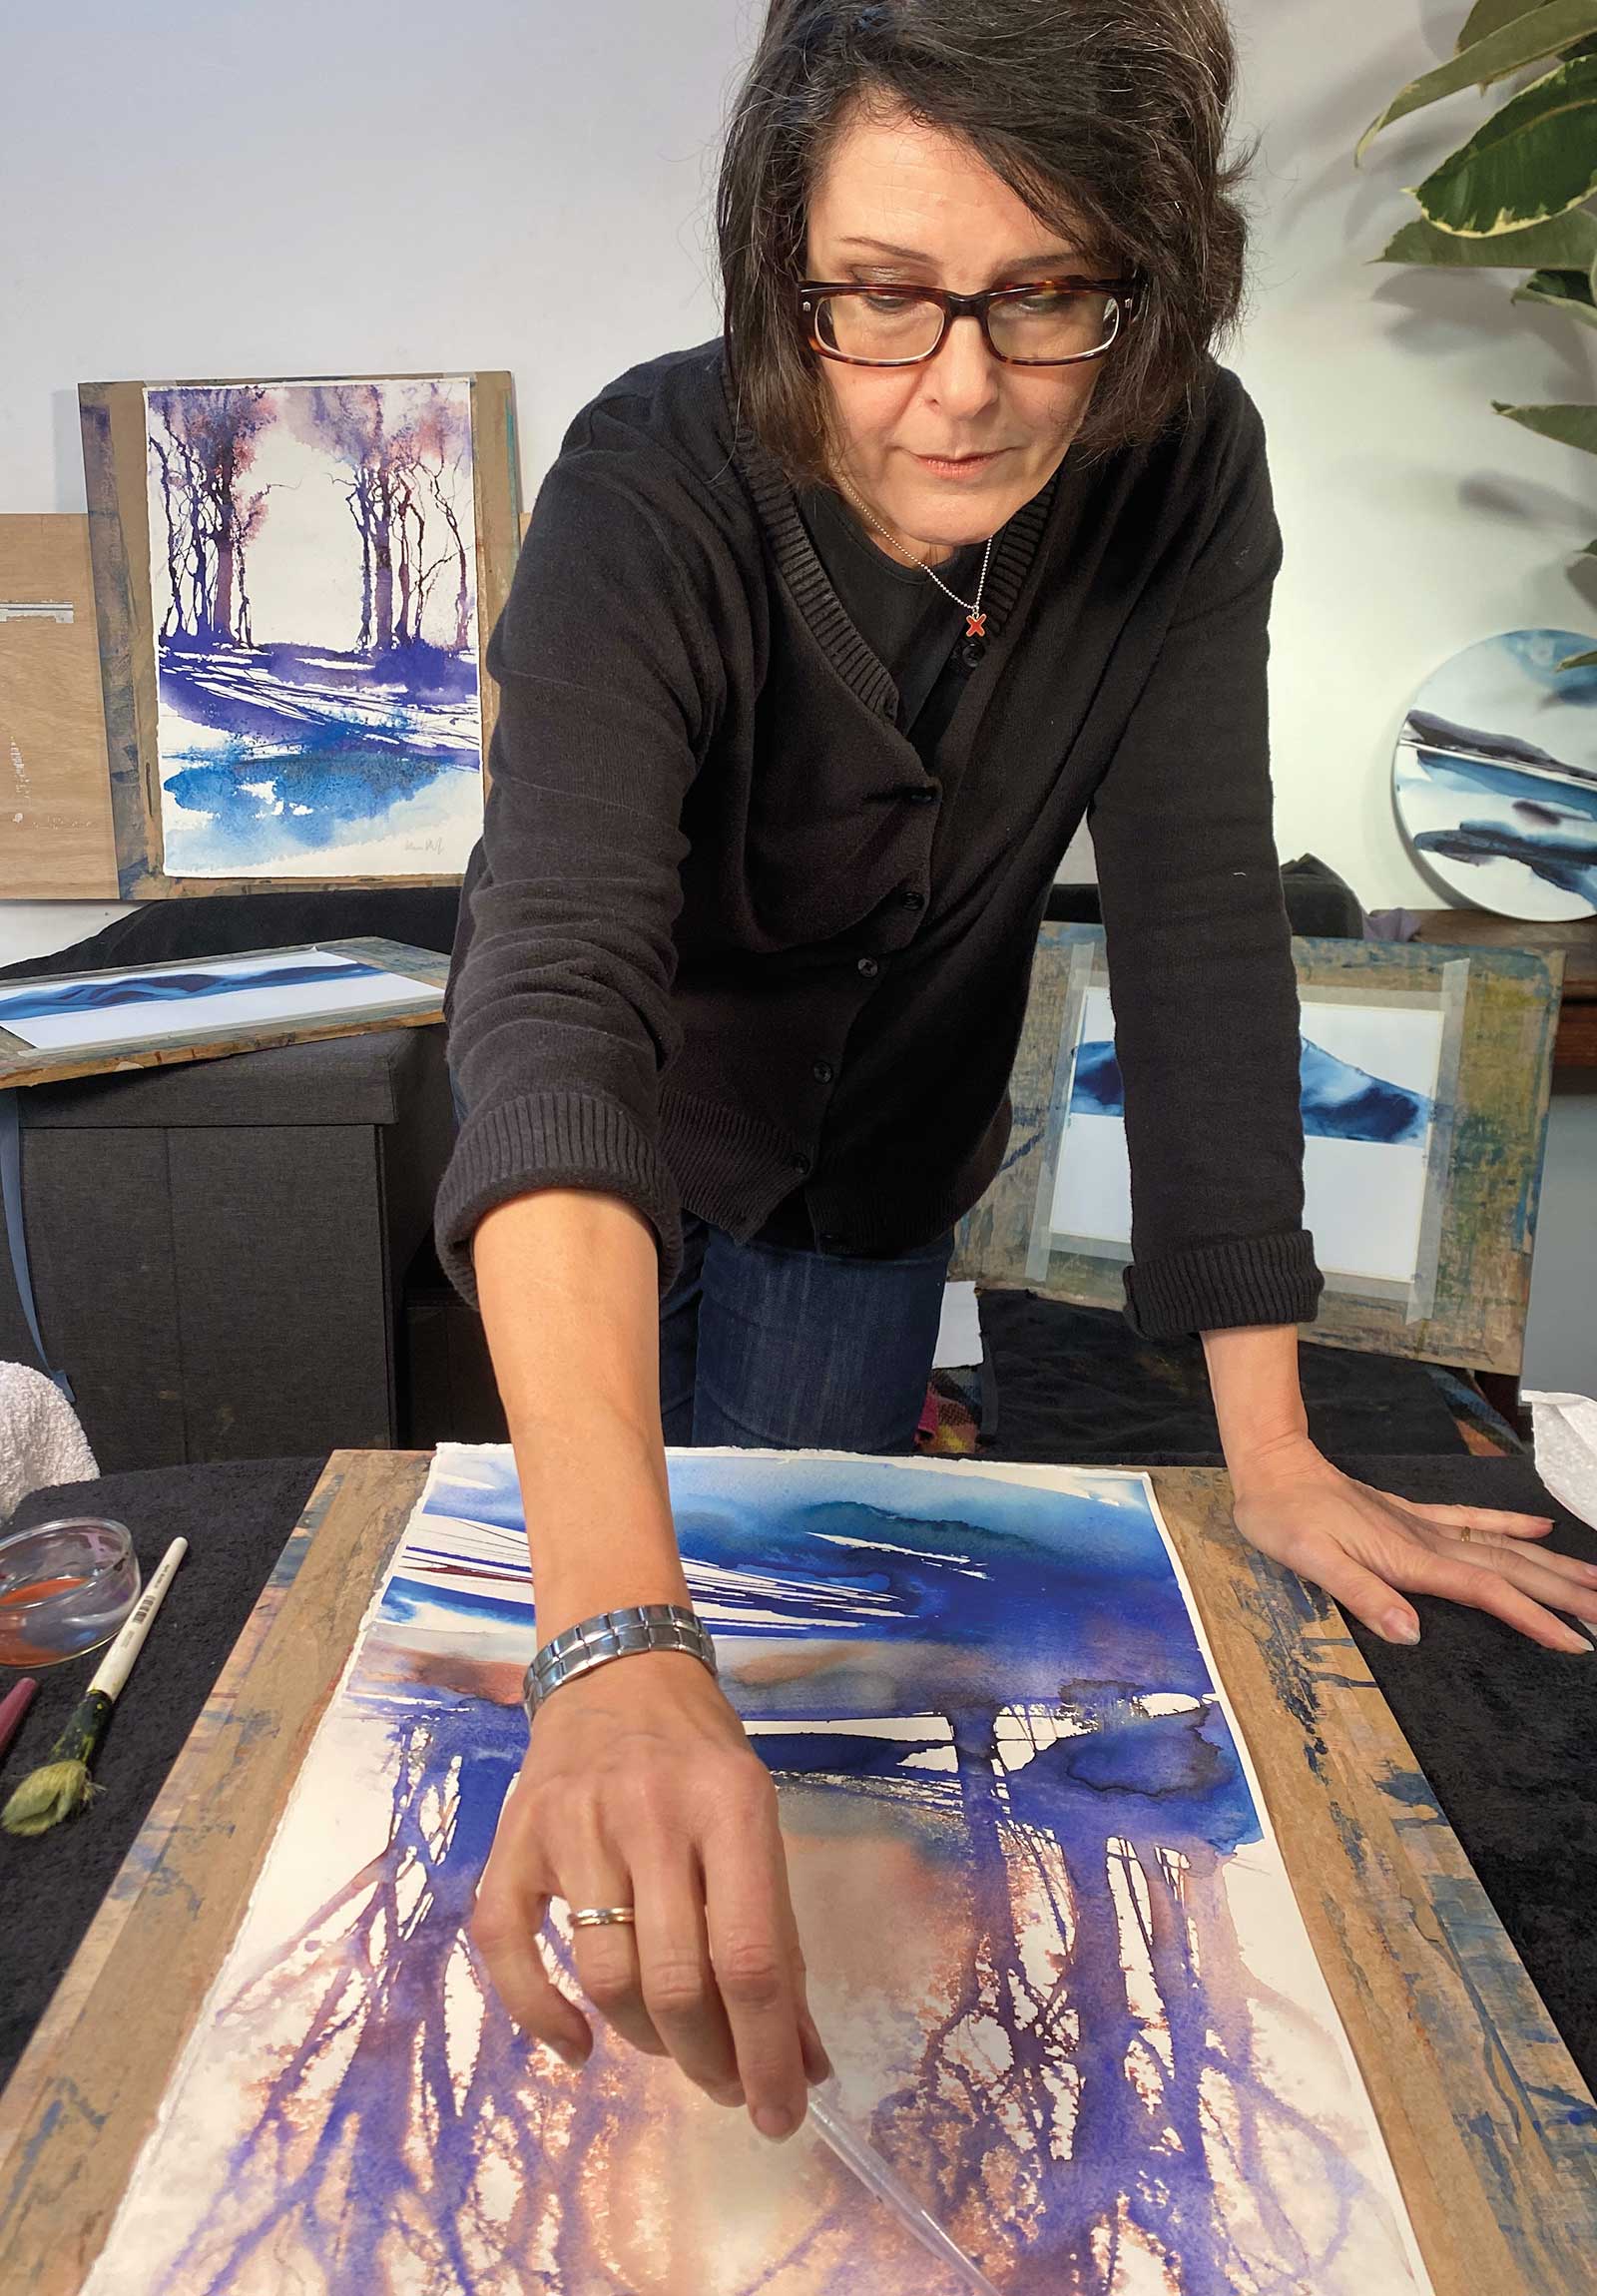
Here I am using a clean wet “oval wash” brush to add a layer of water to the lower edge of the painted surface. This draws the color down and allows it to develop further. Note: the colors of these “self-evolving” paints when first applied are not indicative of the colors of the dried painting. The colors separate, float on the water surface, and appear very orange and brown at first, but the underlying blue and violet tones only appear later. It’s fun and exciting to watch the colors develop!
 Stage 6
Stage 6 Allowing the Color to Run
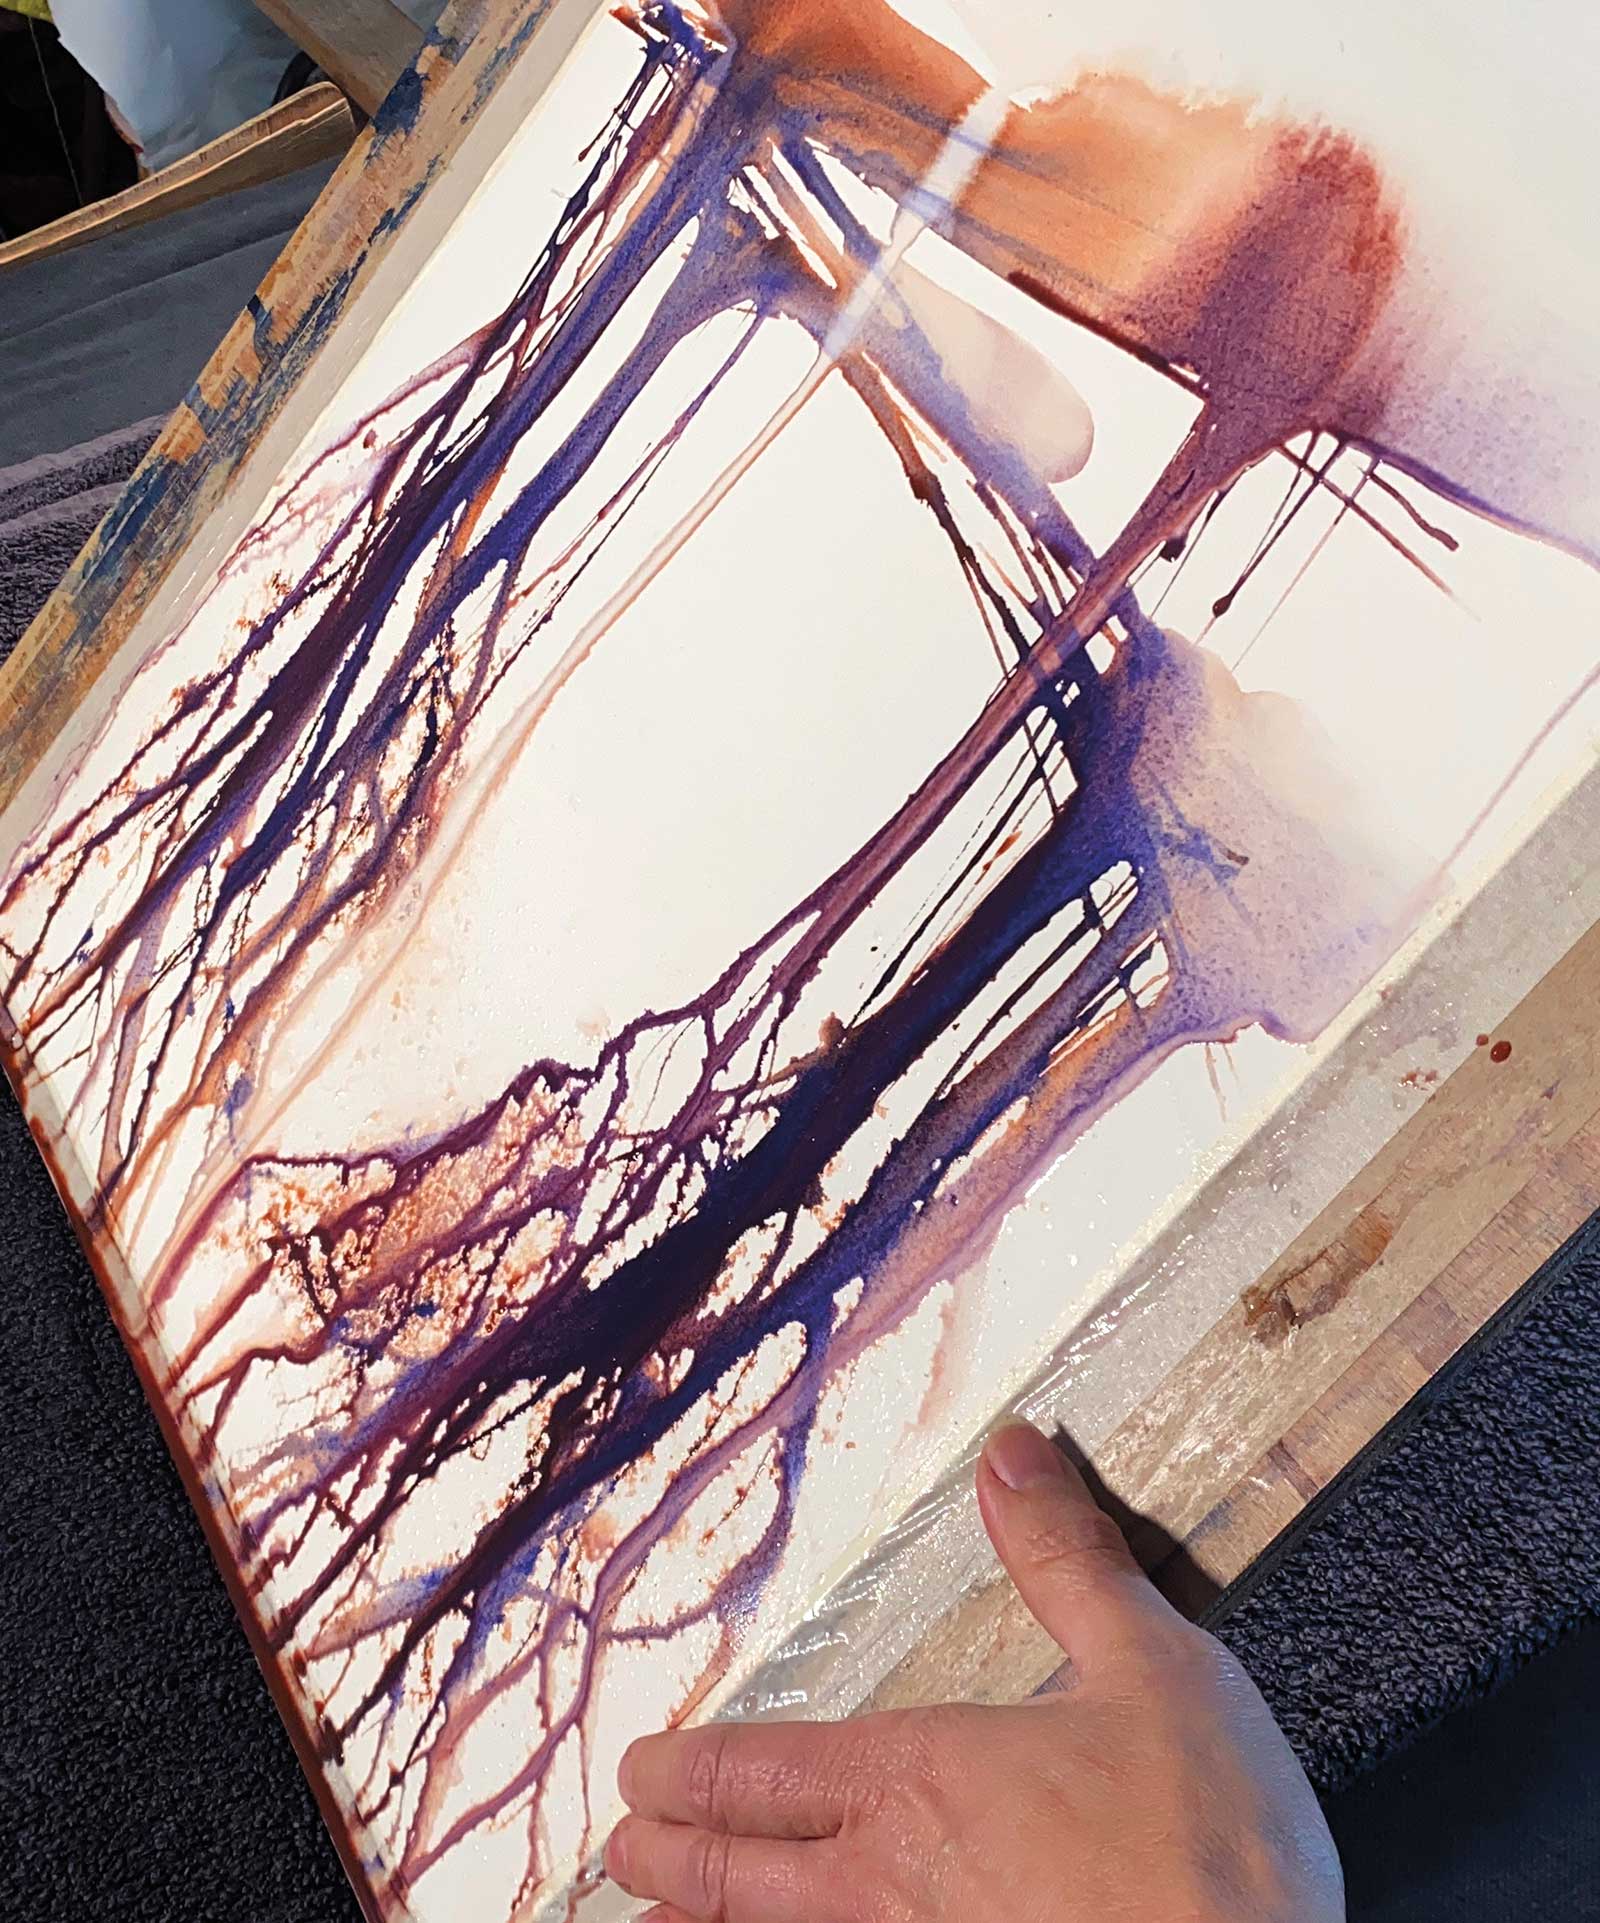
The tree section paint now needs to be tipped almost 90 degrees to allow the color to run and create special effects that cannot be achieved with a brush.
My design and composition tactics
Using a Spray Bottle
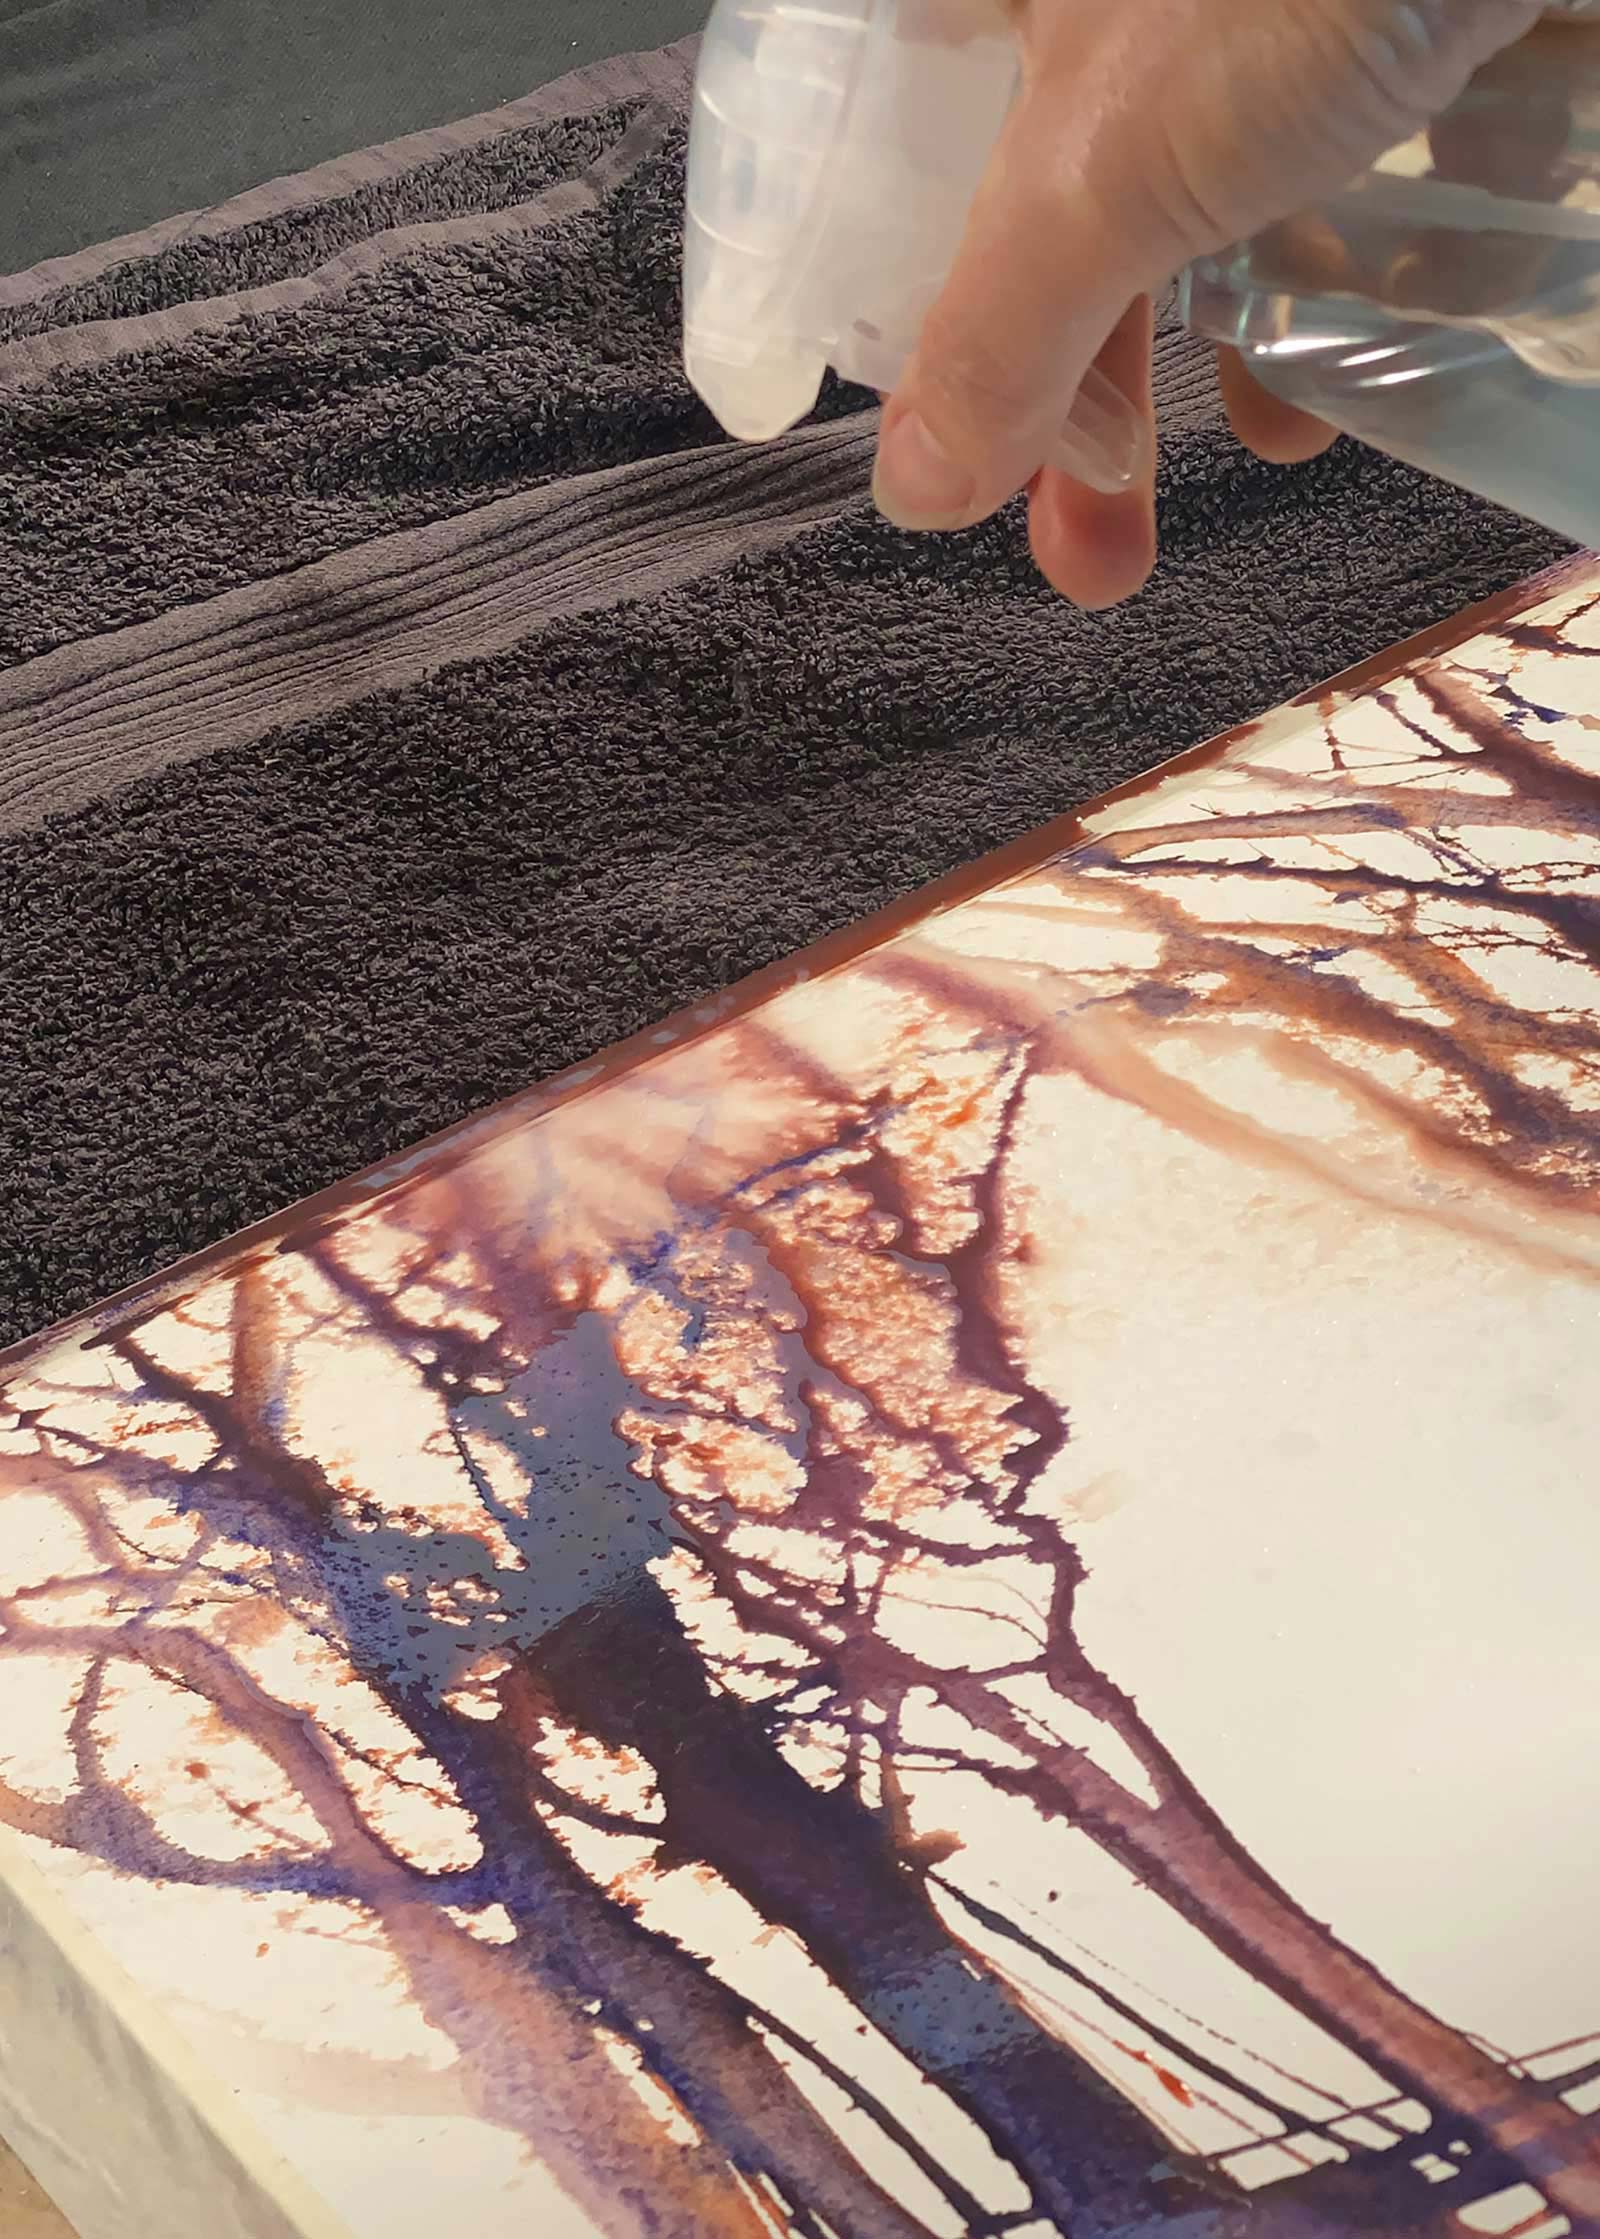
This is an invaluable tool to prepare paper for painting, to soften hard lines, give leaf-like patterns and add or spread color without using the brush. Here, I am using the spray to add leaf texture and spread the color at the top of the painting. Sometimes I use a rapid saturation to wash off whole areas.
Self-Evolving Colors
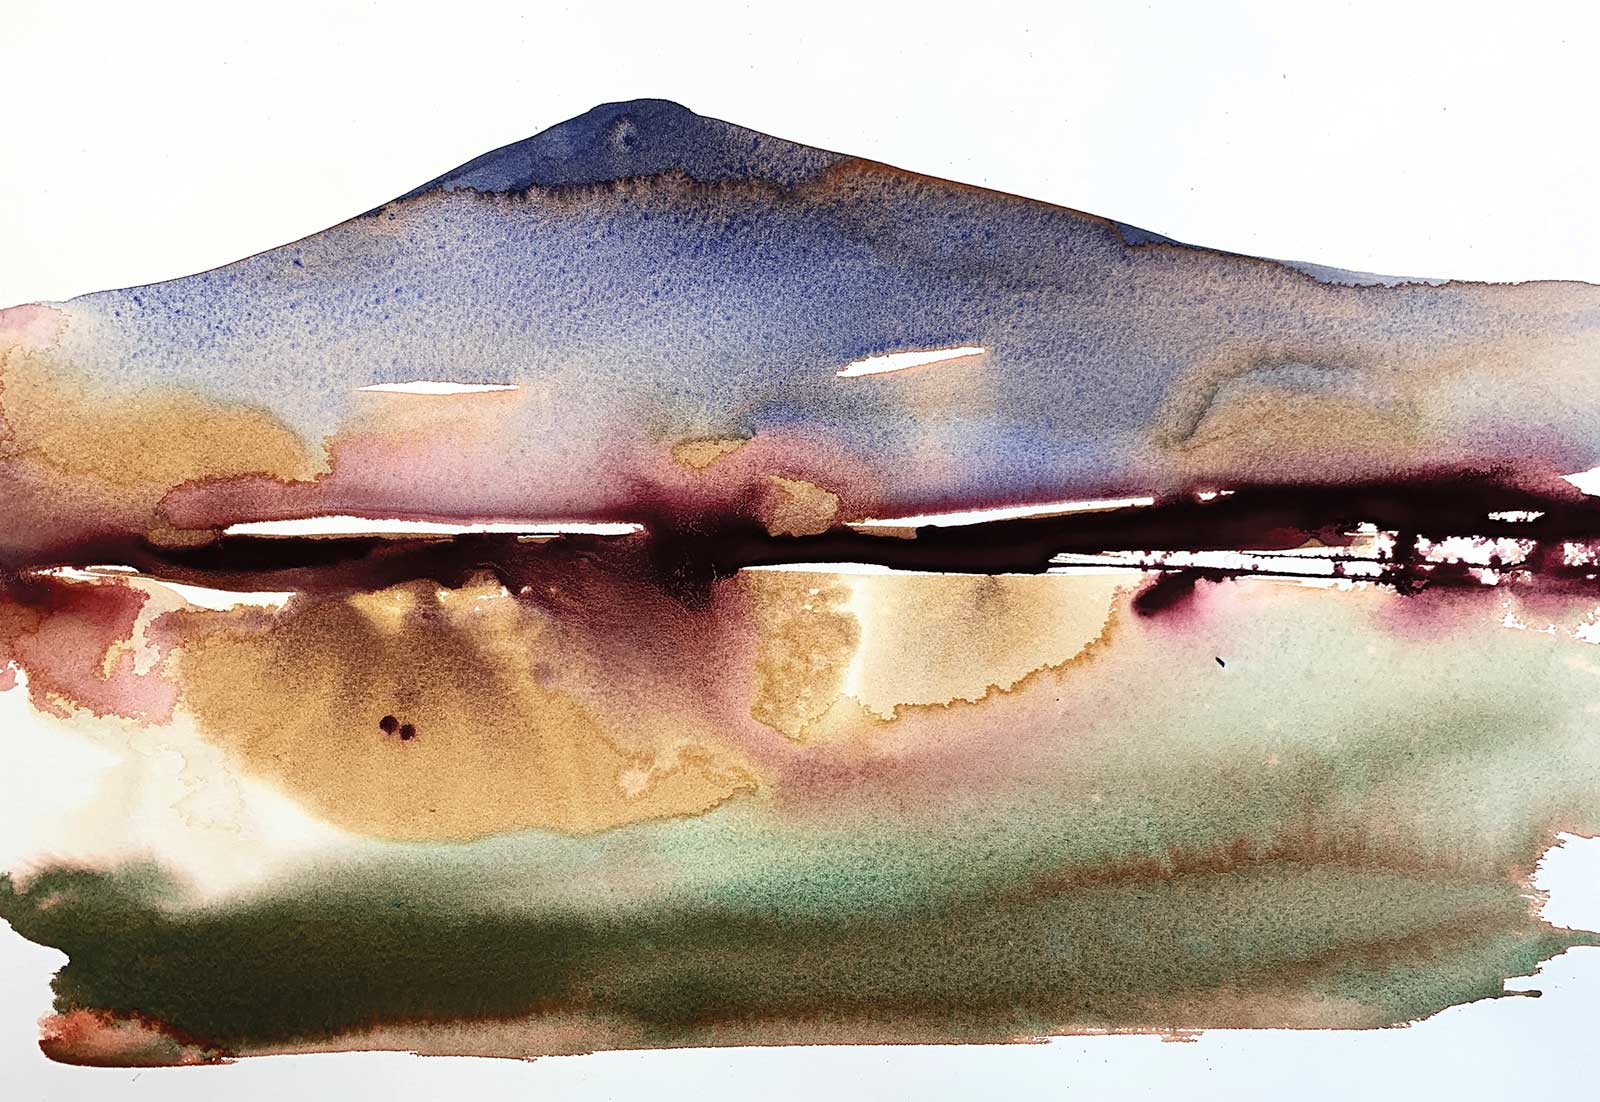
I have always been interested in colors that change and behave differently as they dry, separating or granulating, and creating texture and contrast. I used to mix my own and still delight in making witchy mixtures of a variety of additives and colors, such as minerals, clays, ink, gum arabic and glycerin. Traditionally, artists’ paint manufacturers have perfected their colors so that they do not separate, but lately companies such as RockWell, Schmincke and Daniel Smith have introduced ranges of “self-evolving” and “granulating” colors that separate into beautiful color fringes and washes, which suits my style perfectly. In this demonstration I am using three of my favorite colors from the RockWell range. The picture here is using colors by Schmincke.
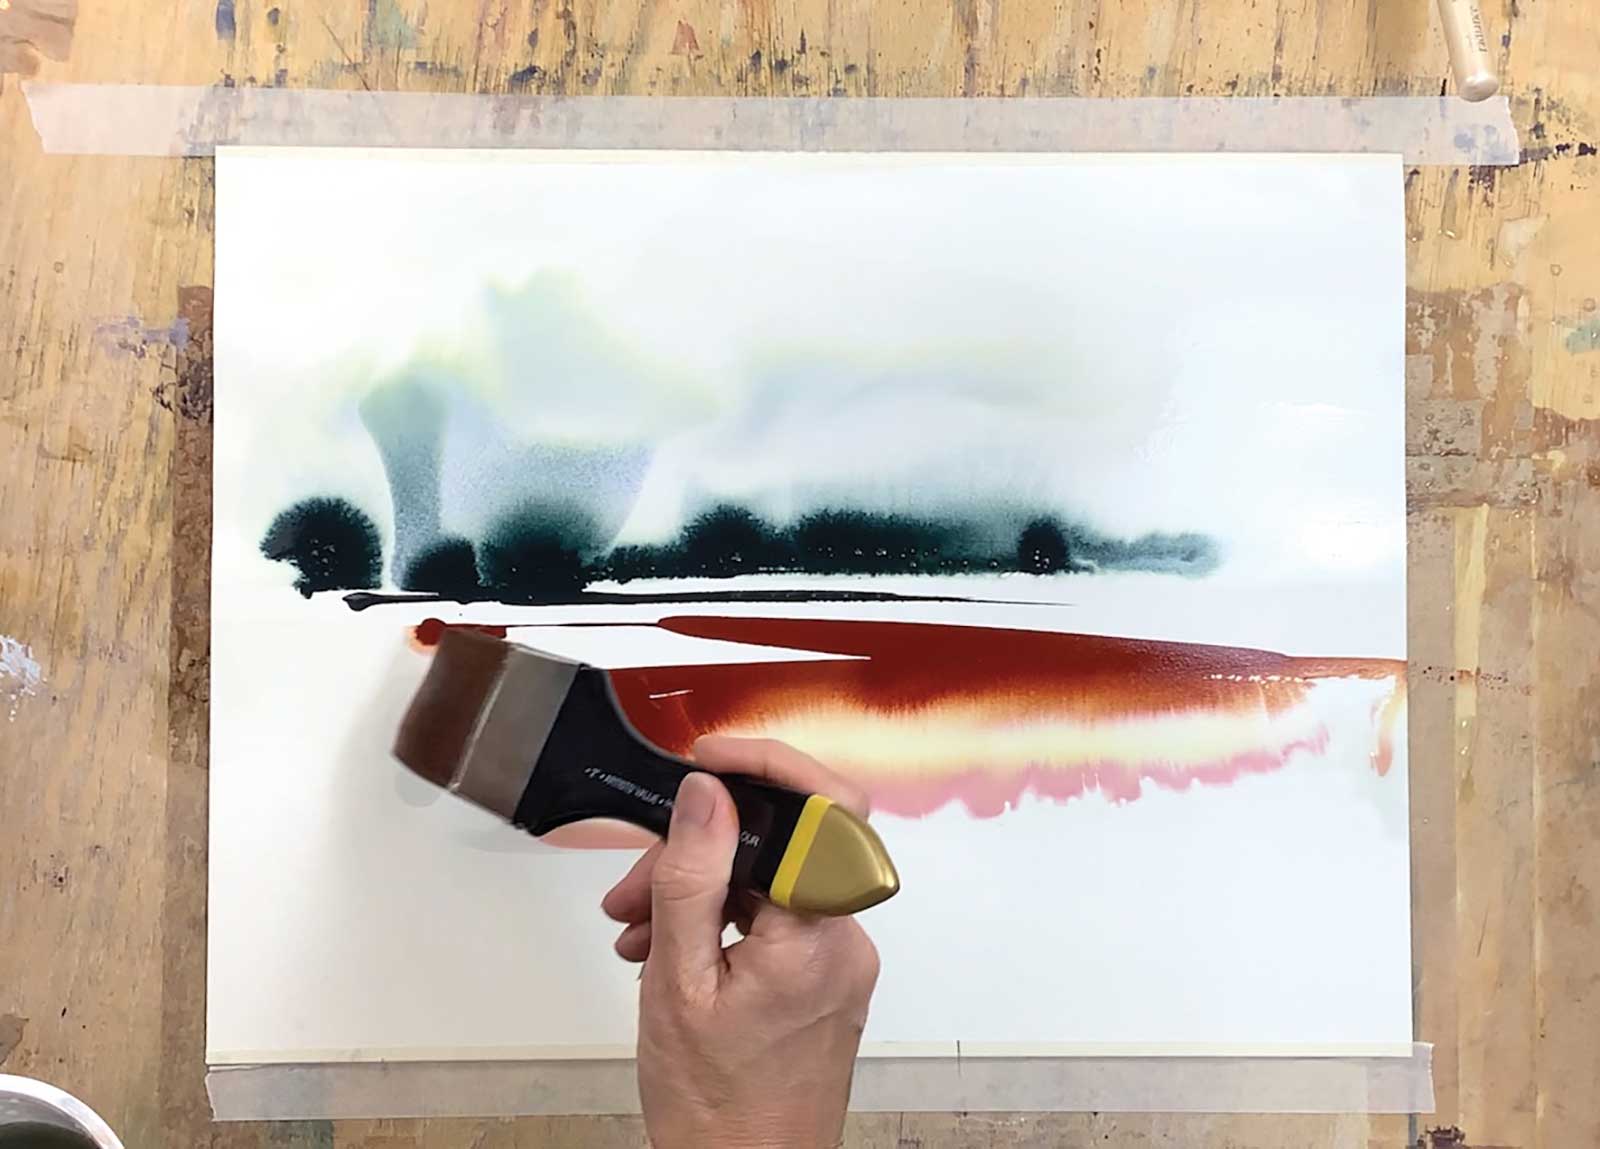
Let the Water Do the Work
A key technique that underlies my whole approach is to apply strong color and then run a large wet brush underneath it, just touching the color, which allows it to spread naturally and dramatically. It’s also about keeping the painting very wet and allowing the water and pigment mix to remain mobile so that it can be manipulated. It’s a fast technique and you need to work quickly to keep within the drying window, but then it may be necessary to leave a layer to dry naturally which can take some time. For this reason I often work on three or four paintings at any one time, changing over as needed.
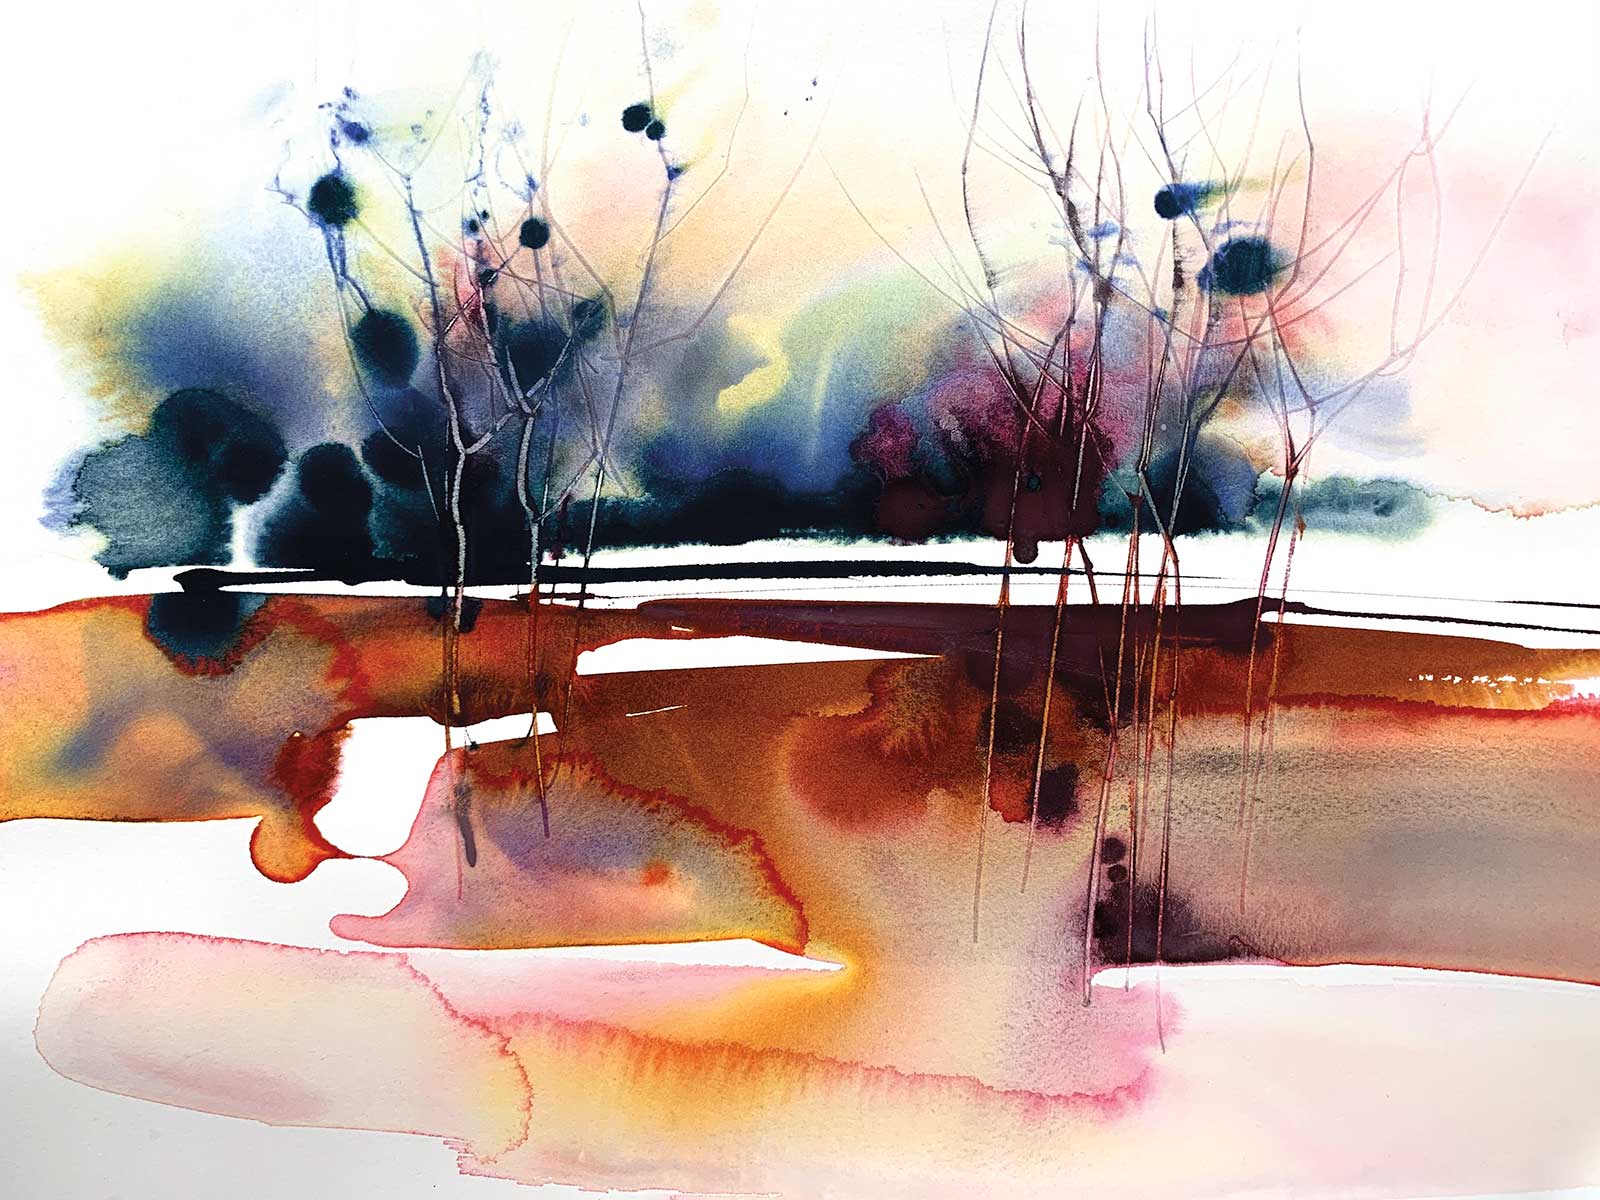
Using Gravity
I mainly work on a flat table, but tipping and angling the board to which the paper is attached is essential, as it encourages the colors or minerals in the paint to separate and creates the illusion of light or granulating texture effects. It also allows excess water or paint to run off, so towels are essential on the work table. Sometimes I leave the painting to develop or dry by leaning it against a wall or putting an object underneath one side of the board so that it dries at an angle.
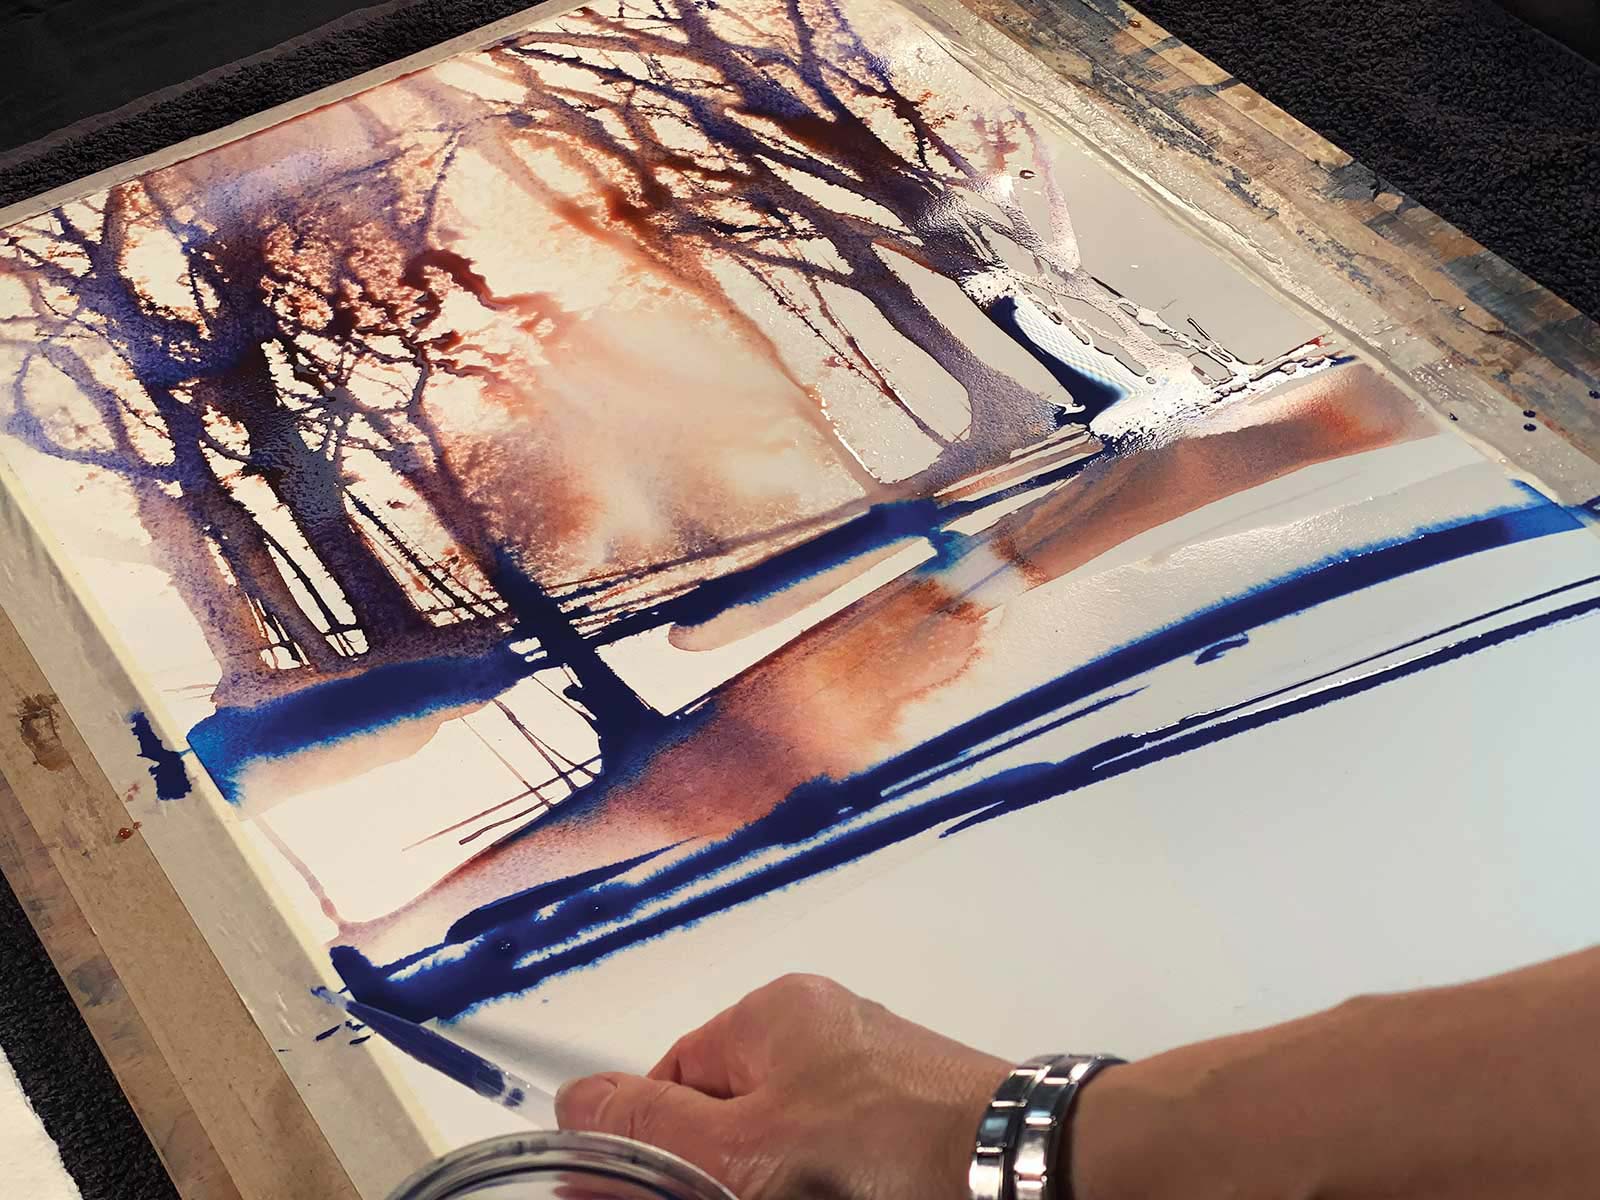 Stage 7
Stage 7 Applying Pure Blue
Now I’m applying RockWell blue enchantress color to establish a foreground/base to the trees, using a pipette to apply streaks of color that will then be swept into wider bands with a wet oval wash brush.
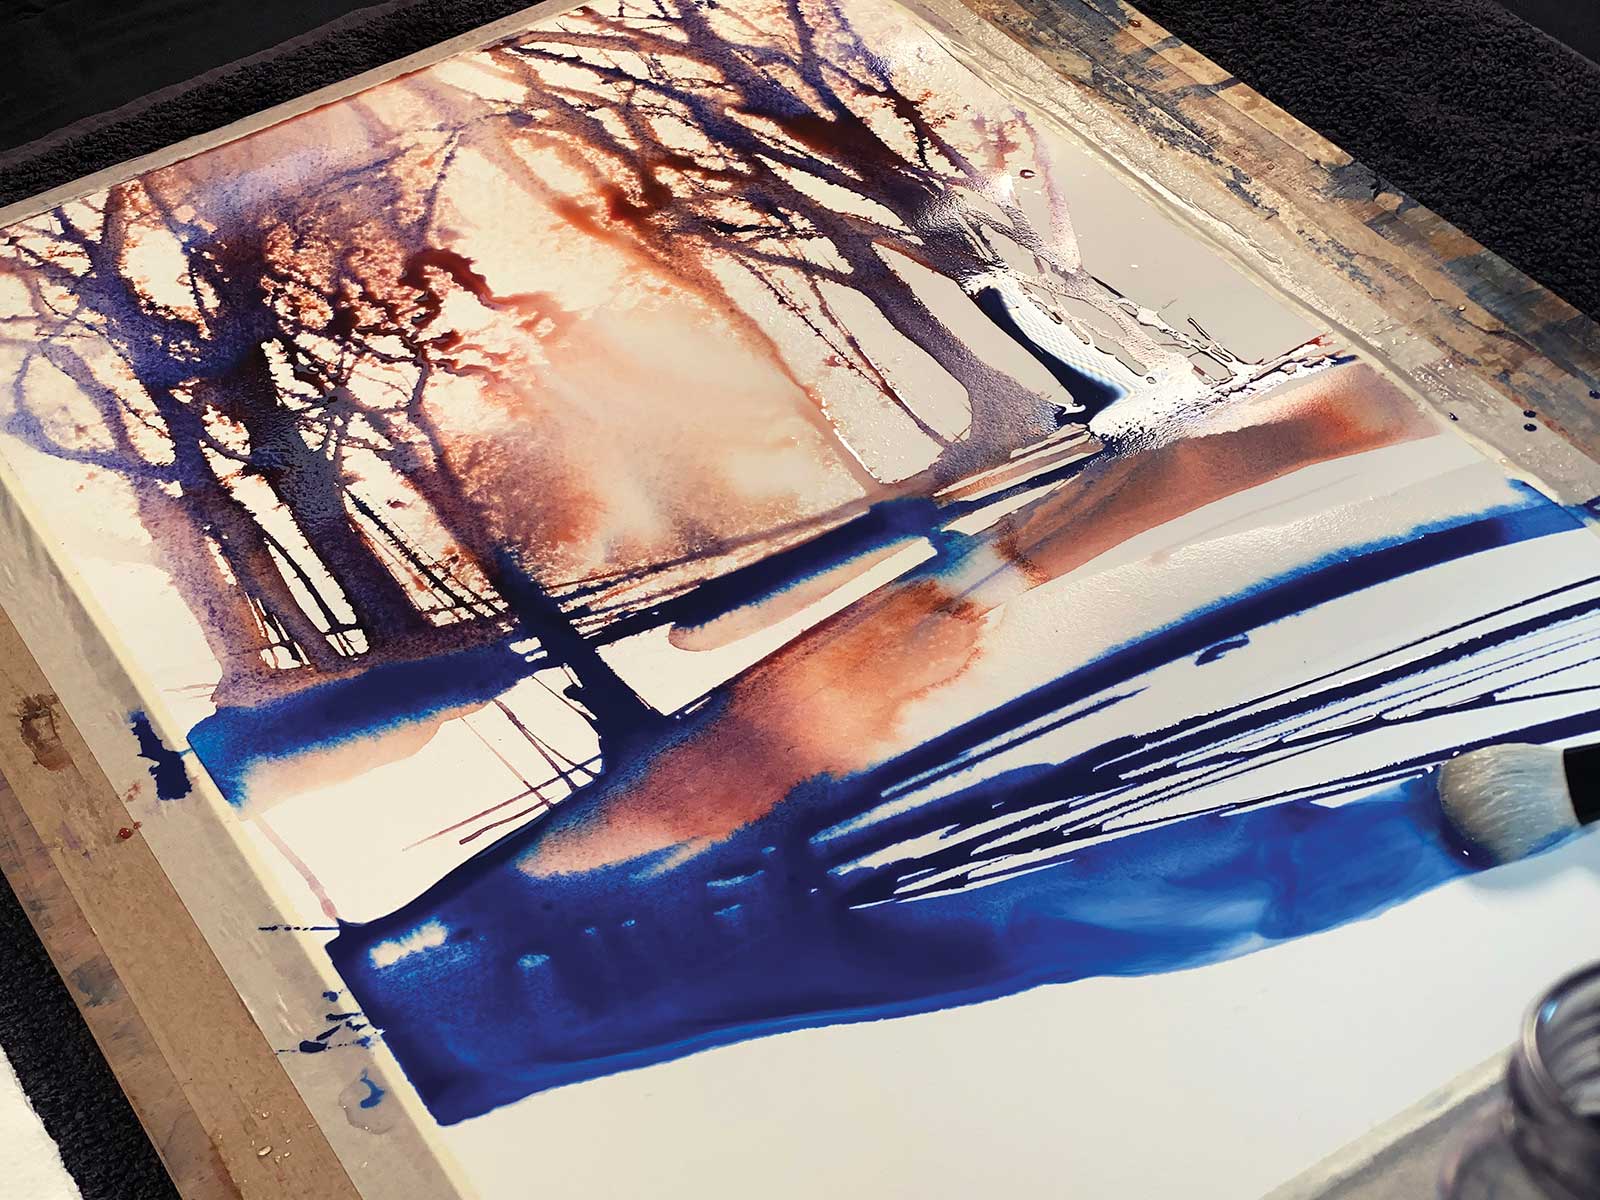 Stage 8
Stage 8 Drawing Down the Blue
I’m “drawing down” the blue color with a wet oval wash brush. One of my core techniques is to apply pure color and then run a wet brush along its lower edge to “draw it down” and create water effects using gravity and capillary action. This brush is great at carrying a large amount of water (or pigment) and prevents one from being tempted to try to create detail with smaller brushes.
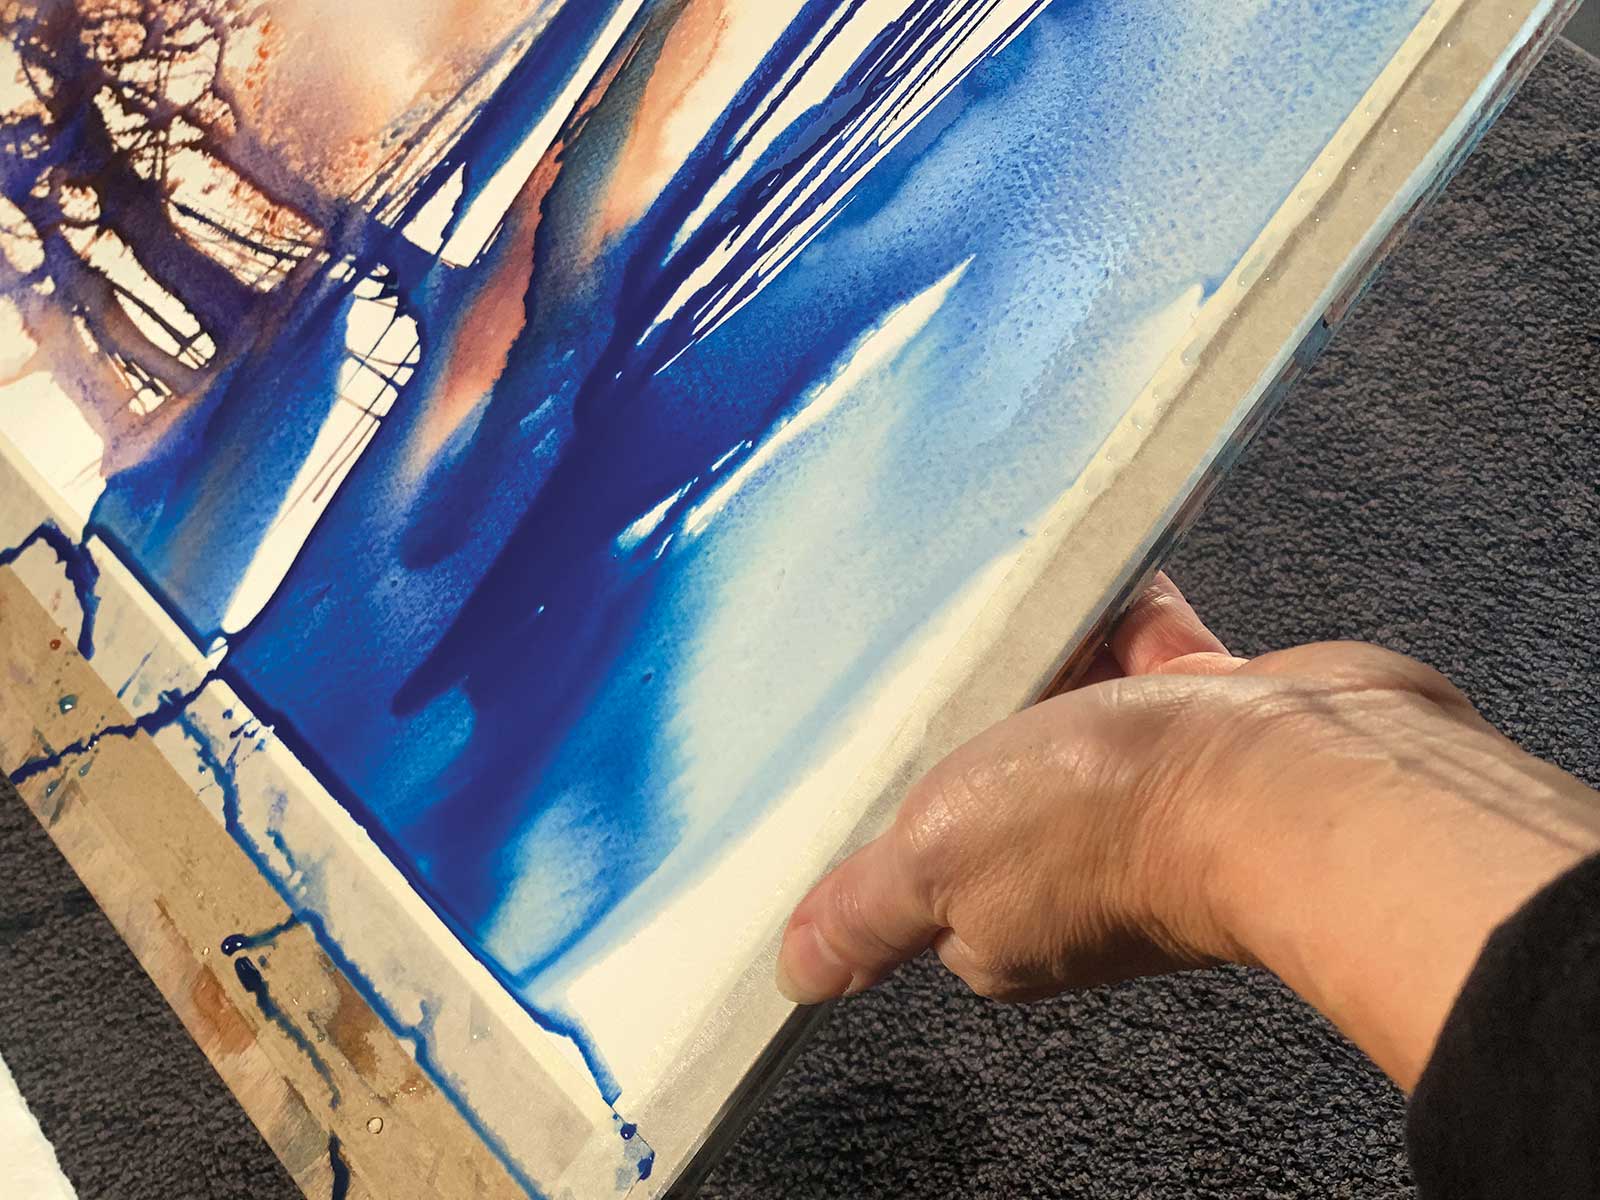 Stage 9
Stage 9 Letting the Colors Mix
Tipping the board allows the colors to run, mix and develop naturally and organically. You’ll need a towel on the table for this step.
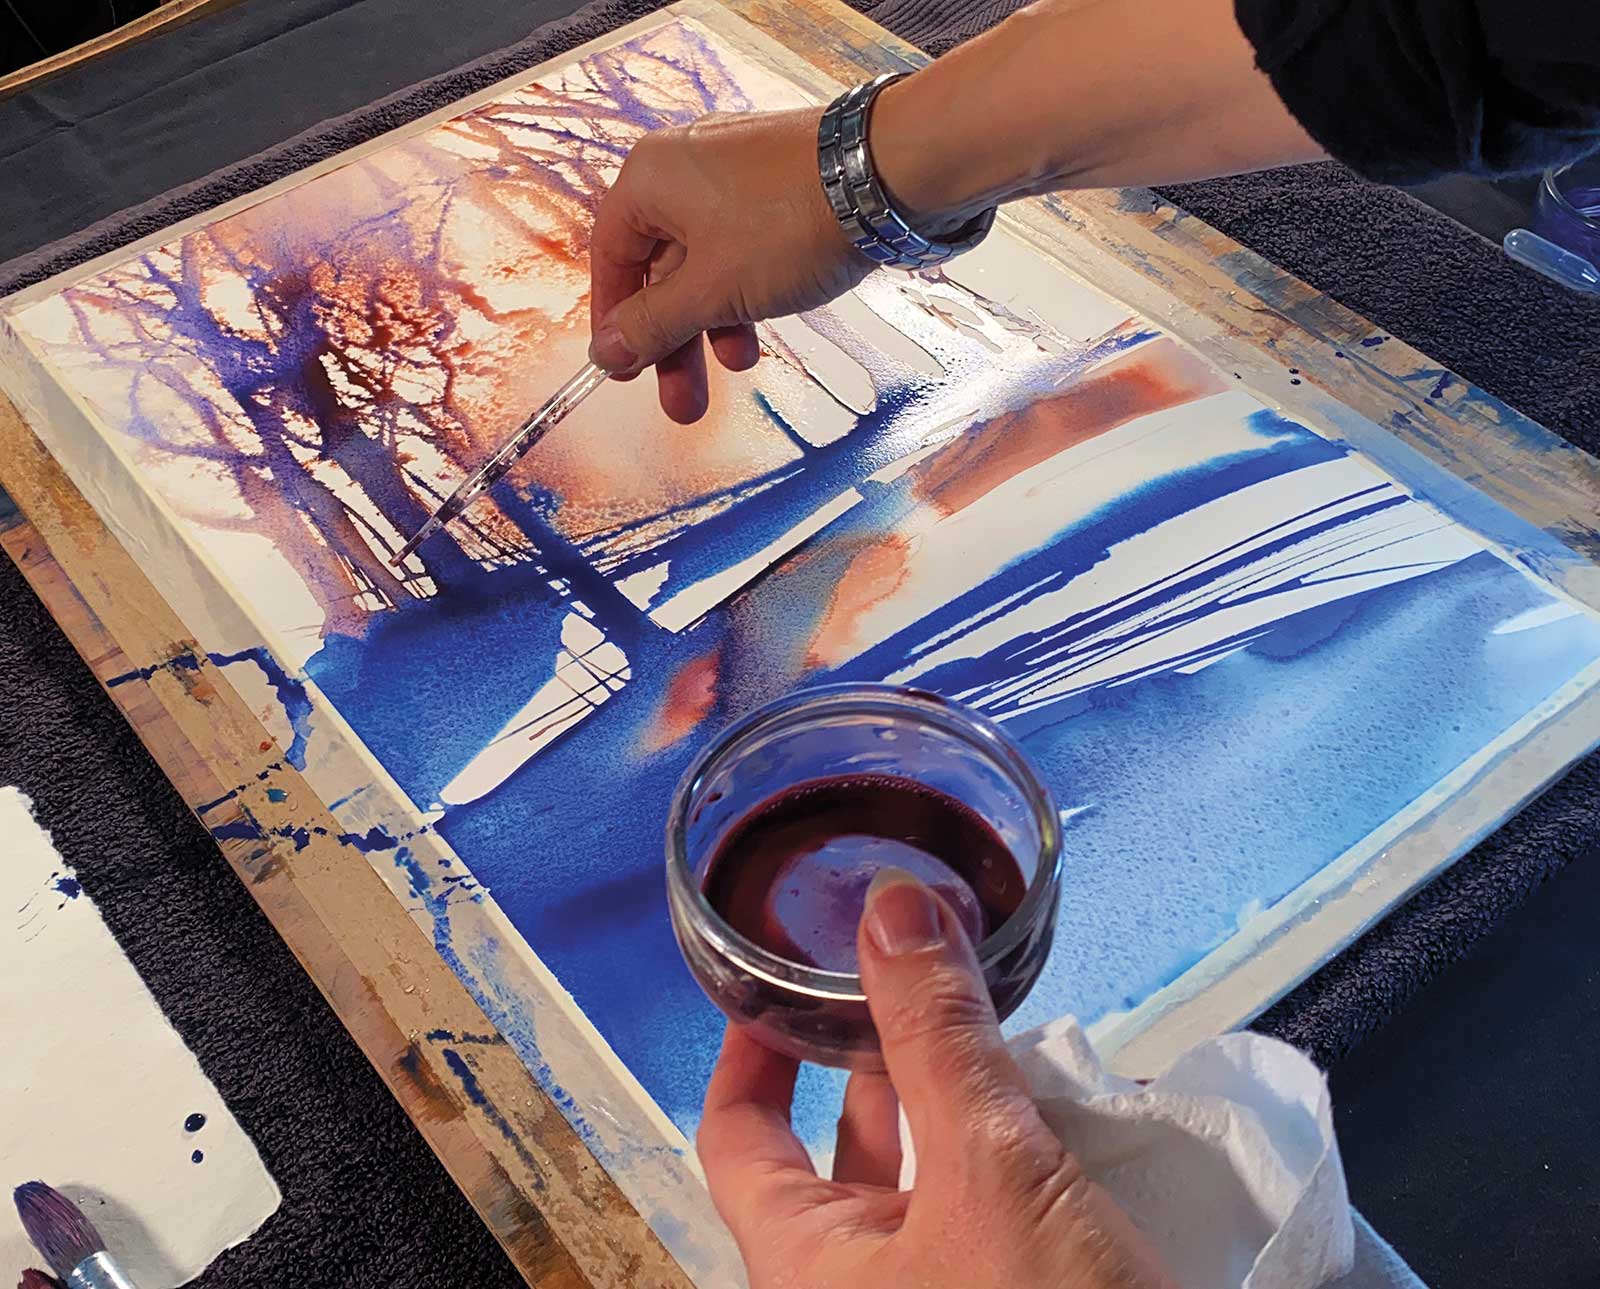 Stage 10
Stage 10 Adding More Pigment
I’m now applying RockWell elf wings color to selected areas to increase the depth of the color. Everything is still wet, and the whole painting has taken less than 20 minutes.
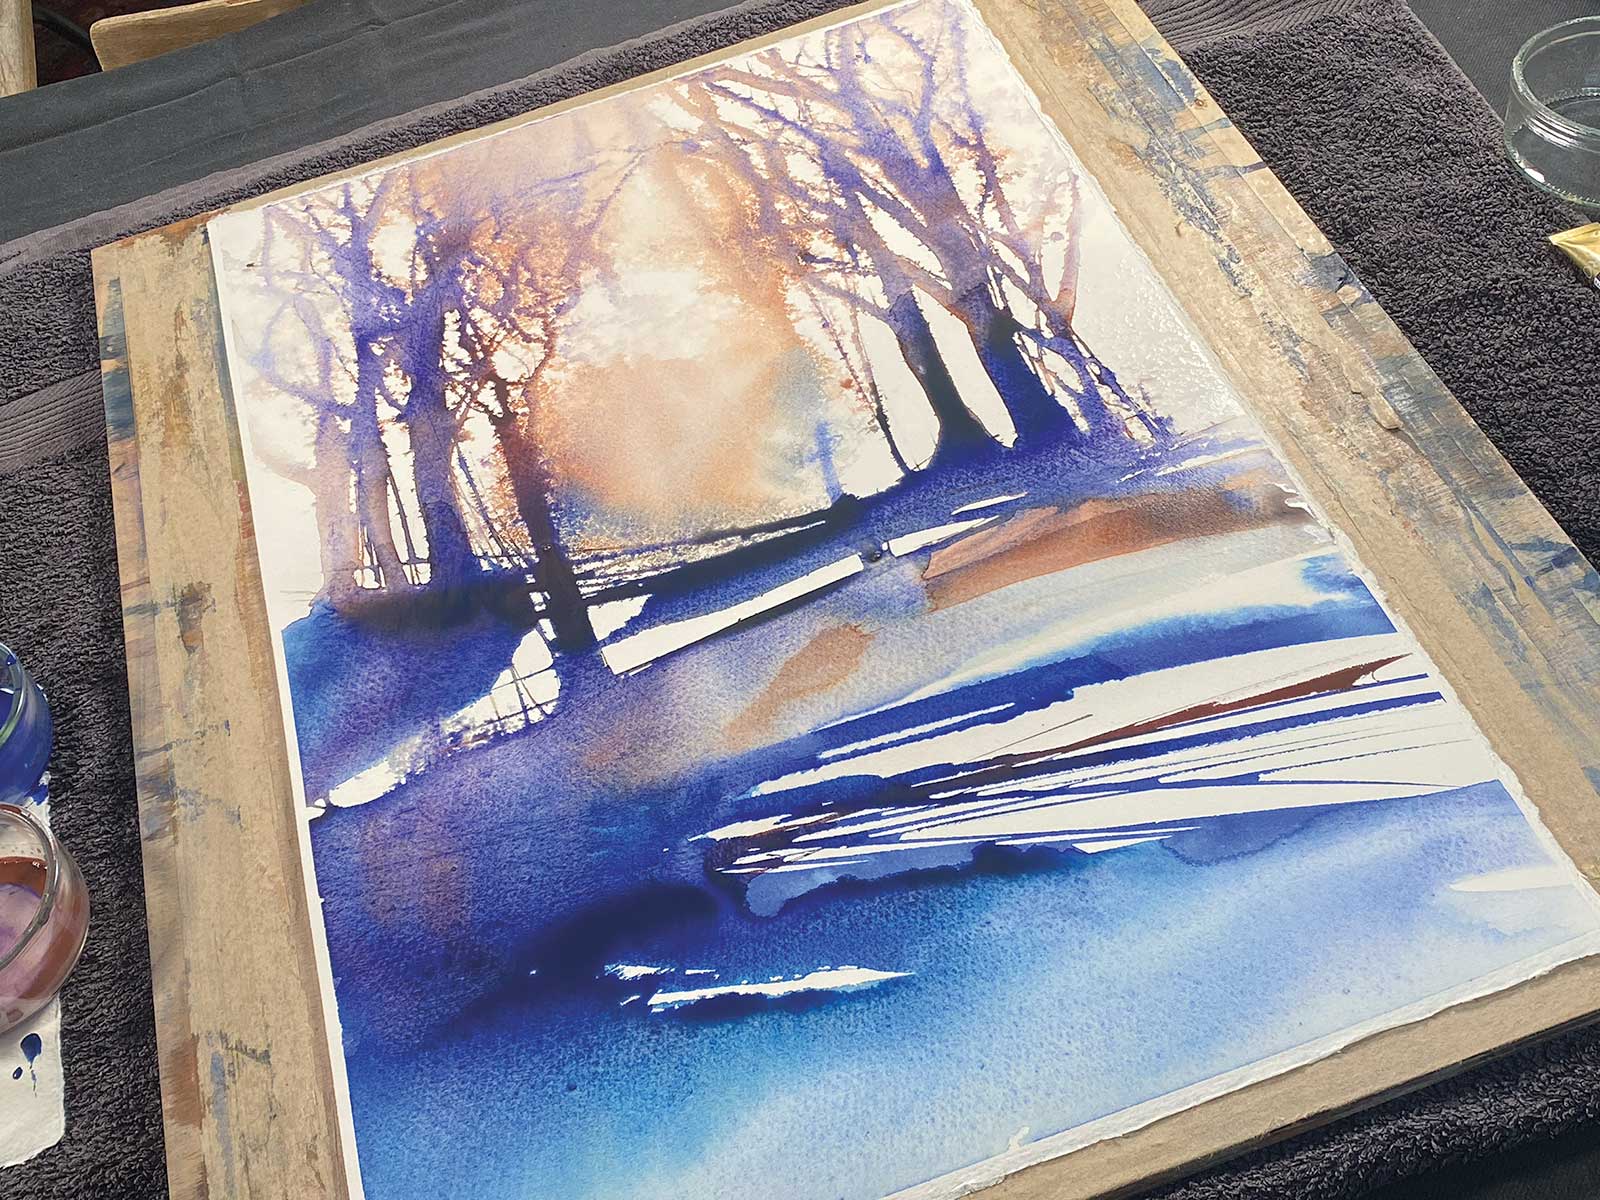 Stage 11
Stage 11 Final Details
The piece is largely finished, although some extra touches may be added when dry, such as spattering to give an impression of wildflowers at the base of the trees or sgraffito scoring of the paper while damp to suggest grasses.
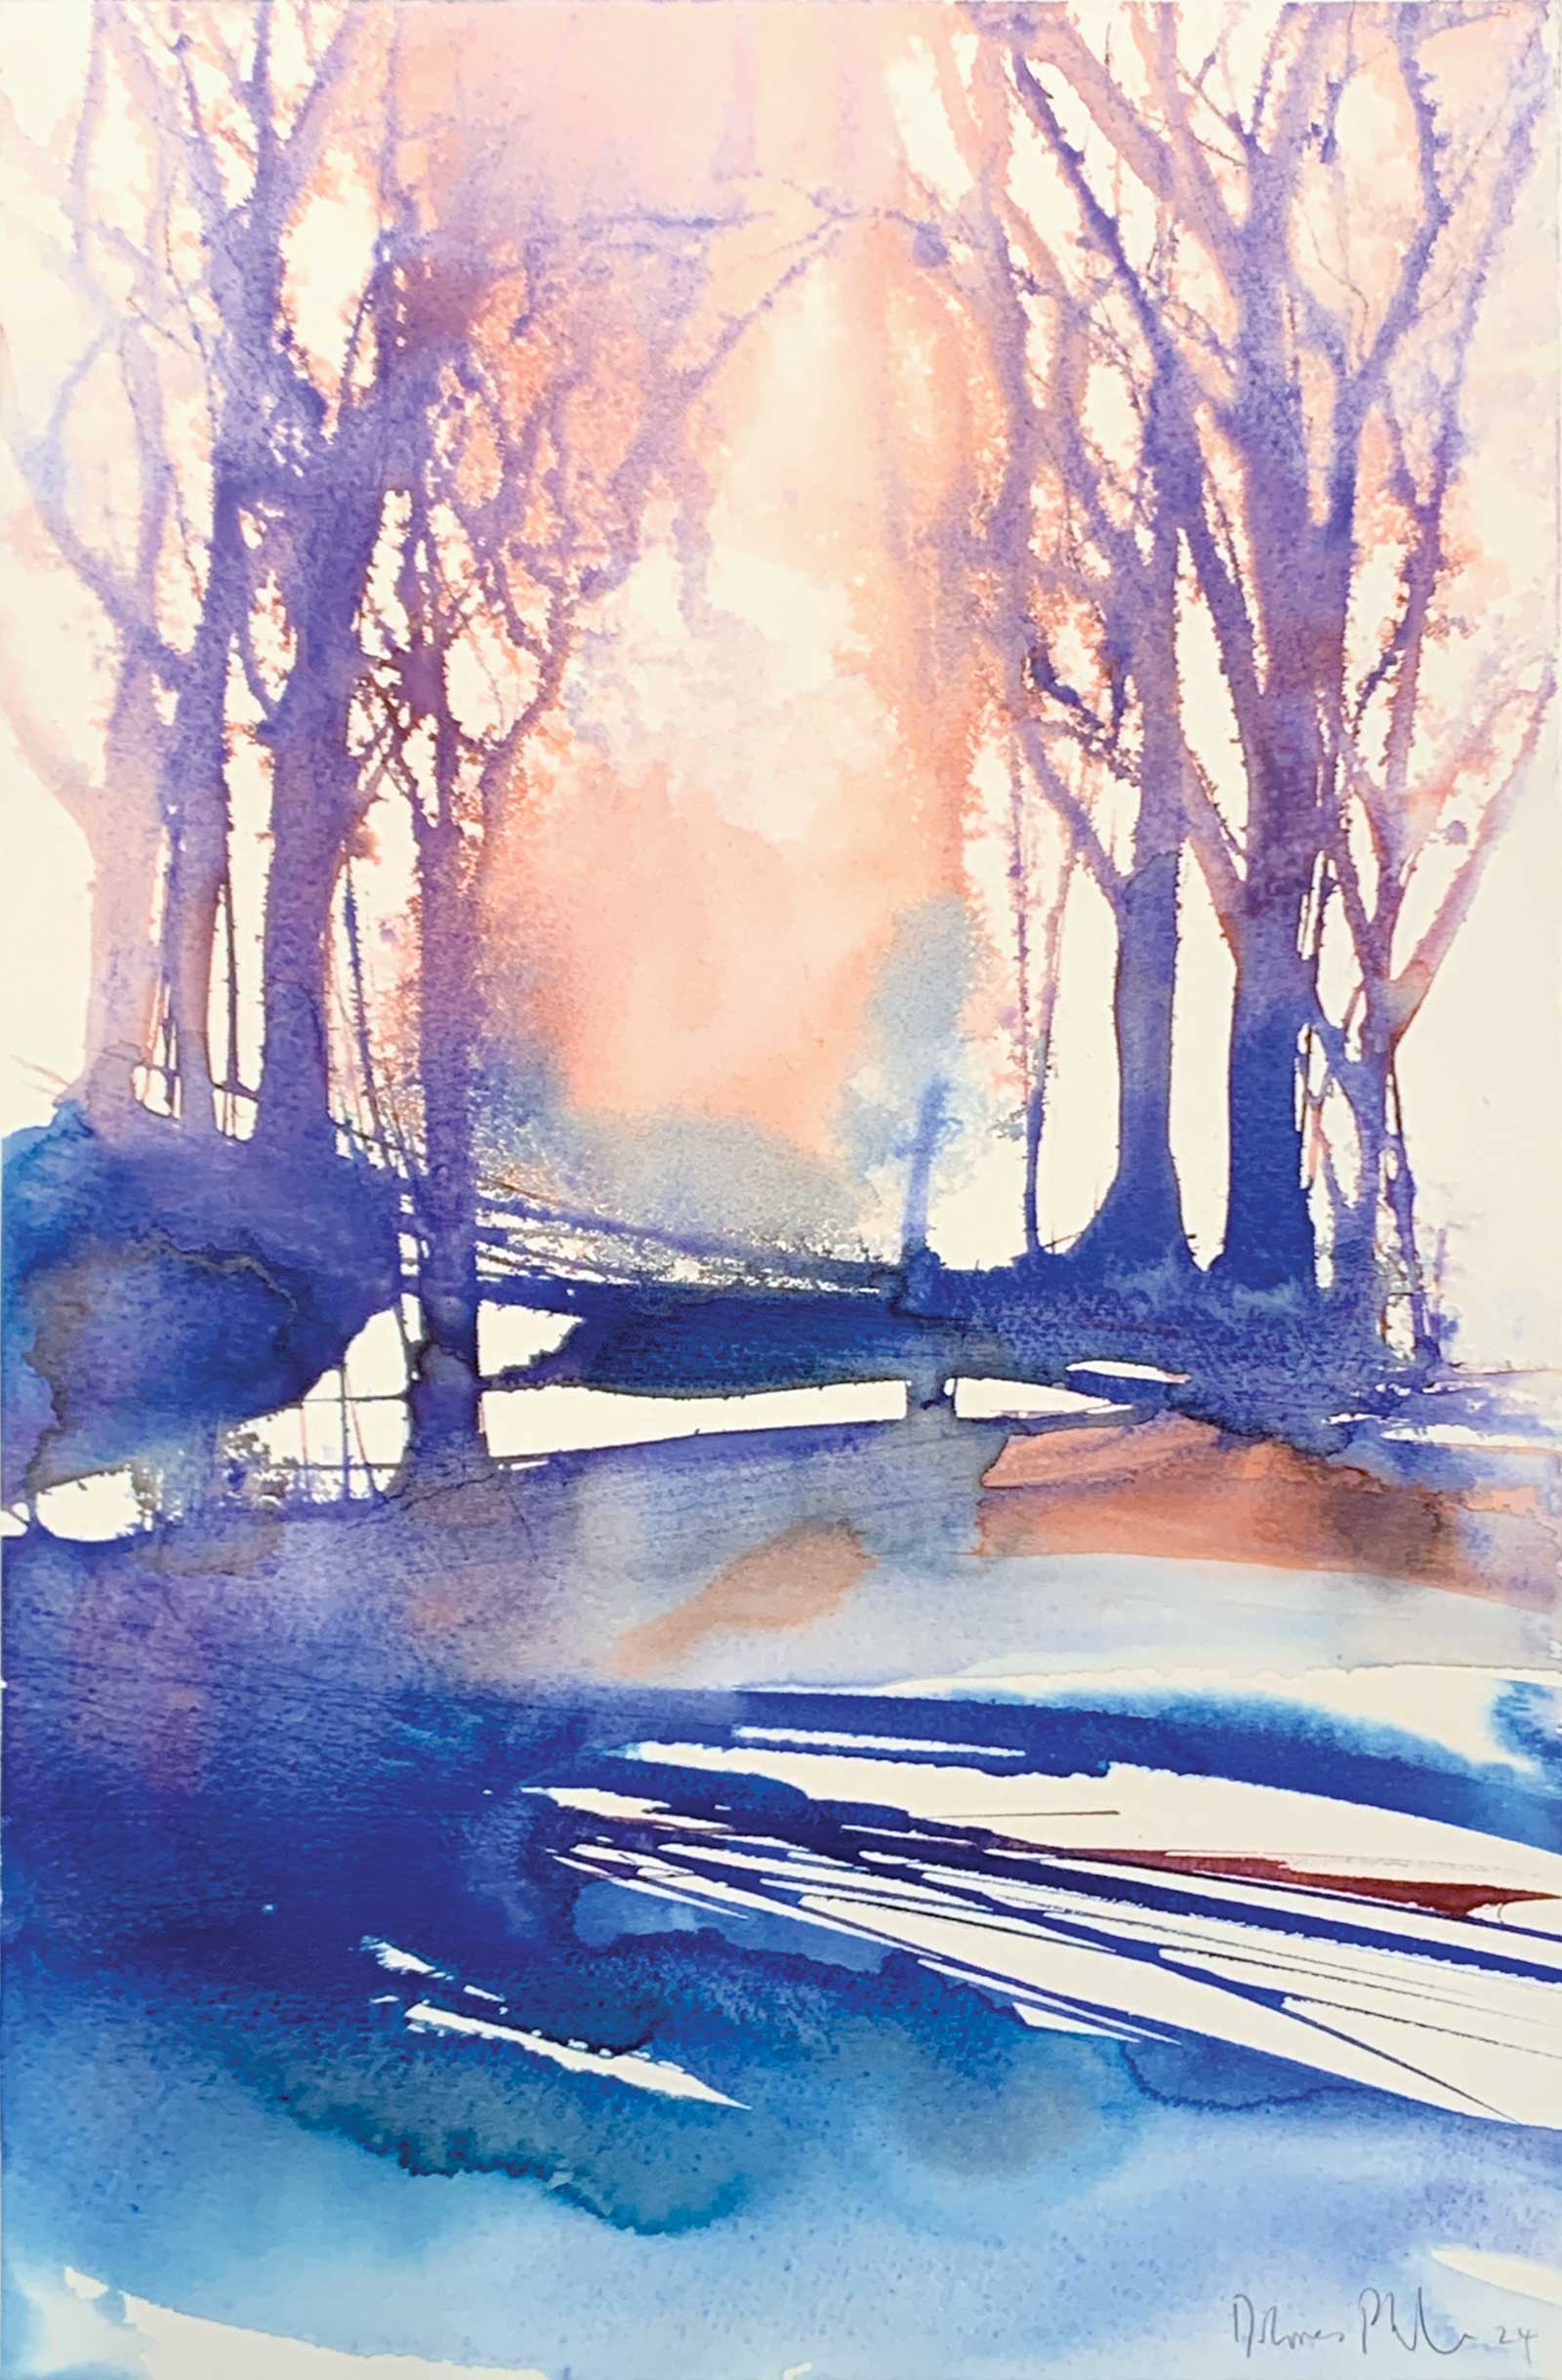 Stage 12
Stage 12 Finished Artwork
Forest Light I, watercolor on Saunders Waterford hot-pressed paper, 22 x 15” (55 x 38 cm)
About the artist
 Dolores Phelps
Dolores Phelps started her watercolor painting practice in 2005 and has developed into a mature and sophisticated style that incorporates pigmented ink and gouache with watercolor. Her process has won her thousands of followers online and a worldwide demand for her techniques to be demonstrated in workshops and classes.
Her subject matter for watercolor focuses on the natural world and abstract landscapes, specializing in evocations of the surrounding forest where she lives and the nearby mountains of South Wales. She also creates large-scale abstract pieces on canvas, using an innovative technique using gouache paints, following the same principles as her more representational pieces.
By applying an intuitive and gestural visual language, Phelps seeks to express nature and natural forces in her work. Light, especially as it may be evoked by transparent watercolor, is very important to any watercolor artist, and Phelps has developed specific techniques that are evocative and dynamic while challenging traditional watercolor painting techniques. Phelps works to achieve poetic and aesthetically beautiful images that are sometimes abstract but also hover on the edge of recognition, invoking the spectator’s memory and imagination.
Phelps developed her online course “Wild Watercolor” in 2022 and has developed three new short courses for spring 2025: “Magic Color” (with RockWell paints), “Wild Forests” and “Wild Landscape.” For details, see the courses page on her website at doloresphelps.net or follow her on Instagram.
Represented by
Soul Gallery of Winnipeg, Winnipeg, Canada, soulgallery.ca
Contact at
doloresphelps.net