



Thirty-four years ago, I left oils behind and fully embraced acrylics—my life changing medium. Art requires taking risks and approaching the easel with braveness regardless of feelings. The quick drying time of acrylic was the answer to overcoming the fussing and drove me to focus on laying brushstrokes down as quickly and as competently as possible—creating with ambition, assurance and bravado until I no longer knew how to paint any other way.
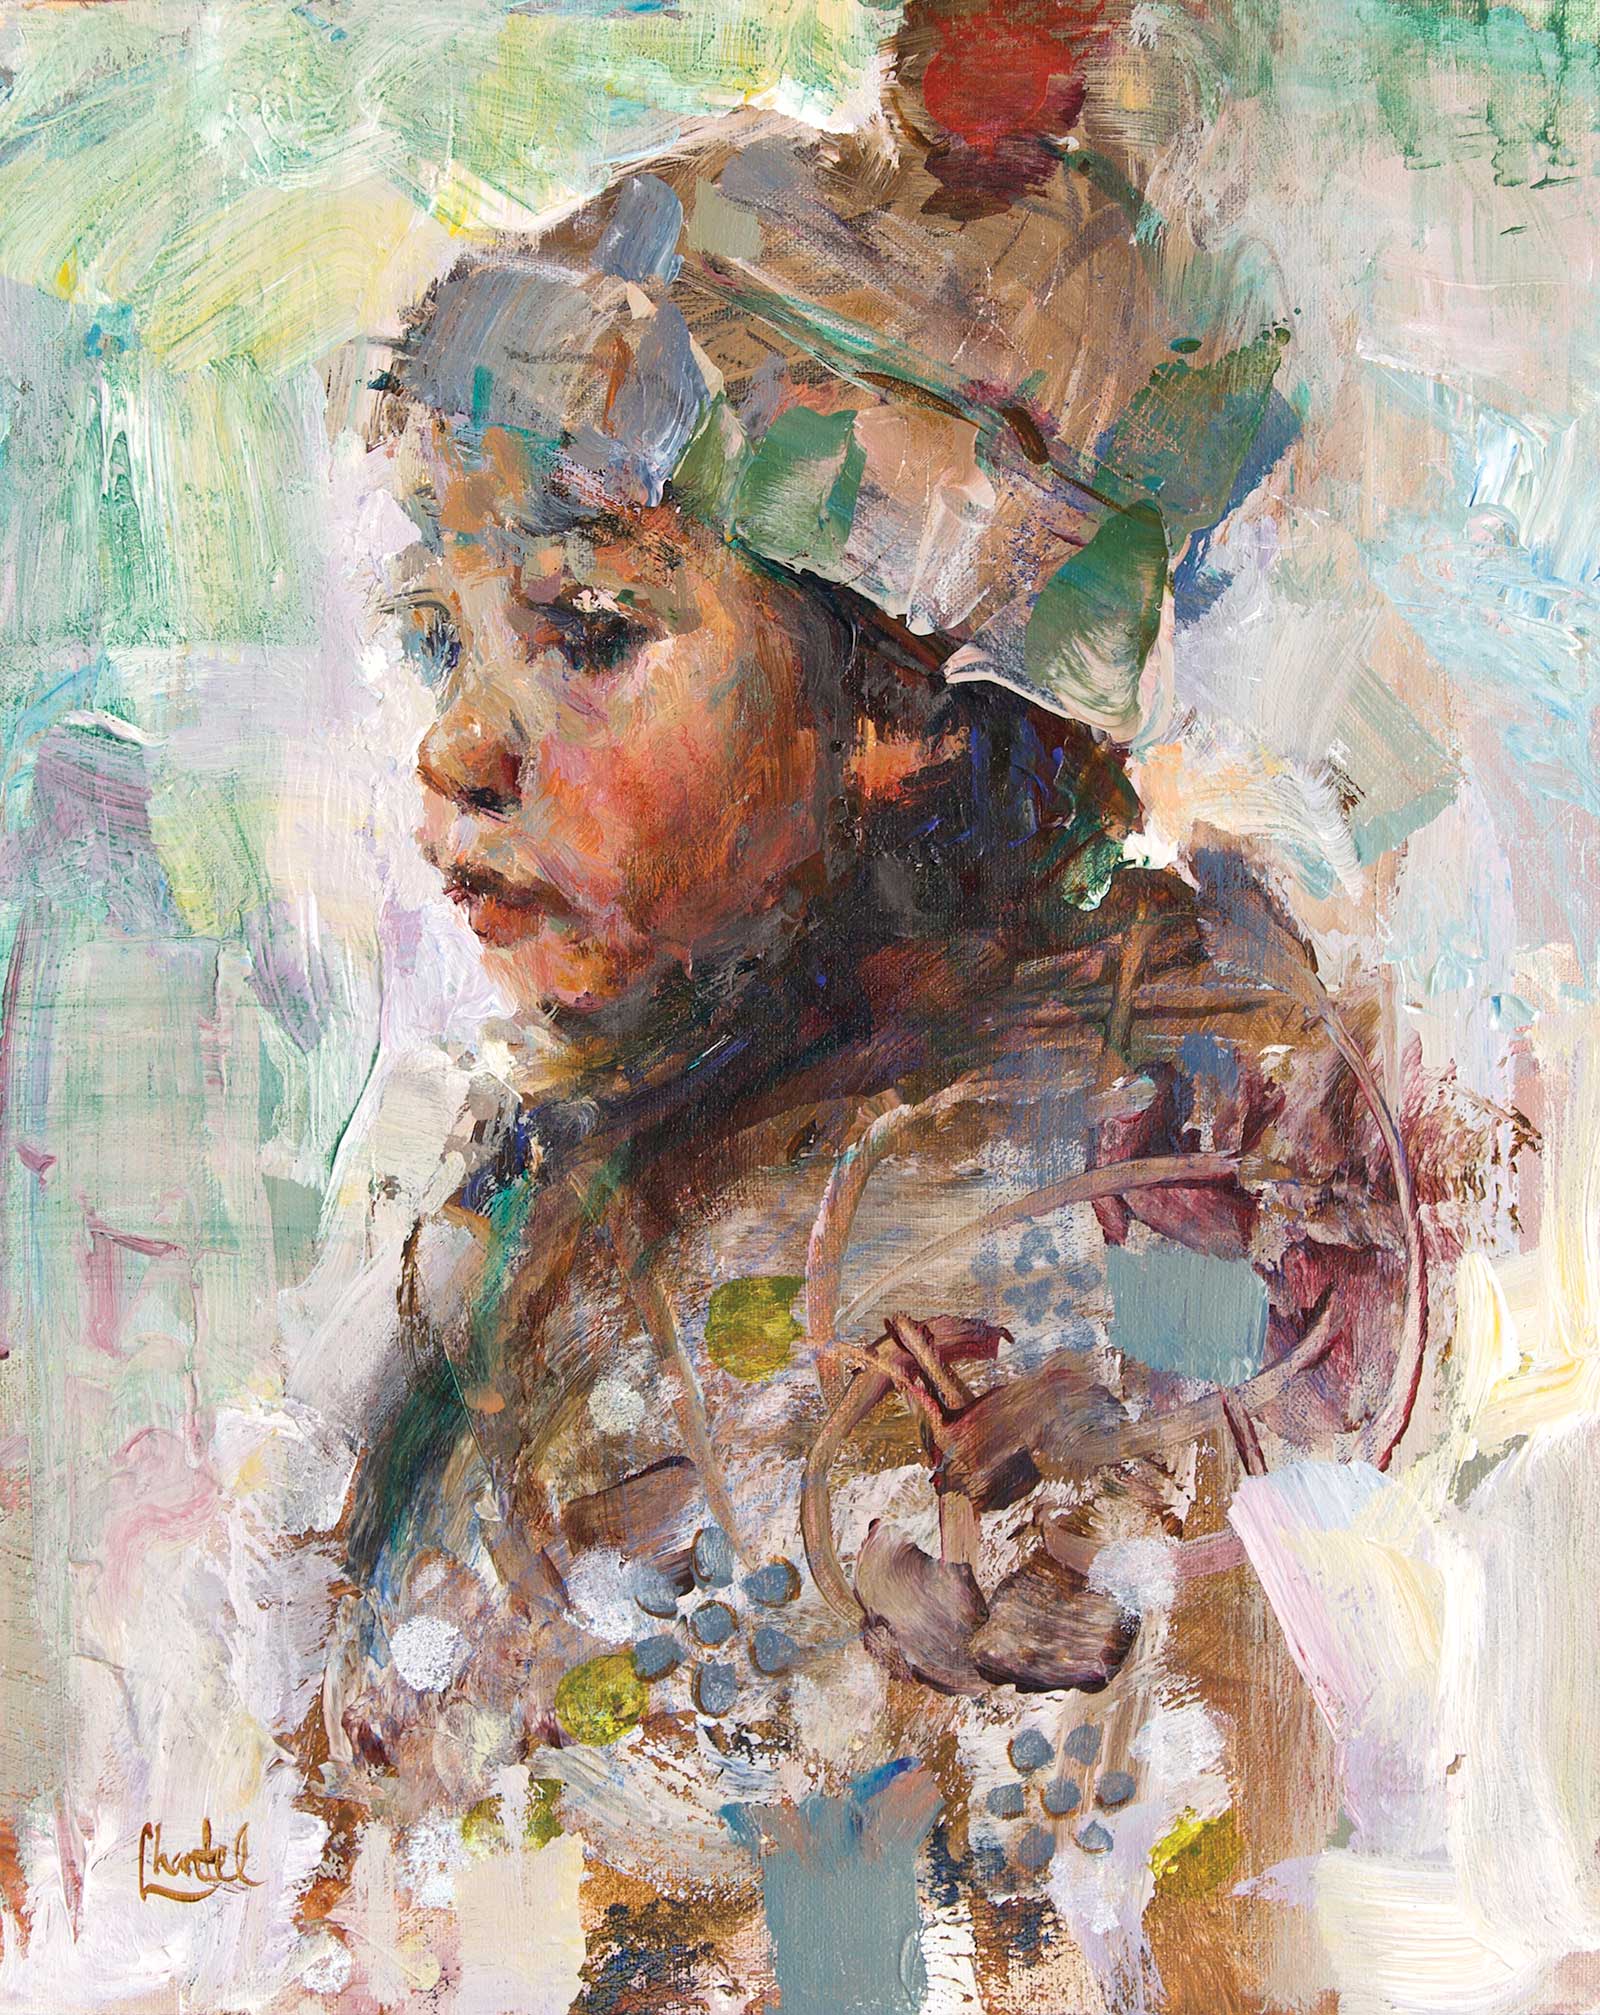
With a Warm Heart, acrylic on Artefex panel, 10 x 8" (25 x 20 cm) This painting exemplifies my strategy of creating with ambition, assurance and bravado. I began with bold brushwork using heavy body acrylic. Once those foundational strokes dried, layers of acrylic inks were added. Some layers were applied as color washes, while others were dripped and splattered using old brushes. Silicone blades and wedges cut back into wet paint, creating a variety of edges.
Now, from the moment I place the paints out on the palette, my adopted mindset is that I would rather have an audacious failure than a timid half success. This approach leads to more experimentation with various techniques. Recently I’ve started including open slow-drying acrylic in my work alongside traditional acrylic for different effects. A painting is begun with heavy body acrylic, allowing the foundational strokes to dry quickly. If a stroke in this stage of the painting process doesn’t work, it is immediately wiped off, and since the existing paint is already dry, removing the offending stroke won’t hurt the integrity of the block-in. In the early stages I like to think I am sculpting with paint and prefer using the consistency of heavy body acrylic with its quick drying time. Once I’m satisfied that the beginning brushstrokes may have a future as a finished painting, I start adding layers using both inks and open acrylics.
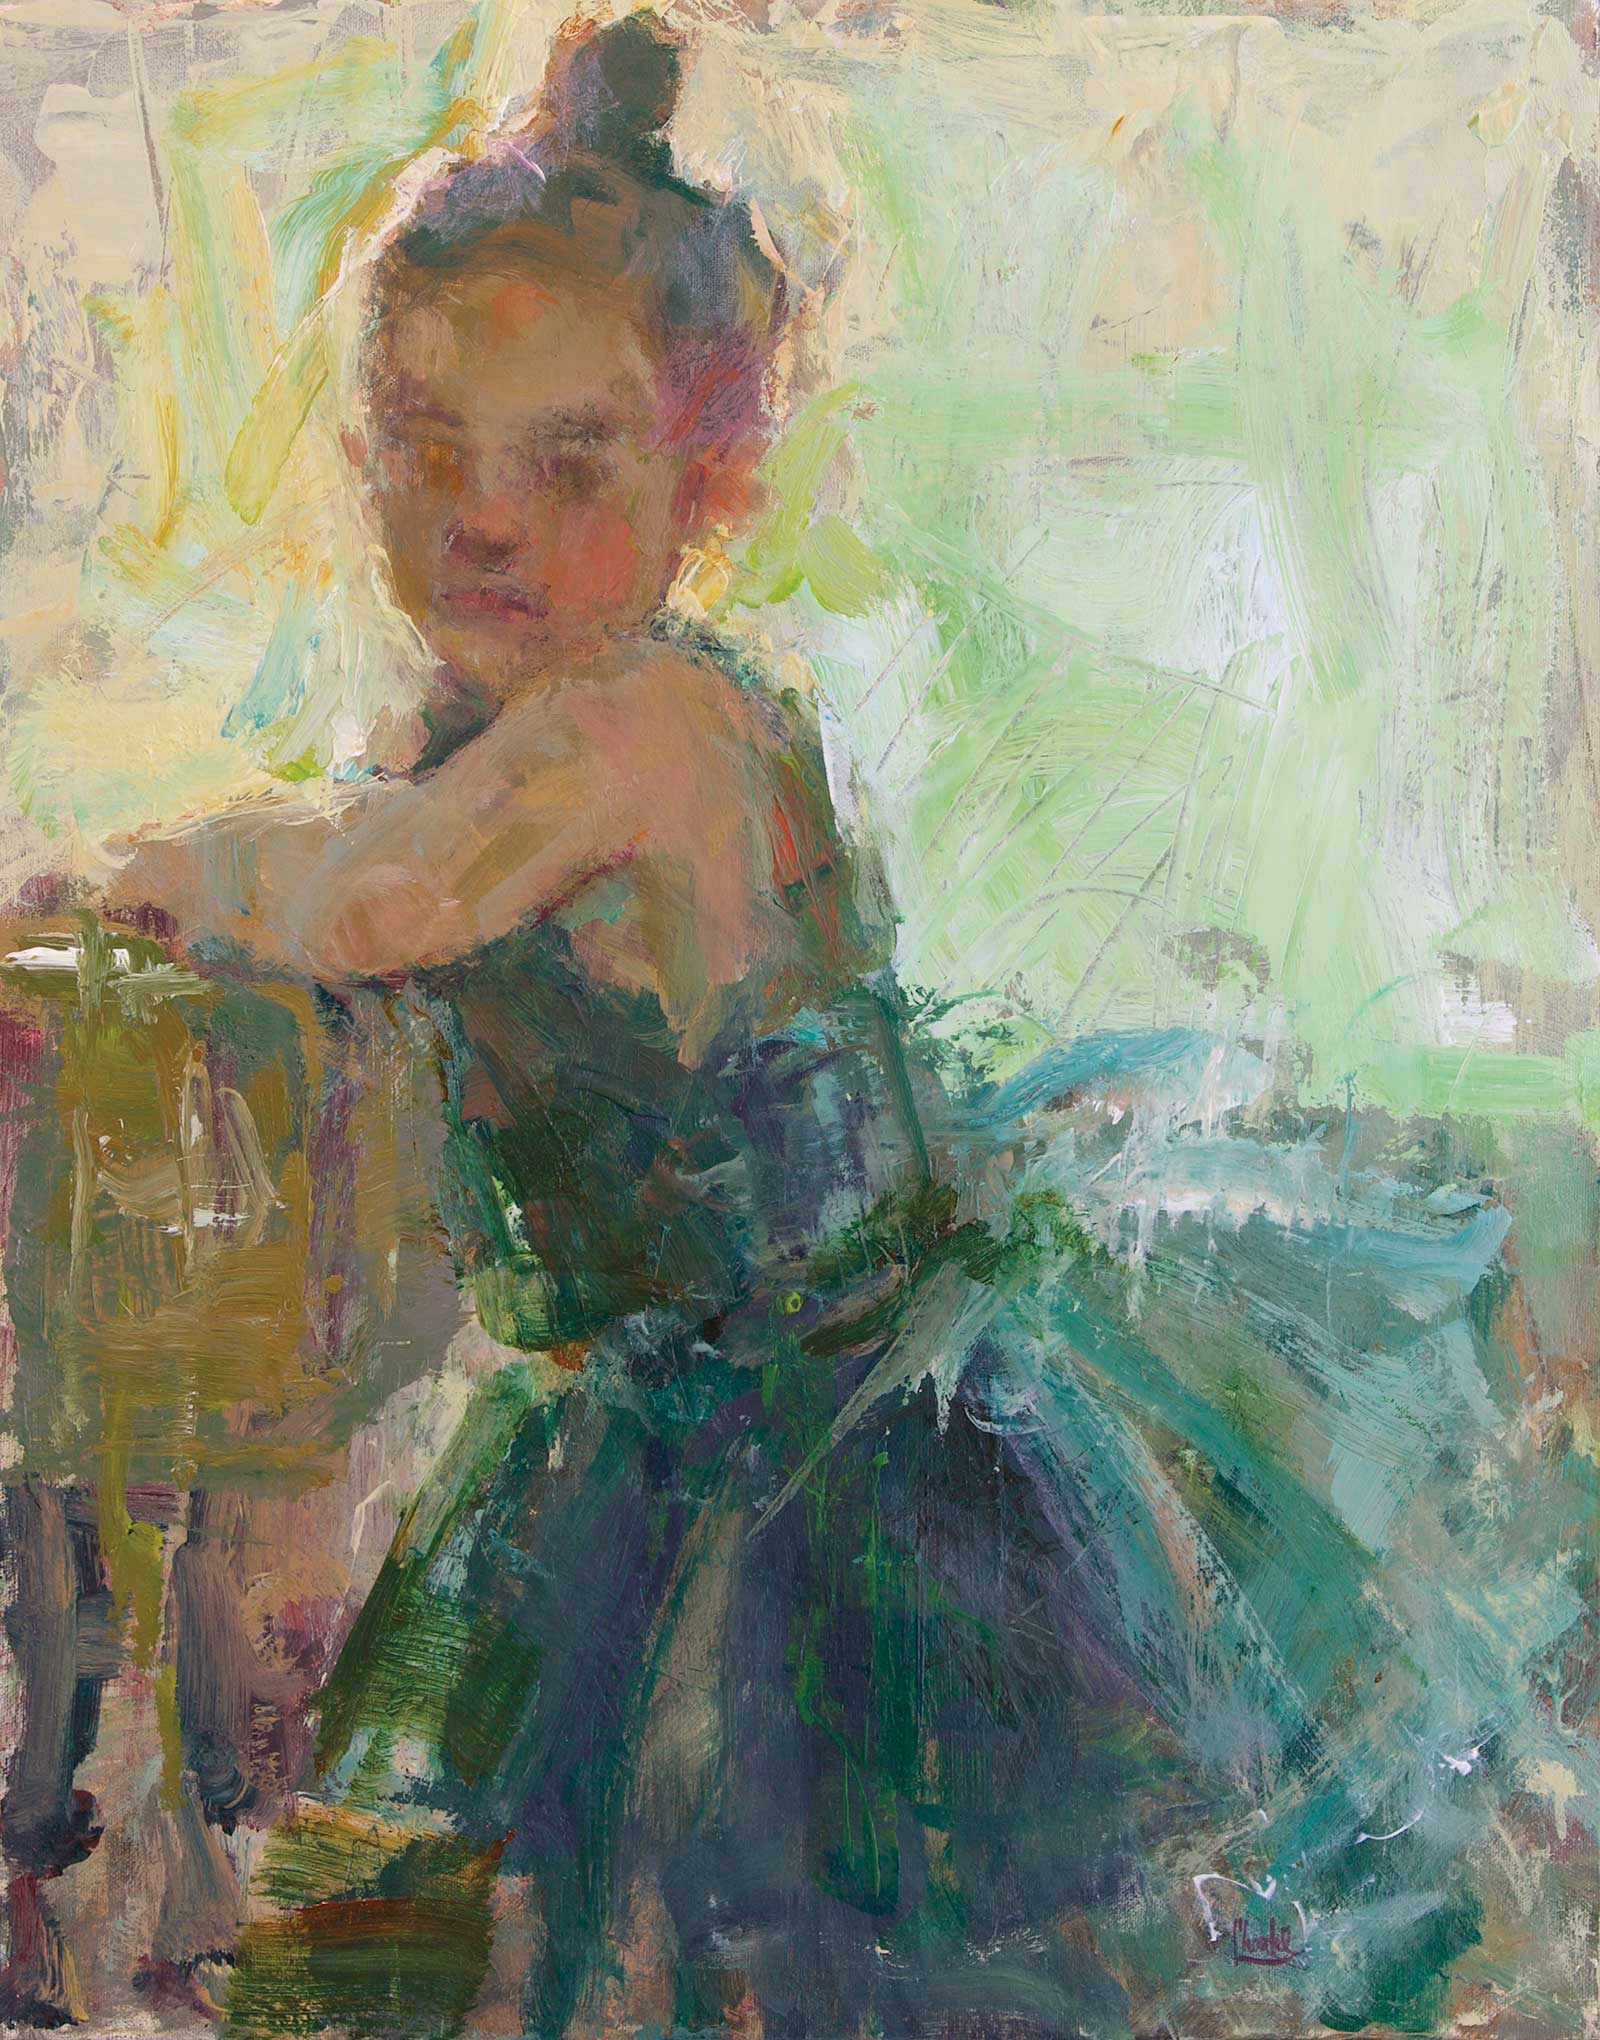
Her Poetry, acrylic on Artefex panel, 14 x 11" (35 x 27 cm) I love painting light. Deepening values, along with cooling and warming chroma, is effective when conveying light spilling over a figure. Harmony of colors was achieved by starting with a mother color and then adding it to each of the colors mixed on my palette. Open thinner used with open acrylic allowed more fluidity in the finishing strokes. Acrylic ink washes in cadmium red light hue, cadmium red orange hue and cerulean blue hue peeked through in the final painting.
Acrylic inks are extremely fluid, have beautiful color saturation (opaque and transparent) and dry quickly, allowing for various effects like drips, splattering and color washes. I especially like using them to add transparent washes of light and darks, which lets me describe in subtle ways more than might first meet the eye. So much of my work now is about adding more and more layers. Each layer sometimes only has a bit peeking through in the finished painting, but never underestimate how important it is to have subtlety. Just a hint of a color or a stroke can change everything in a painting, especially in portraits and figures. People have intricate personalities and a painting that reflects sensitivity toward the subject captivates the viewer time and time again. Sea sponges, palette knives, silicone wedges/blades, and ink brayers are all used with open acrylic to create beautiful edges and nuances. While I favor using hog hair bristle brushes with heavy body acrylic, I find synthetic brushes work better with open acrylic. Open acrylic used with a special open thinner creates whispers of paint passages, allowing me to achieve greater depth of being in my paintings. An ink brayer’s versatility puts color down and lifts wet paint off, moving bits of paint around while building upon other passages of paint. One of the things I always look for as a painting progresses is whether values are too light or too dark, which can ruin the form. This is especially important when working in heavy body acrylic because it dries one value darker. Open acrylic has very little value shift. Combining the two on the same brush makes things interesting. The effect is exciting and sometimes surprising as the paint dries and the values change. Throughout a painting’s journey, start to finish, I remind myself to commit to do something and accept the possibility of failure. This means committing to your brushstrokes, regardless of whether they turn into a mistake.
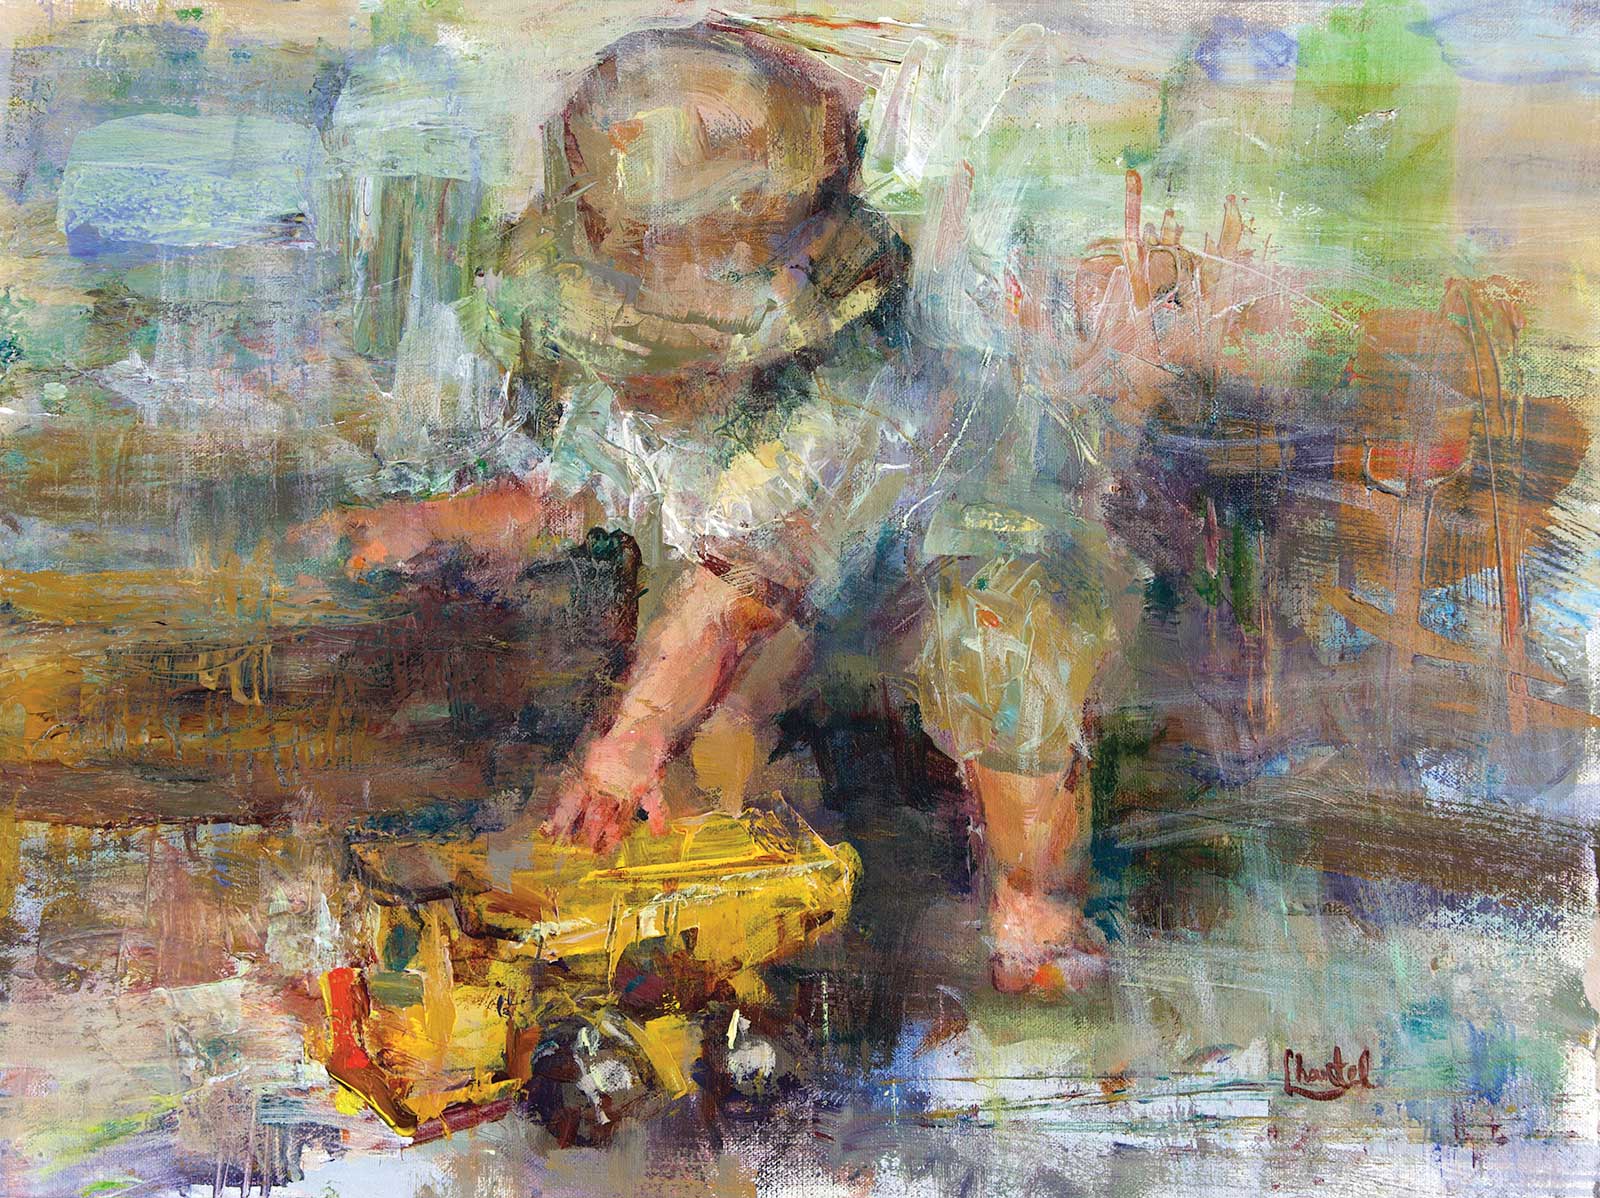
His Yellow Truck, acrylic on Artefex panel, 9 x 12" (22 x 30 cm) The photo reference that inspired this painting was of my youngest son when he was little. The picture had faded, and the colors were washed out, but the memory was vividly alive. I spent time observing children the age my son was to get a feel for (and be reminded of) a young child’s body language. Filbert and flat brushes, silicone wedges and an ink brayer used with both heavy body and open acrylics helped me create beautiful edges and nuances.
Don’t let the threat of others walking on your dreams hold you back. There is an obvious difference between a painting done with vitality and intention, and one painted with uncertainty. We should not be timid. In painting we must be bold.
My Art in the Making Tapestry
Hundreds of photos are taken while working with a model, but not to copy explicitly, because photos are misleading. Rather, these photos become visual reminders. The entire time I’m taking pictures, I’m intensely studying what is happening before me and recording it in my memory. Sketches are being made, not with pen and paper, but in my mind’s eye. Imagination plays an intensely important role in bringing the subject into an enhanced reality. Having been drawing diligently since childhood, I have a deeper understanding of the correct proportions needed to make something credible. Some may think drawing skills are not important, especially if you want to paint in a looser, more impressionist style. But they are foundational to knowing what can be exaggerated in a work of art while still maintaining believability. Finally, I study the photo reference before beginning the painting, but then memory, imagination and observations take over and I can leave the reference behind. This allows me to focus on what the painting needs by considering the questions: What is the overall mood of the painting? How can I enhance the mood with facial expression that connects emotionally with the viewer, drawing them into the painting? Which of my favorite techniques can be used as the painting emerges to create harmony while supporting the overall mood? I believe it is this approach that gives my work its feeling and originality.
 Stage 1
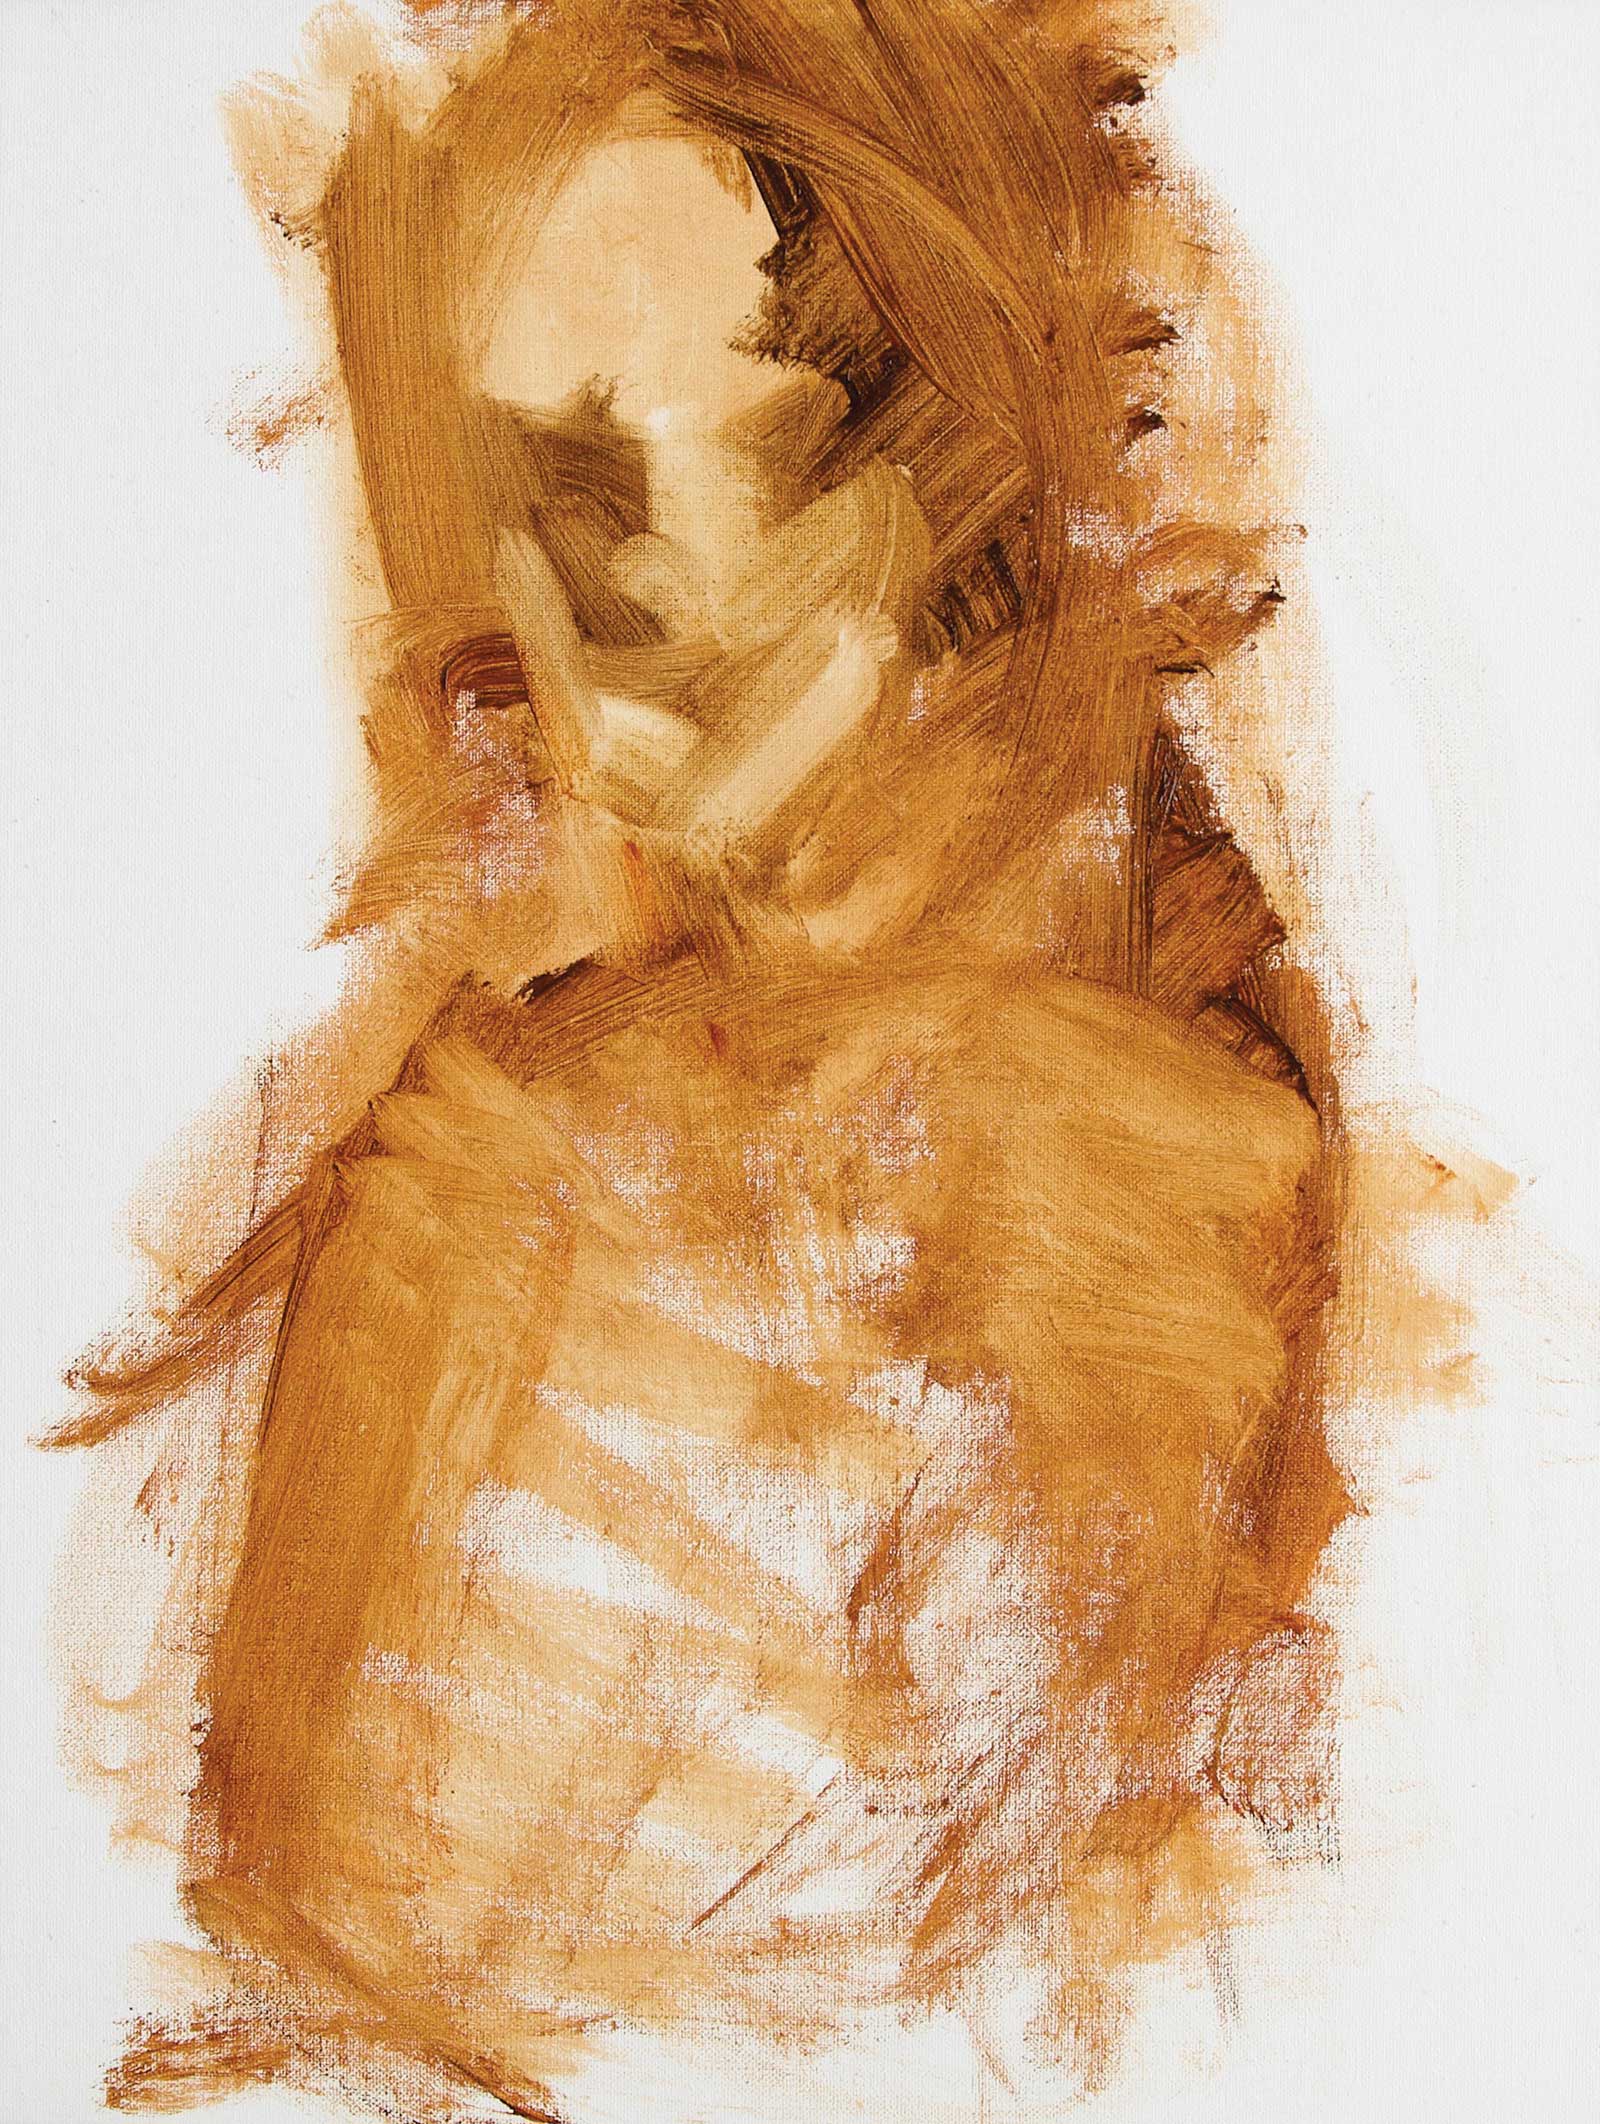
Stage 1 First Strokes
Using transparent red iron oxide and transparent burnt umber heavy body acrylic, gestural strokes are made with a natural white hog bristle extra-long filbert brush in size 8. This extremely loose beginning allows for exploring the subject’s body language.
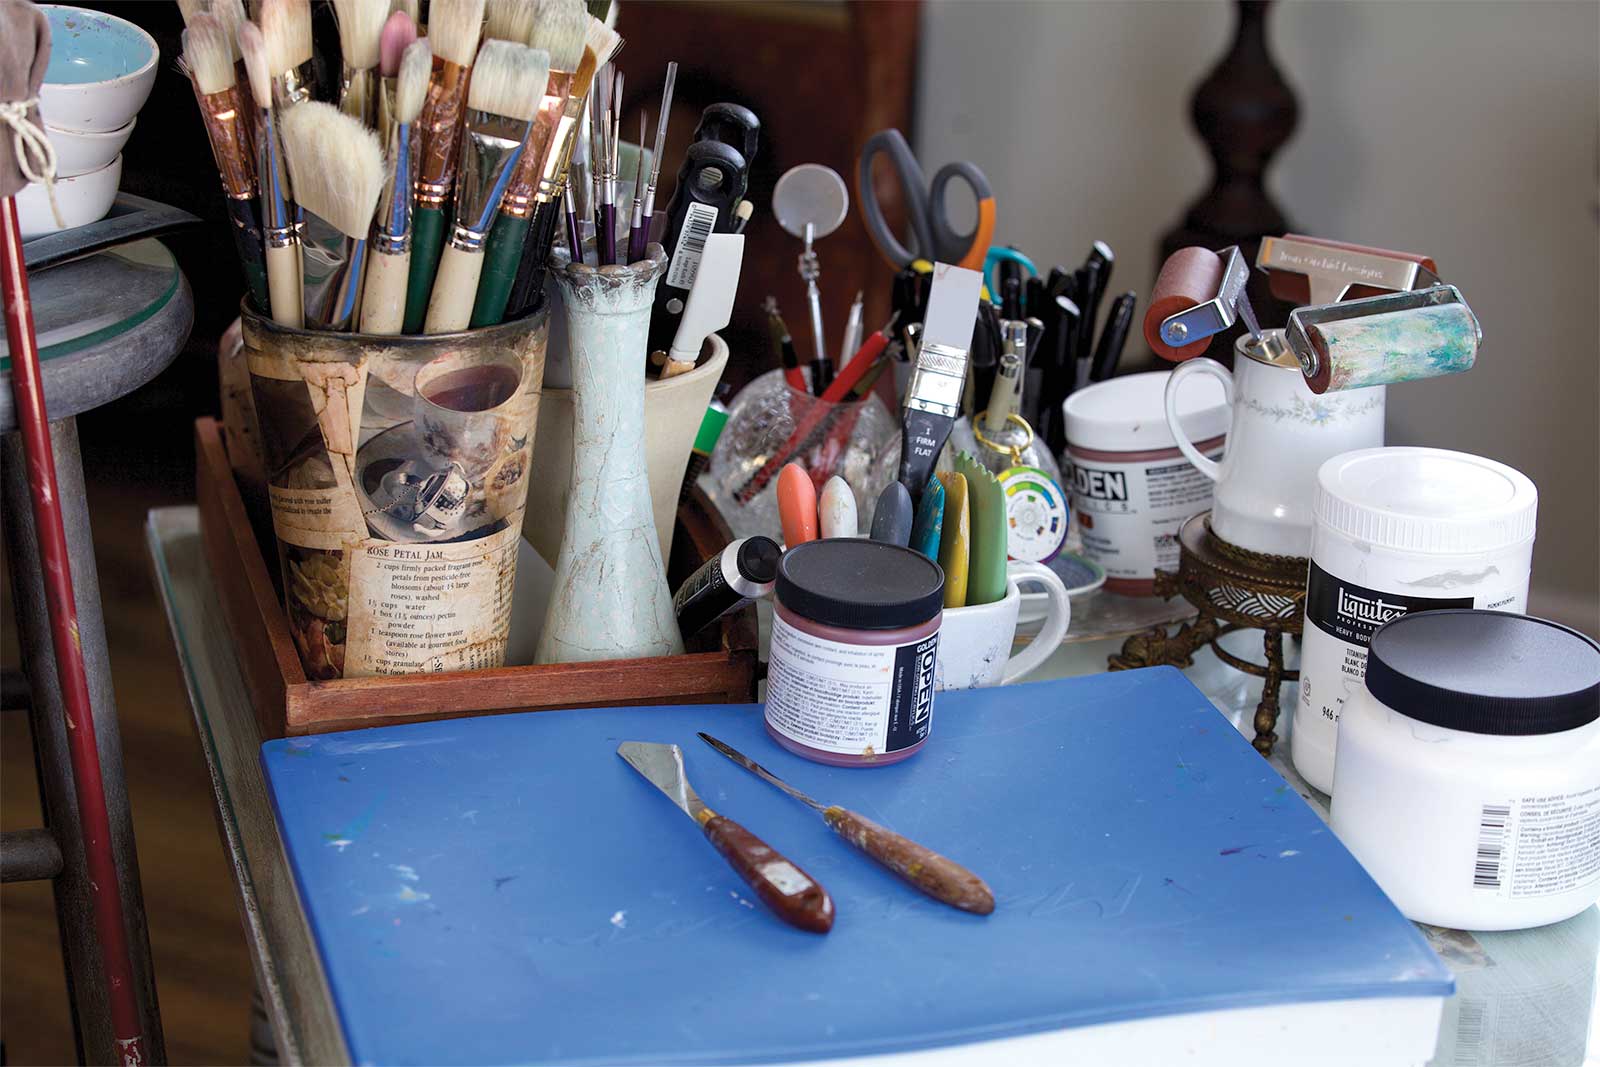
WHAT THE ARTIST USED
Heavy Body Acrylics
Titanium white (Liquitex), N8 neutral gray (Golden), Transparent red iron oxide (Golden), Transparent burnt umber (Liquitex), Ultramarine blue (Liquitex), Cadmium yellow light (Liquitex), Cadmium orange (Golden), Alizarin crimson hue (Golden), Chromium green deep (Sennelier)
Golden Open Acrylics
Indian yellow hue, Manganese blue, Cadmium yellow medium
Liquitex and Sennelier Acrylic Inks
Titanium white, Cadmium red light hue, Cerulean blue hue, Sanguine
Brushes
Silver Brush Grand Prix, Silver Silk 88, Bristlon and Ruby Satin brushes (synthetic and natural), White hog bristles, extra-long filberts, flats, liners, rounds and fans (various sizes), Rosemary & Co. ‘The Tisch’ bristle daggers
Additional Materials
Artefex Alcot Panel 513, extra fine, 12 x 9", Masterson’s Sta-Wet Palette System, 12 x 16", New Wave Easy View Palette, gray, 12 x 16", Ink brayer, Palette knives, Catalyst silicone wedges and blades, Royal Sovereign color shapers
 Stage 2
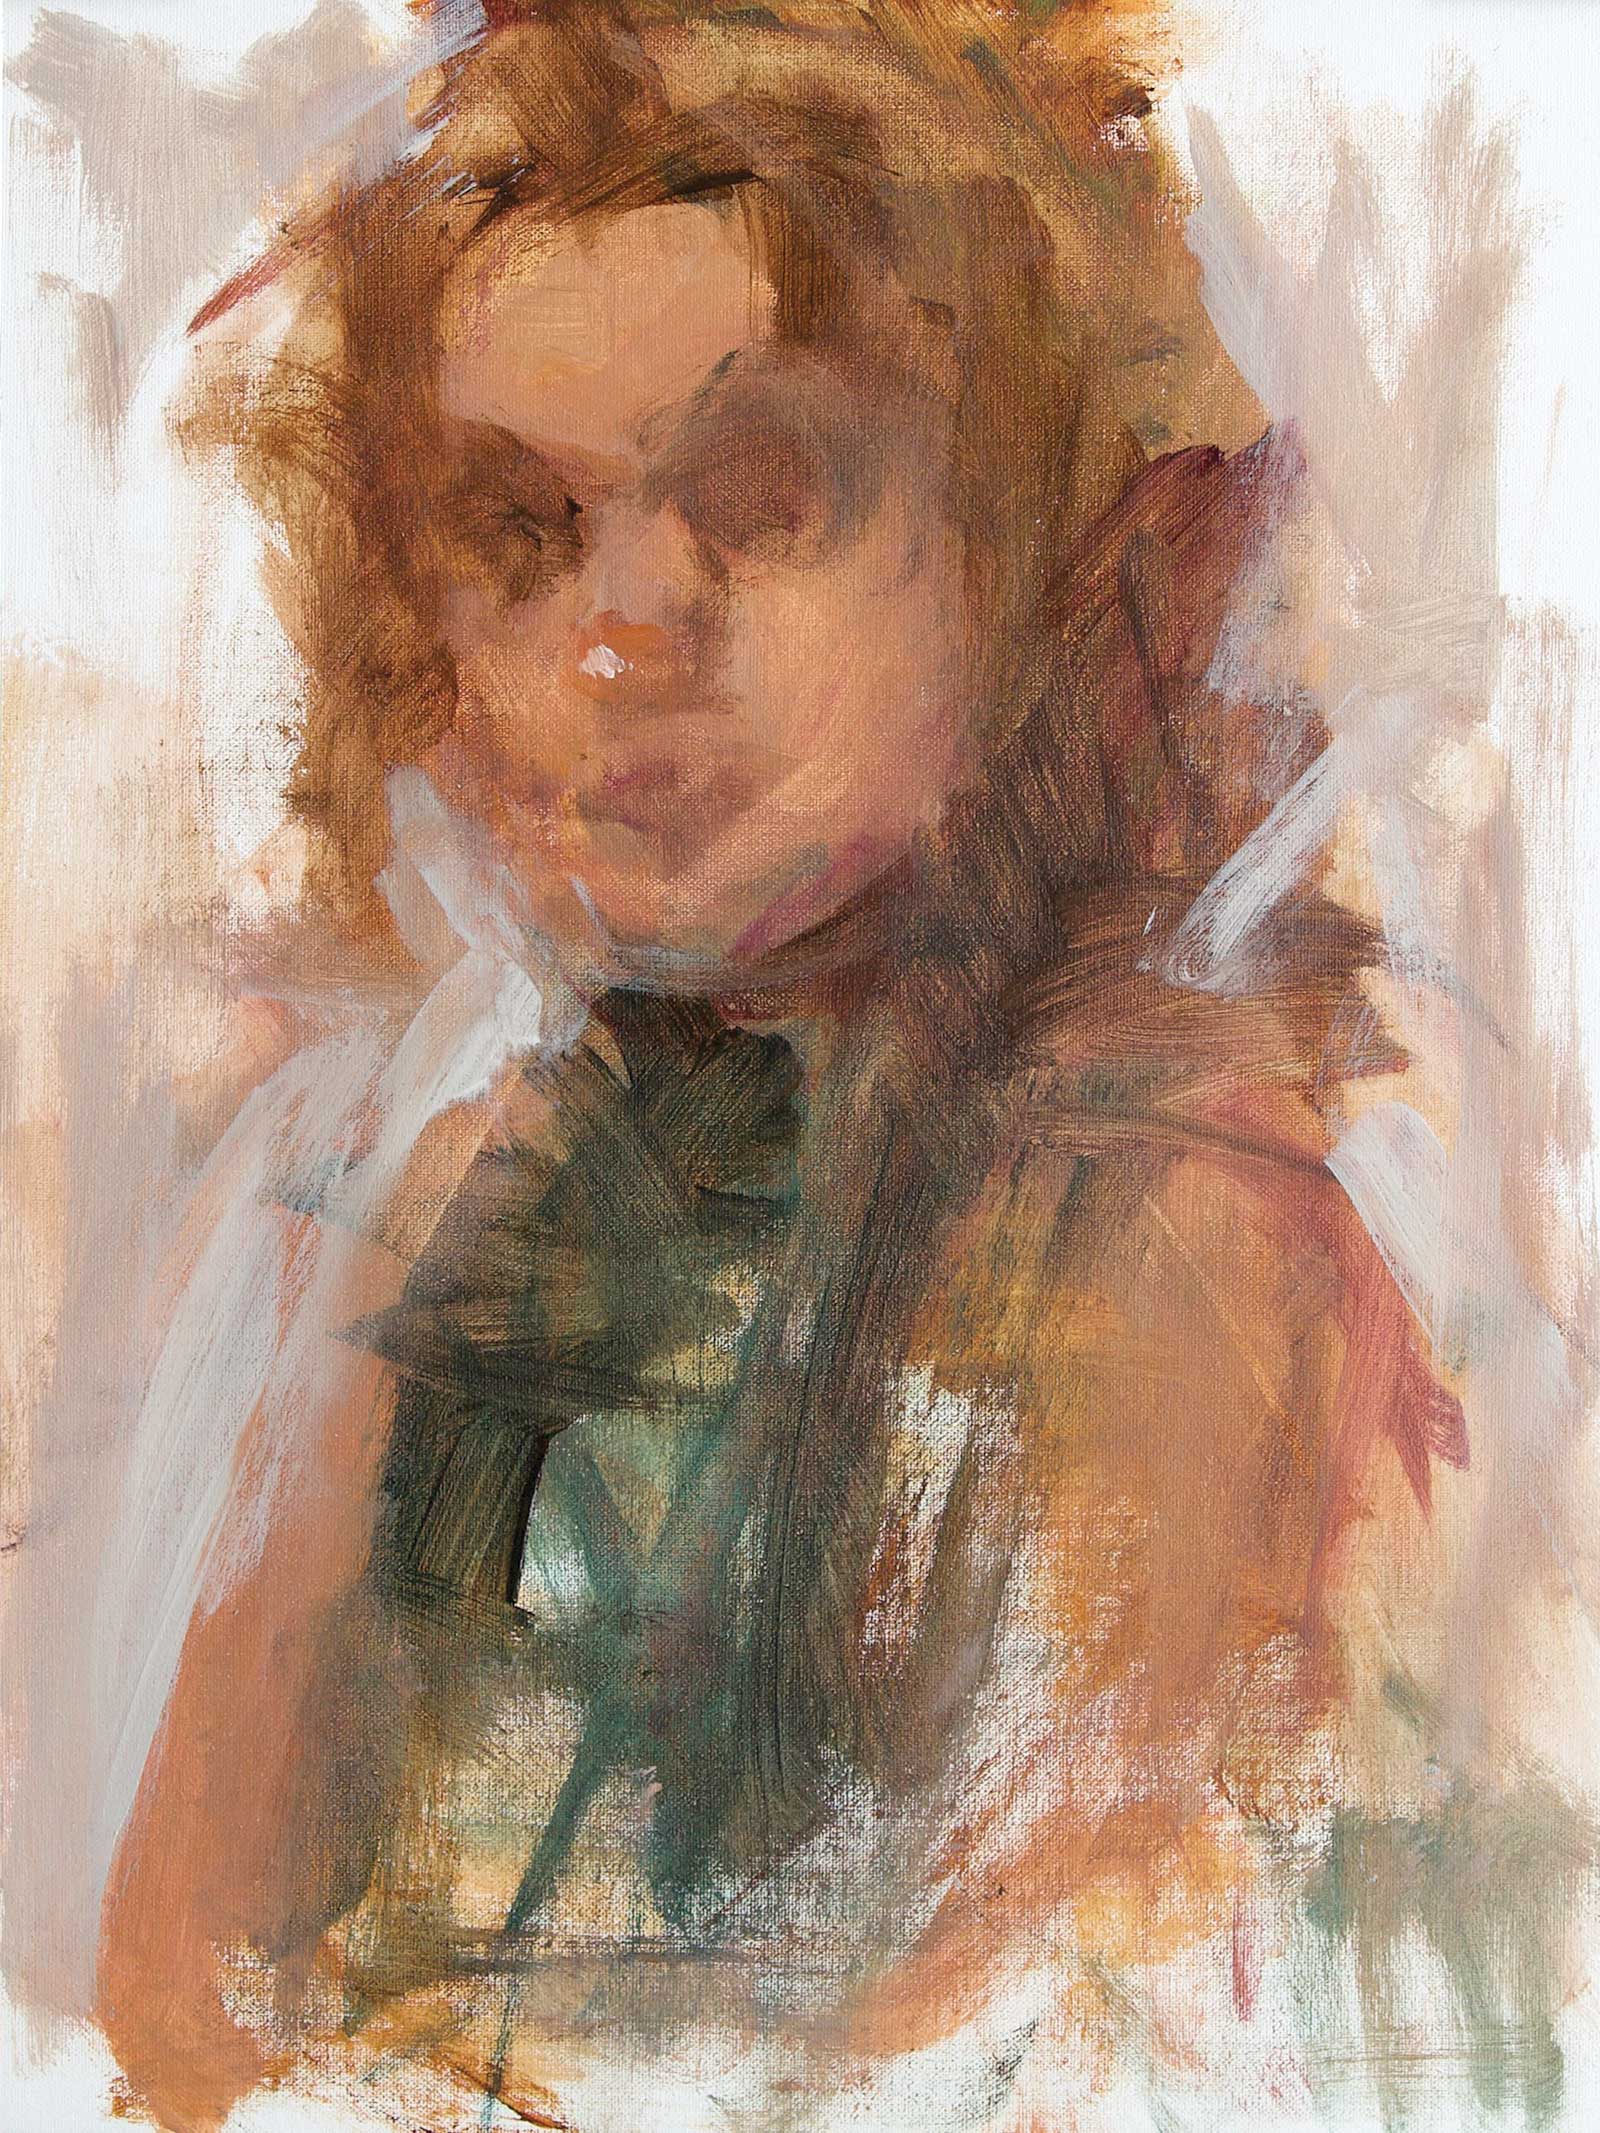
Stage 2 Sculpting with Paint
Sculpting with heavy body acrylic, I begin modeling the head. Titanium white, N8 neutral gray, cad orange, cad yellow light, ultramarine blue, alizarin crimson and chromium green deep are now added to the palette.
 Stage 3
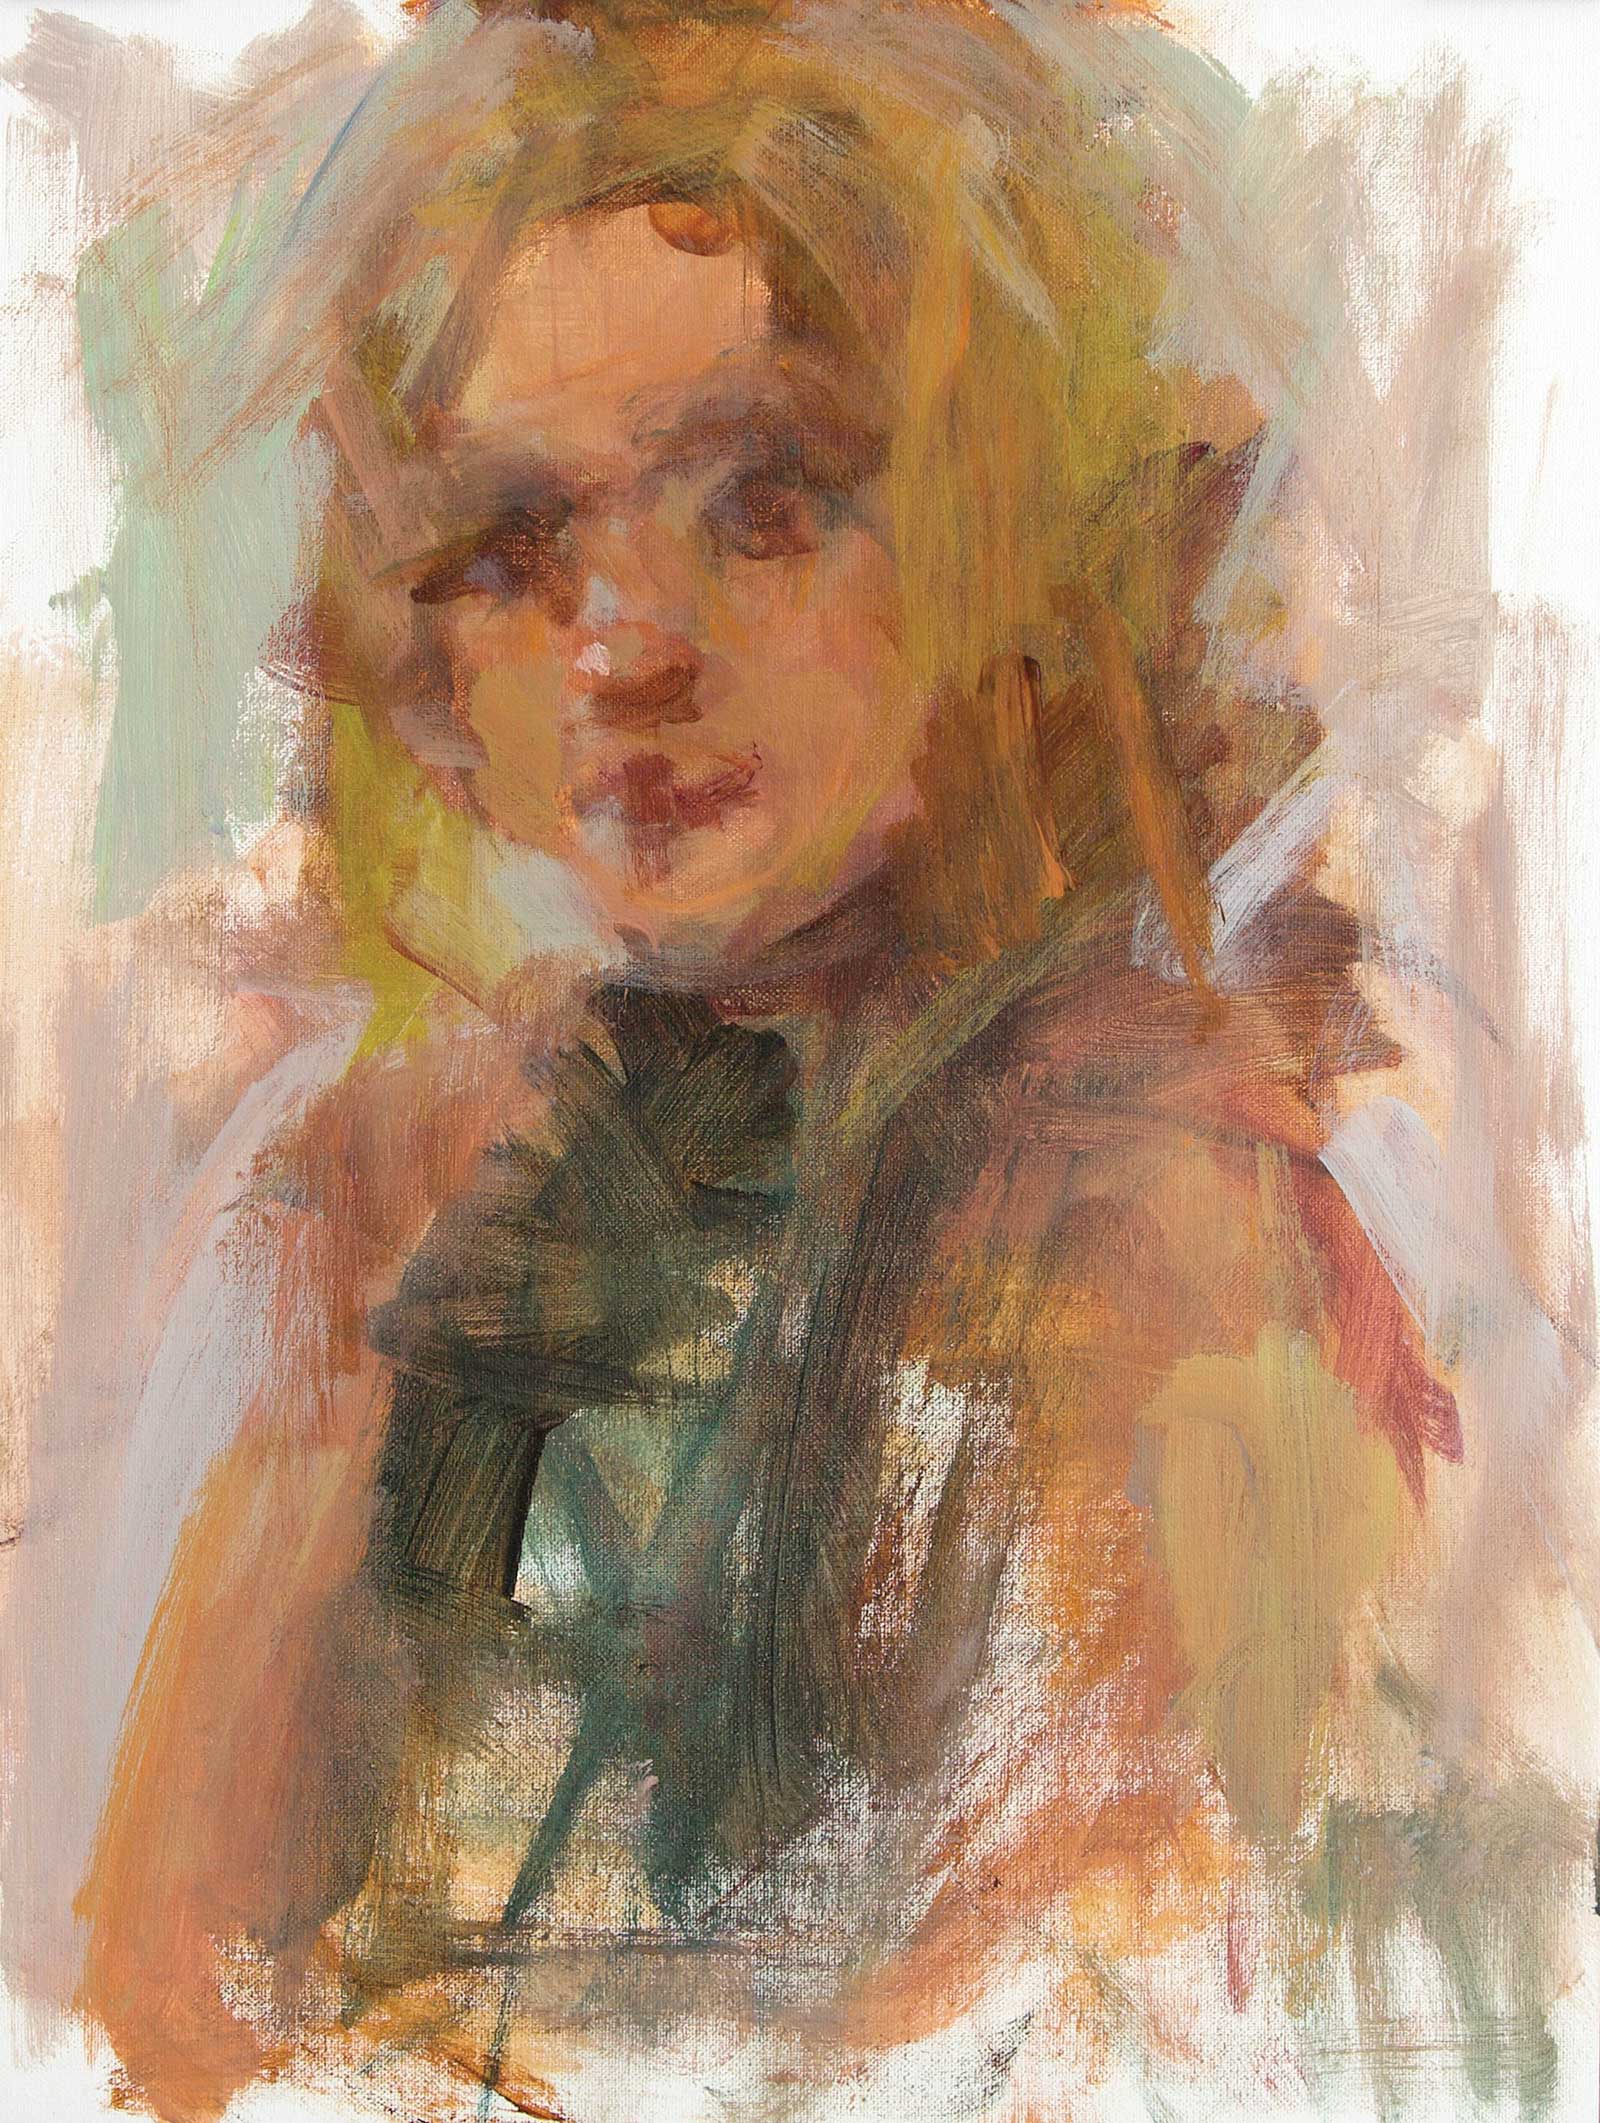
Stage 3 Finding Rhythm
I’m focusing on rhythms in the face and the shapes created by them. Indian yellow and manganese blue (both hues) are introduced into the painting. I don’t rush this stage but extend it for as long as needed.
 Stage 4
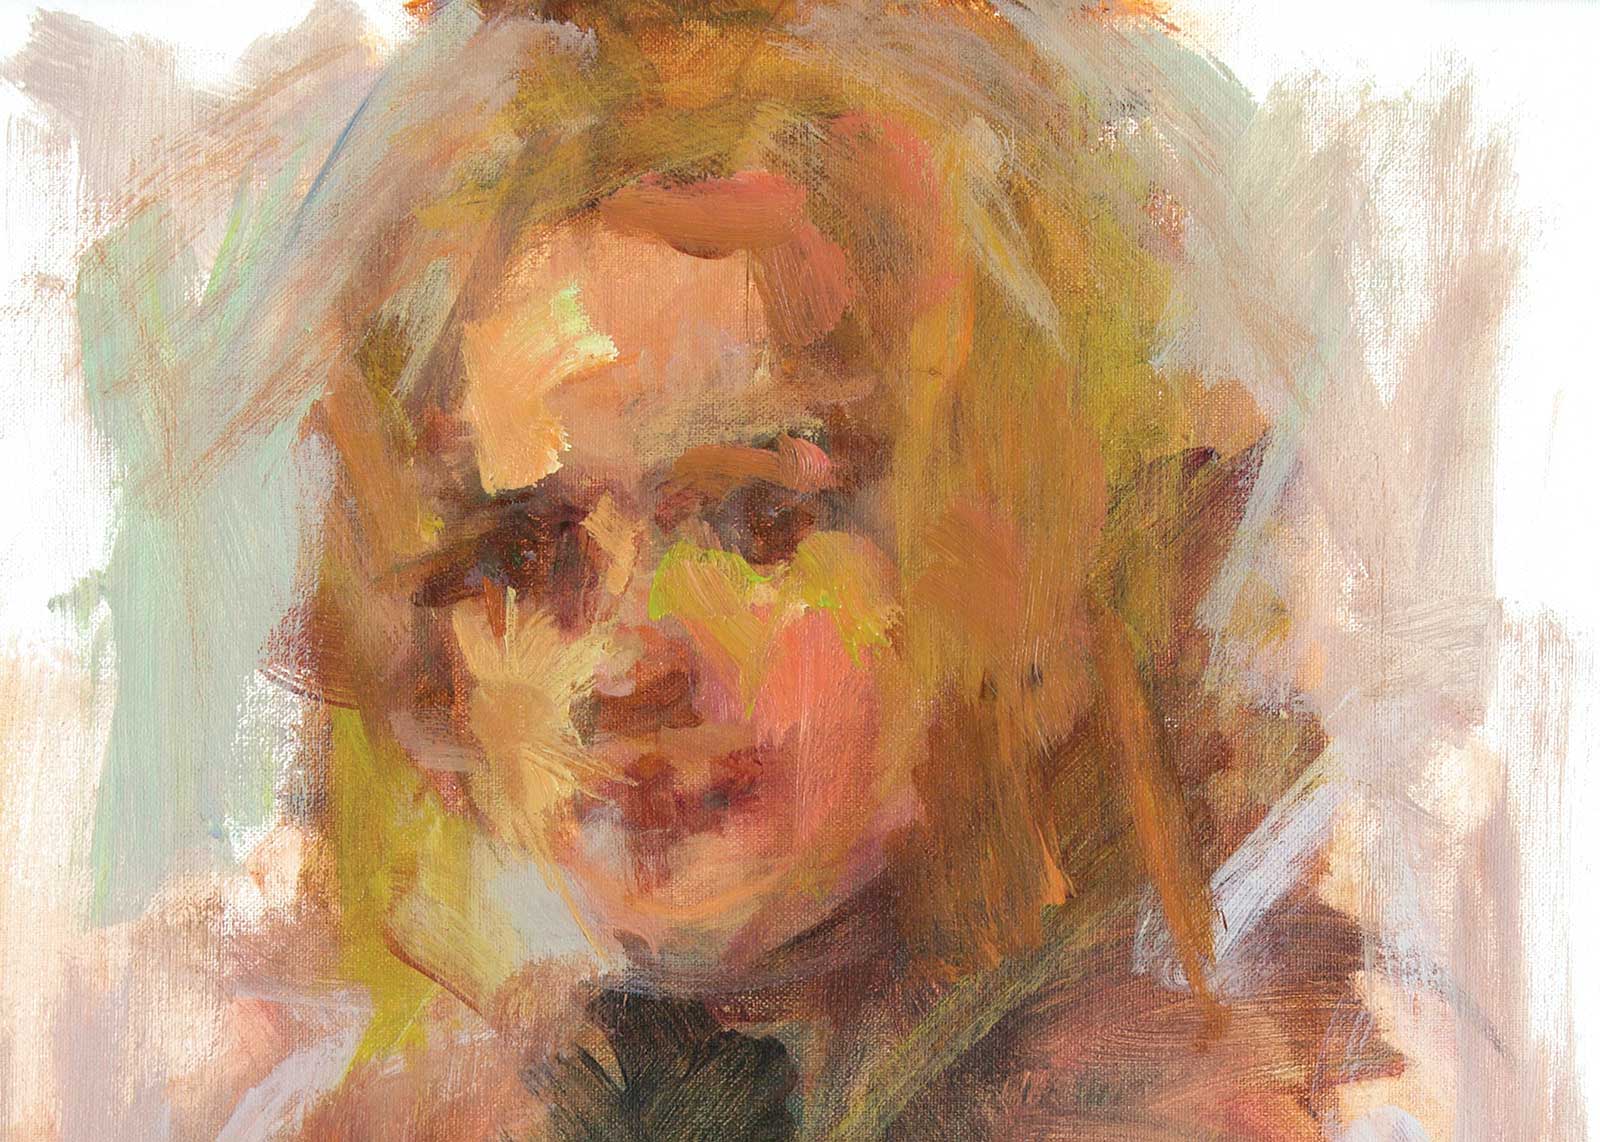
Stage 4 Color Notes
I begin putting paint passages down using open acrylics. A warmer yellow is added to paint mixtures with cadmium yellow medium. Using a synthetic long filbert brush in size 6, I place color notes and adjust angles.
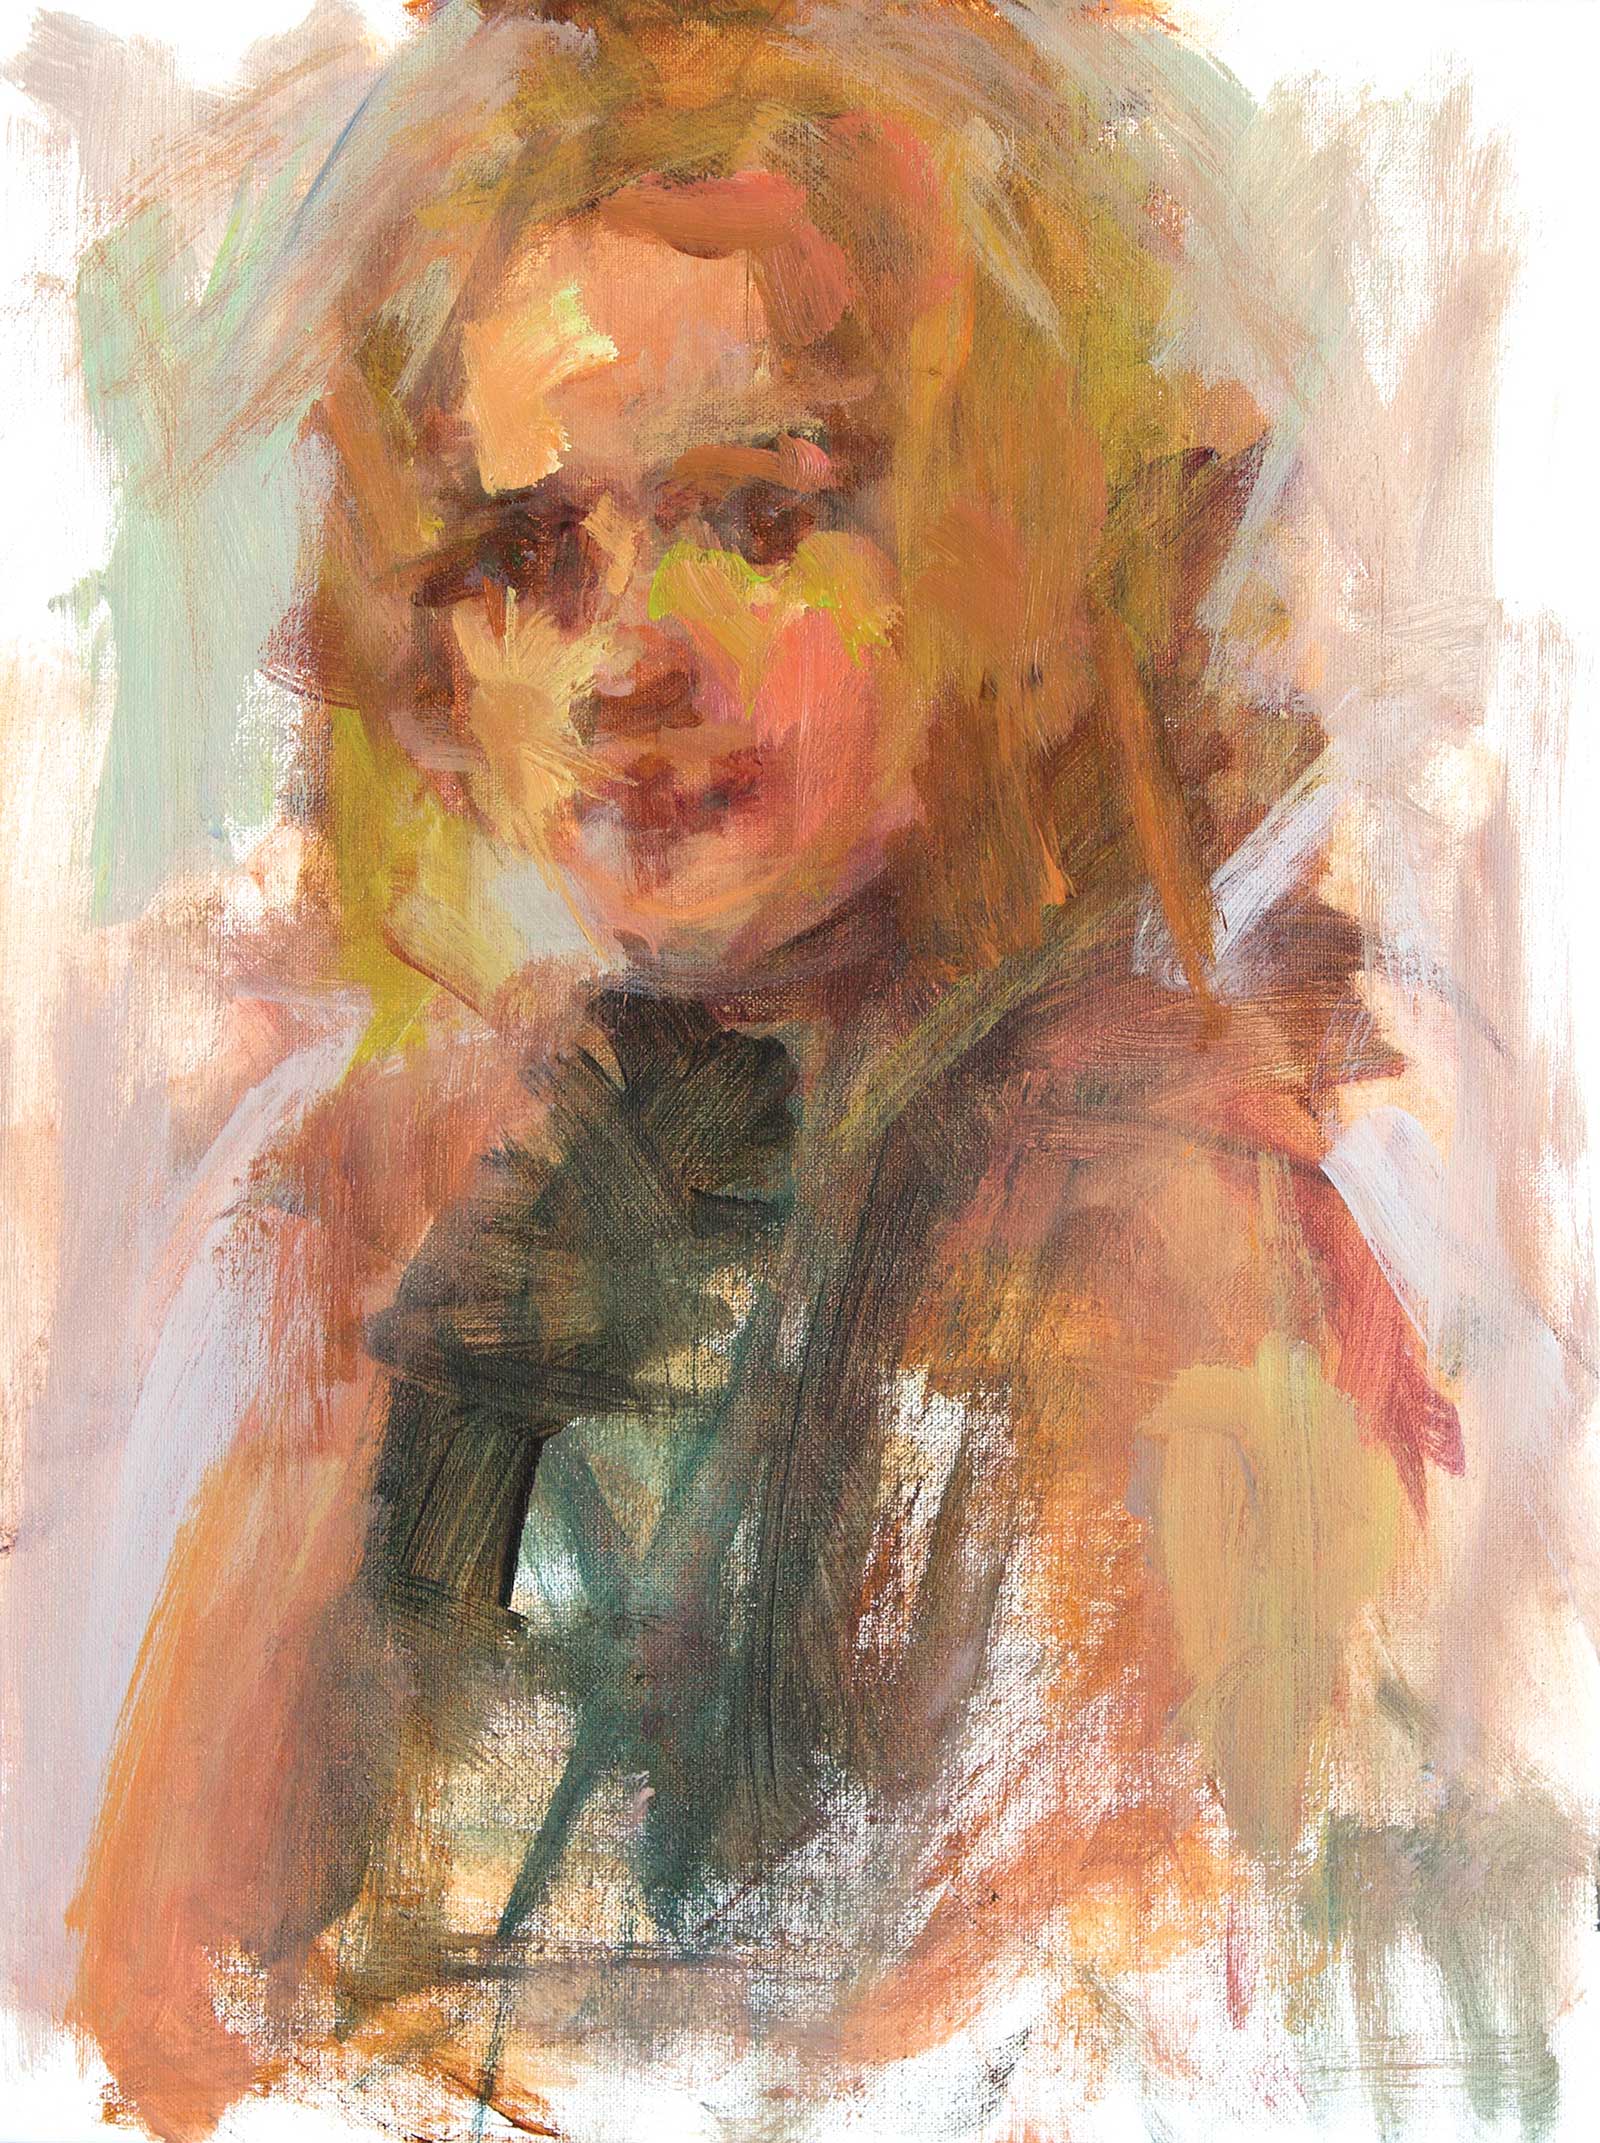 Stage 5
Stage 5 Heavy Body and Open Acrylics
At this stage, both heavy body and open acrylic are used simultaneously. Chunky marks are created by using palette knives and silicone wedges to both apply paint and lift paint off, leaving transparent and opaque passages.
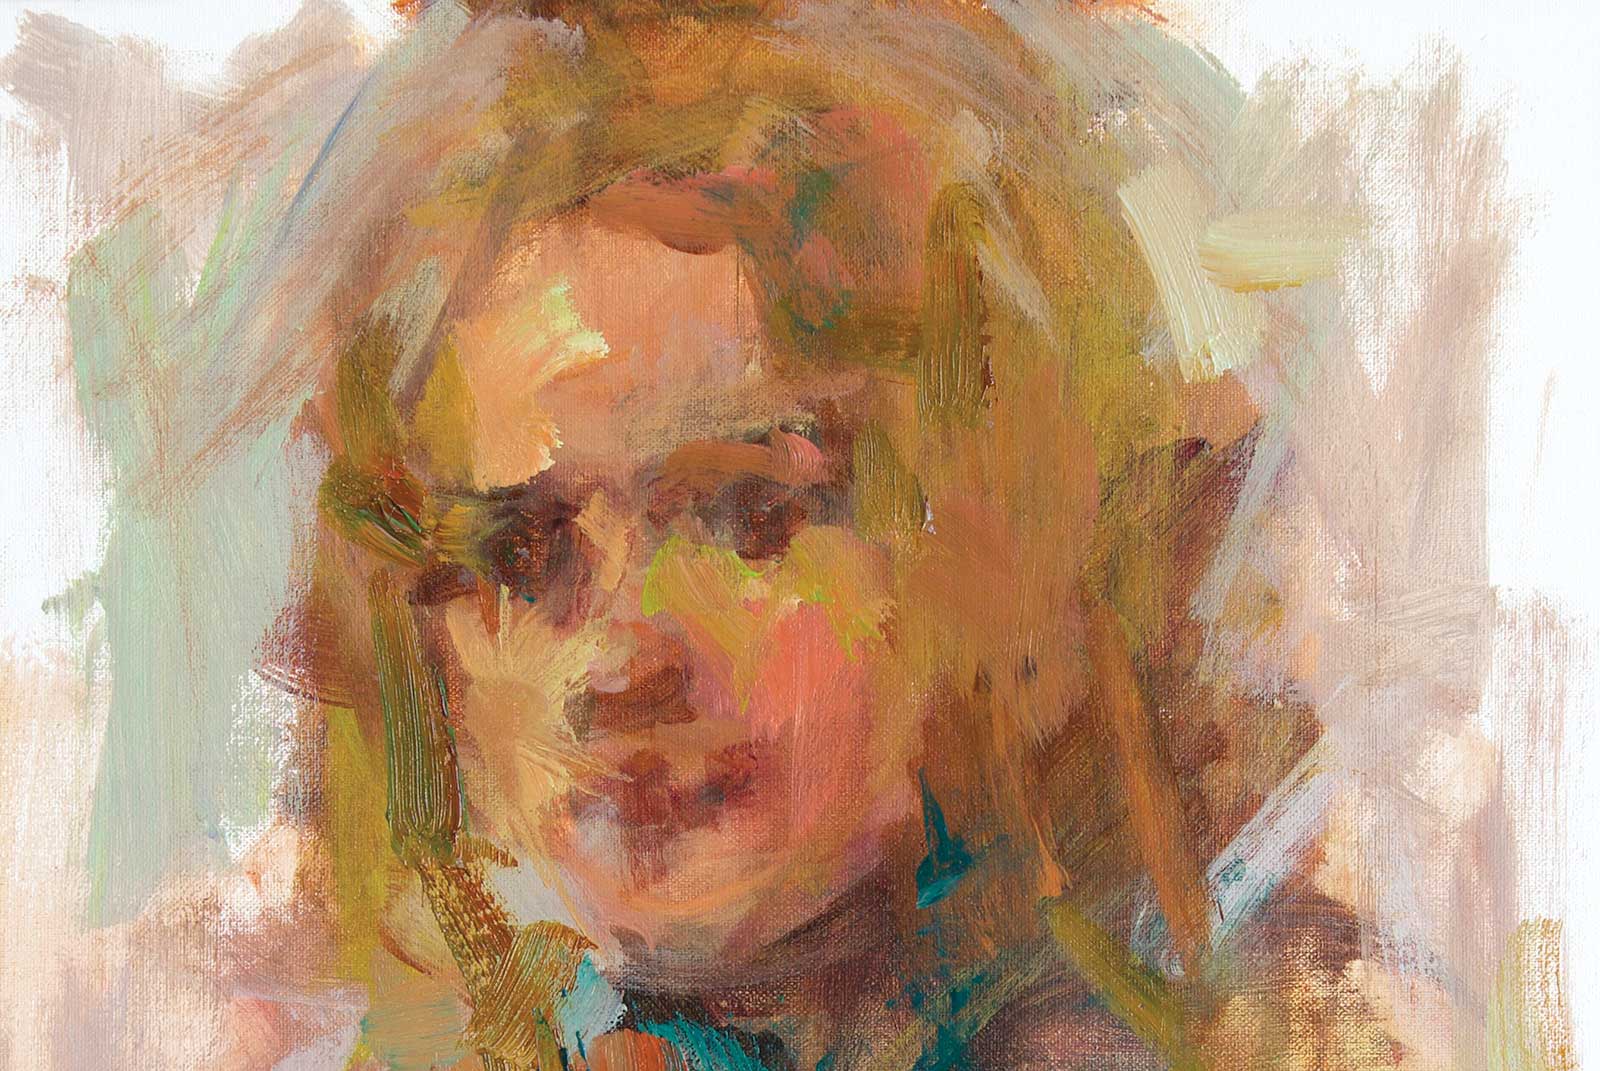 Stage 6
Stage 6 The Eyes
Much of the expression I want to convey is dependent on the eyes and eyebrows. Open acrylic, along with open thinner and a Silver Silk 88 white goat mop oval brush, lets me begin adding darks into the eyes while keeping edges softly blended.
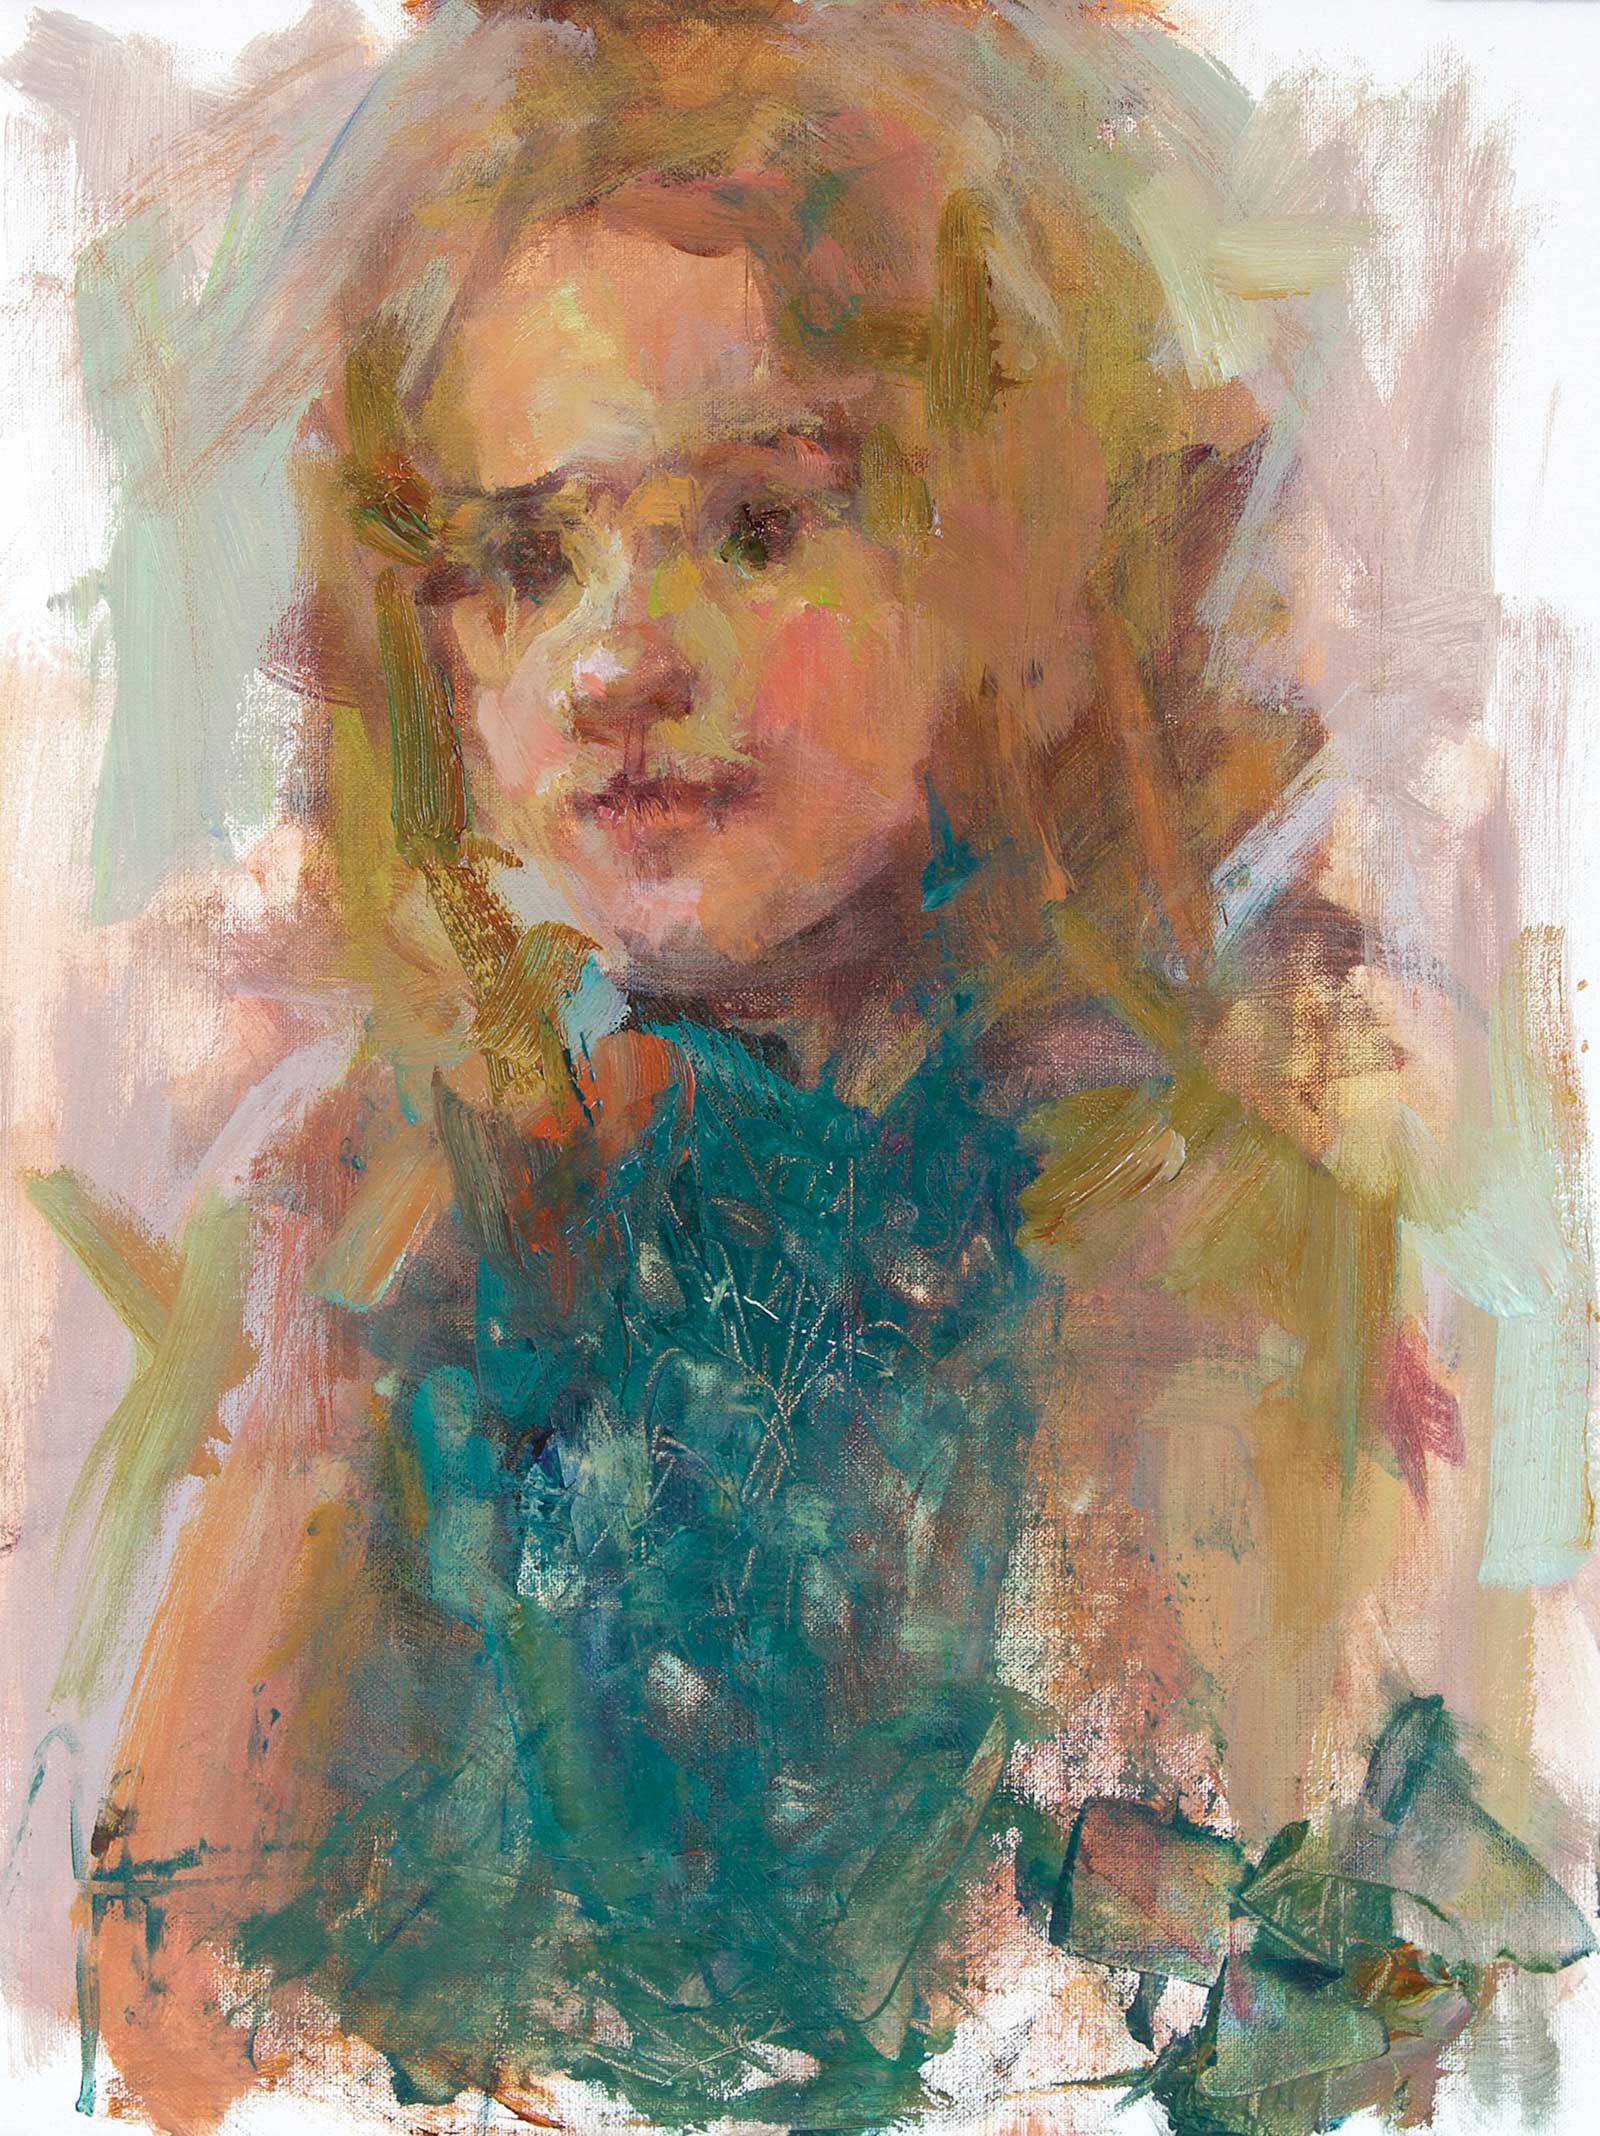 Stage 7
Stage 7 Mark Making
I move back and forth between spontaneous, energetic mark making and more precise drawing that continues to strengthen and refine. Texture is added with a water-soluble graphite stick and acrylic ink washes using cad red light hue, cerulean blue hue and sanguine.
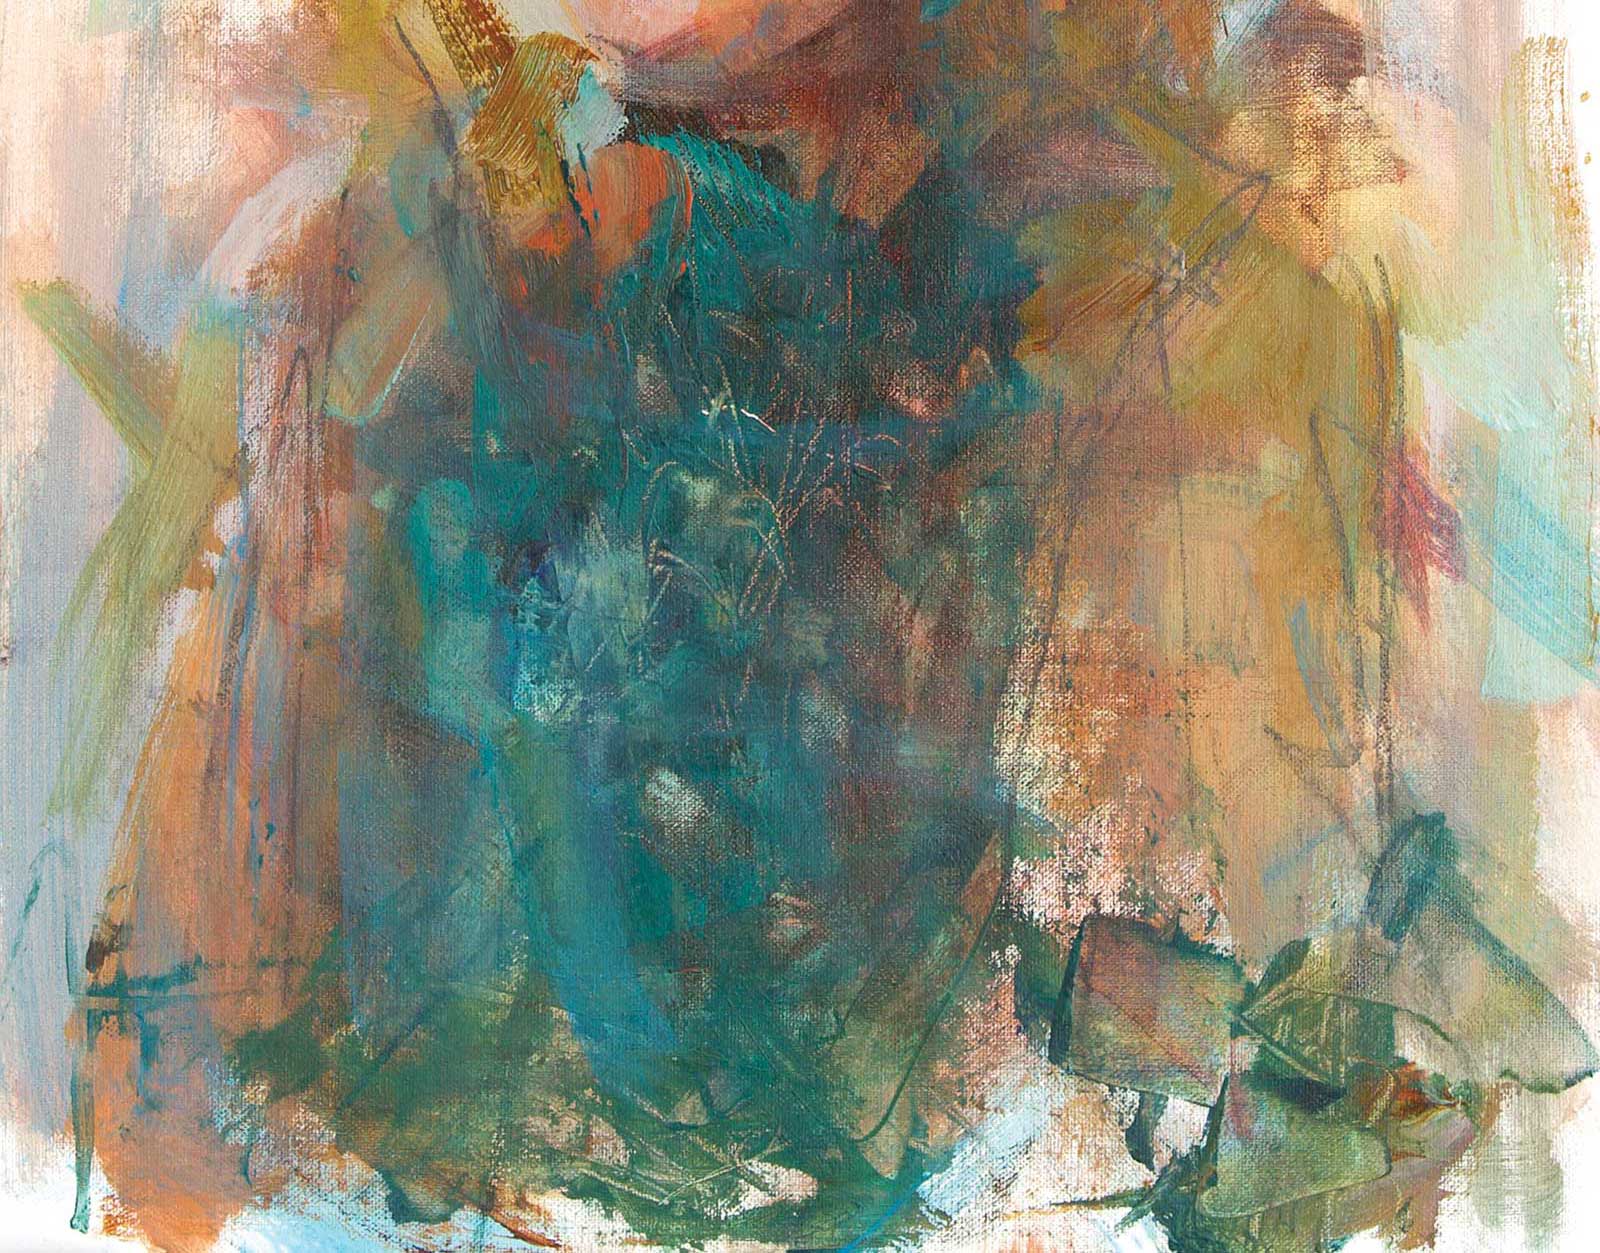 Stage 8
Stage 8 Letting the Paint Speak
So much of my work now is about adding more and more layers. Each layer sometimes only has a bit peeking through in the finished painting for various effects, such as drips, splatters and color washes combining acrylic ink with open acrylic.
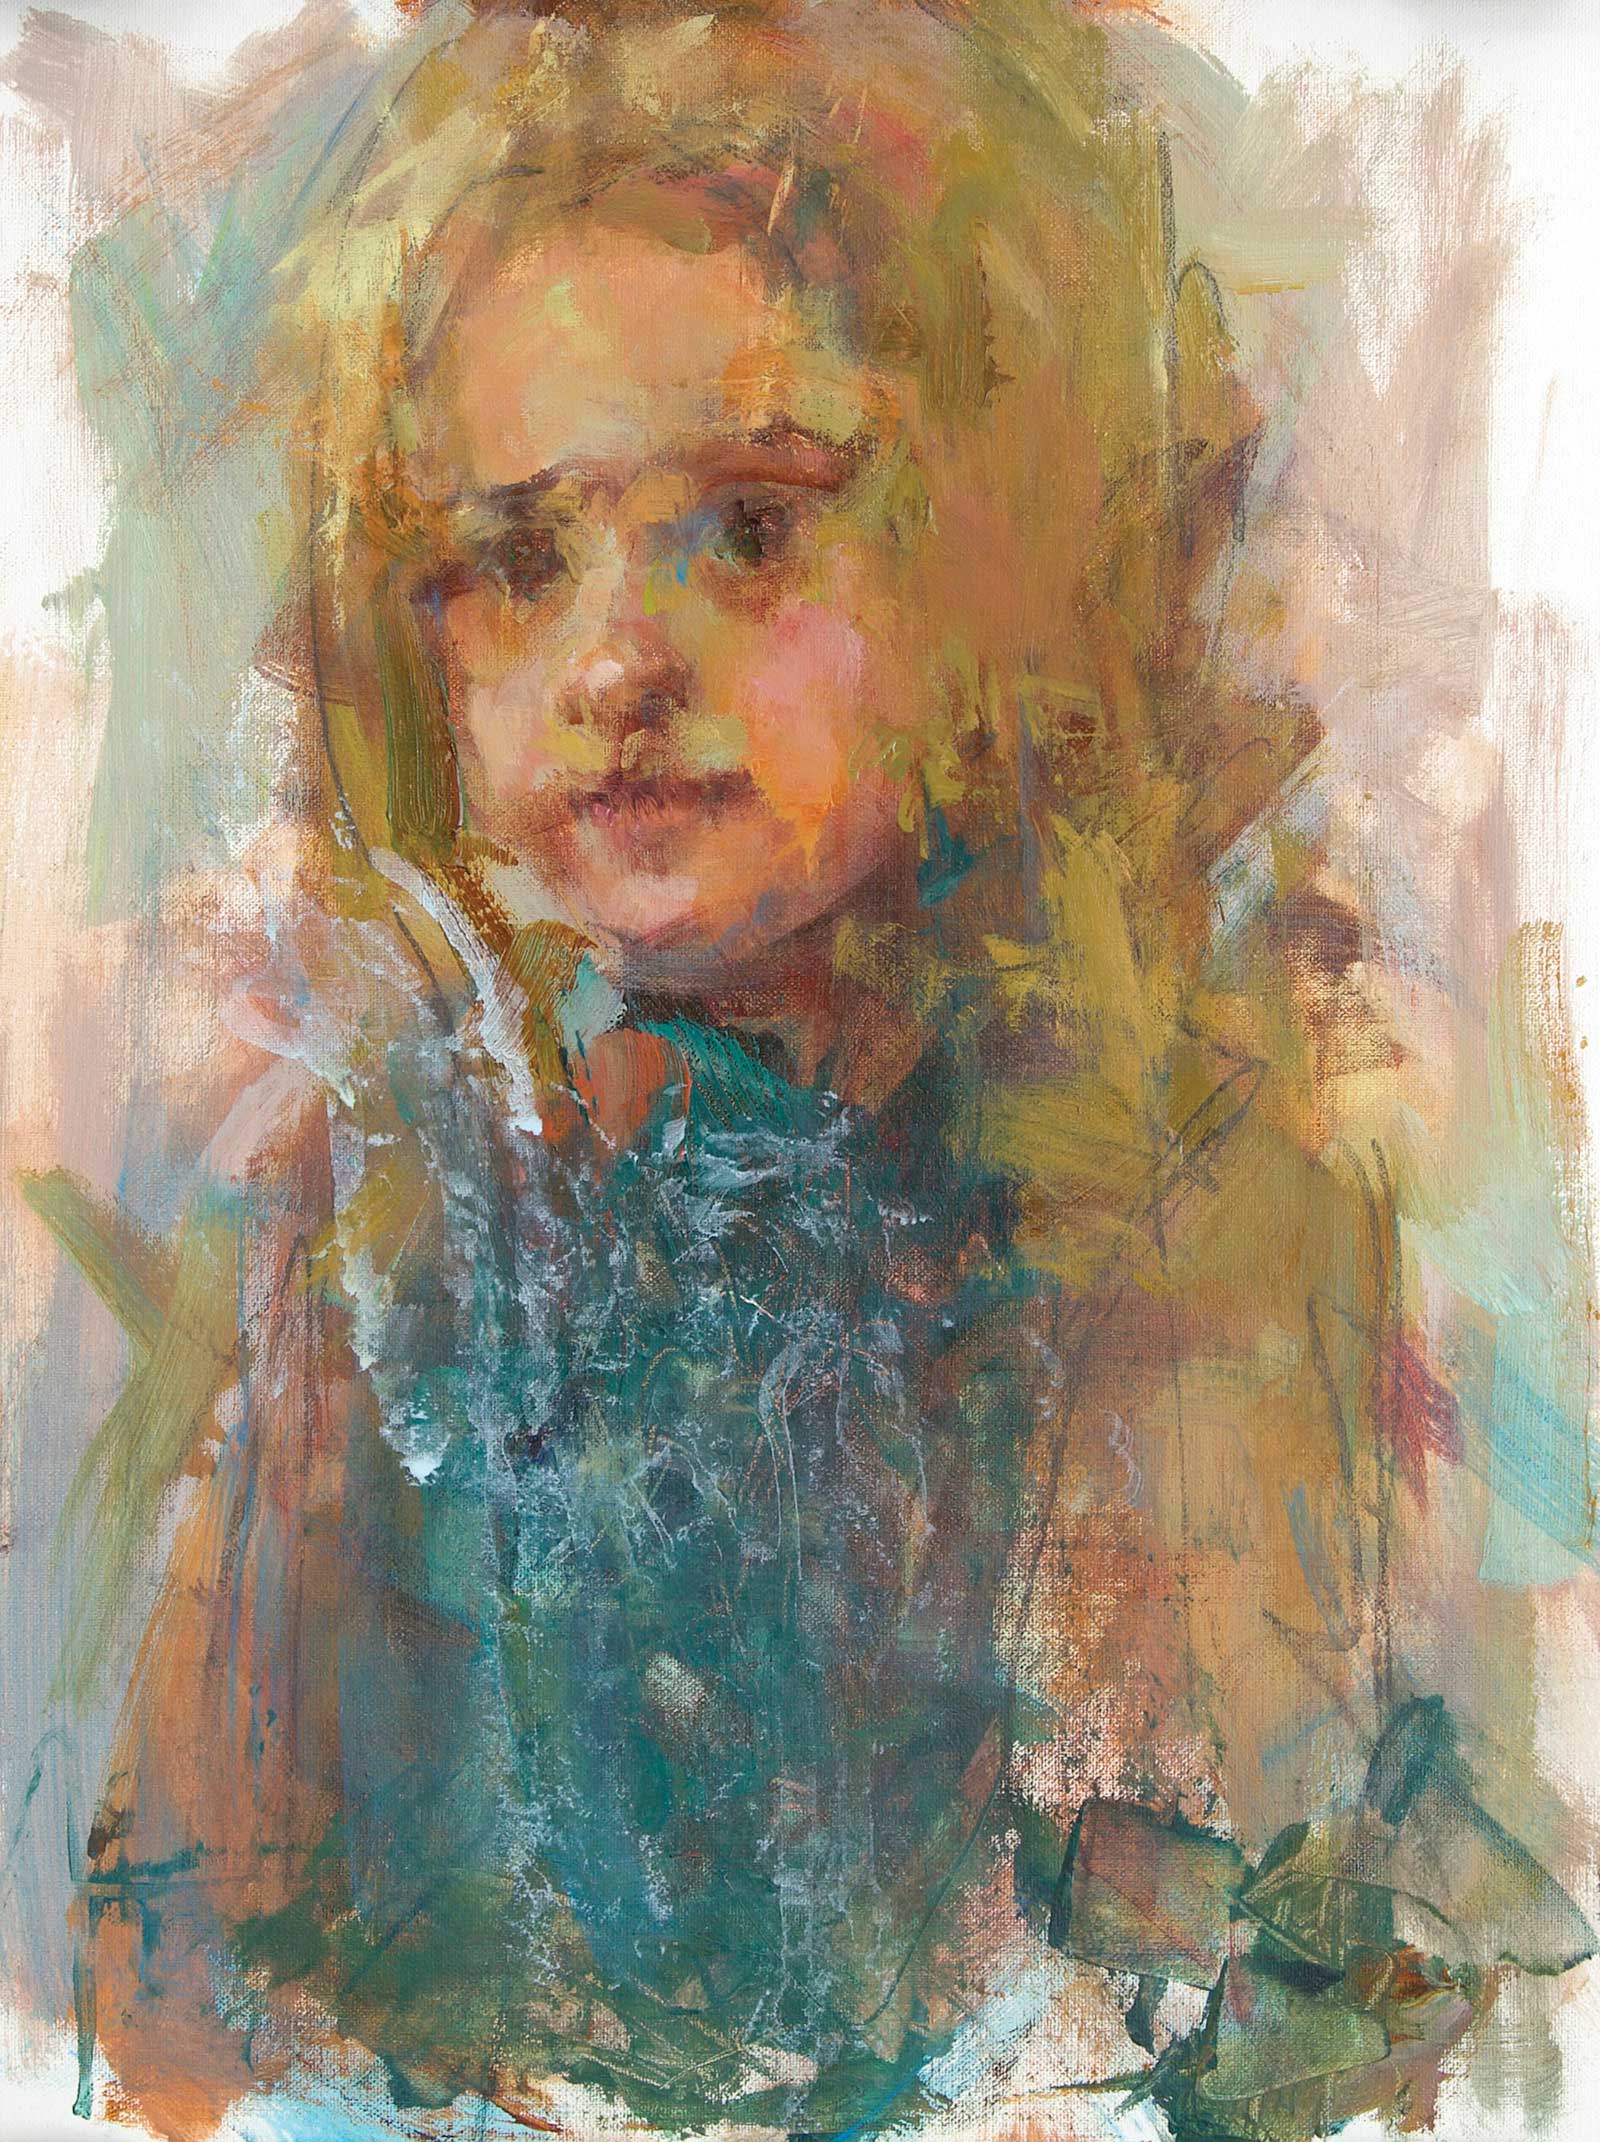 Stage 9
Stage 9 Changing Direction
Something bold was needed to change the painting’s direction. I simplified everything by adding a wash of cerulean blue hue and titanium white acrylic ink over the entire painting, rebuilding softer passages with open acrylic and adding strong directional lines with heavy body acrylic.
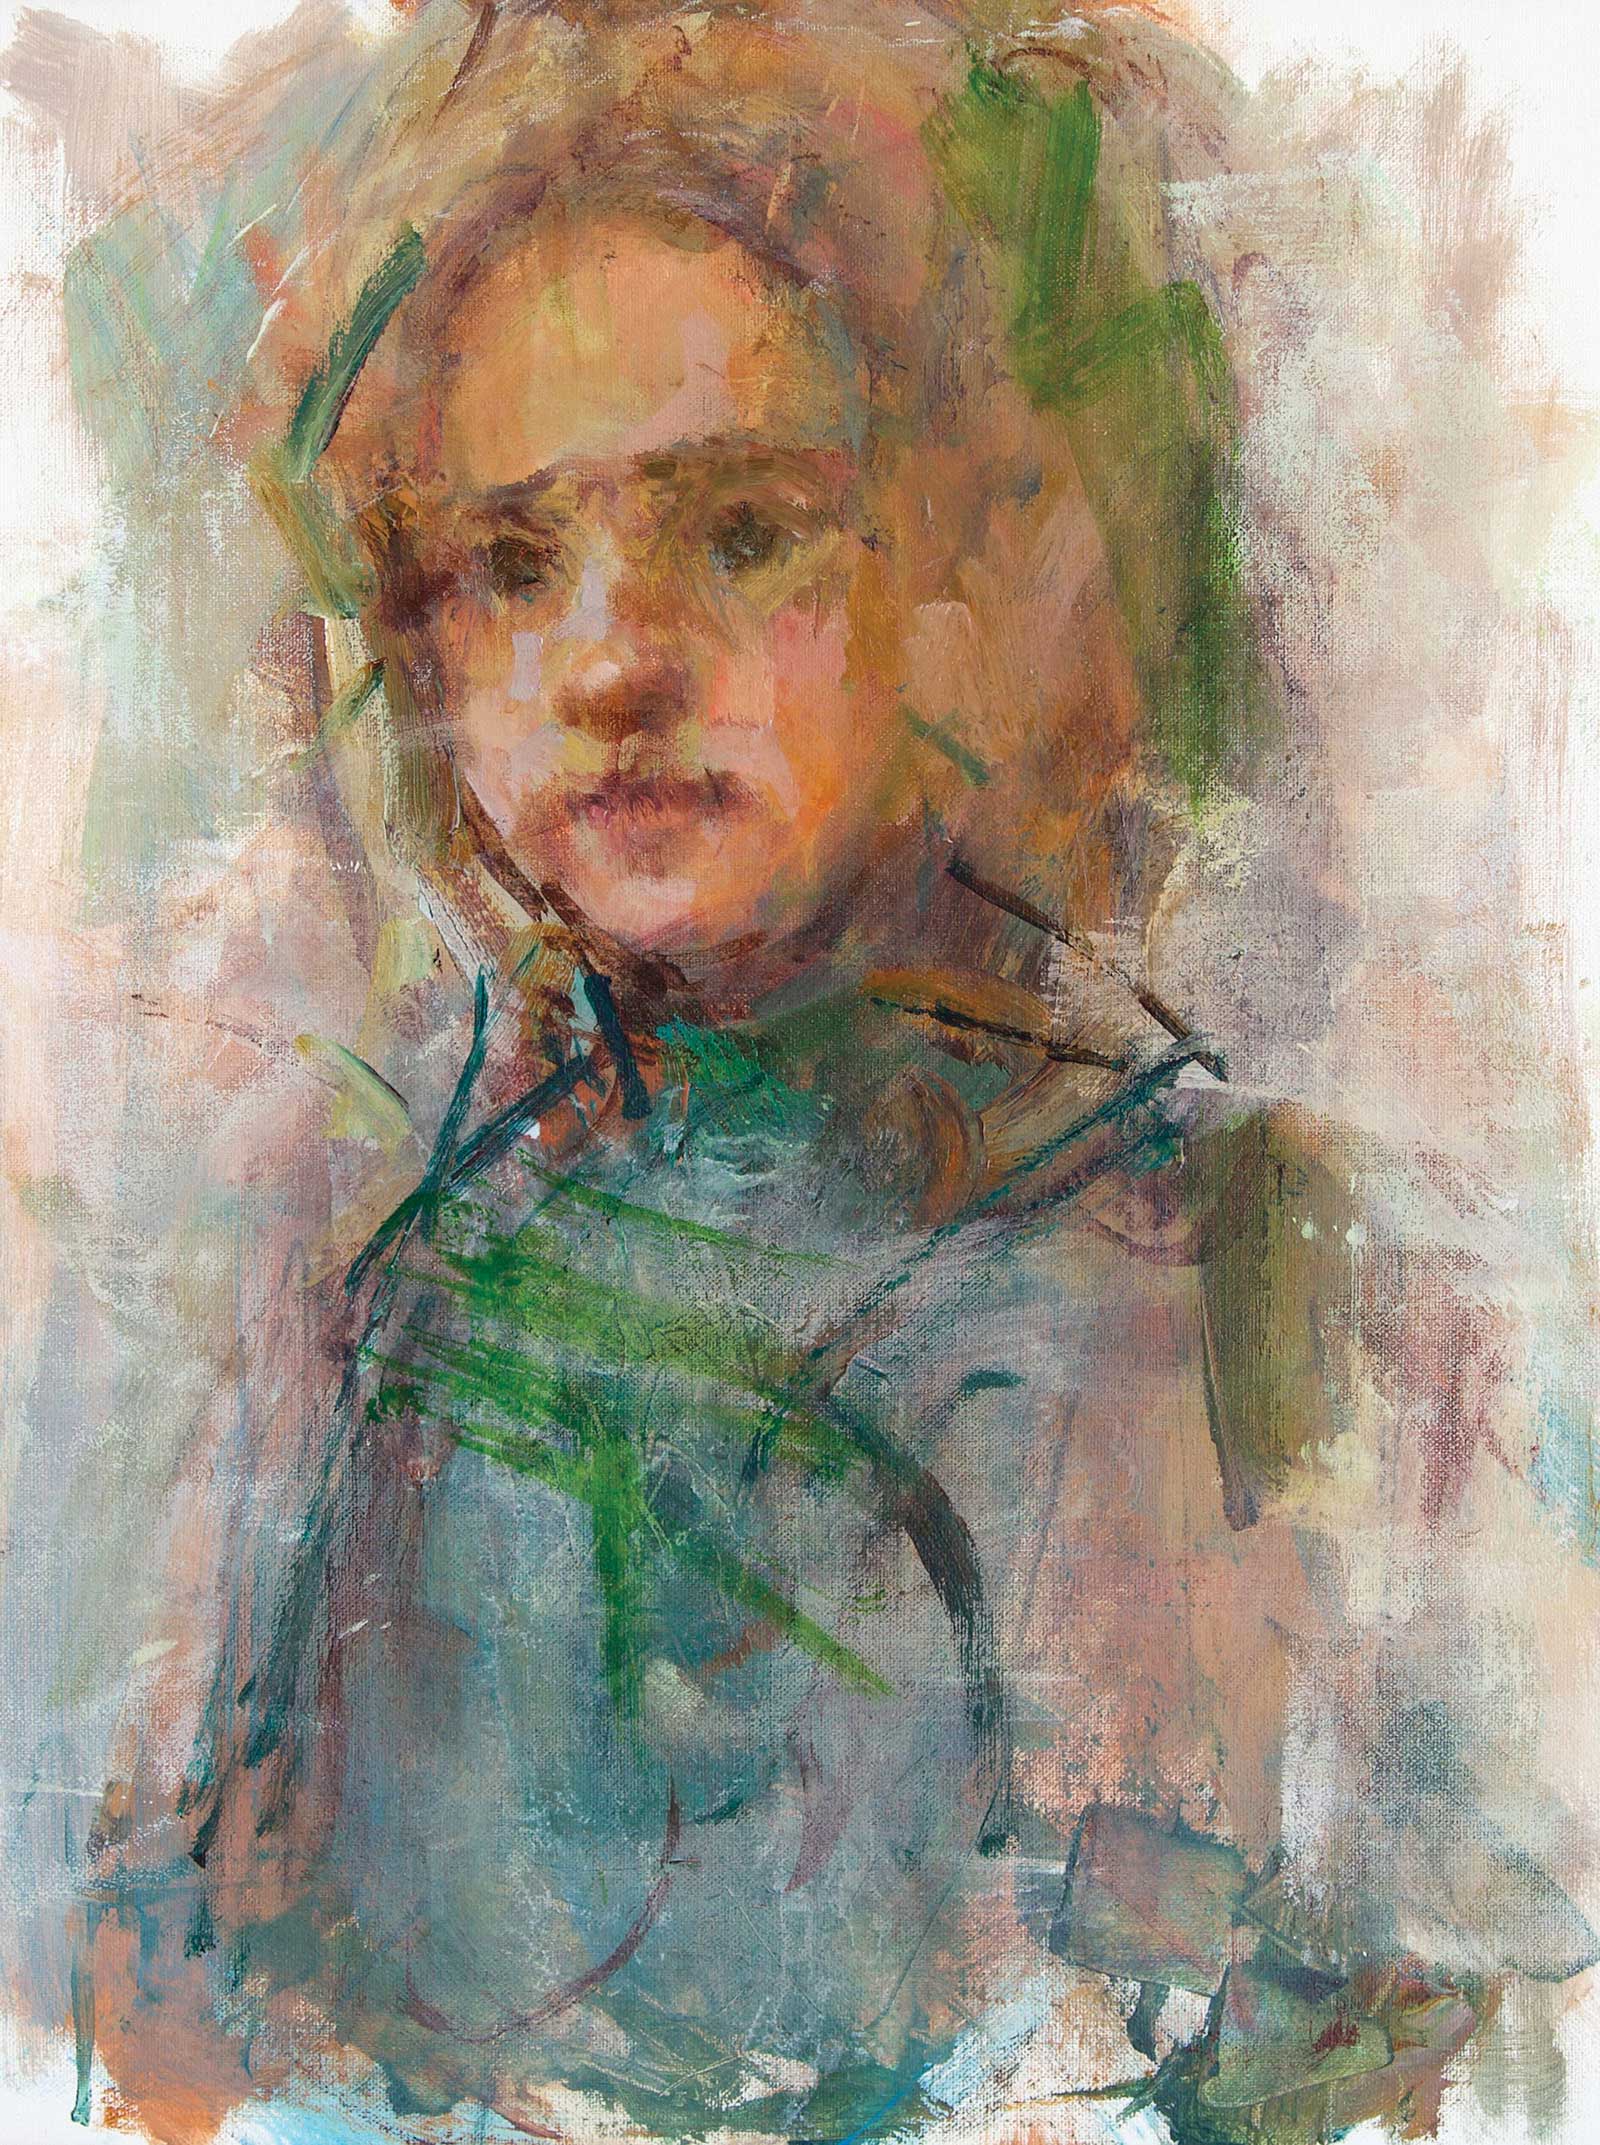 Stage 10
Stage 10 Adding More Texture
Using fan brushes, loaded with both heavy body and open acrylic, I added texture into the face, hair, body and background. Silicone wedges were effective in creating pattern and rhythm in the wet passages of paint.
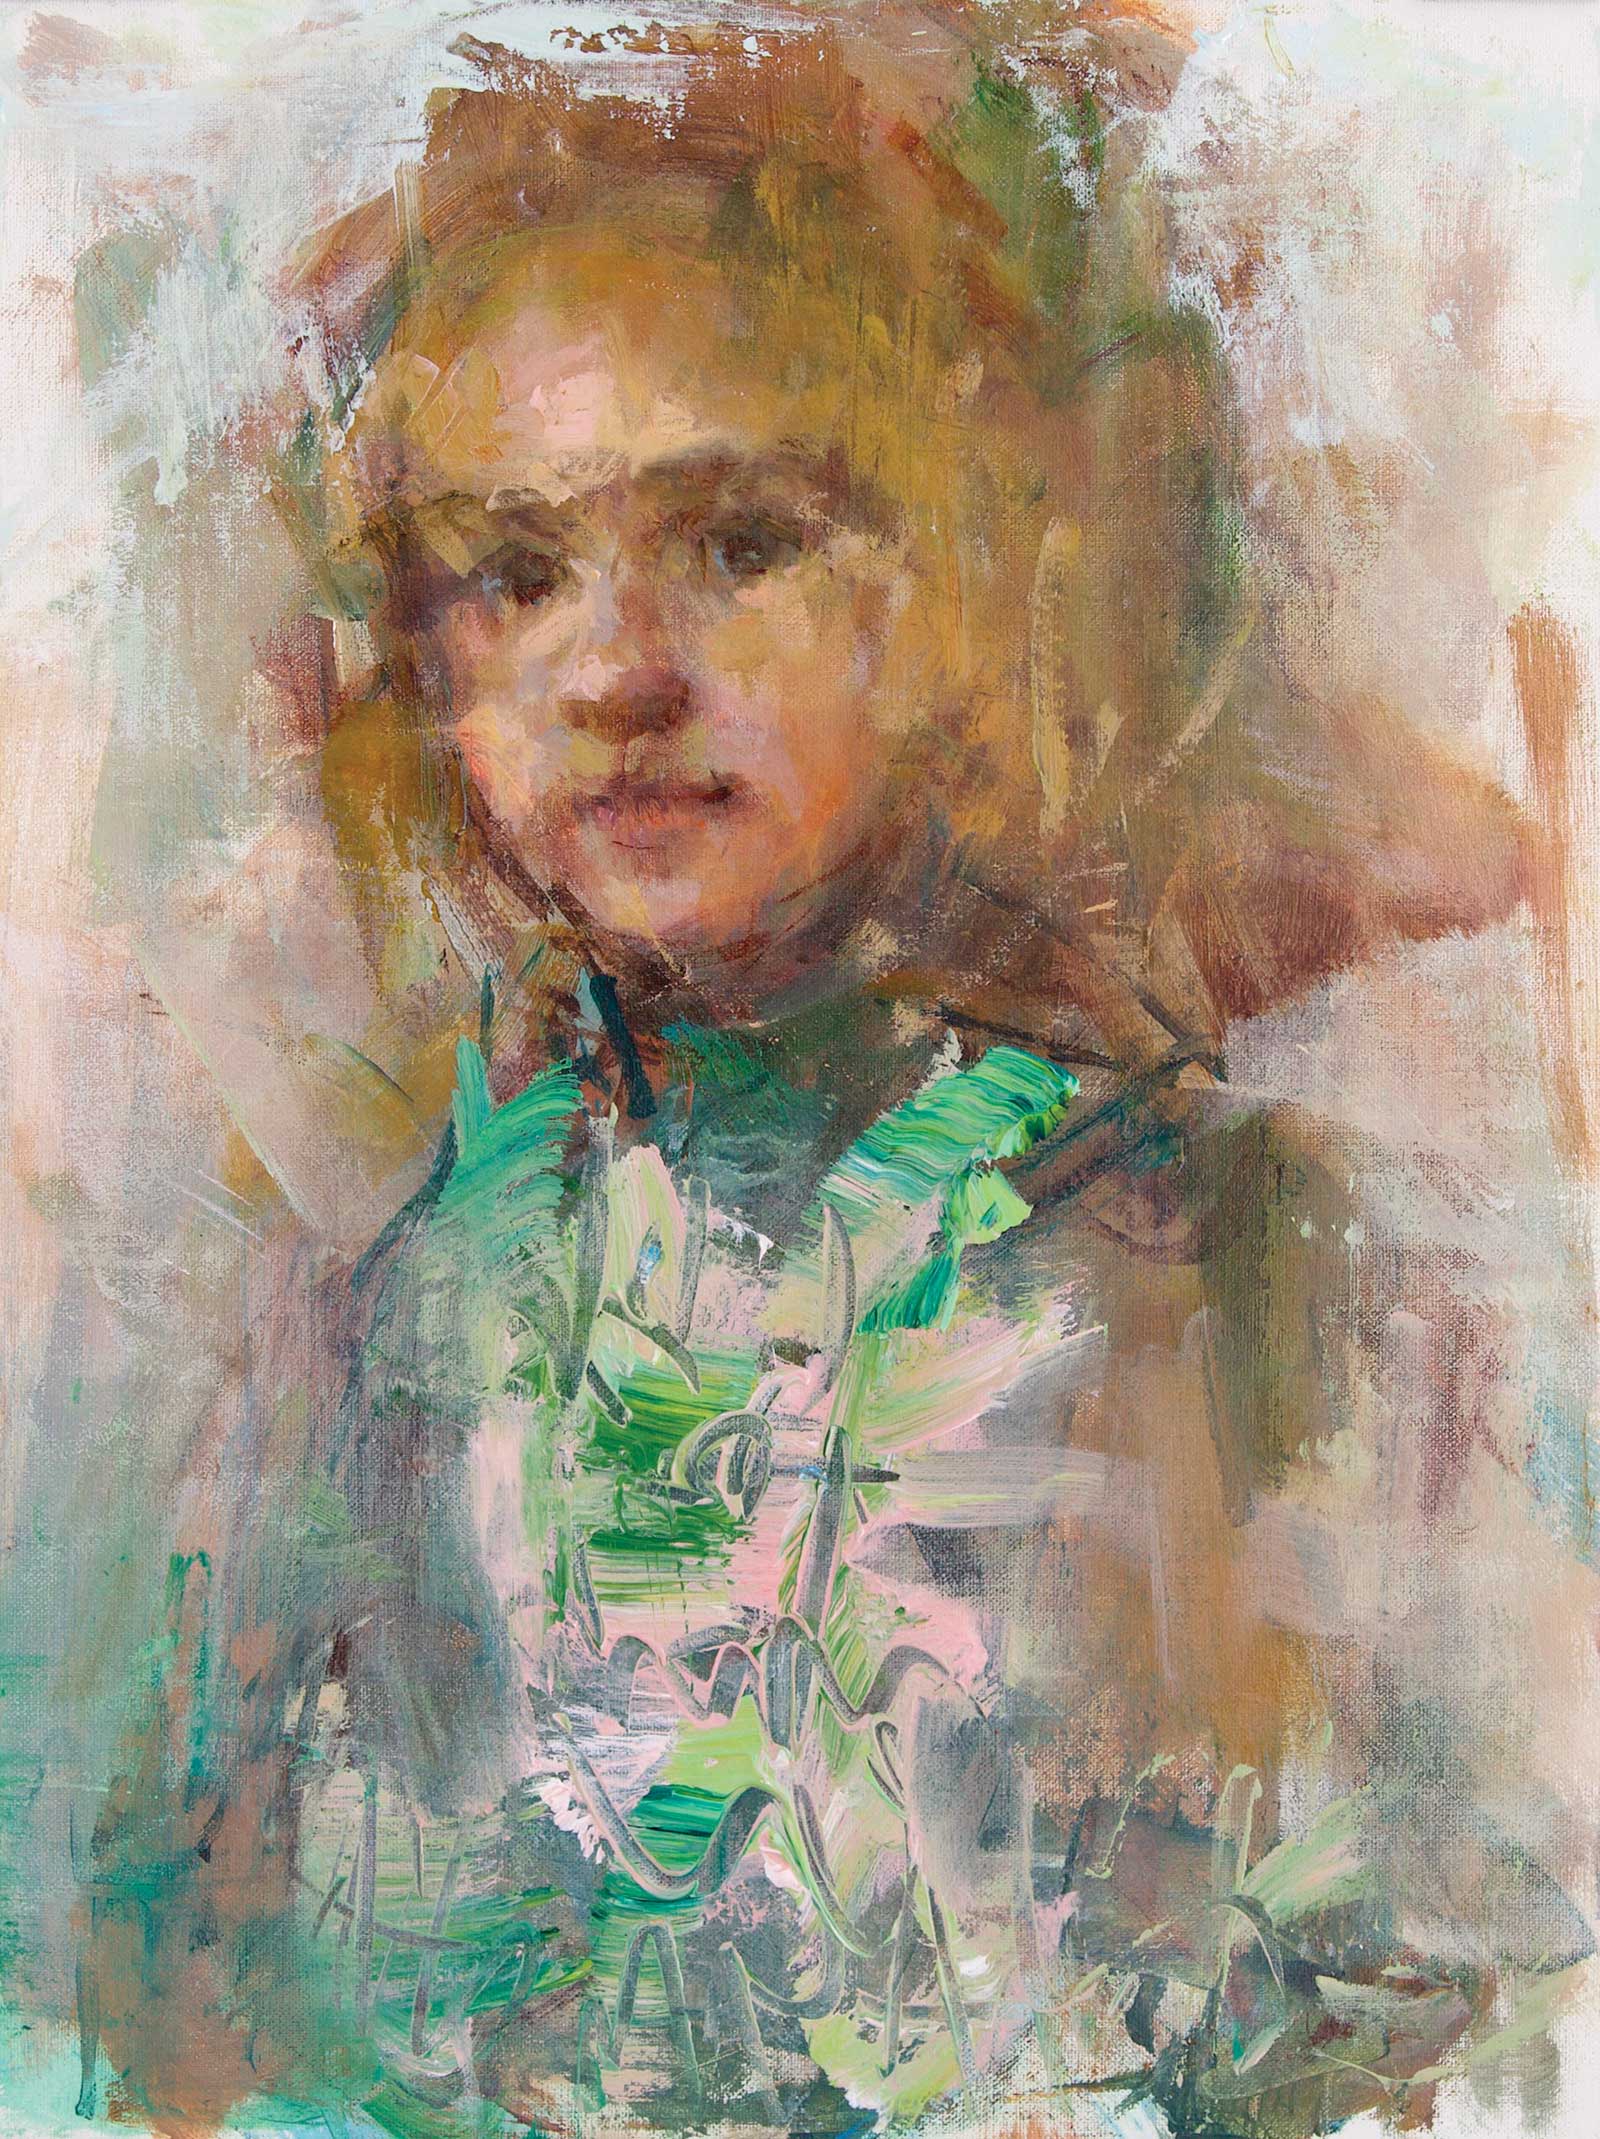 Stage 11
Stage 11 Losing and Finding Edges
Now I am asking, “What does the painting need?” So many wonderful effects, but they needed harmony with each other, supporting the overall mood of the painting. Light and dark strokes were added for defined edges and other strokes softened, creating seamlessly lost transitions.
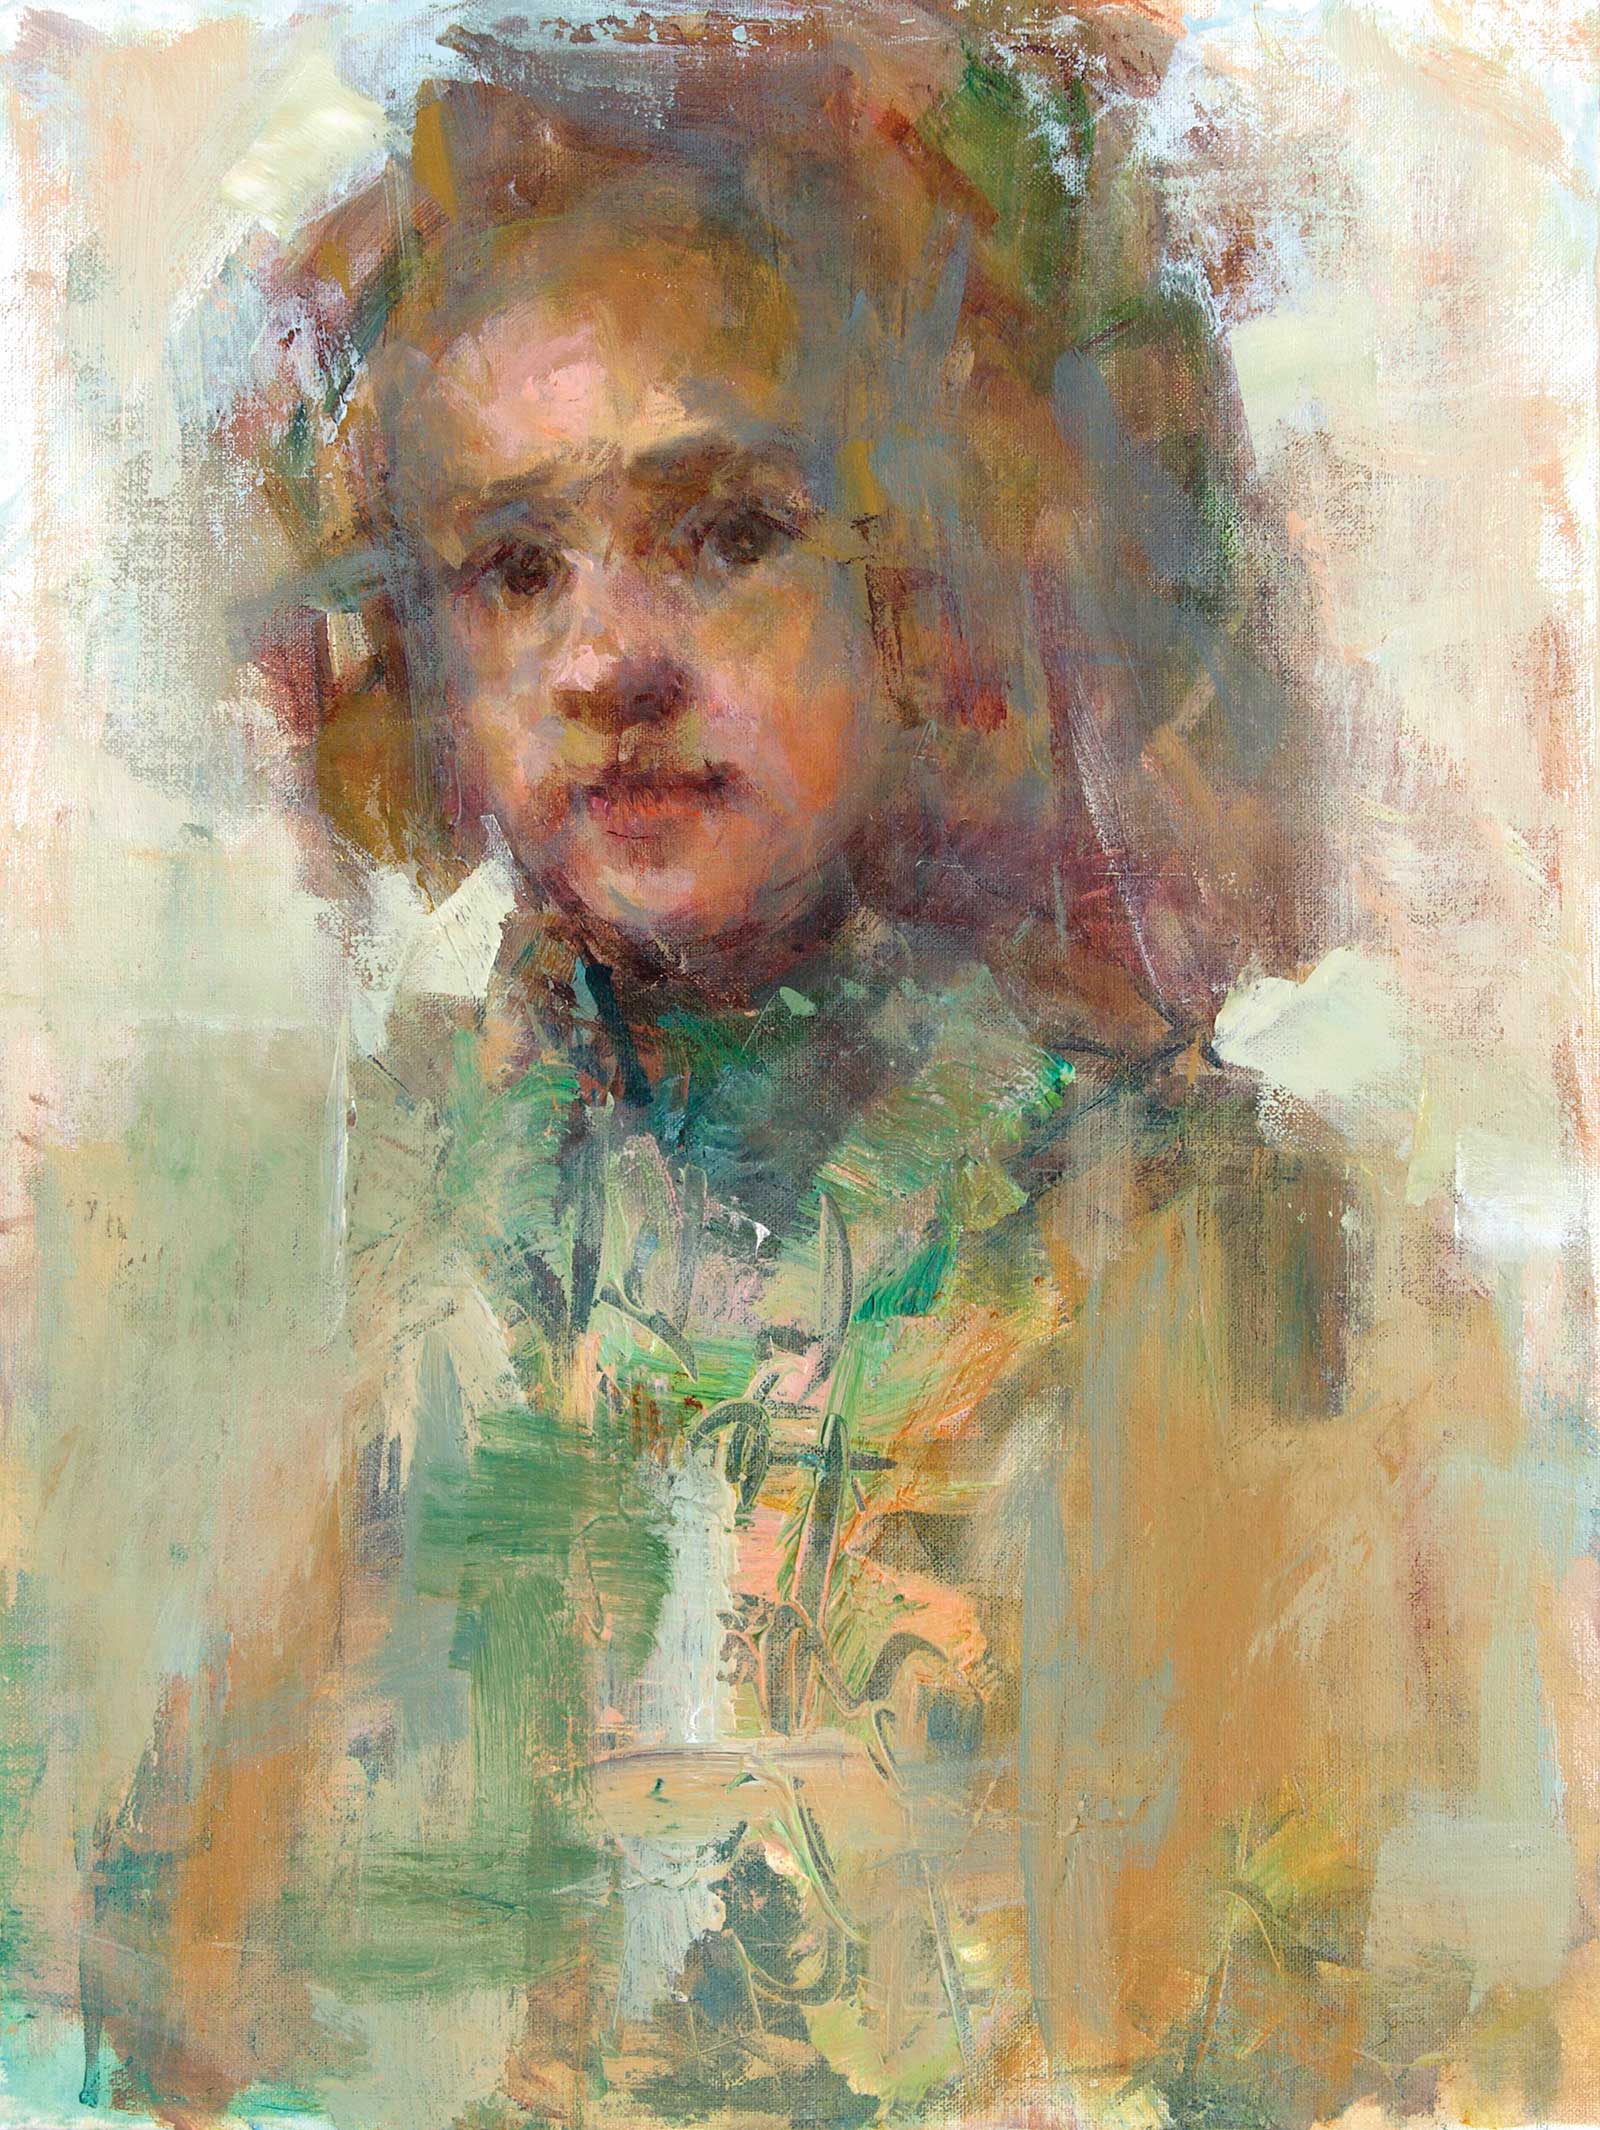 Stage 12
Stage 12 Refinements
Here, I am continuing to refine and adjust the painting.
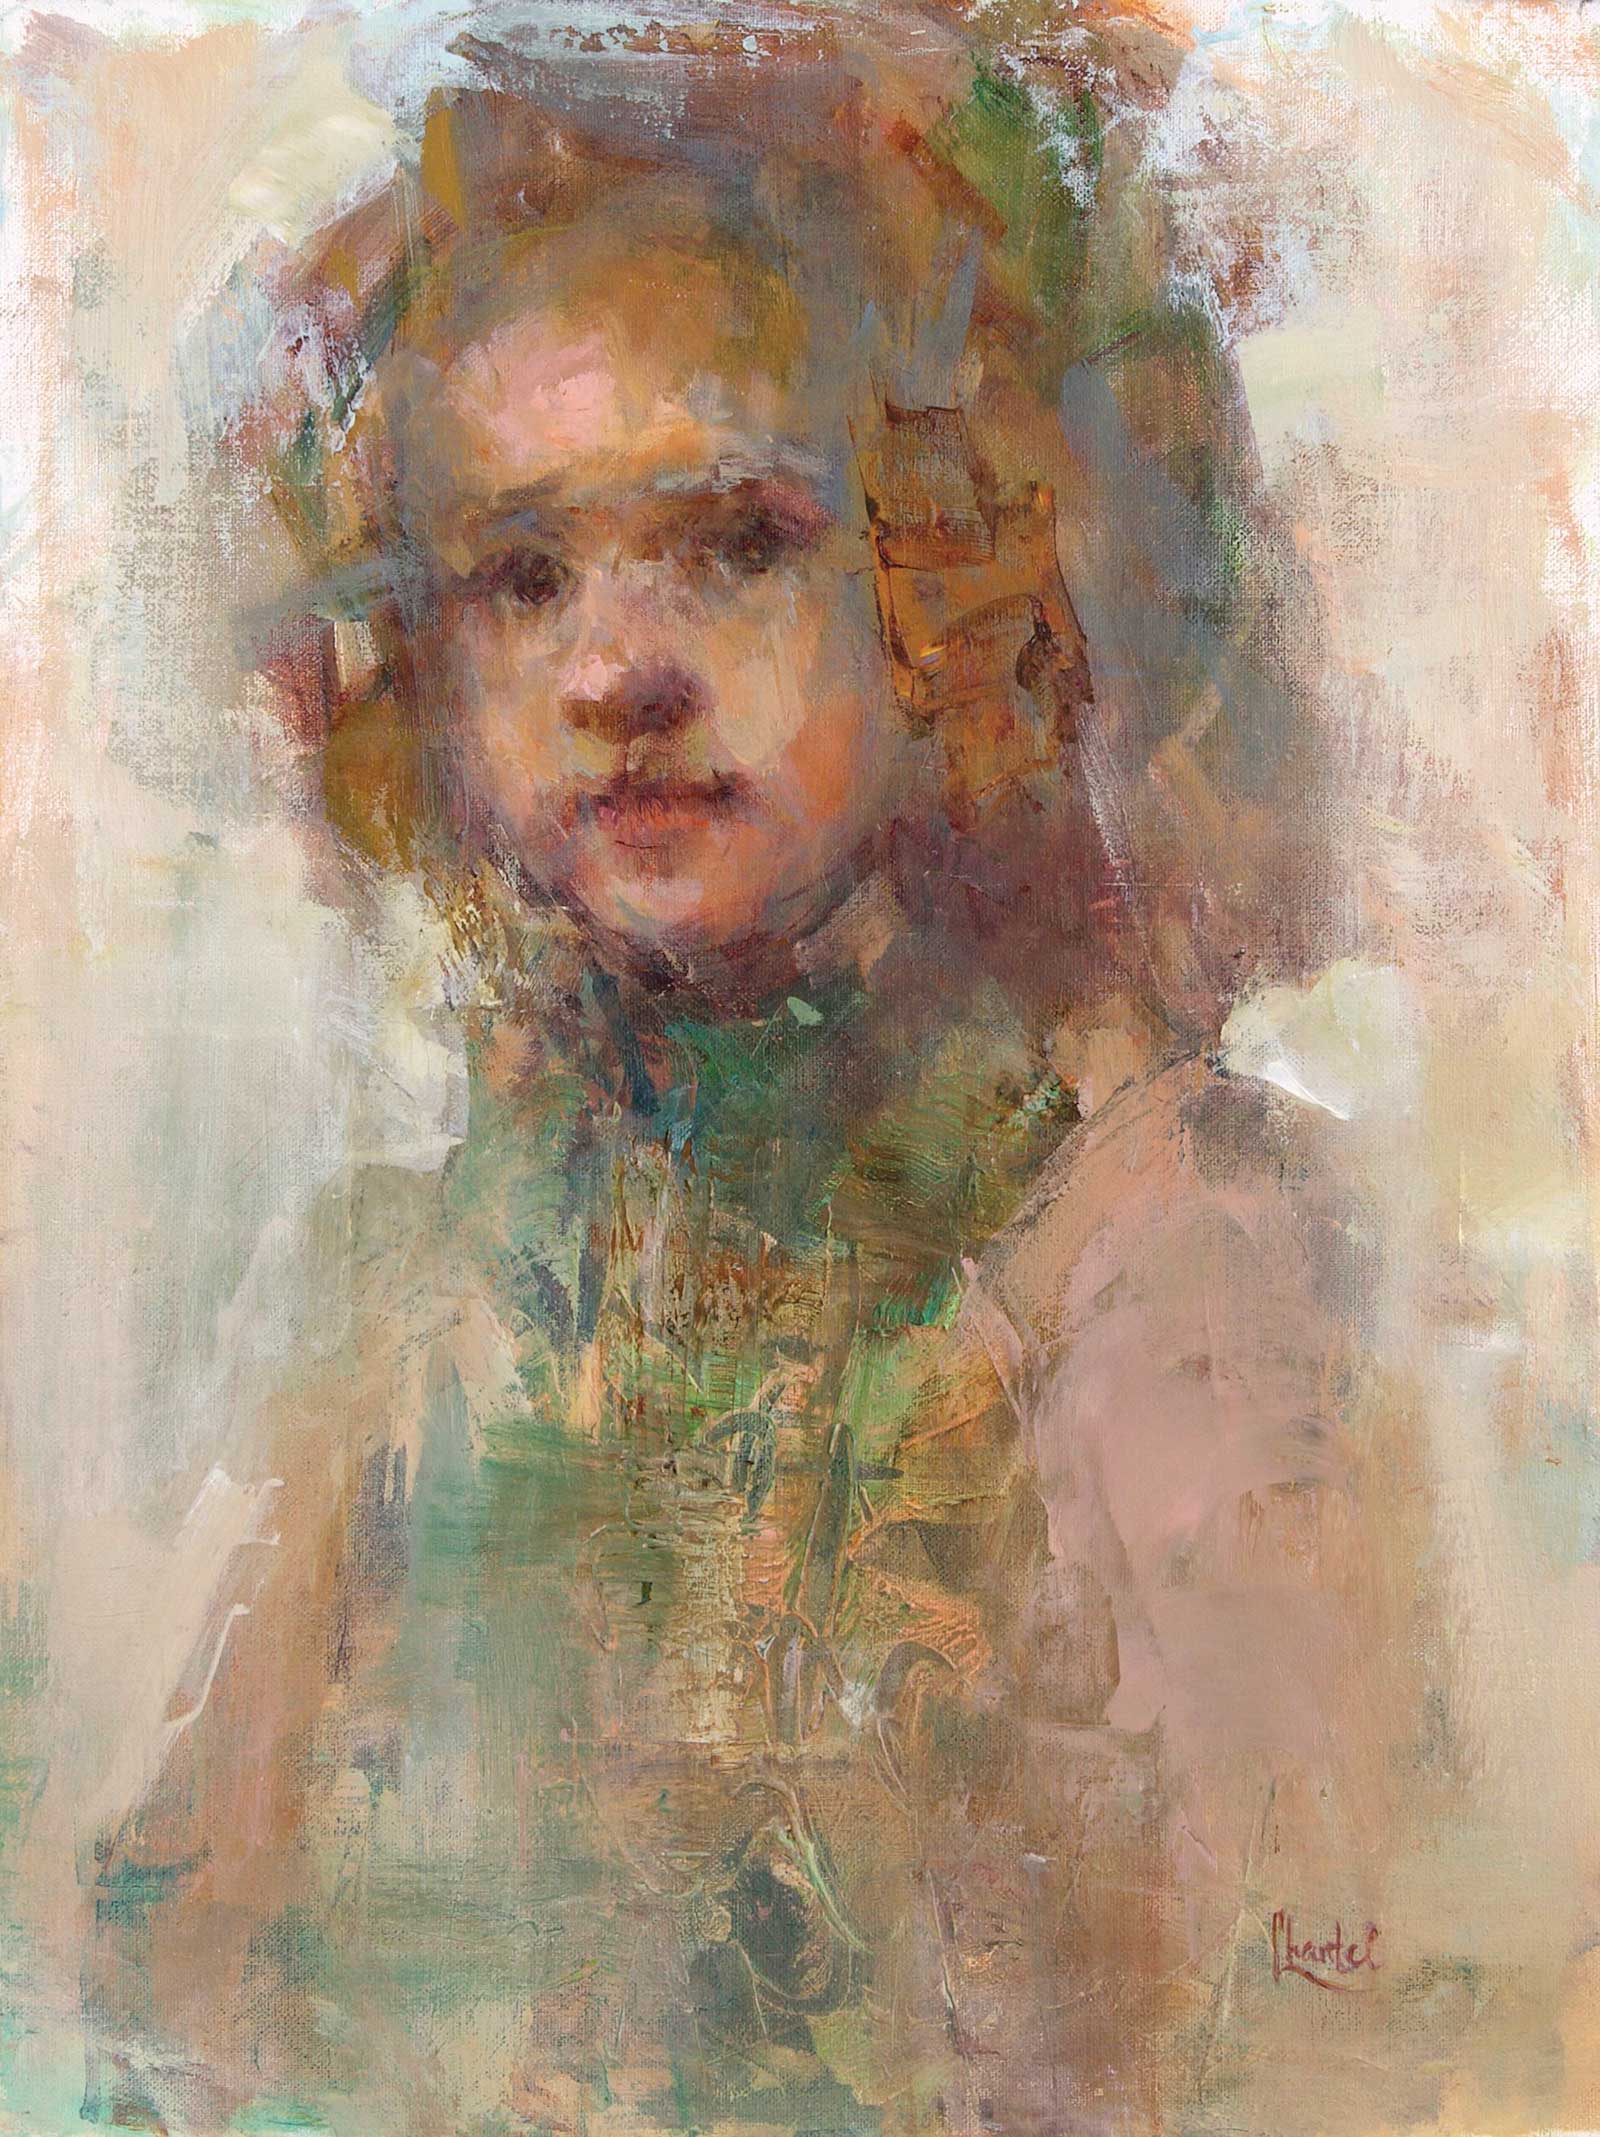 Stage13
Stage 13 Finished Artwork
Tapestry, acrylic on panel, 12 x 9" (30 x 22 cm)
About the artist
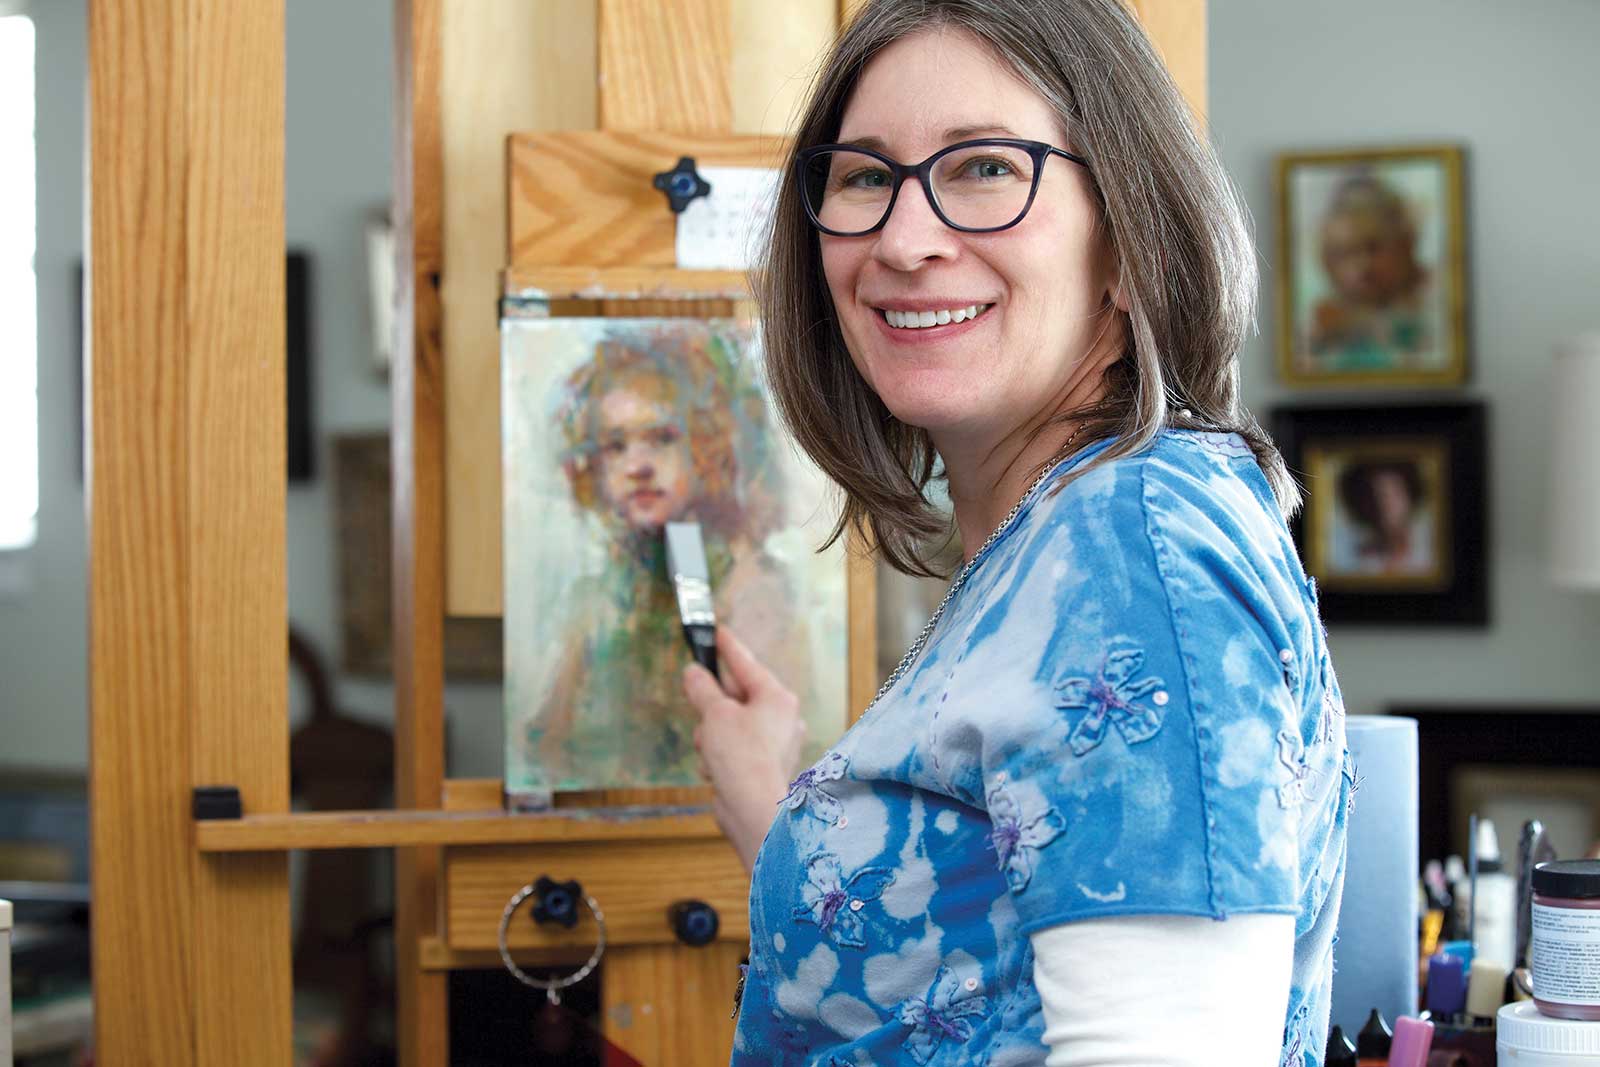 Chantel Barber
Chantel Barber’s work has been featured in solo art shows and juried exhibitions, including a solo show at the Customs House Museum & Cultural Center in Tennessee, and is in private and public collections worldwide. Her awards include Certificate of Excellence Award Winner (The Portrait Society of America International Portrait Competition), Ninth Place Non-Commissioned Portrait Category (The Portrait Society of America Members Only Competition), finalist in the Outside the Box Category (The Portrait Society of America Members Only Competition), and second place and 14 Outstanding Acrylic Awards in the BoldBrush Painting Competition.
Her work has been published in multiple art magazines, including American Art Collector, as well as several books. Her DVD produced by Streamline Publishing is a bestseller. Barber resides in Bartlett, Tennessee, where, in her studio, she creates and teaches private workshops. In addition, she teaches online through Mastrius and holds workshops throughout the United States.
Represented by
dk Contemporary Gallery, Georgia, USA, dkgallery.us
Contact at
chantel@chantellynnbarber.com
chantellynnbarber.com