



As a botanical artist, my aim is to capture scientifically accurate portrayals of live plant specimens in watercolor. I endeavor to present these works in an aesthetically pleasing manner by using simple clean compositions with the subjects suspended within the white space. Presenting the subjects without a background is the traditional approach in botanical art and keeps the focus firmly on the plant. Some older traditional botanical illustrations can be a little lacking in form, so I try to create further interest and a feeling of dimension by using strong directional lighting to enhance the features of the plant, while still maintaining accuracy.
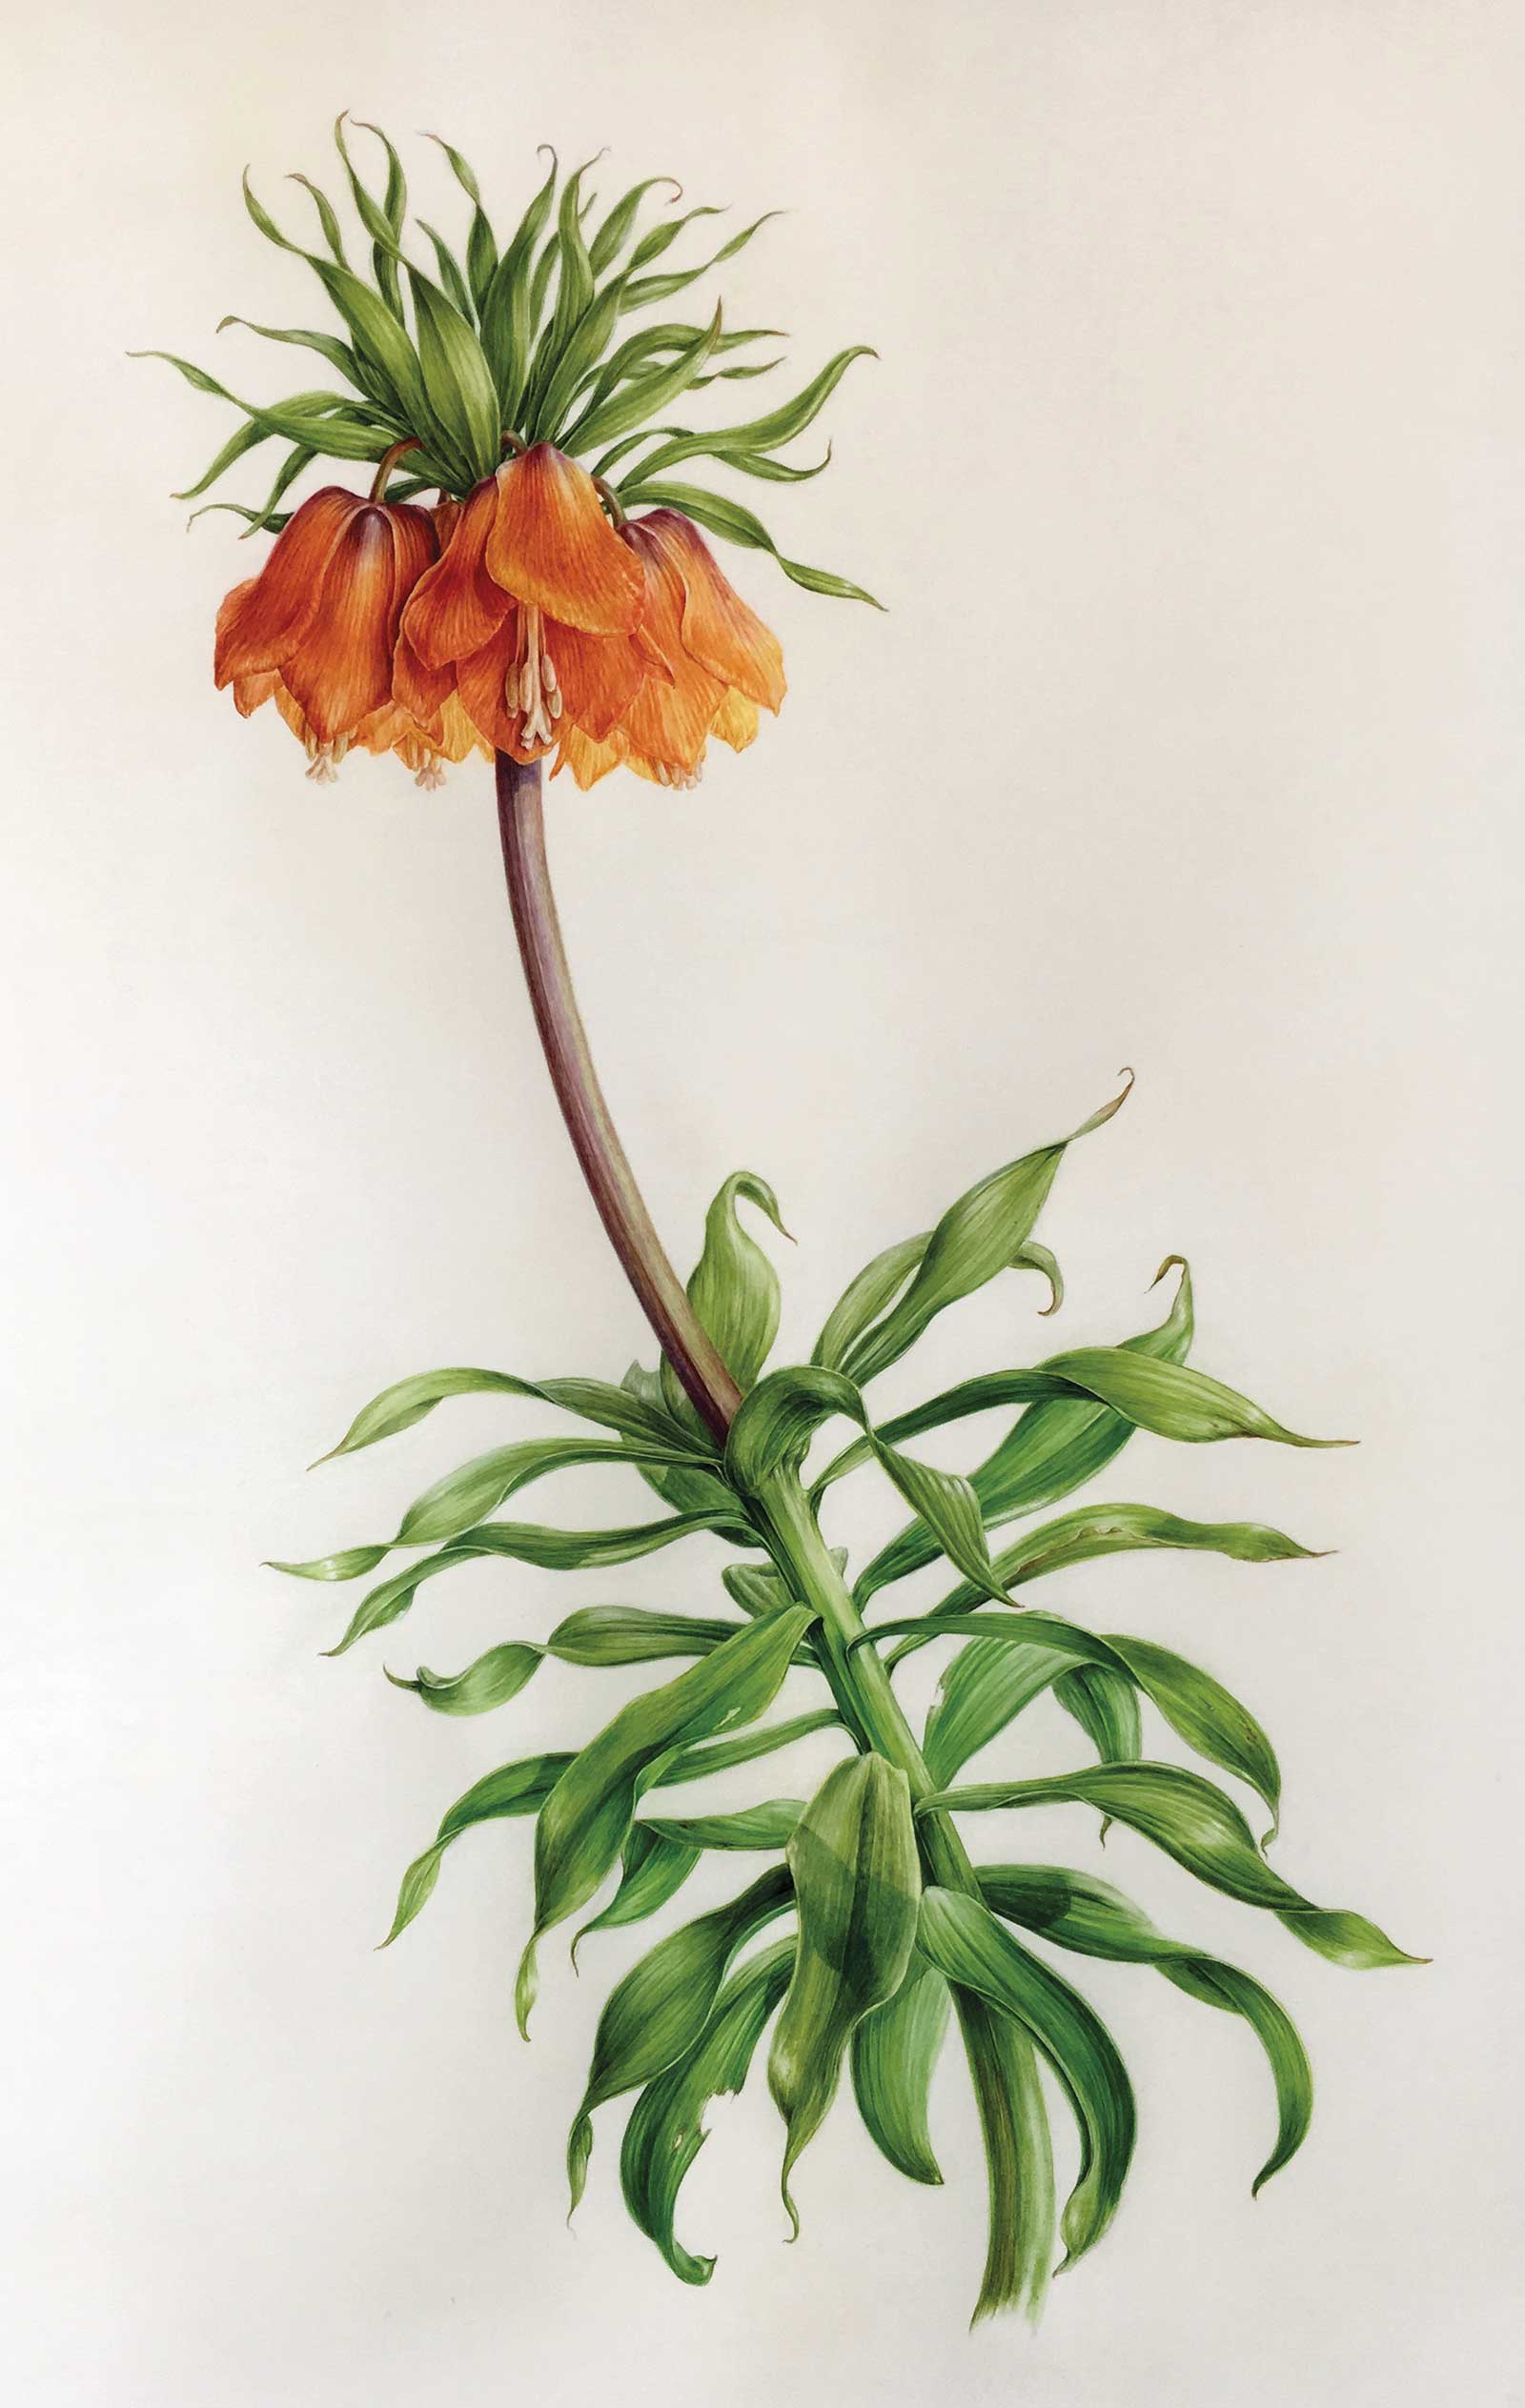 Fritillaria imperialis or Crown Imperial fritillary, watercolor on vellum, 23½ x 15¾" (60 x 40 cm) This impressive plant originates from the Anatolian plateau, but I came across the subject in cultivation at Chatsworth country estate in England and was inspired to paint it on the traditional substrate of calfskin vellum. Vellum requires a dry brush technique as the surface is non-absorbent, but if paint is applied correctly a beautiful luminous glow can be achieved.
Botanical works should always be accurate in all details: color, size and texture. In addition, sometimes scaling of parts is used to provide necessary information about the plant. Whether illustrating a whole plant or a simple plant part, it should be possible to identify the plant from the painting. Often the subjects are small, creating additional challenges with detail, and the approach must facilitate the precision to replicate what is found in nature. In botanical art, too much repetition should be avoided; the aim is to show all of the parts of the plant, such as the stages of reproduction and growth habit. Painting is limited by seasonality and so work must be well planned.
In order to achieve color accuracy and detail, I use what I refer to as a modified watercolor technique. Working on hot-pressed paper ensures that clean edges and a high level of detail can be achieved. To begin I often use a pale painted outline initially, as this defines the plant parts and ensures that no pencil lines are trapped under the watercolor.
Once an outline is established, the first and only wash is applied to the paper surface, which has been dampened with clean water. This wash establishes the underlying color and basic form. I don’t use any larger washes unless working on very large subjects. I always try to achieve the base with one light wash as I find that it is better not to allow the paper to absorb too much water as this can lead to a dullness in color or ragged edges.
Thereafter, and for the majority of the work, I utilize a range of relatively dry brush techniques, which means that I paint dry into dampened areas or directly onto the dry surface. The process is carefully controlled at all stages. In the latter stages I utilize very small, soft hatching strokes with the dry brushwork. Strokes can also be similar to the continuous tone method used with pencils. Whatever brushstroke is used, the paint should always be applied with a light touch to achieve gradual saturation and shadows without making the color too heavy or uniform.
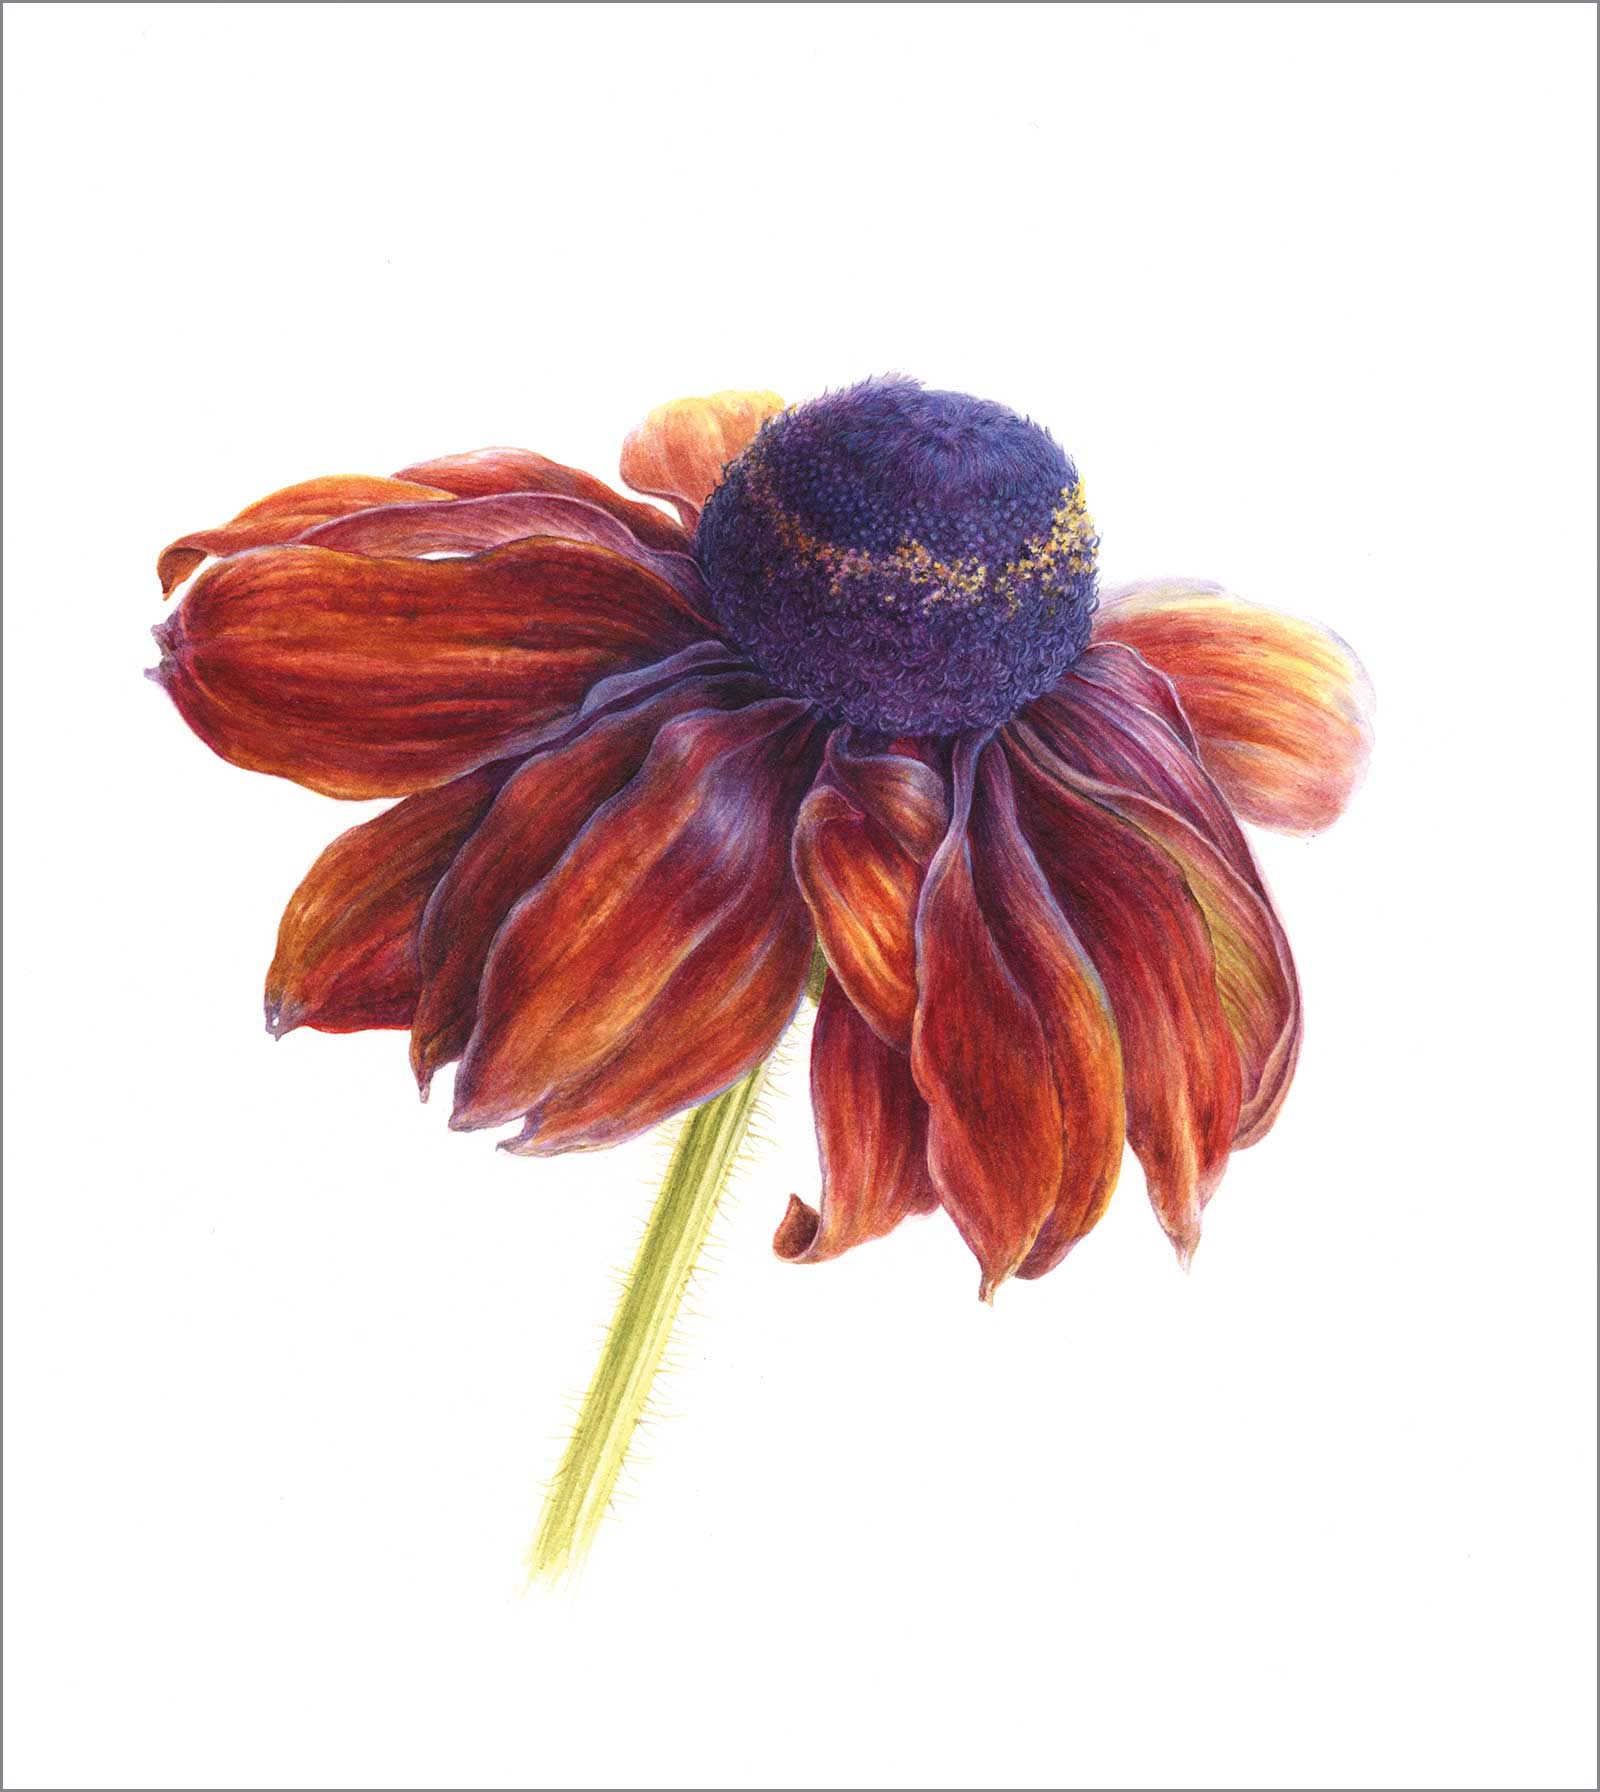 Rudbeckia, watercolor on paper, 7¾ x 8¼" (20 x 21 cm) I wanted to achieve the rich colors and velvety texture of this flower. Underlying yellow and violet washes established the base, then building the golden colors slowly, with many layers of dry brush into damp and onto dry to create texture. Some final glazing of blue violet in the center was the last touch to make the contrasting of blue to orange, which seemed to bring it to life.
In addition, I often scumble paint on with the very tip of the brush to work into highlights and to create texture and transition. With some subjects, final glazes of transparent color are applied in carefully selected areas to increase the vibrancy.
I developed my technique over many years. After my initial training as a painter on ceramics, I switched to watercolor but discovered that I couldn’t quite achieve the depth and detail needed for botanical subjects using multiple watercolor washes on an absorbent surface, so I utilized the dryer approach used in the earlier on-glaze painting technique. I also paint some works on vellum, and this technique is very well suited to the surface of the skin because of the lack of absorbency and smooth surface. The aim is to finely layer paint on the surface, hence the dry brush approach.
In the following demonstration of an Autumnal Rumex leaf, all key stages of the painting are shown, using the techniques described above, from the washes and the development of the dry brushwork to the final painting. This subject may initially appear simple, yet it has many complexities within its contours, with many fine veins, color transitions, bright highlights, strong saturation and deep shadows in the recesses. Careful planning is required, and the process is slow, taking around 10 hours to complete the leaf.
My Art in the Making Autumn Rumex Leaf
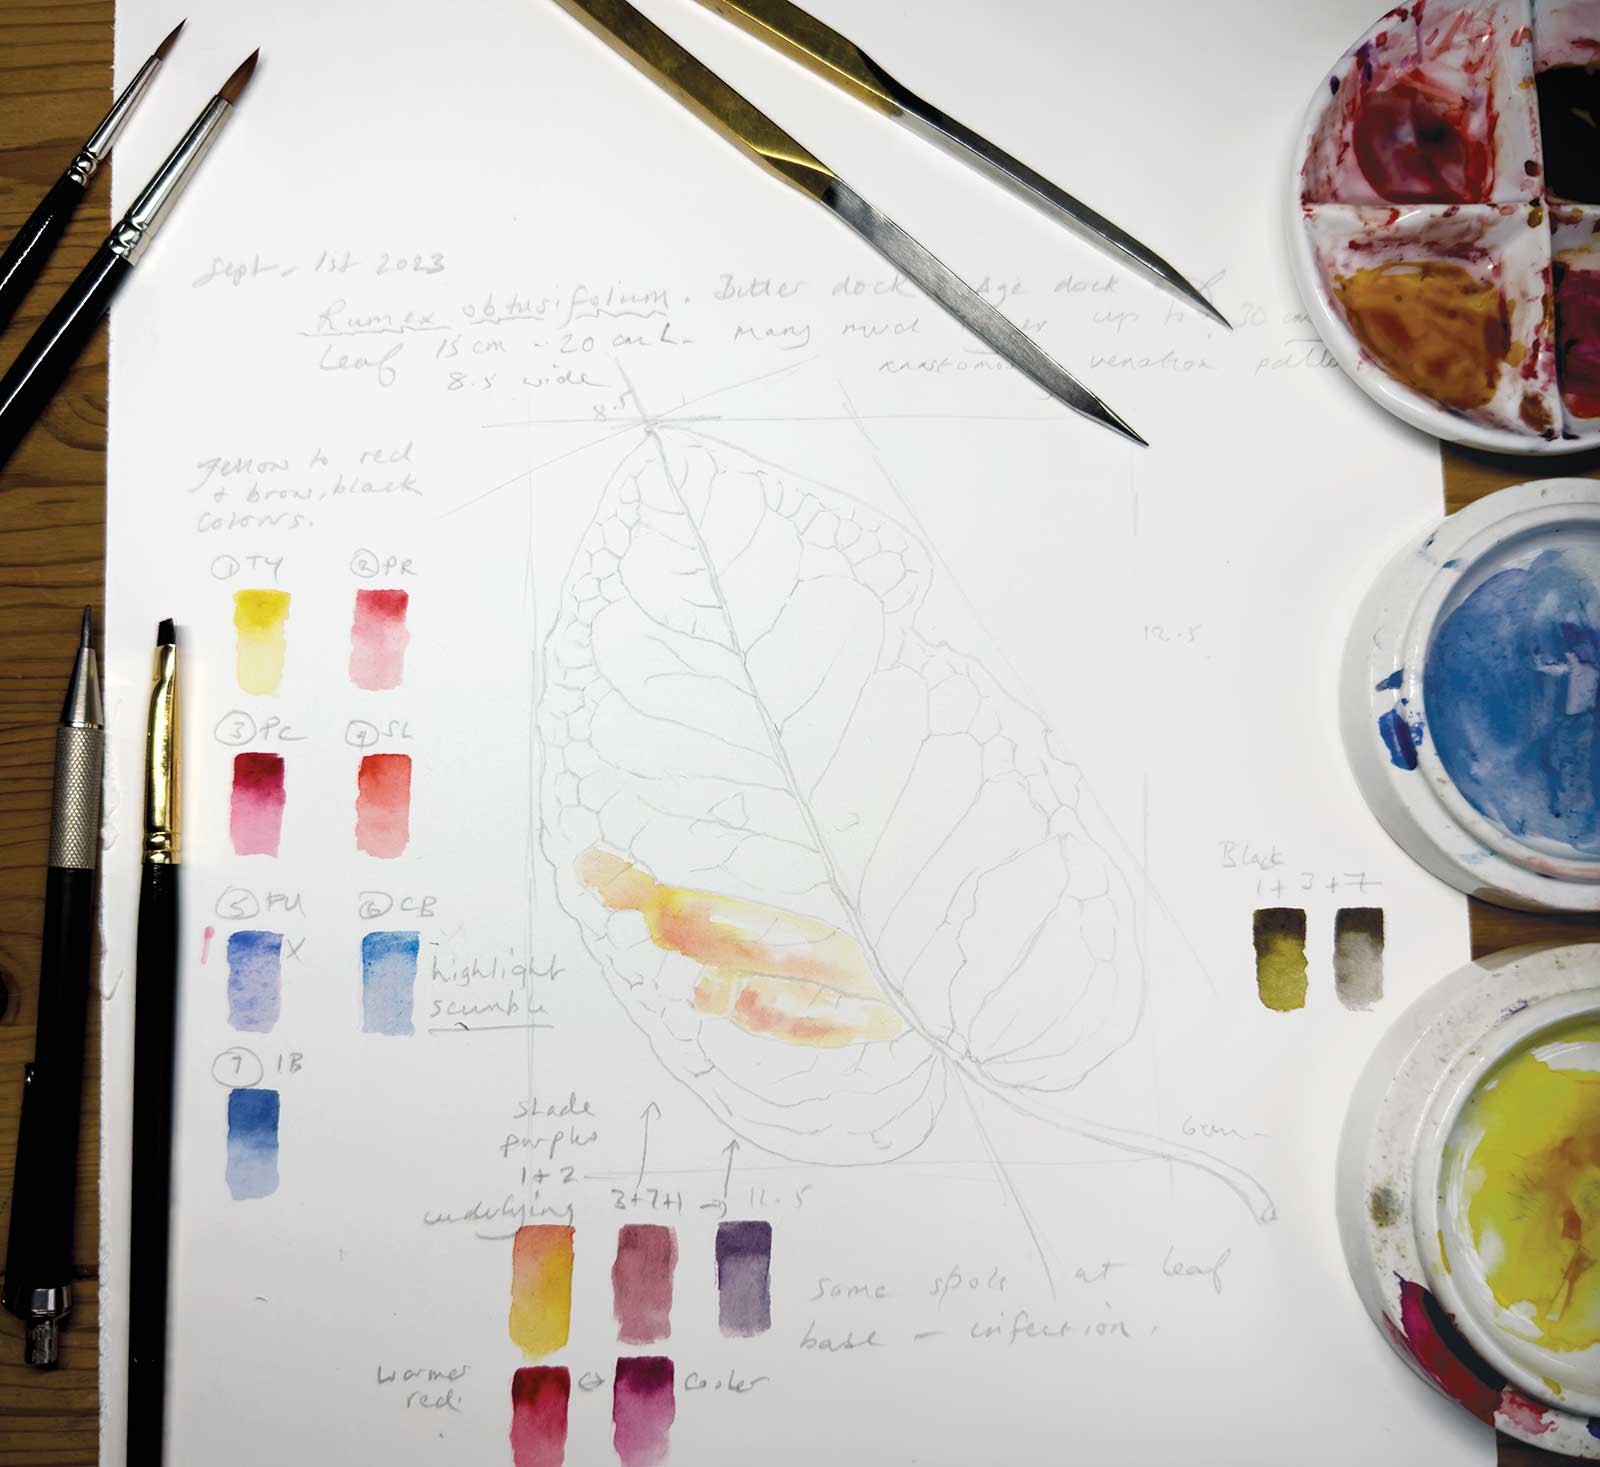
The process begins with observation of the plant in situ, then in the studio in a sketchbook, with measurements of parts, notes about features and line drawings alongside color studies. I create sketchbook or page studies for all of my painting subjects.
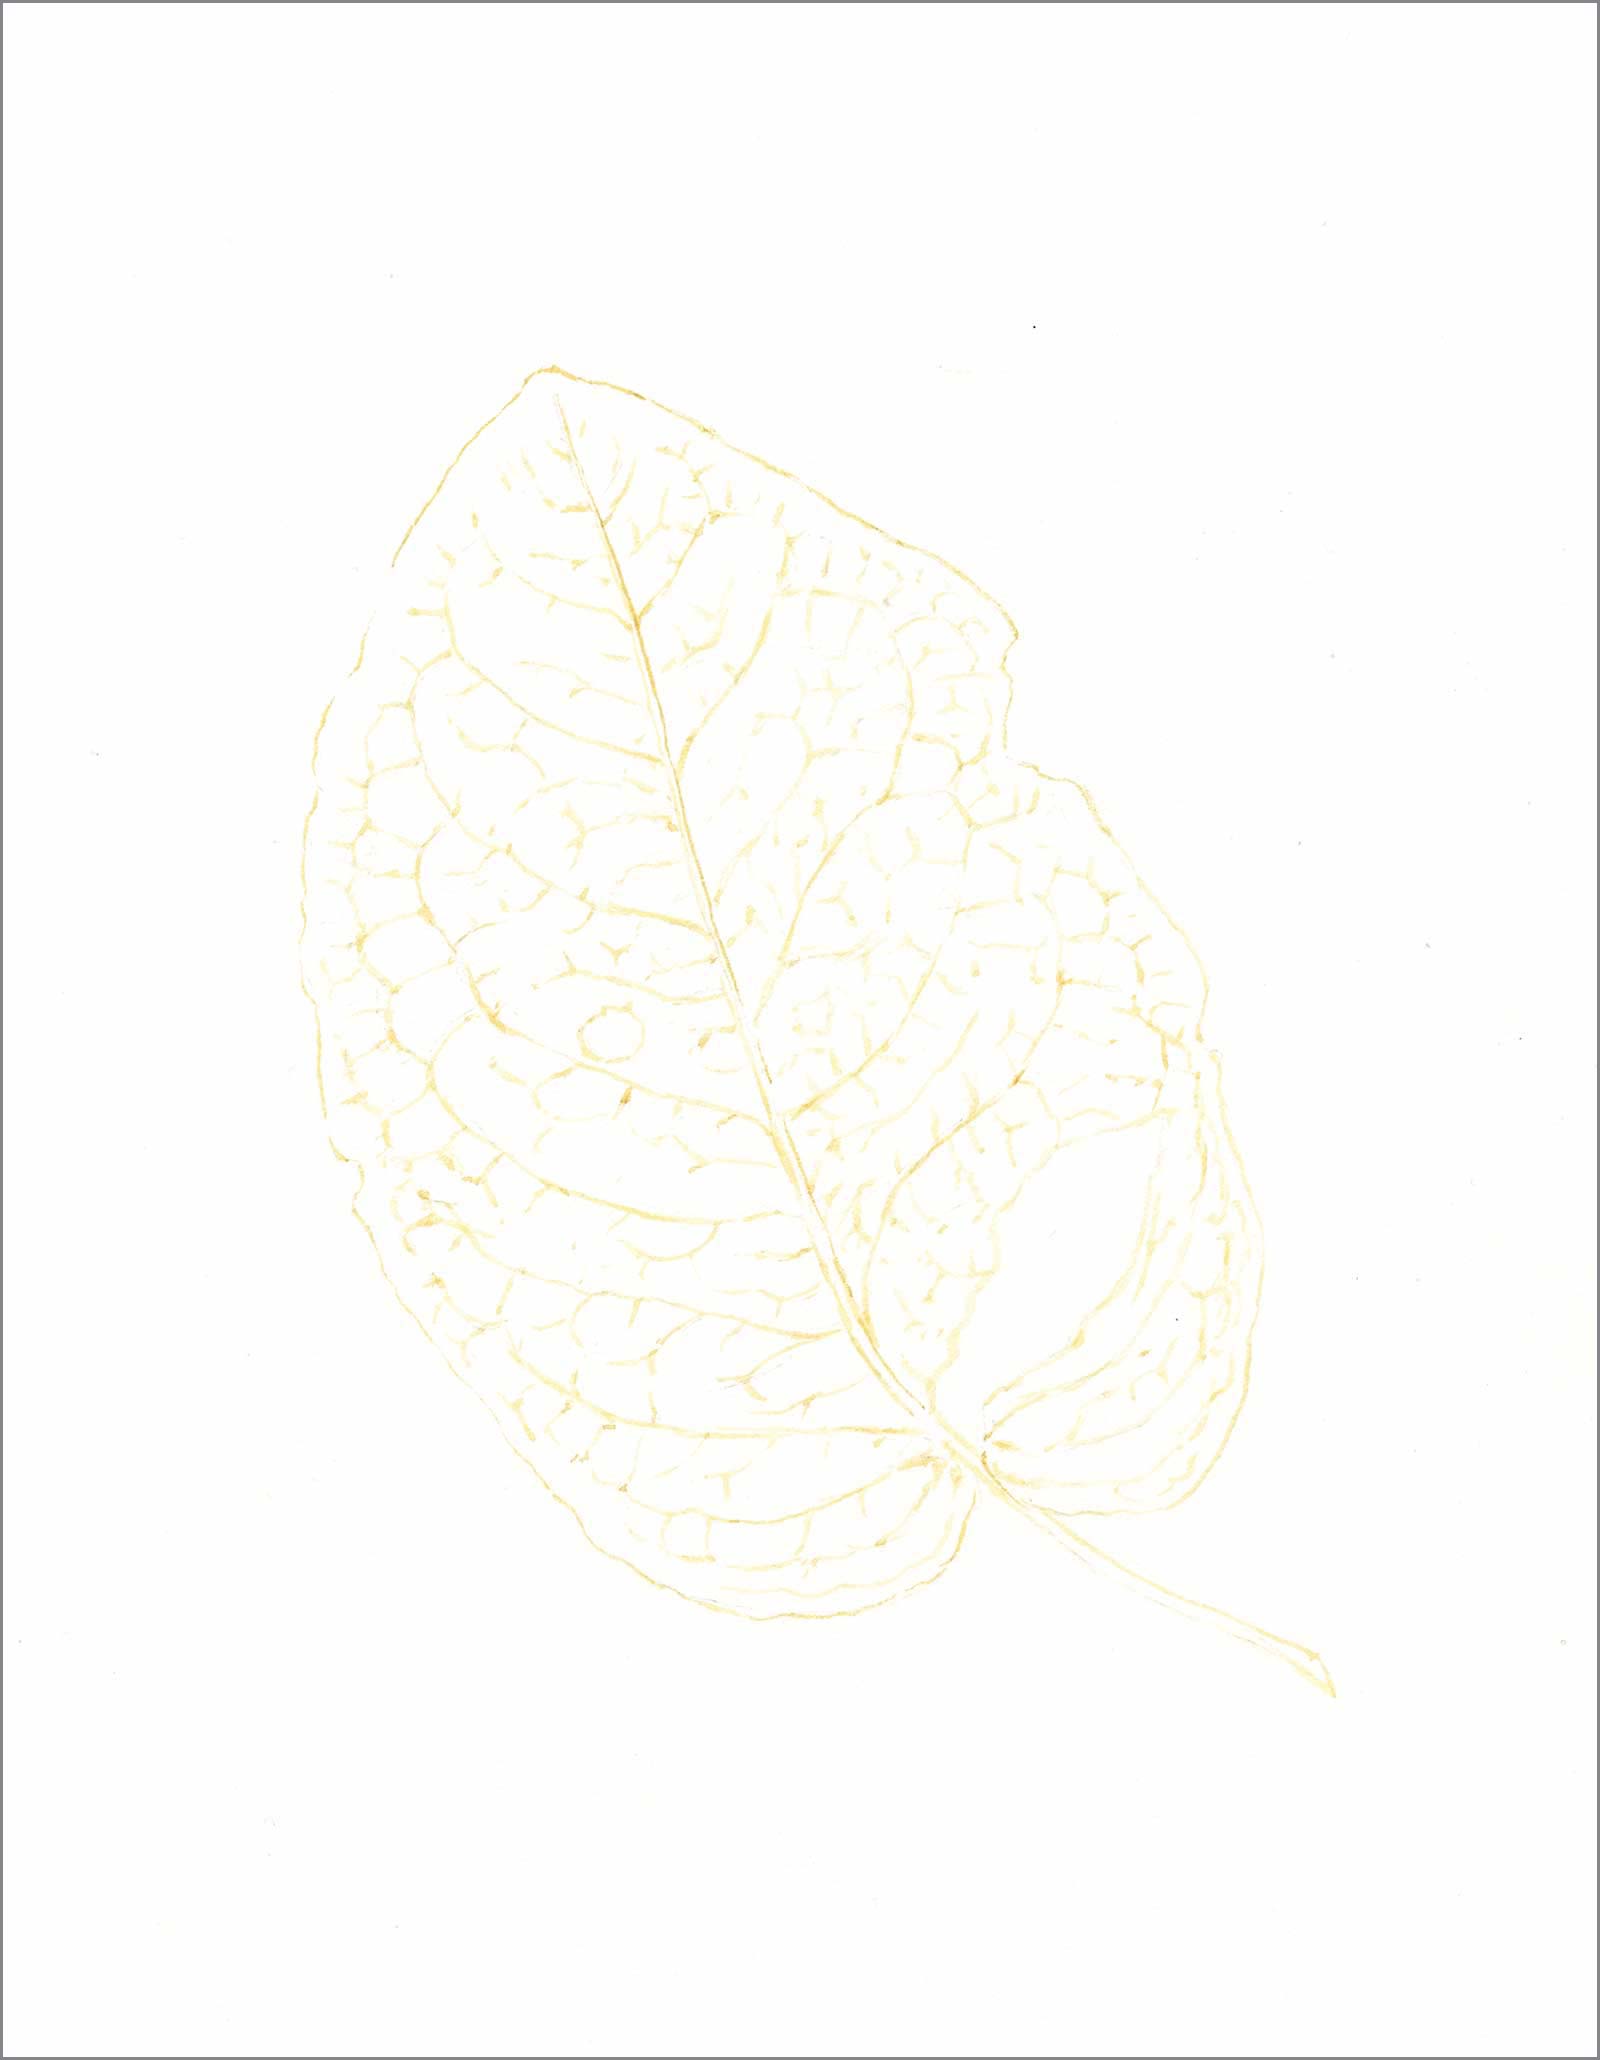 Stage 1
Stage 1 Transferring Drawing
The line drawing is transferred to HP watercolor paper, 28 by 24 cm. The outline is painted with a dilute mix of transparent yellow and permanent rose, using a small pointed brush.
 Stage 2
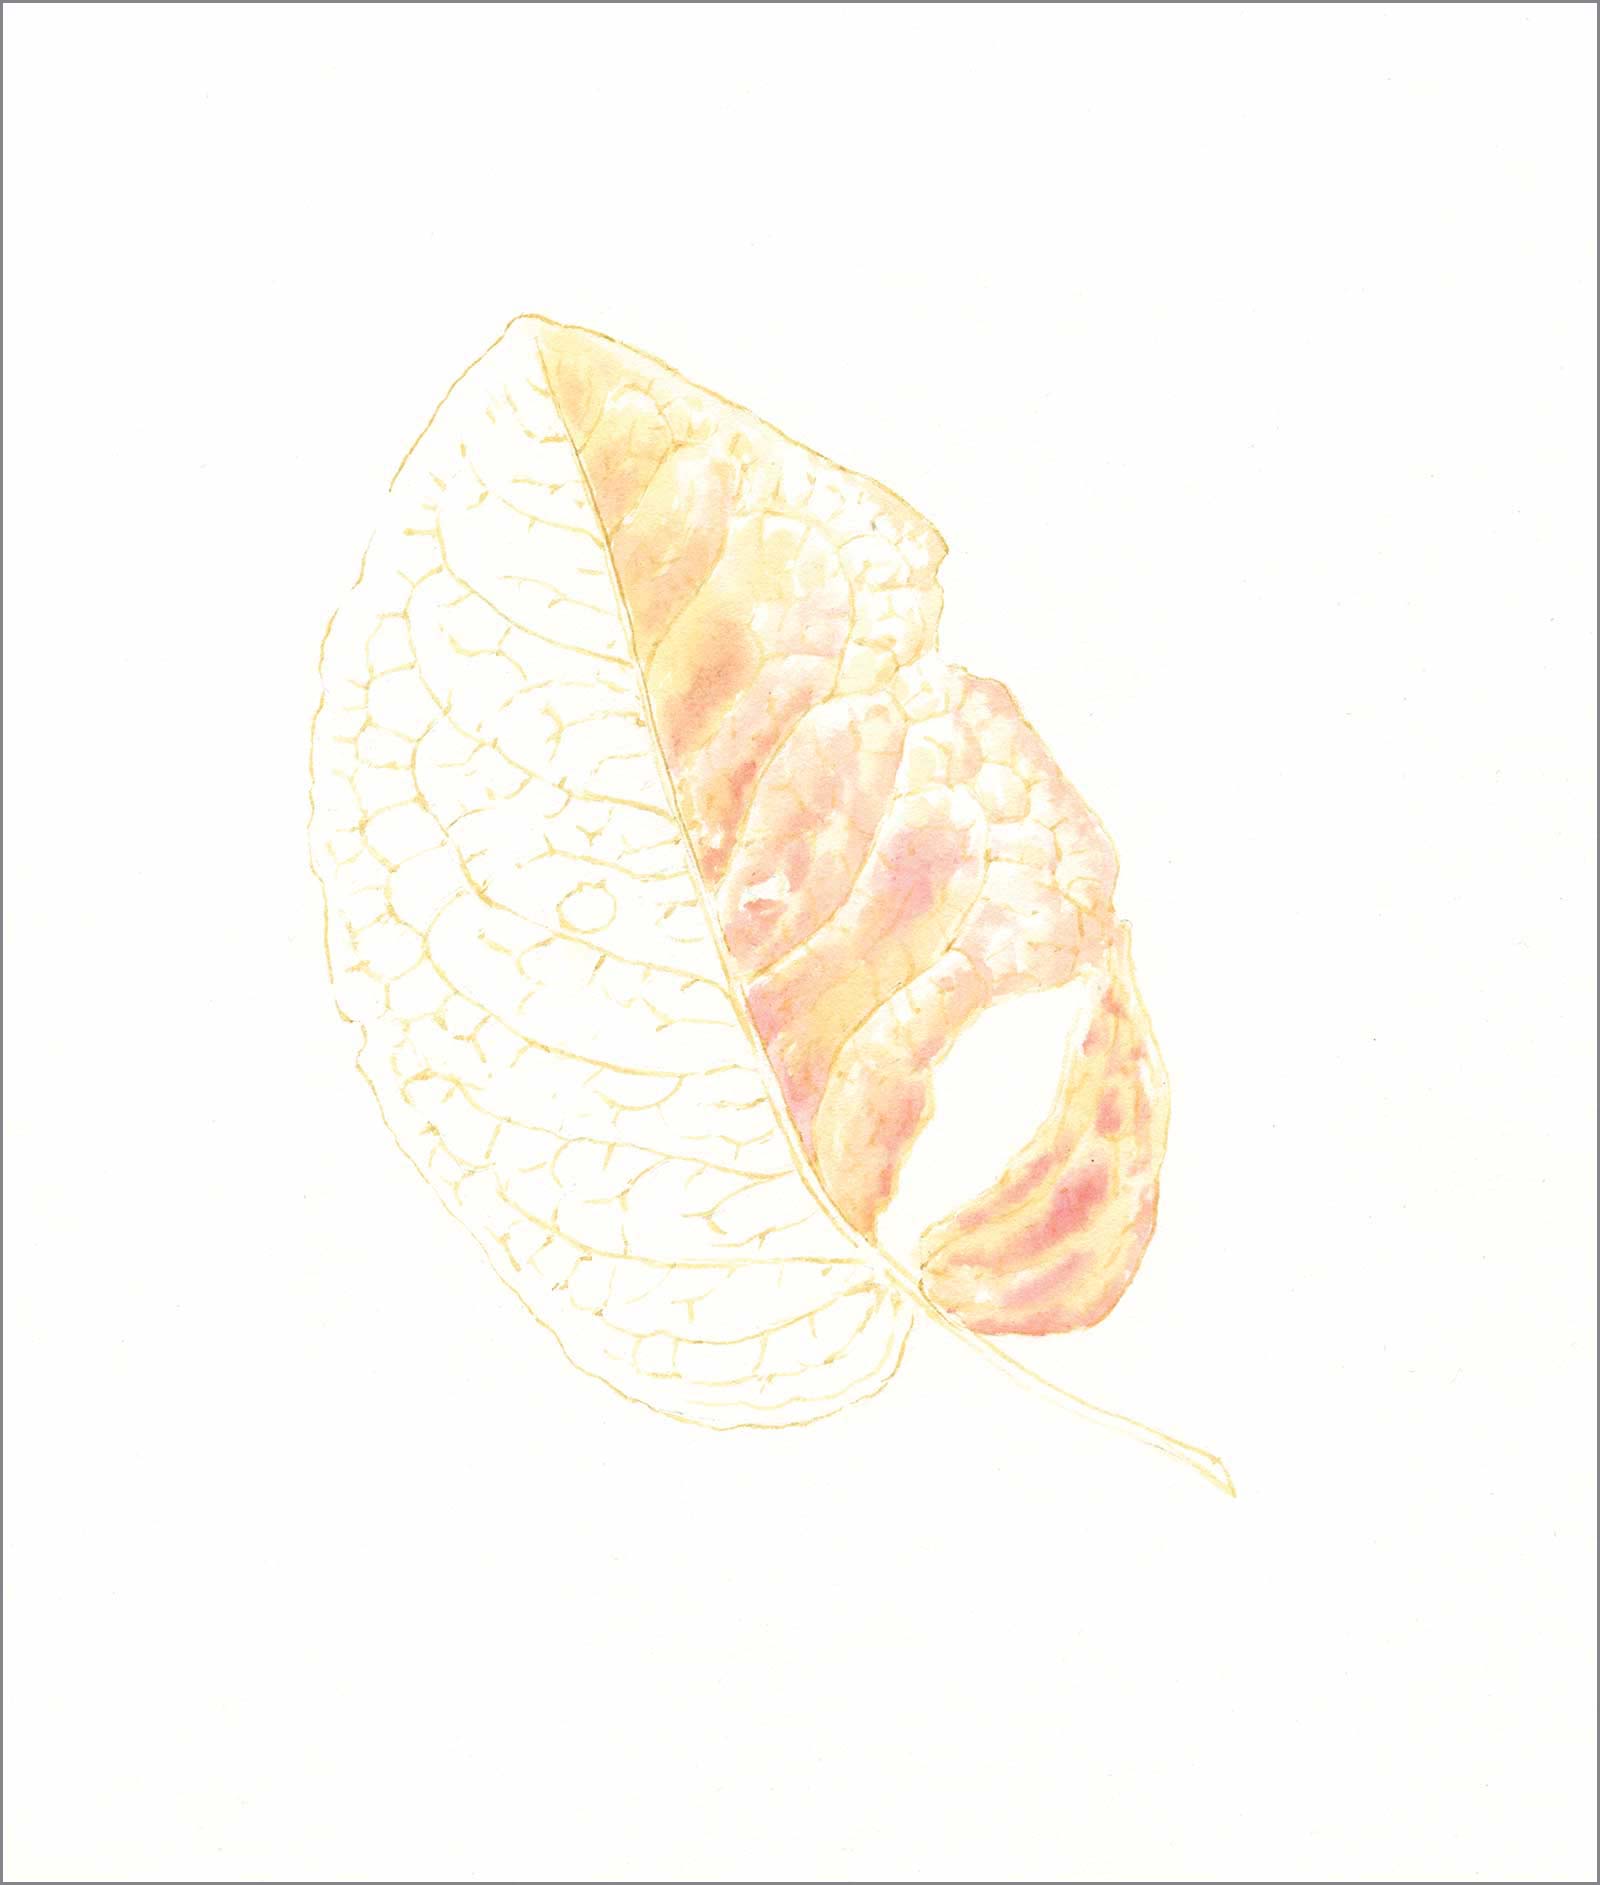
Stage 2 Yellow/Red Wash
Working one leaf blade at a time, the blended yellow and red wash is added with a size 4 brush to a dampened surface, which should be glistening but not overly wet. Highlights are left clear.
 Stage 3
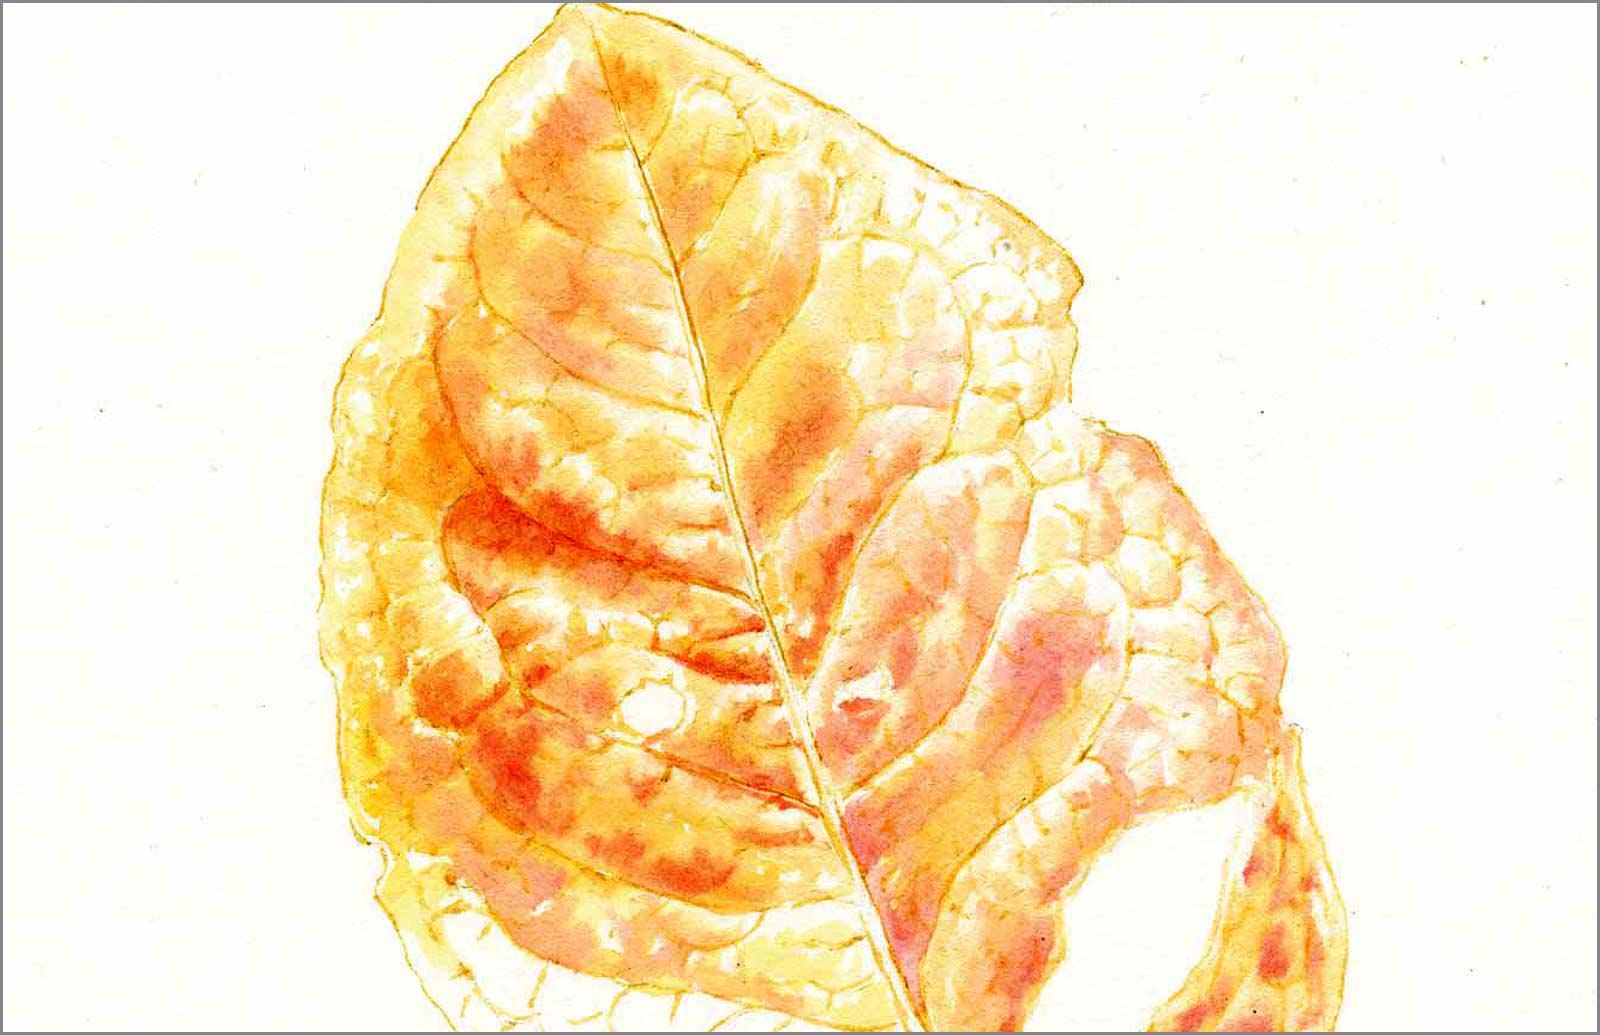
Stage 3 Other Leaf Blade
Continuing to the next leaf blade, note that you can work between the secondary veins as natural junctions. This allows delineation of the prominent veins and further control of the medium in small areas.
 Stage 4
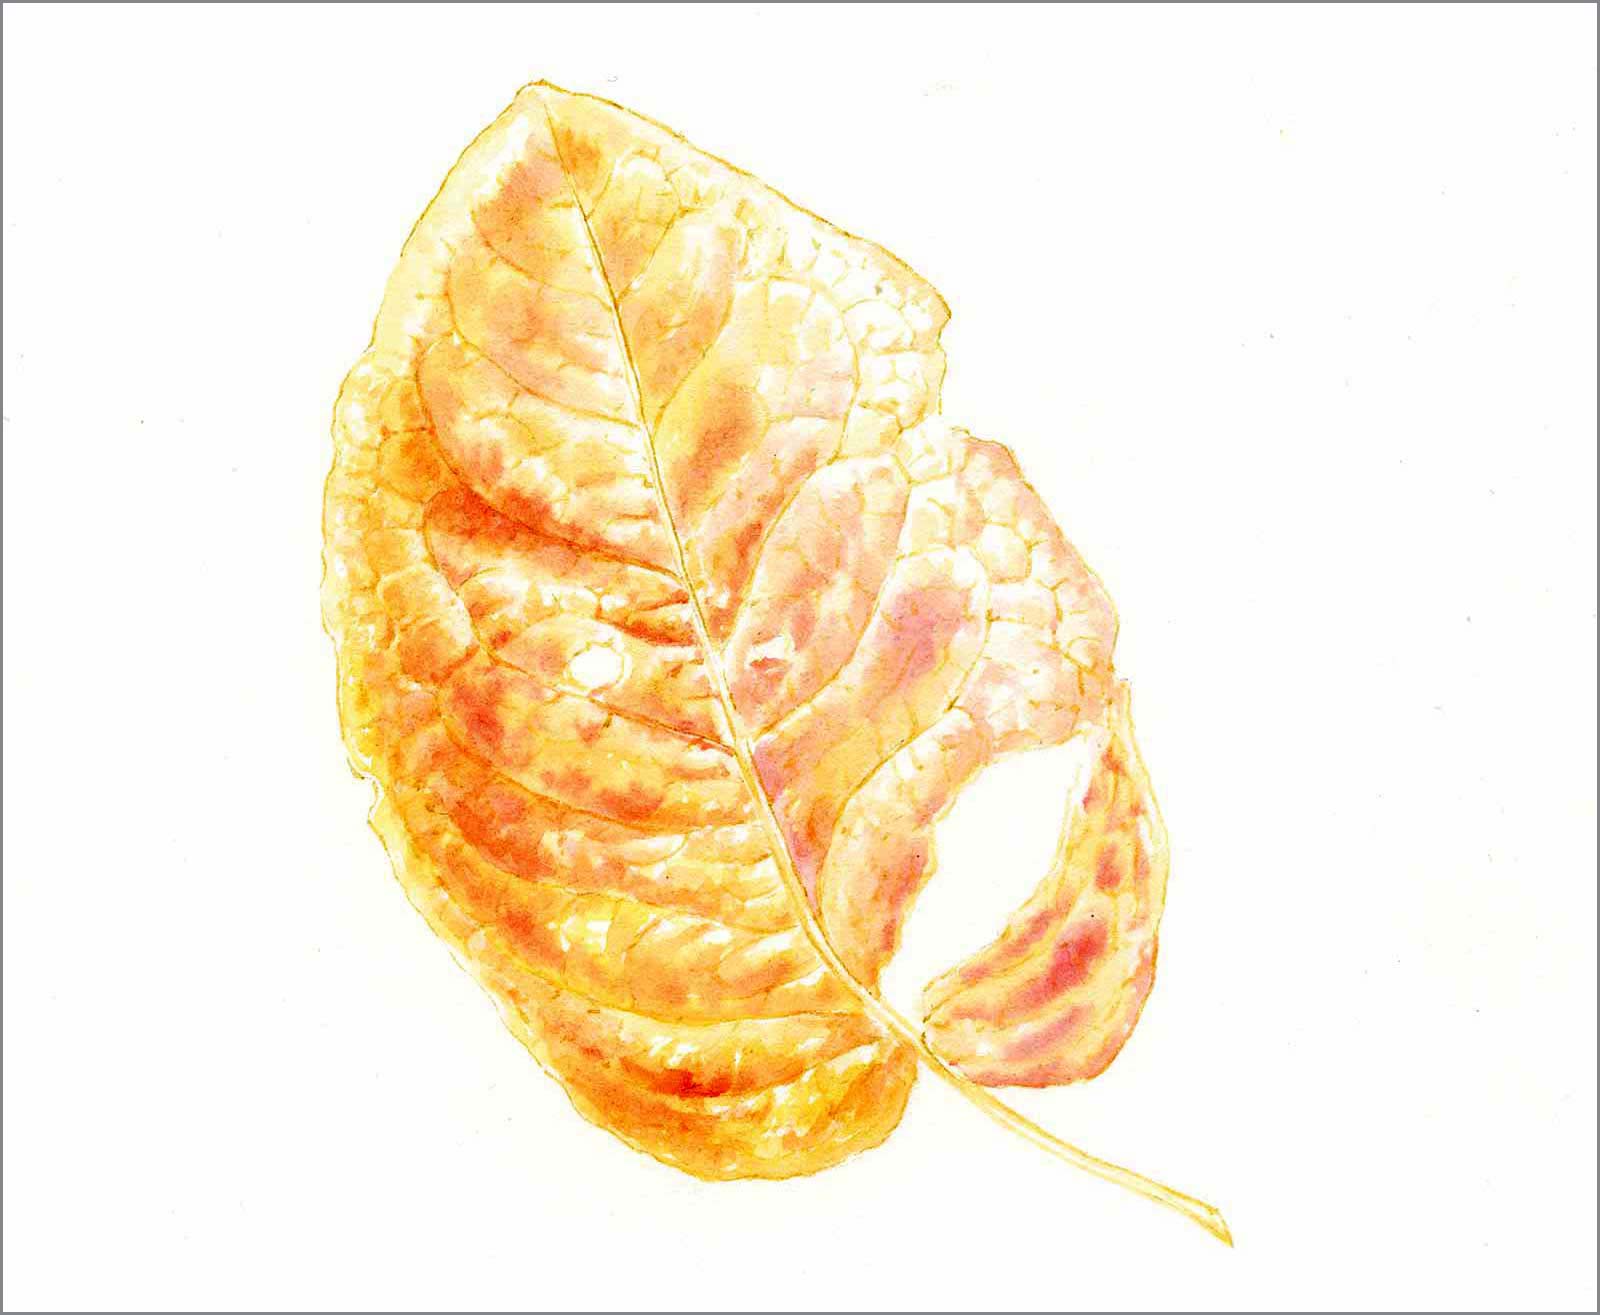
Stage 4 First Wash Finished
The initial wash is complete at this stage and allowed to dry, laying the foundation for the next stage, which is painting with a creamy mix of dry technique into dampened areas.
 Stage 5
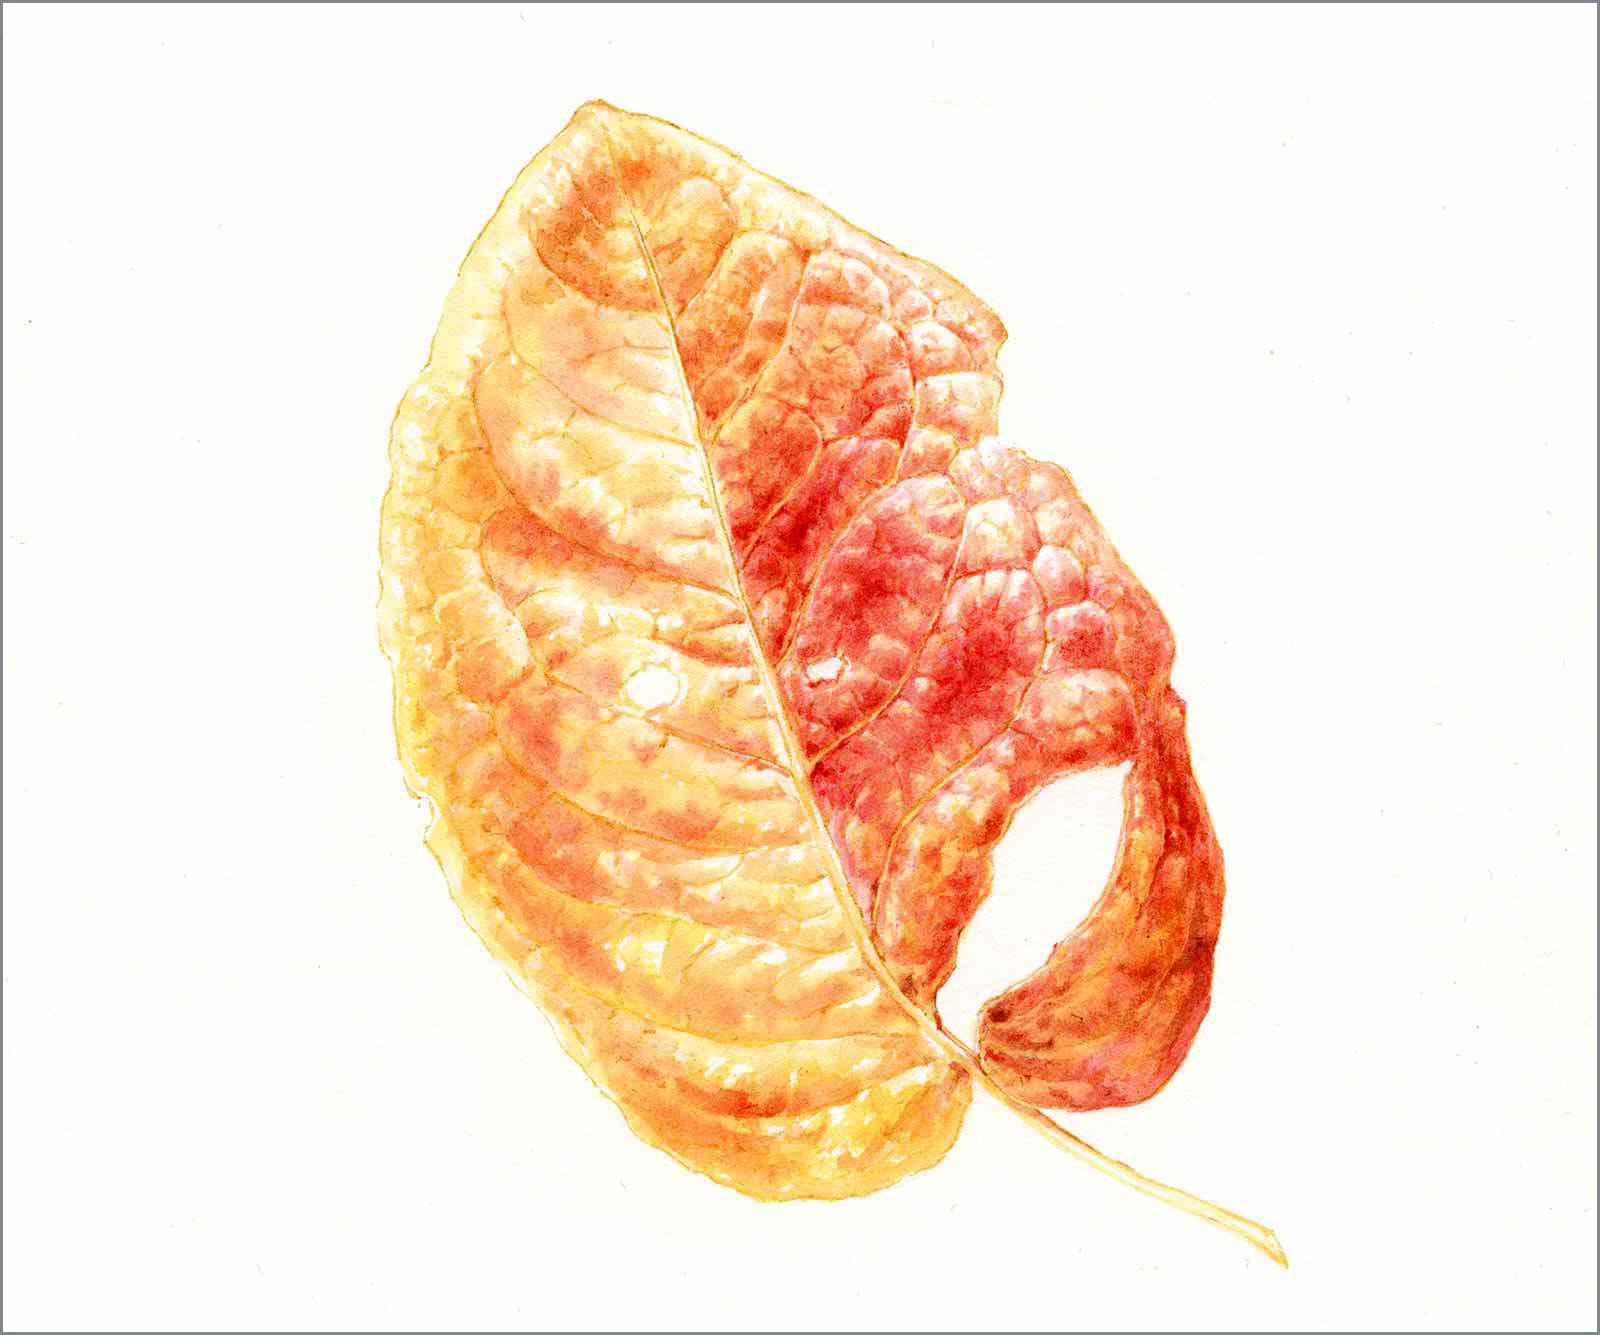
Stage 5 Second Layer and Hatching
The second layer is built using sizes 2 and 4 brushes, continuing painting into damp but also drawing in fine veins and hatching with the small brush. The color is softened with the larger brush.
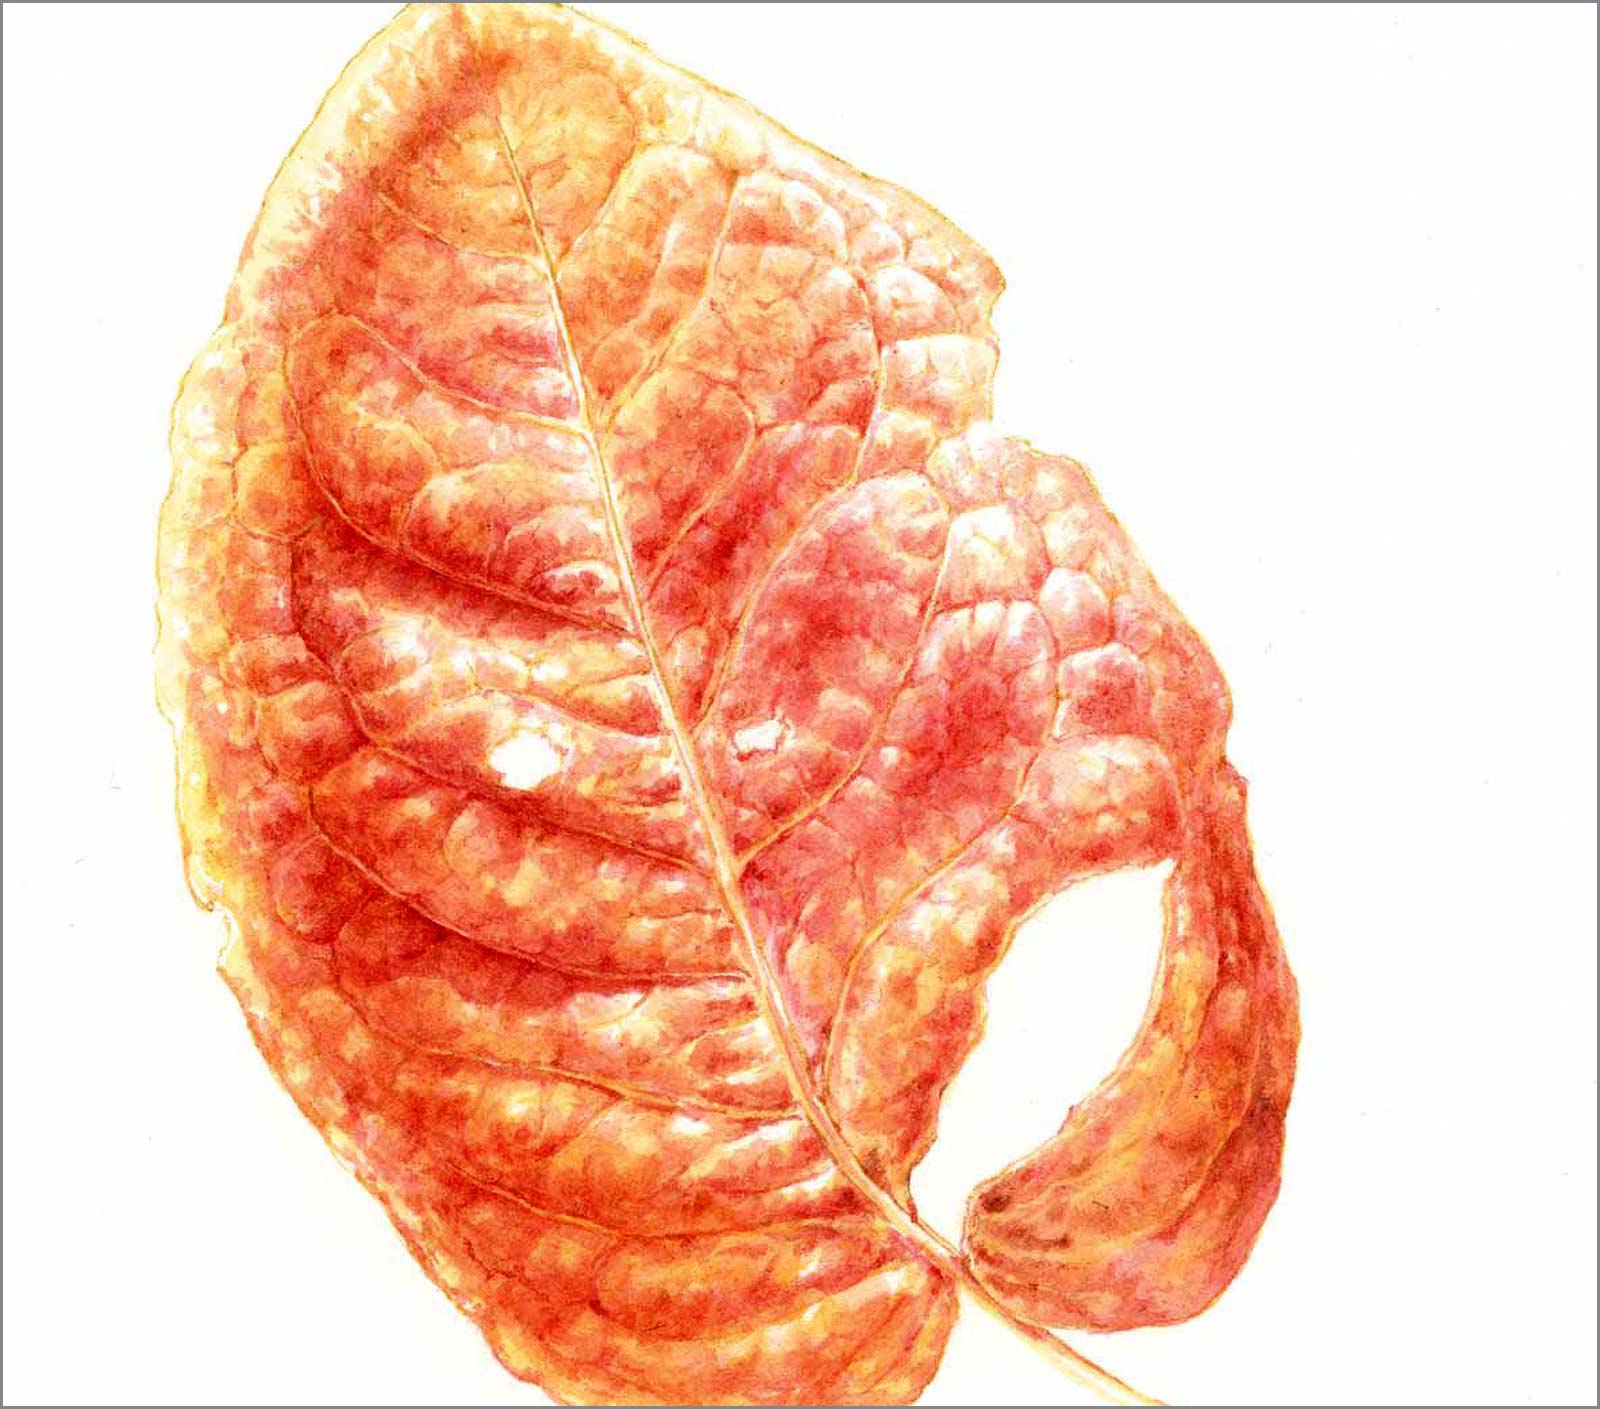 Stage 6
Stage 6 Shade Side
The same process is completed on the left blade, noting that this side is in the shade and is therefore darker. Permanent carmine is added as the darker red and scarlet lake create warmer reds.
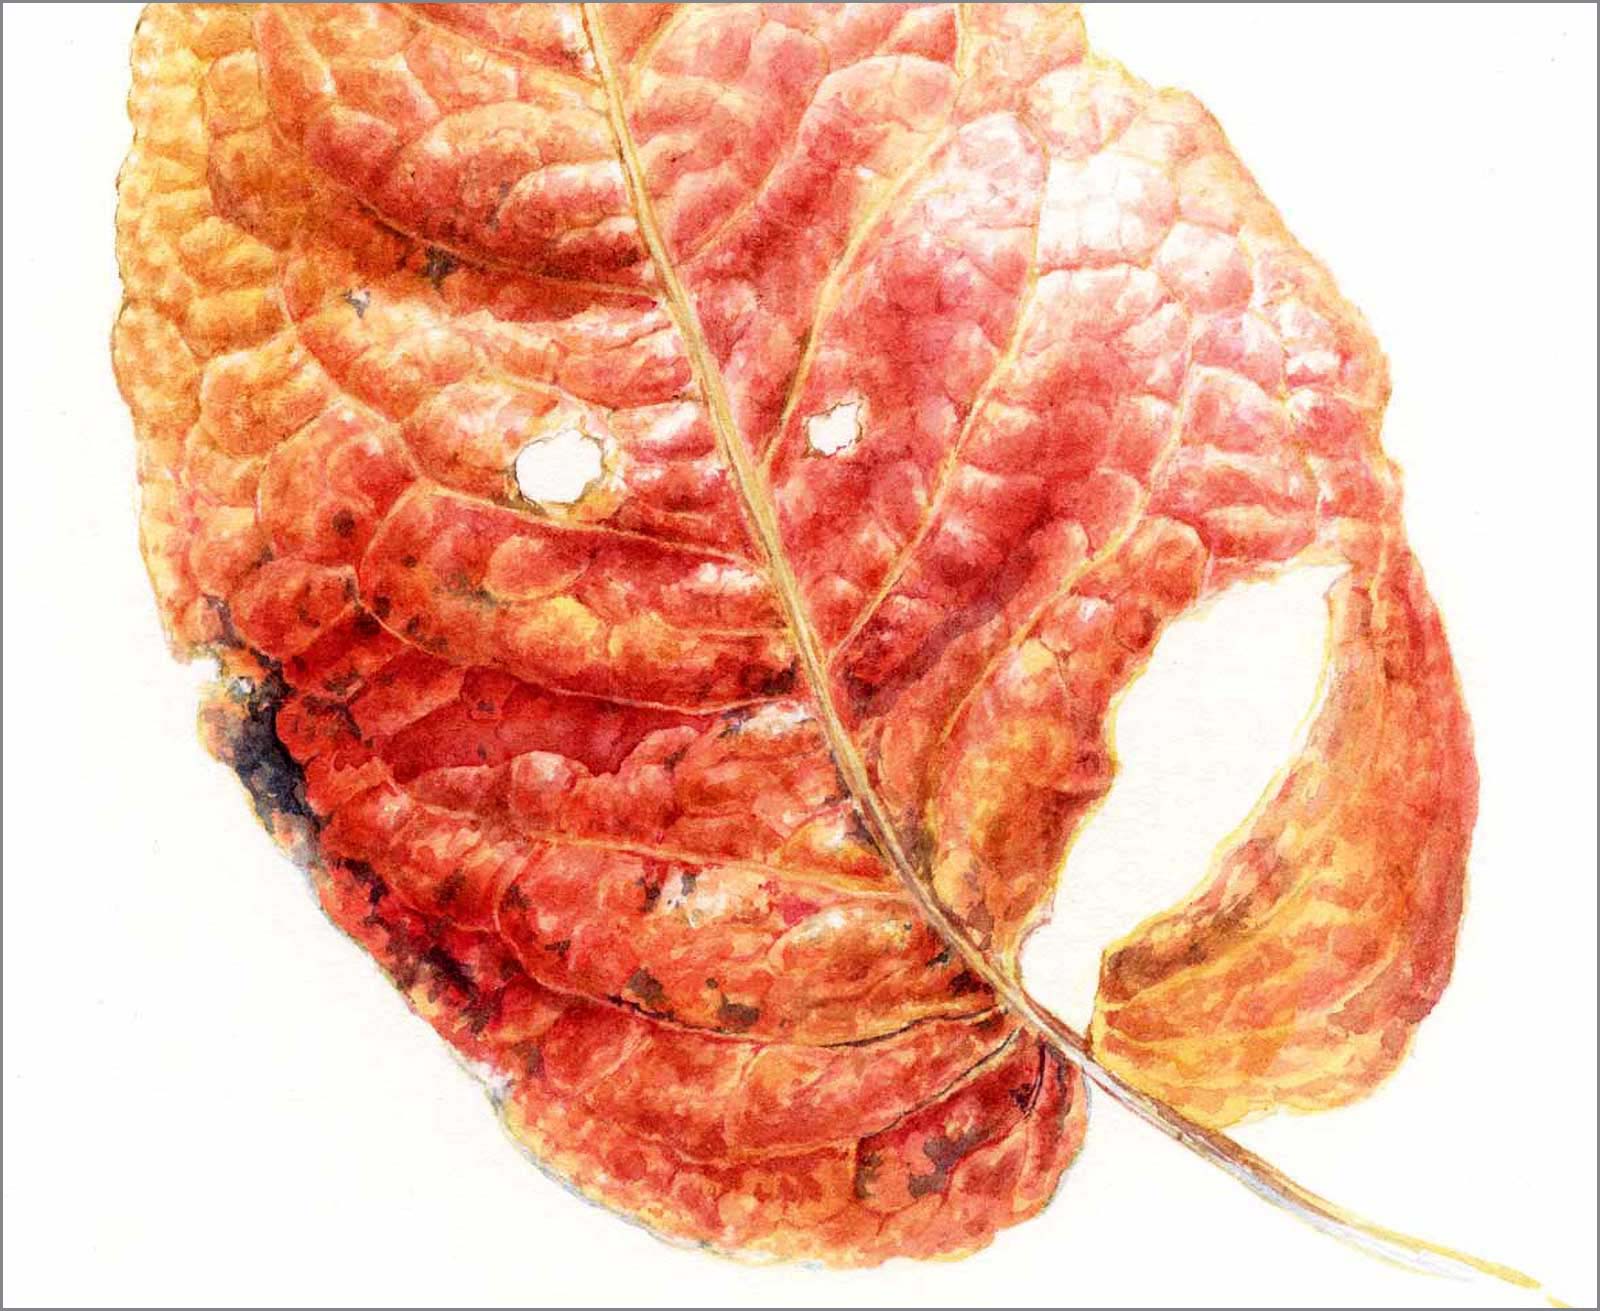 Stage 7
Stage 7 Building Detail
The whole leaf is deepened, intensifying color, form and detail using a dry brush on dampened areas and dry on dry. A size 2 brush is used with soft hatching strokes to develop the darker shadows.
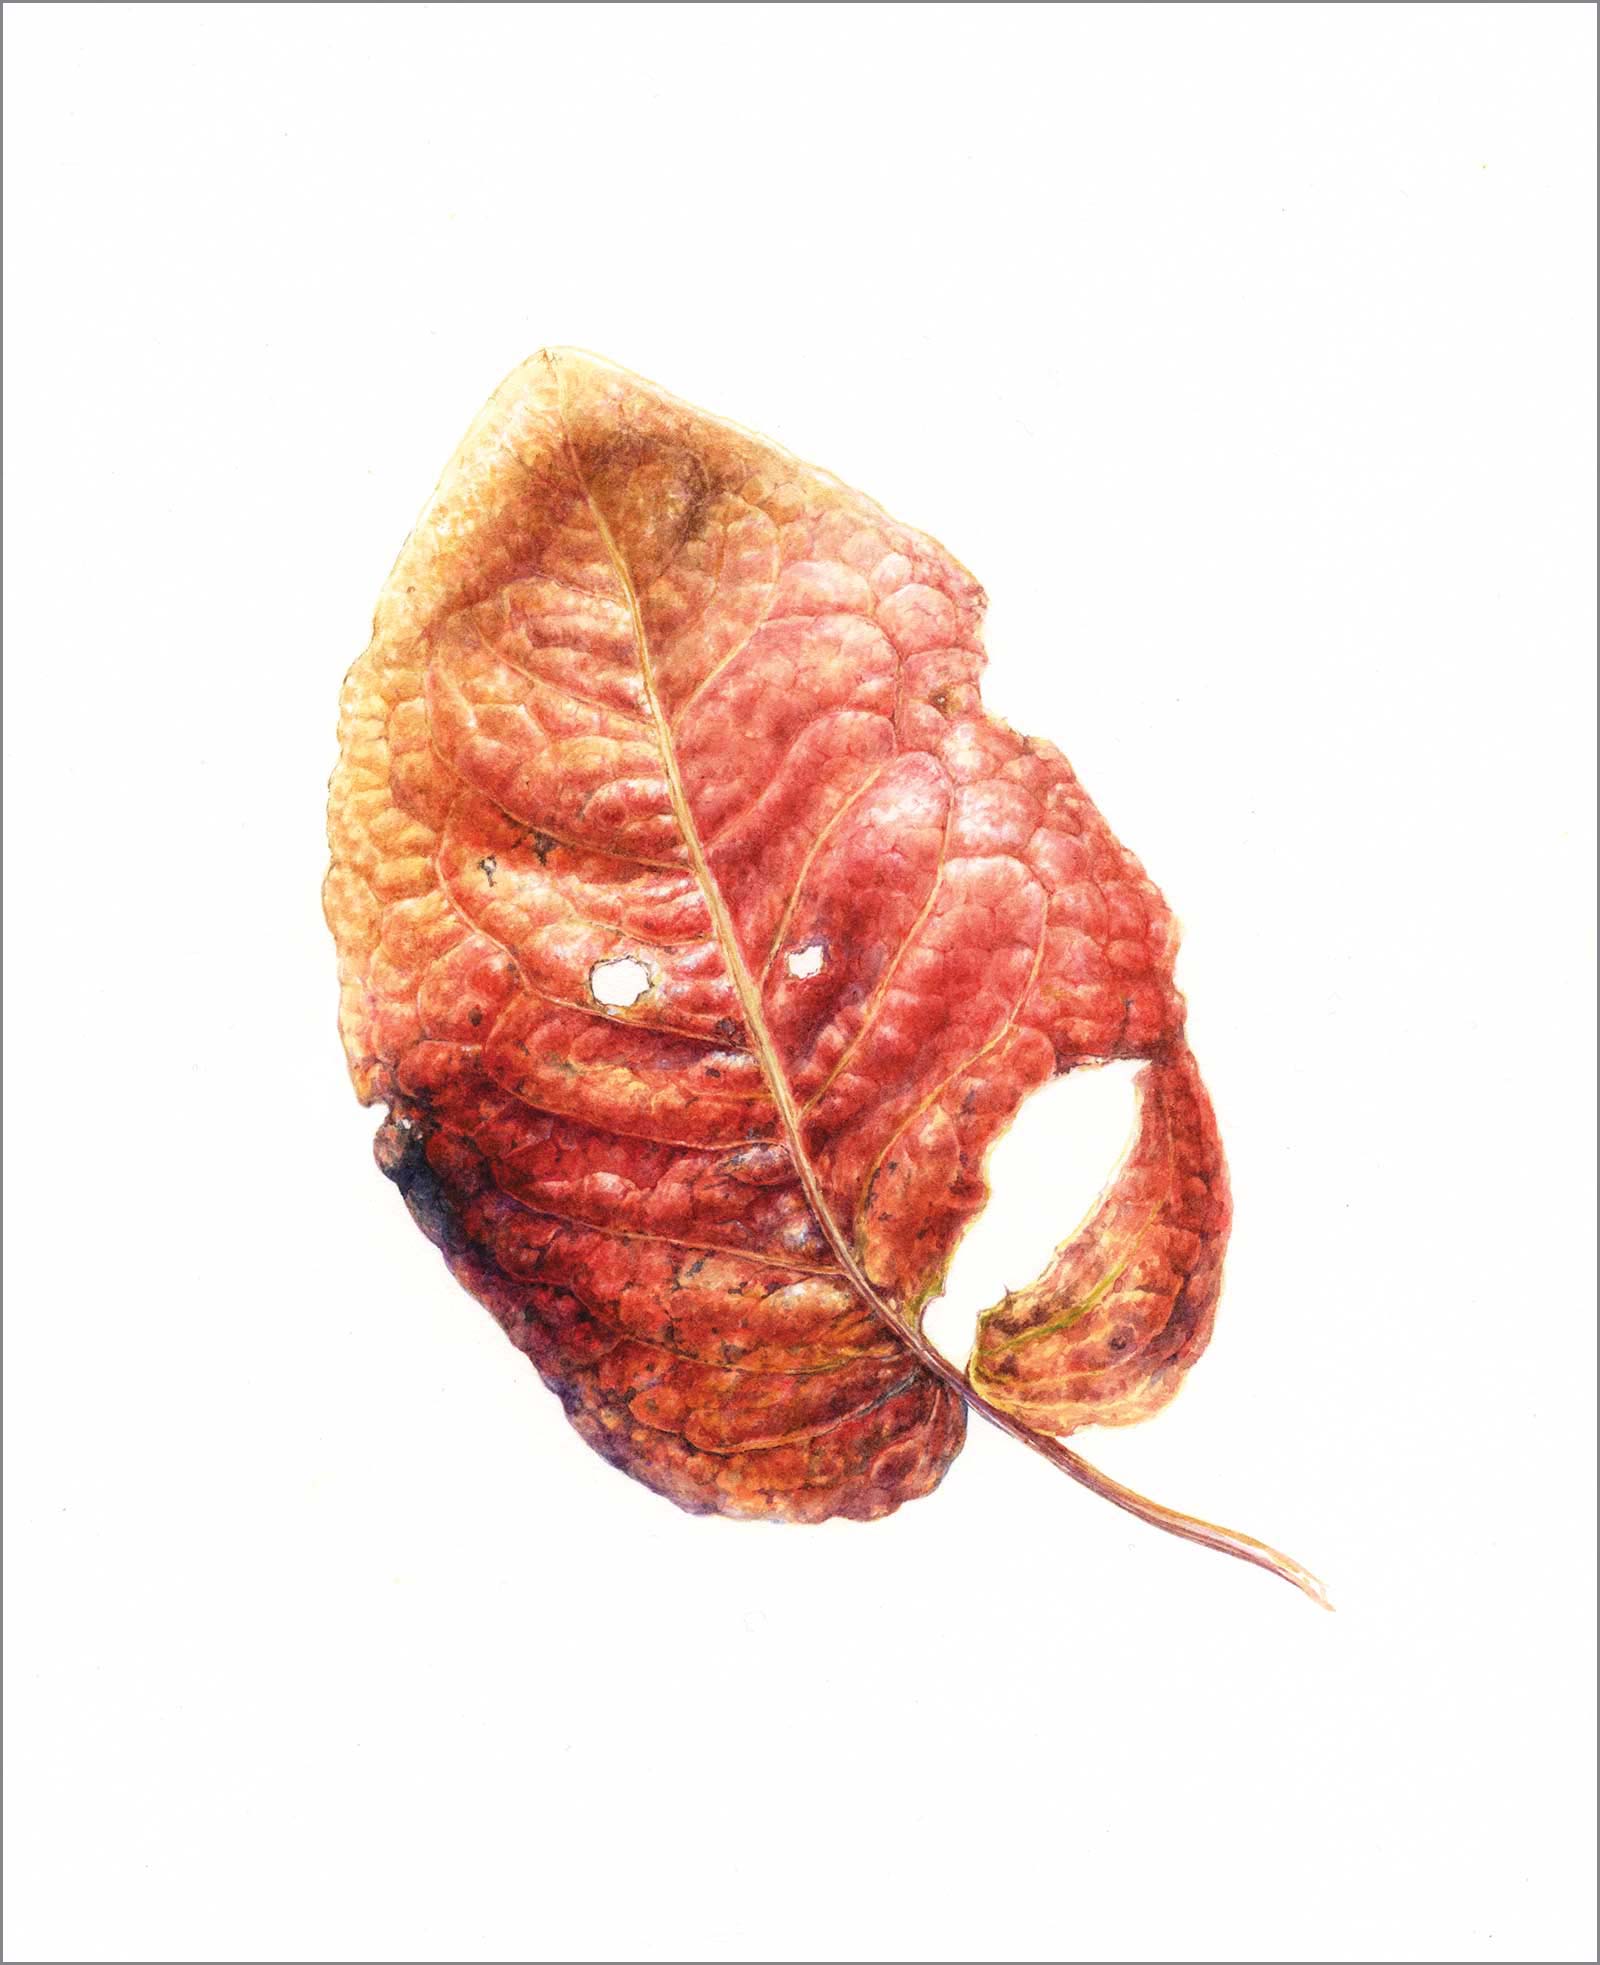 Stage 8
Stage 8 Final Details and Light Glazes
Autumn Rumex Leaf, watercolor, 11 x 9½" (28 x 24 cm)
In the final stage, detail and markings are added. Light glazes of yellow and red are added where color saturation is most intense. Violets are added to darker shade areas and blue scumbled into the highlights.
About the artist
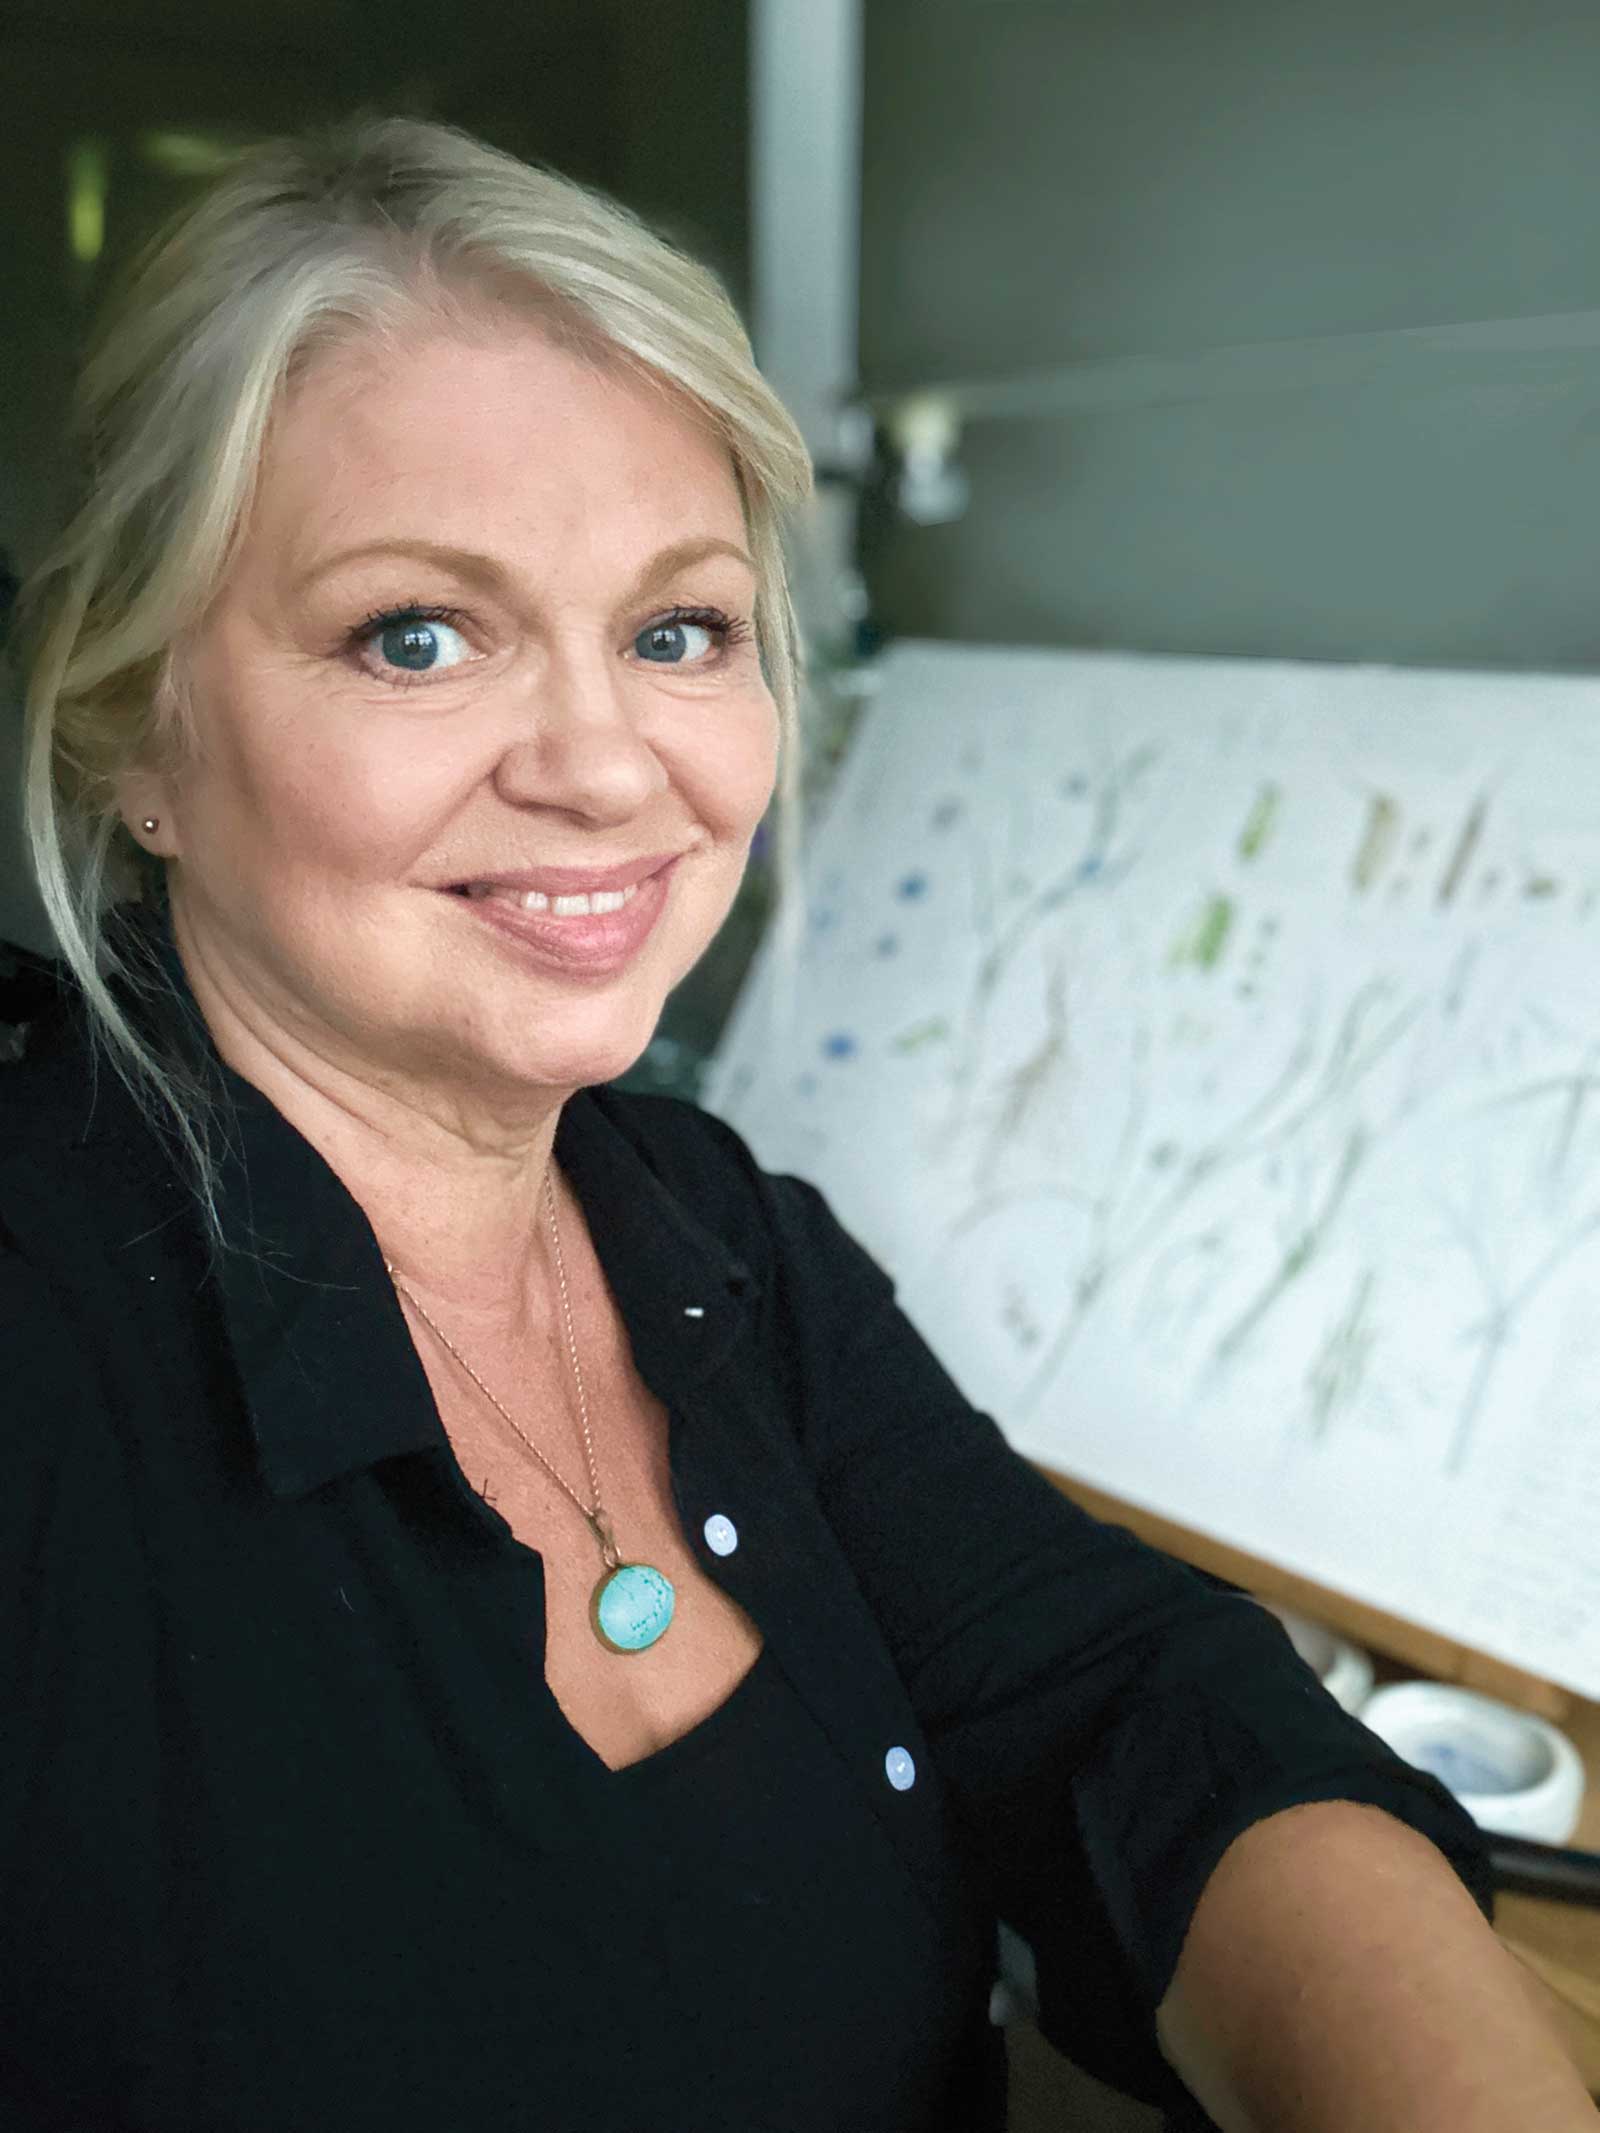 Dianne Sutherland
Originally trained as a ceramic painter with Royal Albert, Dianne Sutherland holds a Bachelor of Science in Biology and a DipSBA(Dist) with the Society of Botanical Artists, and she is a member of the Linnean Society.
She works in graphite and watercolor on paper and vellum, inspired by the British native plants and species from her travels. Her work is held in permanent collections at the Hunt Institute for Botanical Illustration in Pennsylvania, the Royal Botanic Garden Sydney Florilegium, the Royal Botanic Garden Edinburgh Florilegium and the Singapore Botanic Gardens where she was awarded Best in Show by the Botanical Art Society (Singapore). Sutherland was highly commended for her Fritillaria painting on vellum at the New York Design Center with the American Society of Botanical Artists.
Currently, the artist is writing two instructional books. The first focuses on painting on vellum, and the second will be a publication on botanical sketchbooks.
Contact at
www.diannesutherland.com