



The chaotic arrangement of shapes, colors and textures in this group of medieval buildings in Albi, France, makes it an absorbing subject. At first glance it looks a little overwhelming—but once you break it down into a few larger shapes then break these up with the smaller shapes of buildings, walls and windows, it becomes much more manageable.
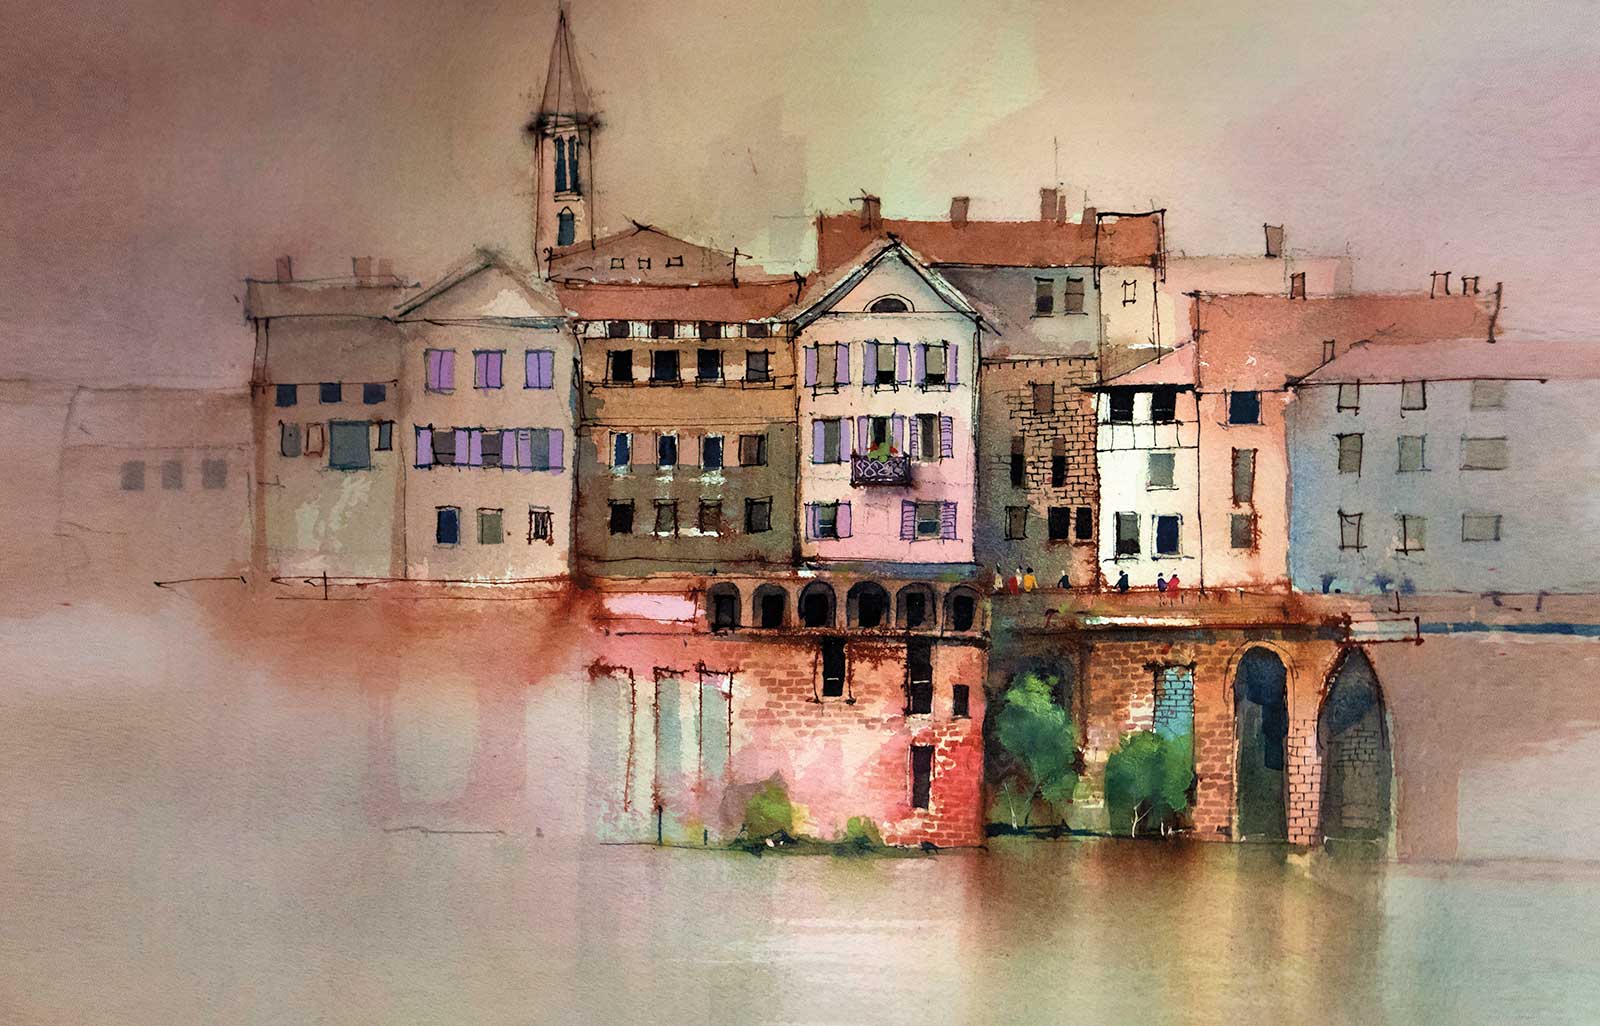
This painting is of the town of Albi in Southern France. It was done on 300gsm Arches cold-pressed paper using watercolor, white gouache, white gesso, burnt sienna ink and charcoal pencil.
Draw things as accurately as you can, but don’t worry if you miss out on a few windows or a couple of your buildings are out of scale or in the wrong place. We are not after a photographic record, it’s more an interpretation of what we see. The quirks and twists of inaccuracy can add character to what might be a very accurate but uninteresting painting.
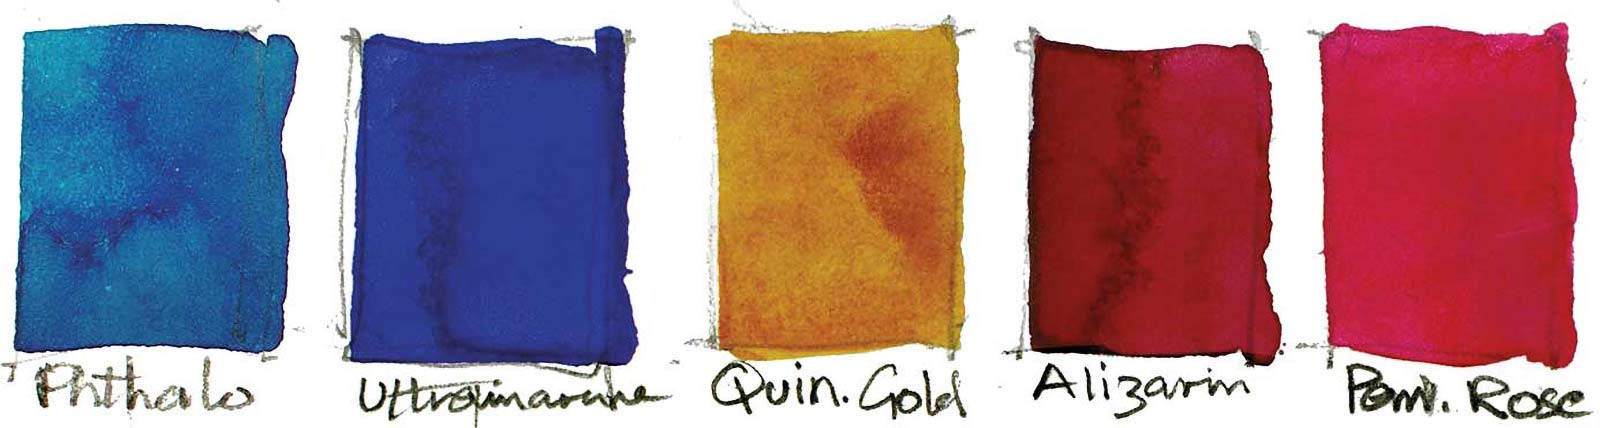
Apart from the white gouache and white gesso, the other paint colors I used were:
- Phthalo blue (green shade)
- French ultramarine blue
- Quinacridone gold
- Permanent alizarin crimson
- Permanent rose
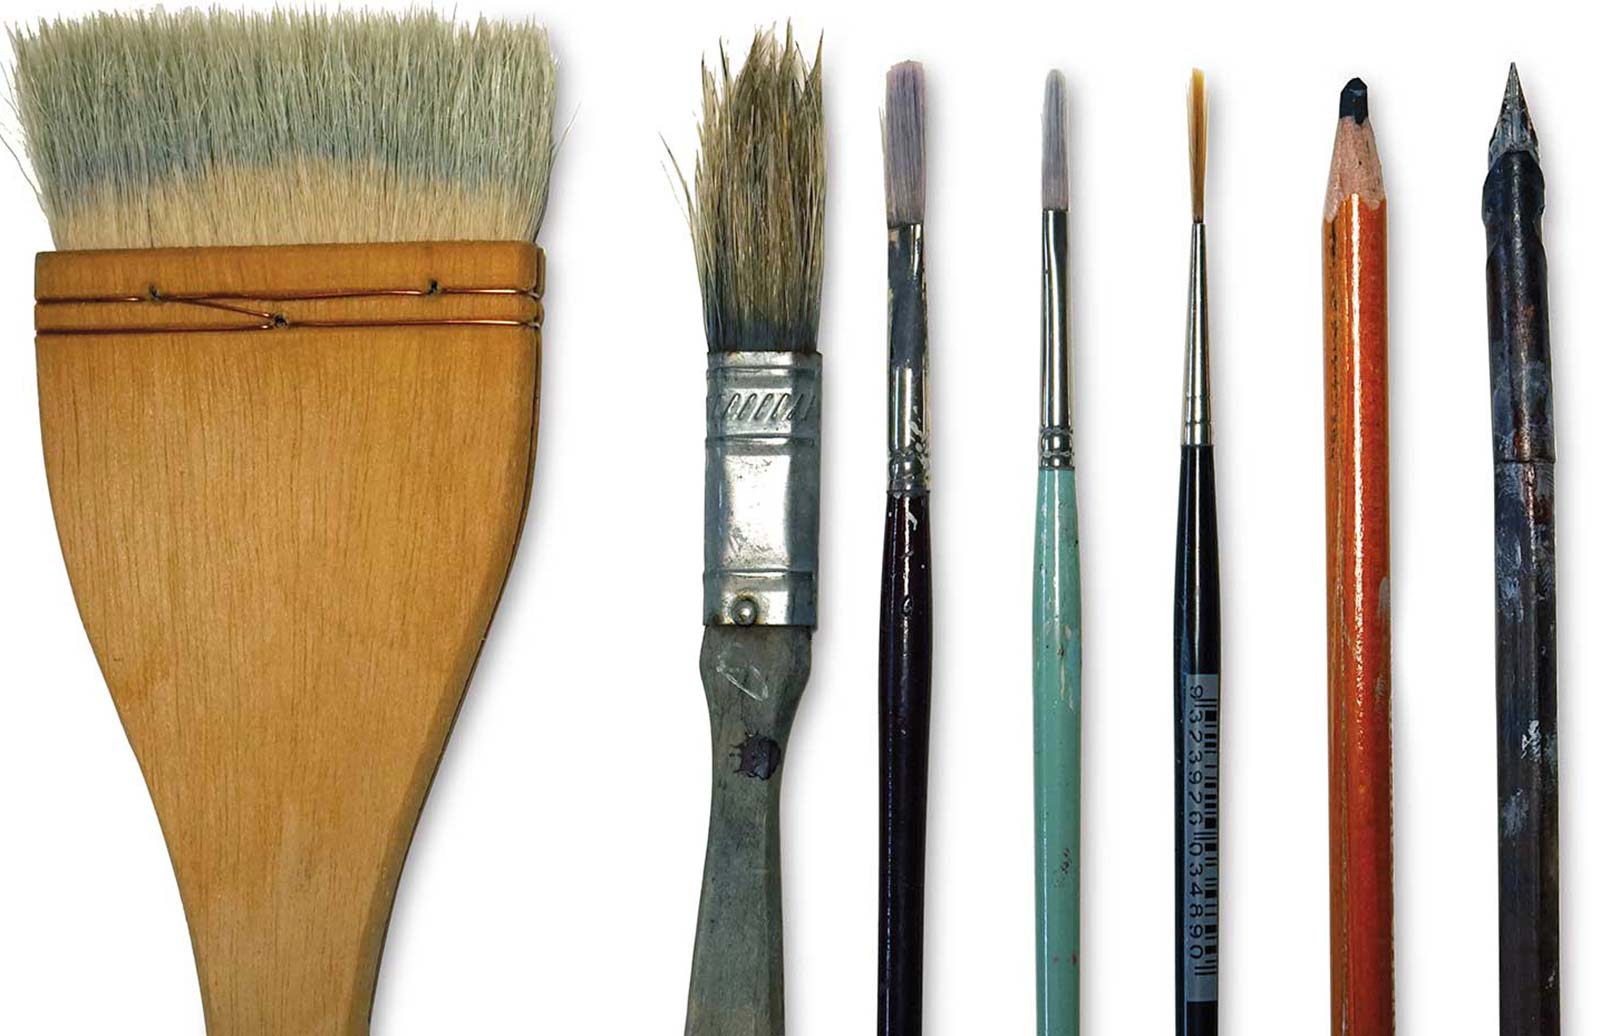
Brushes and other materials I used:
- 3" goat hair Hake
- ½" bristle brush
- ¼" long, flat Taklon
- 1⁄8" long flat Taklon
- #1 Taklon rigger
- Medium charcoal pencil
- Dip in pen with plain nib
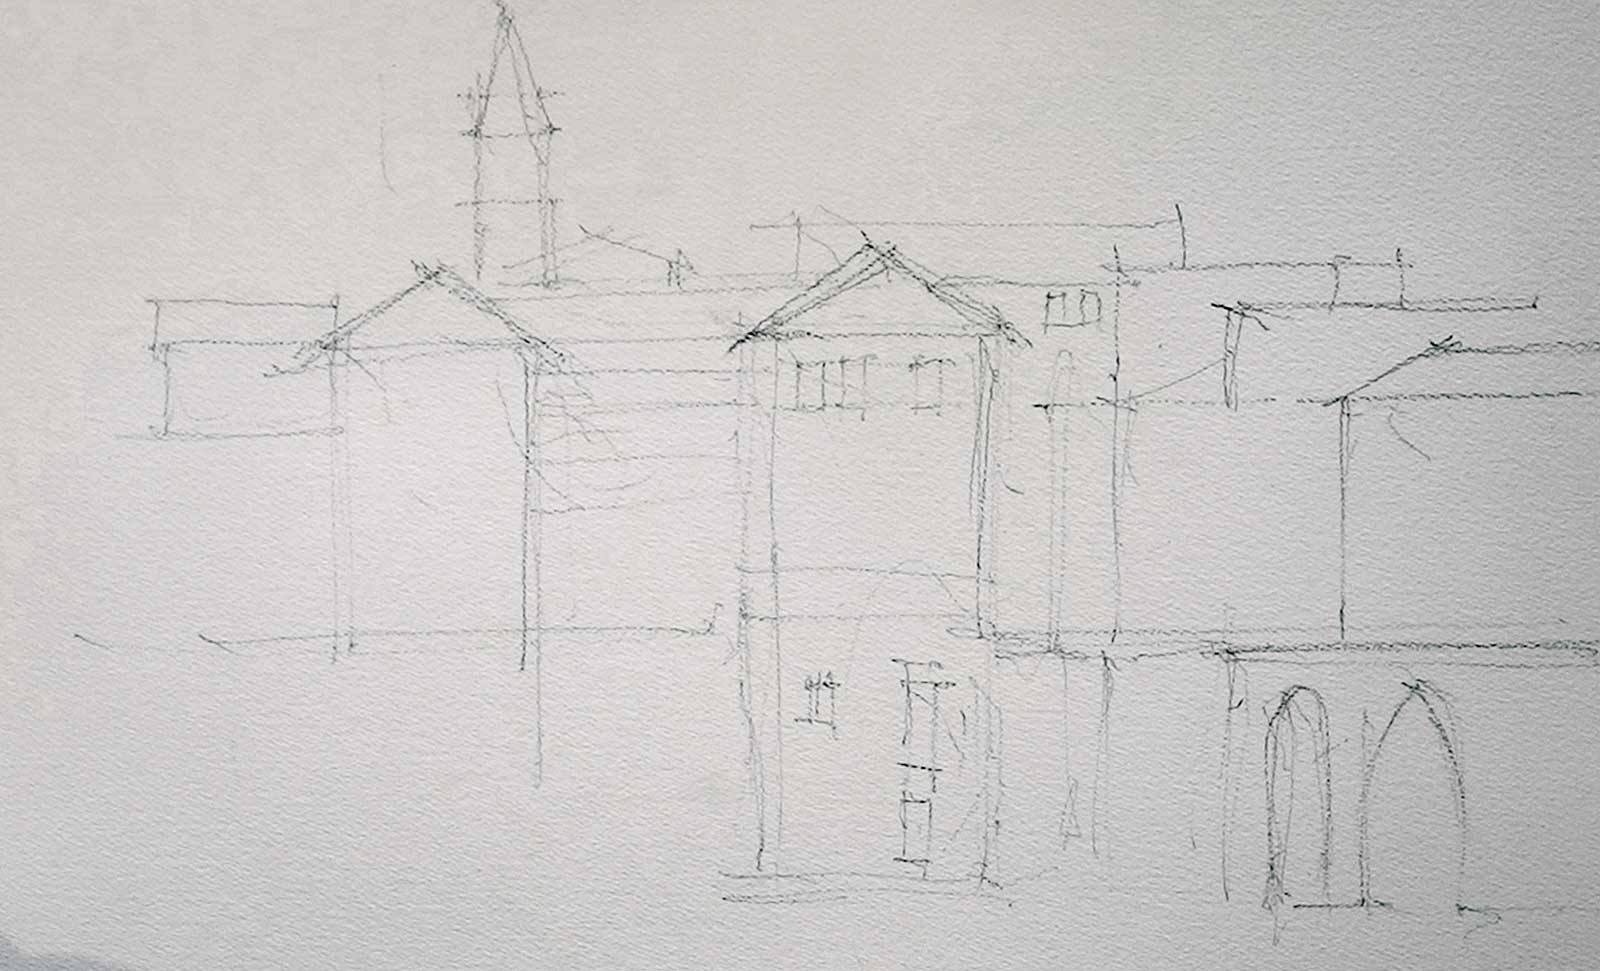 Stage 1
Stage 1
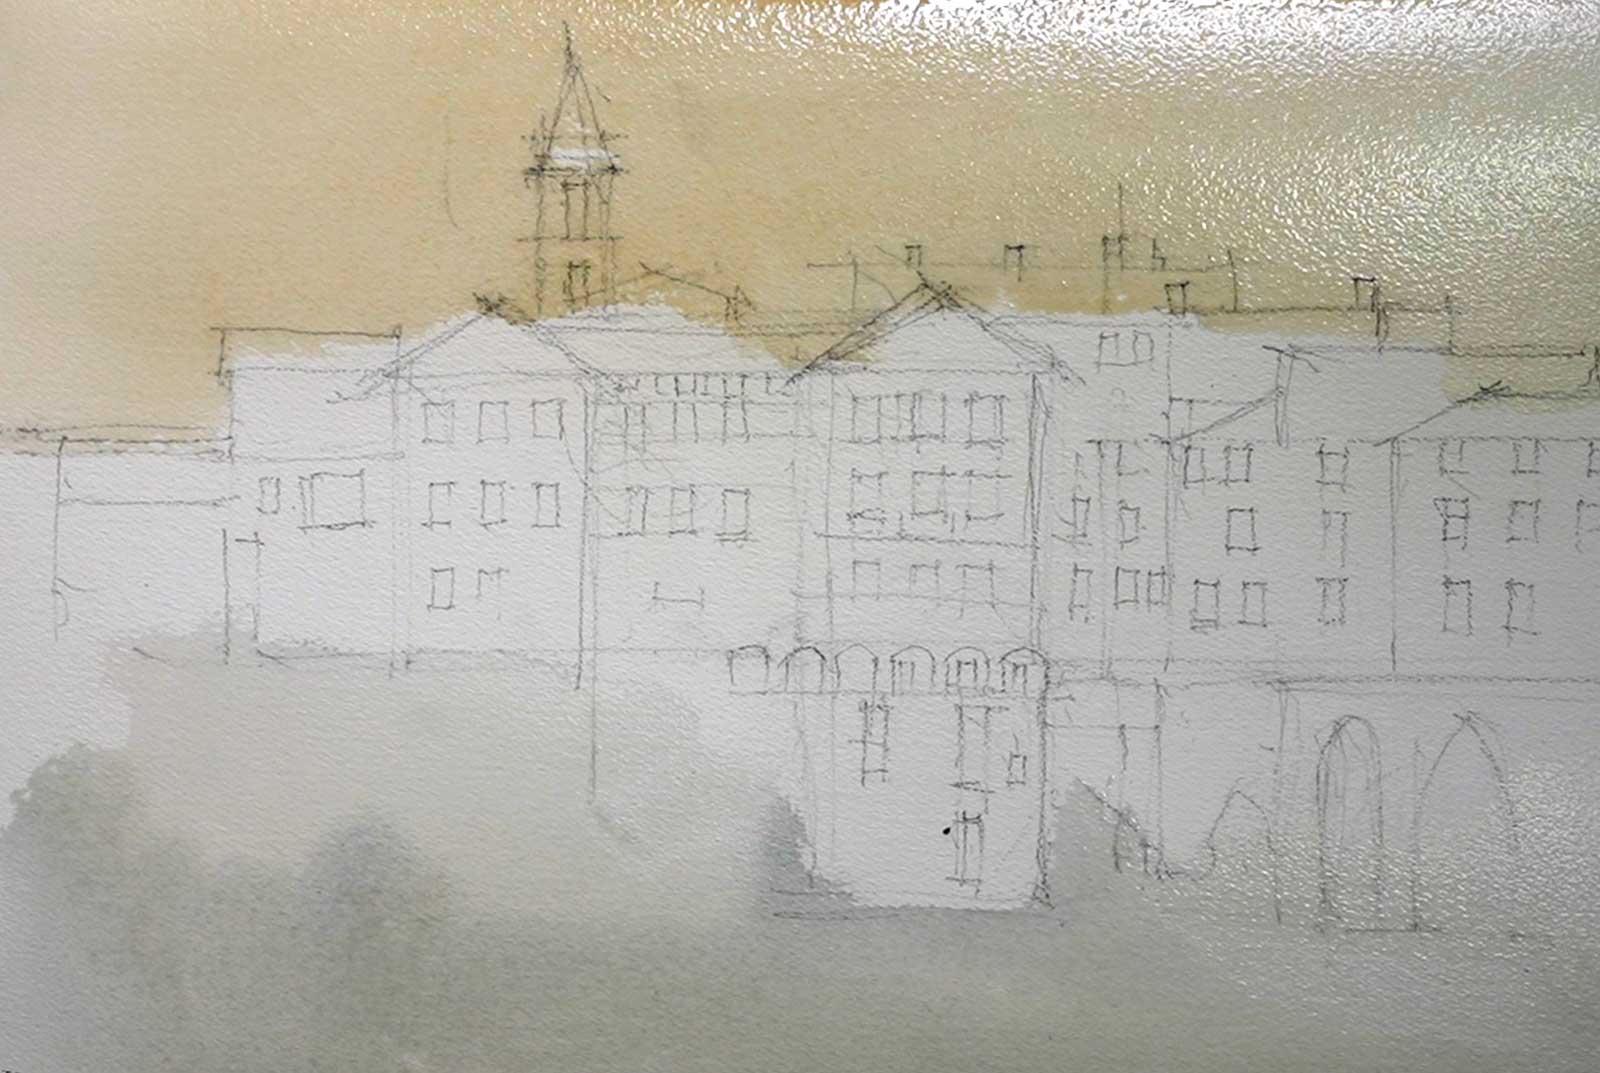
The first step is to lightly sketch the composition. I placed the region of shadows, arches and bushes off center and to the right to work as a focal area. Placing the white building with dark windows above the green bushes helps reinforce the focal area.
 Stage 2
Stage 2
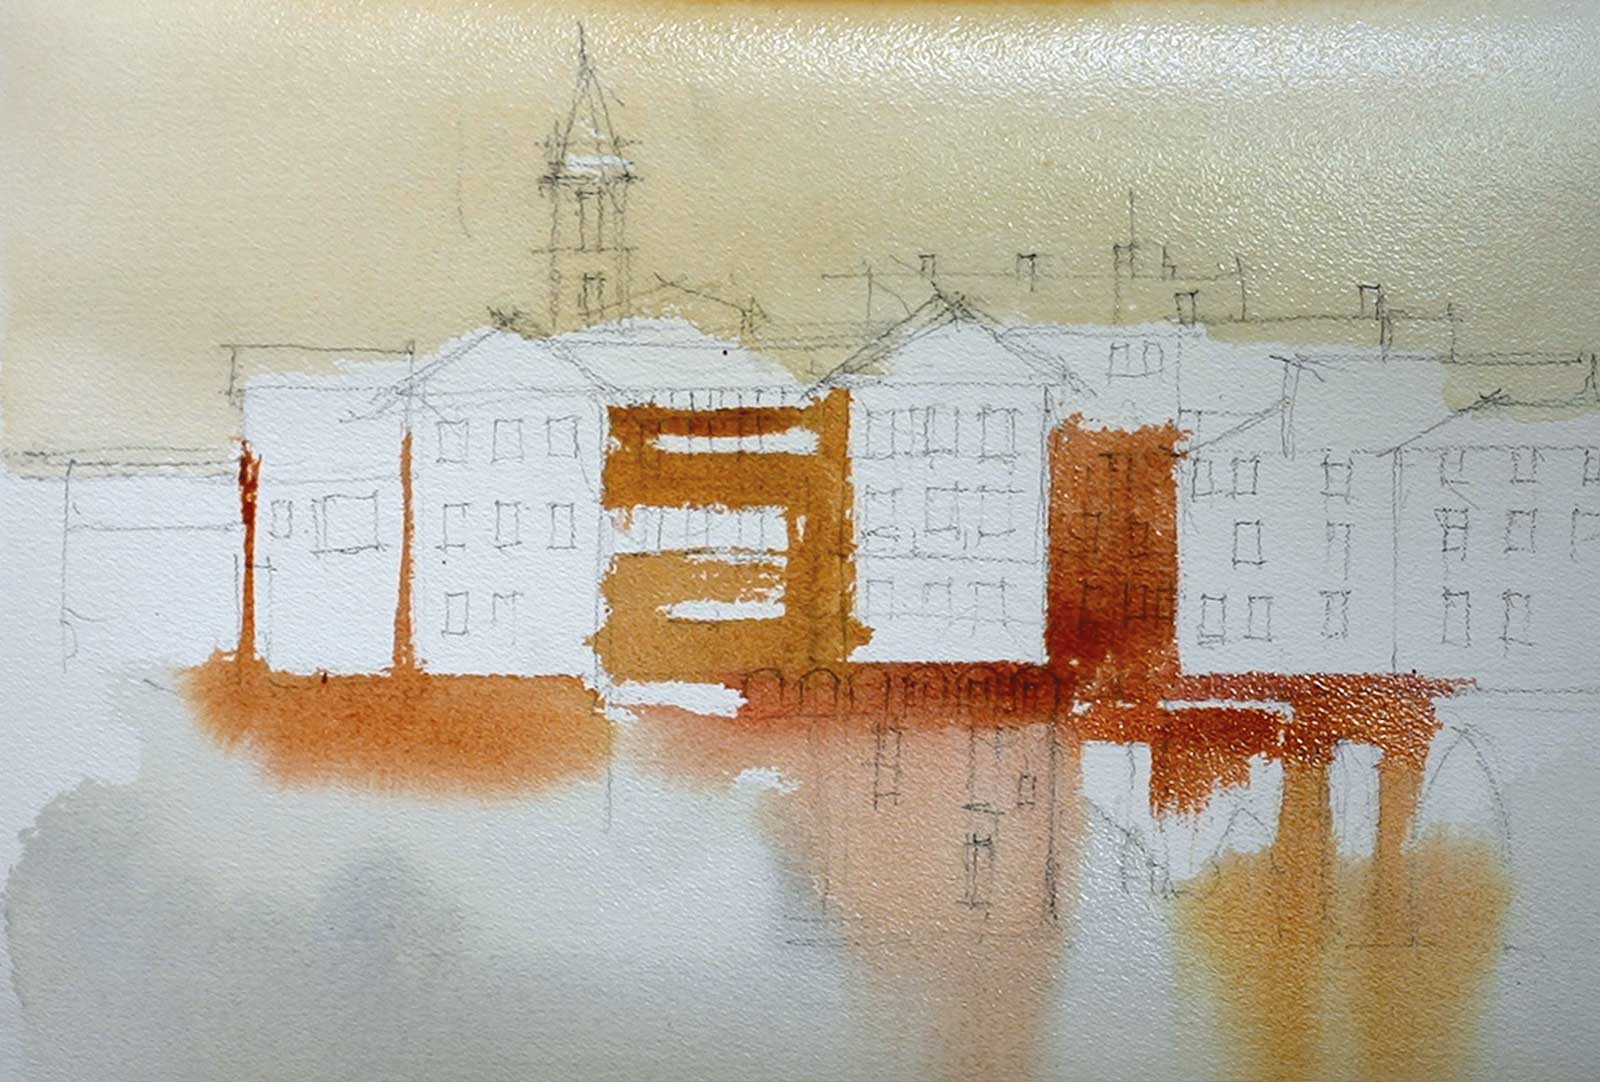
The first dirty yellow wash of quinacridone gold, alizarin and ultramarine was graded through the sky. The same mixture was adjusted with the addition of more ultramarine and washed over the water. The color of these washes are not critical, but it is important to keep them nice and light. They can be adjusted, if necessary, with more layers once they dry.
 Stage 3
Stage 3
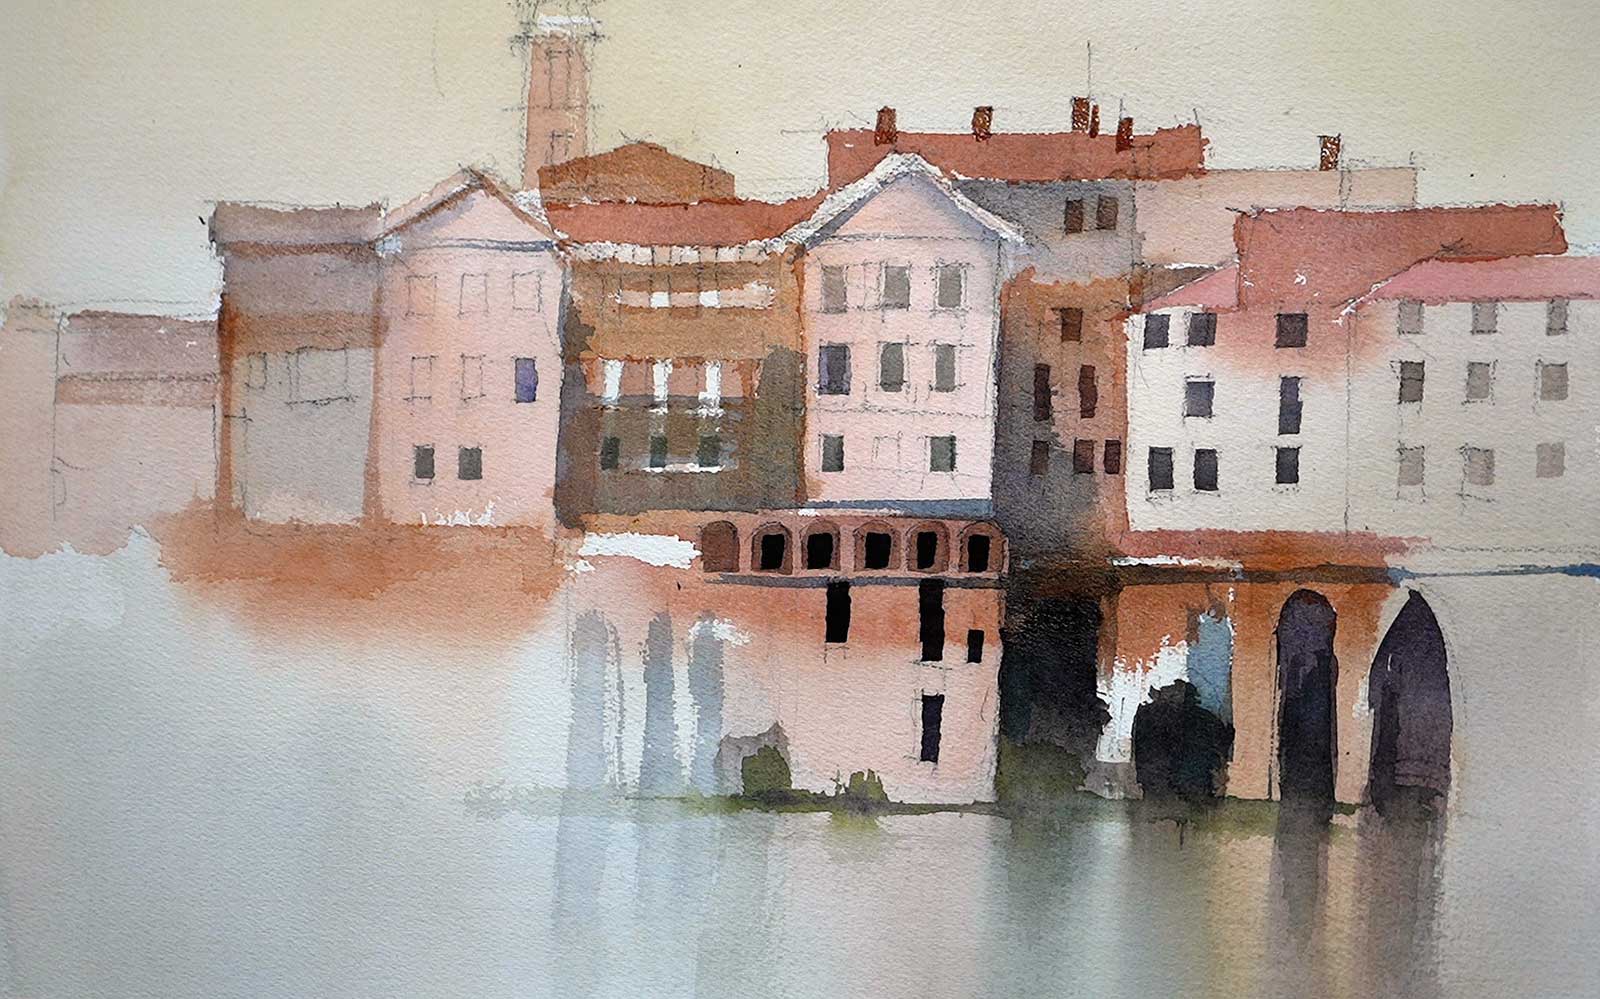
The puddle of the same three colors was again adjusted to make a dirty red/orange and some of the building shapes were applied. Using the ½" bristle brush gives a nice variety of rough, unpredictable lines. These marks will contrast nicely with the more geometric marks made with the square Taklon brushes. These marks were applied while the first washes were still wet. You can see how they have bled down into the water at the bottom. The gentle application of a dry hake brush pulled vertically down through the water will keep these bleeds under control.
 Stage 4
Stage 4
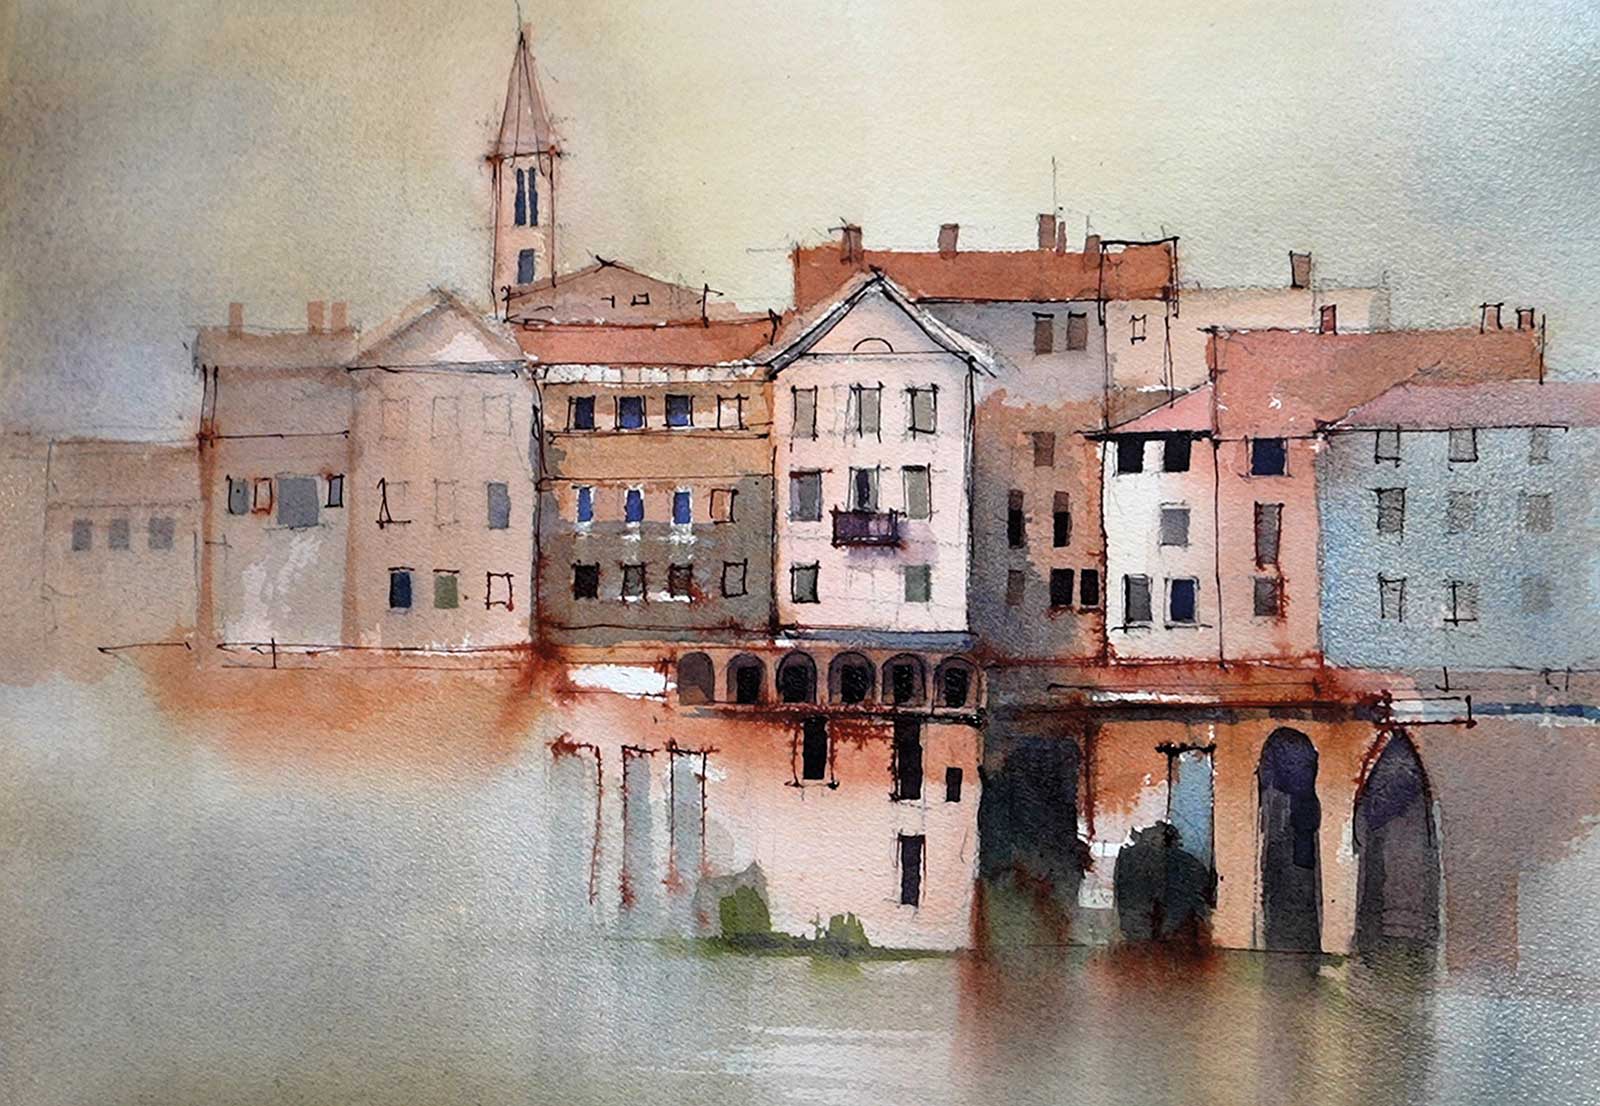
Once everything has dried we can use our long flat brushes to build up some more precise details across the surface of the buildings. The dark mixture is made from the same three colors, but with lots of pigment and very little water (if you’re not getting it dark enough you are making the mixture too wet). I concentrated the darks around the focal area then diluted the mixture as I moved away from that area.
 Stage 5
Stage 5
Next, some fine rigger lines sharpened up some of the details. A dip in pen and burnt sienna pigment ink lines were threaded through the buildings, particularly around the focal area. Spraying these lines with a mist of water makes the bleed into interesting warm stains.
 Stage 6
Stage 6
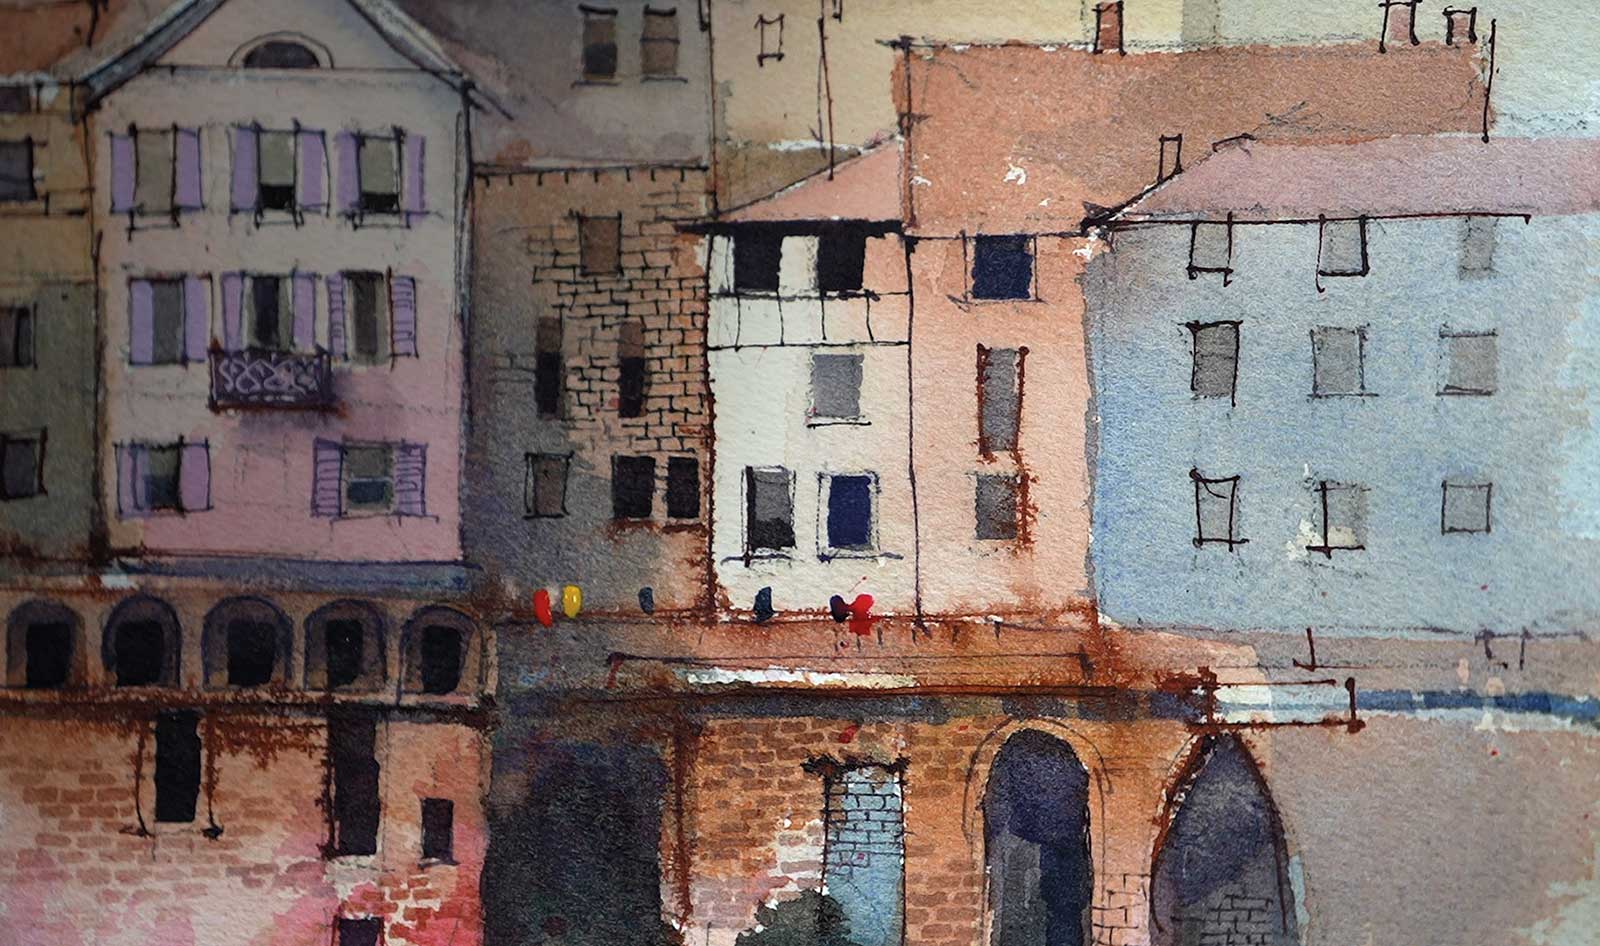
Bricks and figures were added with the 1⁄8" flat brush and the rigger.
 Stage 7
Stage 7
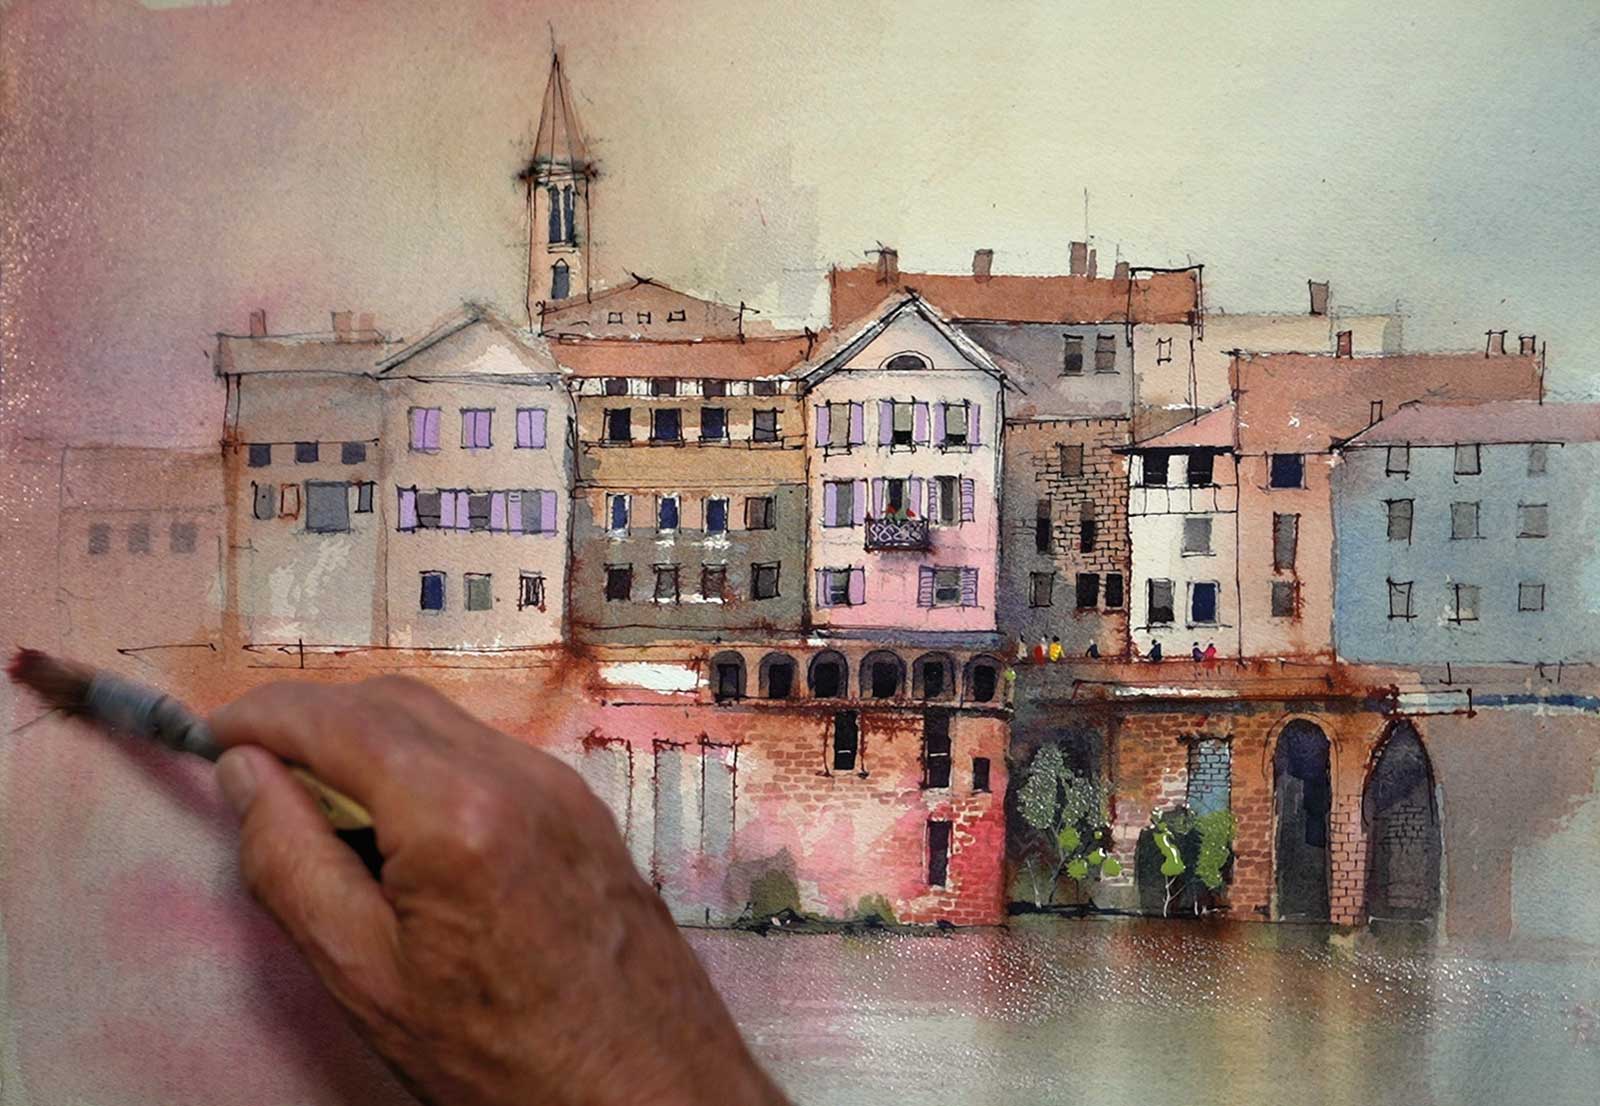
The green bushes were painted loosely into the focal area and a splash of pure permanent rose was dropped into the lower wall. The buildings were left to dry, then a pale wash of permanent rose was graded over either side of the painting.
 Stage 8
Stage 8
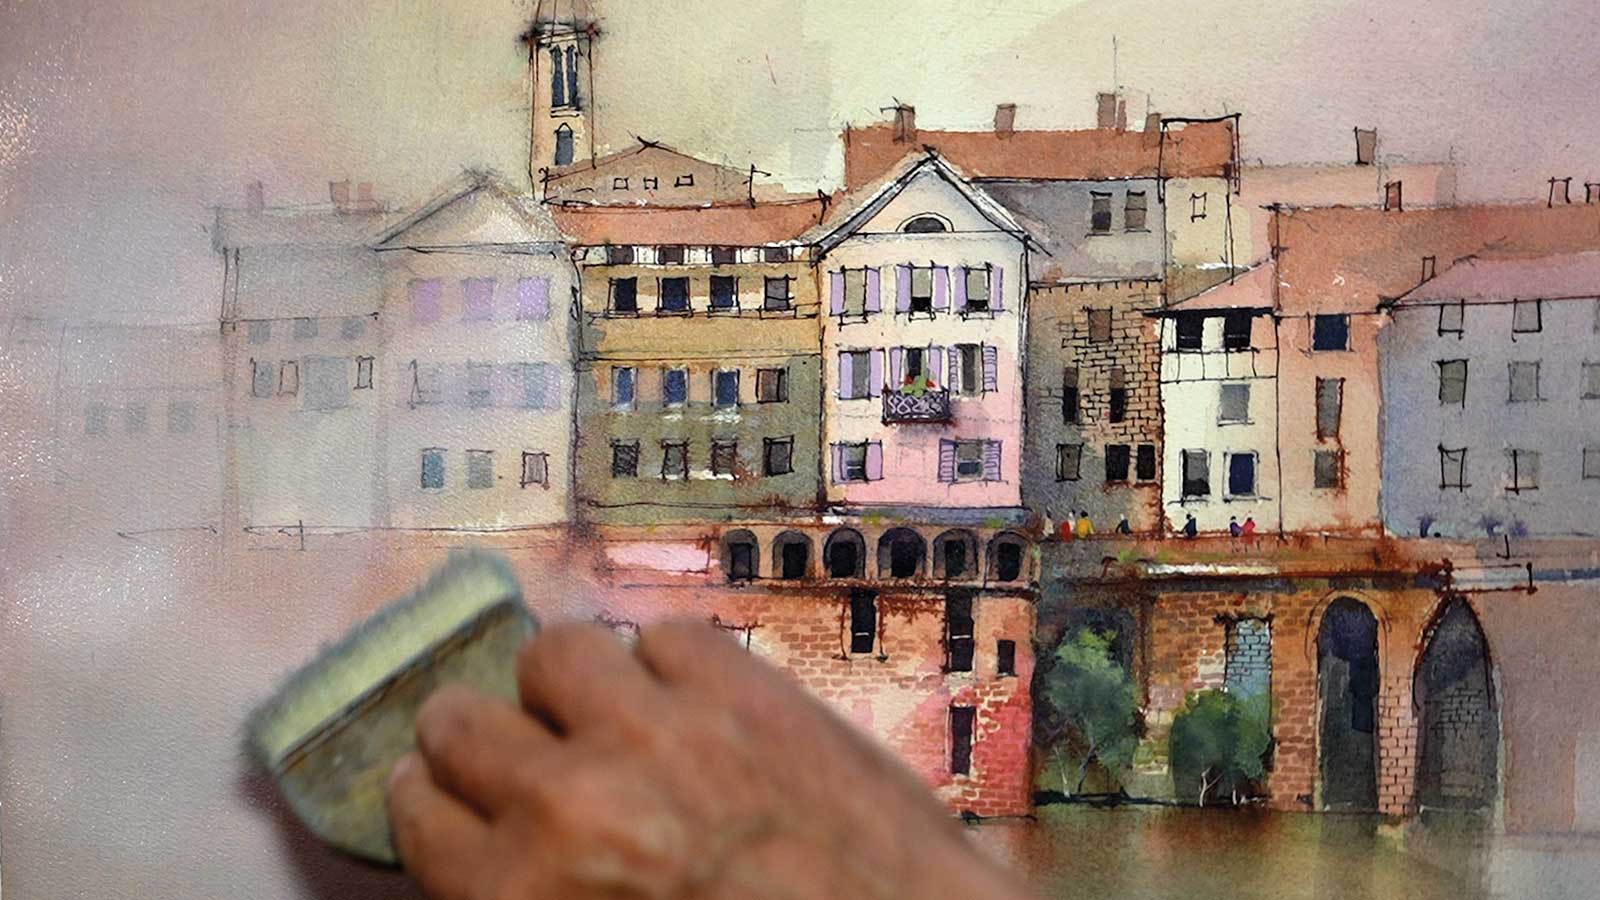
Everything was left to dry again, then a glaze of gesso was applied to the bottom left of the painting. The area was completely coated with undiluted gesso using the ½" bristle brush. As soon as the gesso has been applied, the brush is washed out thoroughly in water then worked back across the gesso to dilute it. This washing and diluting is done three to four times making sure the gradation from the untouched area of the painting to the gesso glazed area is as even and invisible as possible. Once you are happy with the dilution of the gesso, a dry hake brush can be used very gently, one stroke at a time, to feather out the gesso. Make sure you dry the hake brush after every stroke so you don’t end up with white stripes where you don’t want them.
 Stage 9
Stage 9
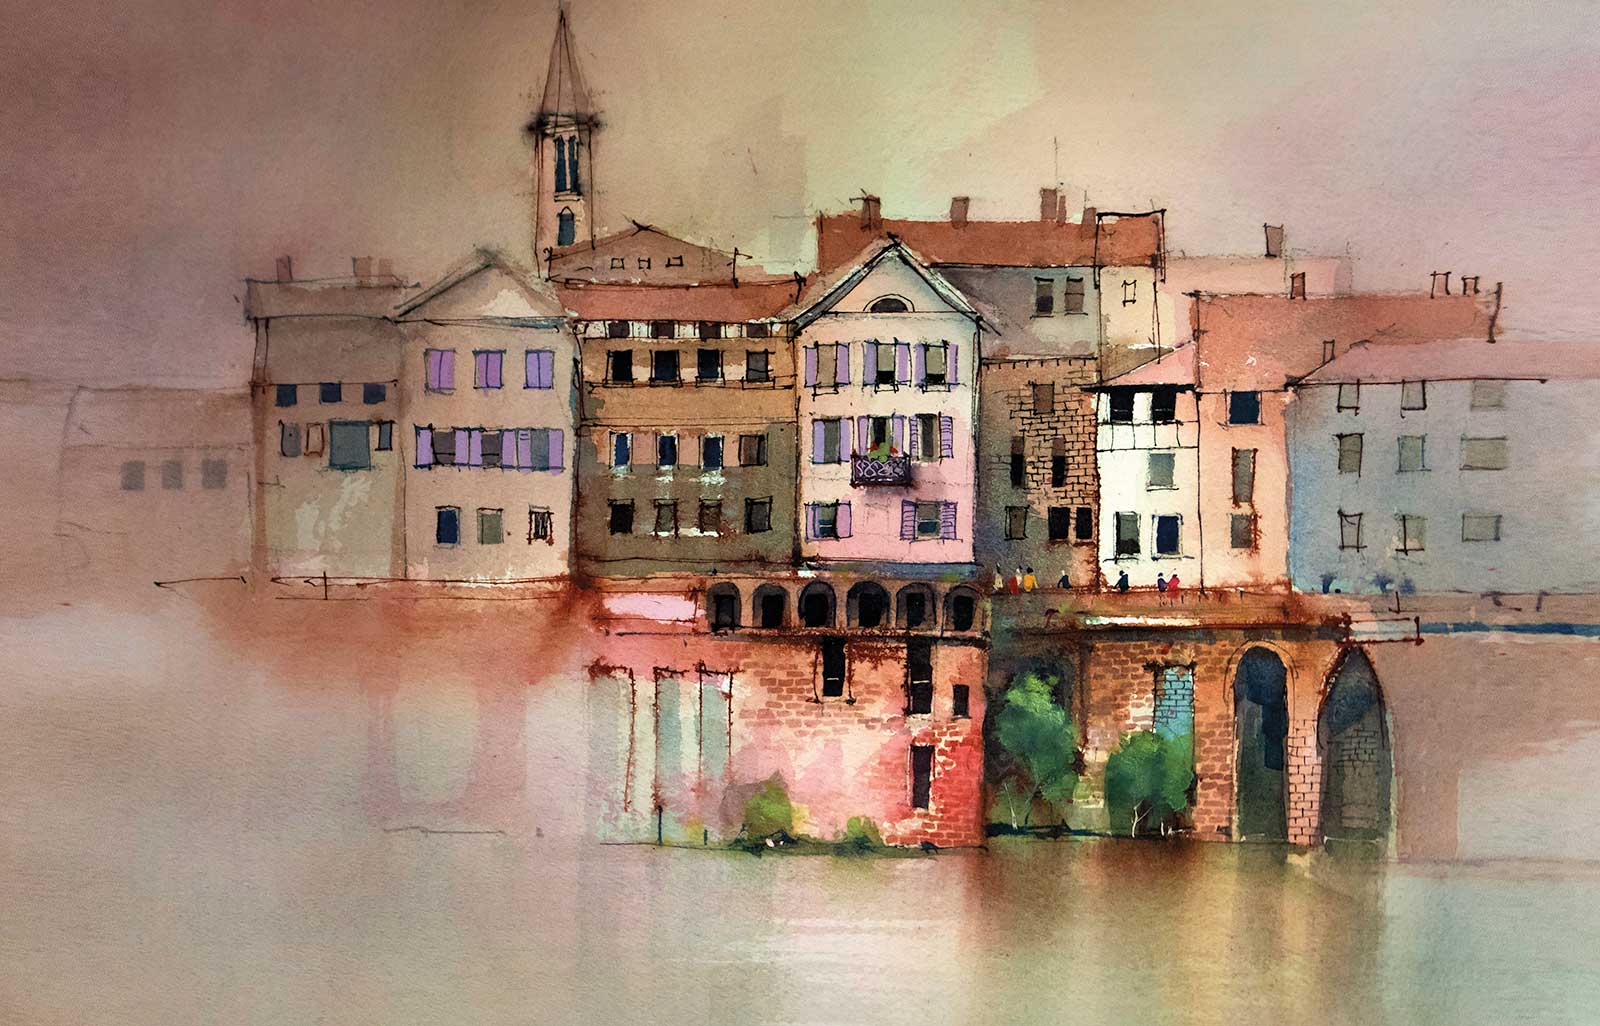
Another gesso glaze over the top right hand corner will leave a concentrated band of interest running diagonally through the painting. When the gesso is thoroughly dry a small amount of detail can be reinstated so the gessoed areas tie in with the band of detail. This technique of subduing areas and leaving a contrasting area of detail and clarity works well with subjects like this. Too many repeating shapes and textures can make a painting appear busy and overworked unless subdued areas of relief are created.
Join me for an art retreat in the South of France in October 2024. We will be visiting Albi to paint and sketch. See my website for details.
Contact at www.johnlovett.com