



My work has a heavy emphasis on expressing emotion and letting the painting process tell the story. In this demo, I want to share with you how I am able to capture these emotions on canvas and the steps I use to refine the expressive stage into a finished work of art. The key to doing this successfully is finding the right balance between intuition and craft.
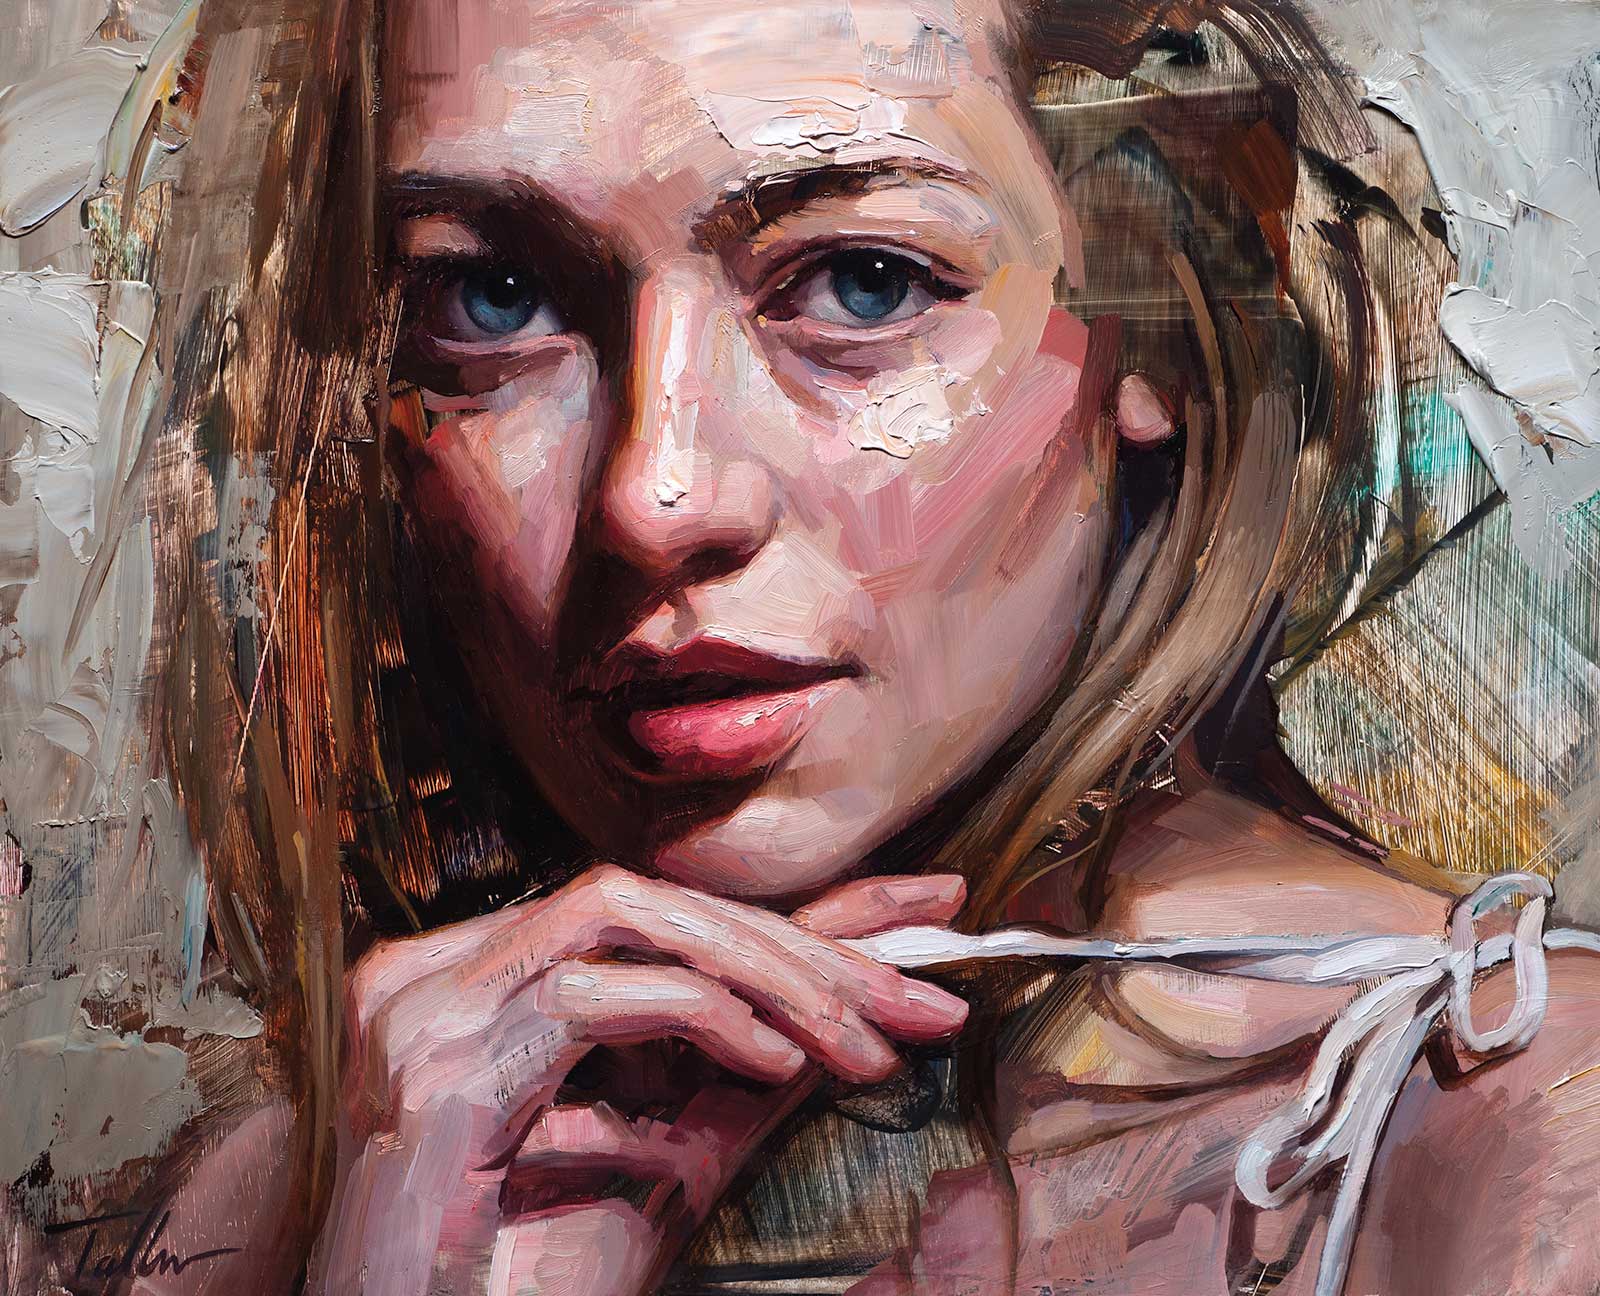
Dagny, oil on panel, 12 x 16" (30 x 40 cm) I always love incorporating hands into portraiture. The way she is delicately holding the string on her clothes was very intriguing and the look in her eyes made it something I knew I had to paint.
It might seem obvious that the best way to express emotion is with our intuition, but often as artists we are trained for so many years that we become a bit too technical. It was a pivotal moment in my career when I realized that letting go was the key to moving forward. You have to take all that knowledge and let it come out naturally without thinking about it. Ideally one gets into the flow state and has very few thoughts at all, besides the podcast or music that you’re listening to.
I can boil down my method into three basic parts: prep, expression and craft.
Prep
Don’t underestimate the prep work. This is crucial so you have some idea of what direction you’re heading. You need great reference photos and sketches, but before that you need a muse. It’s important to find someone or something that really inspires you to paint. After you’ve done your photoshoot you need to find the images that really stand out. Do the work of shorting, editing and sketching your photos so you know exactly which ones will make a great painting. (By the way, please take your own photos, you’re missing a huge part of the creative process if you’re using someone else’s photography. If you have the time and the means, work from life, but as long as you train from life, photos are just fine.)
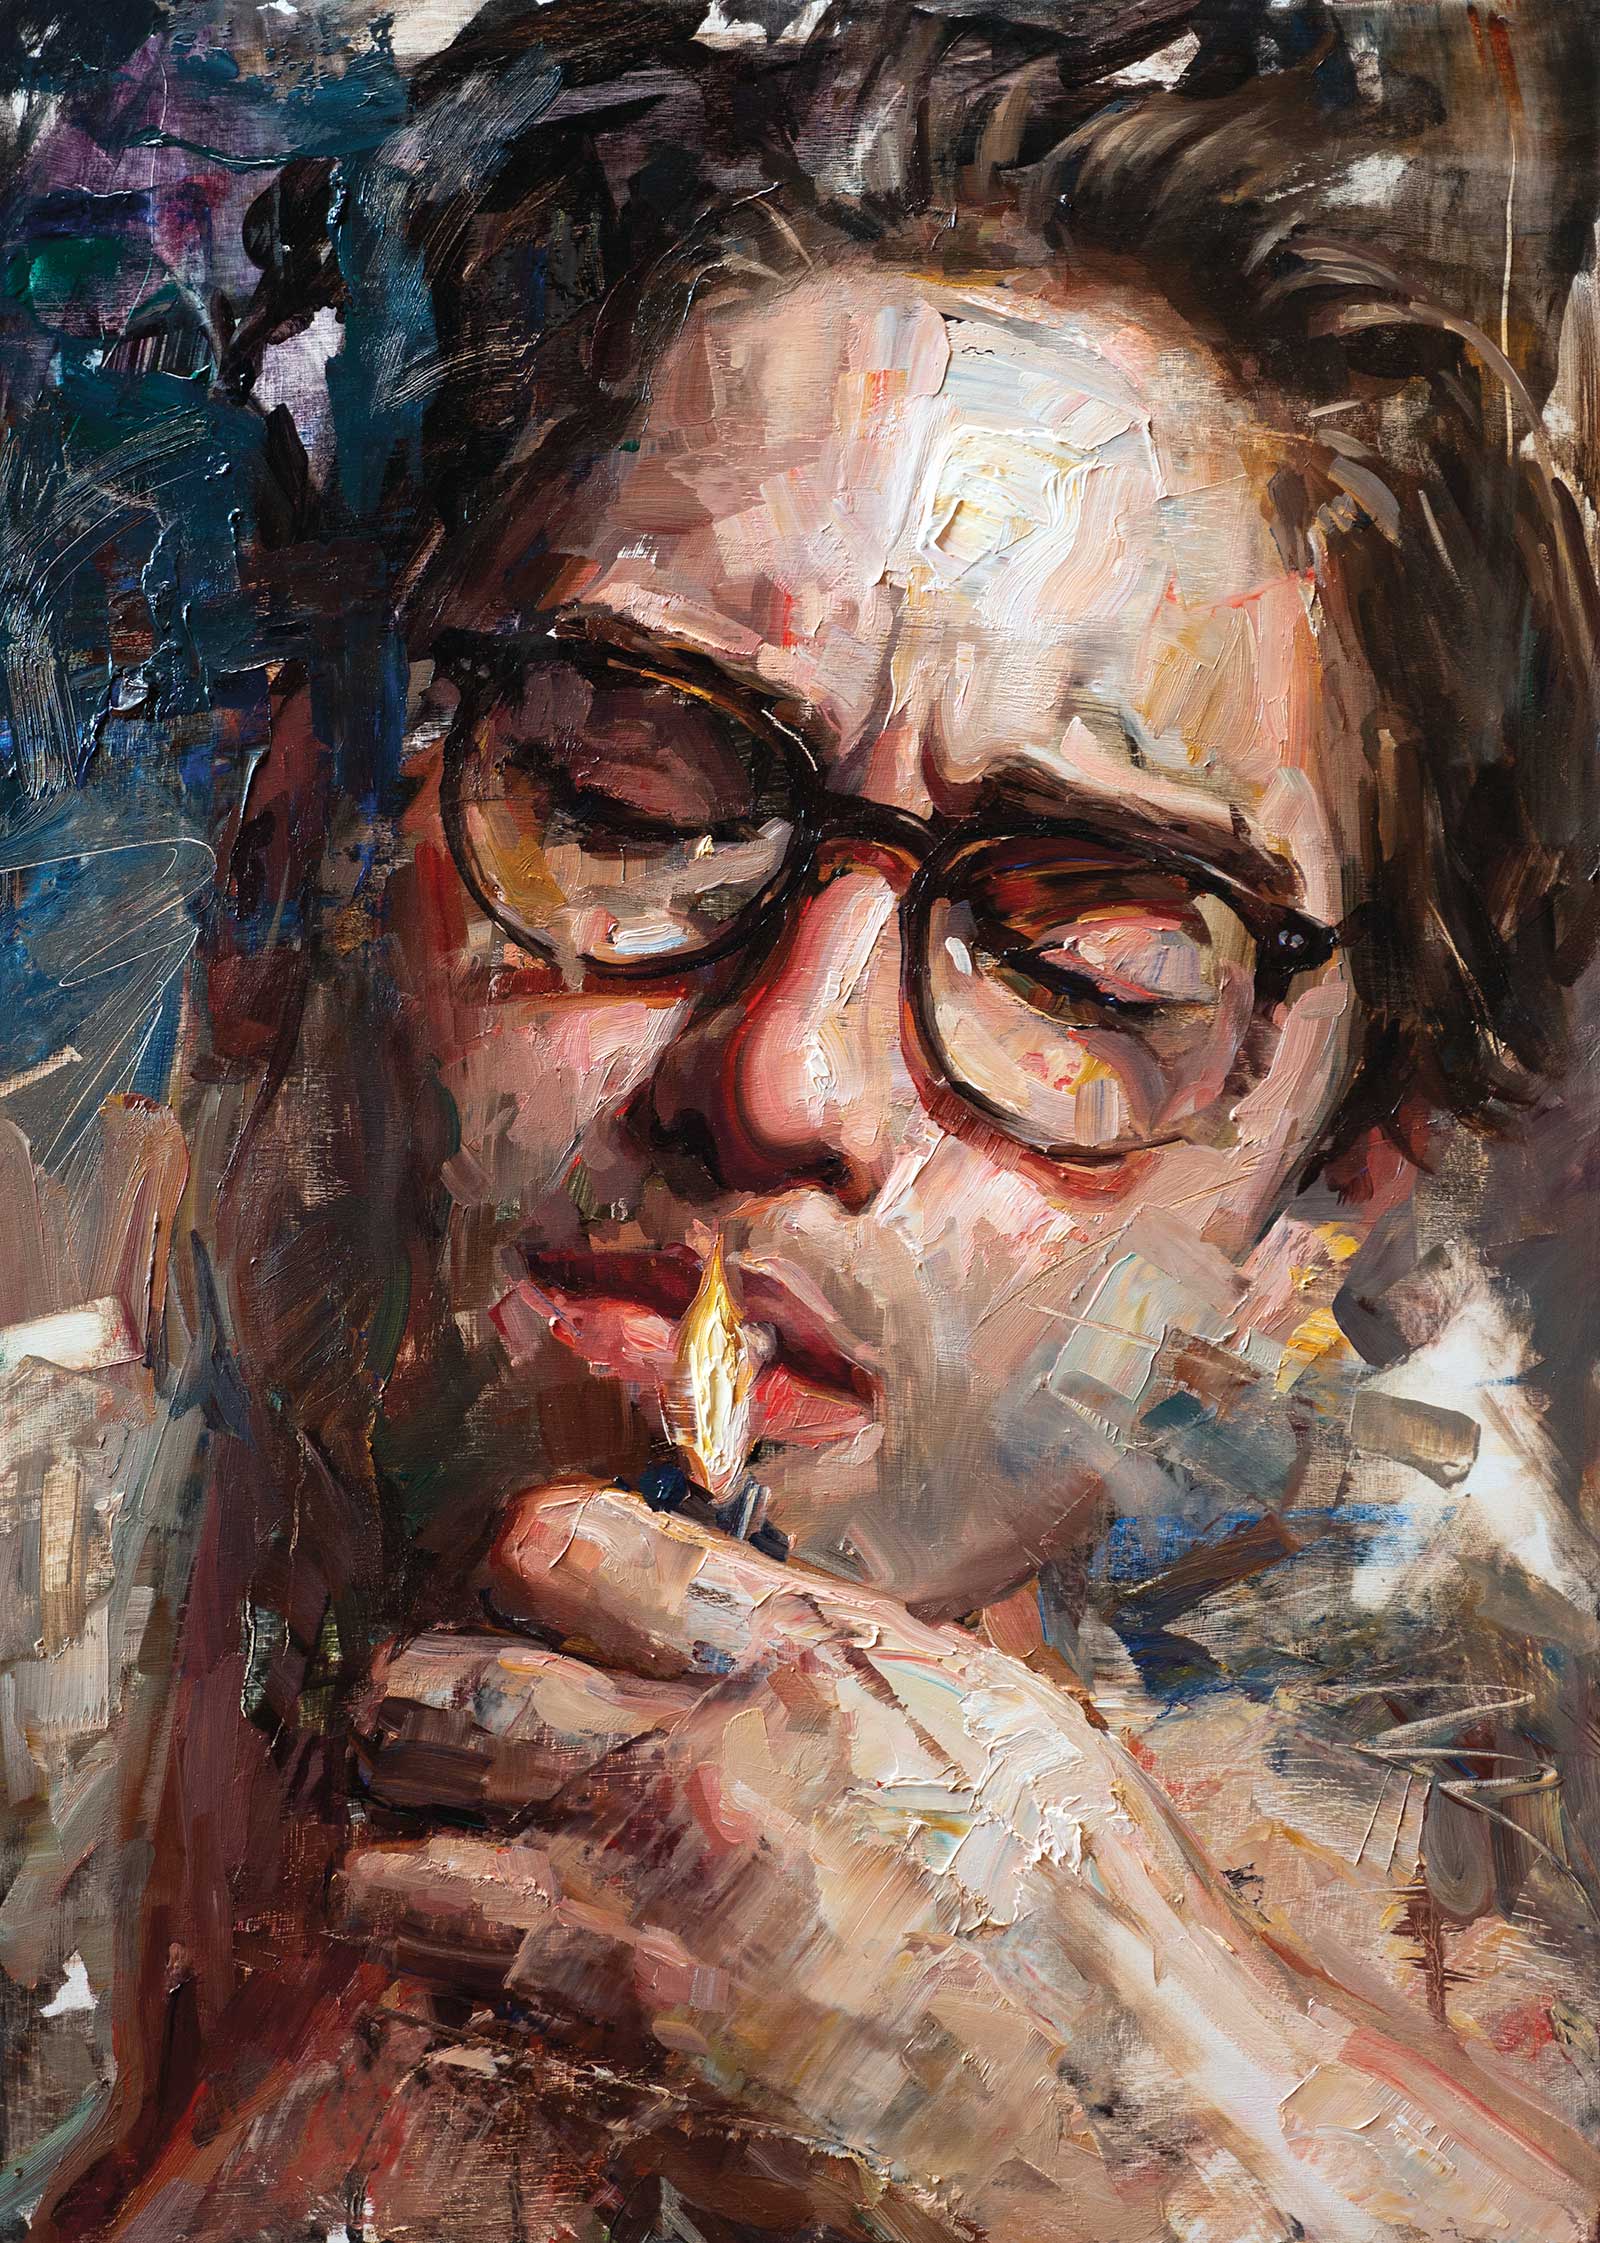
Time Stands Still, oil on panel, 25 x 18" (63 x 45 cm) I had a chance to work with this actor who had a classic, James Dean look. The goal here was to capture that late night, out on the town vibe. The brushstrokes are bouncing around the canvas, giving the figure a sense of movement in the night.
Expression
It’s time to paint and let things get wild with expressive strokes and textures. This is where you let feeling and intuition guide you the most. It almost seems random, but after years of doing it this way I believe there is something unconscious happening that lays the foundation for the rest of the painting. This is the time to turn your music up loud and get in the zone. Use loads of paint and much more than just a brush. Anything can be a tool at this point, from knives, to rollers, to weird items you find at the hardware store. I make a mess at this stage and always have to make sure nothing important is in the vicinity of my easel.
The goal in this stage is to bring forth movement, energy and texture. Use your reference for cues on direction and color, but don’t take anything too literal at this stage. By the end of this “underpainting” you end up with an interesting abstract painting. Hopefully it excites you and gives you motivation to develop the painting.
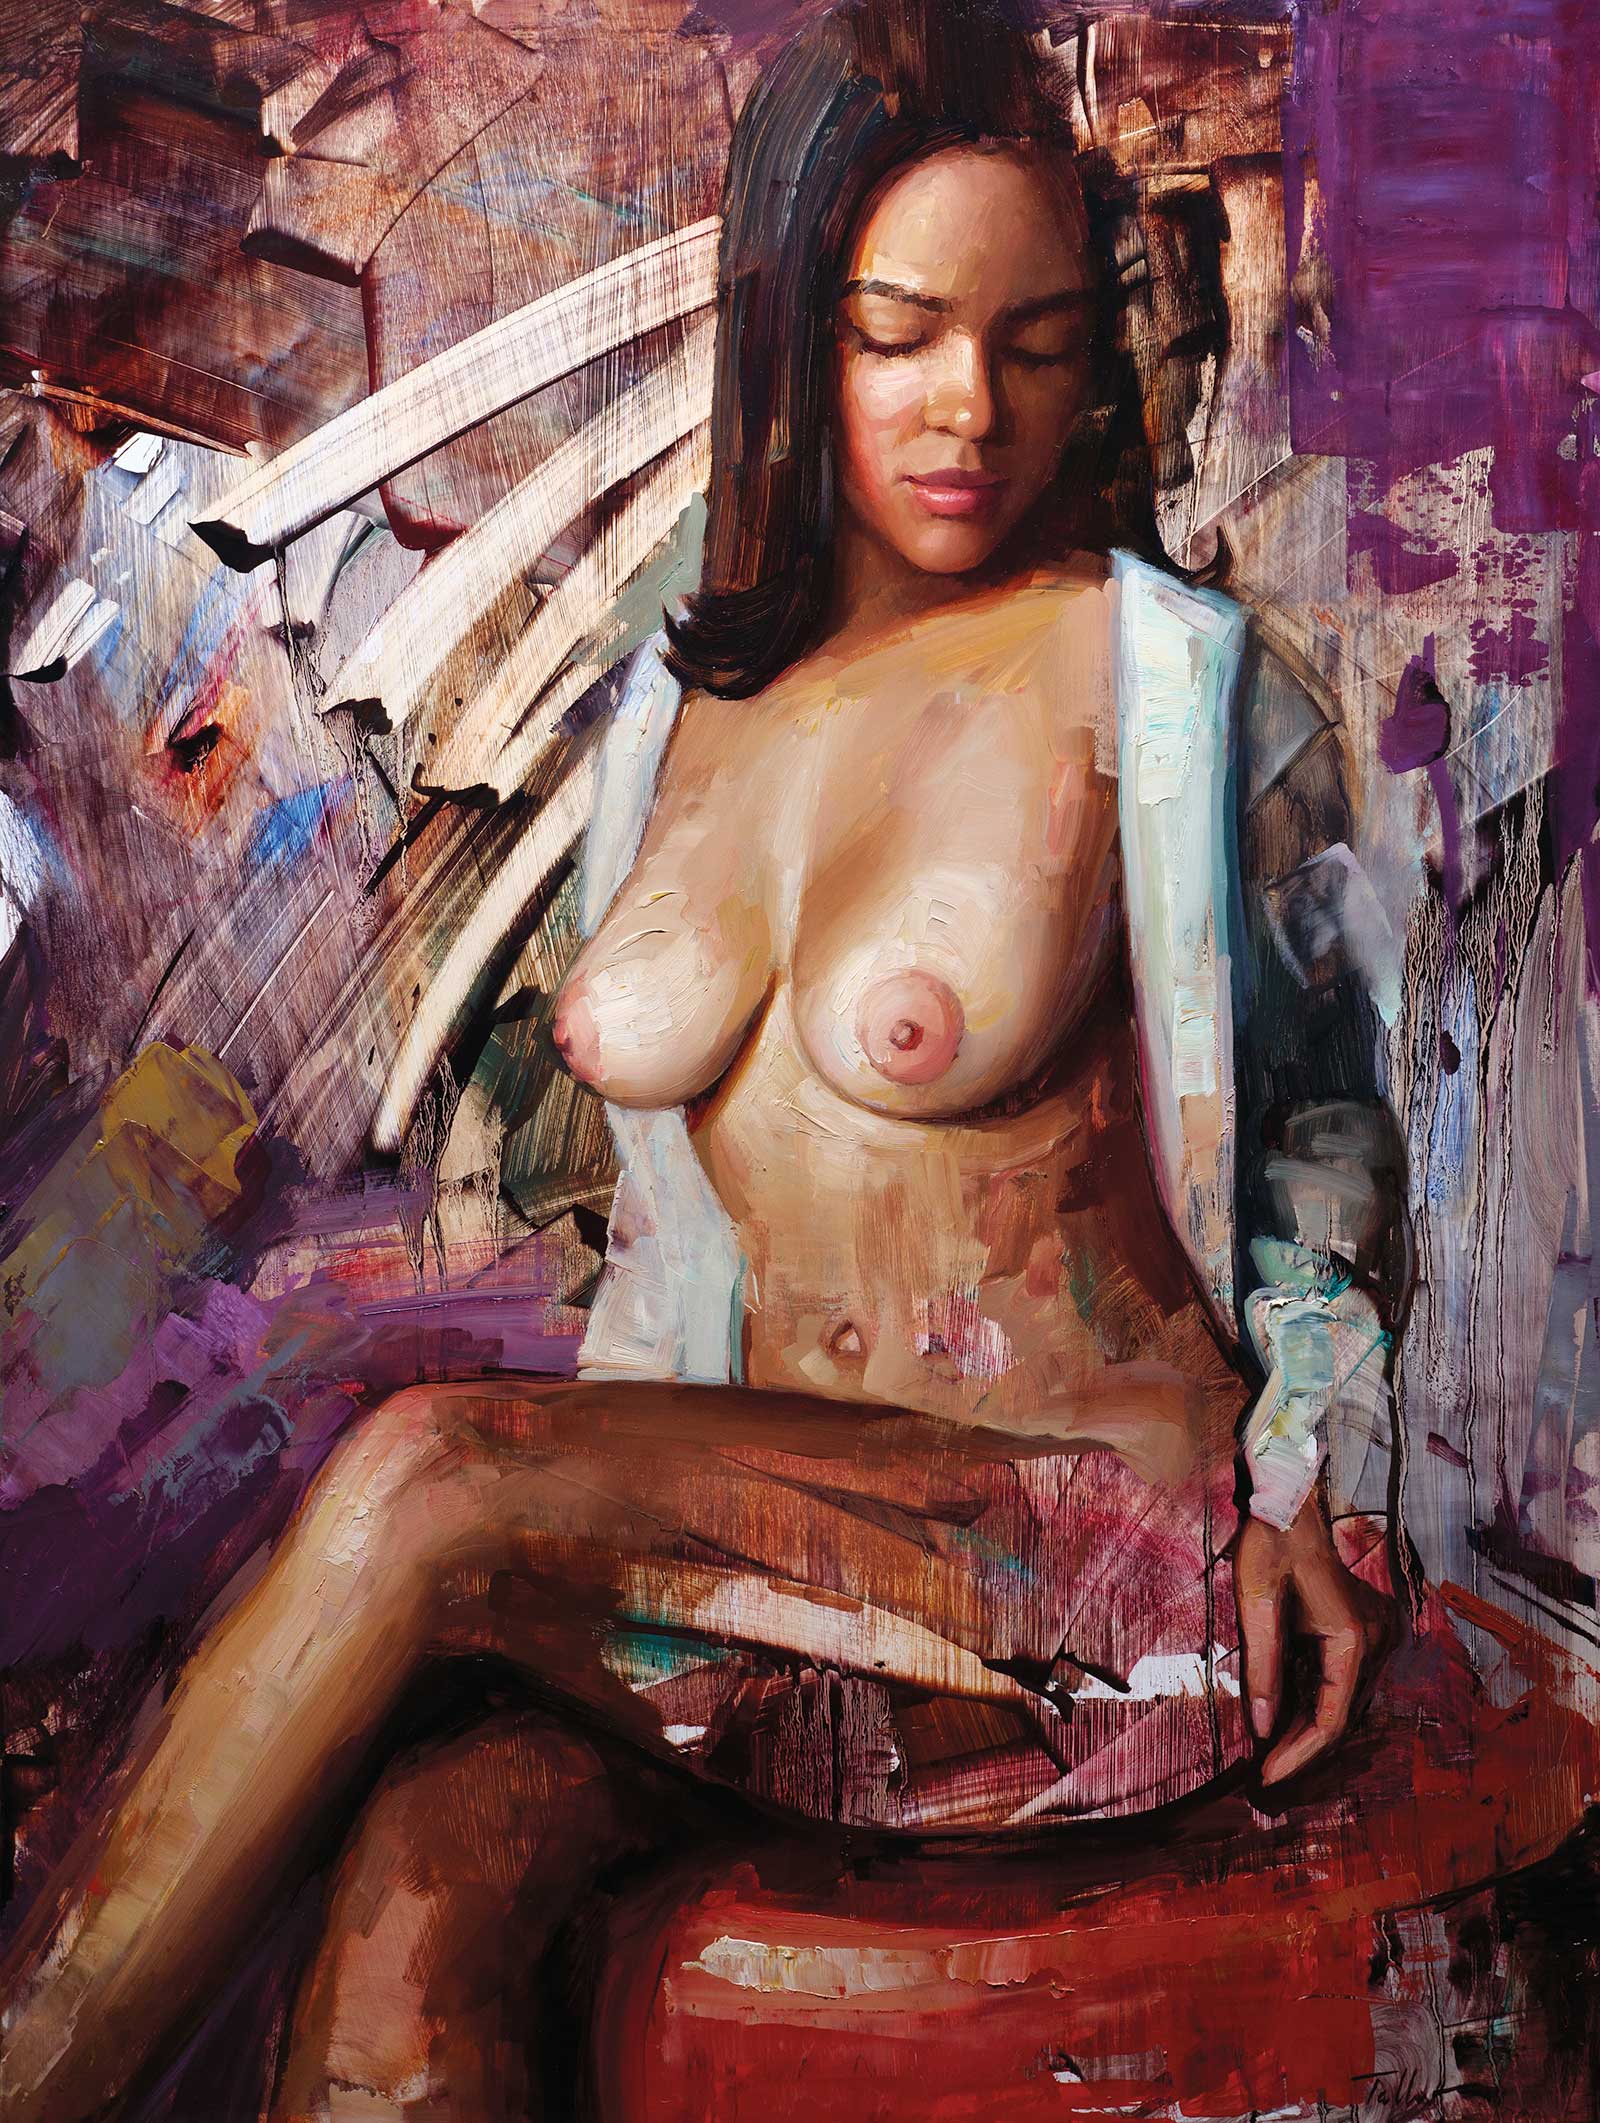
Between Worlds, oil on panel, 32 x 24" (76 x 60 cm) For me this painting has a lot of positive energy and the brushwork and color palette support that. She is seamlessly morphing in and out of the background, defined and ethereal at the same time. It’s like she’s in the world, but not attached to it.
Craft
Next we want to take the expression we’ve laid out and begin to add context. Build in your subject and be as accurate as possible with the drawing and proportions. Things can be a bit wild, but they also need to be accurate. While you’re refining the painting you want to make sure that the subject and background flow together as one cohesive unit. Things are not only being added but also removed at this stage. It’s okay to scrape things out, it might just add a bit of needed energy.
As things are becoming more finished you run the risk of over or underworking the painting. This is just a judgment call but one that is very important to keep in mind. I’ve seen just as many paintings ruined from overworking as under. In many cases the best way to handle this issue is letting the painting sit for a couple weeks without looking at it. Very often you will know exactly what to do when you come back to it and occasionally you get the surprise that it’s perfect just the way it is.
My Art in the Making Waiting for a Sign
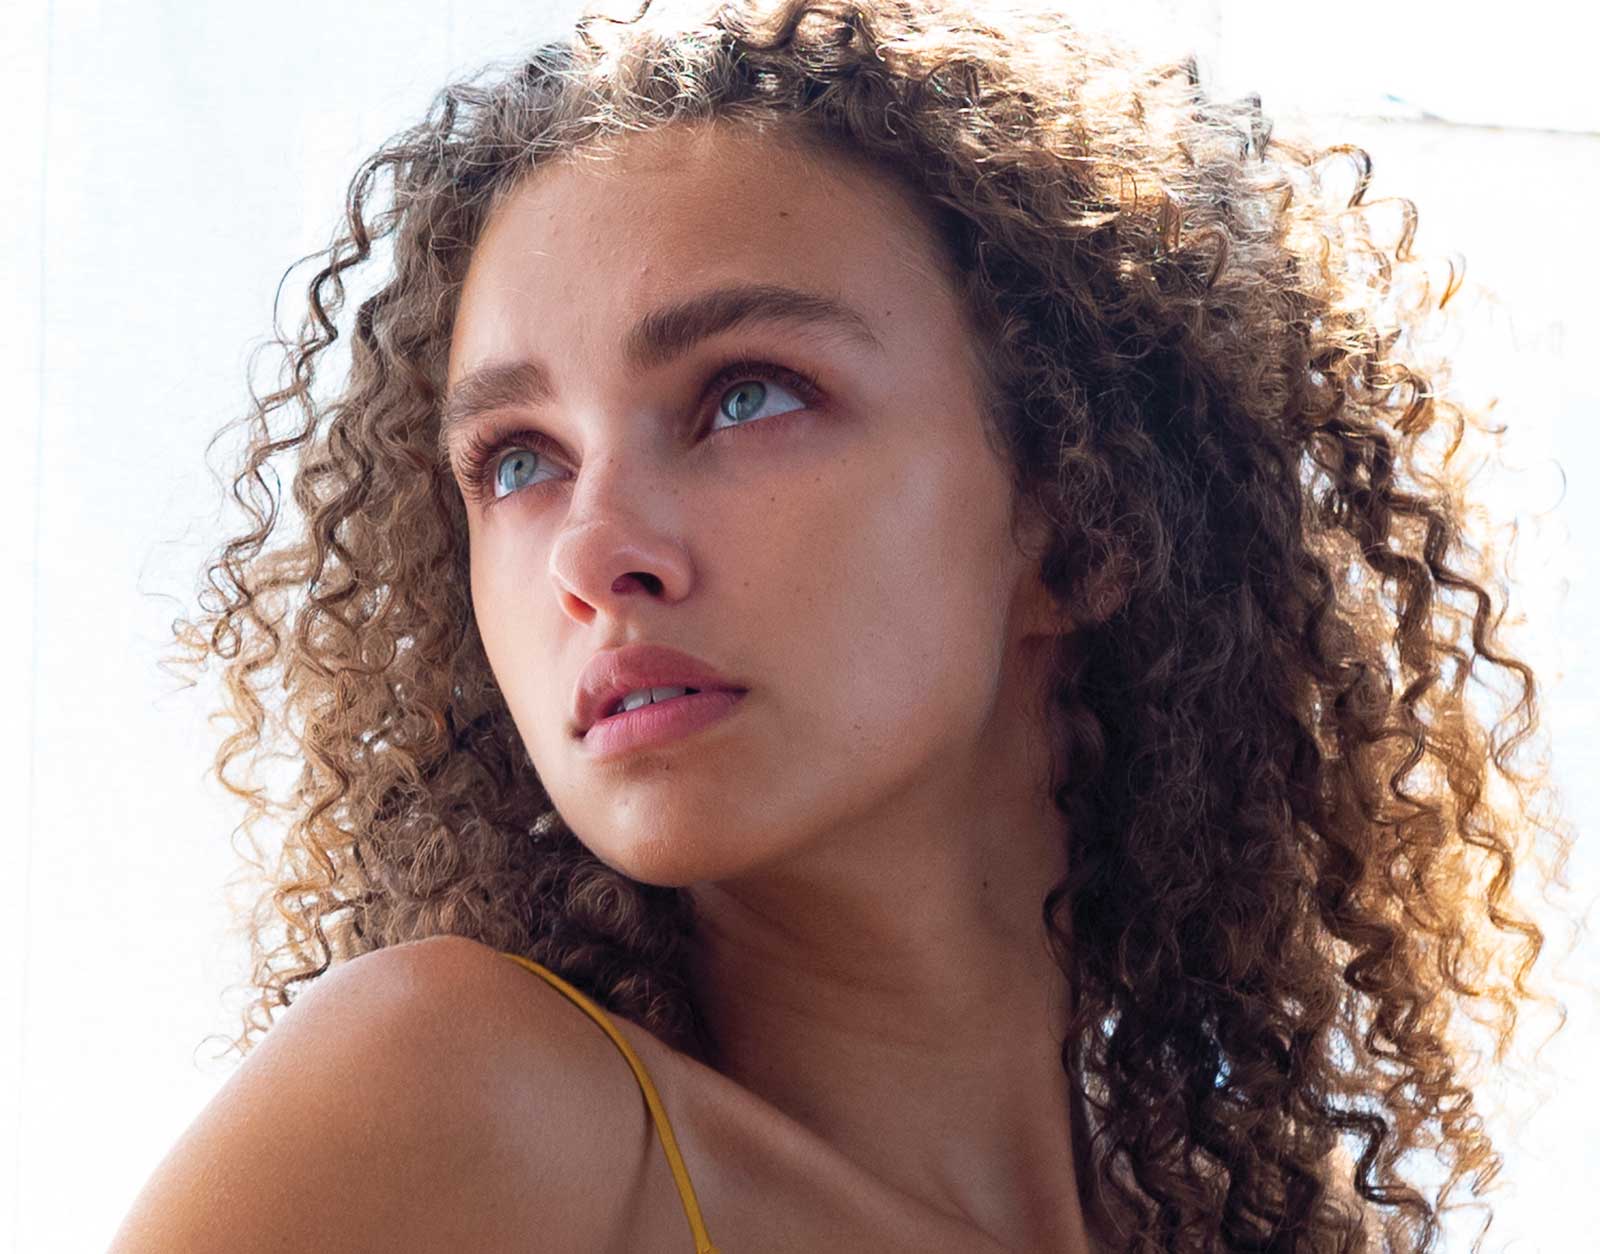
Reference Photo
 Stage 1
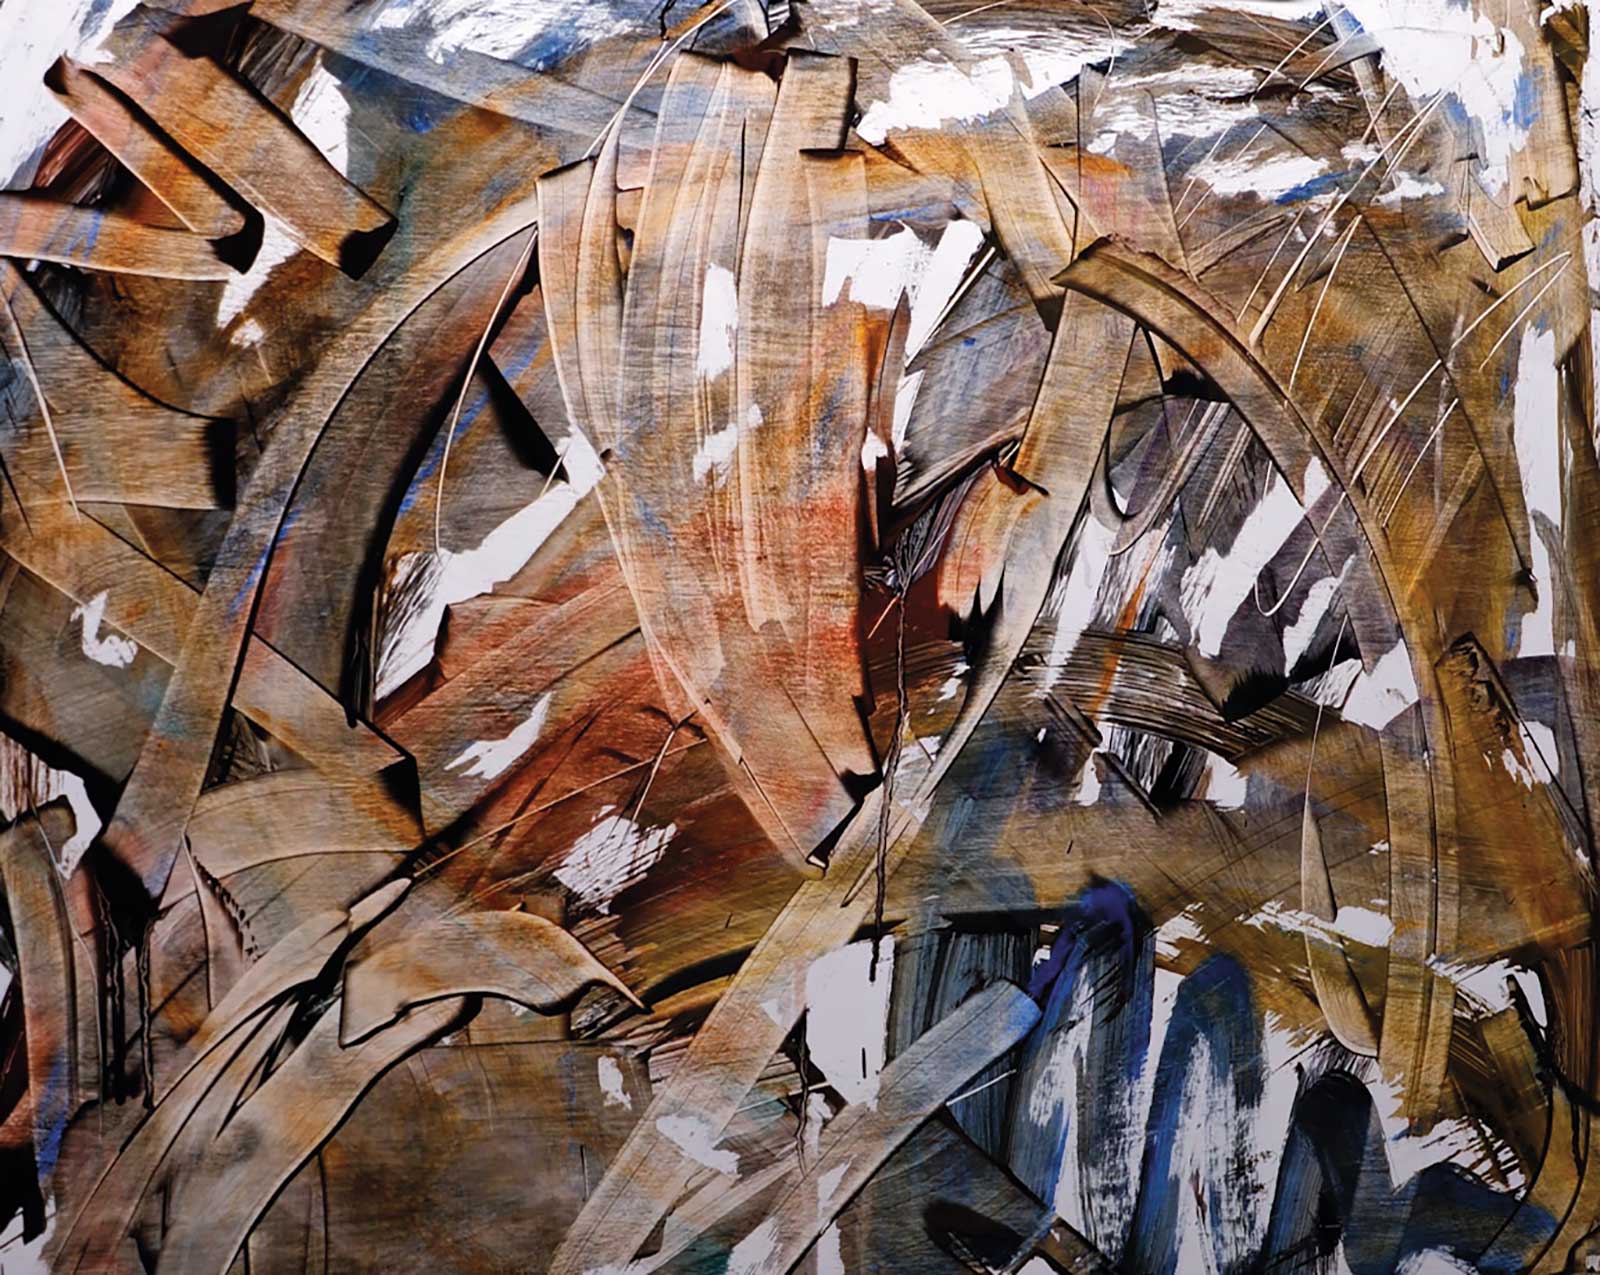
Stage 1 Initial Layer of Texture and Color
The first layer is similar to toning a canvas, but instead I’m using a lot more texture and color. This painting is on an aluminum panel so it allows the paint to be pushed around more easily than on canvas. I use my reference photo as a subtle guide, but it’s mostly institution and free exploration. A lot of the texture here comes from the plastic scraper tool.
WHAT THE ARTIST USED
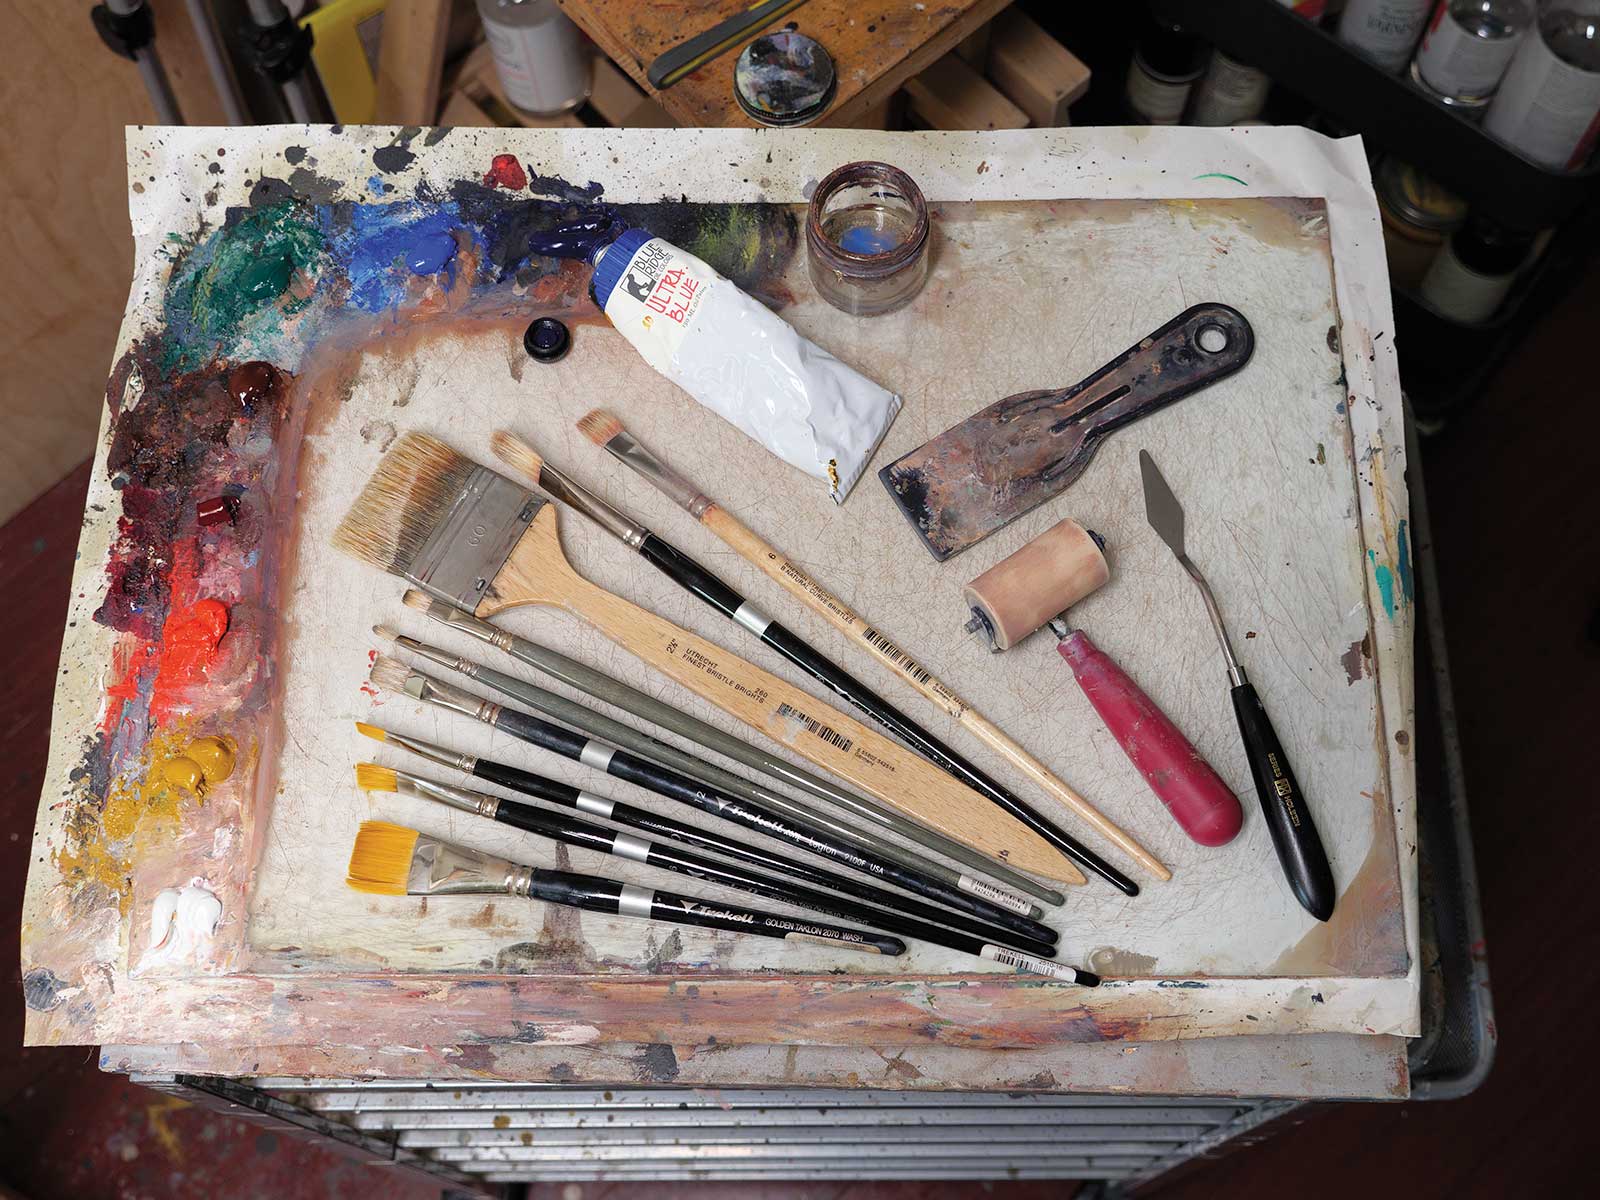
Oils
Titanium white, Yellow ochre, Cadmium red light, Permanent crimson, Transparent red oxide, Viridian green, Cobalt blue, Ultramarine blue, Ivory black
Medium
Odorless mineral spirits
Brushes and Knives
Synthetic and hog bristles: all sizes, mostly flats, with some filberts and rounds, High-quality painting knives, Cheap putty scrapers in a variety of sizes
Panels and Canvas
Aluminum composite panels primed with gesso, Oil-primed linen
Additional Supplies
Glass palette, Traditional easel, Charcoal air purifier, Mahl stick, Brush cleaning jar with safflower oil
 Stage 2
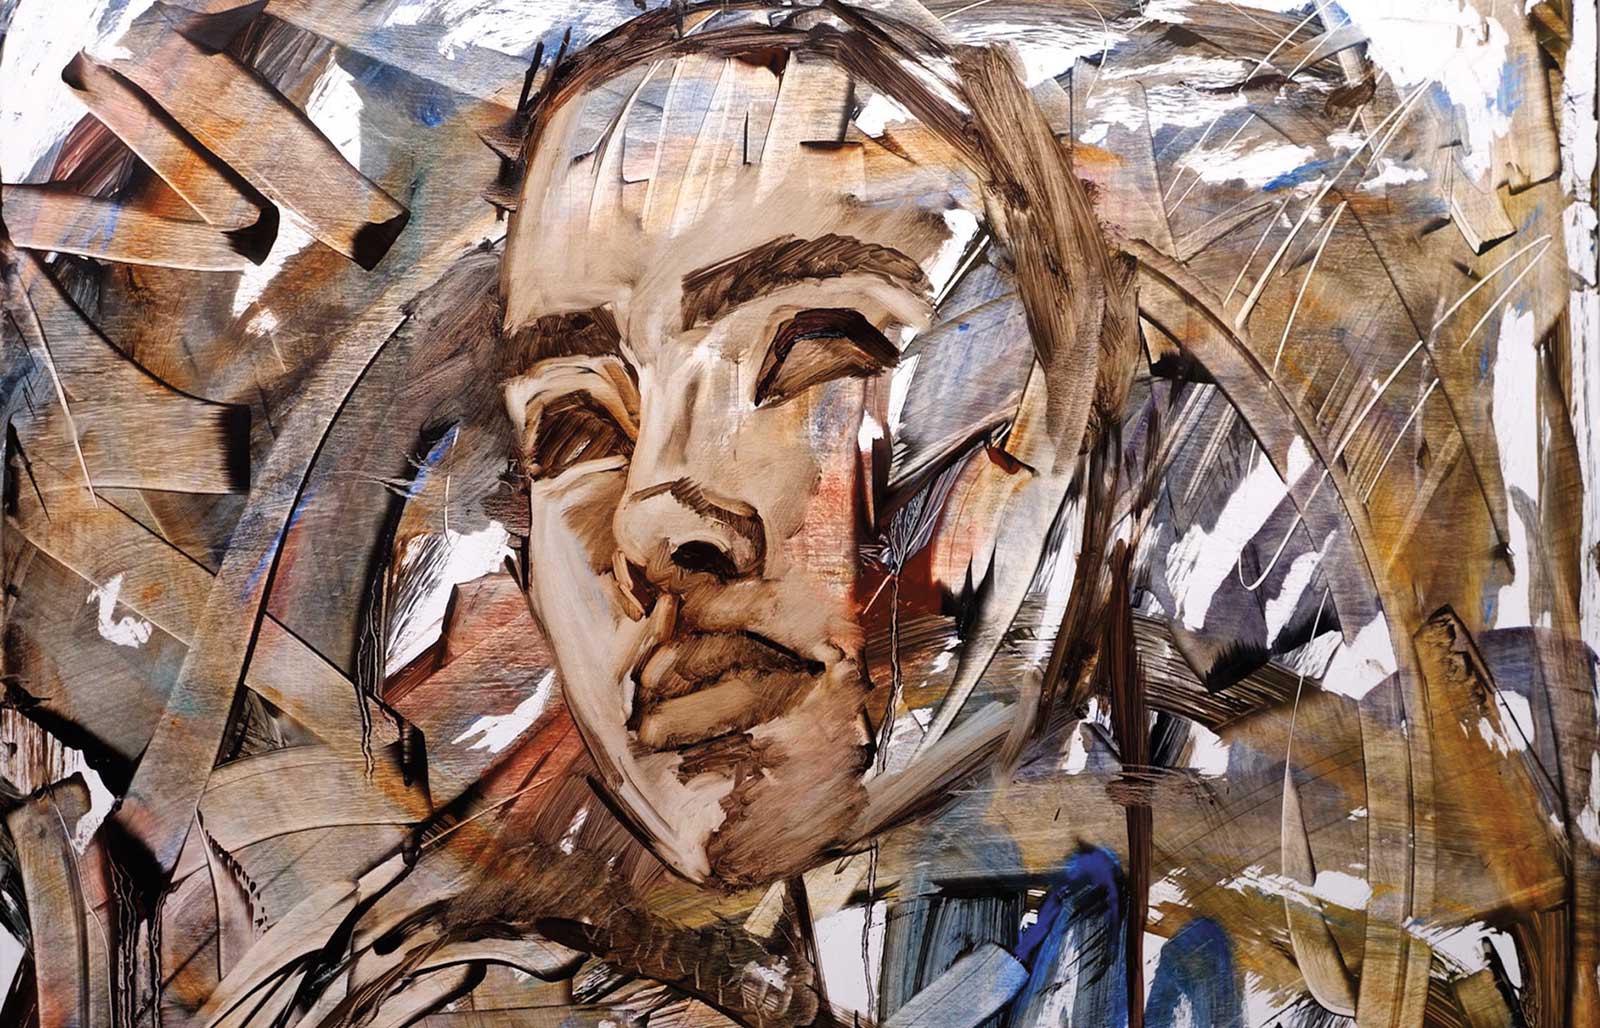
Stage 2 Roughing in The Subject
Now I start drawing in my subject with a mix of ultramarine blue and transparent red oxide. I sketch the form by looking at the photo on my computer monitor setup next to my easel. I pick out the light areas with a paper towel. I want to retain the underpainting so I try to keep the drawing minimal.
 Stage 3
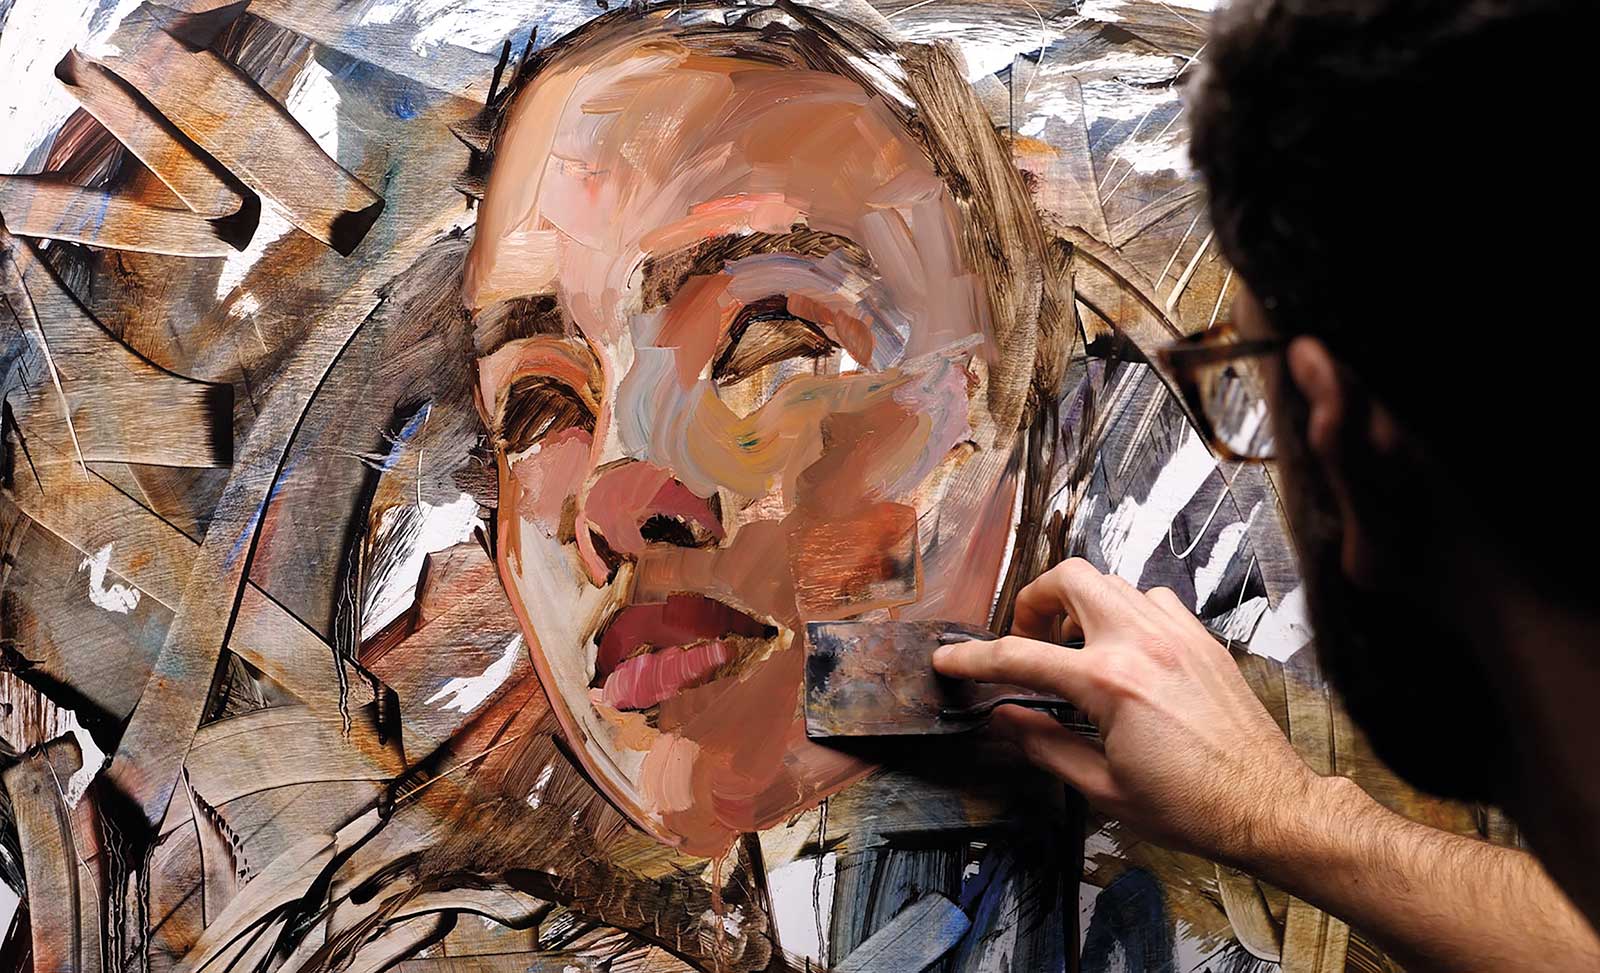
Stage 3 The Basics
Here I am blocking in the basic colors and shapes of the face. I’m still trying to keep things loose and high energy. I go bold with the colors in this stage because I know there will be many more layers on top. Most of this is with a brush, but as you can see in the photo I also use the scraper to push around and apply paint.
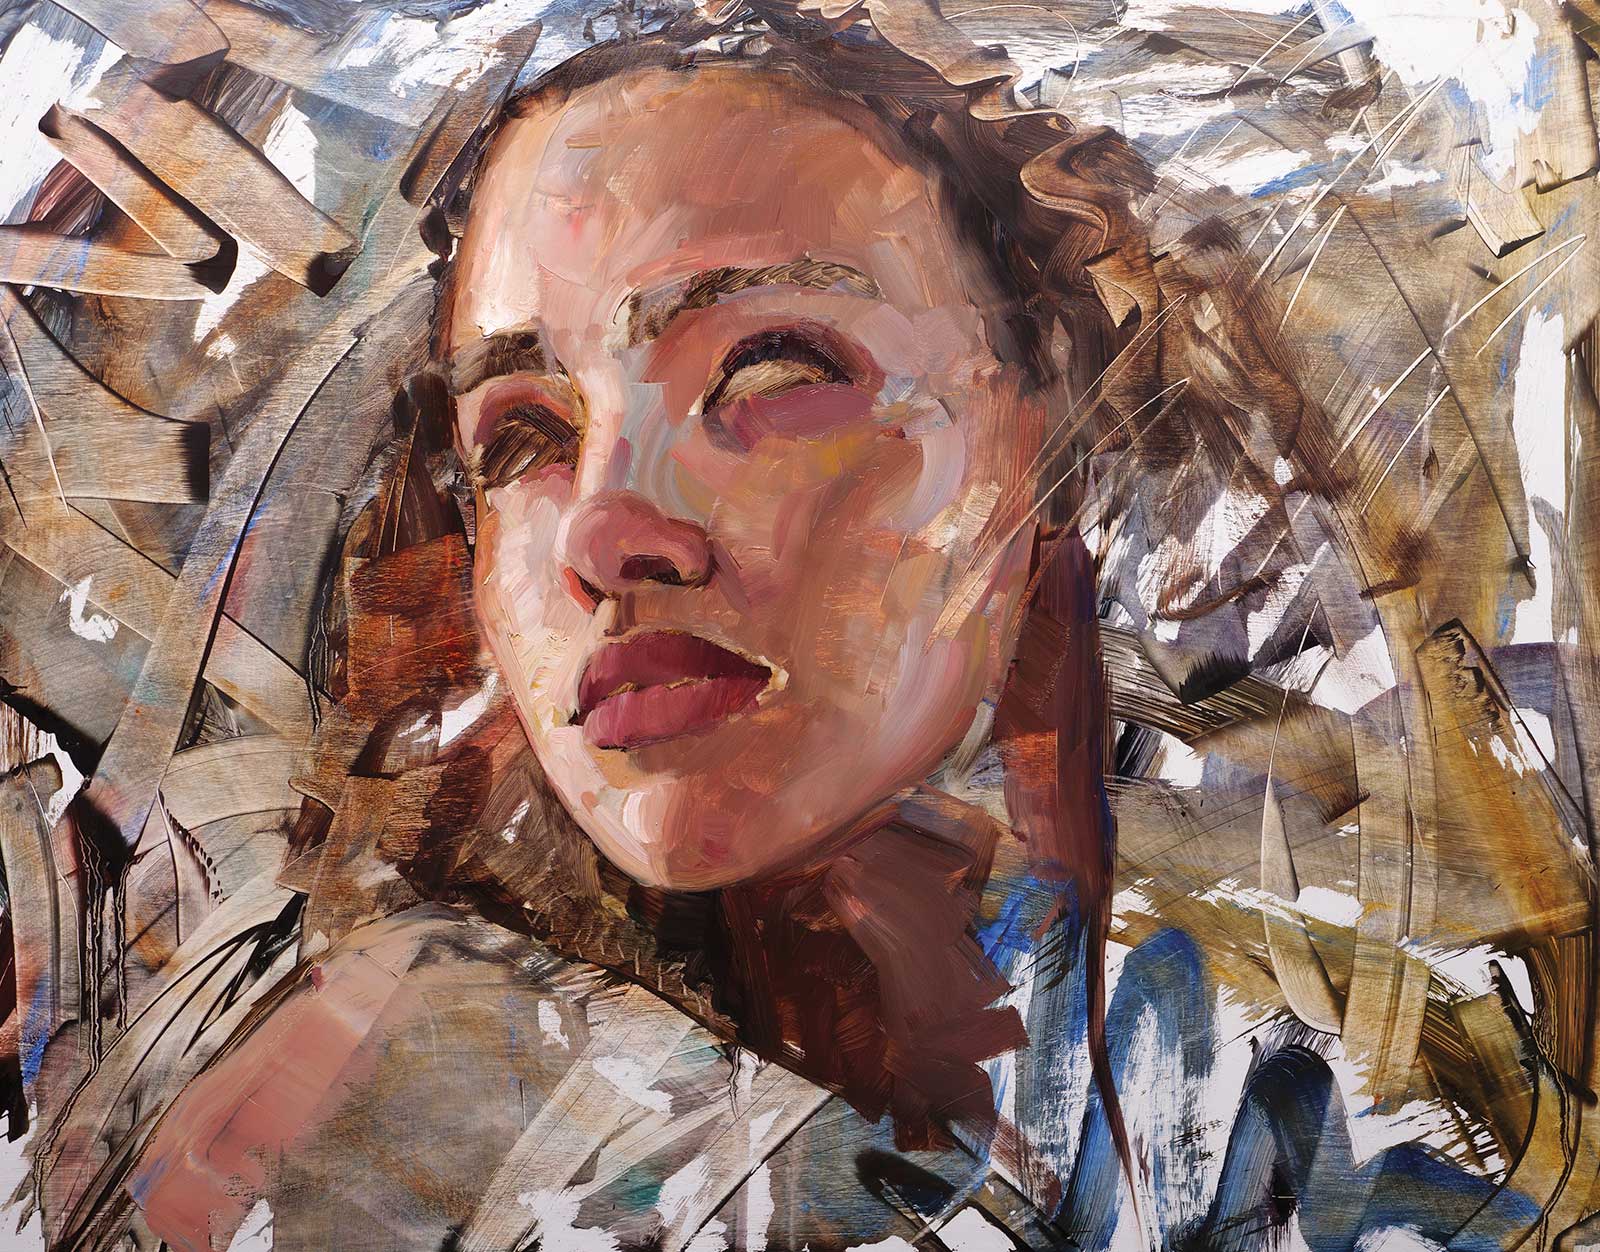 Stage 4
Stage 4 Refinements
I continue to block in and refine the painting here. It’s important to be expressive while still keeping the drawing and proportions in mind. I make a lot of small adjustments as I go to make sure the nose, lips, etc., look just right.
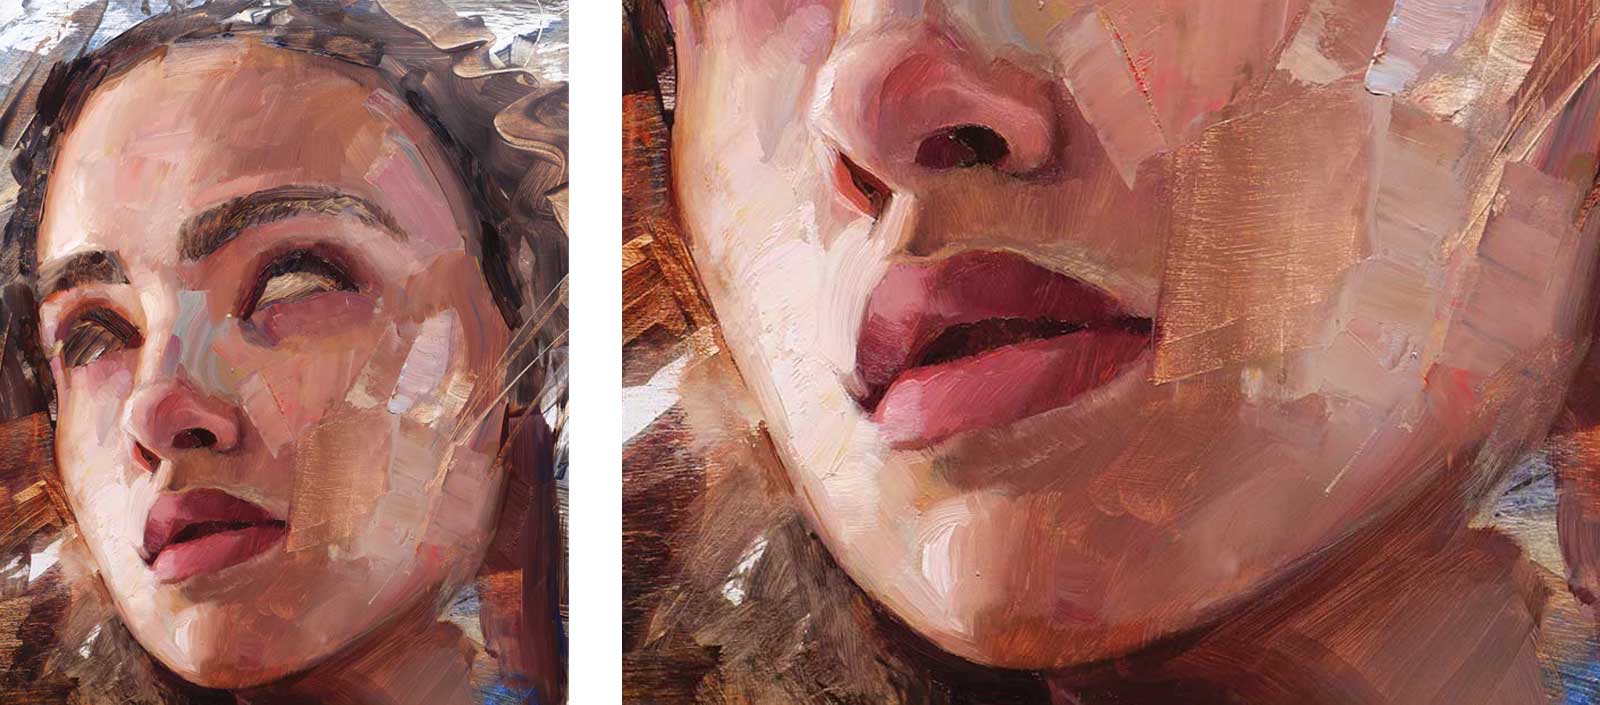 Stage 5
Stage 5 Building Volume
I look at painting a bit like sculpting the form. So the work in the early to middle stages is about making sure the subject has volume. So it’s not just a bunch of little adjustments, sometimes they are big bold strokes or scrapes that are needed to unify the form. Value and color are top of mind in this stage. I use a variety of brushes from medium flats to small filberts.
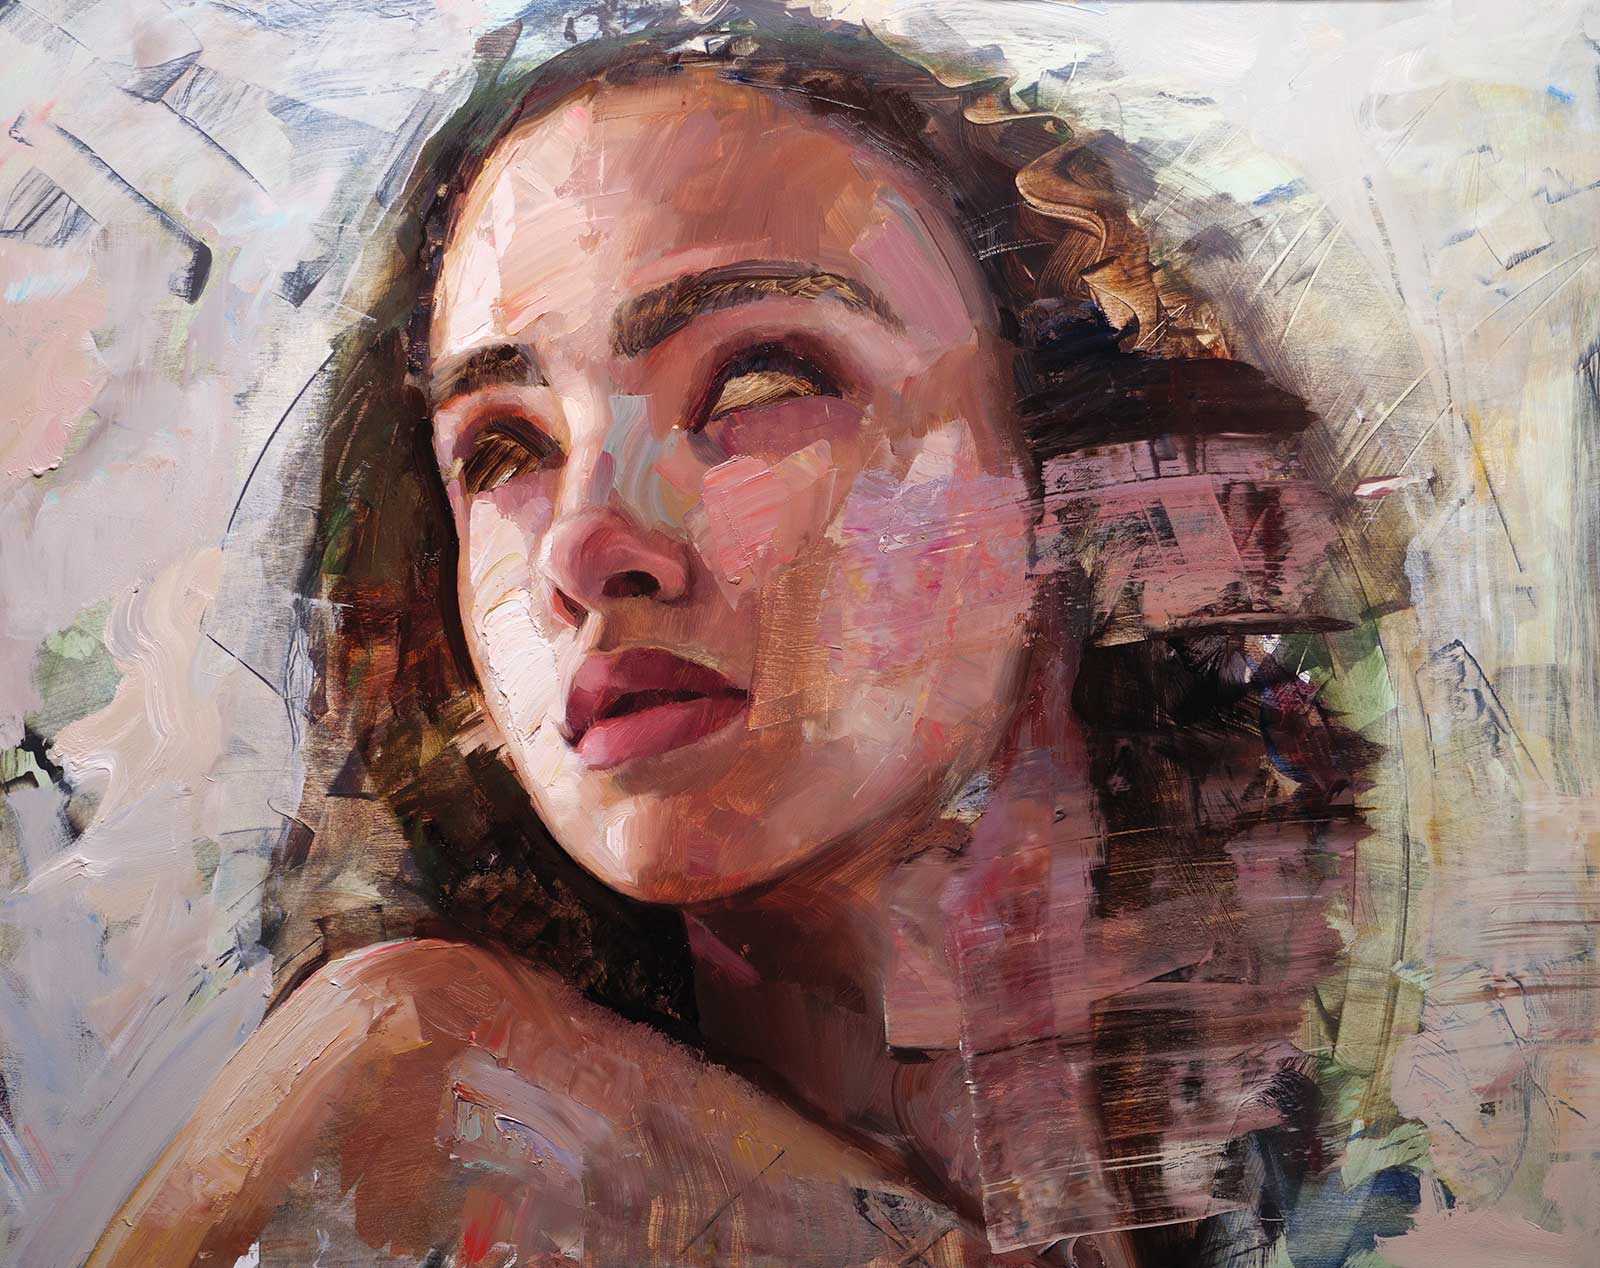 Stage 6
Stage 6 An Element of Abstraction
Occasionally I make scrapes and splashes of paint to abstract the subject and open things up. I don’t like feeling confined while I’m painting, so this technique gives me more freedom. These scraps of color often get covered back up, but on this occasion they survived into the final painting.
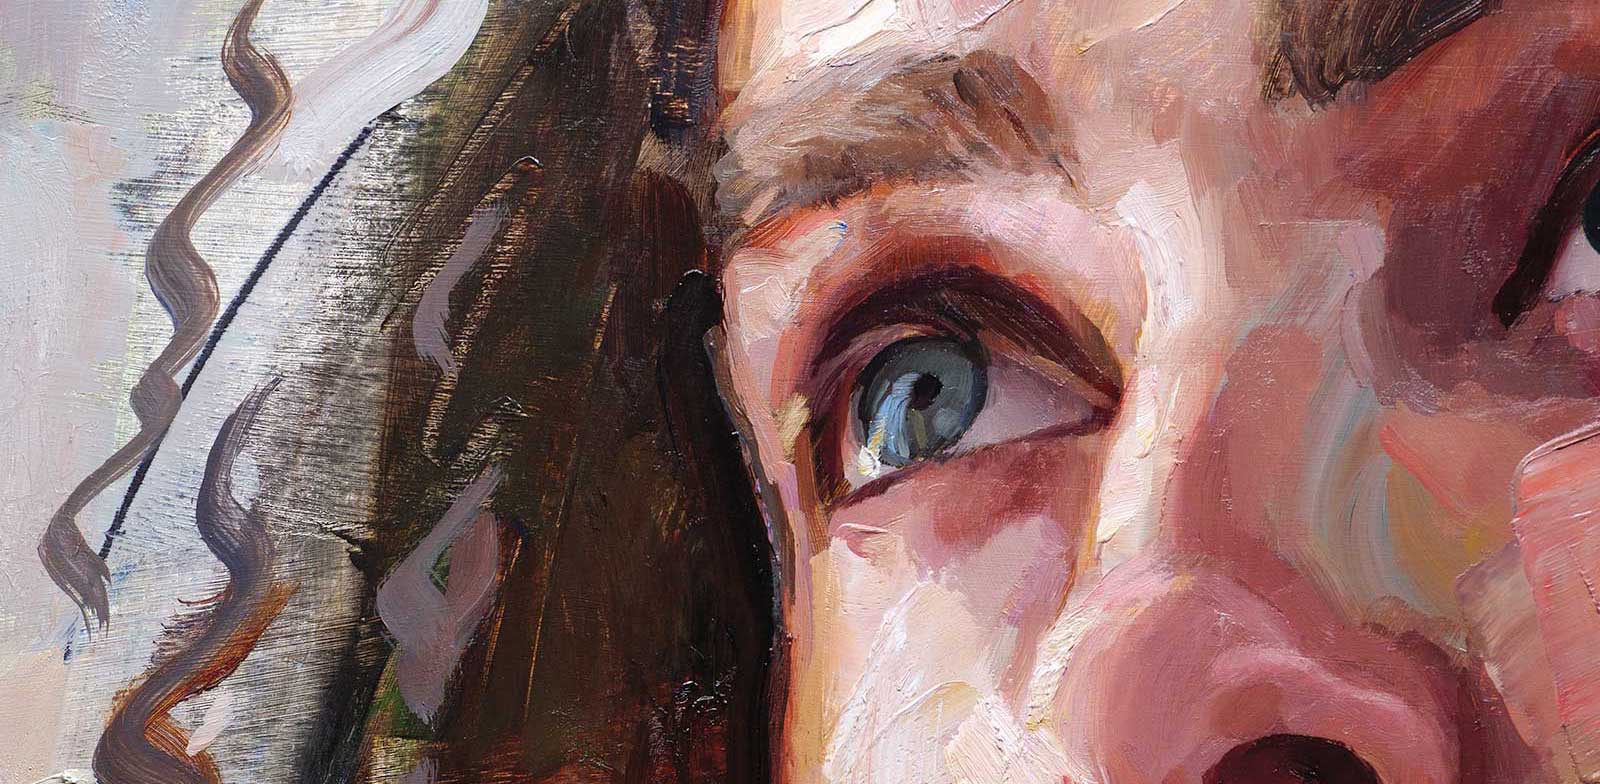 Stage 7
Stage 7 The Eyes
The eyes are finally being painted in. I often save the eyes until I know the overall painting is working. I break the eyes down into big shapes and slowly add more detail as I go with small filberts and round brushes. I paint both eyes at the same time, going back and forth to ensure they are unified in size and color.
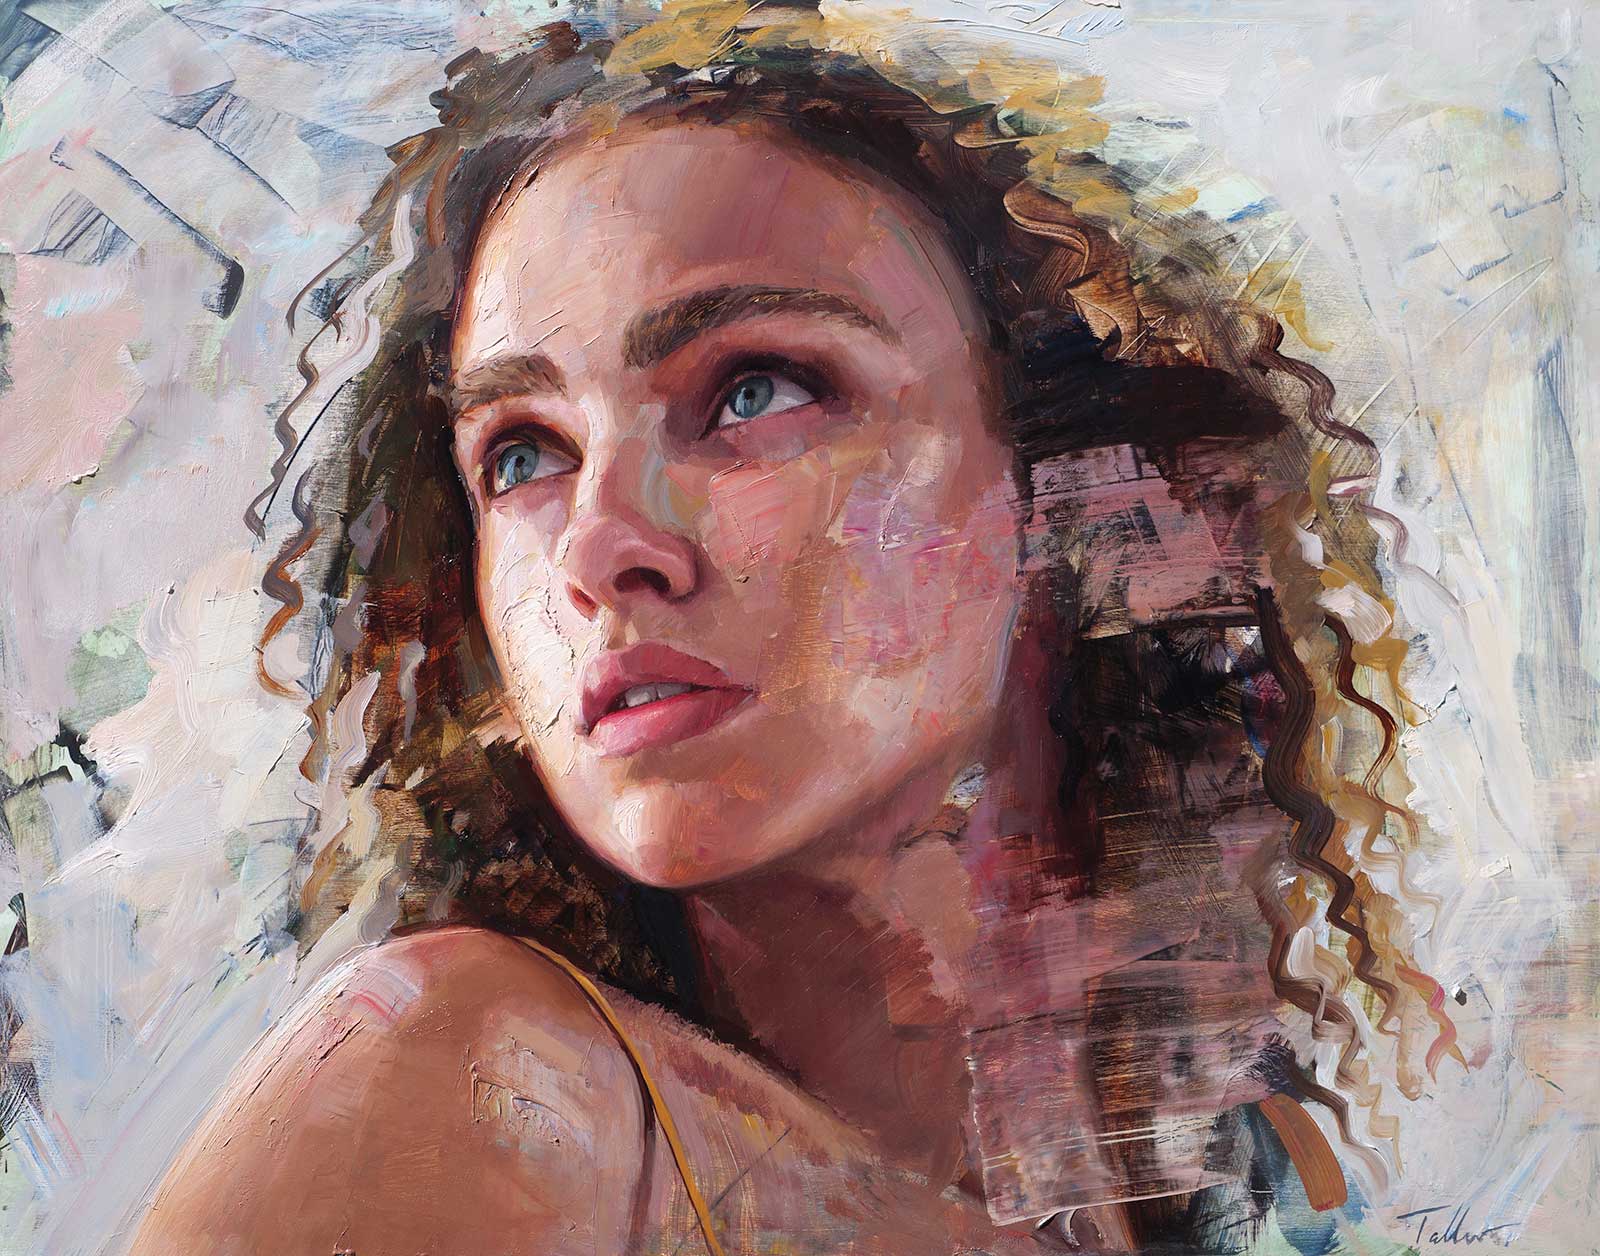 Stage 8
Stage 8 Finished Artwork
Waiting for a Sign, oil on panel, 22 x 28" (55 x 71 cm)
I applied the finishing touches on the mouth, eyes, eyebrows and hair. Then I set it aside for a few weeks. When I came back to it I saw that it needed a few more things. I repainted the shoulder and added a few final highlights on the forehead. Once it’s fully dry I will varnish it with a thin coat of gloss Gamvar and use a floater frame so you can see right up to the edges of the painting.
About the artist
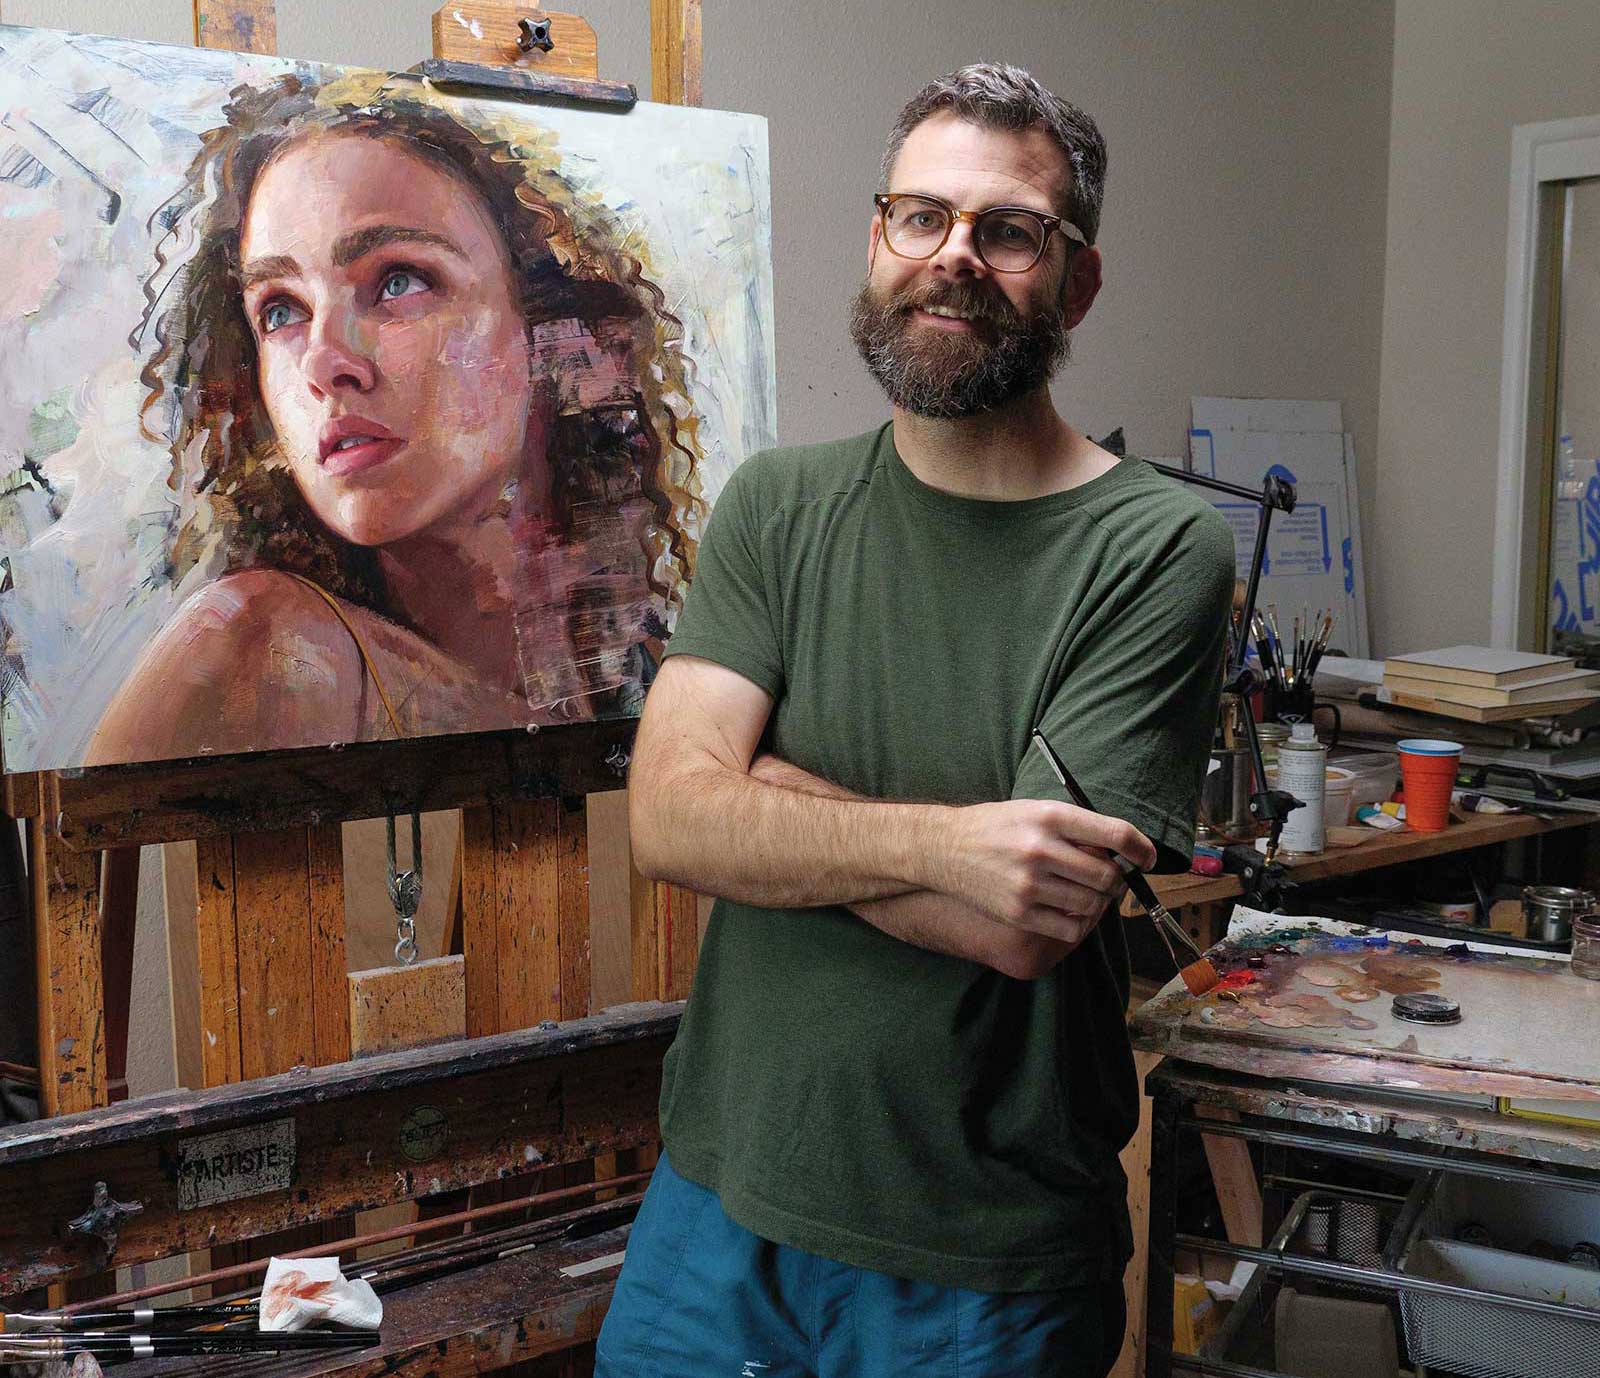 Matt Talbert in his studio
Matt Talbert is a contemporary oil painter living in Southern California. While he grew up at the beach, Talbert attributes much of his artistic development to his years spent in New York City. Working in the basement of the old Pearl art store on Canal Street and meeting a wide range of artists from all disciplines was indispensable. He is both a graduate from the Orange County School of the Arts and the Laguna College of Art and Design and has had the honor of being named one of the “Top 100 Figurative Artists Working Now” by PoetsArtists Magazine. Talbert’s primary focus is expressive paintings of the human figure exhibited in galleries such as Arcadia Contemporary, Abend Gallery and the Salmagundi Club in New York City. Talbert splits his time between work for gallery shows and portrait commissions. He is currently preparing for his fourth solo show at Abend Gallery this fall.
Represented by
Abend Gallery, Colorado, USA, www.abendgallery.com
Contact at
matt@talbertart.com
www.talbertart.com