


When you look at my artwork now, I think it becomes very clear, very quickly, that I like to work in a style creating realistic wildlife art. But that hasn’t always been the case. Finding and developing my style as an artist has taken many years of experimentation with mediums, surfaces and styles. I feel like saying this might be a cliché, as I think many artists find this challenge all too real. I started off with a determination to create artwork that was far flung from realism, using an impasto technique with oil paint to create tactile art that allowed the viewer to not only see the artwork but feel it. However, what I found after each piece was a voice in my head, urging me to add “just a little more detail there,” and “just refine that area around the eye.” I found myself edging closer and closer to a style I initially had no intention of working in. But it started to intrigue me and drove a passion in me to want to create a realistic artwork that would make someone stop and question if it was a photograph.
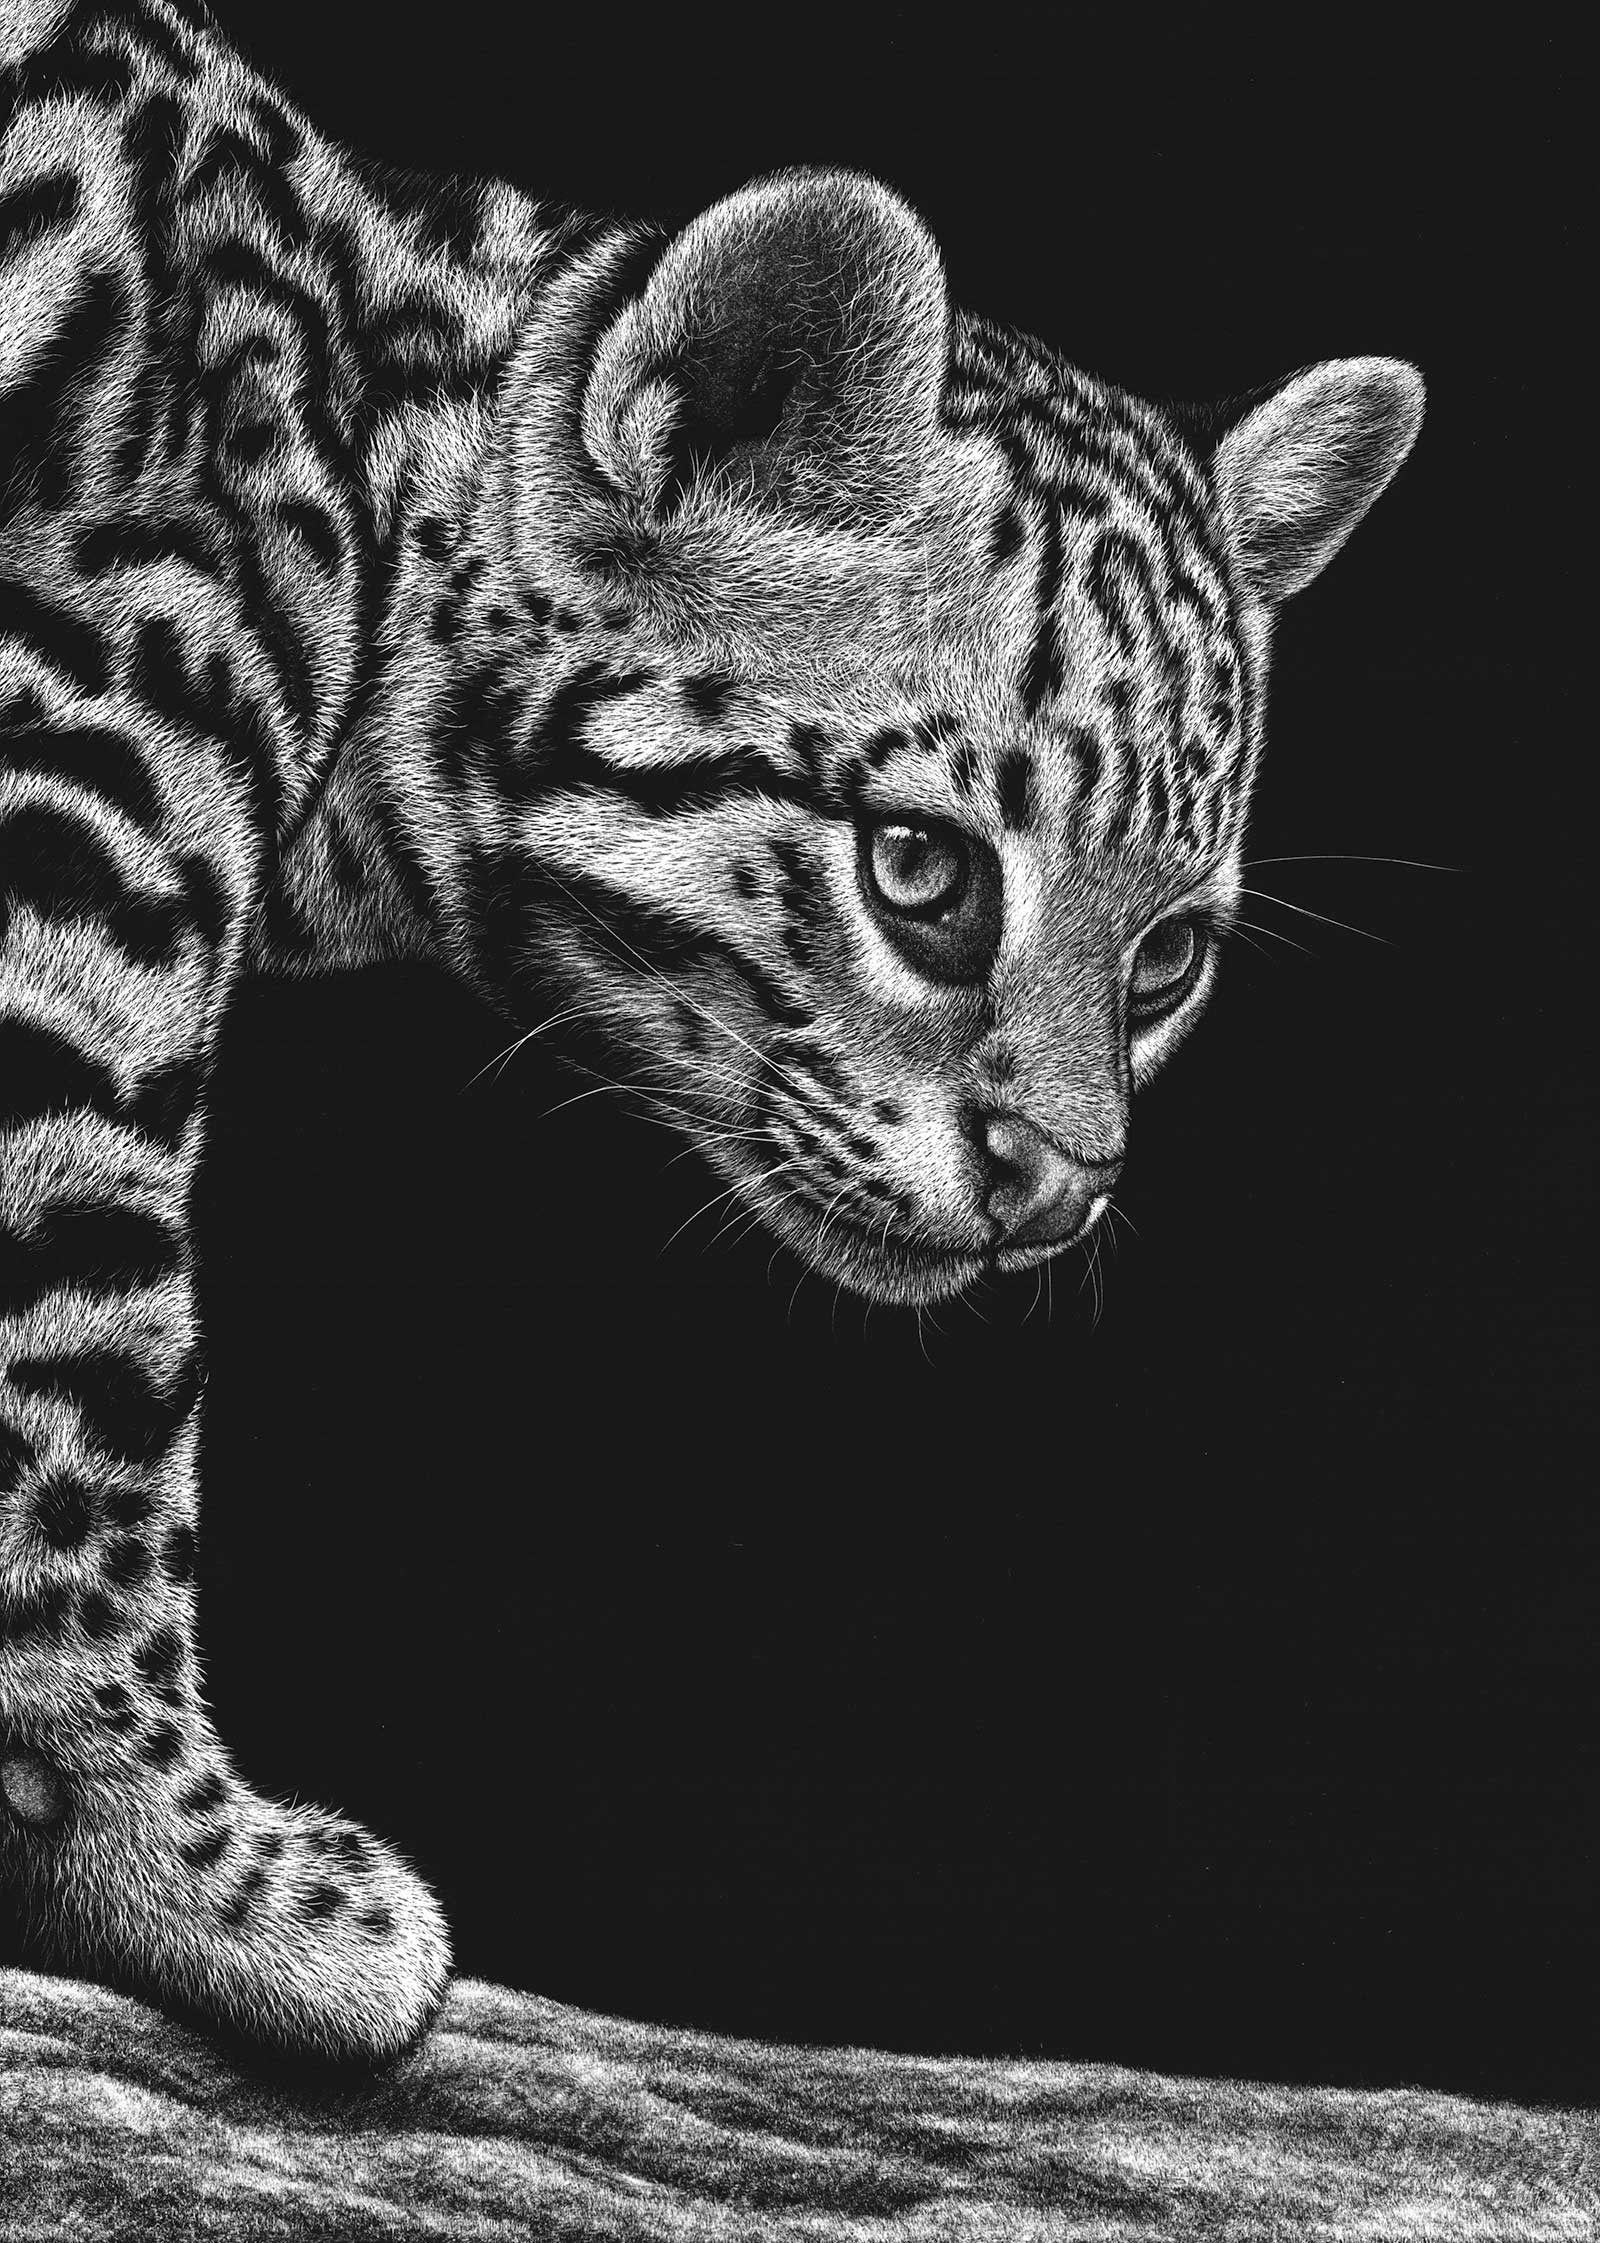
Oncilla, scratchboard, 5 x 7" (12 x 17 cm)
When I finally came across a medium known as scratchboard, straight away I was unable to put it down. I felt like after years of searching and experimenting, I had finally found a medium that just felt comfortable and right. Scratchboard is a notoriously unforgiving medium—every mark made is forever etched into the board. And for some reason, this restriction and unforgiving nature draws me to it, the permanence of every mark, the fact that every mark must be laid with confidence and commitment. If you really look closely at my artworks, you can see and feel the scratched indented lines. There is a tactile element to it. The restrictions of every mark being permanent also gives me freedom in knowing if I put a mark down that’s incorrect or that I regret, I just incorporate it and carry on (as much as it frustrates me at the time). There are always ways of darkening certain marks with ink if you find you have made a mistake, but I rarely do this, as I prefer to use a completely subtractive technique and embrace all the marks made.
Wildlife has always been my passion, and I think this was one element of my artistic journey that has never wavered. My aim when I create a piece is to try and create something with dramatic or interesting lighting or texture, and this is where the scratchboard medium excels. My pieces will always try and have a strong focus on lighting, with areas that are starkly contrasted to the blackness of the board. I often choose subjects that have significant meaning to me, with the majority of my pieces focusing on big cats, with an emphasis on trying to highlight the endangered and vulnerable status of various wildlife around the globe.
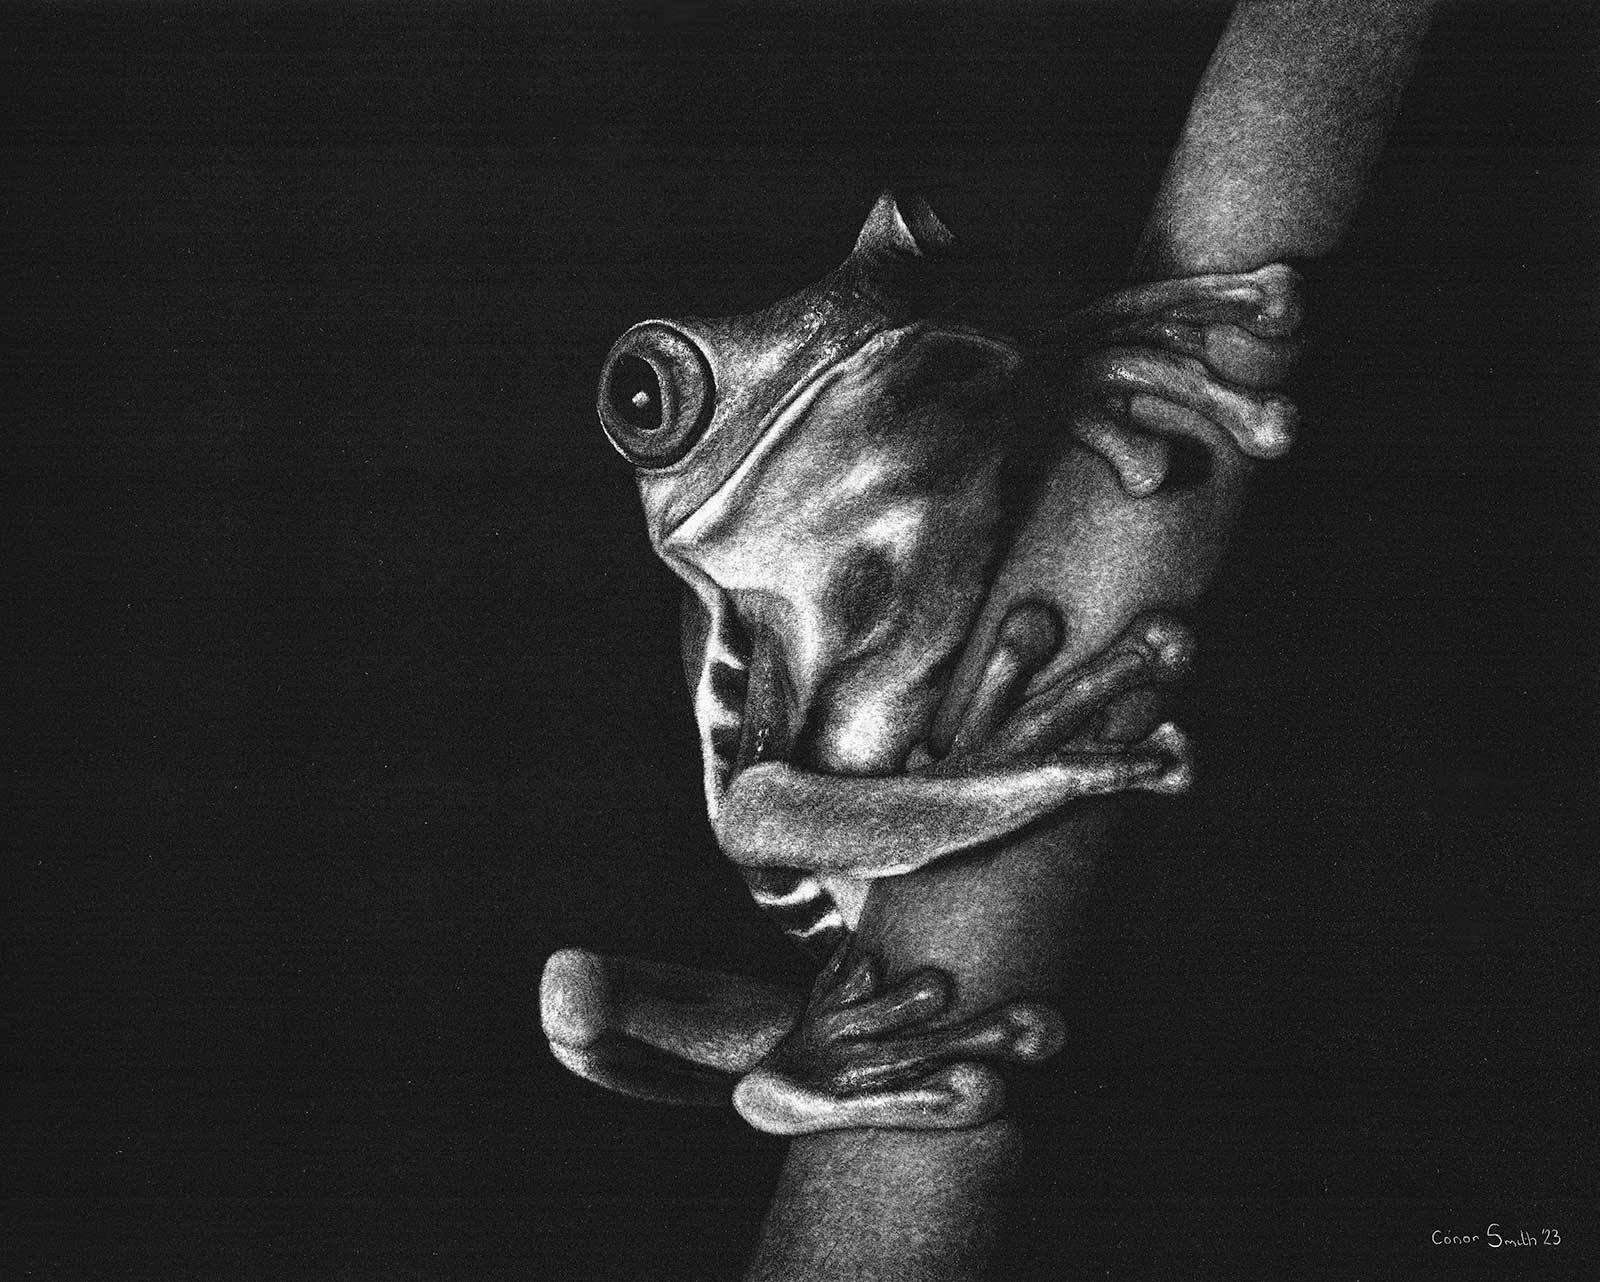
Red-eyed Tree Frog, scratchboard, 8 x 10" (20 x 25 cm)
When it comes to starting a piece, I always strive to find a reference that speaks to me, either with a dramatic or thought-provoking pose, interesting or complex textures, or intense lighting. If I can find one that incorporates all three, it is normally a miracle. Choosing a reference photo is a critical component for me in my process, as the monochrome nature of my scratchboard work means I need to create interest with lighting, textures and form, rather than color.
When I have finally found my reference photo, I then start to plan out the artwork, identifying areas where I can push highlights, problem solving how I will tackle certain textures, and manipulating areas of the reference I am not happy with. When I am planning, I have to carefully think how I will render certain textures, such as the patterns of an iris, or the intricate undulations of a nose. There is also meticulous planning of tones, as the darkest value is the black ink of the board, and the brightest highlight is the white clay underneath the black ink. I have to plan which areas will be the brightest and darkest, and I aim to get these in early in order to help me plan out my midtones. All this planning is done before I even start the first scratches.
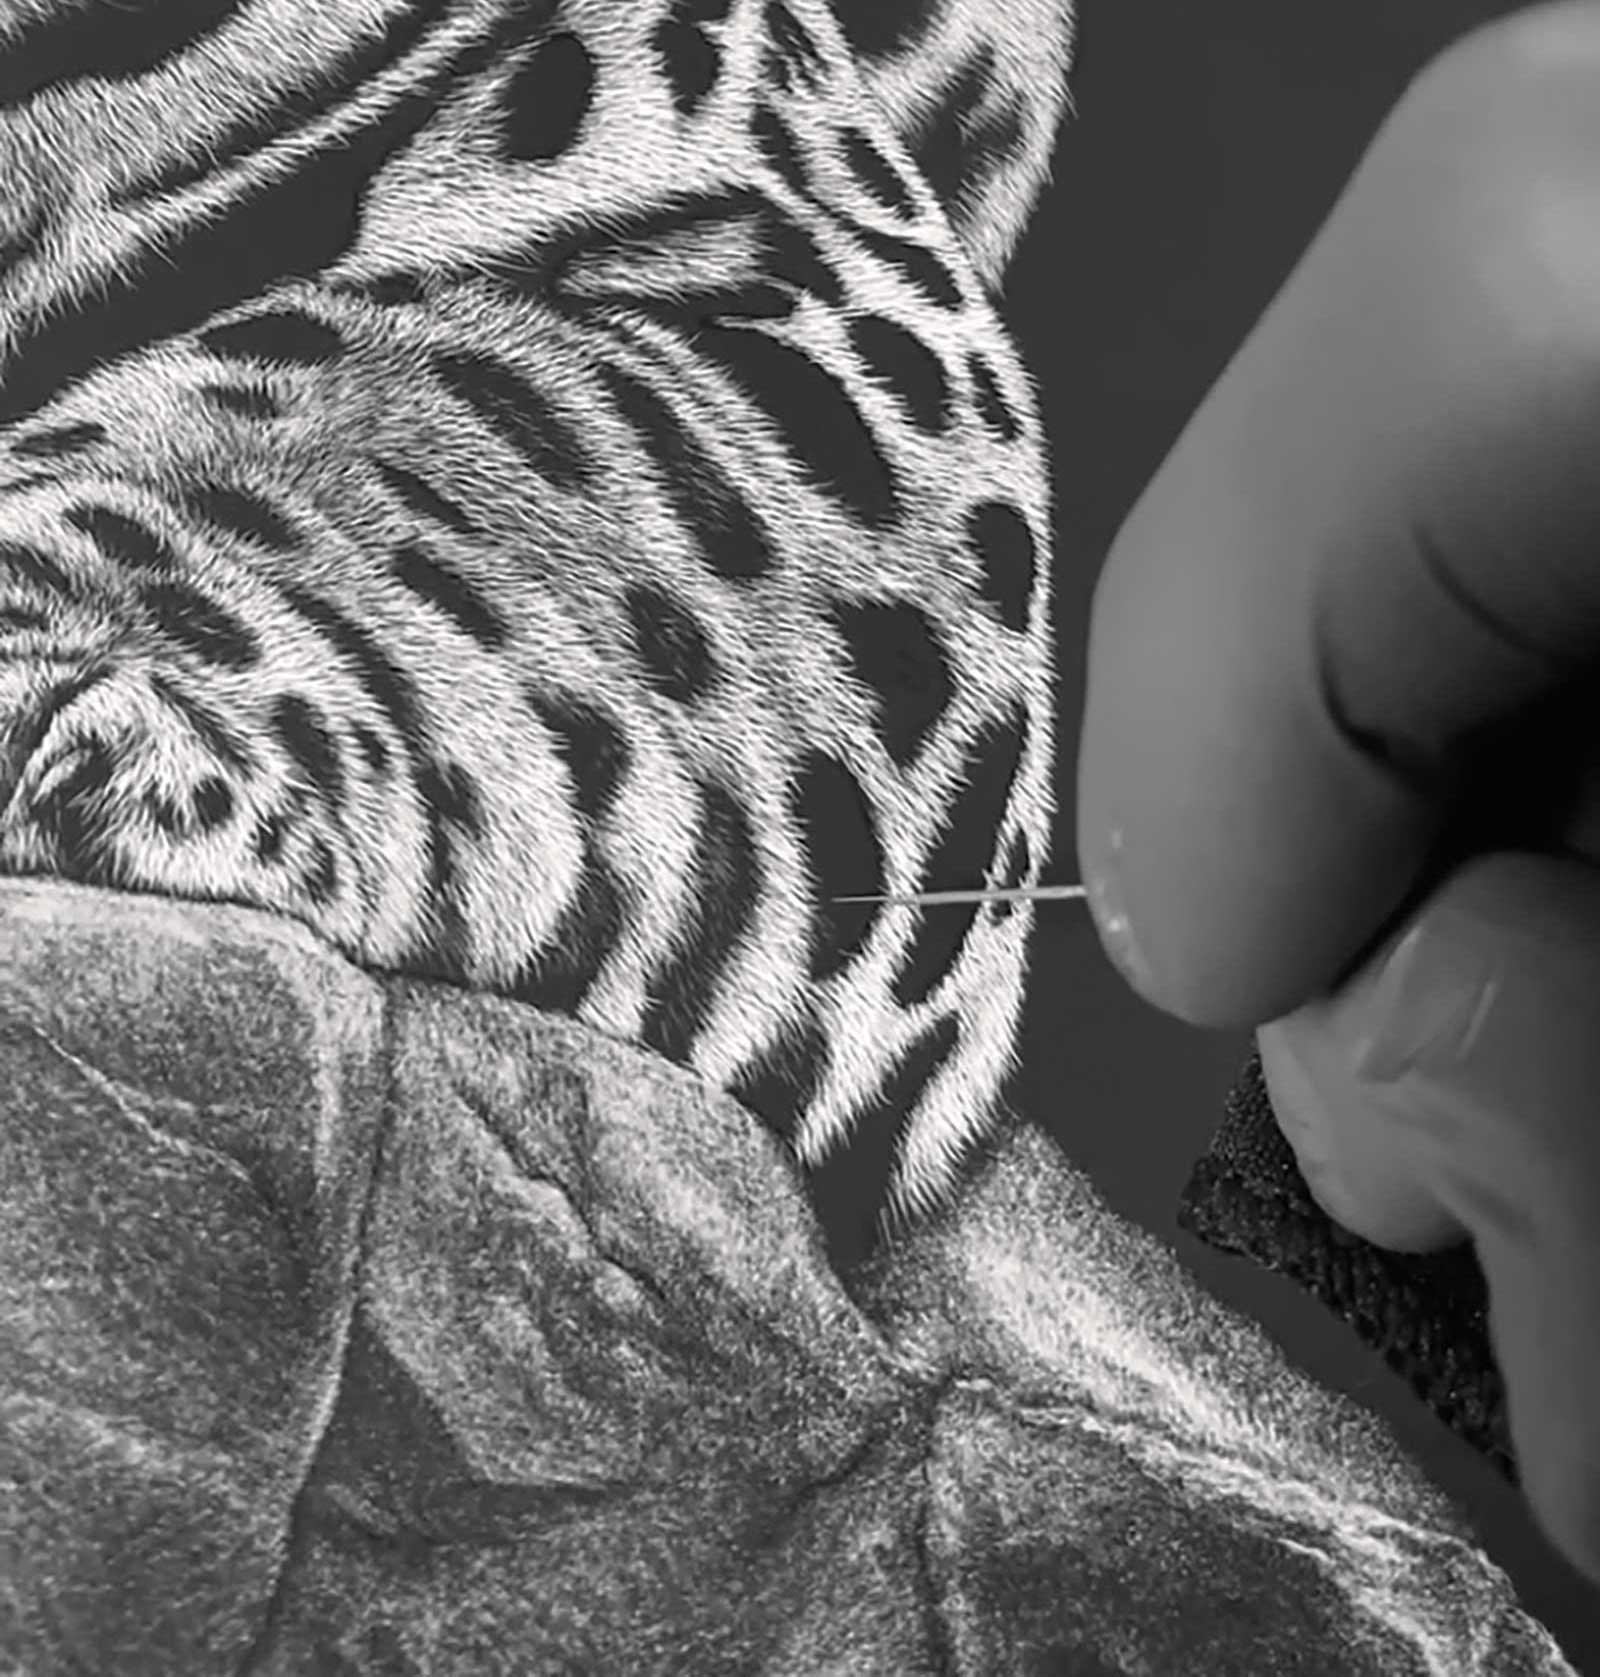
I use Ampersand scratchboard, which has both incredible durability and smoothness when scratching. The materials used to scratch away the ink can vary. This is where I can have a bit of fun and experiment to see what different textures I can achieve. My go to tools are an X-Acto knife/craft knife and various tattoo needles. I can also use a fiberglass brush, an ink eraser and even sandpaper to get a variety of different textures.
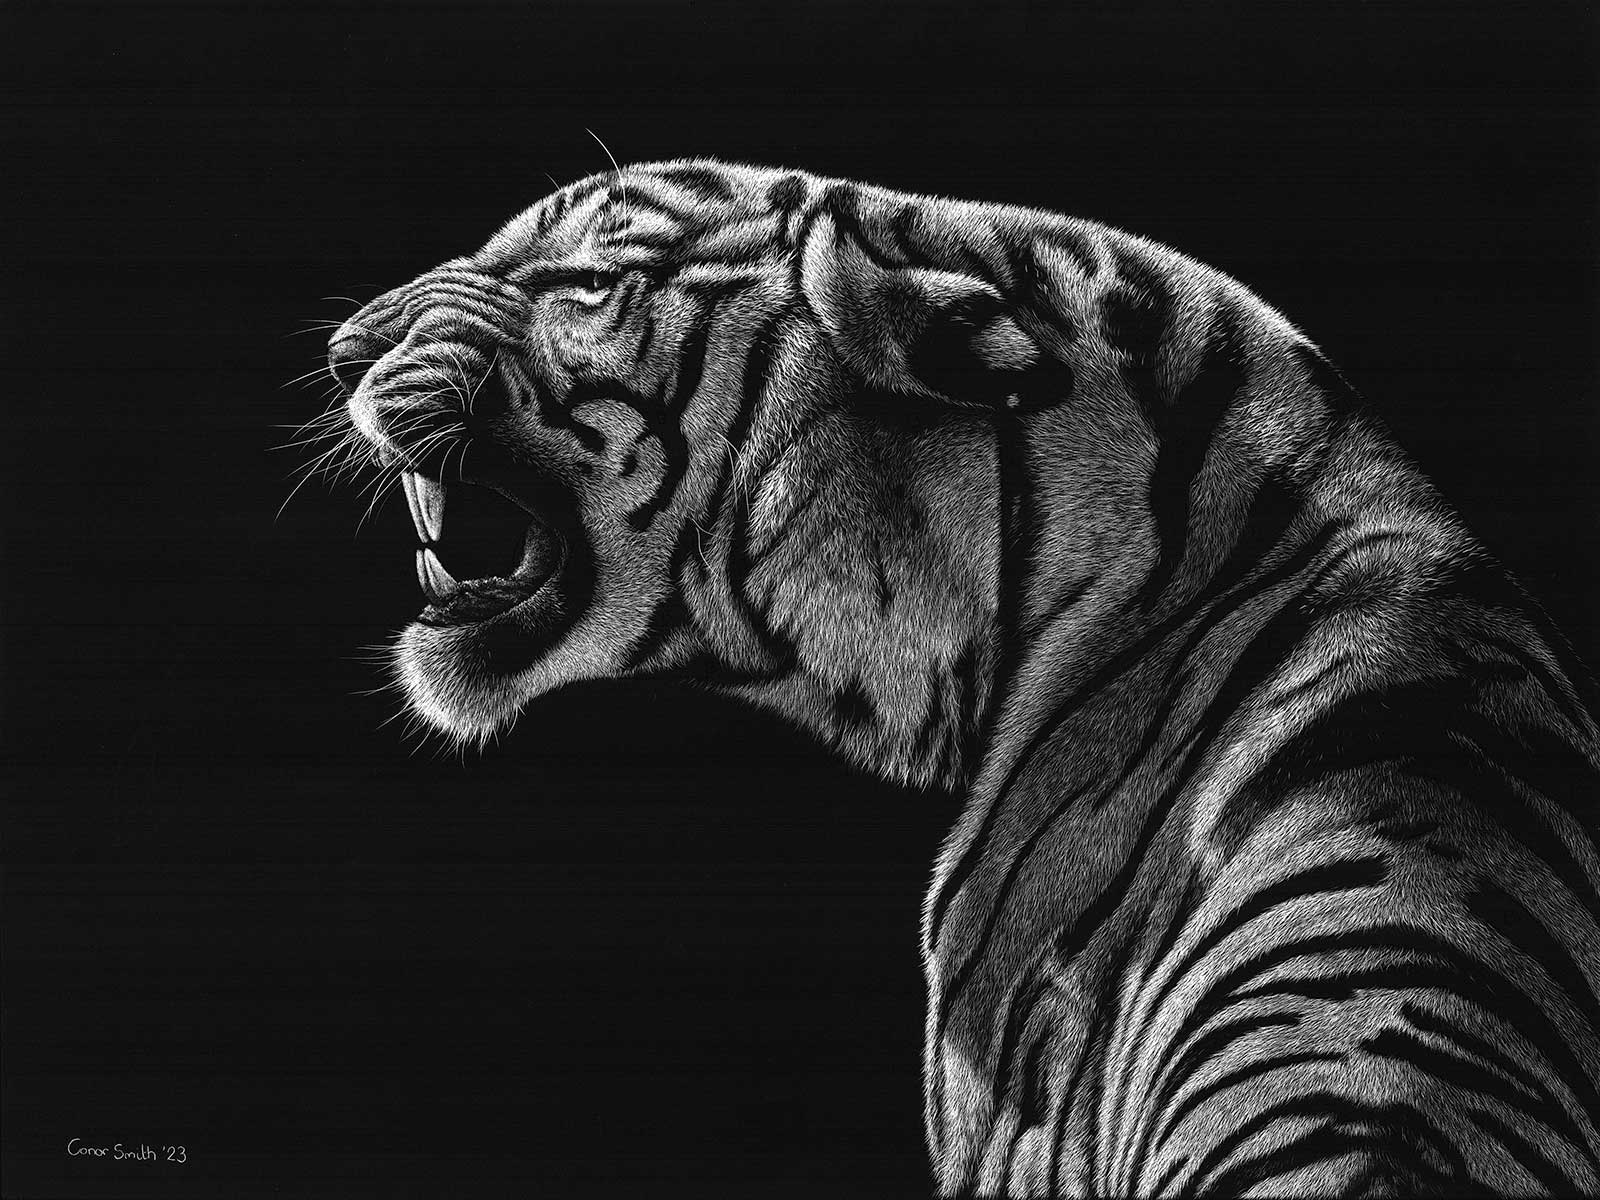
Sun Kissed, scratchboard, 9 x 12" (22 x 30 cm)
When I start the actual artwork, all the planning I have done really pays off, as I have a clear vision in my head of where I want to go and how I will get there. Most of the time I will start with the eyes, as I feel they give life to the artwork, and I will then strive to get the rest of the artwork up to the same standard. They also usually contain both the darkest dark value in the pupil and the brightest white value in the highlight. However, I can also start on an area where I know there are some questions surrounding how I will render the texture. It really depends on the feeling I have when I start. I know a lot of artists like to work across the entire artwork at once, but as much as I have tried, I struggle to do this. I tend to work on a small area, bringing it up to 85 to 90 percent completion, before re-going over the whole piece at the very end.
My Art in the Making Remi
Reference photo by Hollie Gordon
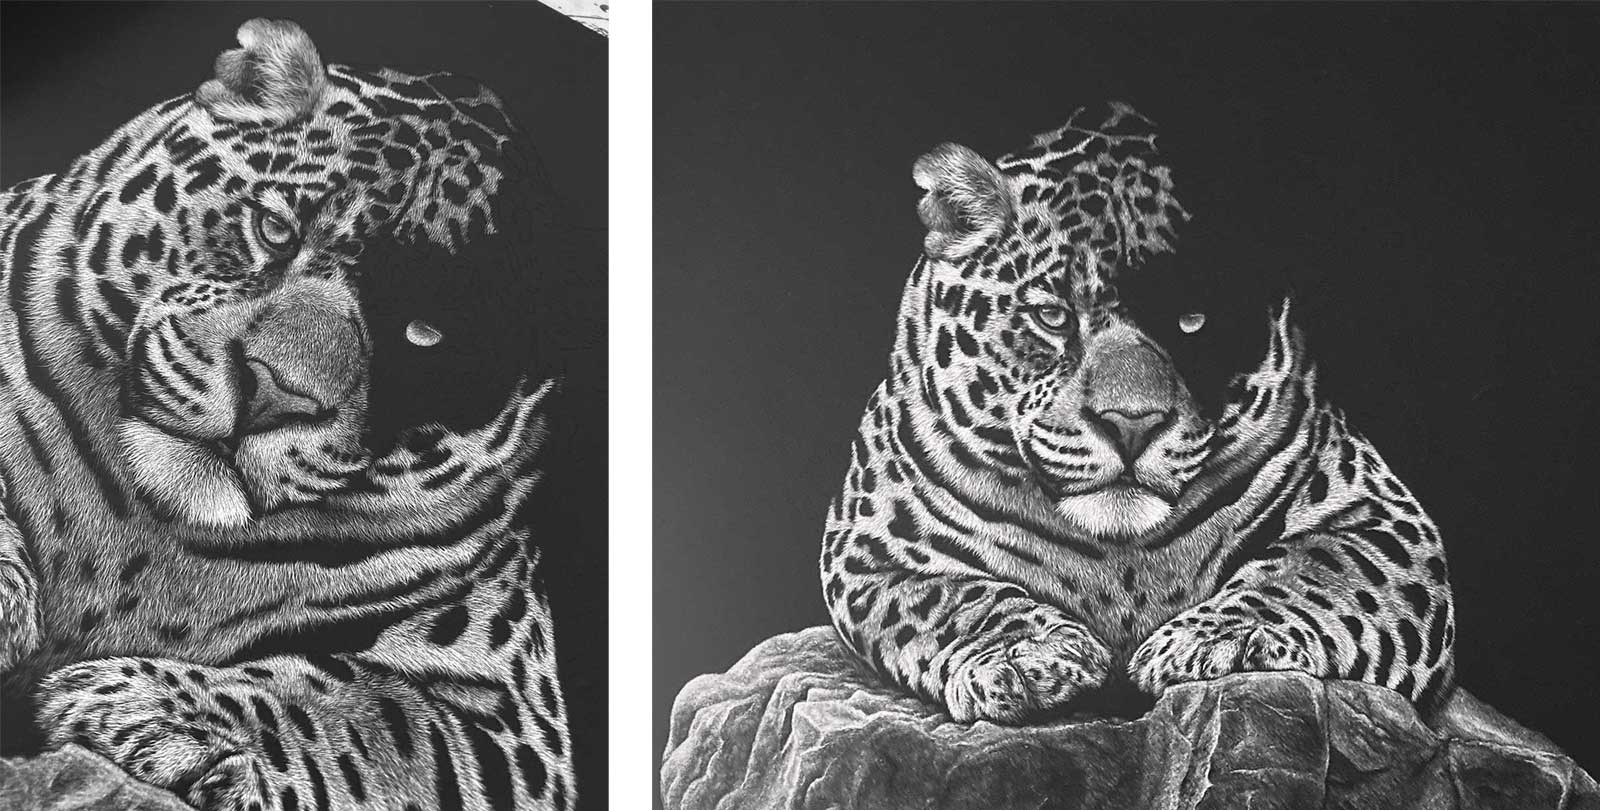
In this demonstration, I will show you my step-by-step process for creating this realistic jaguar in scratchboard. Remi is a jaguar that lives in South Lakes Safari Zoo and has fought off a rare form of cancer. I felt like this reference showed a strength and determination that I wanted to capture.
 Stage 1
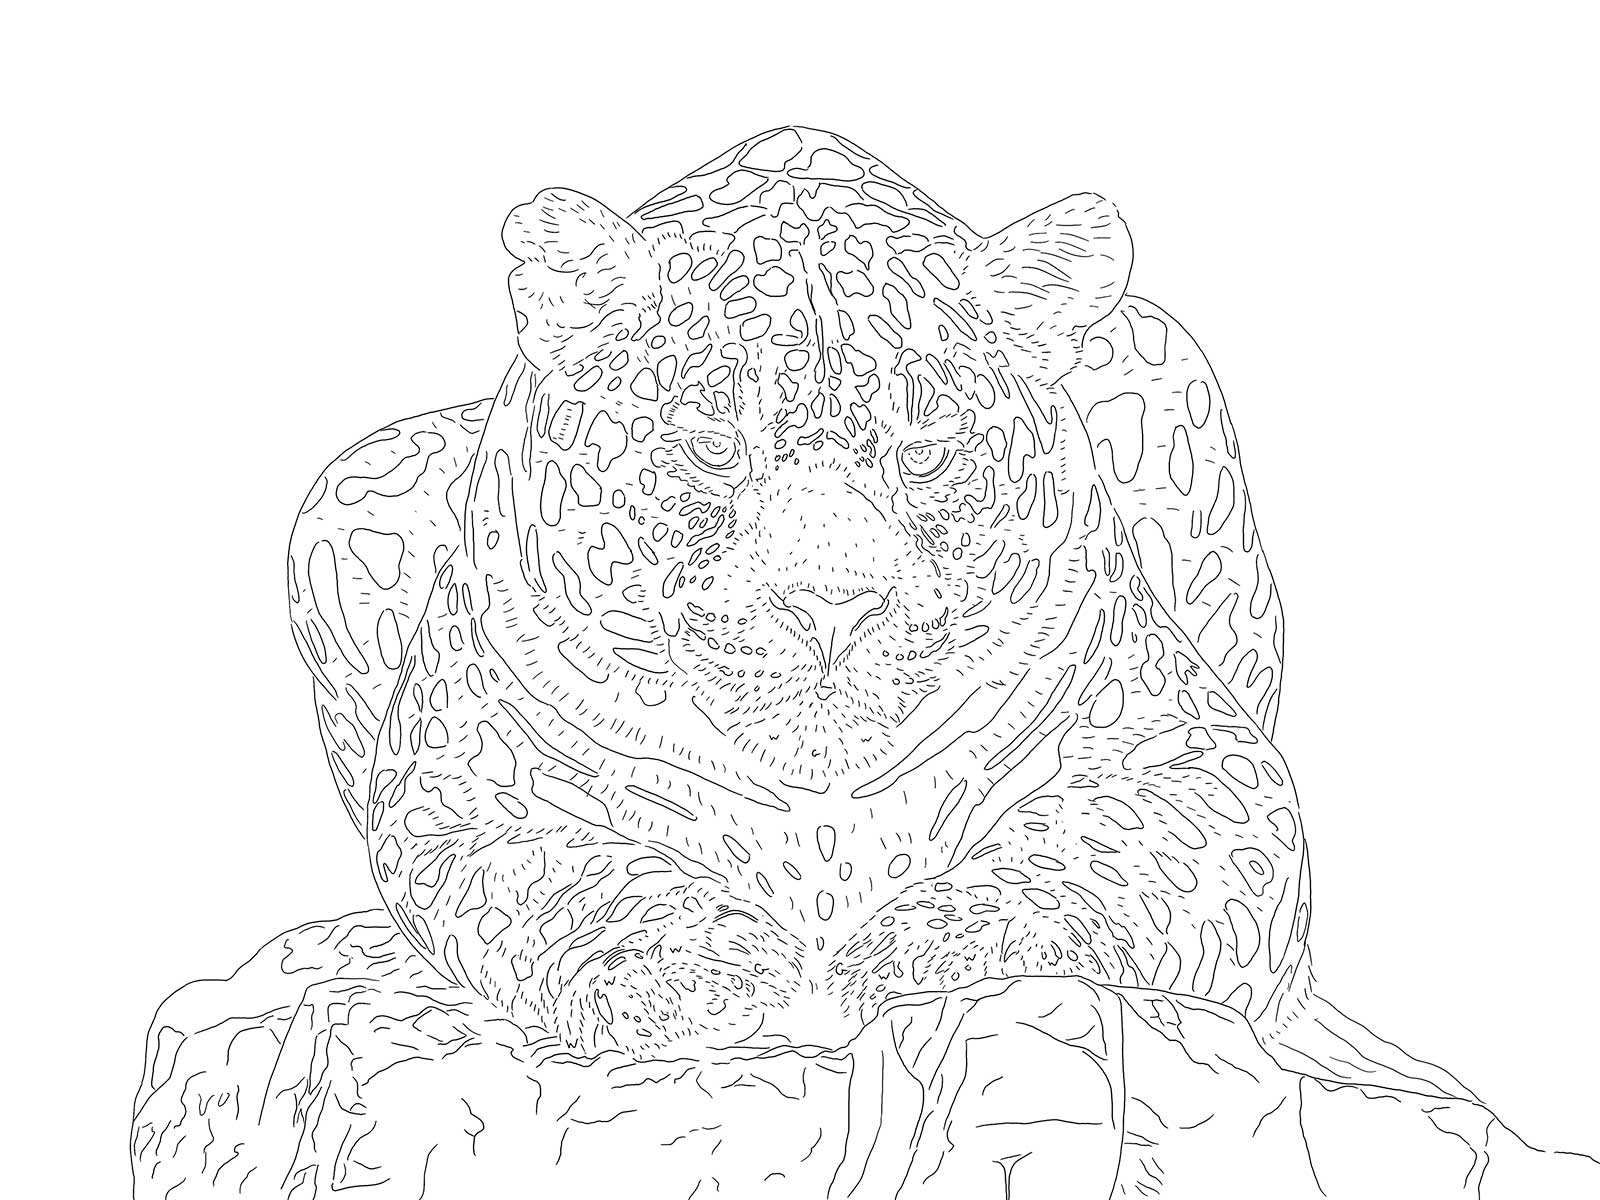
Stage 1 Drawing
For my initial drawing, I use an app on my iPad called Procreate. I then print this off and use carbon/graphite paper to transfer it onto the board.
 Stage 2
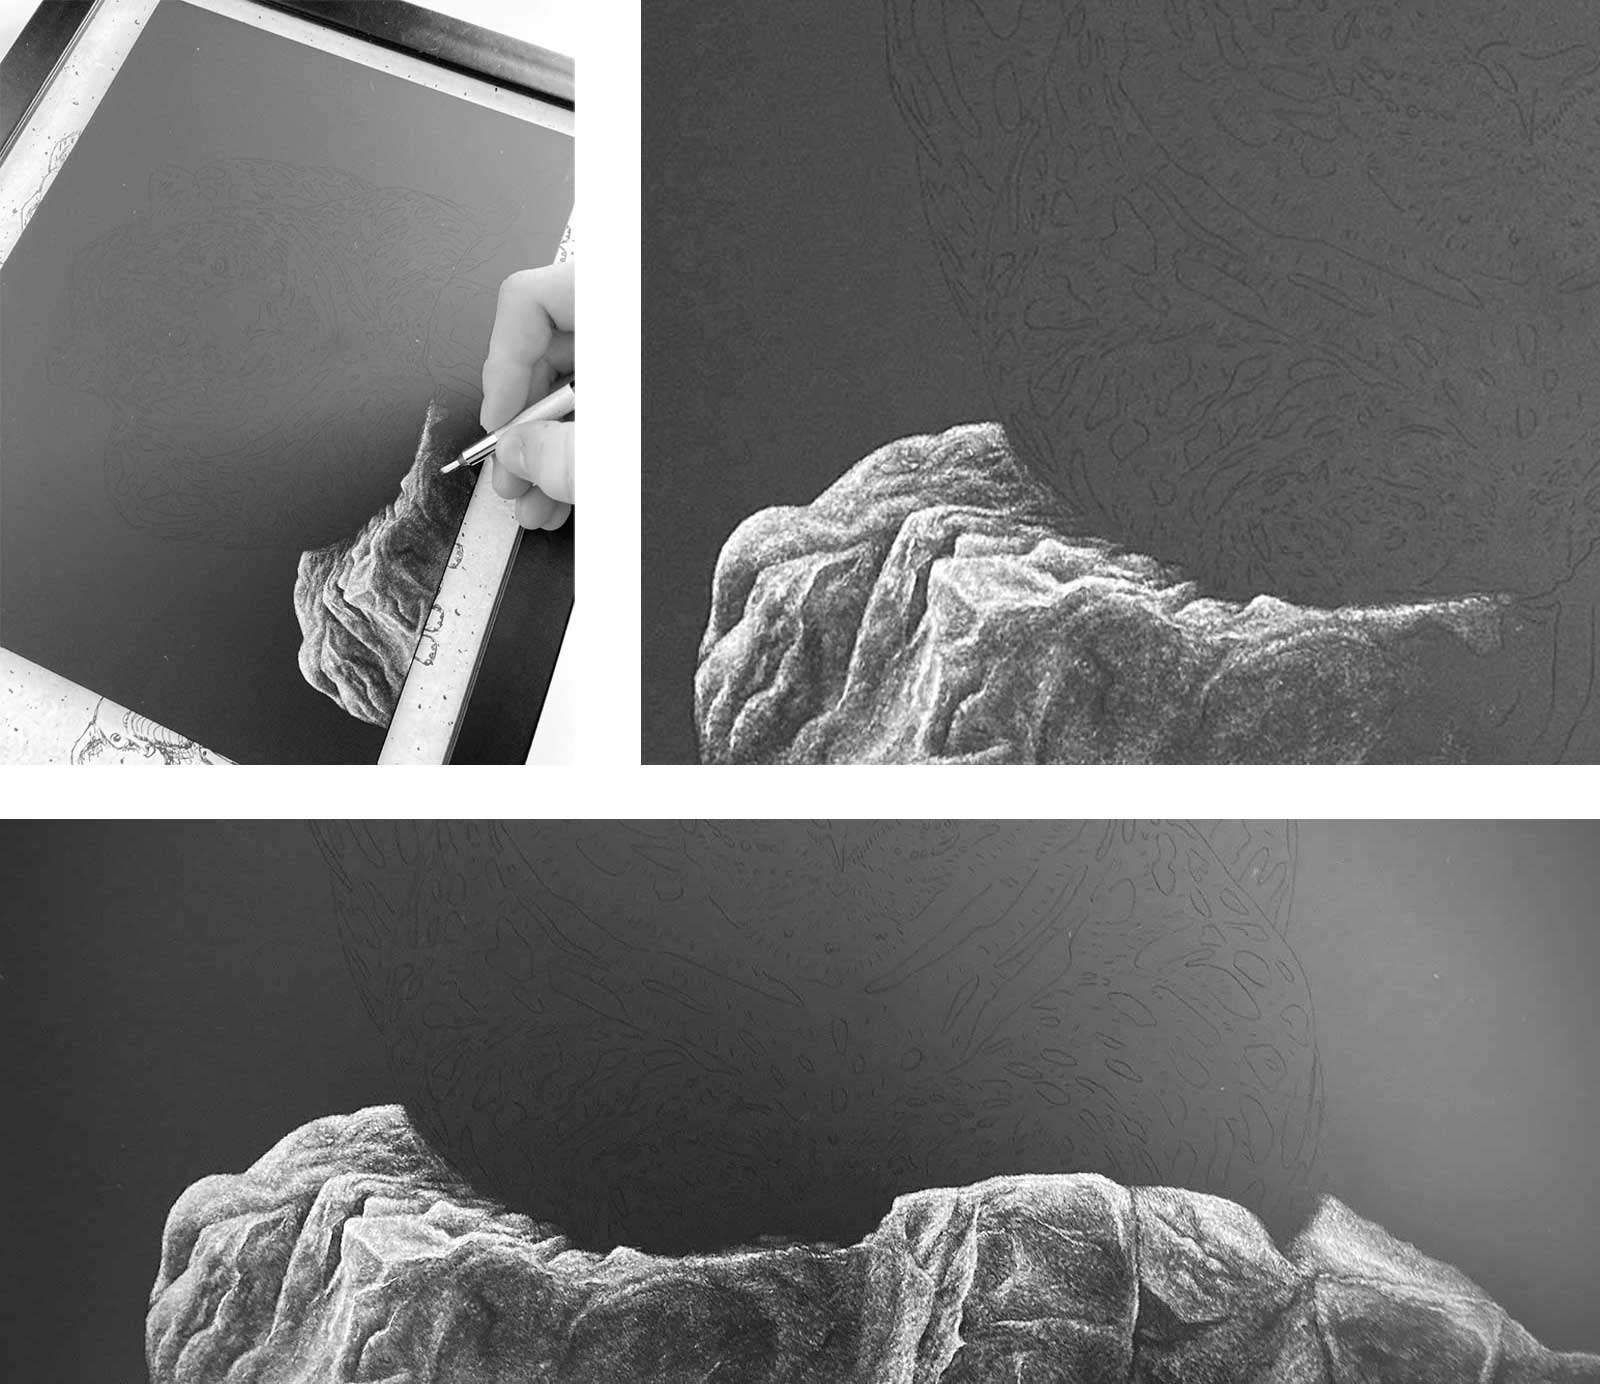
Stage 2 Texture of the Rock
I decided to start on the rock texture. I knew it was going to be a challenging texture to replicate, so I wanted to tackle it early. I used a fiberglass brush and a stippling texture.
 Stage 3
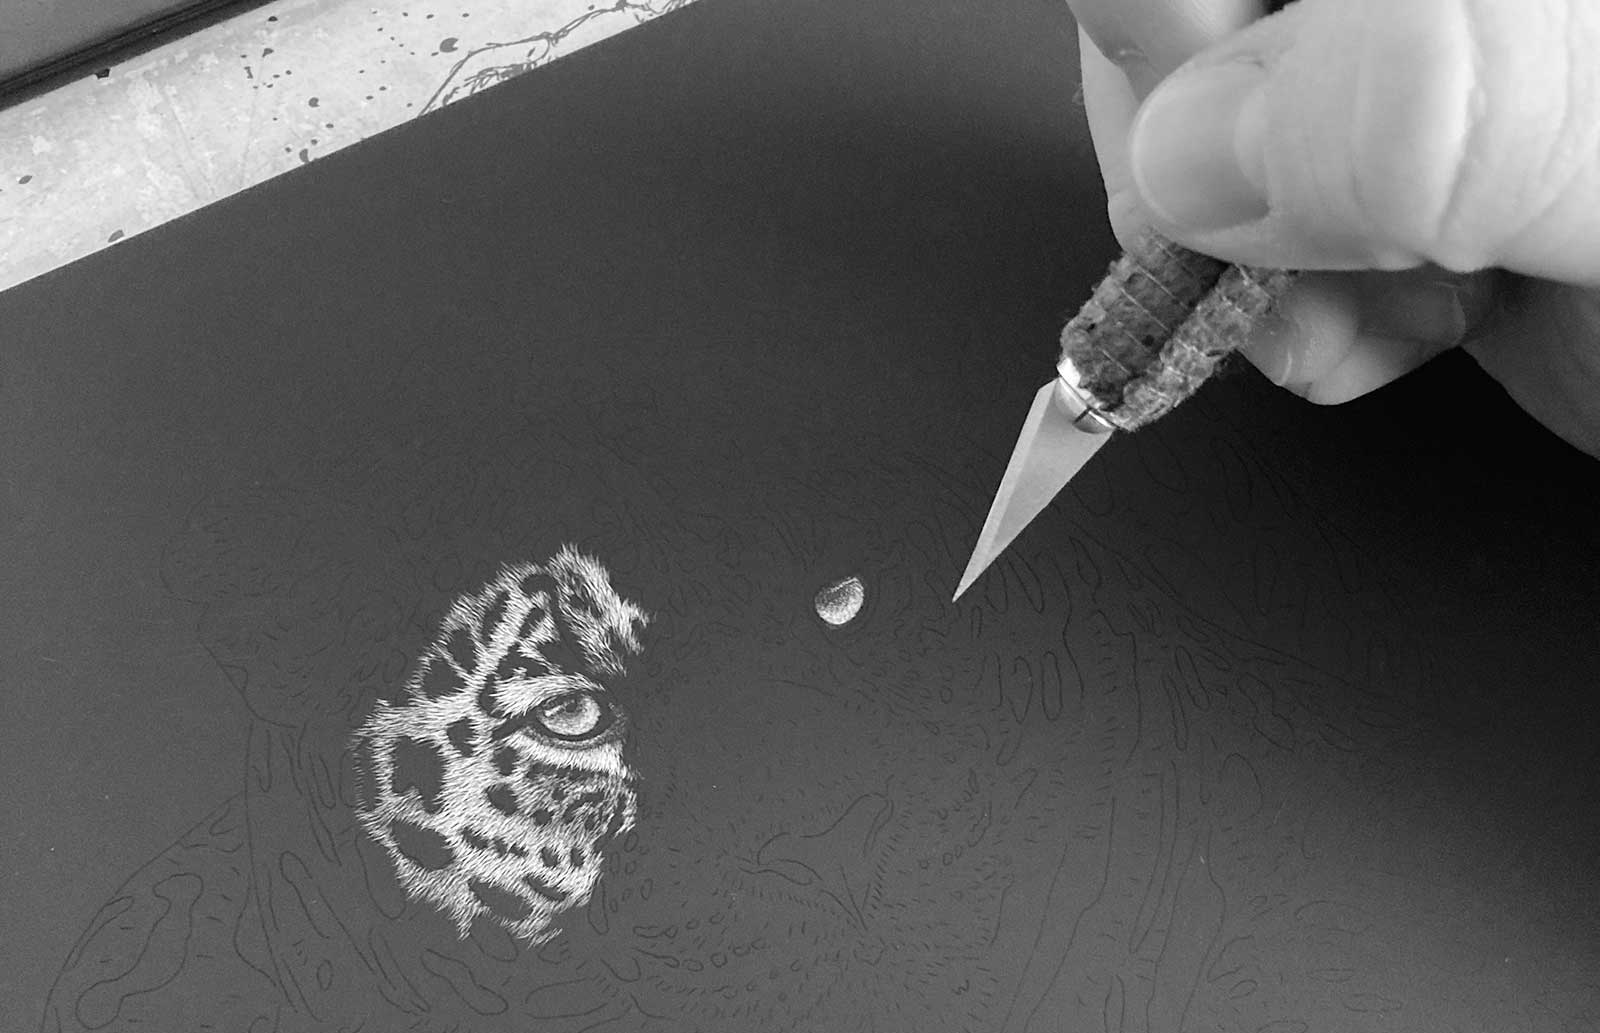
Stage 3 Starting the Eyes
I started this area with his eyes, but because they were such a small area, it was important to focus on the lighting over detailing.
 Stage 4
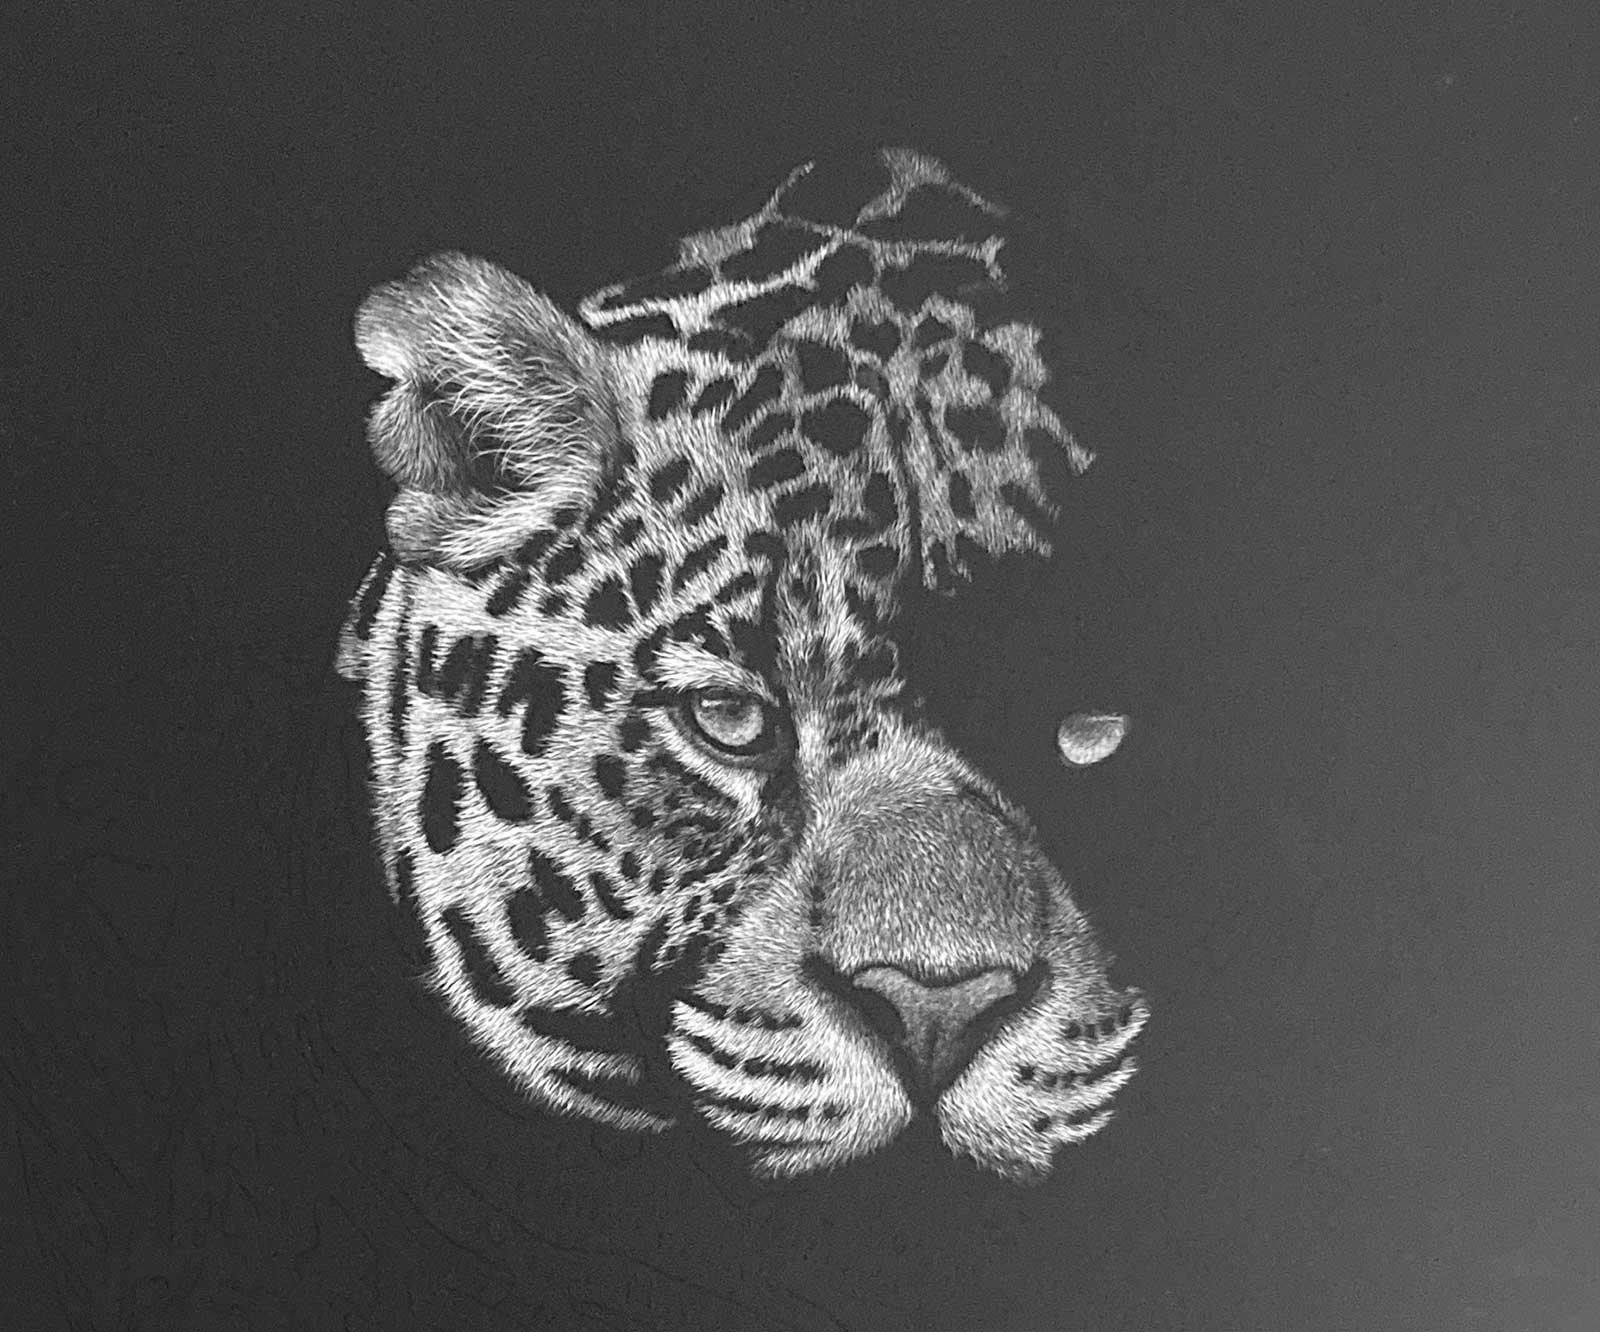
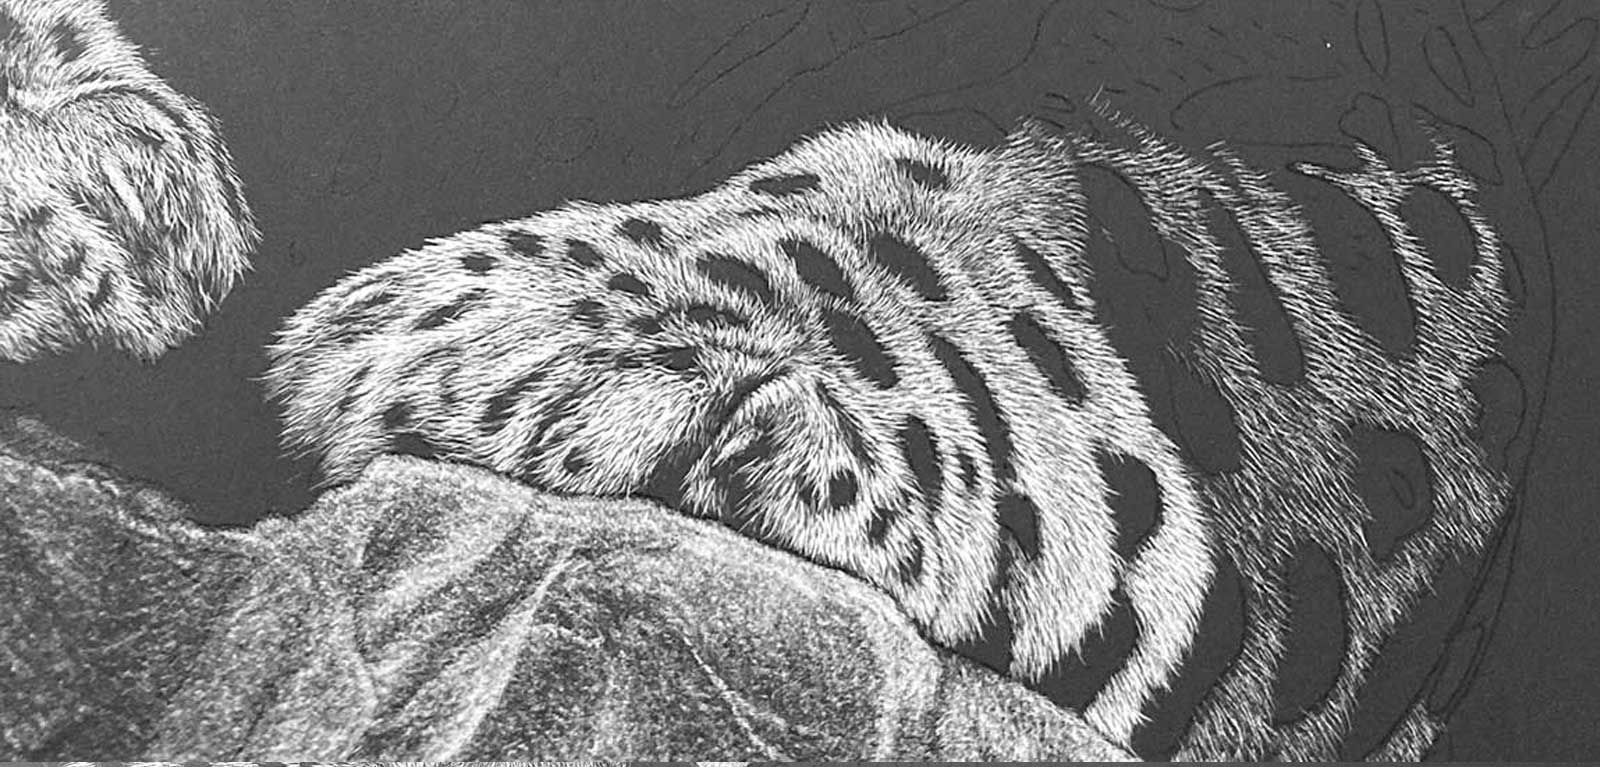
Stage 4 Layering in the Face
I continue working across the whole face, tackling small areas at a time. I use a layering process, laying down fainter areas of fur with my tattoo needles and then building brightness on top of these.
 Stage 5
Stage 5 Paws
The paws on this piece were my favorite part but also one of the most challenging. I worked across these areas very slowly, making sure to get the fur directions and creases accurate.
 Stage 6
Stage 6 Lights and Darks
On the far right I am mapping out the dark spots and fur direction. In the paw itself, you can see how I have worked more layers to create brighter fur.
 Stage 7
Stage 7 Continuing to Chip Away
I continue this process across the entire piece, layering fur and paying attention to fur direction and lighting.
 Stage 8
Stage 8 Fine Details
The finest and smallest details can make all the difference. In the black spots, I add in the impression of black fur catching the light, using my smallest tattoo needle for this.
 Stage 9
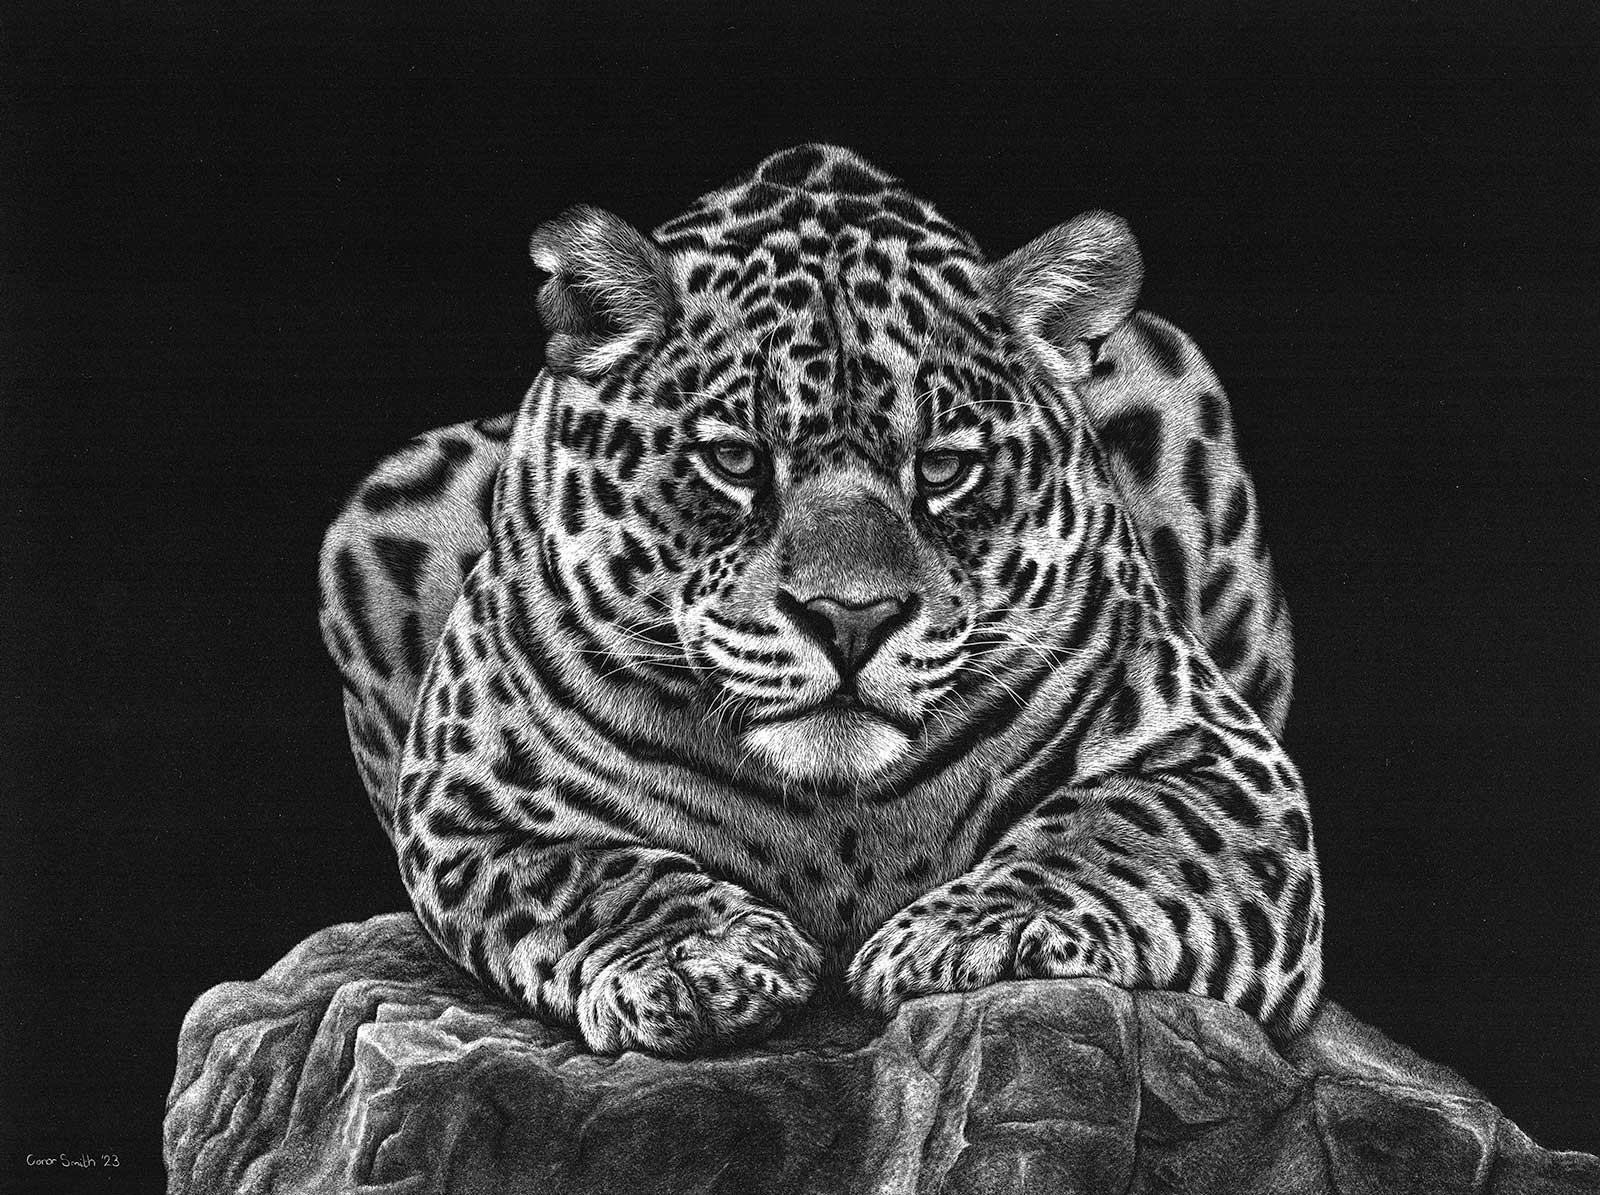
Stage 9 Finished Artwork
Remi, scratchboard, 9 x 12" (22 x 30 cm)
Final touches are just as important as the first. I work across the artwork as a whole, brightening highlights and adding final fur textures including whiskers and flyaway hairs.
About the Artist
 Conor Smith
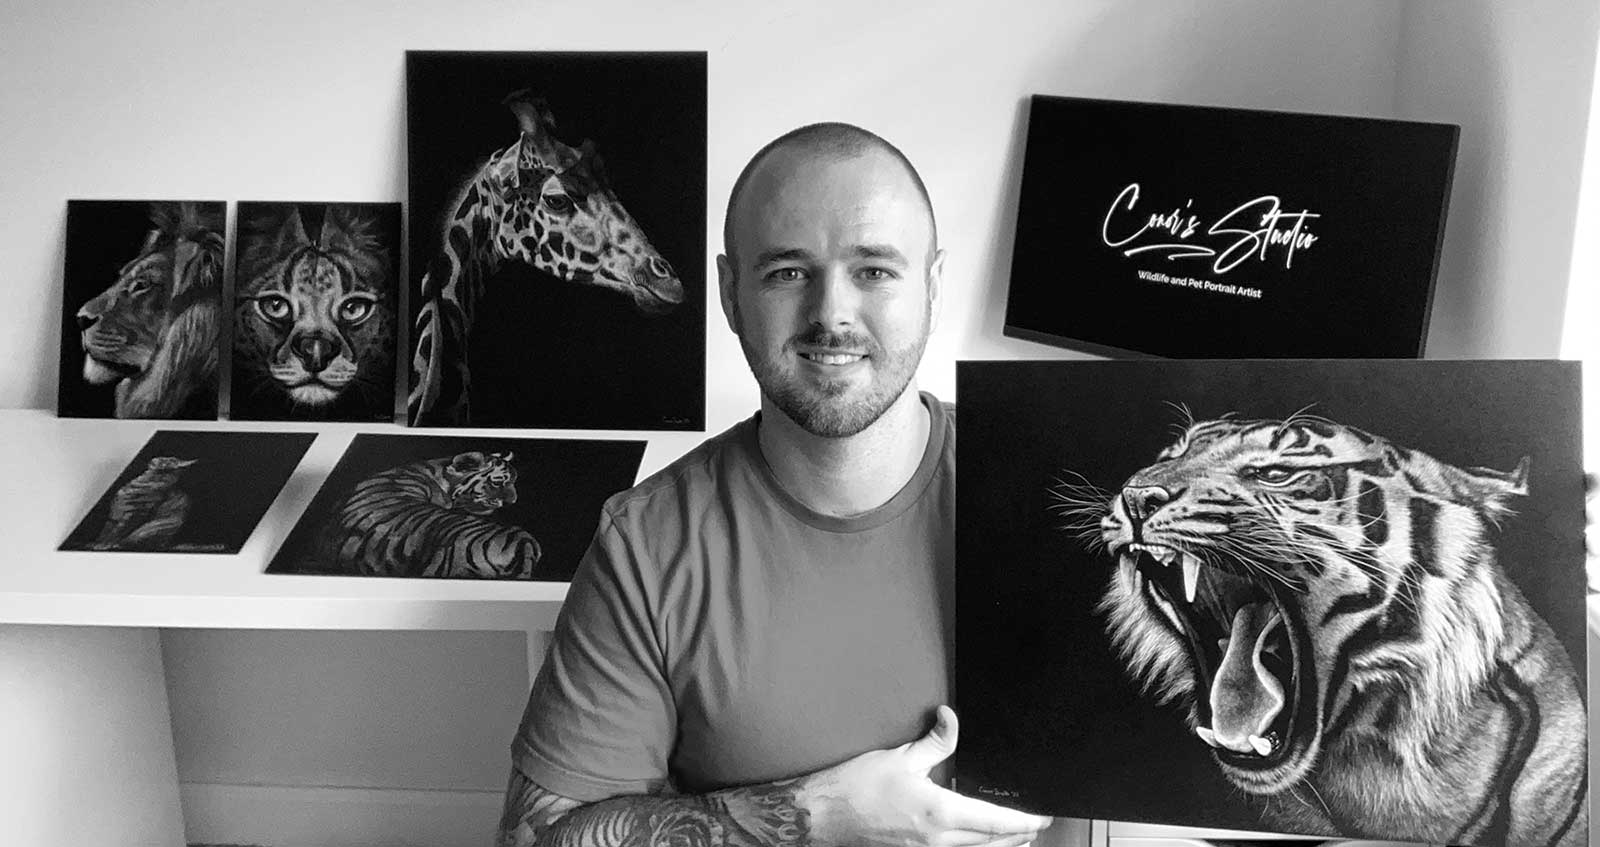
Conor Smith is a 31-year-old scratchboard artist based in Staffordshire in the United Kingdom, specializing in realistic wildlife artwork. He is a member of the International Society of Scratchboard Artists and has been awarded Signature Status. Smith’s work is shown through online platforms such as Facebook, Instagram and YouTube. He has created multiple YouTube videos showing how he creates his works to help inspire and motivate current and new scratchboard artists.
When Smith is not creating artwork, he is working as a paramedic within the National Health Service in the UK. But whenever he gets the chance, he picks up his tools and gets scratching.