


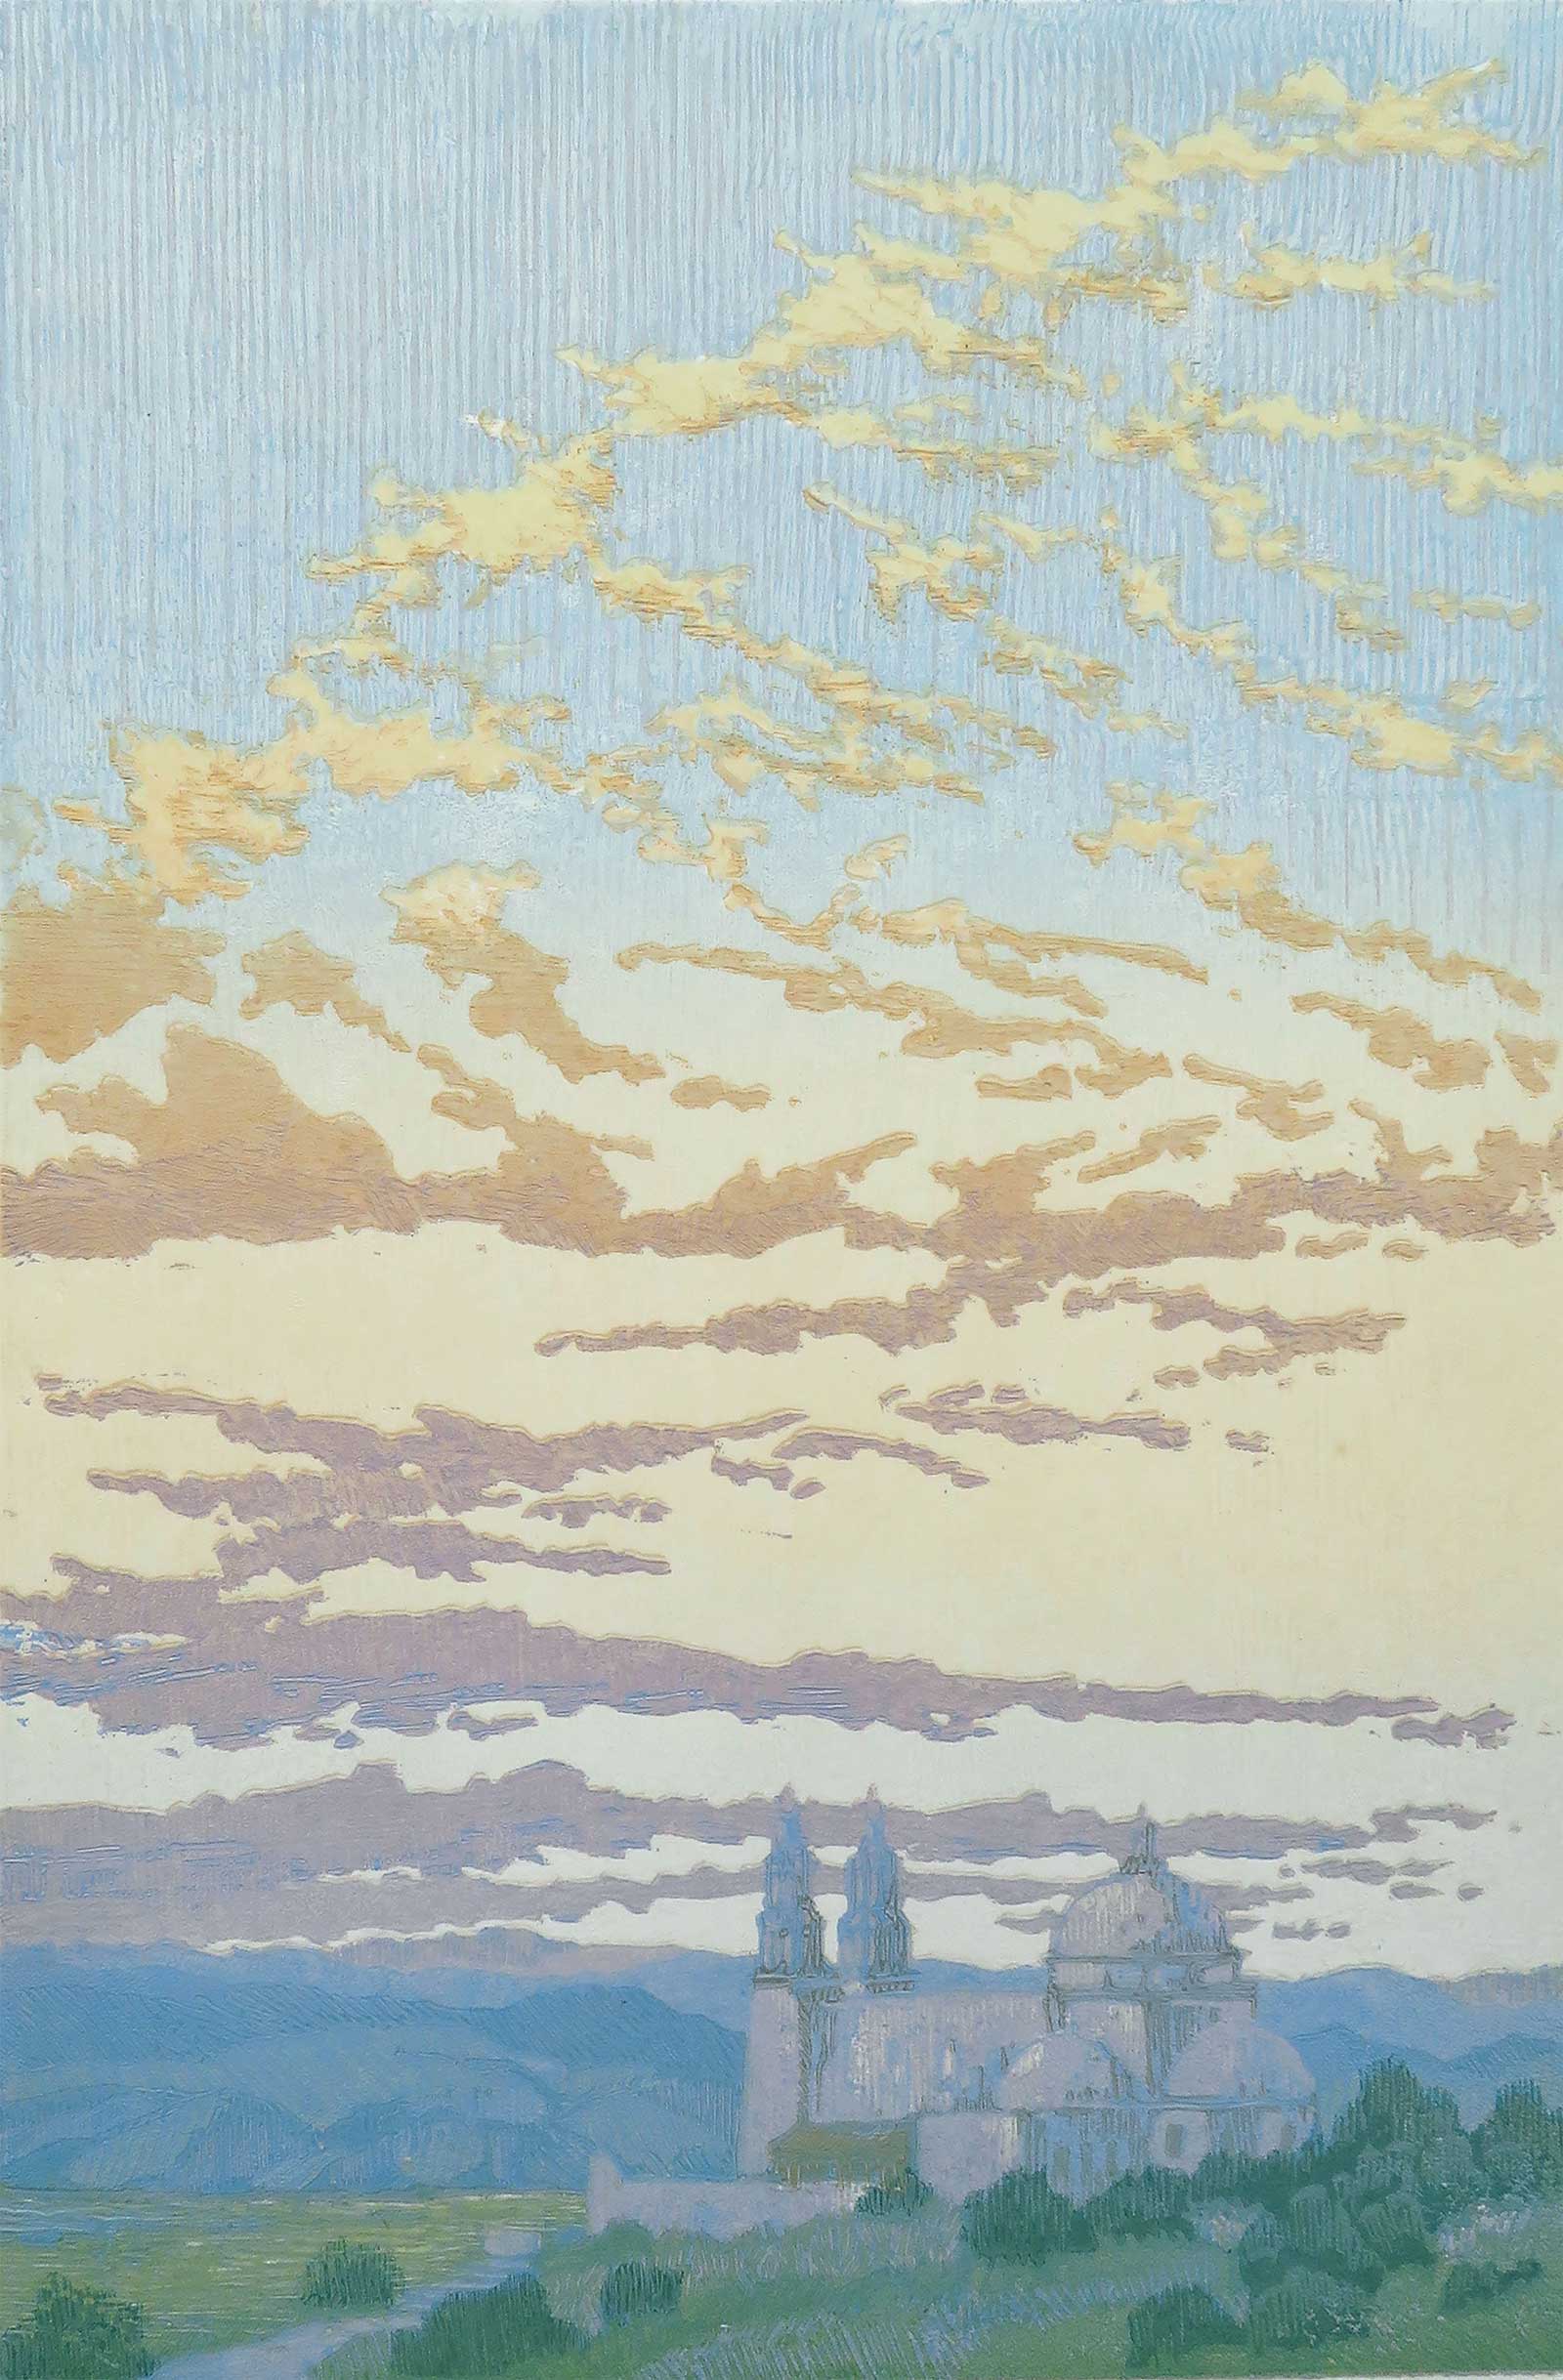
Japanese woodblocks, particularly the work of Hasui Kawase and Hiroshi Yoshida—both considered masters of the Shin-hanga movement—have inspired and influenced my work. There was a great tradition of creativity and innovation in Japanese printmaking during the 18th and 19th centuries. I see the gift of knowledge from former masters not as a dictum of the process, but rather as a springboard for my own creativity.
Passing Time, ed. 12, woodblock print, 14 x 11" (35 x 27 cm)
Moku (wood) hanga (print) is a Japanese printmaking technique distinguished by its simplicity of material: wood, carving tool, water, paper, pigment, rice paste and baren. The mechanics of the process are simple, yet labor intensive, as every step is completely manual. I am physically involved with the control of each step during printing: I can apply ink to a specific area or the entire block; I can blend colors to create a gradation or modulate the subtlety of tone; I can adjust the pressure and texture of the baren to create different effects; I can print using multiple blocks to add detail and depth to a smaller area.
The more I learned about the moku hanga process, the more I moved away from traditional Western style relief printing. What intrigues me most about the hand-printing process is that it is all about touch. As an artist, I learn everything about the language I work in, taking the vocabulary and making it my own. I look at the woodblocks as my woodblock paintings. The more comfortable one becomes with a process, the more fluid and creative one can be.
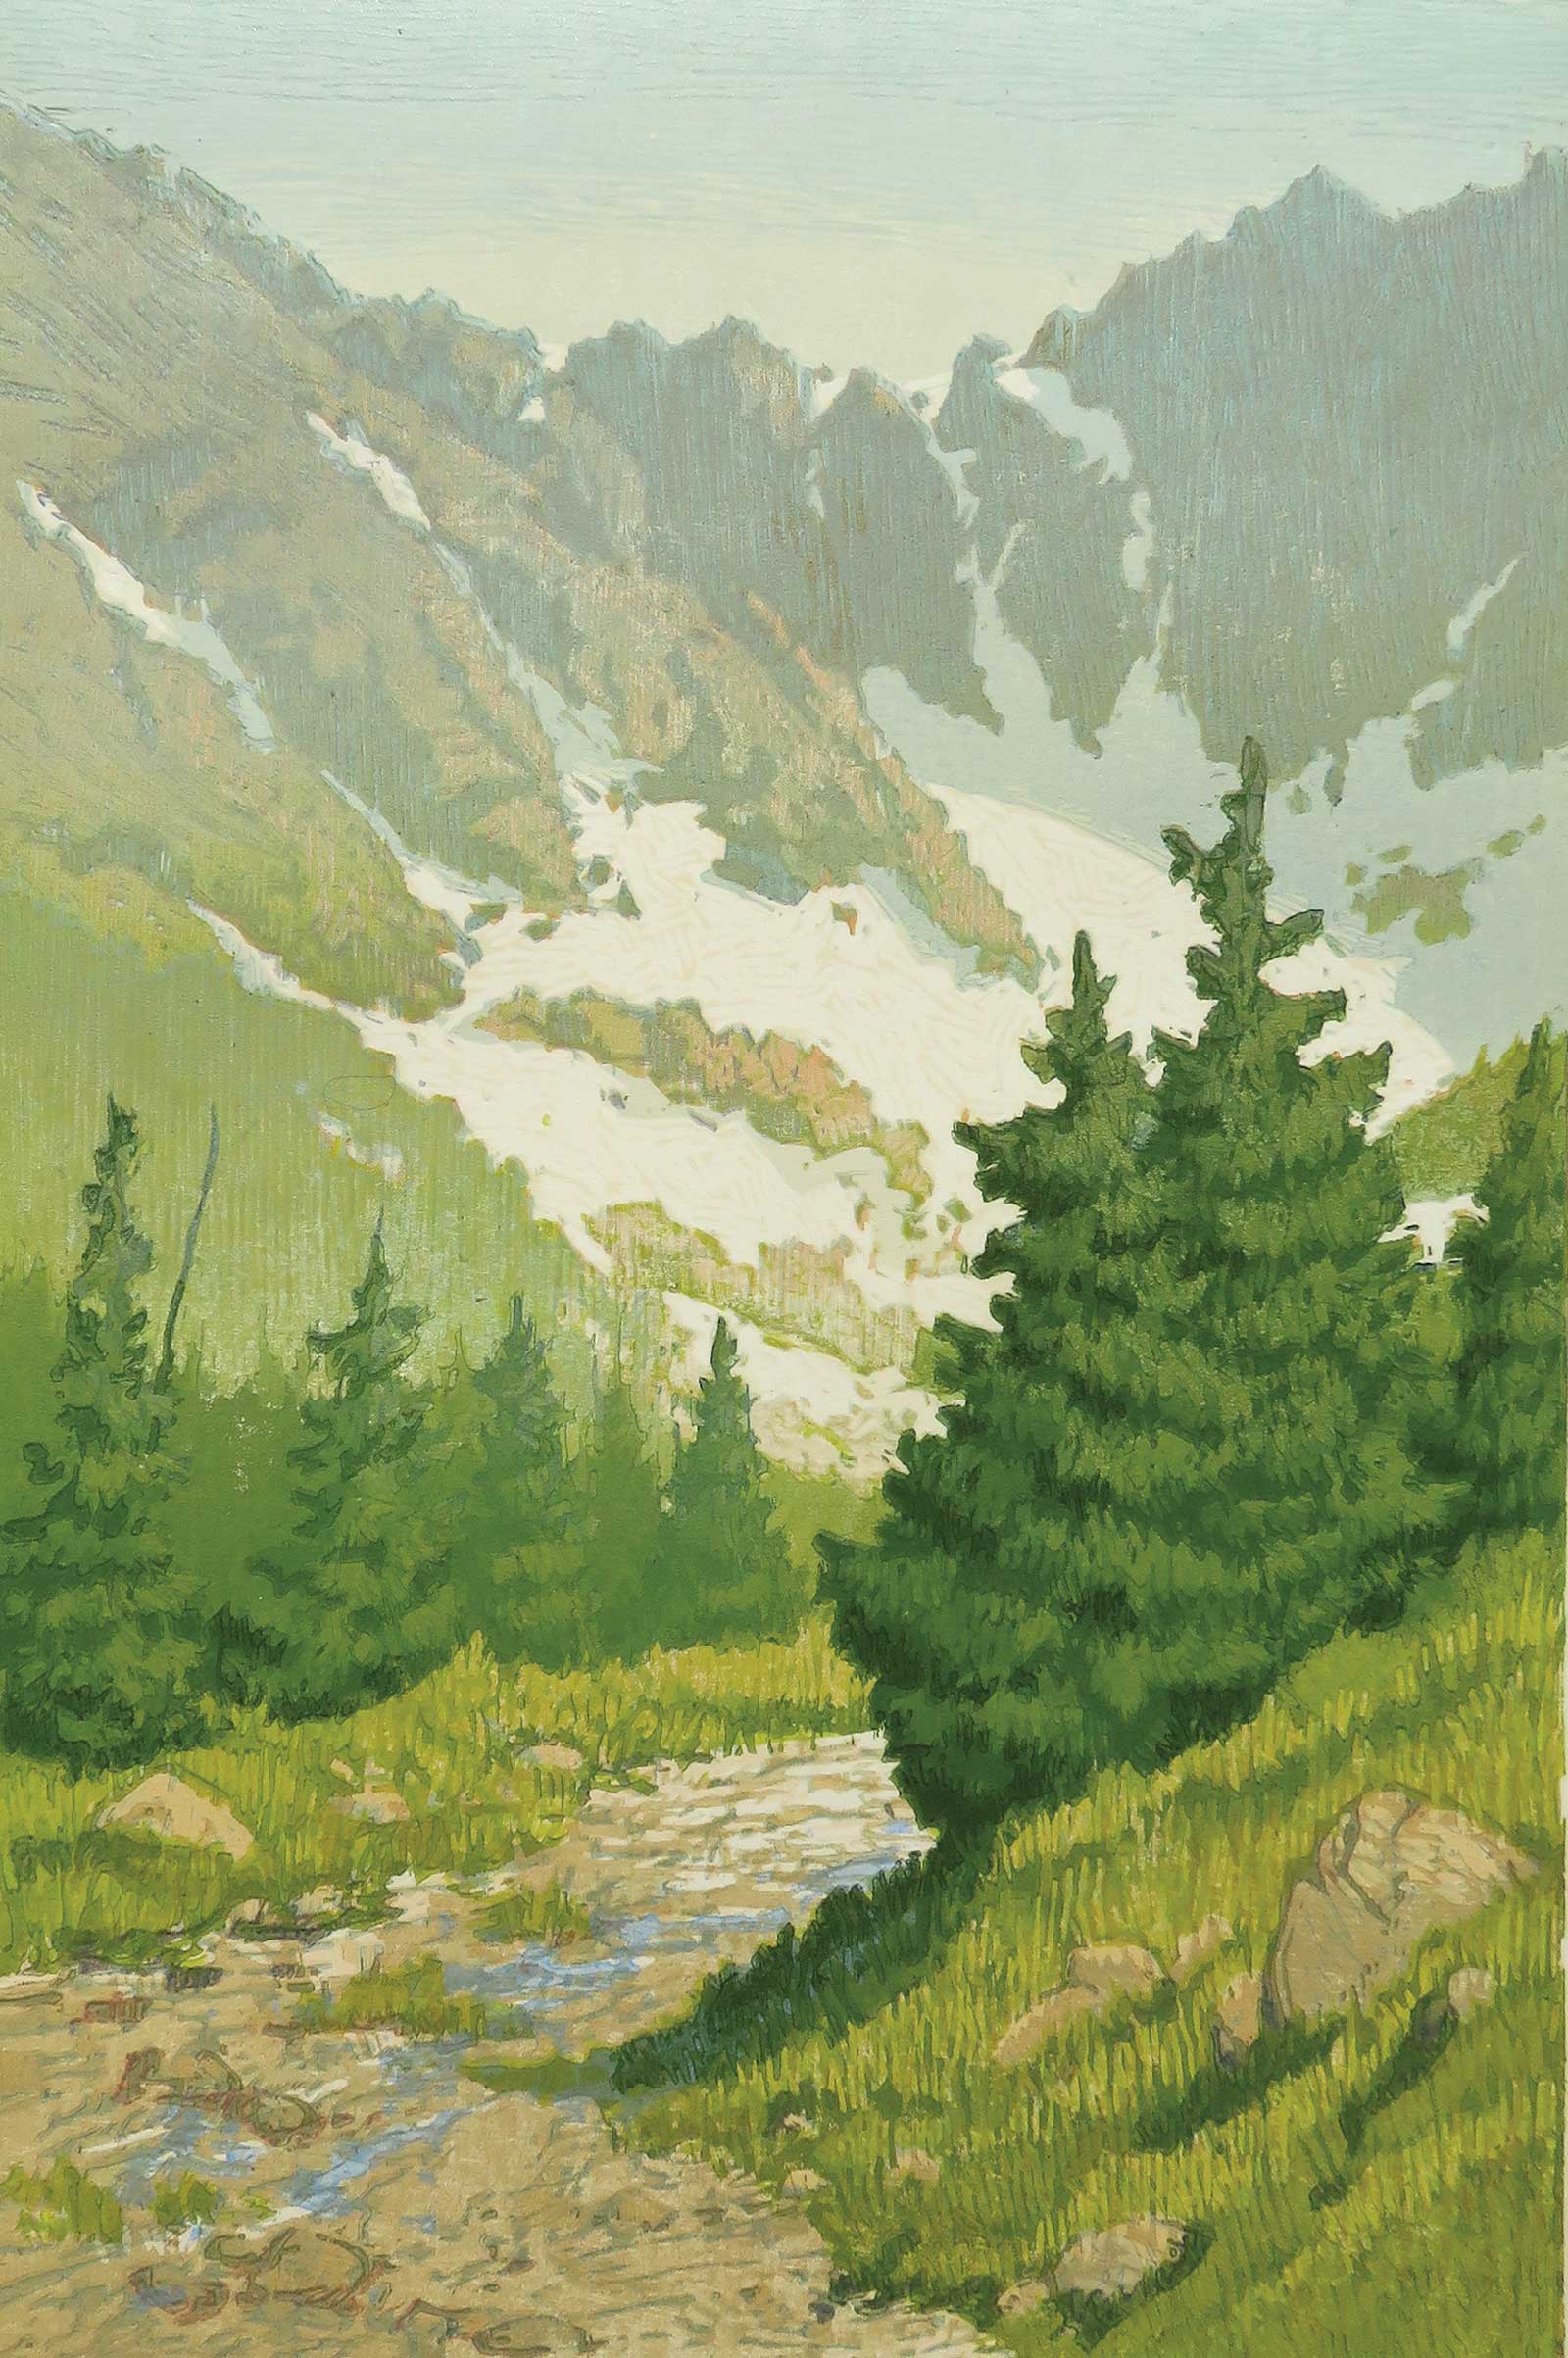
Snowfield, ed. 18, woodblock print, 19 x 12" (48 x 30 cm)
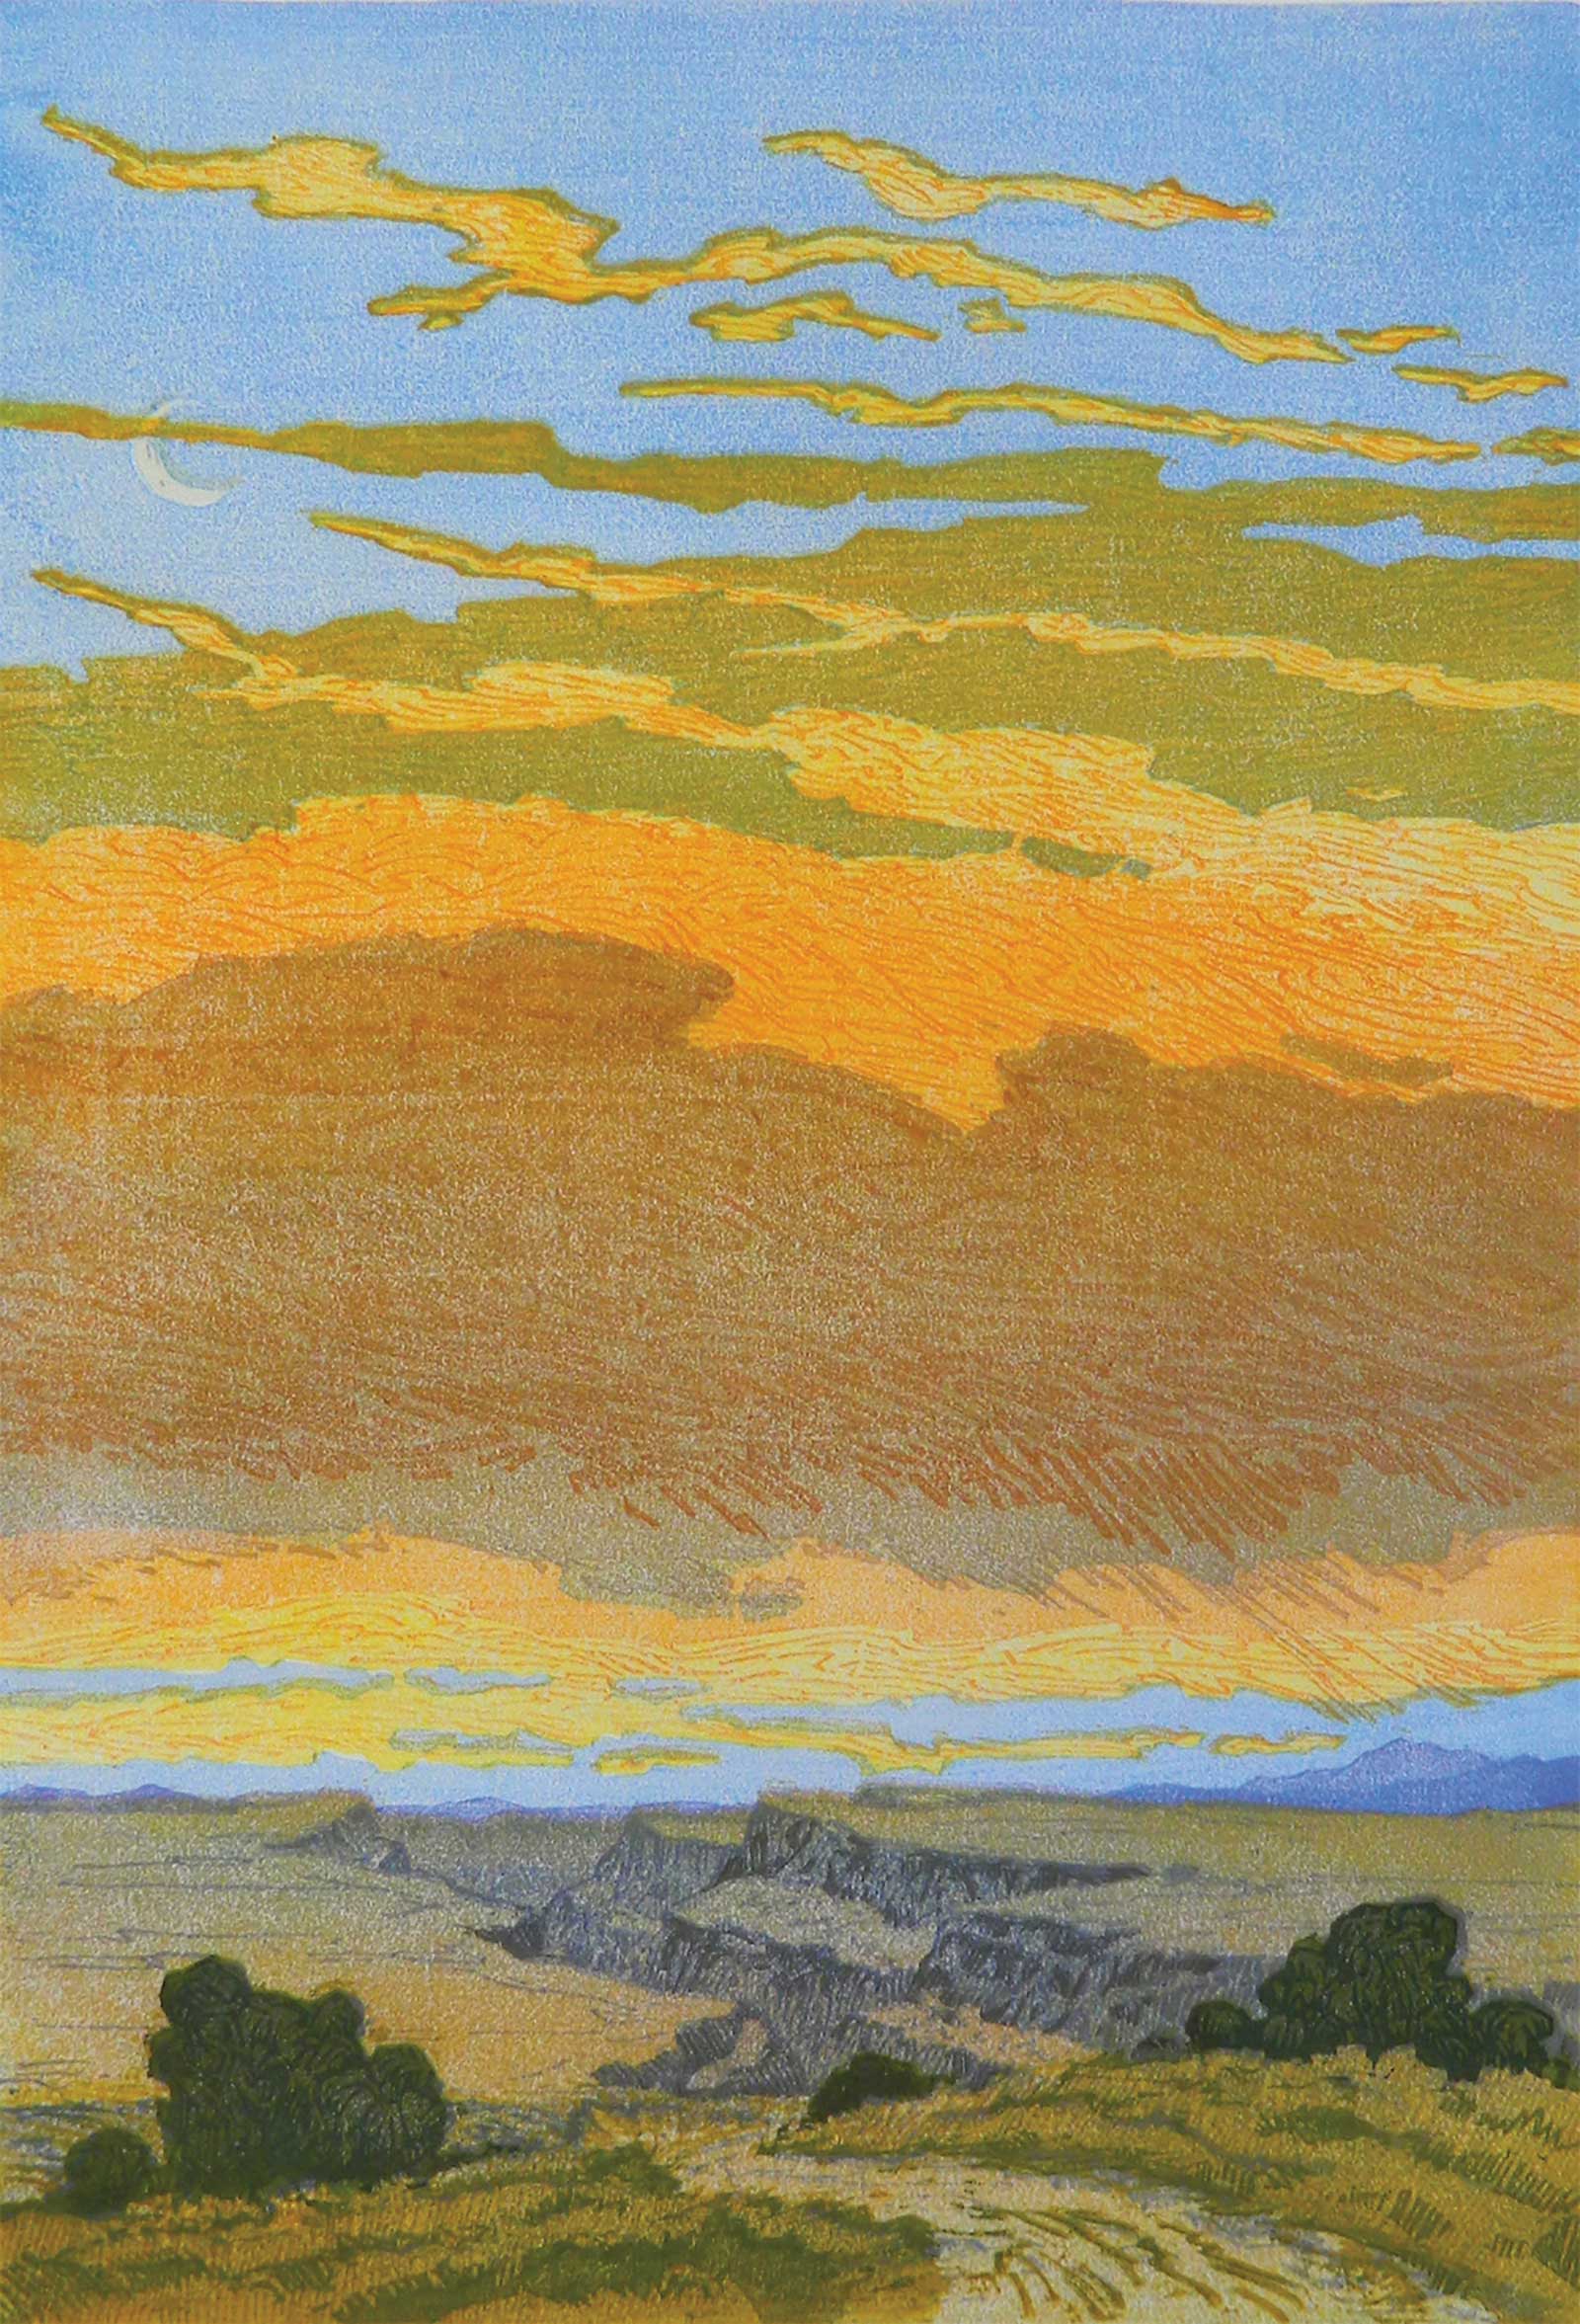
Moon Crossing, ed. 12, woodblock print, 18 x 12" (45 x 30 cm)
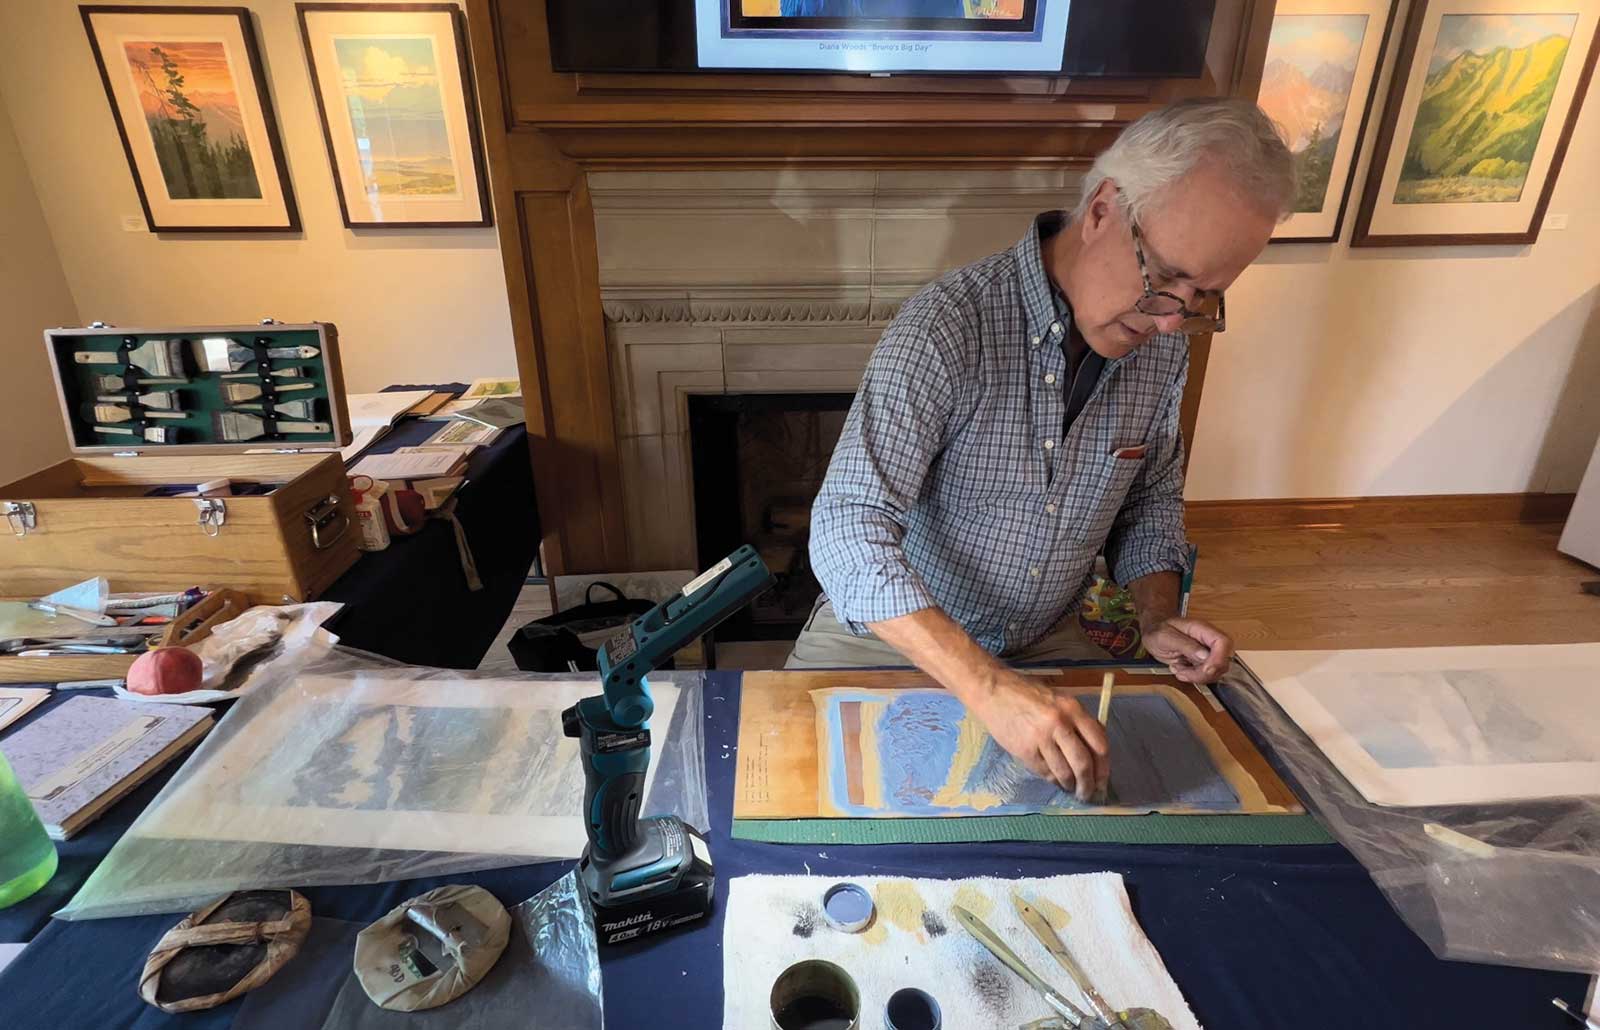
My process begins outdoors with sketches and watercolor studies that become the roadmap for the woodblock. In the studio, I create a master drawing to transfer the image onto multiple blocks, as I did with March Ascent, demonstrated in this article. I begin carving away the block for the first color run, starting with the lightest colors and values, progressively deepening in color to add depth and contrast. I use the reduction process, where one block is carved and then printed multiple times, reducing the print area of the block with each color run. I mix my pigment, rice paste and water to achieve the desired color value and opacity. It is very important for me to mix my own colors in order to achieve the subtle color gradations in my woodblocks. I then transfer ink from the inkwell to the moistened block using a 1-inch brush, followed with a flat, rectangular surikomi (stencil) or hanga (print) brush held perpendicular to the block to distribute the ink with small, circular motions finished with gentle vertical or horizontal strokes.
Culebra Morning, ed. 20, woodblock print, 18 x 12" (45 x 30 cm)
With my washi paper lightly moistened to best receive the ink, I register the paper using the kento system and lower the paper onto the block. Using a baren, a textured, 5-inch round disk, I manually apply pressure to transfer the ink from block to paper. This process is repeated as many times as it takes, often up to 20 color runs, before an edition is completed.
I wish I could say I have a detailed plan of how an image will print and progress. When I’m carving and proofing, it is a spontaneous process. How much ink I apply to the block, how I brush it out and how much pressure I apply with the baren all contribute to the variation of value and color in the image. Sometimes that original concept flows through the process, easily producing a strong image. More often, as the image evolves, colors and values need to be adjusted towards the end goal.

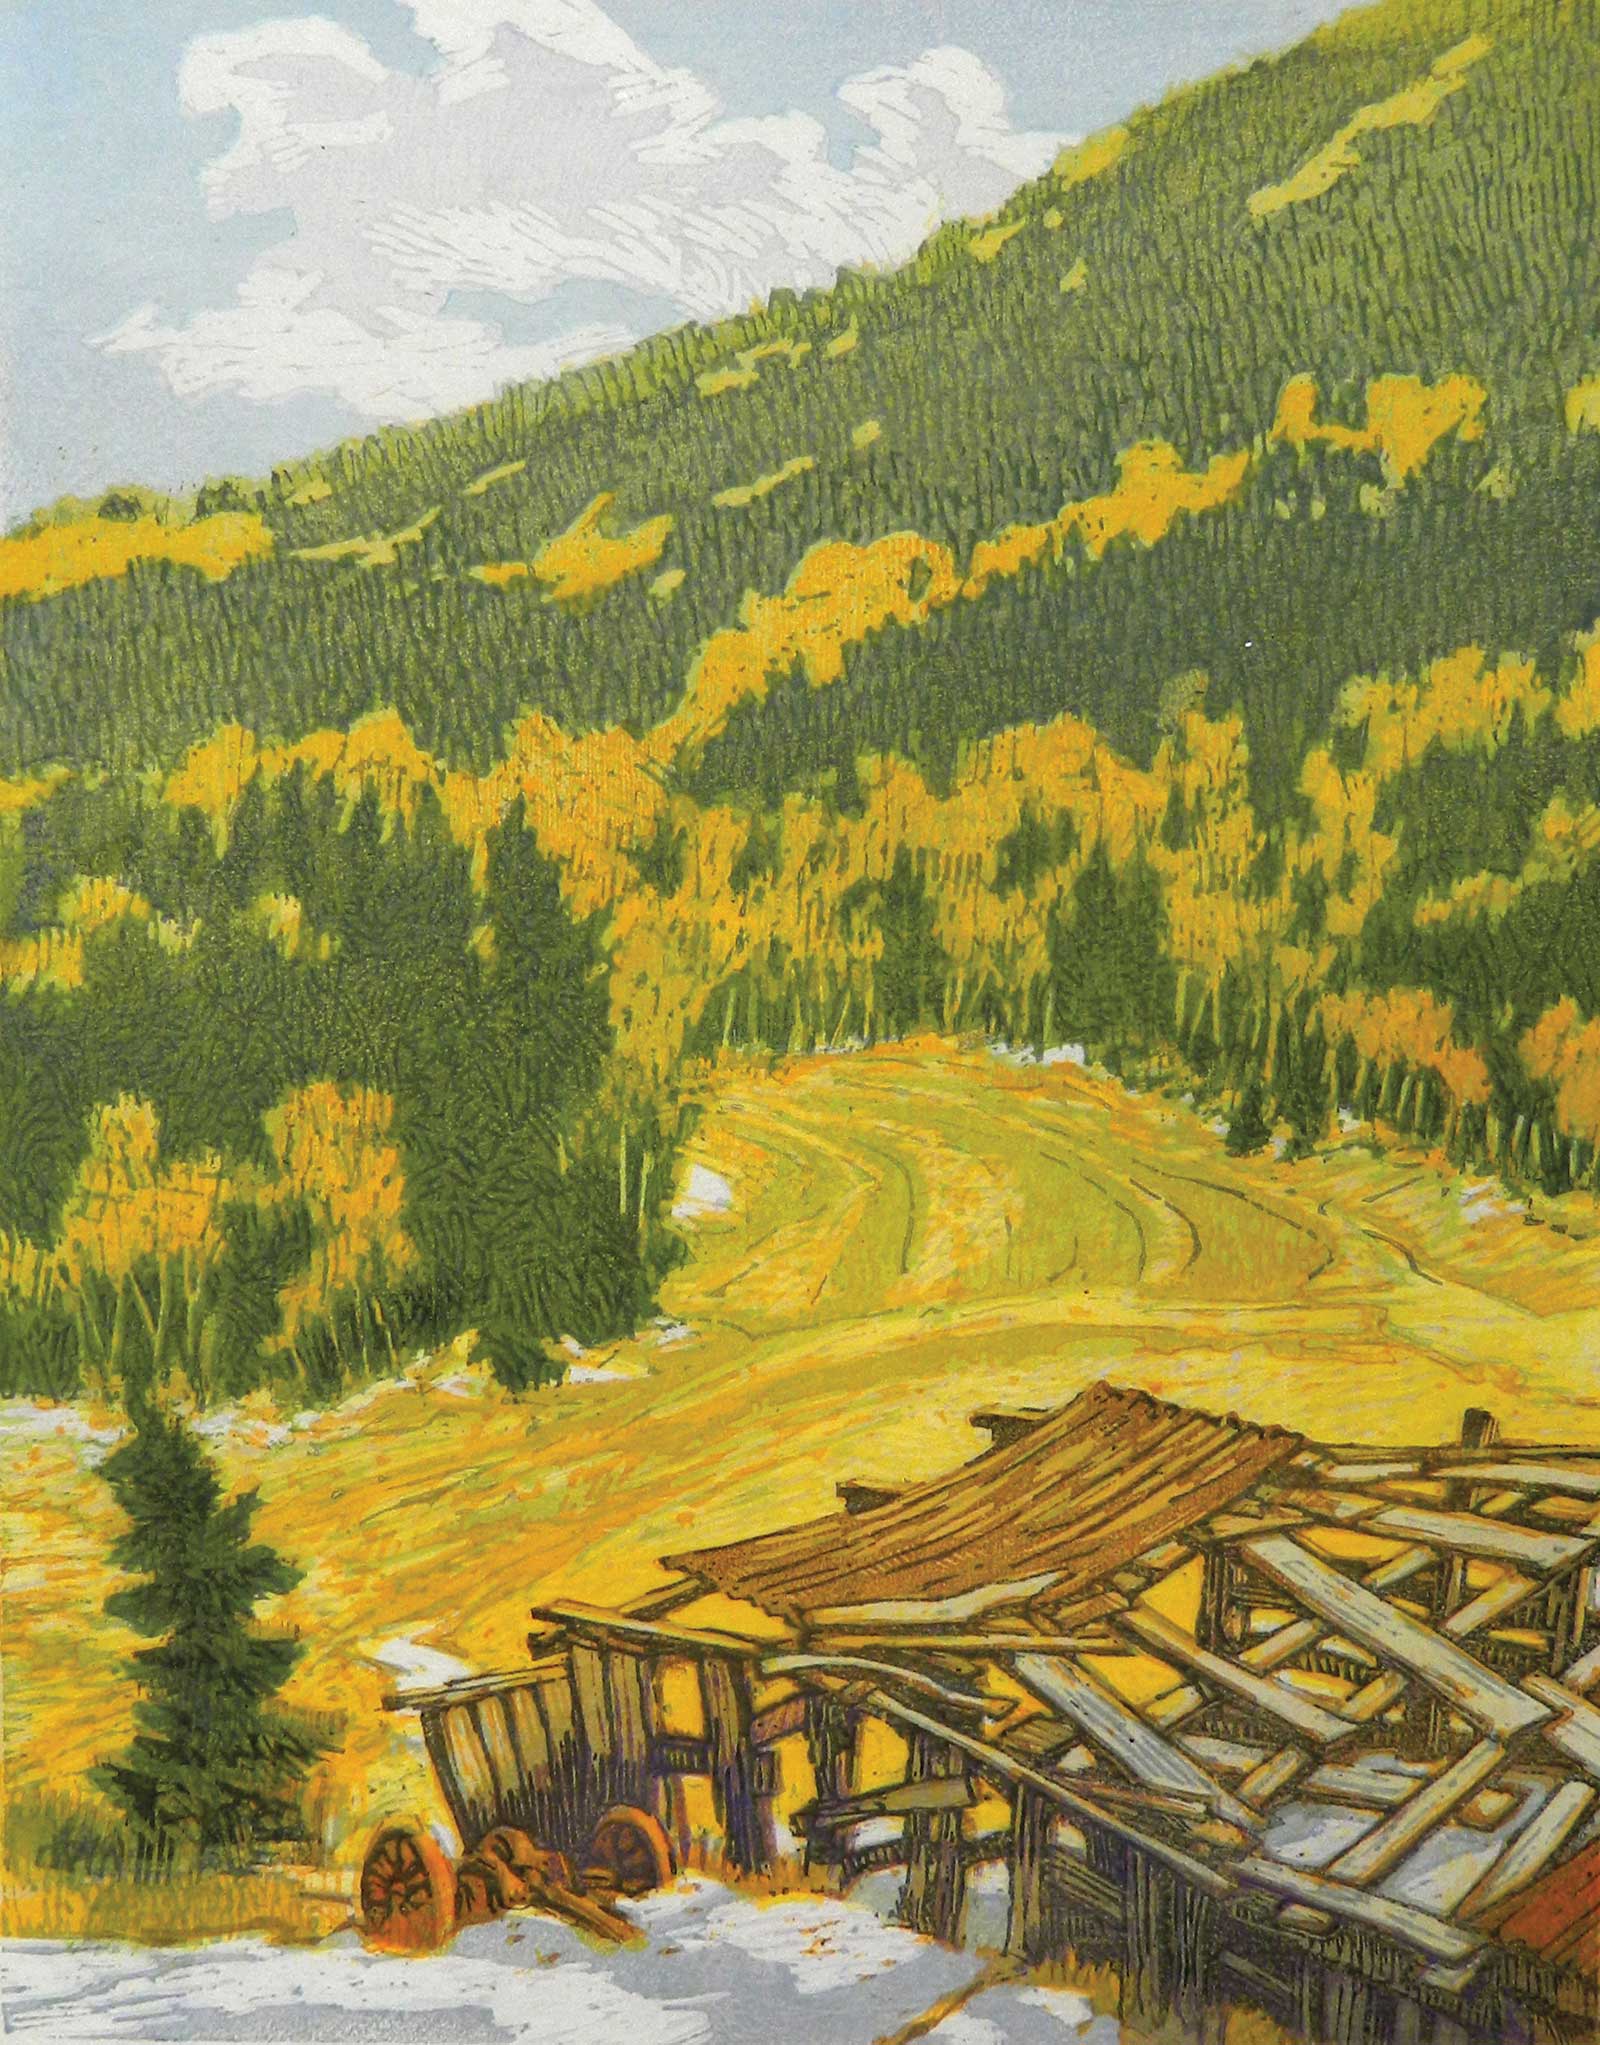
Golden Sentinels, ed. 23, woodblock print, 18 x 12" (45 x 30 cm)
There is a process of deliberation and action after each color layer has been printed, moving towards the end goal of rendering the mood I want to feel. It’s not the amount of leaves on the tree that catches your eye, but the light arrangement. It’s almost like a stage setting: you set the scene to capture its drama. This is where the creativity of the Japanese process allows a block to be printed multiple times with different techniques to push the image towards that mood. Because of that, I tend to obsess and get carried away with color runs. What could be done in six color runs I’ll do in 18 to 20. I like to say that the image decides when it is done.
How It’s Made
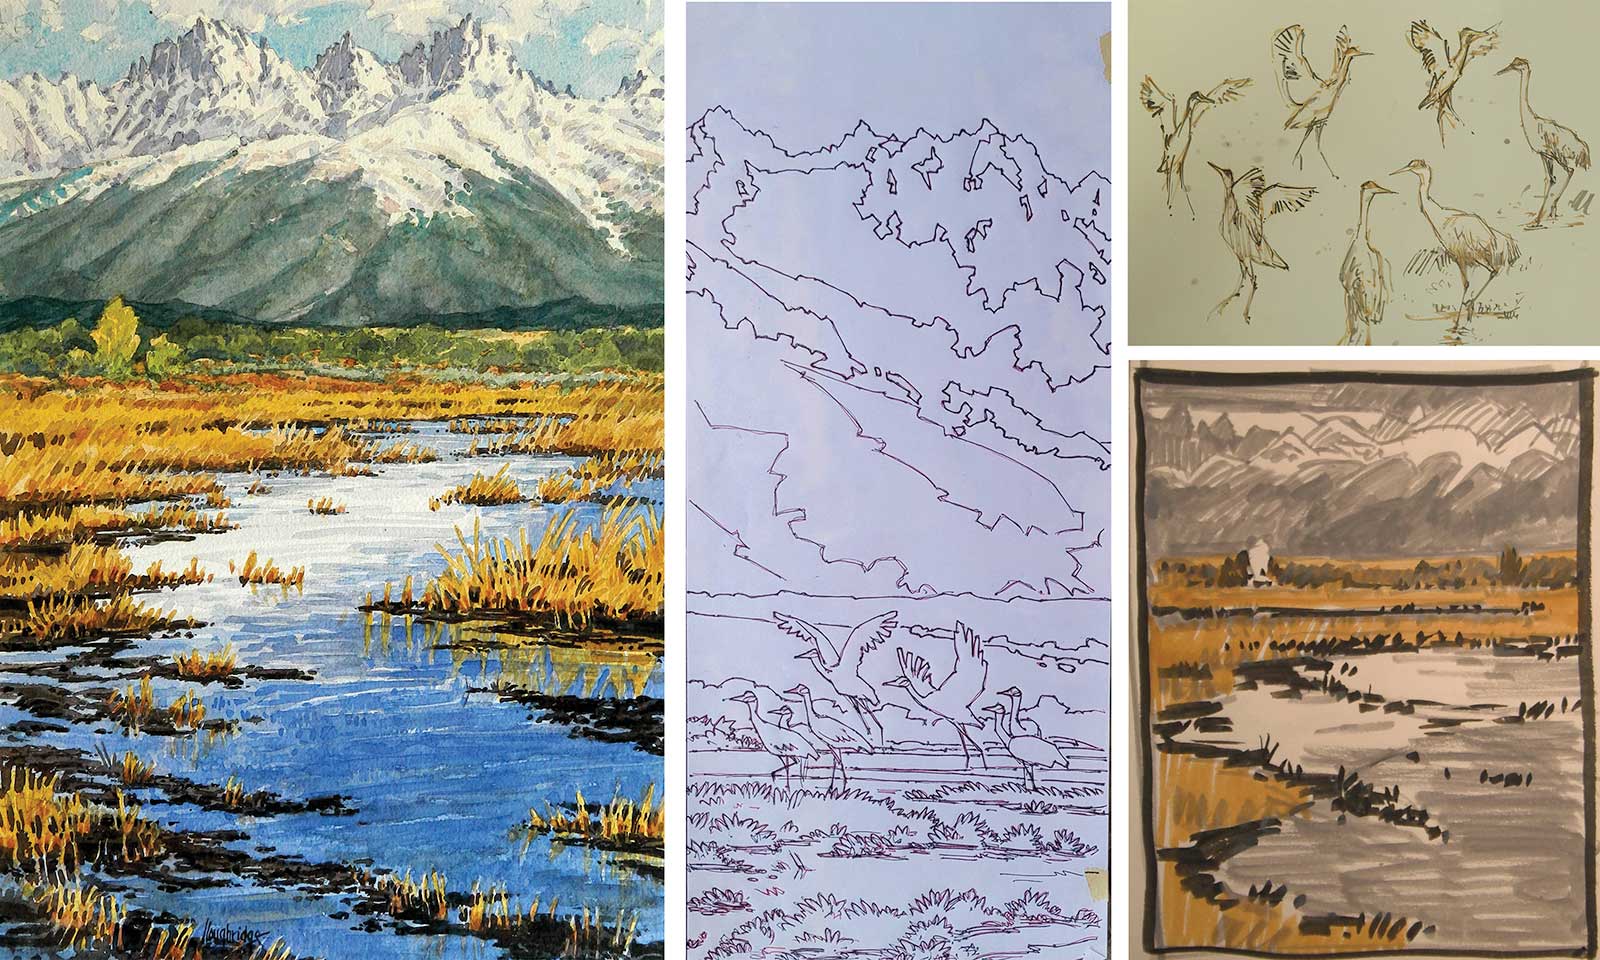 Reference Photo
Reference Photo
I start with a watercolor study and sketches as a reference to work out the arrangement of values, color and shapes and their relationship to one another (pictured right top and bottom). I’ll then create a larger, detailed watercolor in the studio, as I did here with Water Pockets (pictured left). I then create a master drawing (center) to transfer the image, marking the placement of the kentos (registration tabs) for accurate registration.
 Stage 1
Stage 1 Registration and Preparation
Value or color progressions are essential when using the reduction woodcut process. When using multiple blocks that are each reduced between printings, different value or color progressions can be assigned to each block. I use the 1,200-year-old Japanese kento system for registration, and as long as the drawing, block and paper register to that corner and straight tabs, then the system is accurate. The night before I print, I dampen the paper, moistening every other sheet and wrapping the paper pack in plastic. The moistened paper allows for better absorption and saturation of the pigment.
What the Artist Used
Paper: Medium-weight kozo (mulberry) paper, handmade in Japan in 1900.
Pigments: Mixol Pigment Pastes made in Germany, which are light fast, permanent and non-toxic color concentrates.
Ink: Combination of Mixol pigment, rice paste (binder) and water.
Brushes: Surikomi (stencil) or hanga (print) brushes, and a 1-inch paint brush to apply ink to the block.
Baren: The Japanese printing press, a baren is a 5-inch round disk backed with different textured surfaces and traditionally covered with a bamboo leaf. I keep an assortment of barens in my print box.
Wood: MDF fiberboard with a cherry veneer.
Carving tools: Six tools on a regular basis; I recommend beginners start with larger tools so as not to get lost in minutia.
Registration method: Kento registration tabs.
 Stage 2
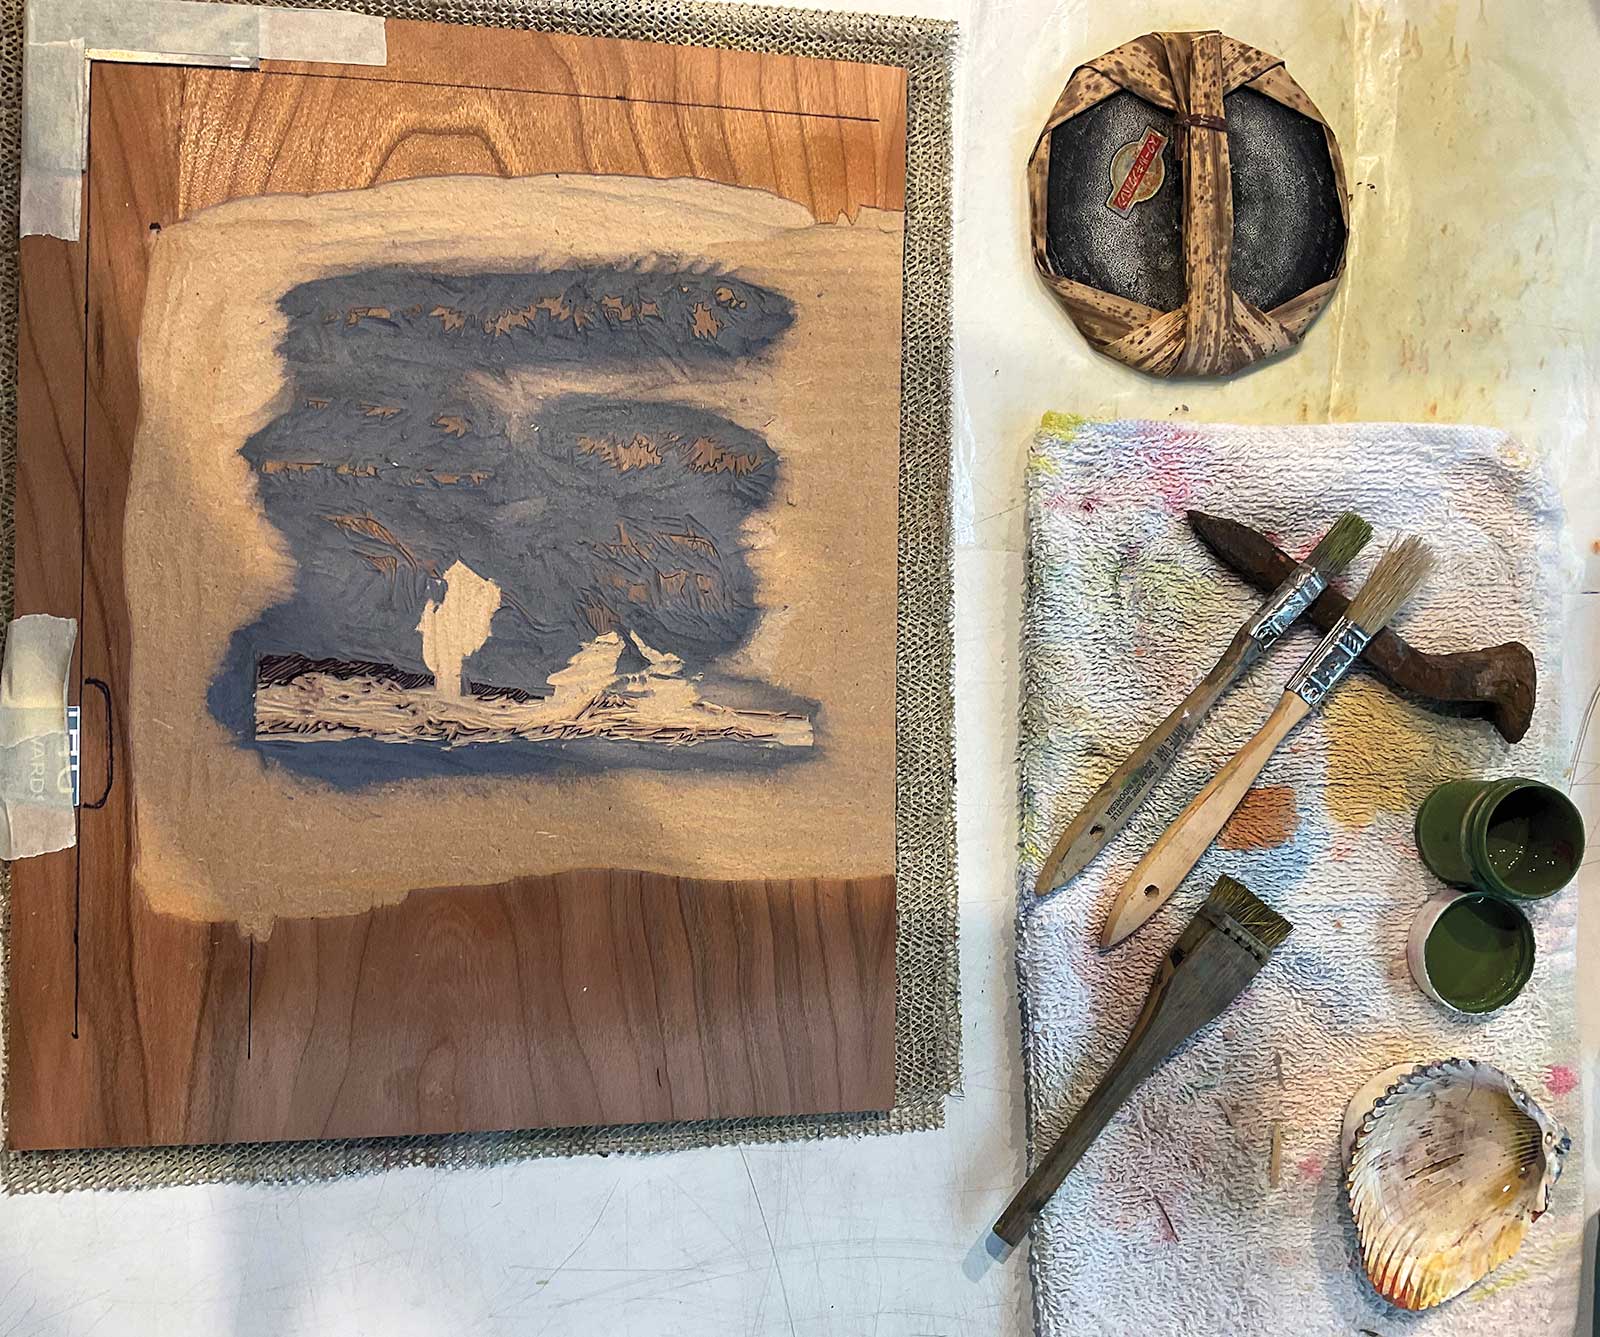
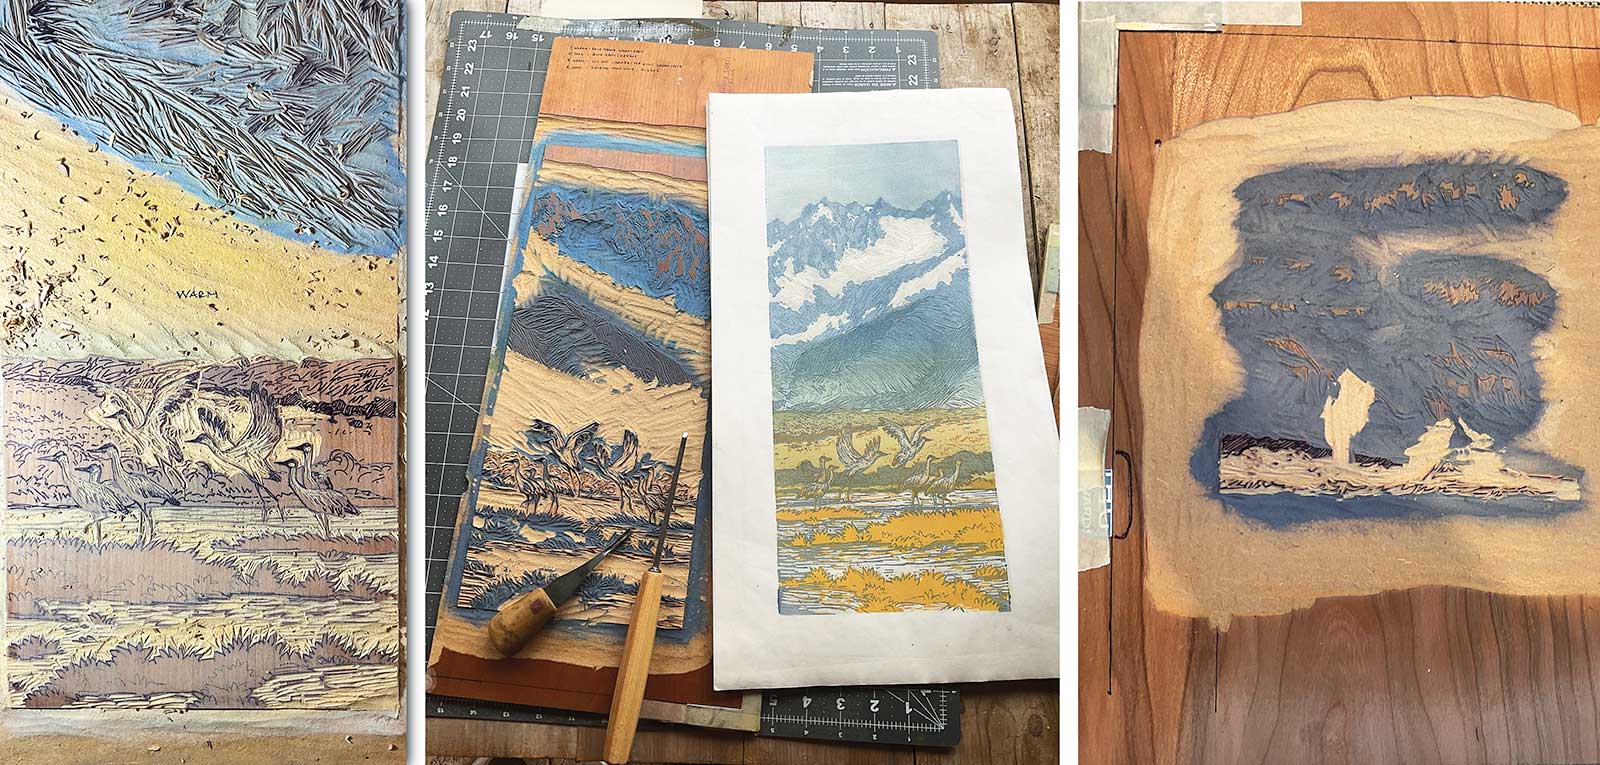
Stage 2 Carving the Blocks
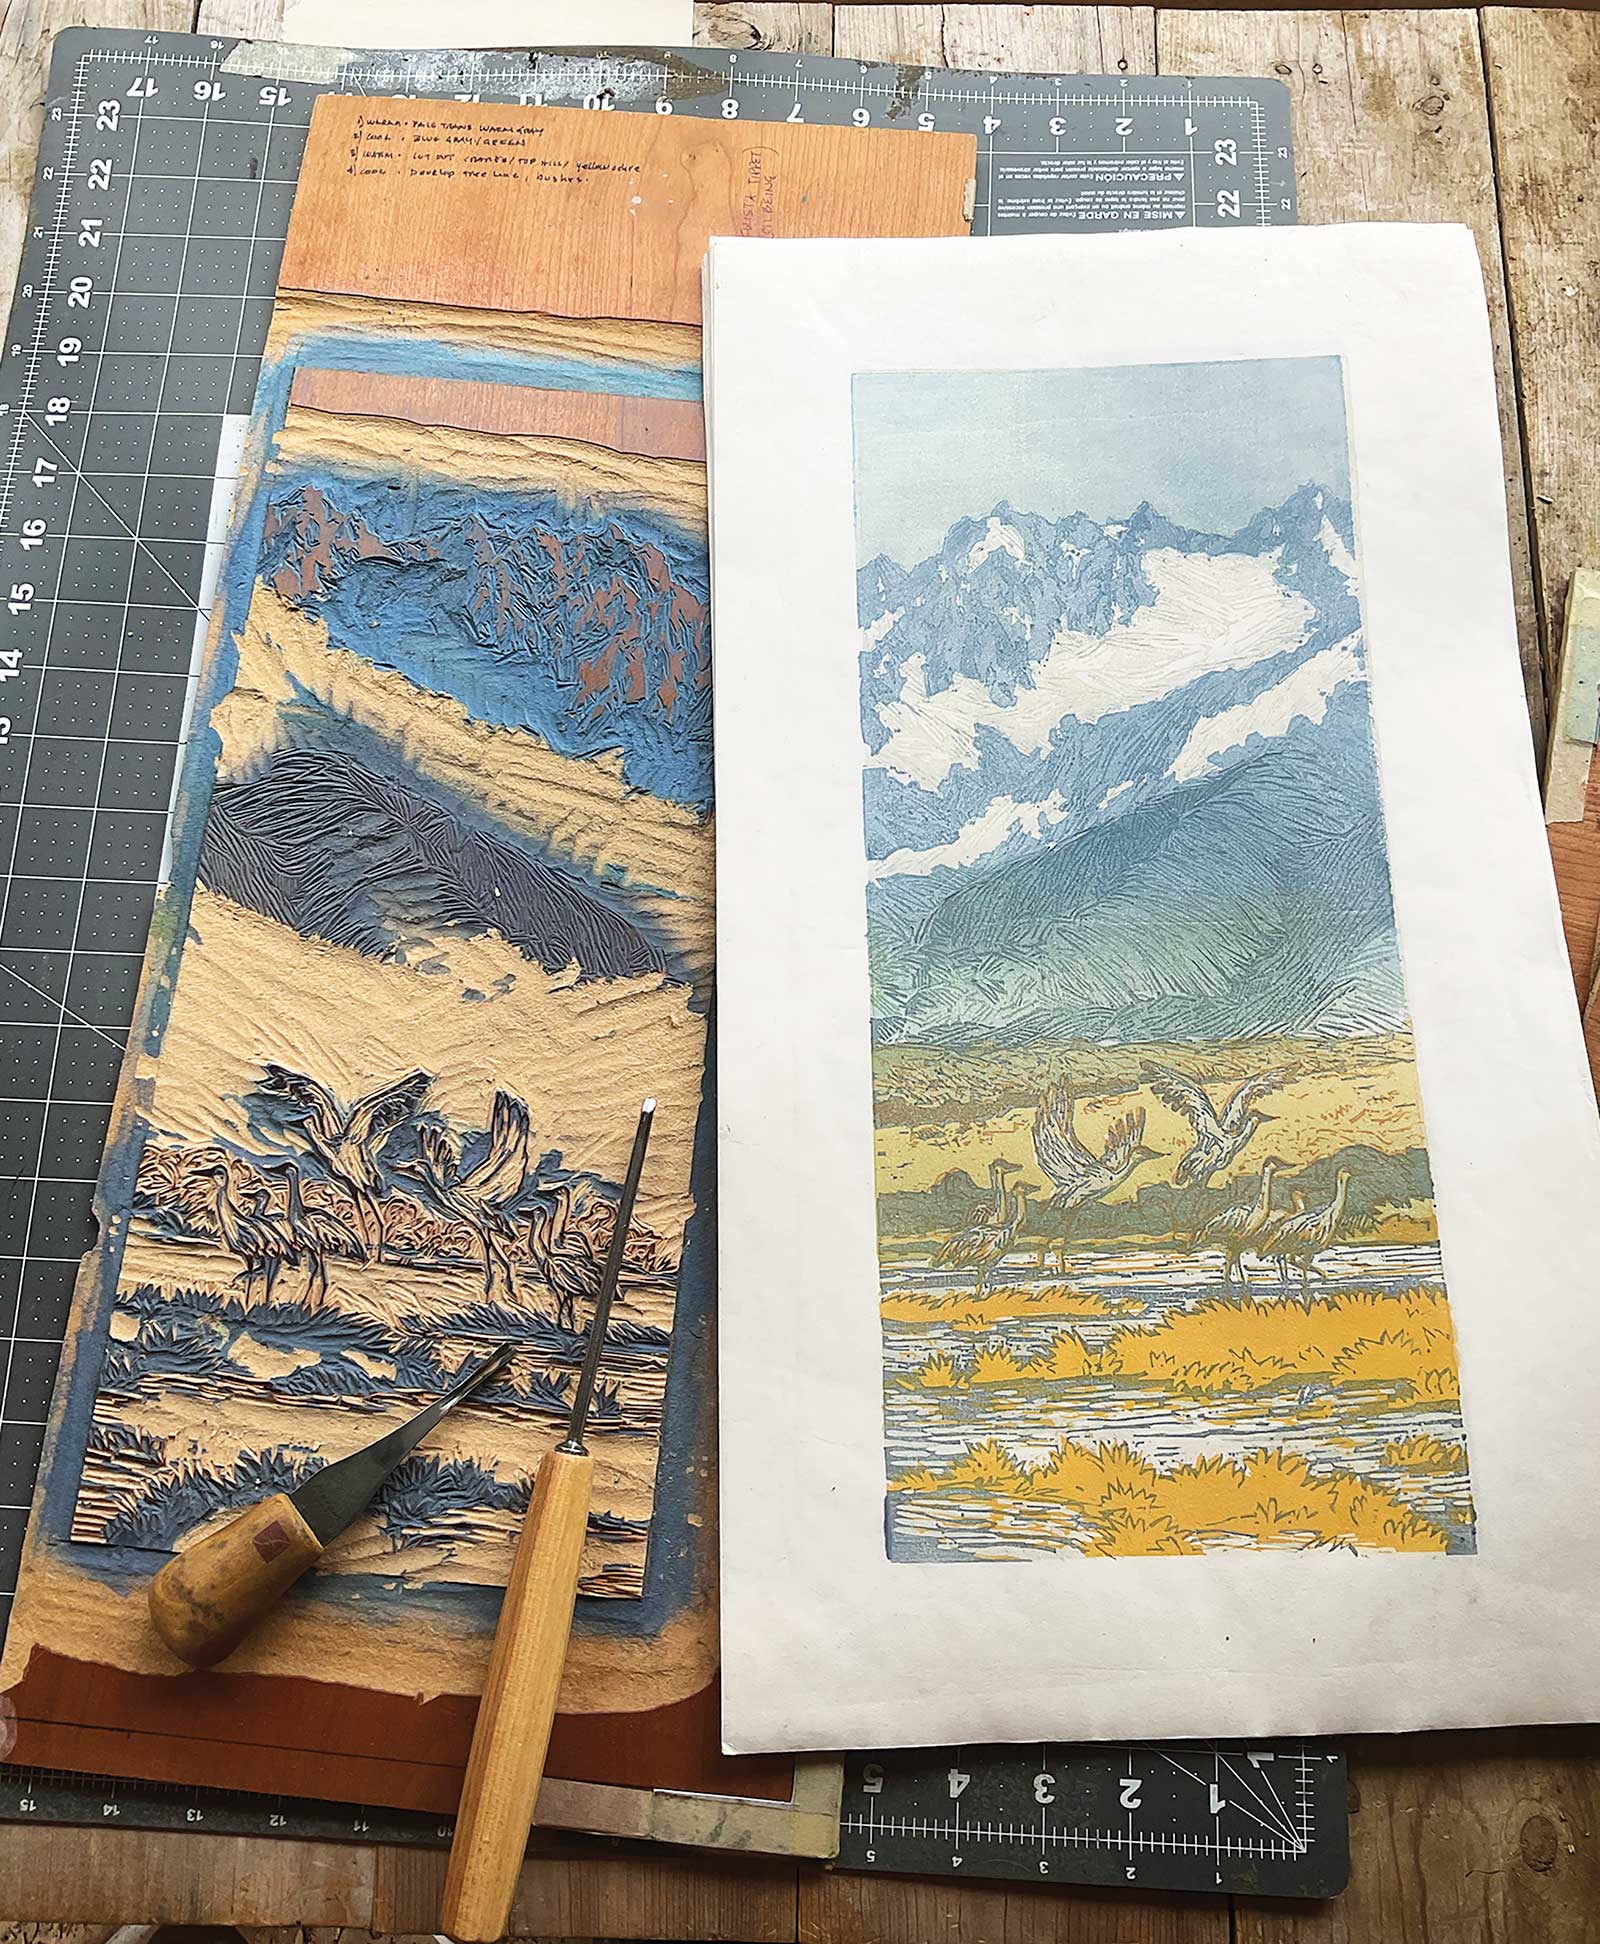
I carve into an MDF fiberboard with a cherry veneer. I enjoy carving into cherry wood as the grain is even and holds the detail well over numerous printings. When carving, I prefer to focus on color fields of the image rather than becoming lost in minutia. This demonstration used three blocks. The first block, pictured left, was used to print the lightest color values and larger blocks of color. The block pictured in the center was used to add details and depth to the cranes, grass and mountains, and the block on the right was used to add additional detail behind the cranes and deeper hues to the mountains. The more comfortable one becomes with a process, the more fluidly one can work with it.
 Stage 3
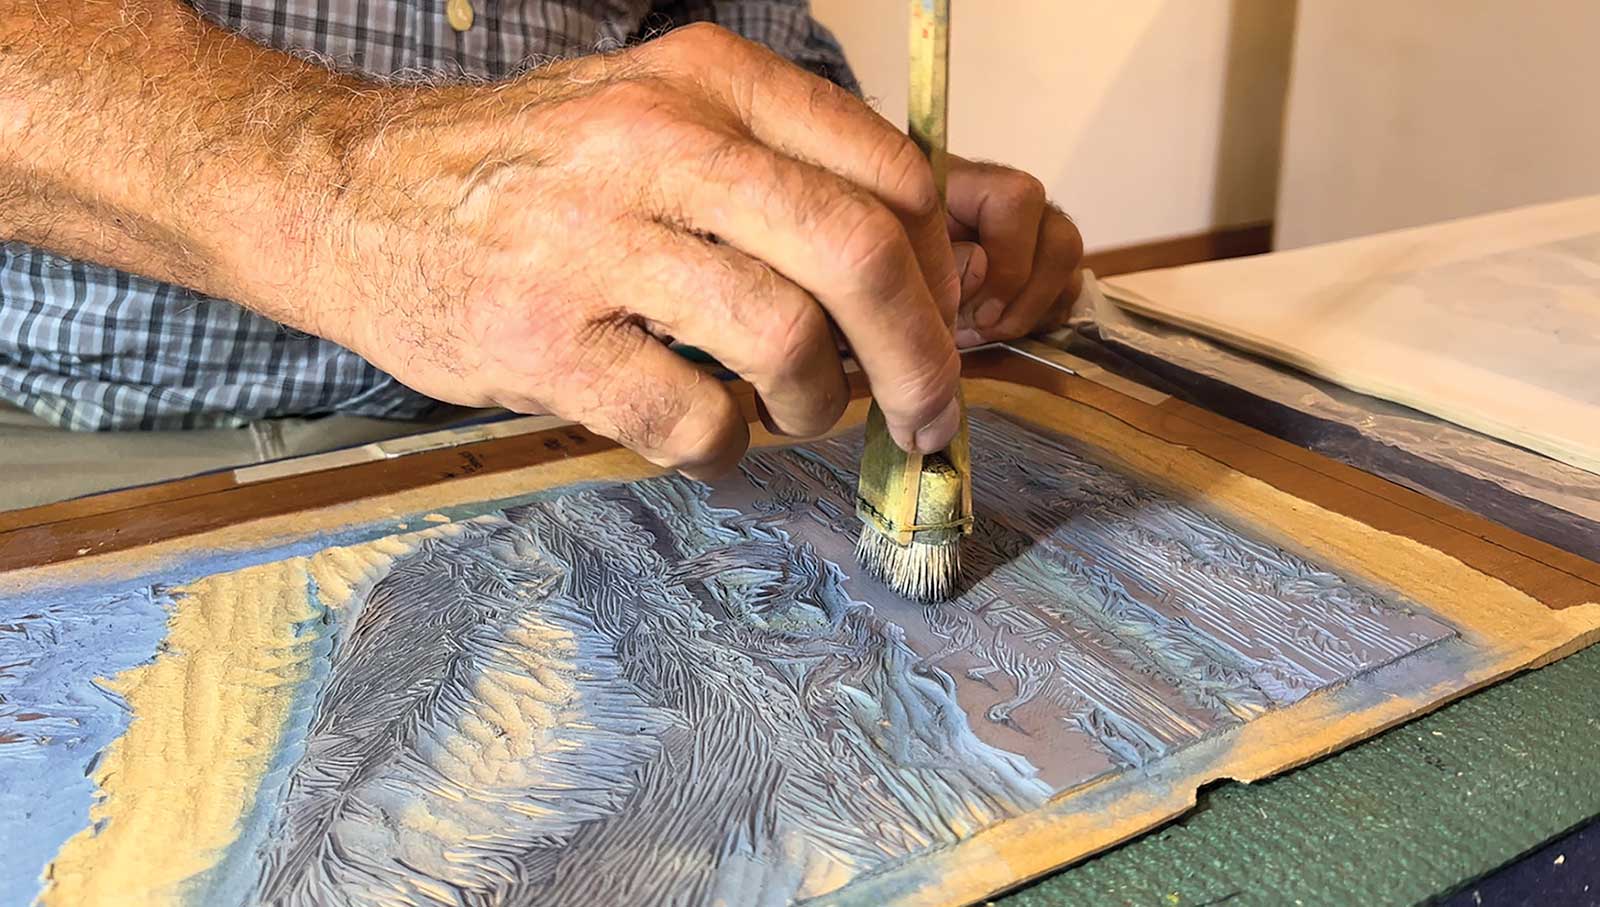
Stage 3 Mixing and Applying Ink
The moku hanga process allows me to use water soluble and non-toxic ink. A light fast, permanent, non-toxic color concentrate is mixed with a rice paste as the binder, and water to thin the mixture. I vary the formula to obtain different effects: more water to achieve a transparent coloration, more binder and pigment to create a more opaque color. I use the surikomi (stencil) or hanga (print) brushes: flat-bottom rectangular brushes to apply ink. The brush is held upright on the block, the ink applied in small circular motions and finished with gentle vertical or horizontal motions across the block.
 Stage 4
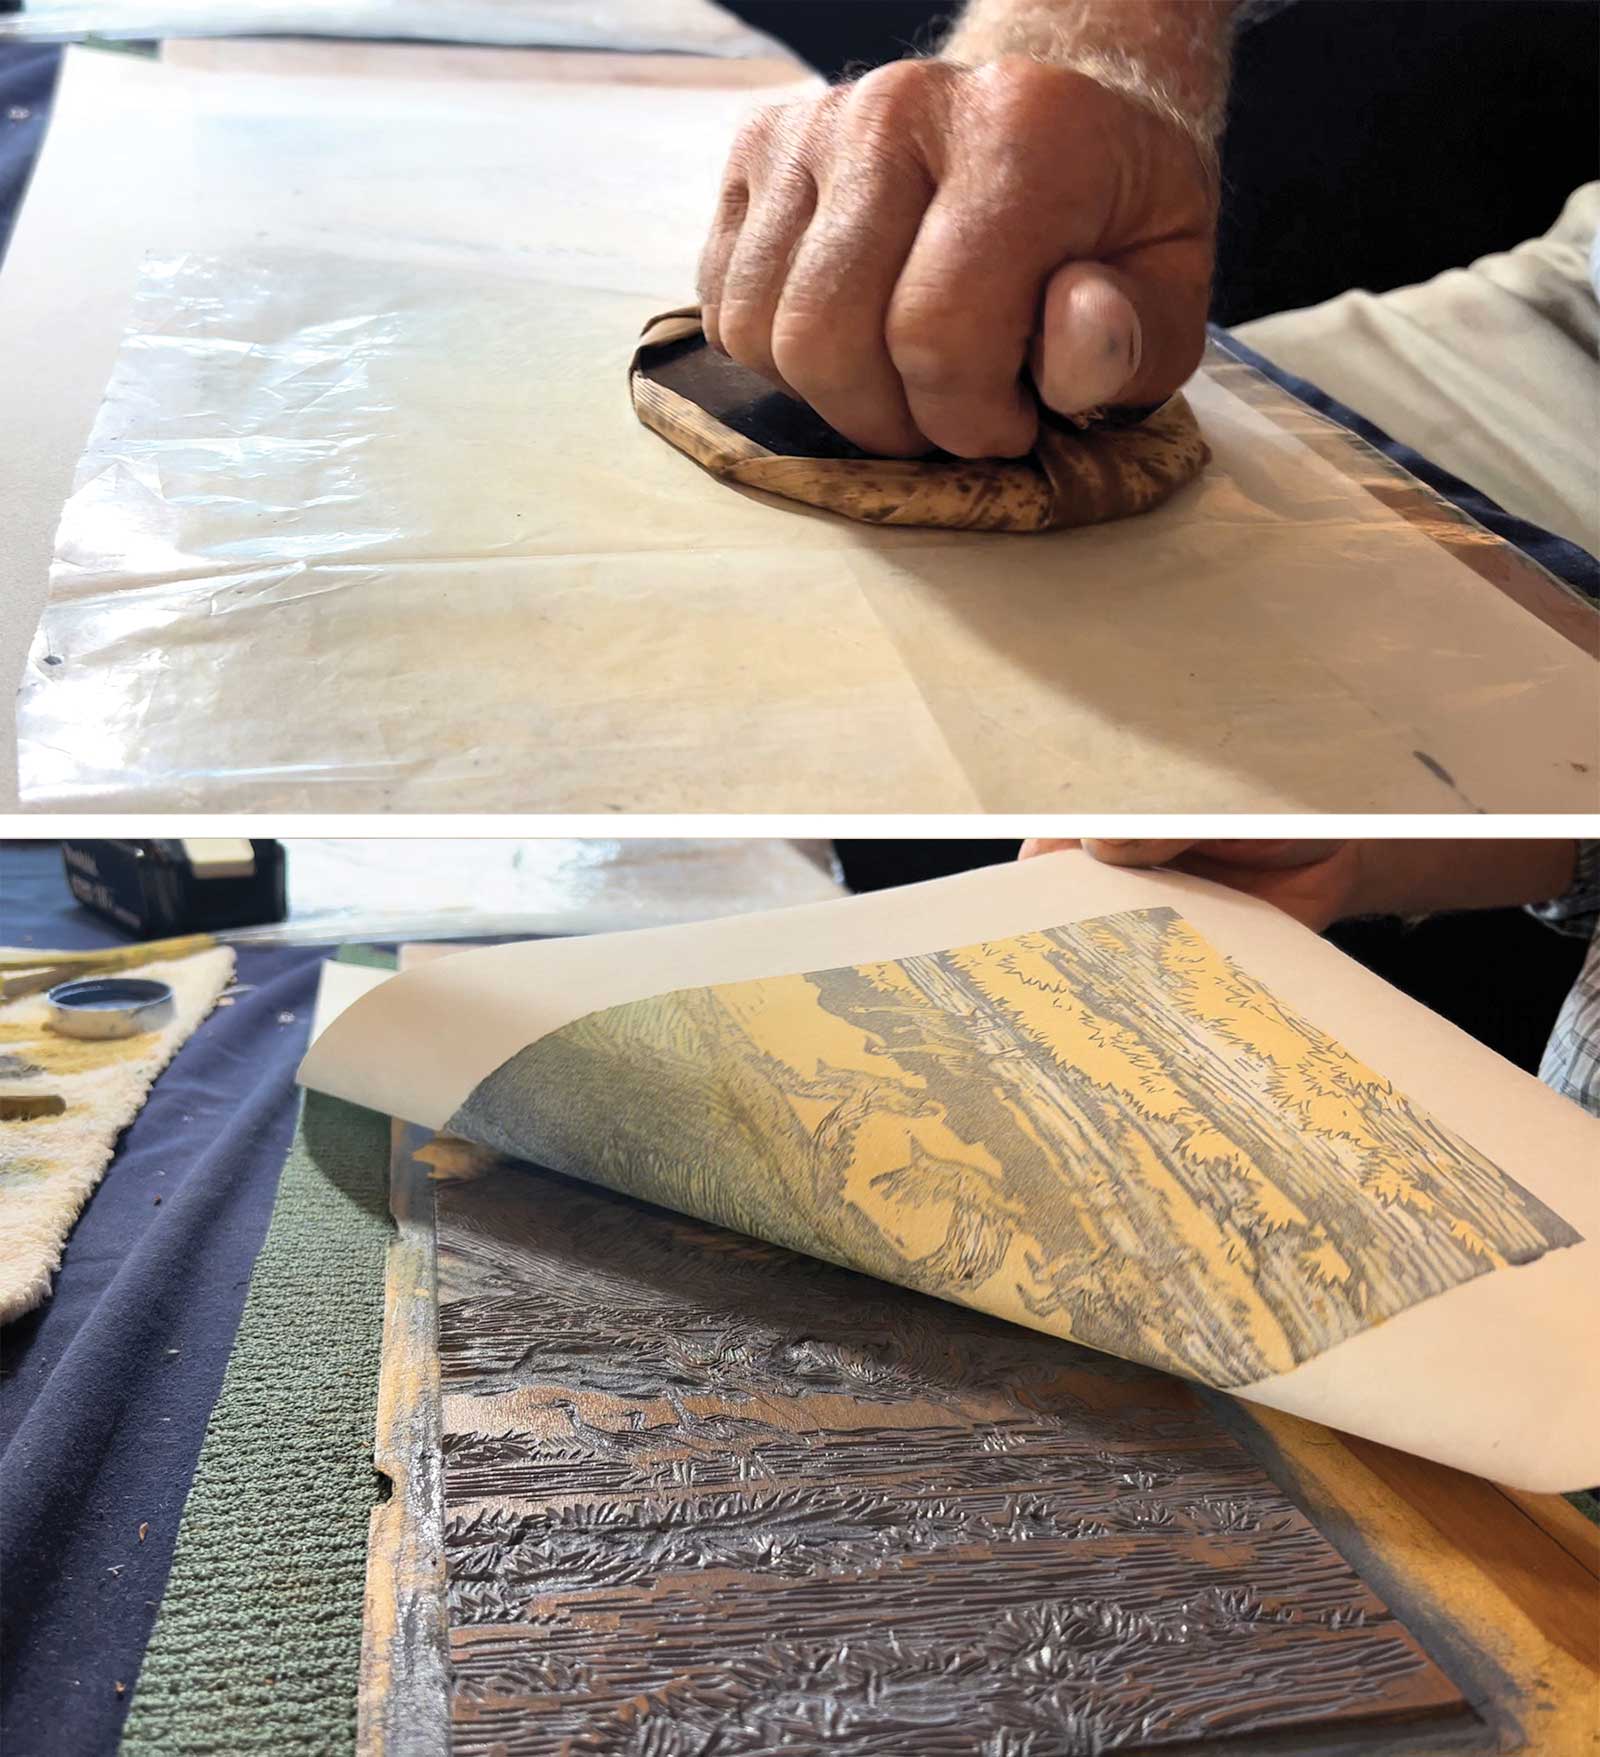
Stage 4 Moku Hanga Printing
Moistened, medium weight kozo paper is placed upon the block and rubbed with a baren, the printing press of moku hanga. The 5-inch round disk is backed with different textured surfaces and traditionally covered with a bamboo leaf. The texture of the baren is related to the pressure applied by the printmaker. The process is all about feel and allows nuances and details in the work that are not easily attained with a printing press.
 Stage 5
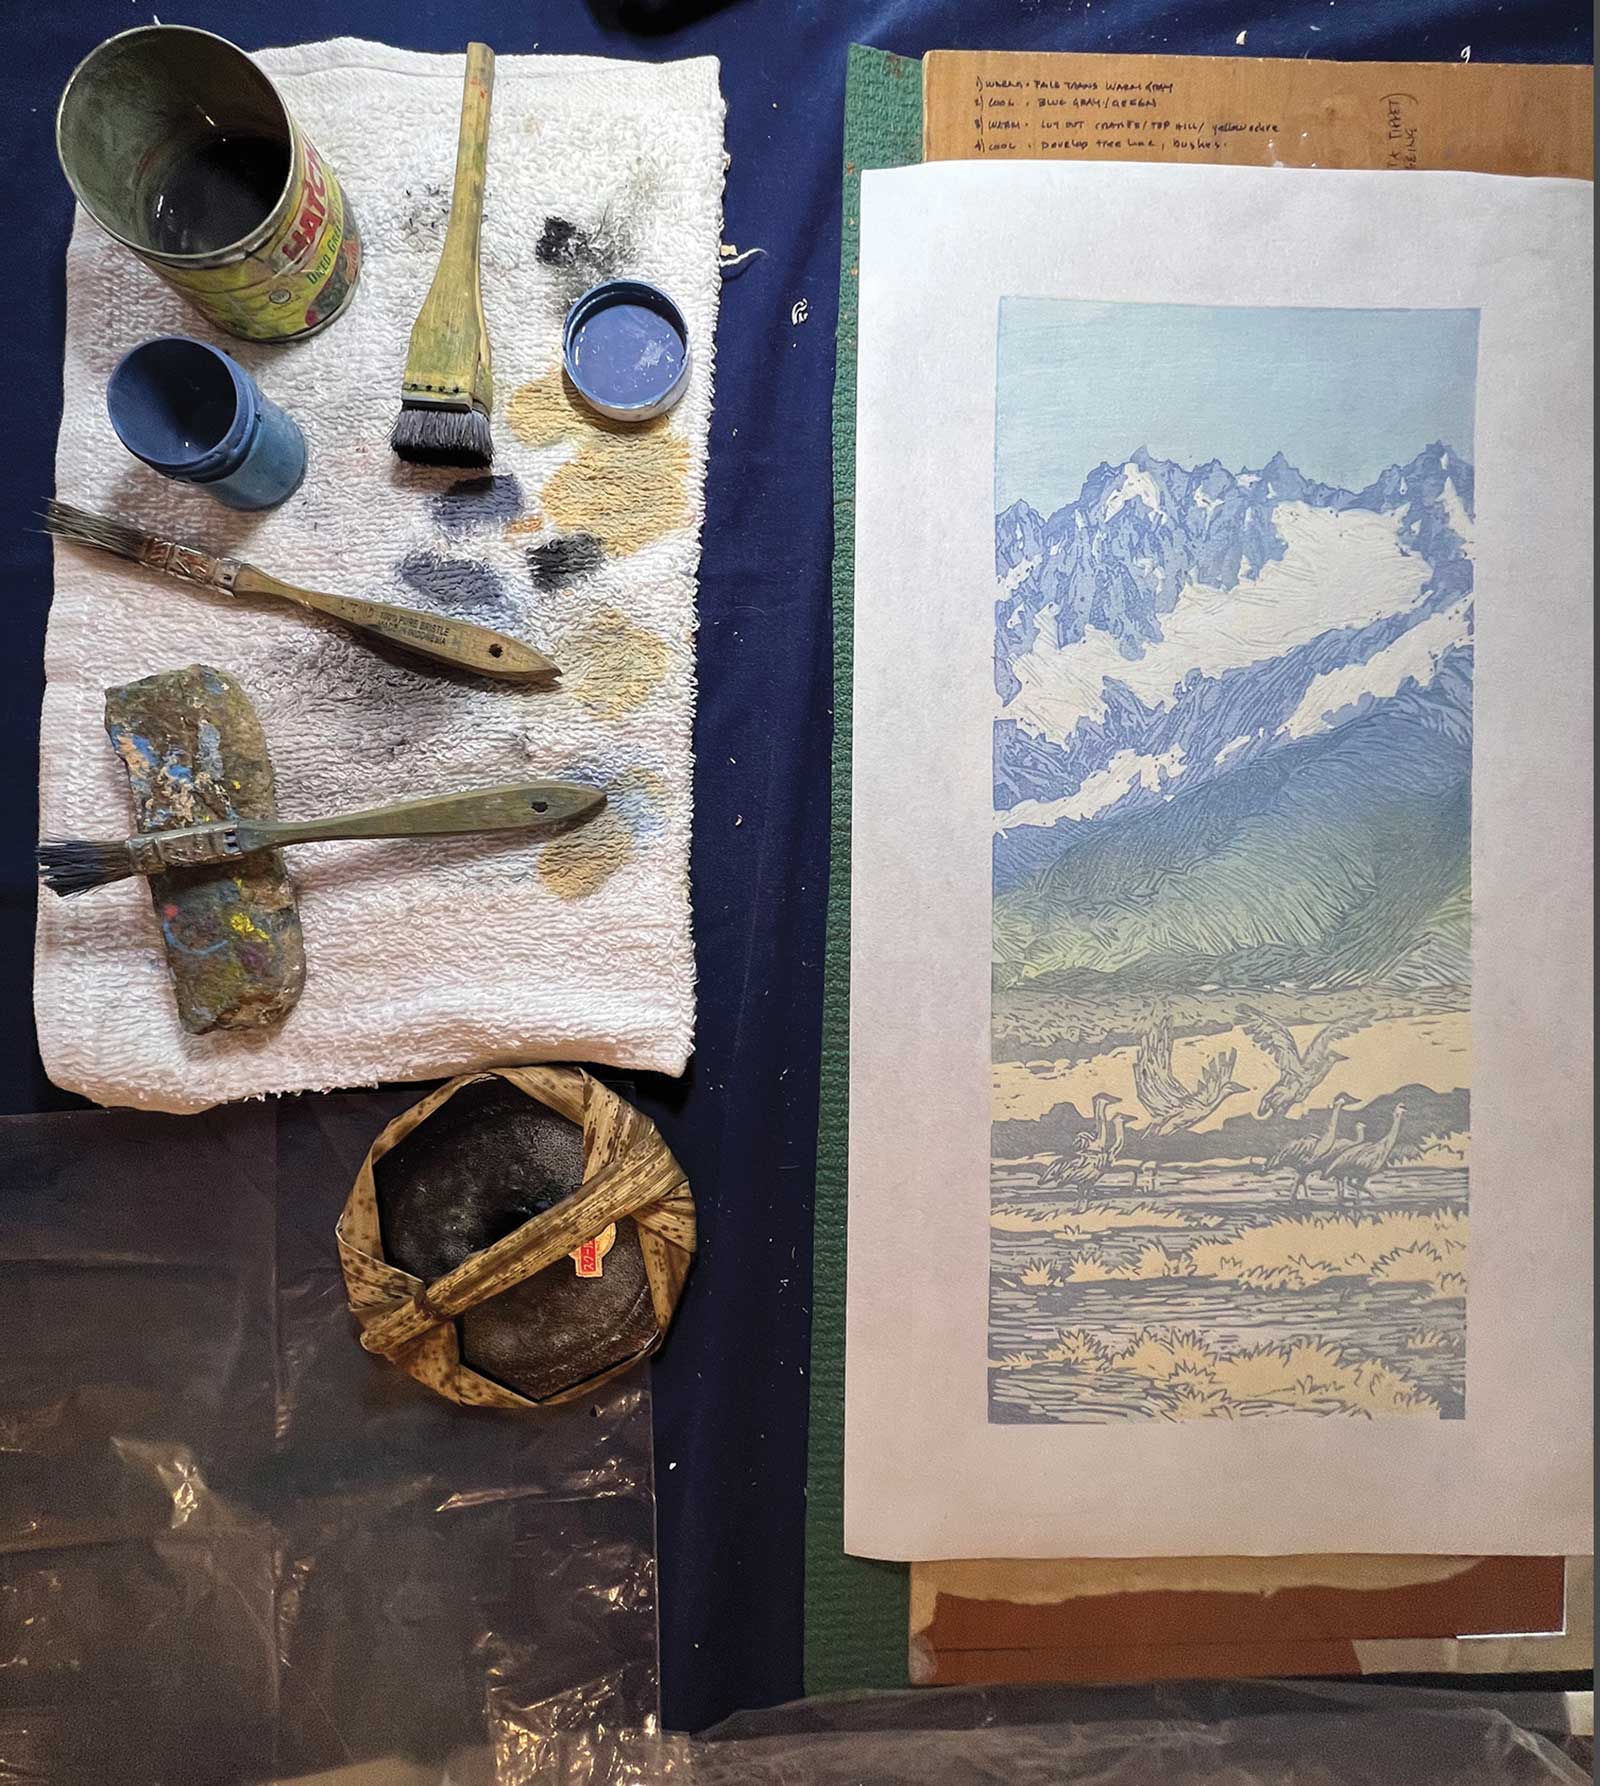
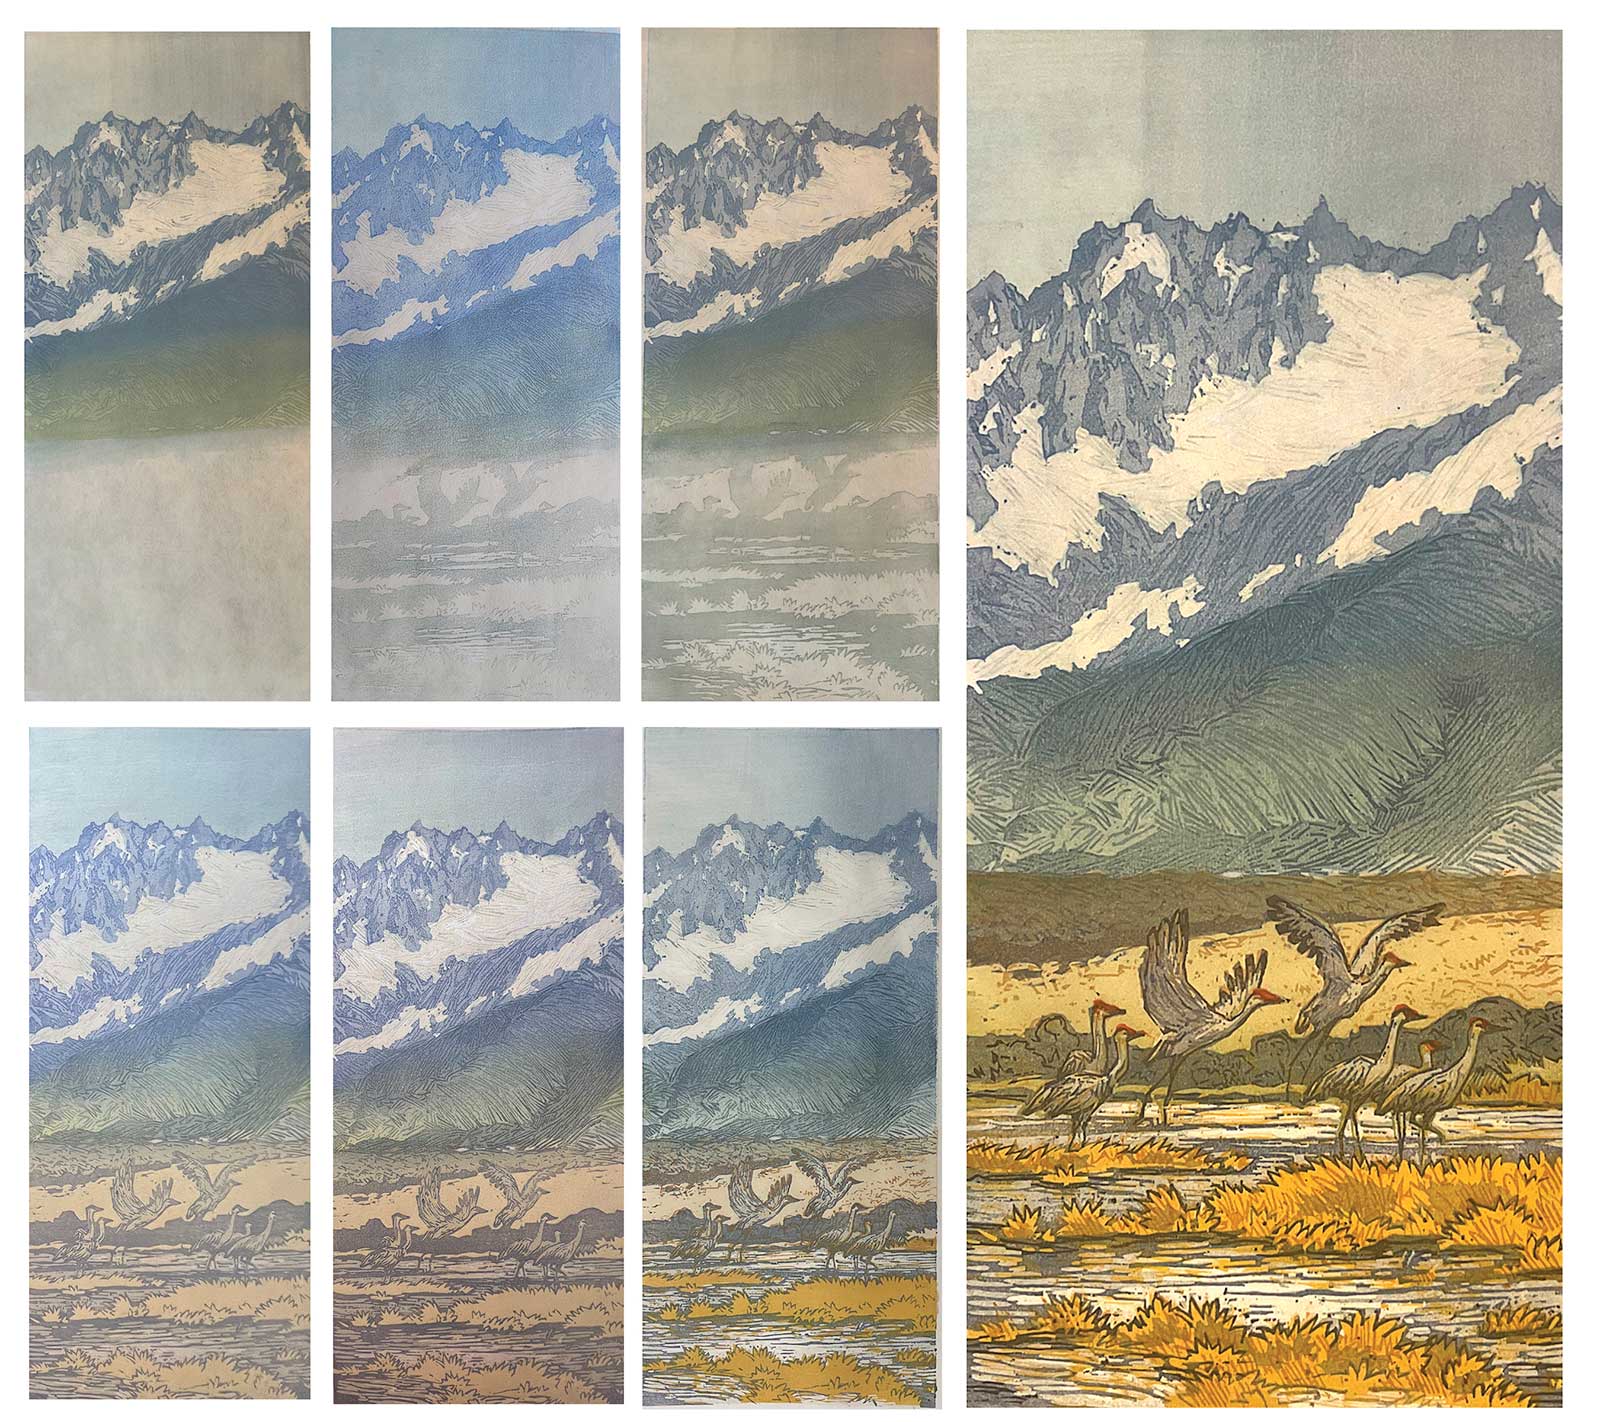
Stage 5 Color Runs, Values and Color Progression
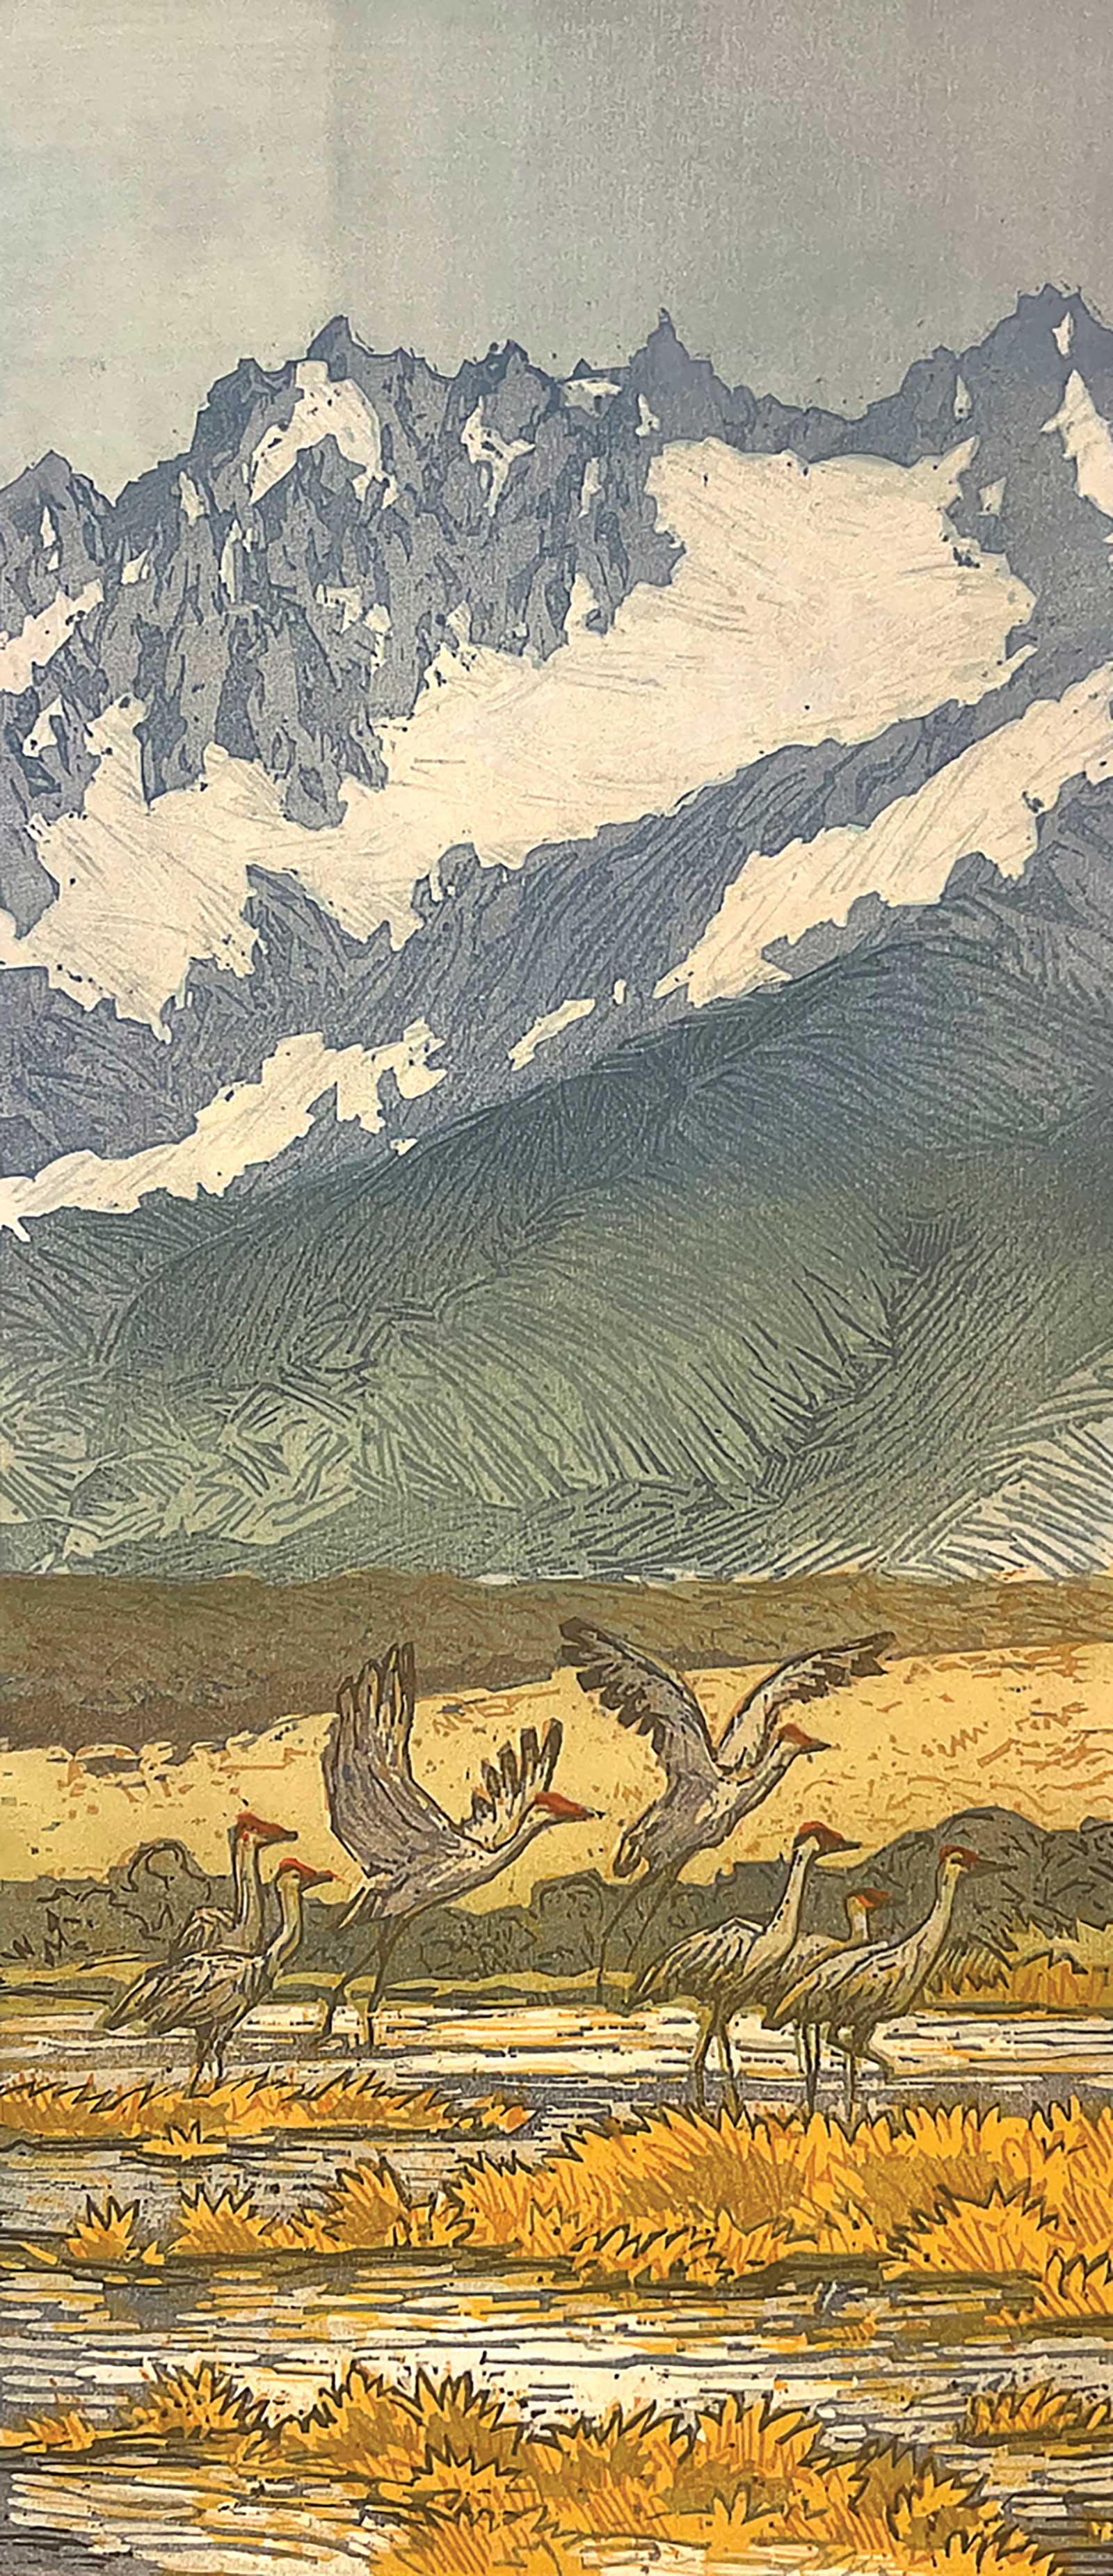
This stage of the demonstration shows the progression of color runs in March Ascent, an edition of 12, printed in about 18 color runs using three blocks. I start with the large color fields and lightest values, using a second or third block later in the process to add detail or deeper values. The first block was used to define the mountains, a second block for the cranes and a third to add further detail behind the cranes. As I would with watercolor, the colors and values progress in multiple layers, from light to dark. Each successive layer defines a progressively darker area of the image.
 Stage 6
Stage 6 Finished Artwork
March Ascent, ed. 12, woodblock print, 16 x 7" (40 x 17 cm)
About the Artist
 Leon Loughridge lives
Leon Loughridge lives in Denver, Colorado, where he makes woodblock prints with the Japanese moku hanga process. Raised in the open ranch land of Northern New Mexico, the artist developed an early affinity for the Southwestern landscape. His grandmother was an early influence in his artistic development, entertaining Loughridge with art classes as a youth, as well as a full house of artists thanks to her involvement in the Northern New Mexico art circles. Loughridge attended the Colorado Institute of Art for drawing and painting. While attending, he received a draft notice and was deployed to Germany during the Vietnam War where he served for three years. Throughout his tour, art continued to be a strong thread in his life: creating pen and ink sketches everywhere he went, purchasing a printing press while stationed in Stuttgart, and after he was honorably discharged, studying painting techniques of the Old Masters for two years, copying a Frans Hals at the Staatsgalerie Stuttgart art museum as his final project.
Today, the printmaker, working out of his studio in Evergreen, Colorado—built with the help of his wife and son—paints, carves and prints the great wilderness of Colorado and New Mexico into his luminous woodblocks. Work by Loughridge is exhibited nationally and collected by numerous museums including the Denver Art Museum, the Denver Public Library and the Wichita Art Museum. Loughridge was selected to participate in the Art in Embassies Program, was the featured artist for the 2005 Colorado Mountain Landscape Exhibition and Sale, and has participated in the juried Coors Western Art Exhibit & Sale nearly annually since 2003.
Contact at
leon@dcartpress.com
www.dcartpress.com