


A long time ago I was introduced to the hatching technique with graphite pencil and charcoal. When a certain situation arose, I used the same technique to draw with colored pencils. My biggest passion is to draw portraits, especially the elderly. I want to show personality in the subject. I try to take a picture so that the face is illuminated on one side and the other side is in shadow. Contact and intertwining of light and shadow enriches the drawing, bringing forth more emotion.

Pearls of Wisdom, colored pencil, 15 x 10½" (38 x 26 cm) With such an expressive personality, the face itself practically asks to be drawn. An optimist, joyful—a lady worthy of perpetuation. A real inspiration. A lover of books, she was photographed with her book for this piece. I chose a light gray tinted paper that served to draw the sweater, hair and some parts of the face. Hatching, some cross-hatching (face, headband) techniques were performed.
Before starting a new drawing project, I think about which color paper to use. The color should help in the workflow to get the final result and helps speed up the drawing process. I usually use Canson Mi-Teintes toned paper. In the end, I don’t necessarily fill the whole sheet of paper with the same intensity because the paper works itself to achieve the completeness of the drawing. I like the roughness of this paper. Its hardness allows me to extract more specific, sharper lines.
I make a black and white linear drawing of the desired size with the computer, which I transfer with the graphite transfer paper on the selected paper. I erase the lines until they remain barely visible but are not lost completely, roughly marking them with a colored pencil. It is especially important to note the lines on the face, as they serve to maintain the facial features and hands as well. I also mark the main lines on the background and the garment. Colors are selected that are specific to the part of the image whose lines are highlighted. They will later fit into the drawing. At the same stage, I sometimes hatch some places freehand. If I use dark paper for the drawing, I hatch the light areas, and if it’s light, I do a little of the same thing in the shaded areas. Now I have the first outlines of a future drawing.
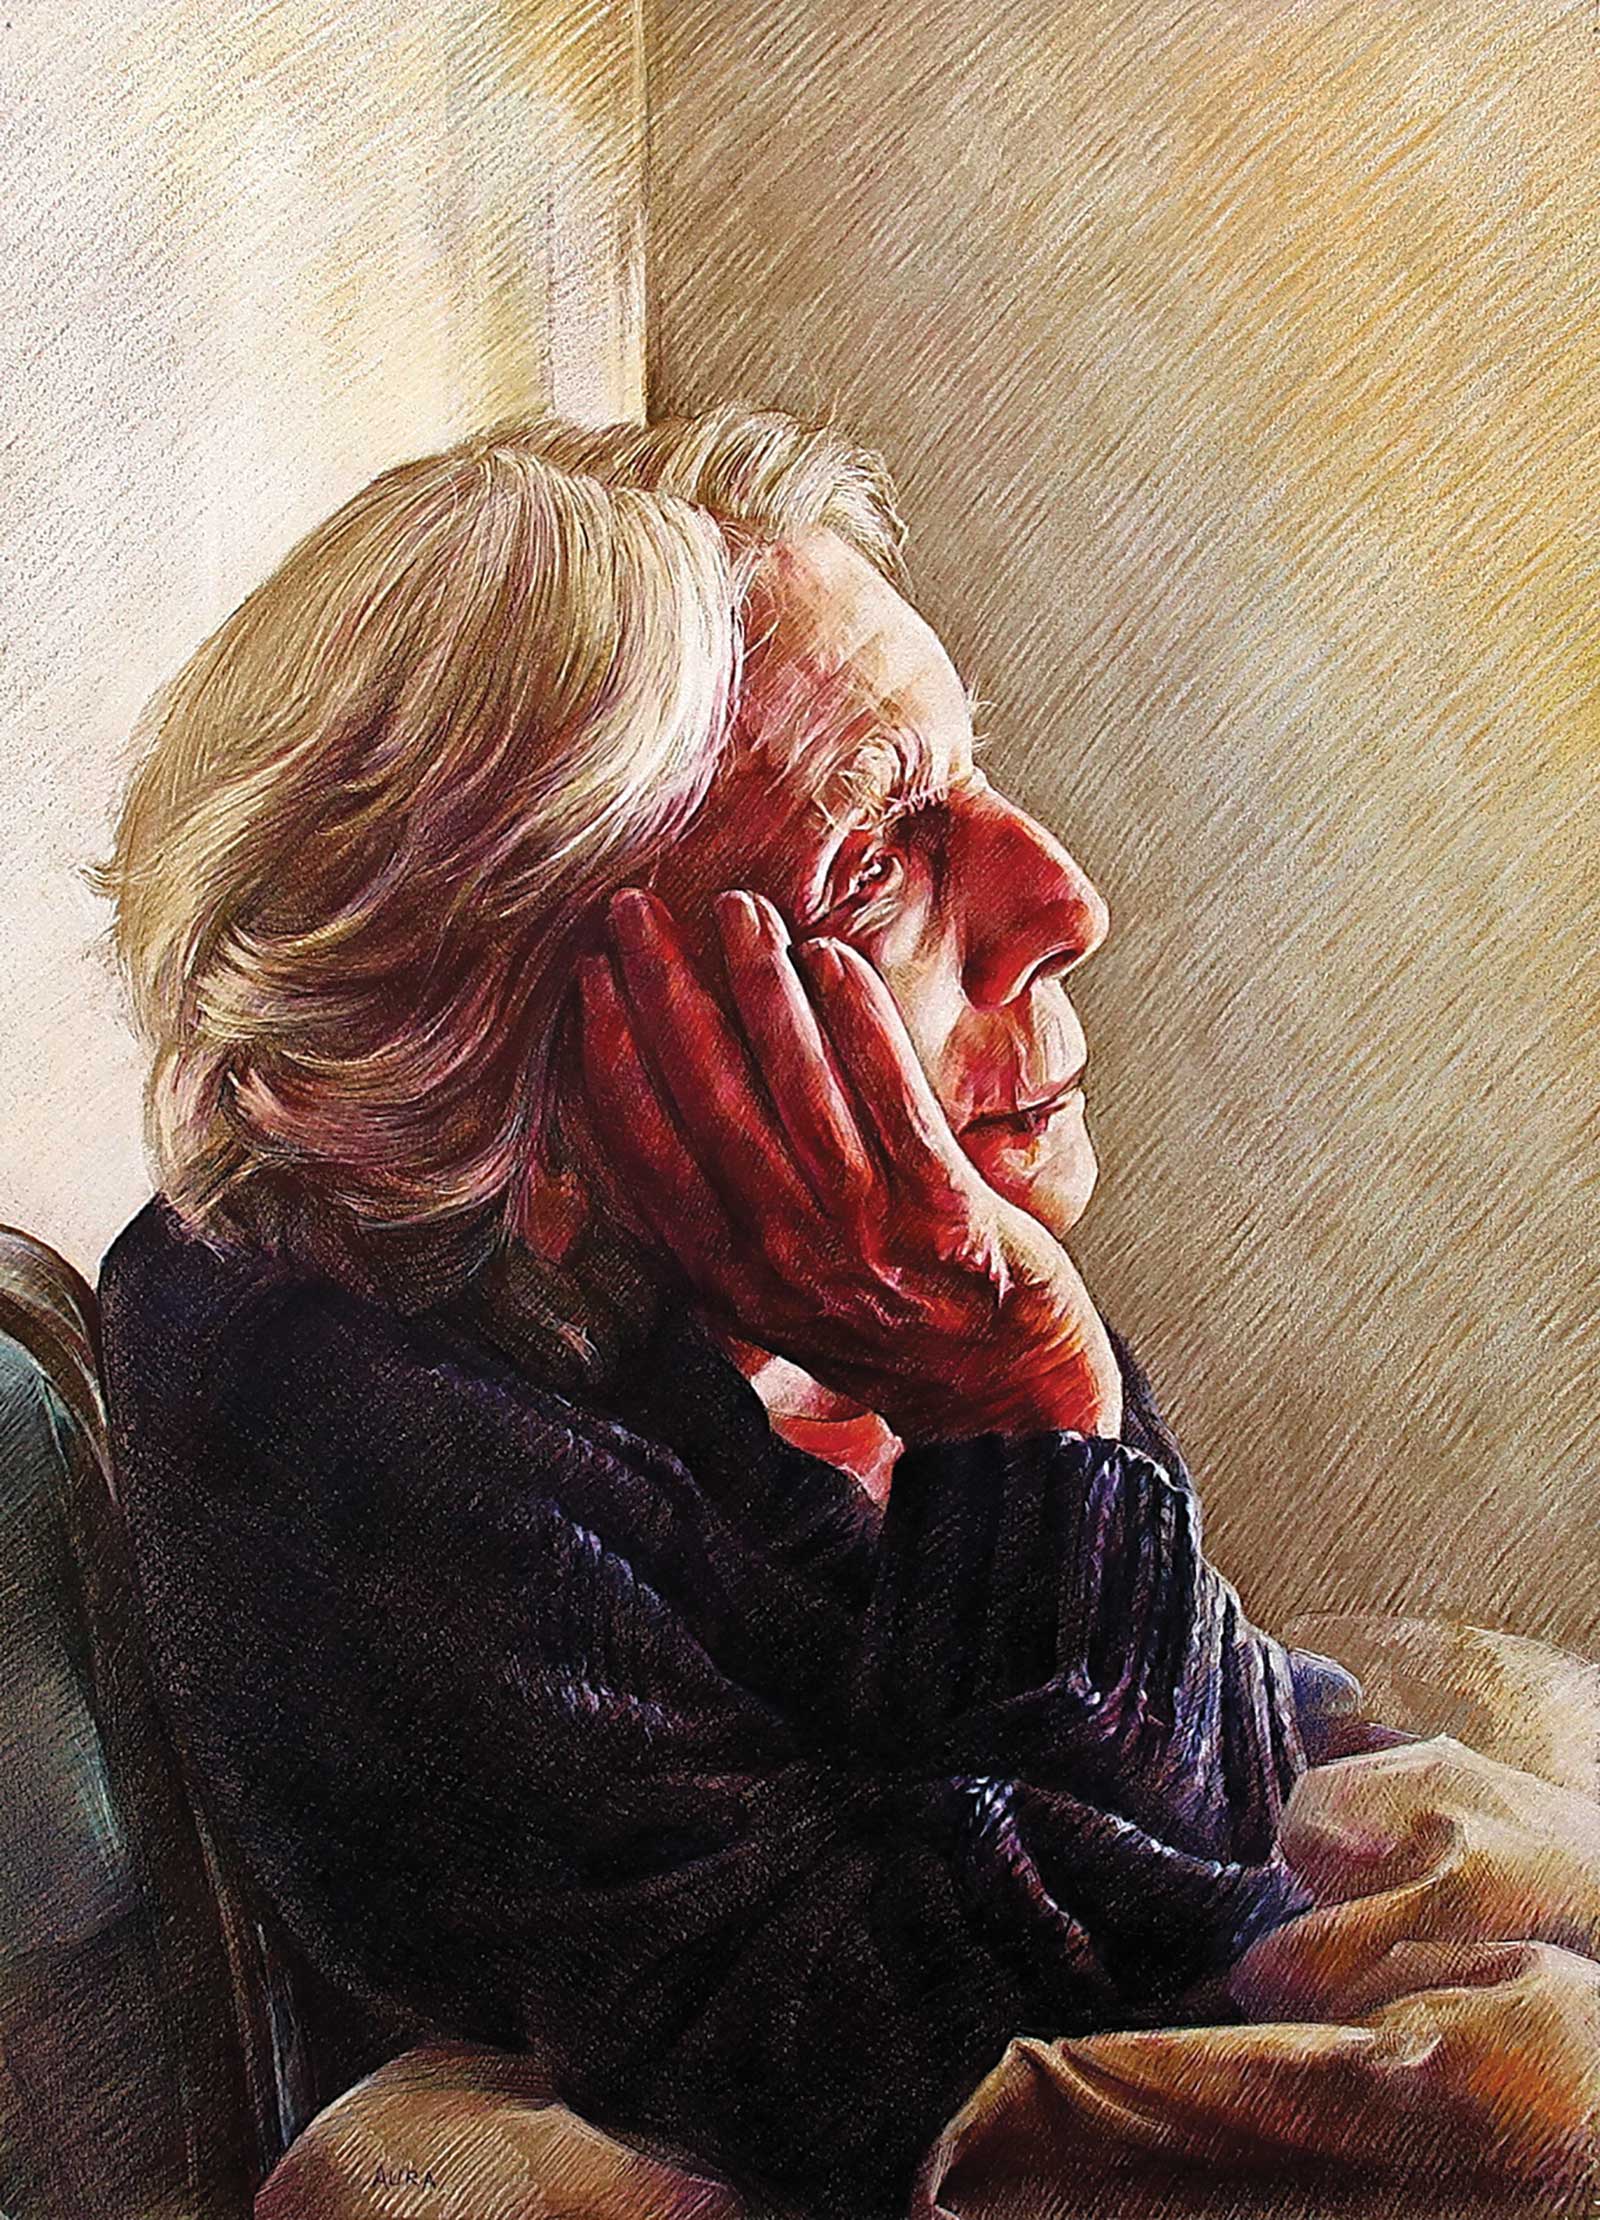
Round Mountain Memories, colored pencil, 22 x 17" (55 x 43 cm) She was a lady with a distinct personality. For a long time I tried to capture a moment that would show her unique pose and character. In an unexpected moment, she appeared in the right place and lighting. The photo was of poor quality, but the main features of the face were visible. I used more pressure and more rich strokes in the drawing, which merged in many places and created a painting effect.
Then, the fun begins. Using the hatching technique, change takes place continuously and throughout the drawing. It is difficult to distinguish one stage from another because the drawing emerges evenly like a photo in a photo lab. When I draw on dark paper, I pay more attention to bright areas of the image because the tone of the paper allows me to maintain the ratio between shadow and light. At the same time, I put on the most characteristic color in the shady part. I hatch in a hand-friendly direction, sometimes changing it to another direction. This can be a changed streak angle or a completely opposite direction, e.g., connecting the illuminated part to the shaded part. This makes it possible to soften the sharpness of the transition or to prevent several layers of different colors from merging into a single heavy mass.
In the early stages, I don’t pay much attention to the hair, I just roughly apply the main curls or shadows to maintain value. I hatch different parts of the drawing, adding more and more colors and their layers. Every time I move away from the drawing for a while and come back again, I see different colors in the same places that I add to the drawing. I don’t try to sharpen the pencil all the time, especially when I draw large areas of one color. Different thickness of lines adds vitality and variety to the drawing. In the beginning of drawing, I don’t pay much attention to background details, especially if a portrait is being drawn. But if the portrait contrasts sharply with the background, then I draw the background in a richly sketching manner. Throughout the drawing, layer by layer is filled with areas using the same and different colors until the desired volume, shape, color and character is obtained. A cosmetic adjustment is then undertaken, which is necessary in some smaller places or geometric shapes.
When I draw on light paper, all the initial work is done in the more shady areas to fill in the light paper, but it should not be avoided if it glows somewhere through the grid of strokes. Throughout the workflow, I look at the drawing from a distance from time to time to evaluate the value. And I go to the mirror to evaluate the accuracy. When hatching, it is possible to apply many layers almost to a solid color, but several top layers will still be visible in some places, giving the drawing vitality. This technique intrigues me in that the drawing always remains fresh, not overloaded, as if breathing, and the layers of color seem to be visible through each other. I feel the creative process throughout the work.
My Art in the Making My Art in the Making
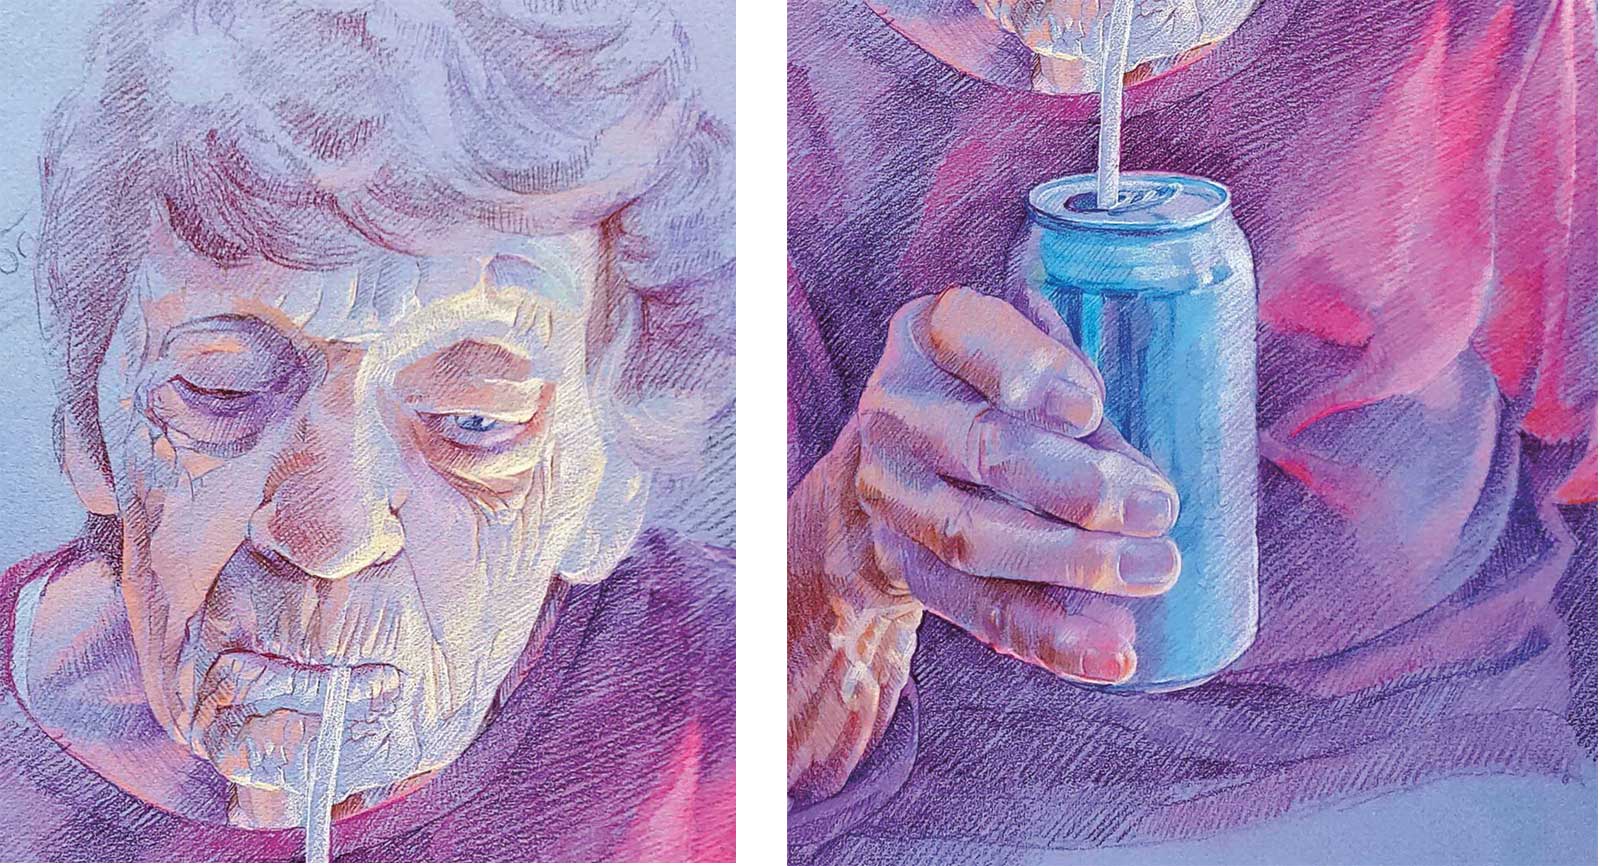
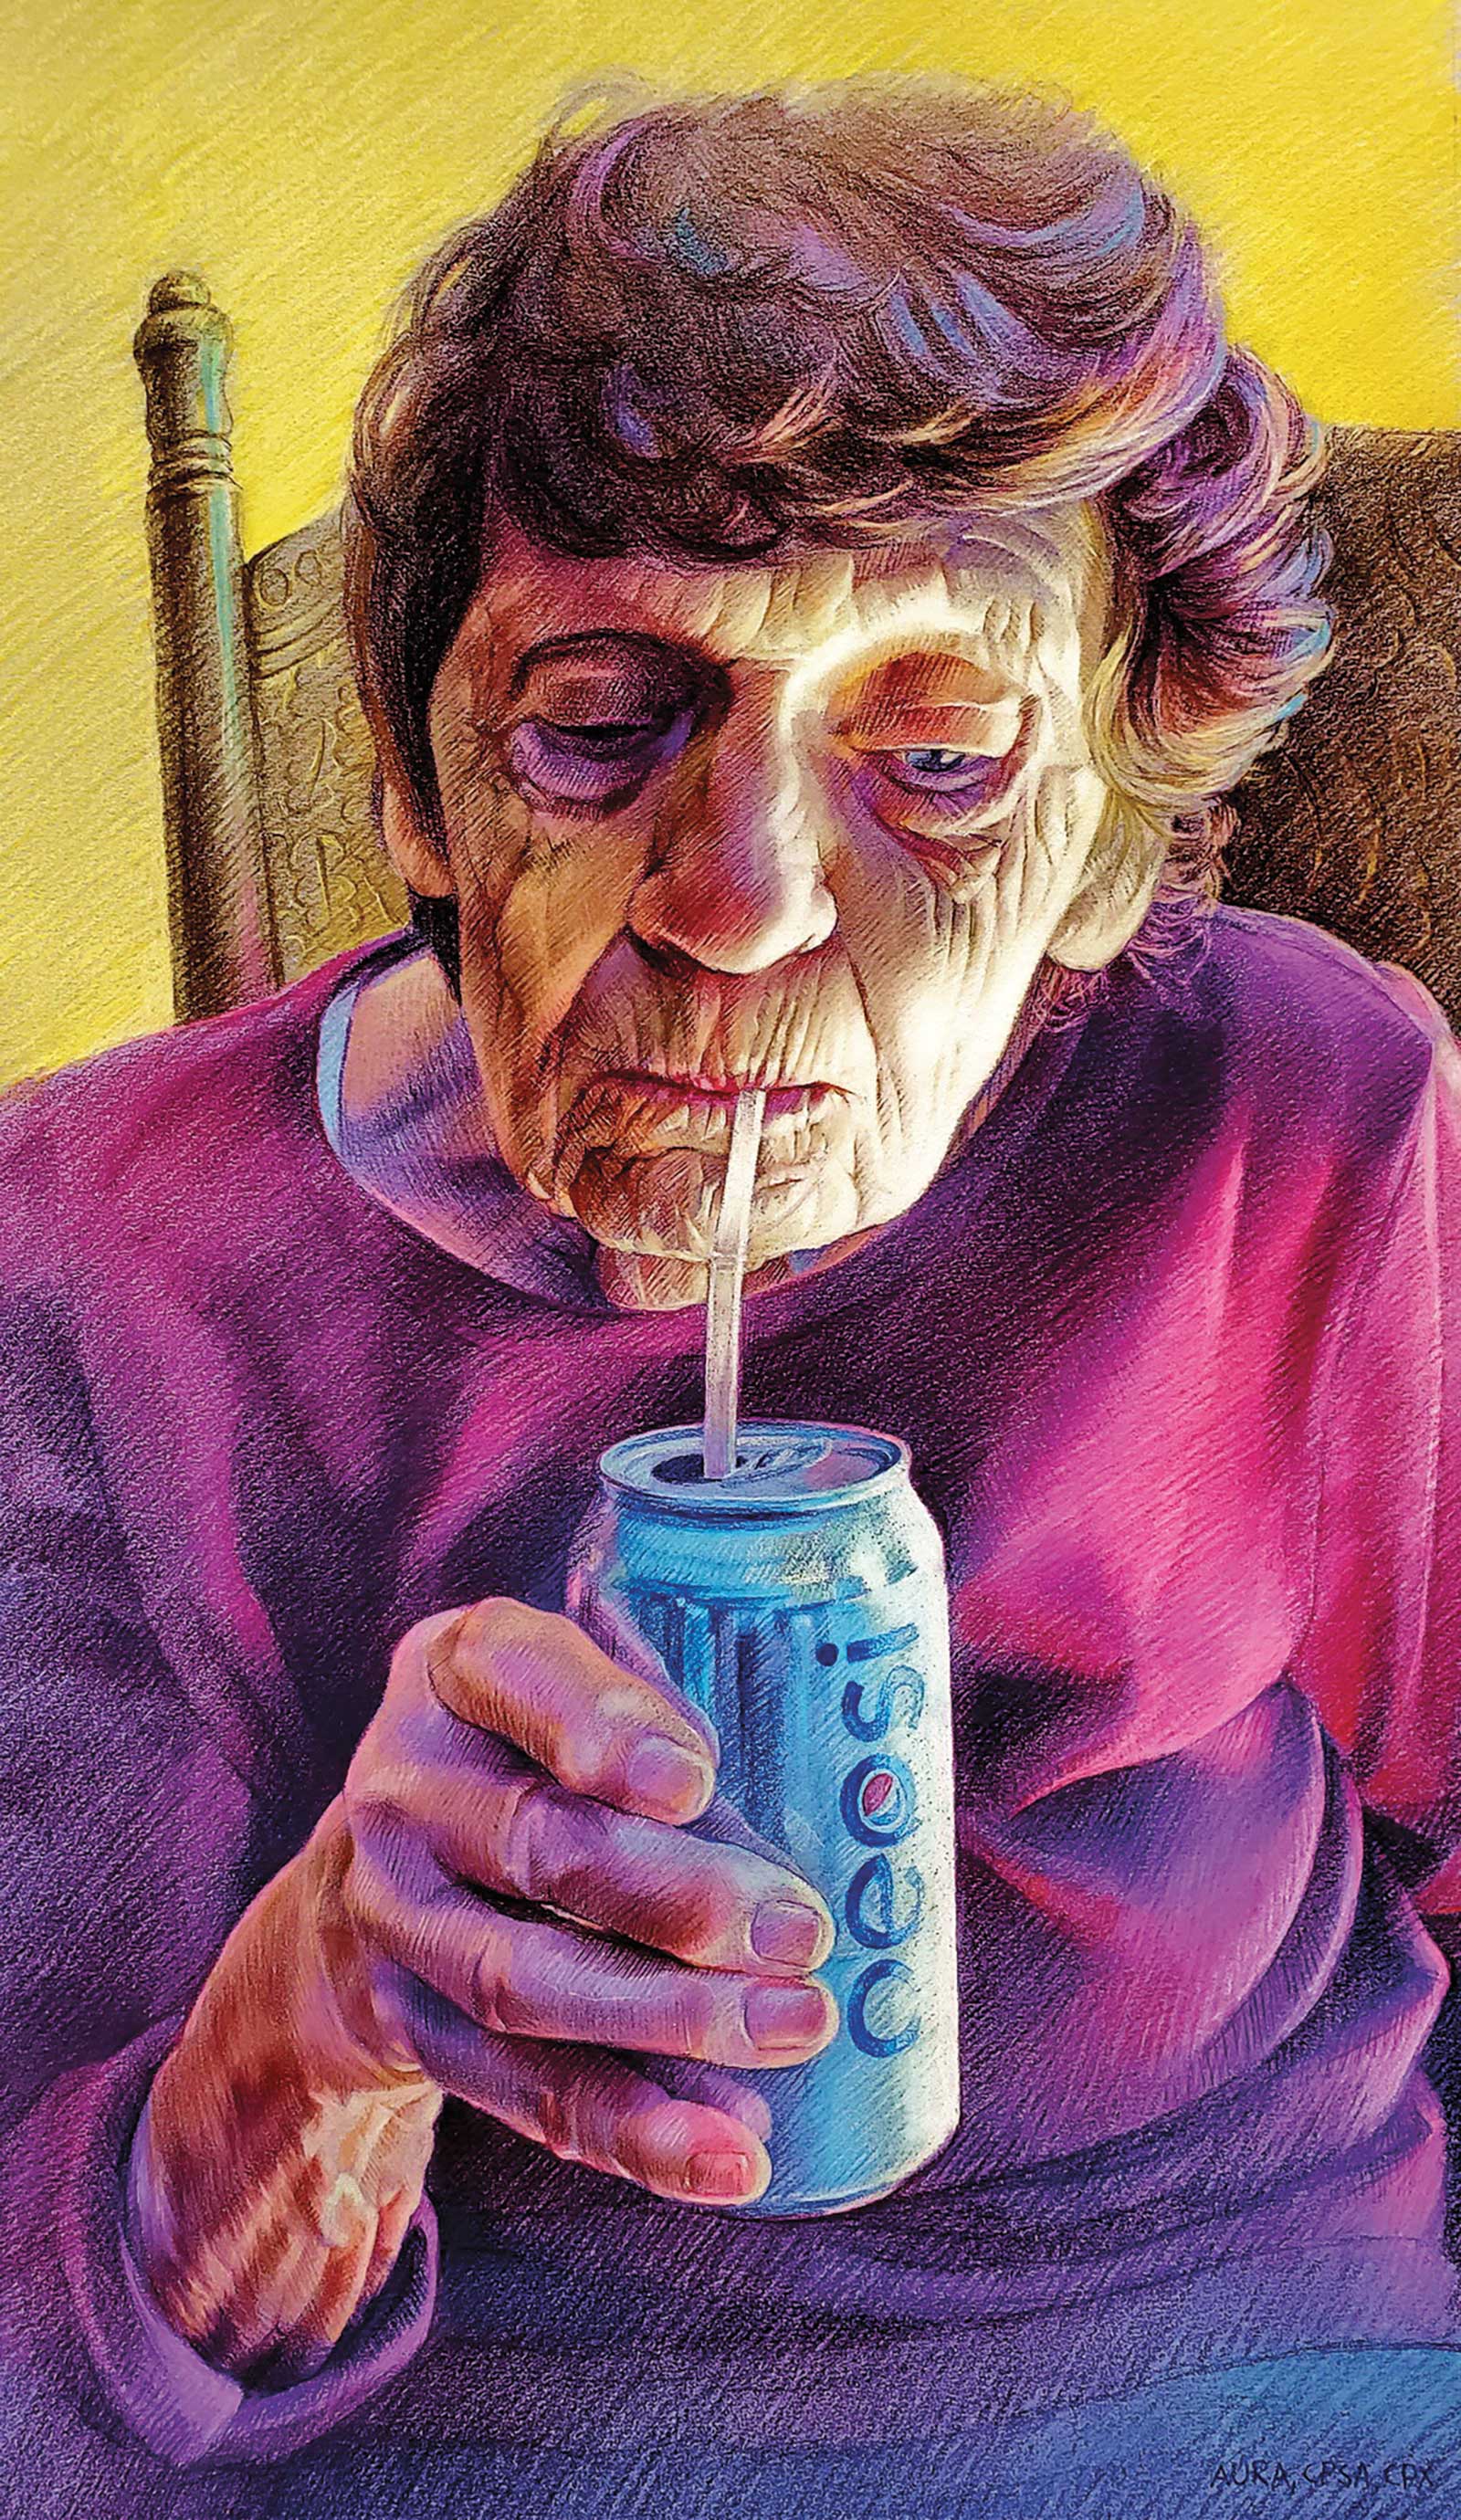
For several years I had to help an elderly woman whose beauty of face always enticed me to draw her portrait—extremely expressive with deep wrinkles, dents and bumps. Also, the eloquence of the eyes kept whispering for the camera and then the colored pencils. The idea was to use a hatching technique to create a portrait of her, showing a moment in her daily routine, intertwined with her sense of humor.
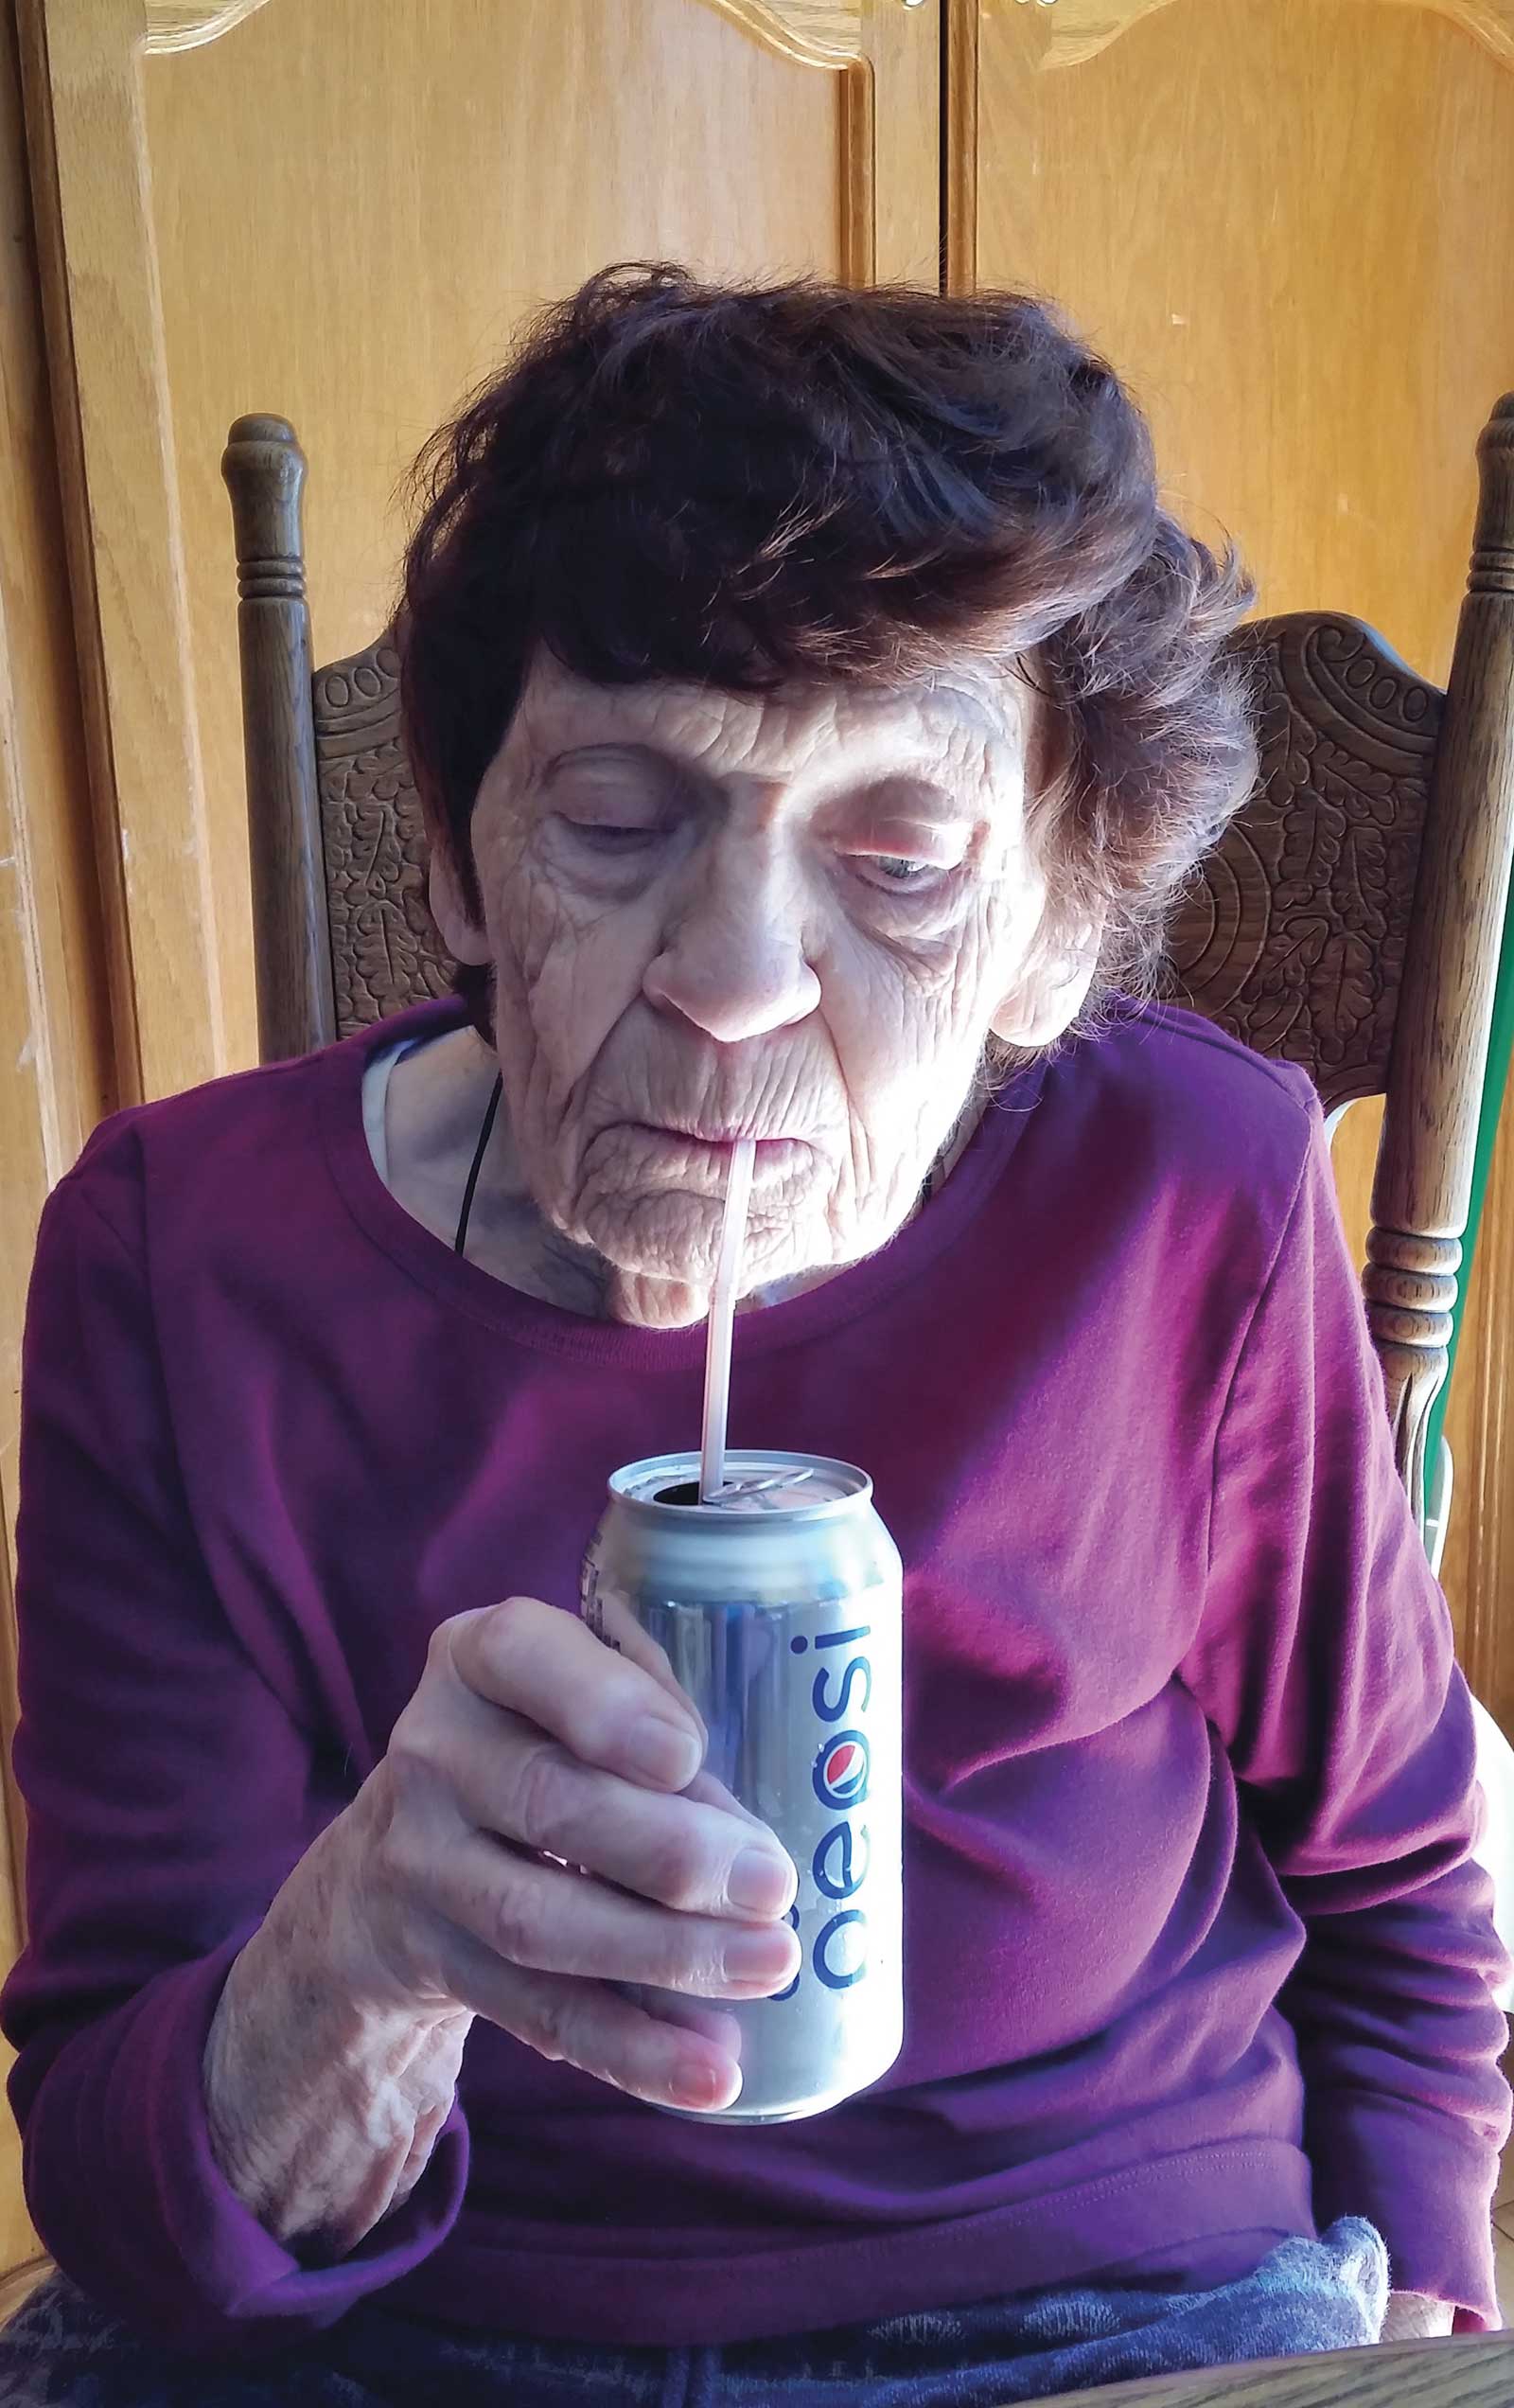
Reference Photo
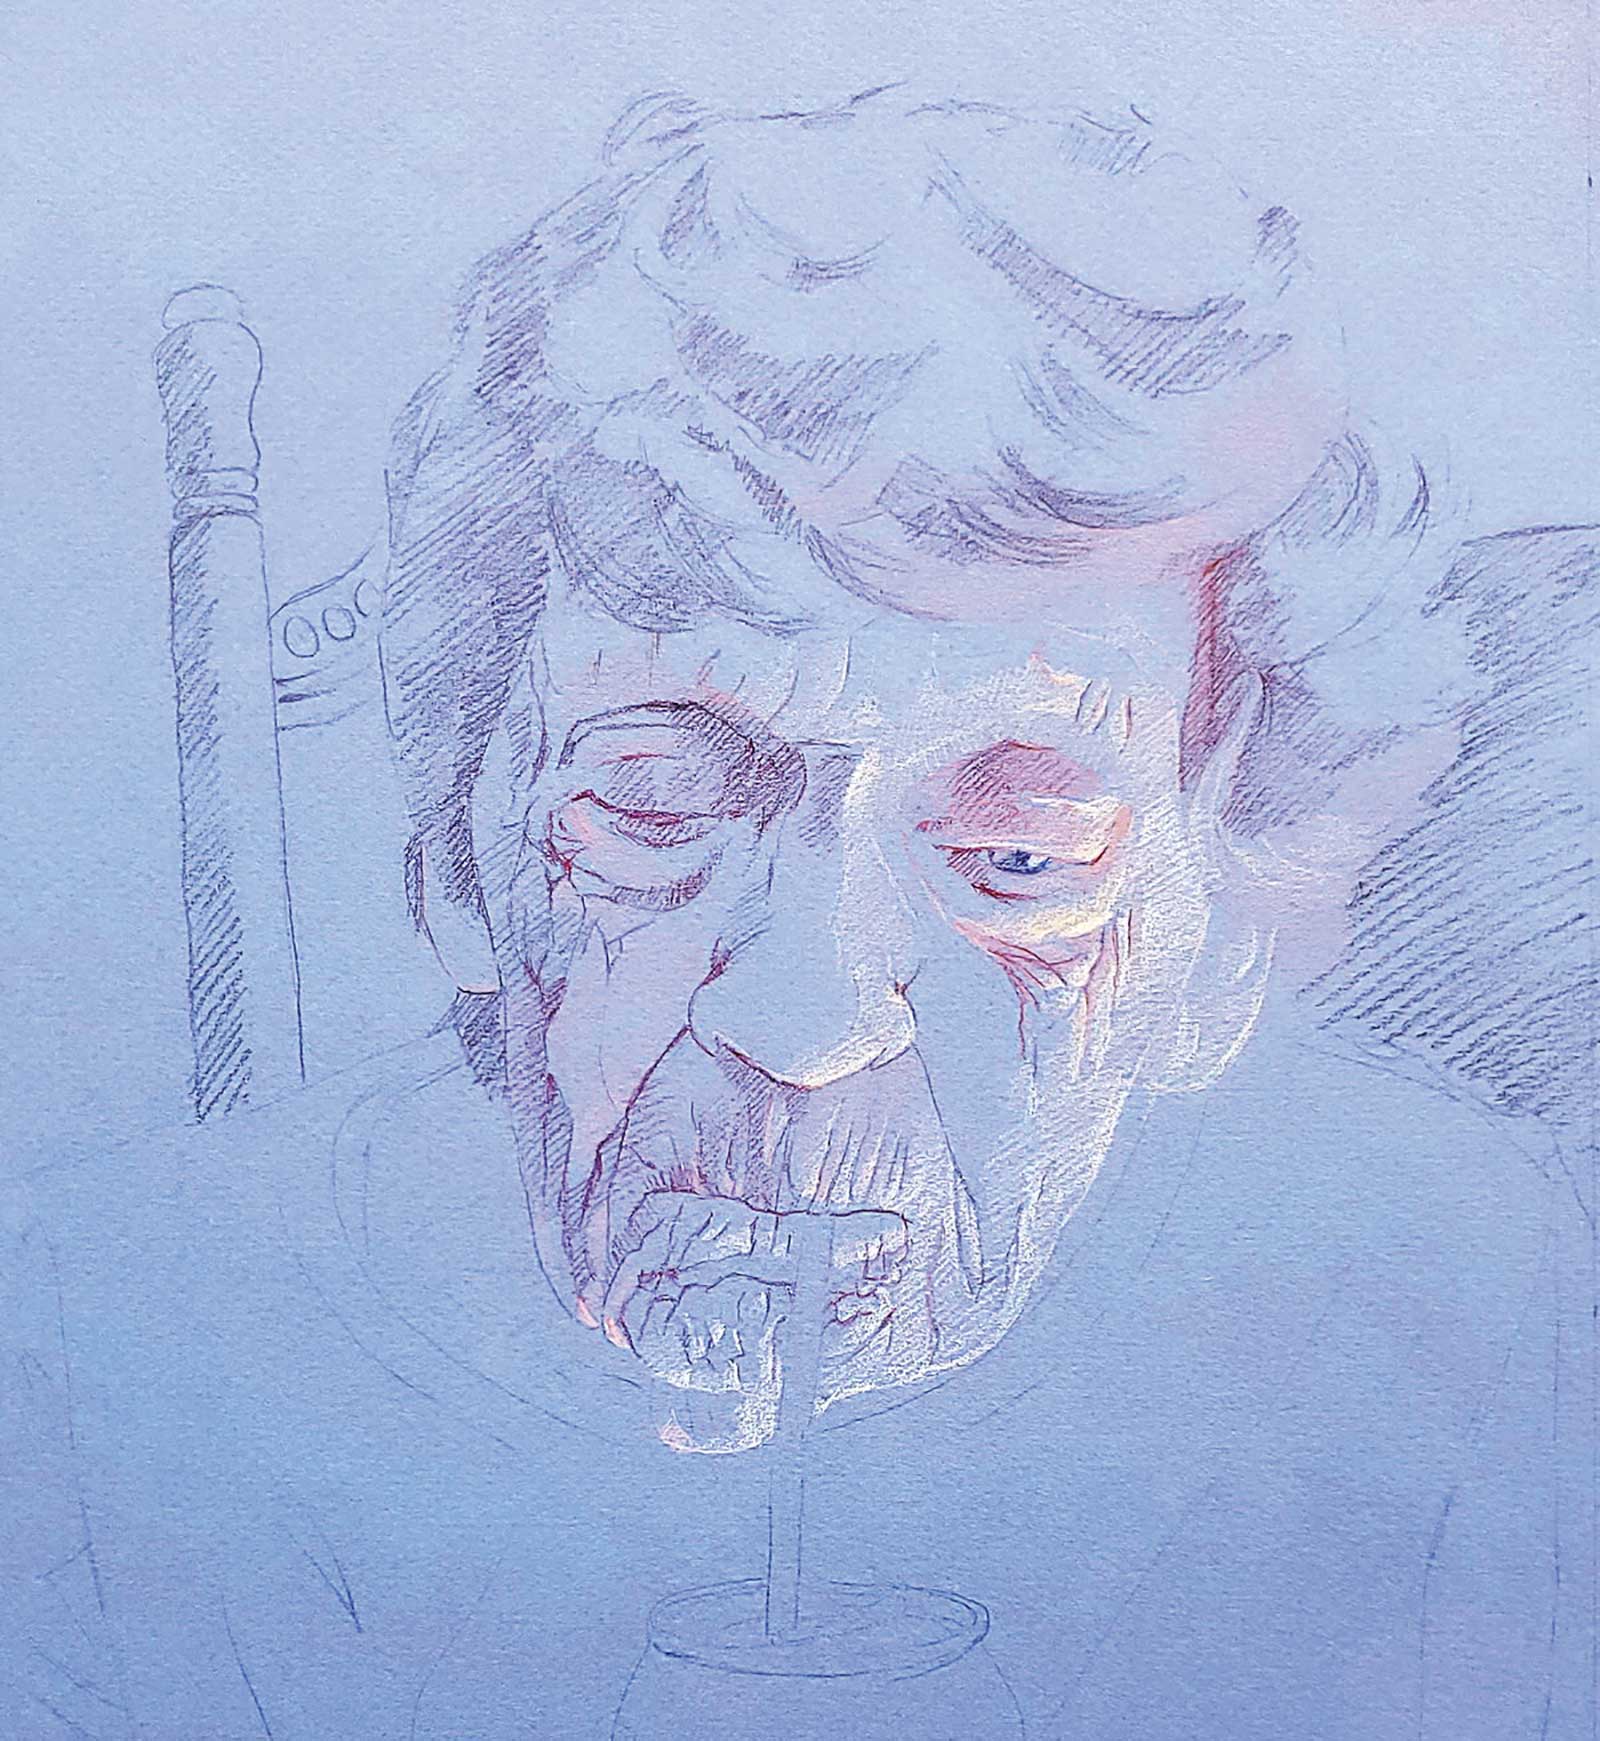 Stage 1
Stage 1 Transferring The Image
With graphite transfer paper, the image is transferred on the paper. The lines are erased and barely visible. The face is marked with dark color in the shadow and light in the light. I also begin the first touches of pencil on paper.
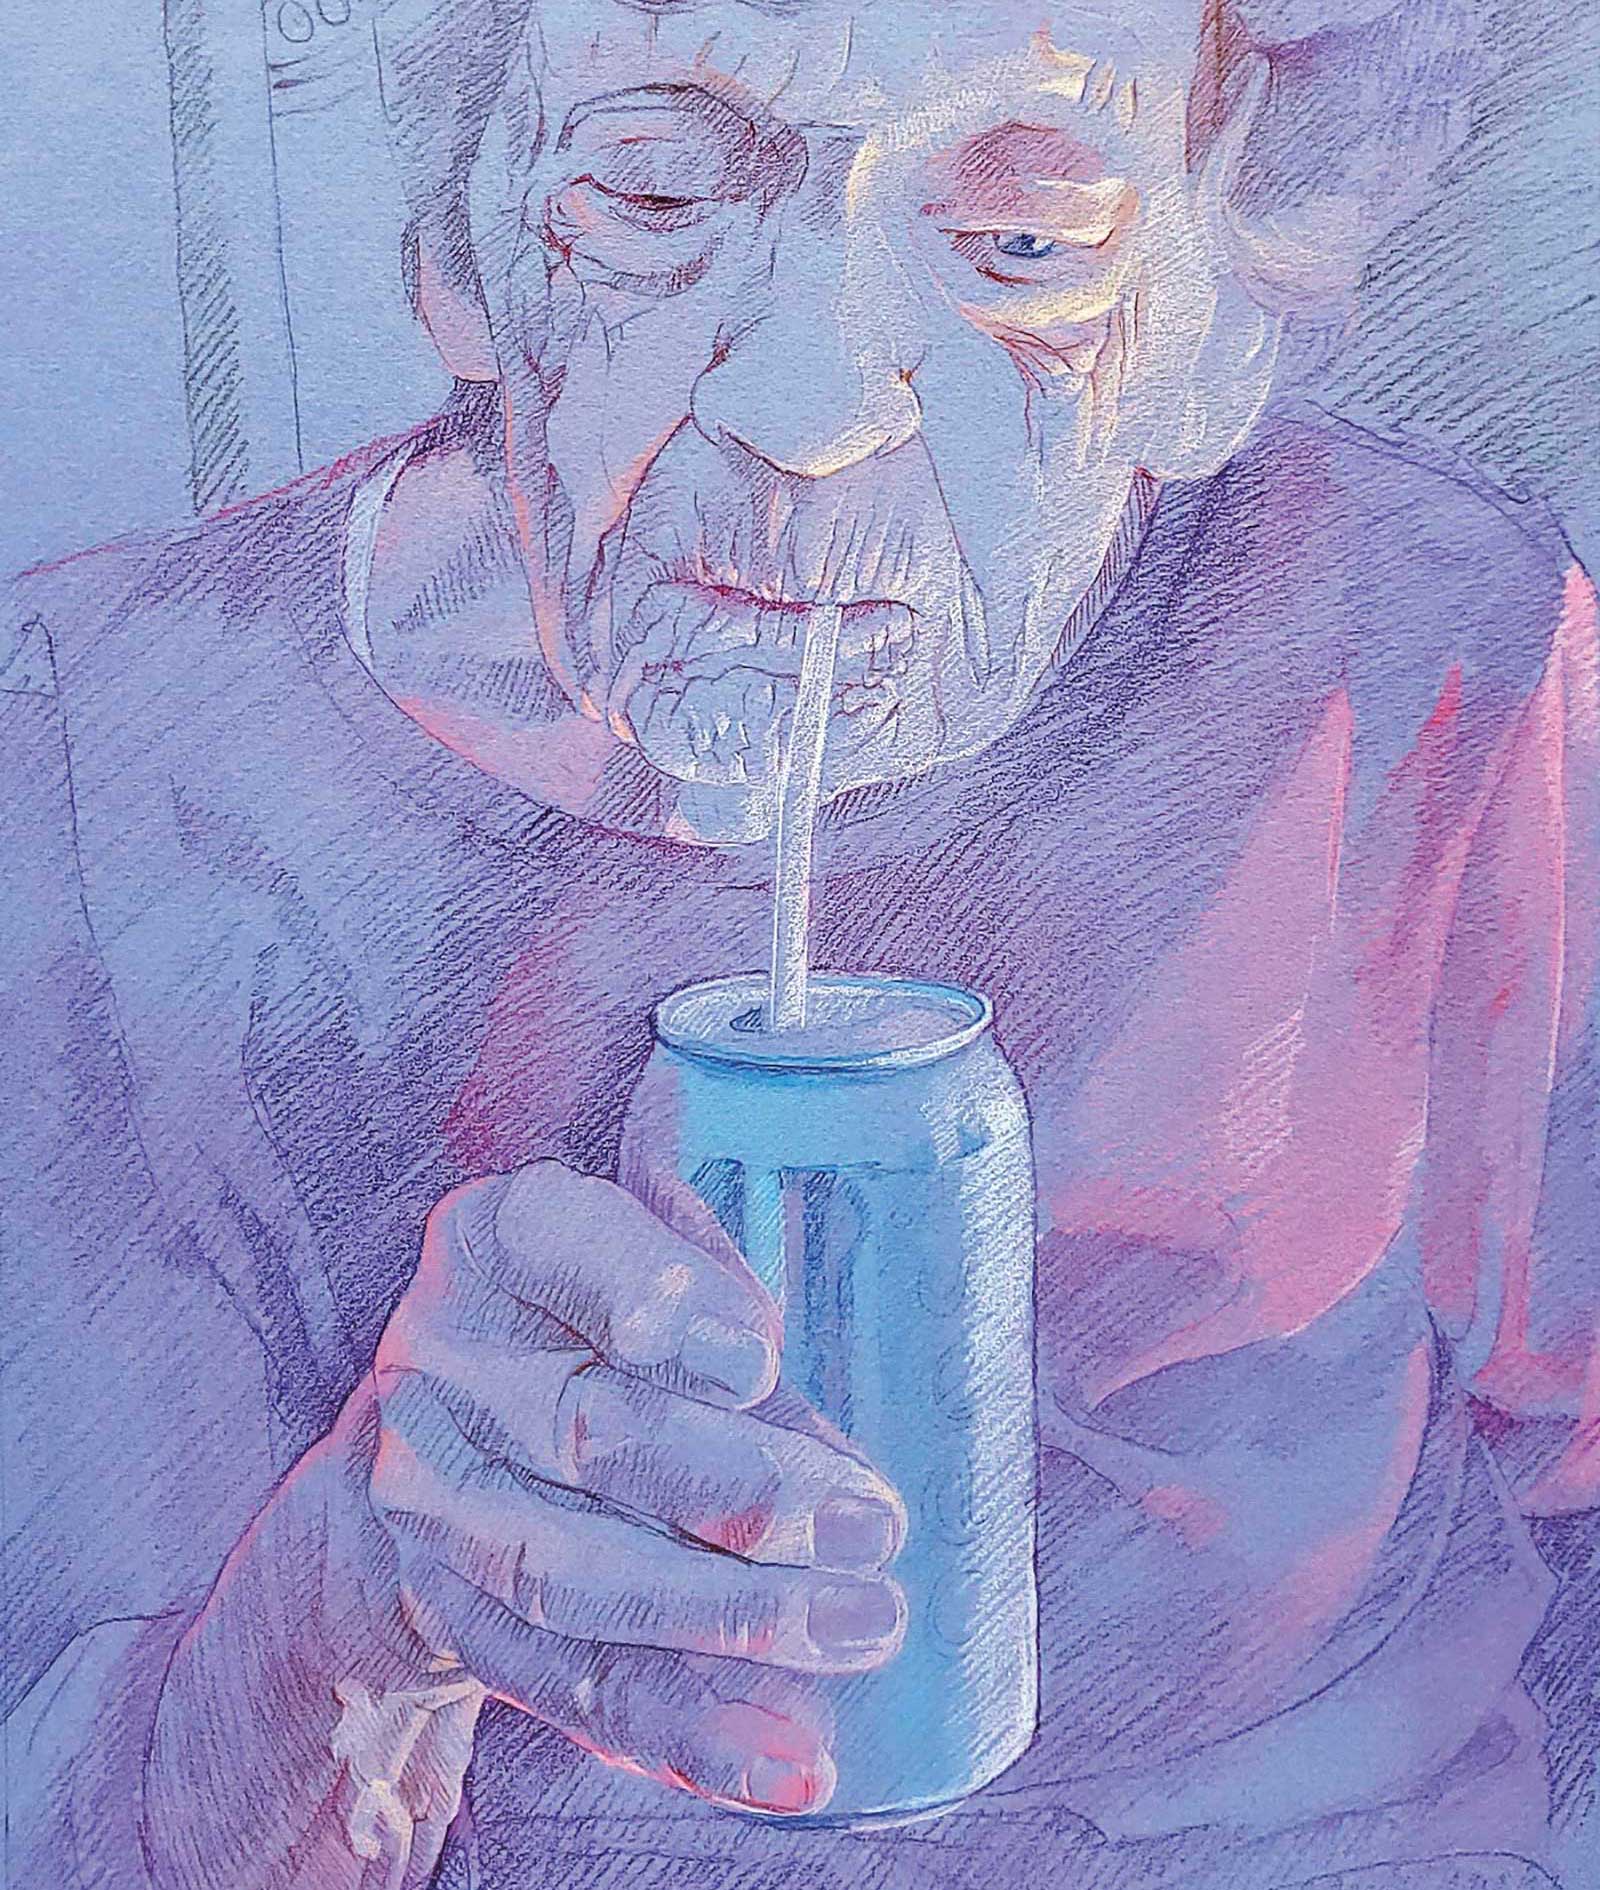 Stage 2
Stage 2 Rough Hatching with Colors
I am now roughly hatching with colors in the main areas of the drawing. The colors are chosen to reflect the coloring of the drawing. By using a sketching style, the darkest and lightest tones are applied to create value guidance. The thickness and intensity of the strokes vary.
 Stage 3
Stage 3 Coloring New Areas
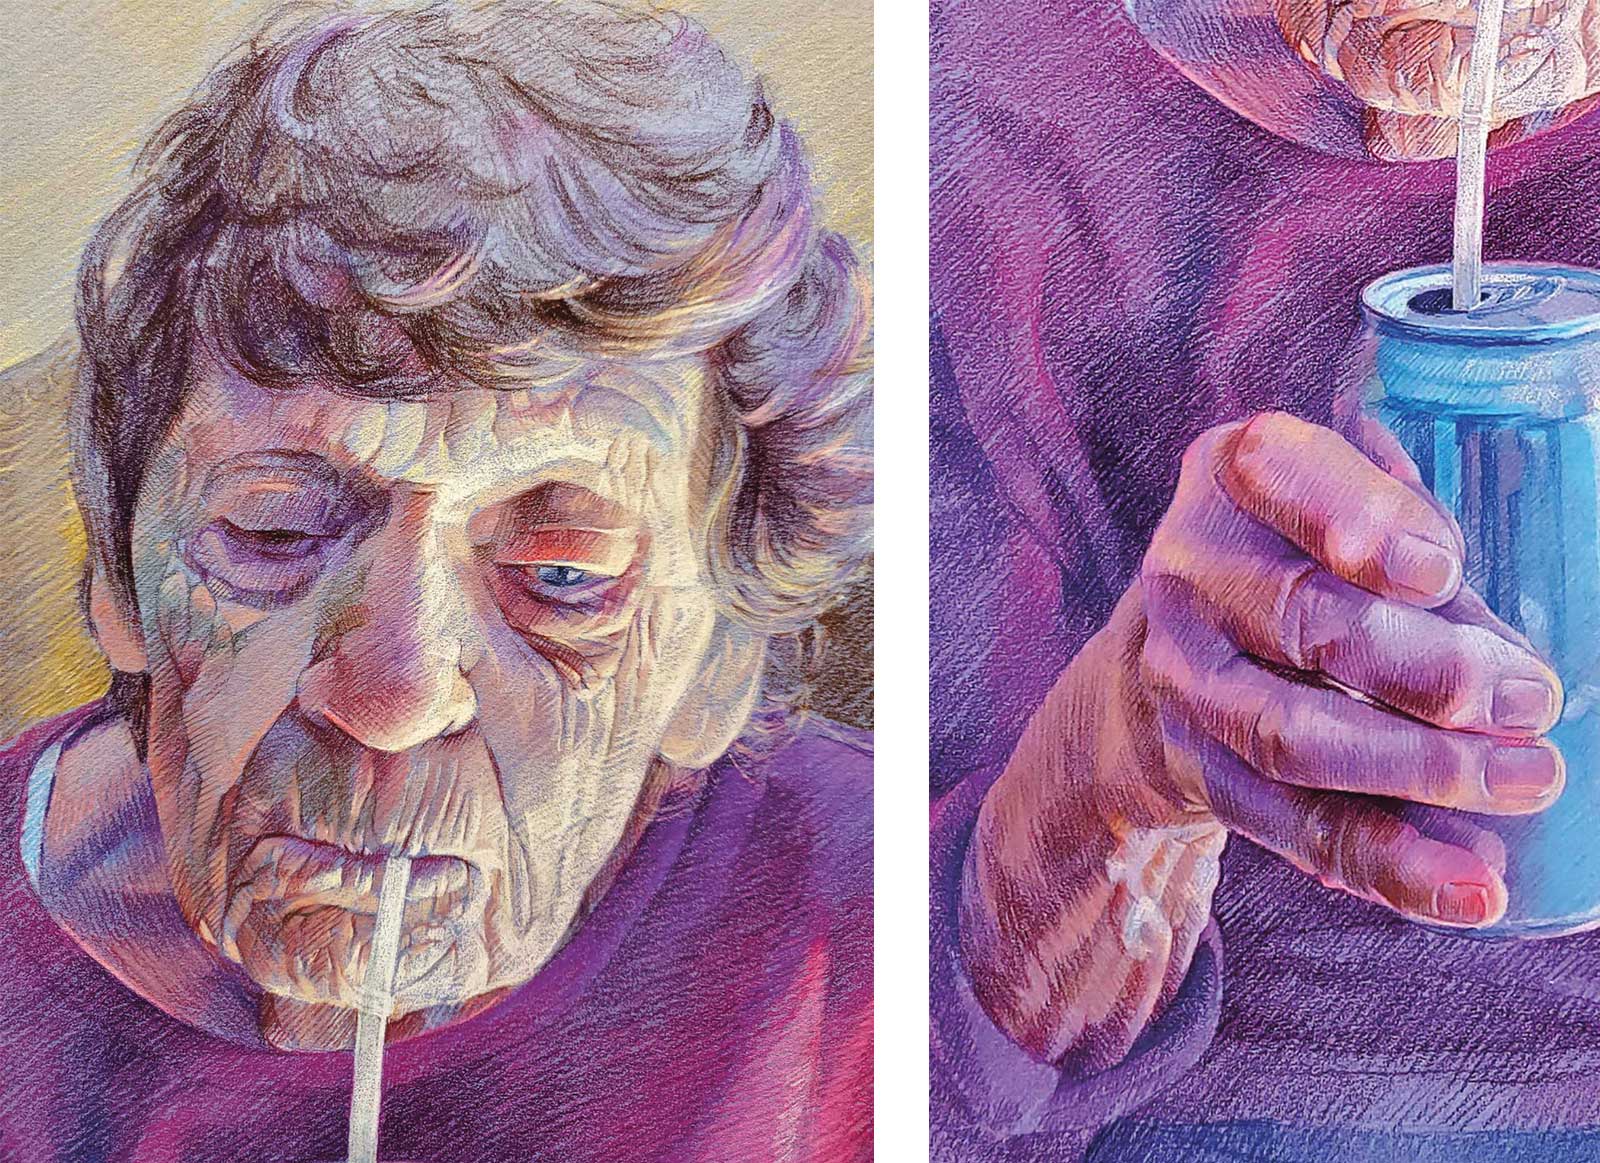
For the lighter areas, intense colors are used to enhance the contrast between shadow and light. The folds of the garment in the shaded part, shadows and half tones on the face are covered with richer colors.
 Stage 4
Stage 4 Head, Hand and Hair
Here, I focus more on the head and hand, as well as enrich the hair color for a slightly deeper shade. Higher pressure is used in the shady part. The same colors are enhanced and several others are used. Untouched areas are covered on the face. The same is done with the hand.
 Stage 5
Stage 5 Volume
More layers are added, specifying the precision of the hatching lines. The direction is varied. Small bumps and dents in the face and hand are softened by joining the illuminated and shaded parts by cross-hatching.
 Stage 6
Stage 6 Value Adjustments
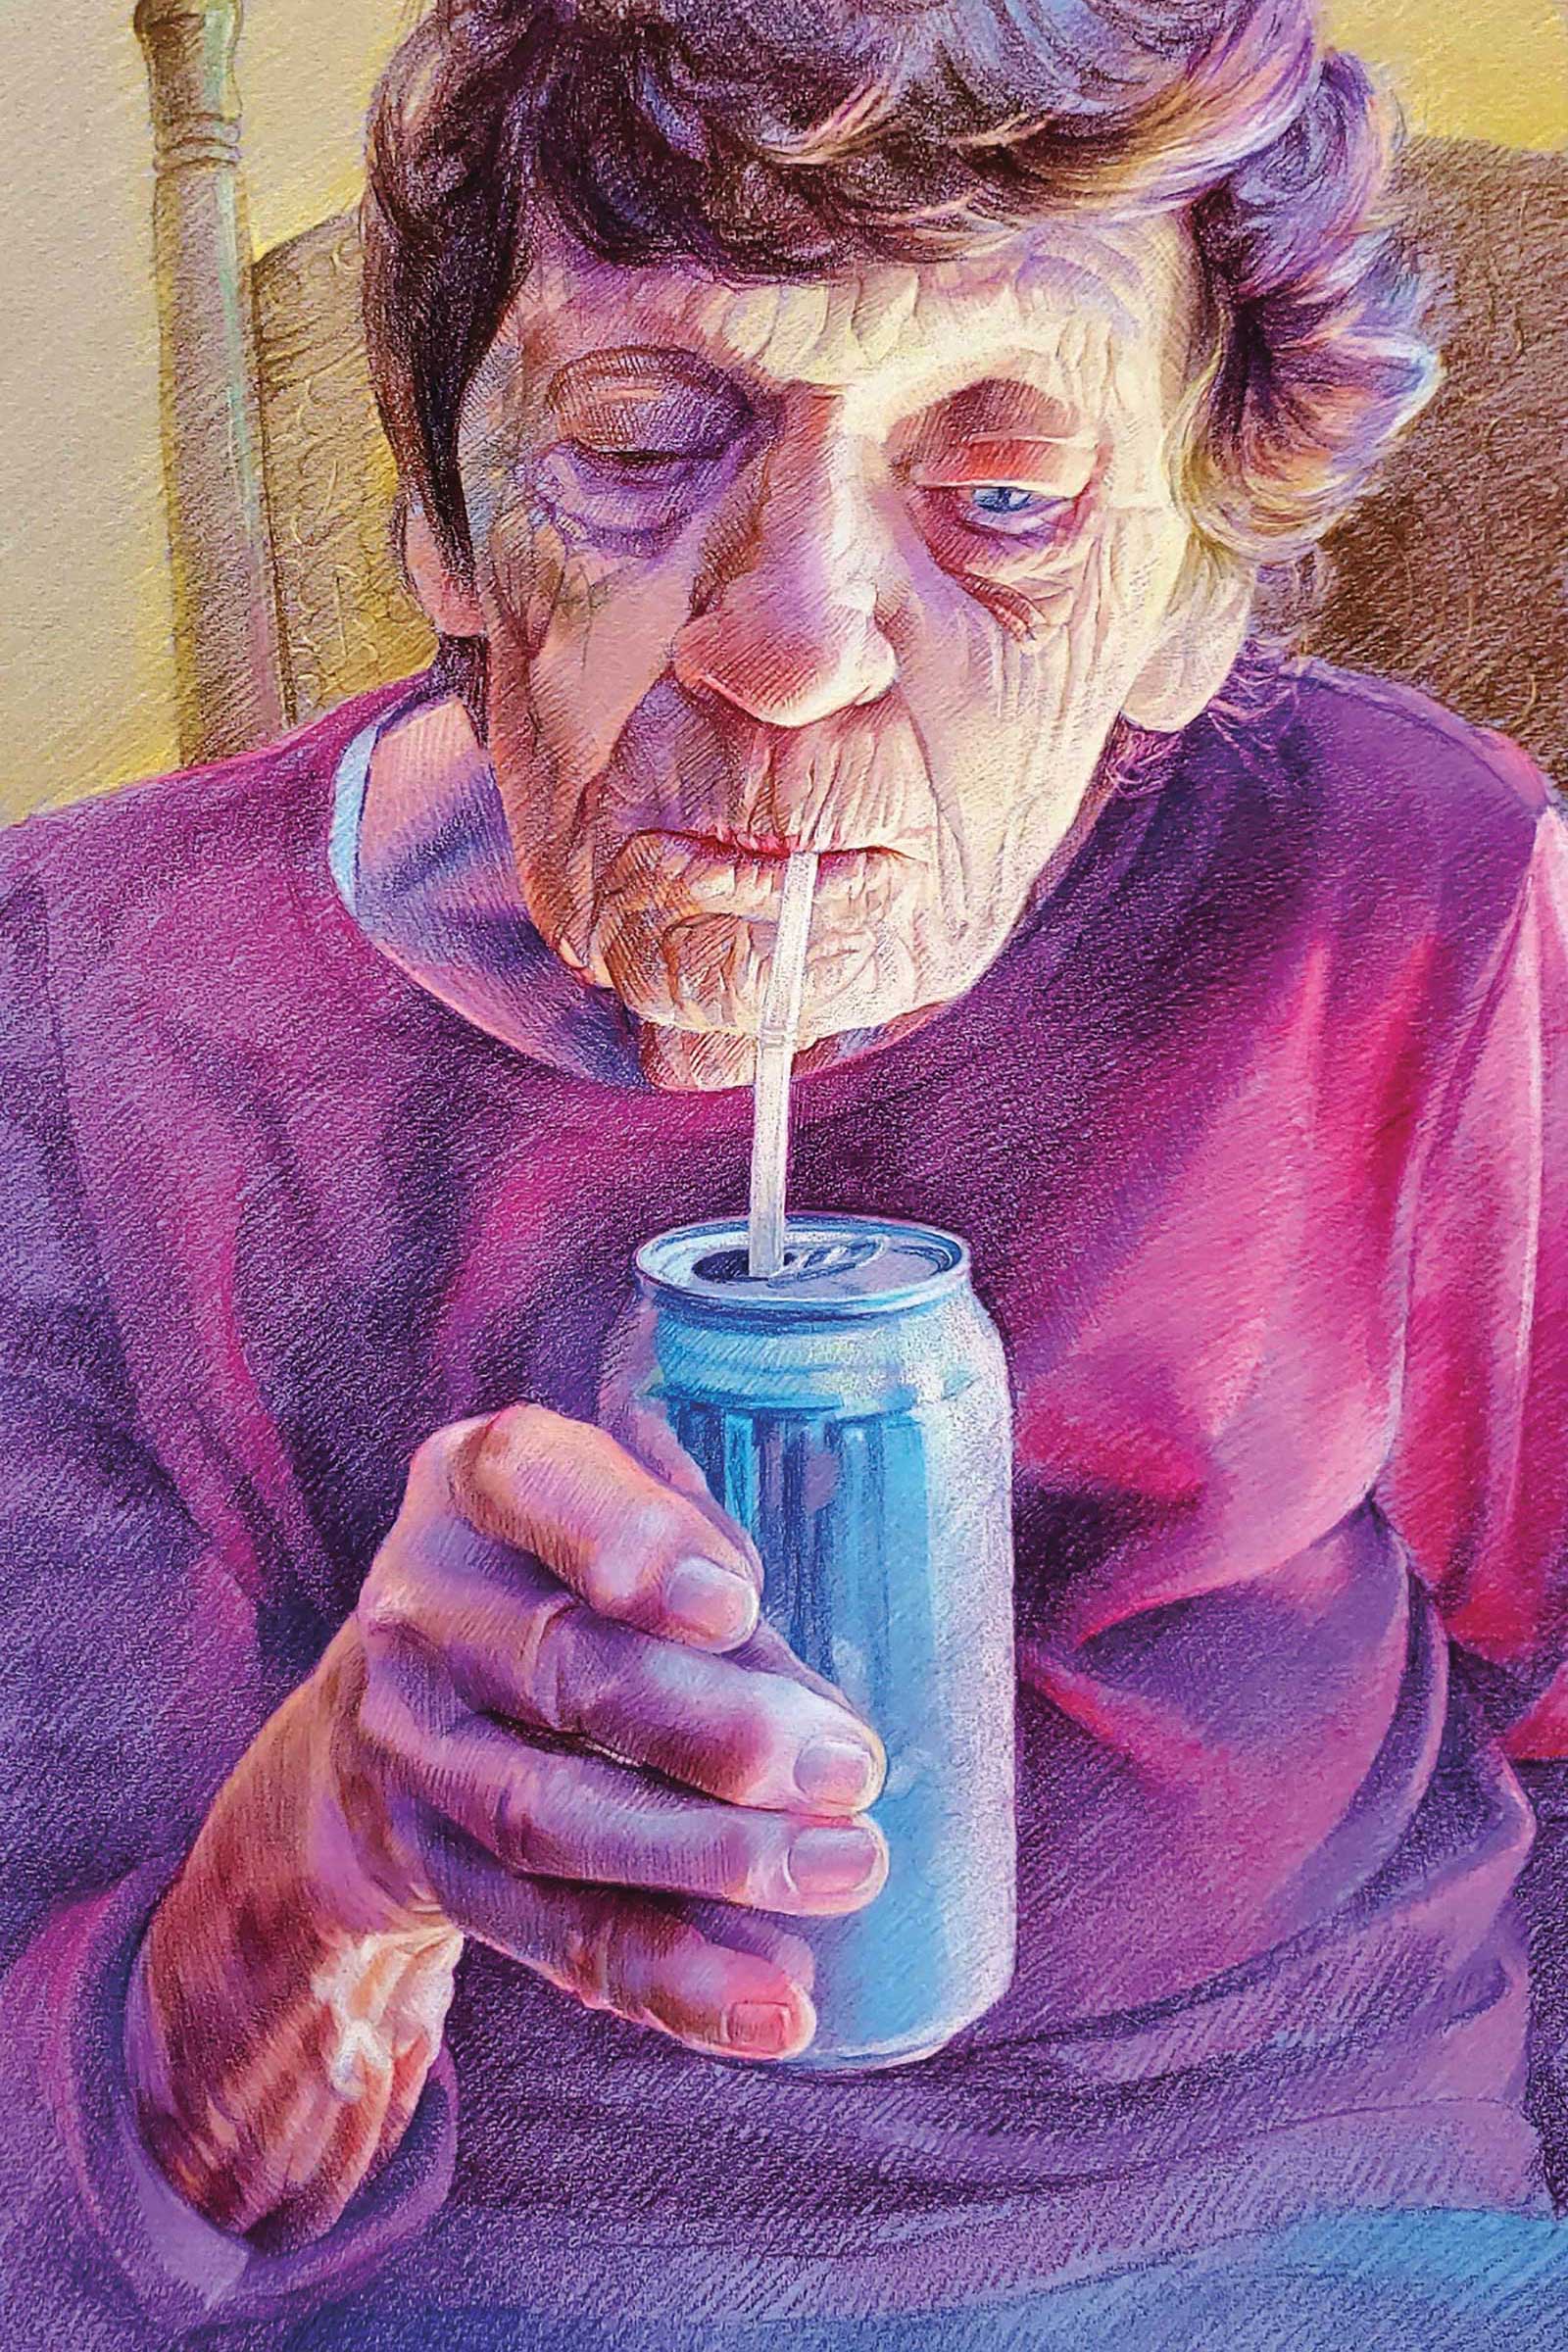
All colors are intensified with colors to enforce contrast. The garment is darkened around the arm to make the hand stand out. The light and shaded parts of the image are reinforced by pressure. I’m also working with the background.
 Stage 7
Stage 7 Final Touches
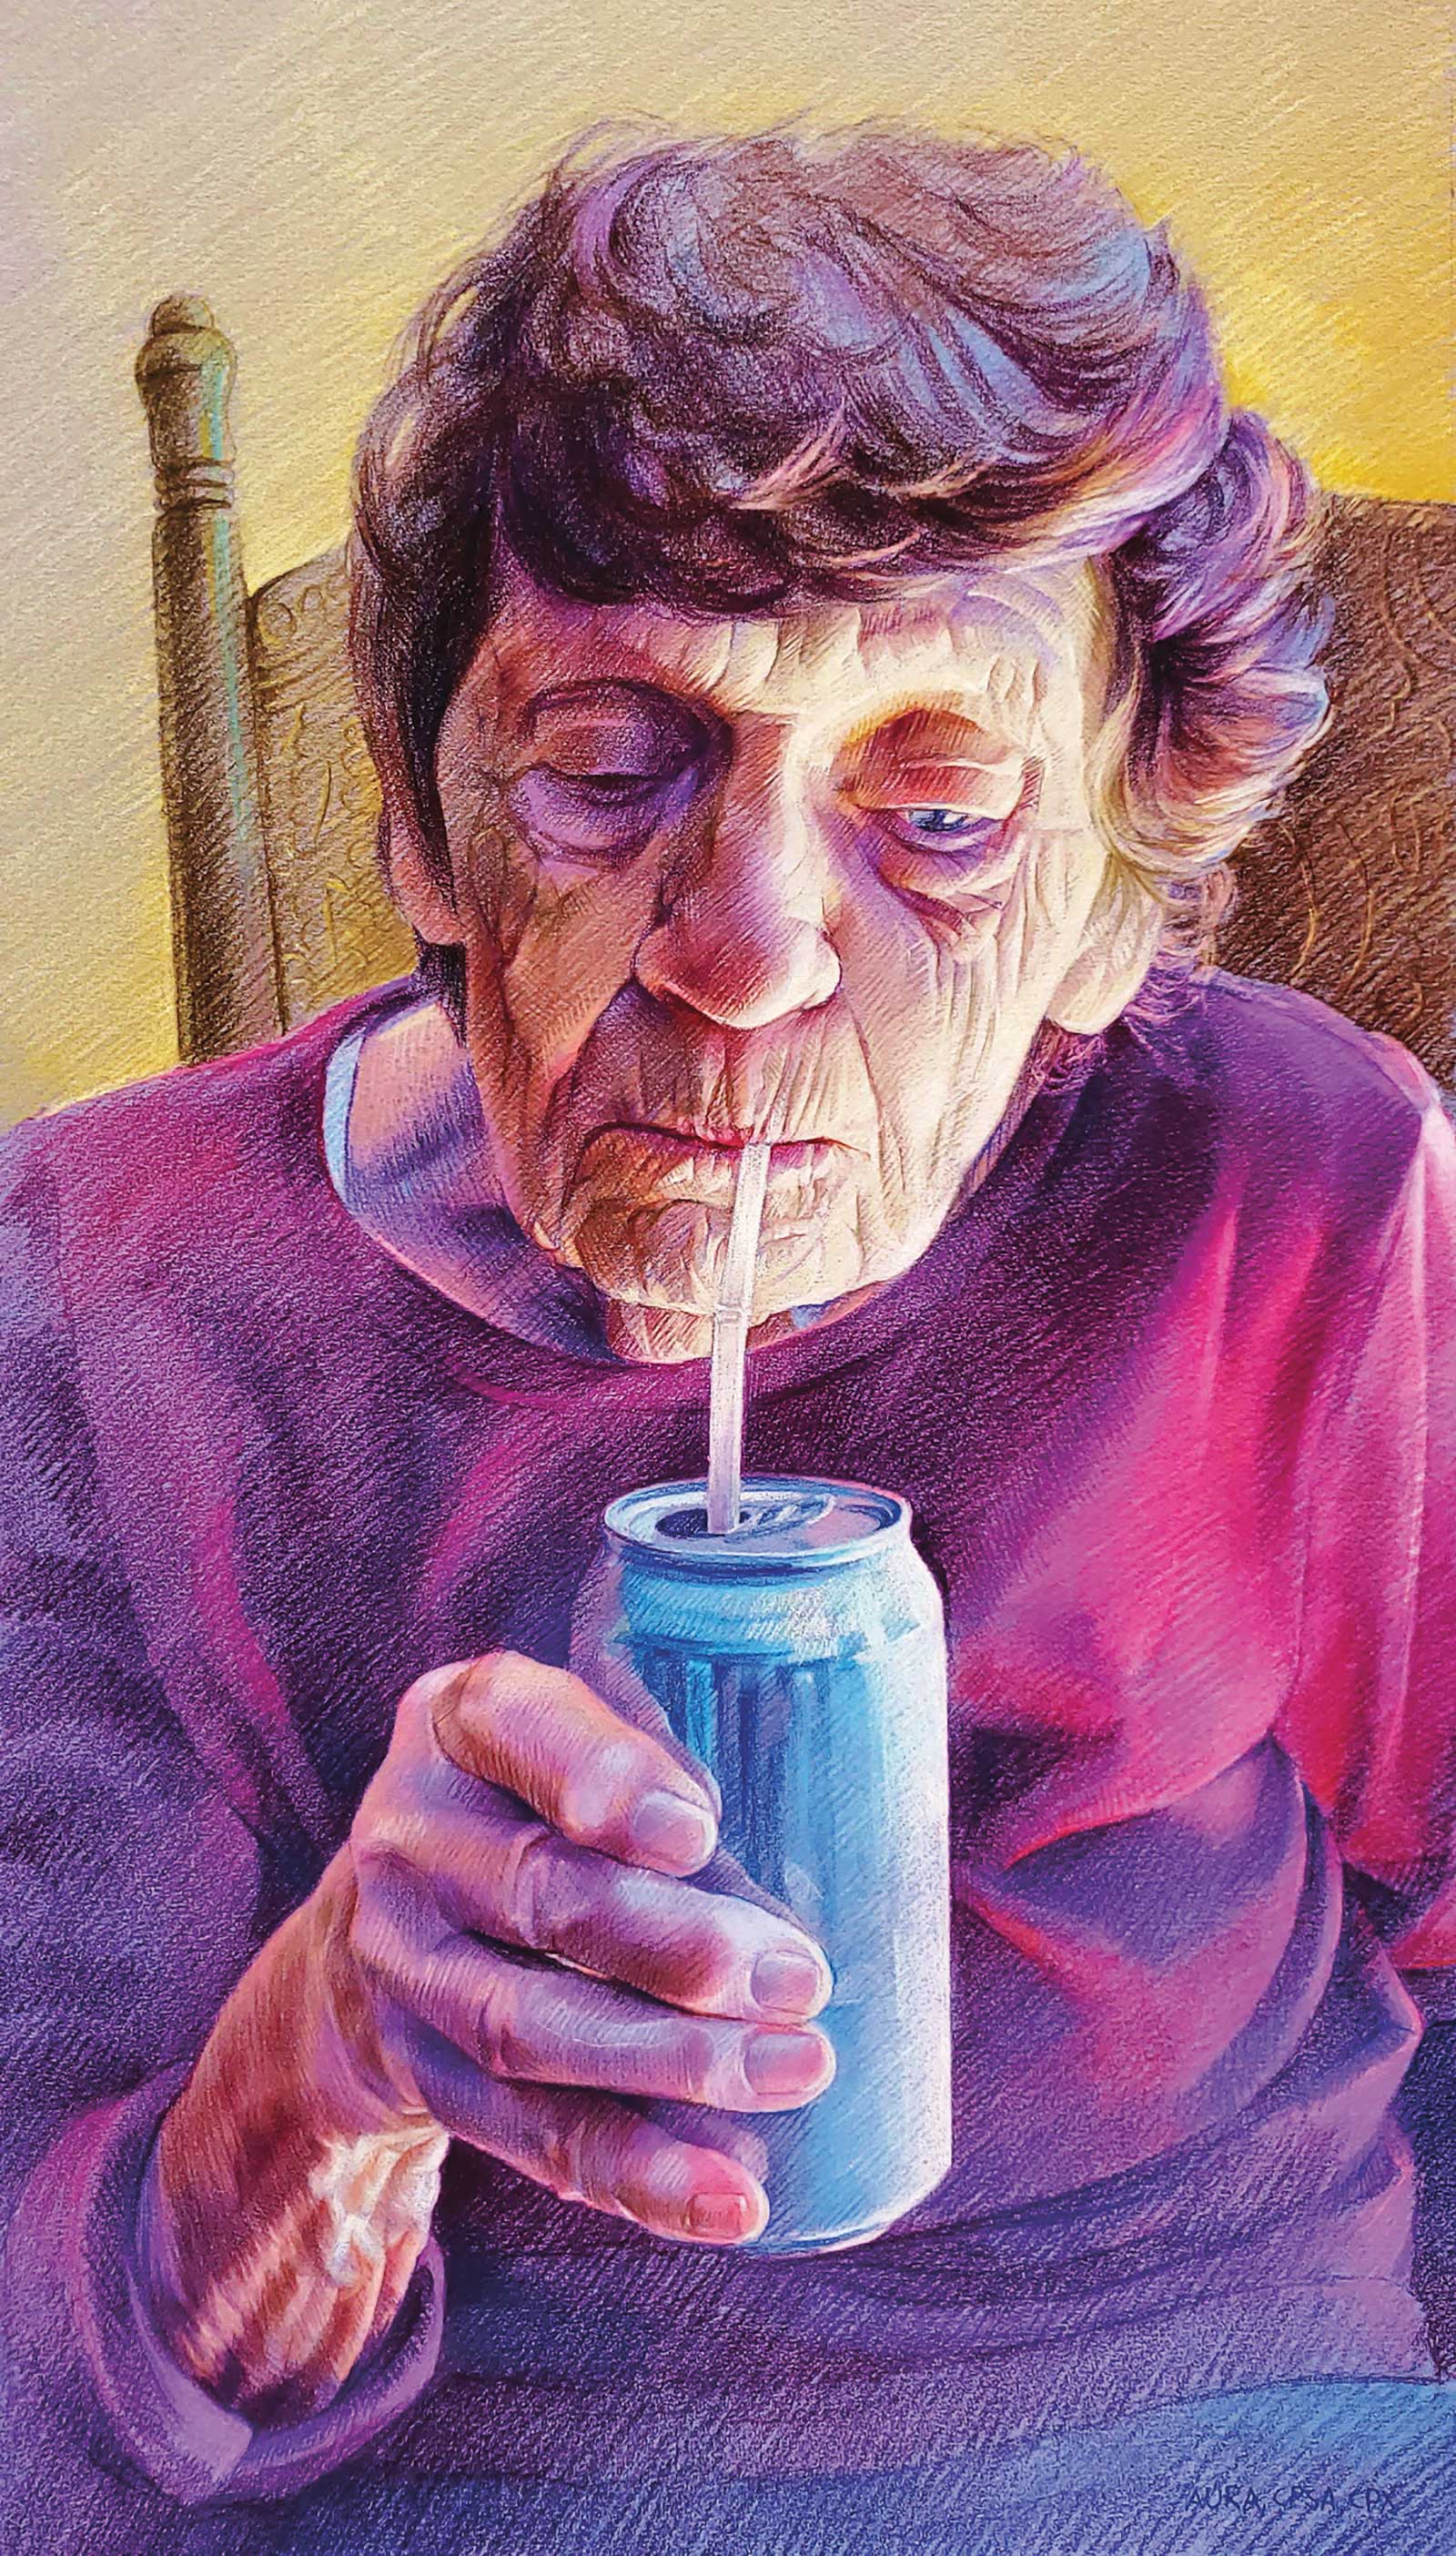
Refreshing Bubbles, colored pencil, 17 x 9½" (43 x 24 cm)
The background is completed. The soda can lines are specified, and the inscription is drawn. The brightest parts on the face are further highlighted. Small details in the shadowy part of the face are slightly lightened.
About the artist
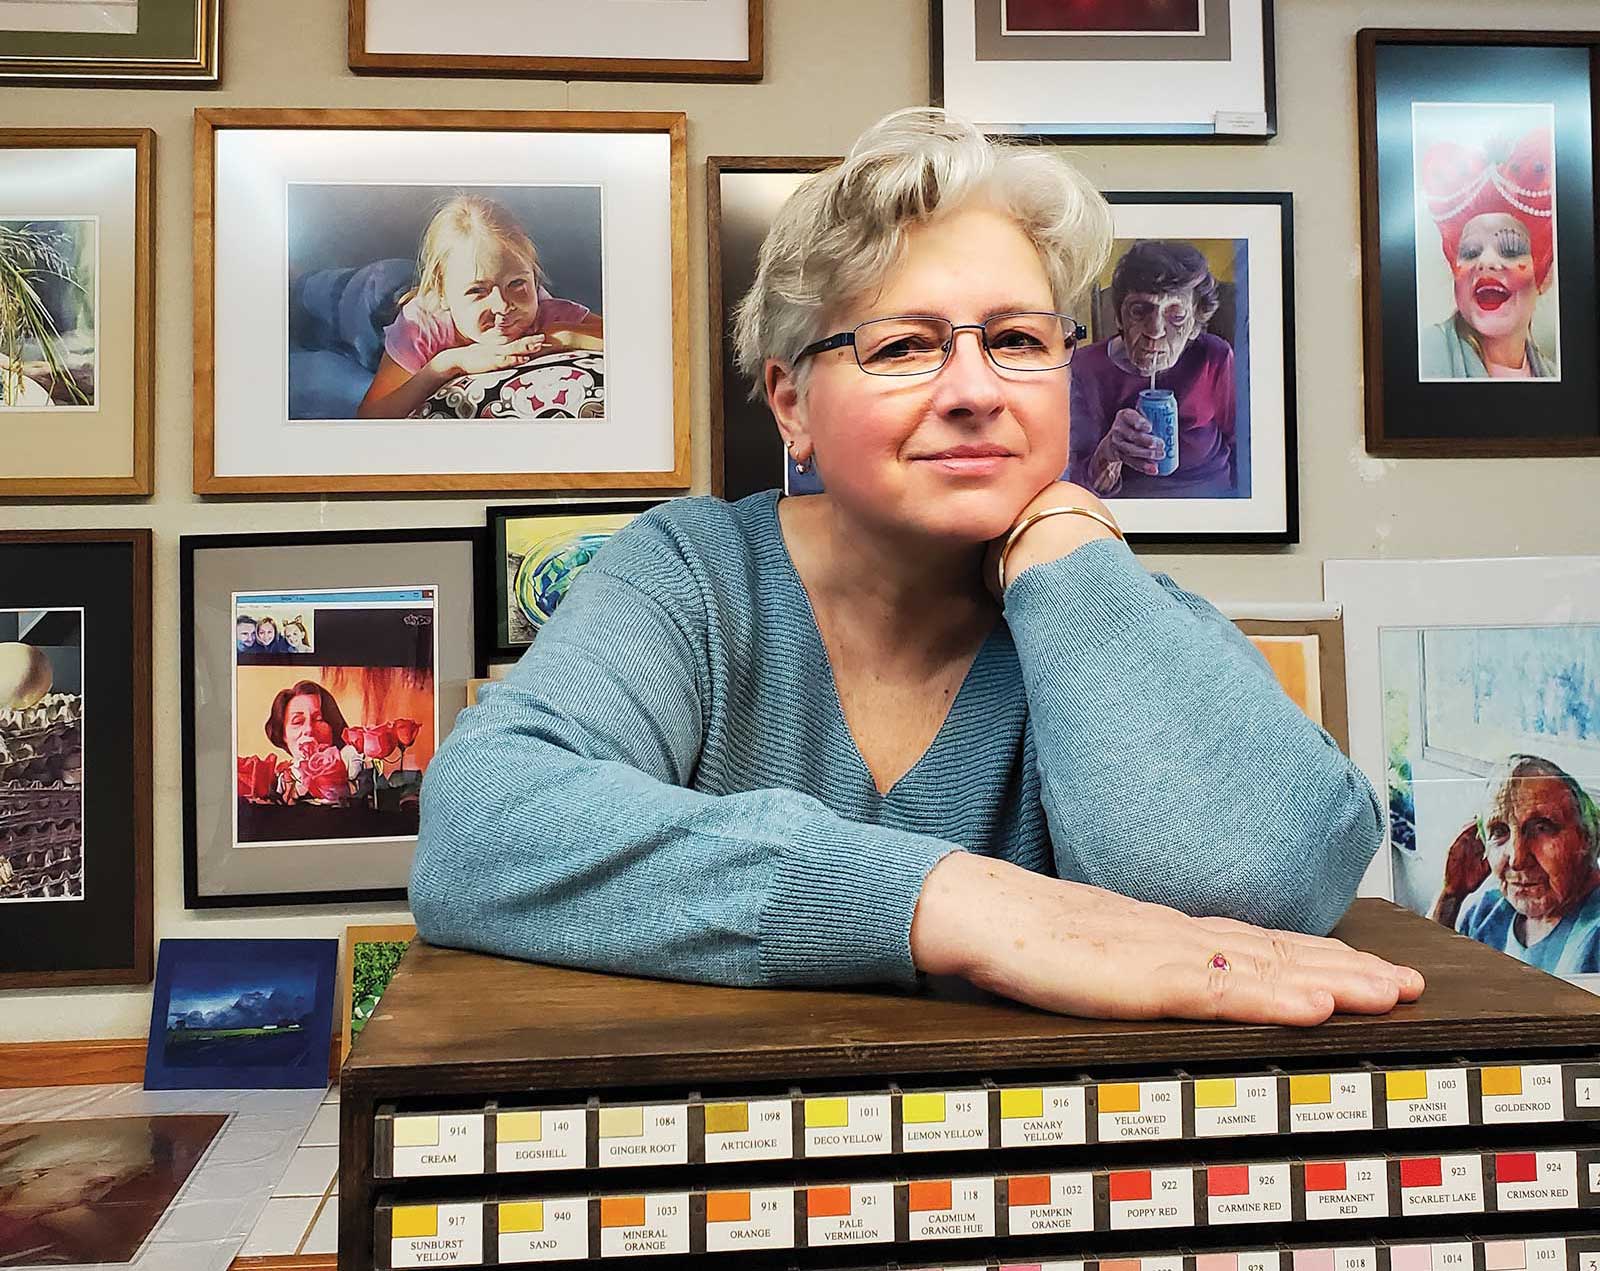 Aura Skugariene
Lithuanian colored pencil artist Aura Skugariene has participated in many exhibitions and received many awards. Her works are also enjoyed by private individuals. Additionally, she is a signature member of the Colored Pencil Society of America. When she arrived in California in 2005, she discovered the medium of watercolor. Skugariene most enjoys drawing portraits of the elderly, as well as experimenting and combining colored pencils with other techniques. She started working in a nursing residential facility in Sacramento, California, where she discovered a lot of material for her creativity. Skugariene was born and lived in Lithuania, where she acquired a BA in teaching art at university and taught high school and college students in drawing, sewing, weaving and fabric dyeing. Now she still likes to create artworks using these mediums and techniques, but colored pencil is still her favorite medium.
Contact at
auskuga@gmail.com
www.auraskugare.com