


While “professional artist” and “instructor” are my job titles, watercolors, reflections and birds are my passions. The challenges of using watercolor to create a vibrant, realistic piece of glass or metal, a bird floating on a reflective lake or a hummingbird caught in midair over a spray of water energize me and keep me coming back for more.

Spa Day, transparent watercolor, 20 x 28" (50 x 71 cm) This red-crested cardinal has no relation to true cardinals. I softened edges and used layering to create his wet feathers. I used a variety of grays to create the contrast with the bird’s bright red head.
I have always drawn. Even as a little girl, I was interested in drawing horses and wildlife. Drawing is still a big part of my artwork today. I use very detailed drawings as the starting point for all my paintings. I draw the scene on a separate sheet of paper and include marks for the shadows and highlights. I use a dashed line in the drawing to note where an edge might be soft or blurry in the painting. For some detailed reflections, I will use a little dot on a shape to note an area as a specific color in the painting.
My photos are a starting point, and they often get adjusted for composition, color and value. I always have my DSLR camera with me when hiking or going somewhere new. I am never at a loss for subject matter because of the variety of subjects I like to paint. In the last 10 years, I have worked on attracting hummingbirds to my garden. Their personalities and flashy feathers make them interesting subjects to photograph and paint. I do not use iridescent watercolor but instead enjoy the challenge of creating shiny hummingbird feathers with vibrant pigments and strong values.
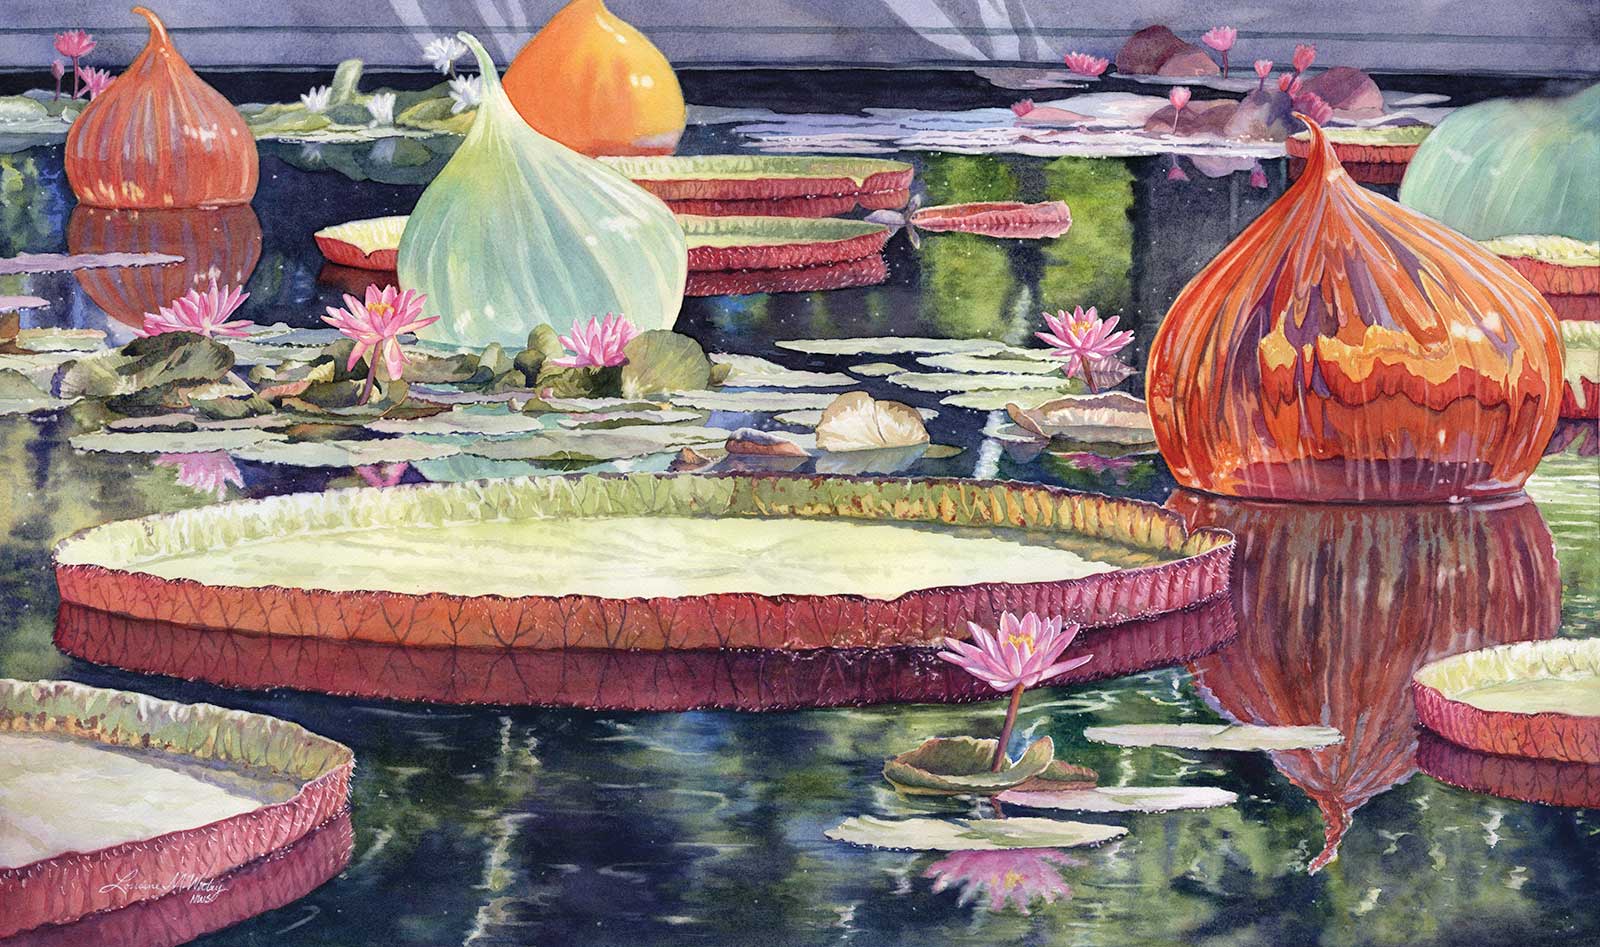
Lilies and Glass Globes, transparent watercolor, 19 x 32" (48 x 81 cm) Painting waterlilies is still a favorite subject of mine, and the glass pieces floating in this scene made it extra fun! I used a very detailed drawing to give myself a roadmap before starting this painting.
I go over my drawing with a black ink pen. Now the lines are dark enough to transfer to watercolor paper using my light table. I prefer 140-lb, cold-pressed, extra white watercolor paper. This is the paper I learned to watercolor on, and I know how it performs with the water and techniques I use. After my drawing is transferred to the watercolor paper, I stretch it. I have a video on my YouTube channel explaining my stretching process.
I tend to start most paintings in the background. I often protect my main subjects with masking tape and use masking fluid on the smaller, more intricate shapes. I prefer masking tape because it gives me a cleaner edge compared to masking fluid or frisket. The specific masking tape I use is listed on my supplies for the demo painting. Depending on the painting, the area around the main subject may be all soft-edged or have a mix of hard and soft edges. I find painting in some of the larger secondary shapes a good way to take away some of the “scary” white areas of the paper. I usually take my backgrounds almost to a finish before removing the masking on the main subjects.
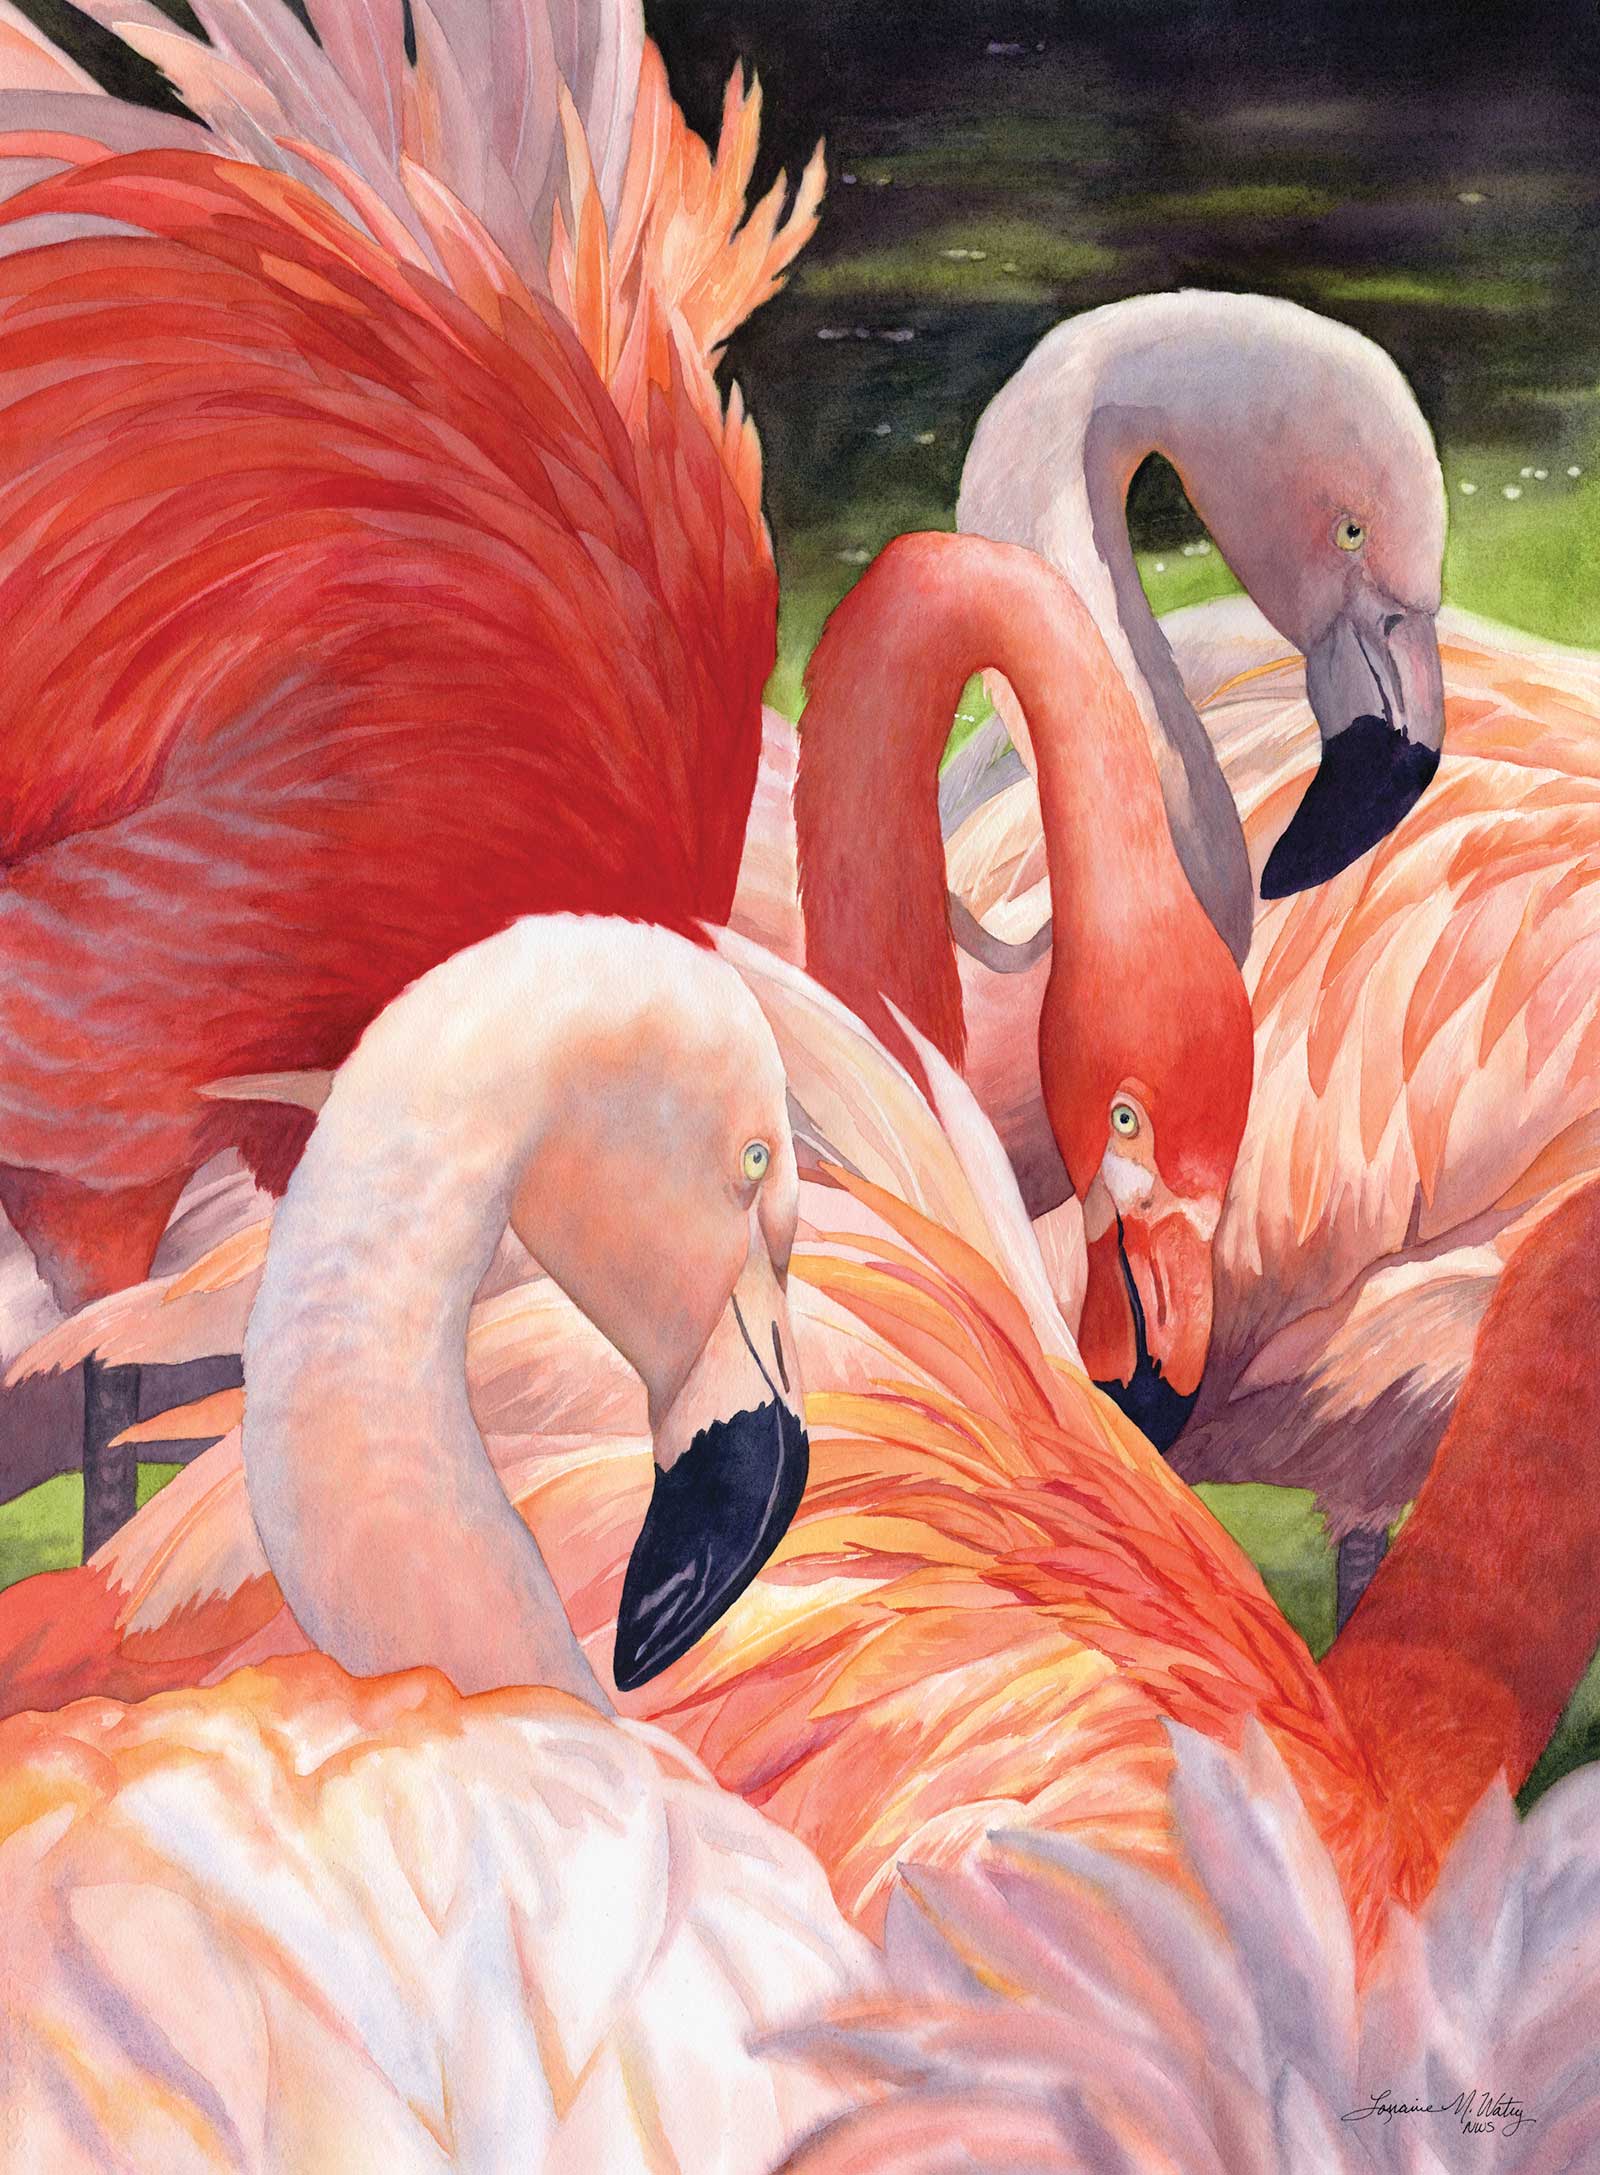
Coral Chorus Line, transparent watercolor, 26½ x 19½" (67 x 49 cm) I took the reference photo for these coral flamingos at a local zoo. I used soft-focus edges in the foreground and repetition of the birds’ heads to lead the viewer through the painting.
Then comes the fun part; I get to work on my main subject! After removing the mask, I clean up any of the unmasked edges if they are rough or not the right shape. If I want some parts of my main subject to have a blurry edge, I will soften the edge prior to painting it. An example of this would be the wing of a bird in motion. Besides the subject matter, what usually catches my attention about a scene is the light and colors. I like to paint with transparent, vibrant colors, and I use neutrals as complements where needed.
In the last 14 years, I have taught my watercolor process in-person and online, in classes and workshops, in private lessons and on YouTube. Teaching my students about watercolor also fills me up, and I feel jazzed when a student picks up a new technique or finds a way to express their own creativity. I am inspired by birds, nature and the play of vibrant colors in glass, metal or water. I enjoy painting the beauty of the world around us and the magic of creating a realistic subject on a two-dimensional surface.
My Art in the Making Flight of Fancy
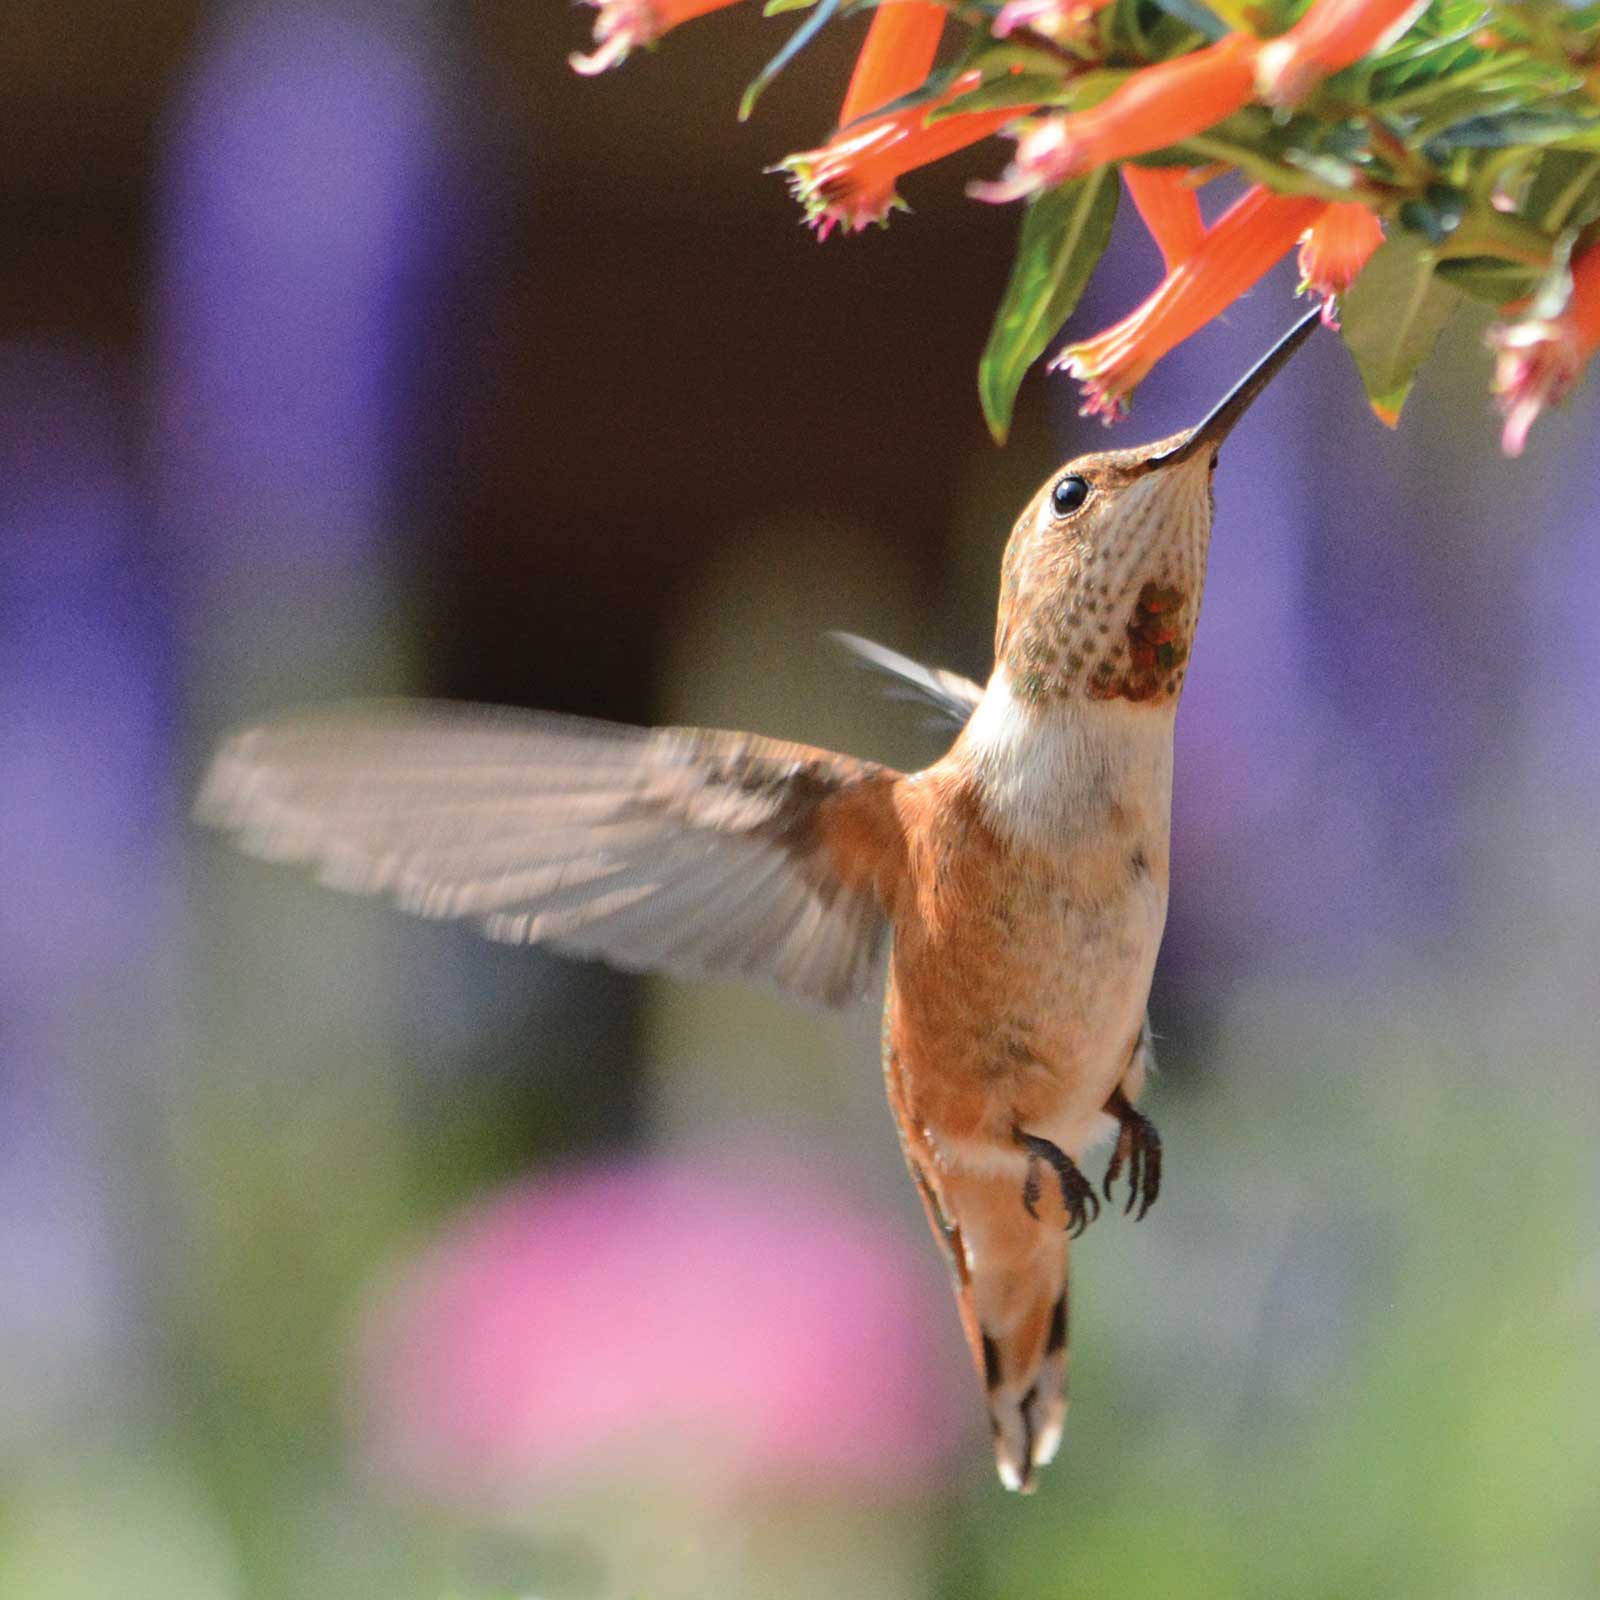 Reference Photo
Reference Photo
The reference photograph for this demonstration was taken in my backyard garden. I use my DSLR camera and a 300mm lens with a fast shutter speed to capture these marvelous birds in motion. This photo stood out from the others I had taken that day due to the light on the Rufous hummingbird and his pose in midair. The beautiful colors of the flowers in the soft-focus background are a great contrast to the rusts and oranges of the bird and Cuphea flowers in the foreground.
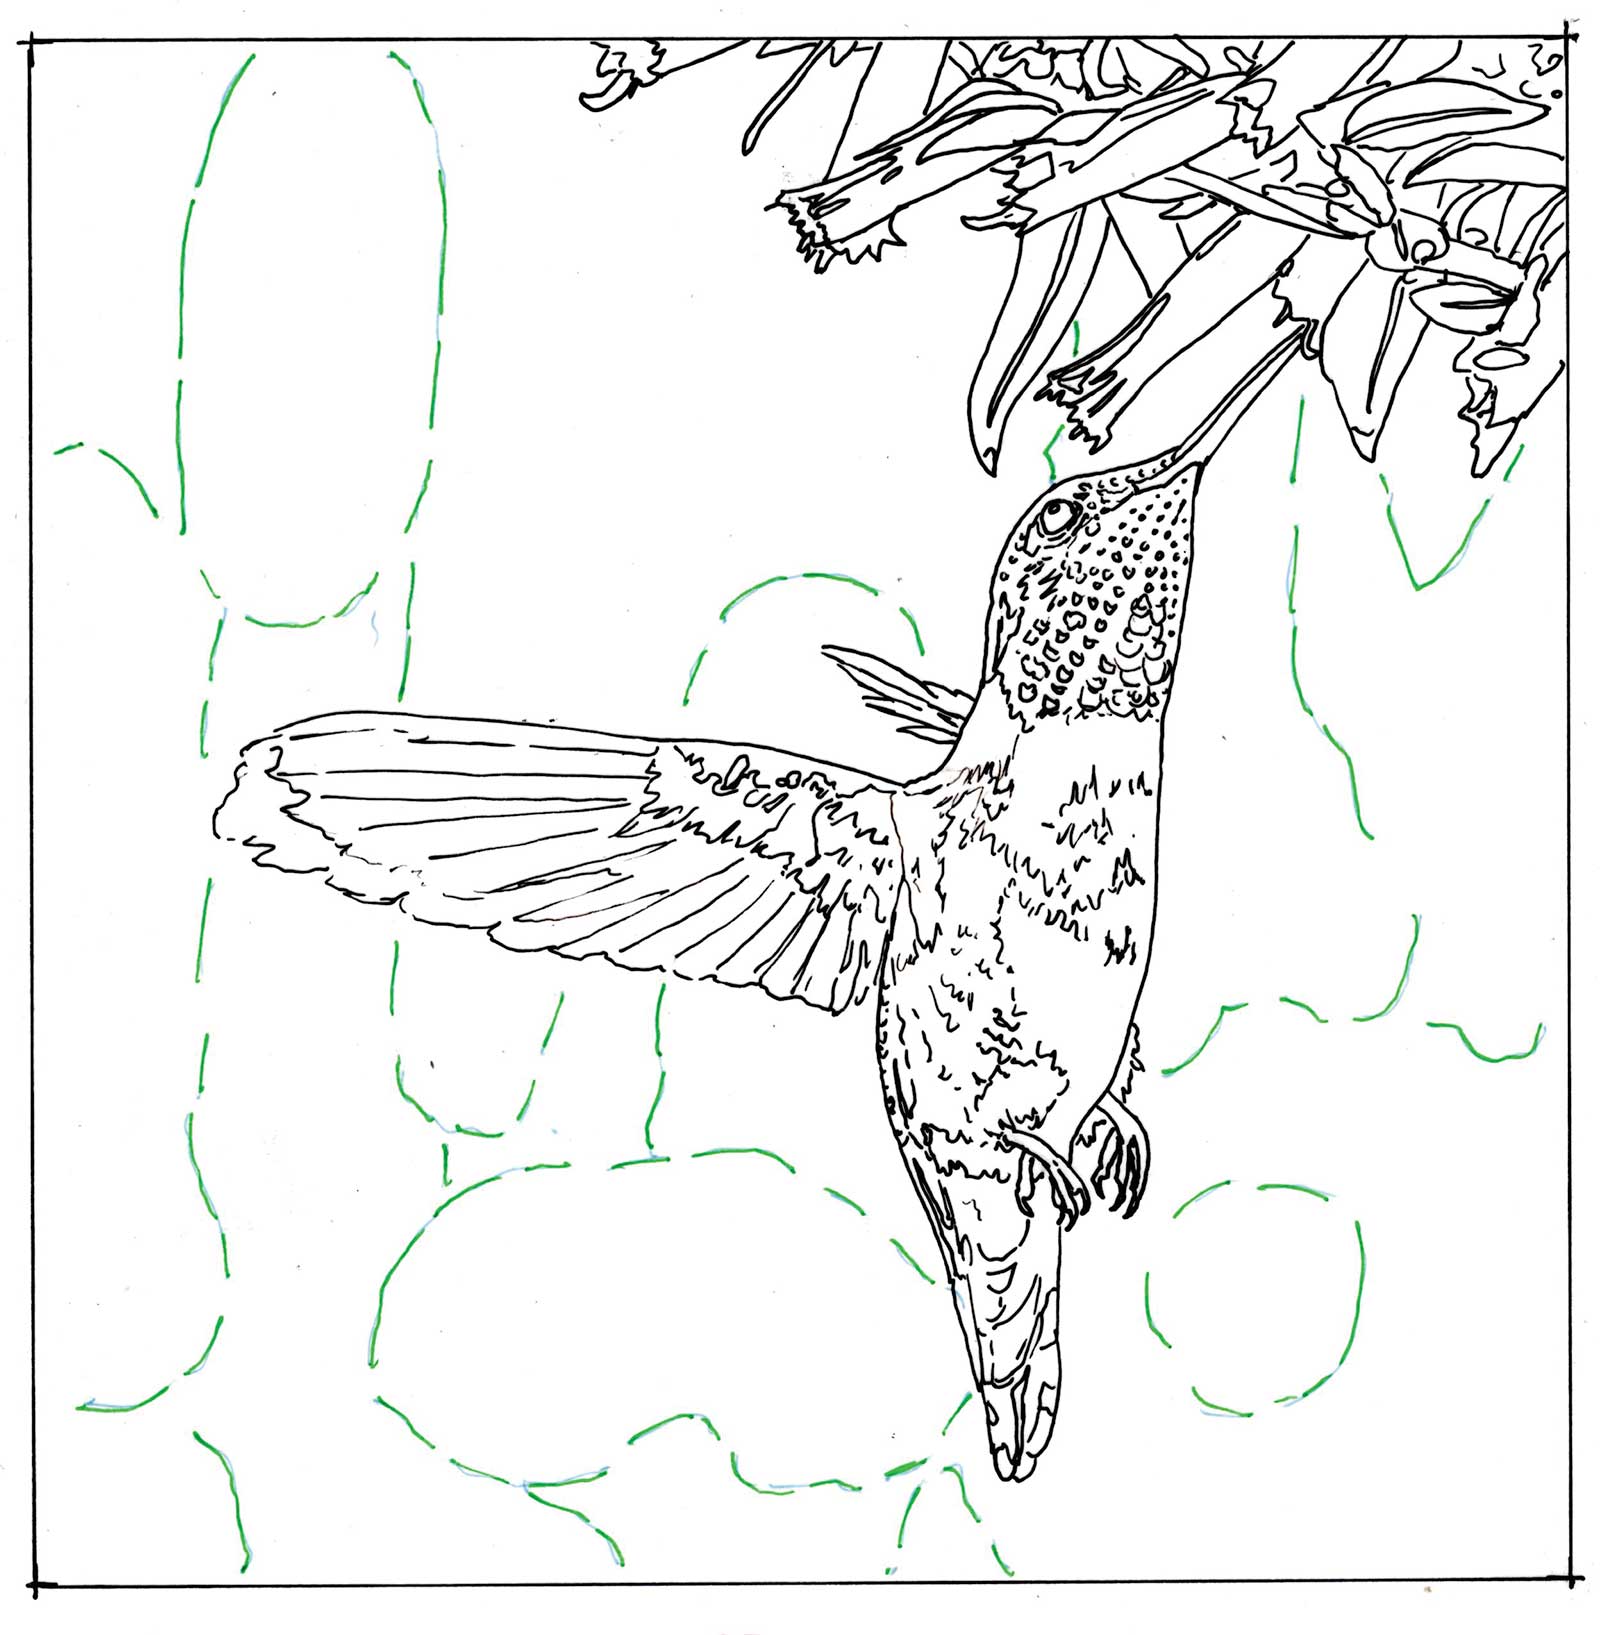 Stage 1
Stage 1 Detailed Drawing
I do a detailed drawing for all of my paintings. I note the main lines of the subject, and I include the shapes of the shadows and highlights. I ink my drawing with a black pen and transfer it to my watercolor paper using a light table. In this case, I also used a green pen so the soft-focus background shapes would stand out from the foreground bird and flowers.
 Stage 2
Stage 2 Initial Color
I mask the bird and foreground flowers. Then I start the wet-on-wet background by painting the pink shapes, followed by the purple and then the green. I test the moisture level of the paper, and if the color moves too much, then I pause and let some of the shine reduce before continuing. I look for a variety of shapes, colors and values with soft edges.
 Stage 3
Stage 3 Let First Layer Dry
I let the first layer dry completely. This helps set the color. Then I re-wet the paper and apply the dark areas in the background. Once I have color in the background, I will take time to review it before moving on. If I need to adjust some of the values or shapes, I will re-wet all or a portion of the background to keep the edges soft.
 Stage 4
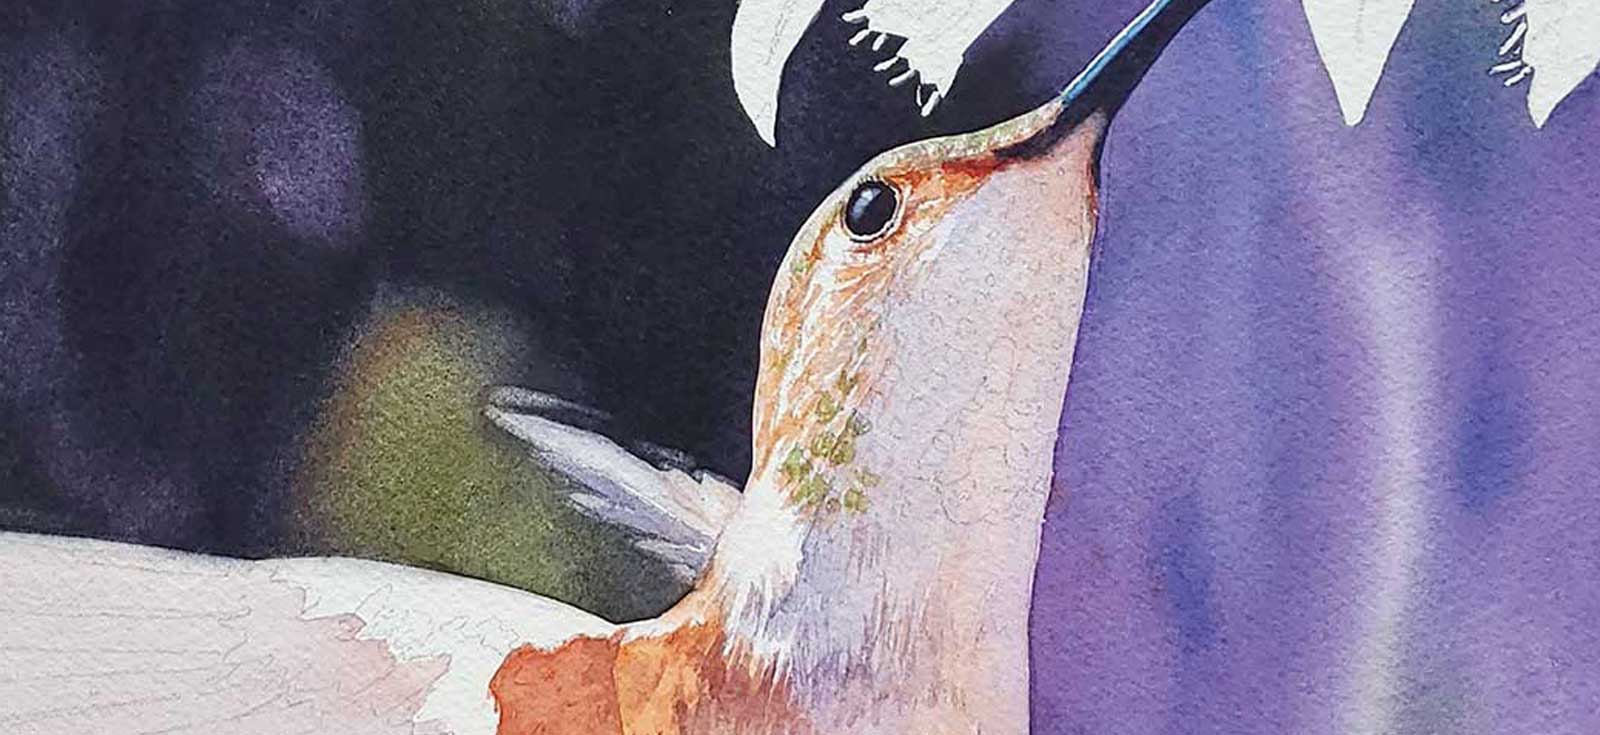
Stage 4 Feathers on Head
When I am happy with the background, I will then remove the mask on the main subjects and begin painting them. I often start birds by painting the feathers on the head and the eyes. This male Rufous hummingbird has vibrant rusty orange feathers, and quinacridone sienna is my choice for them. I start slowly and build the colors, shapes and values with layers.
 Stage 5
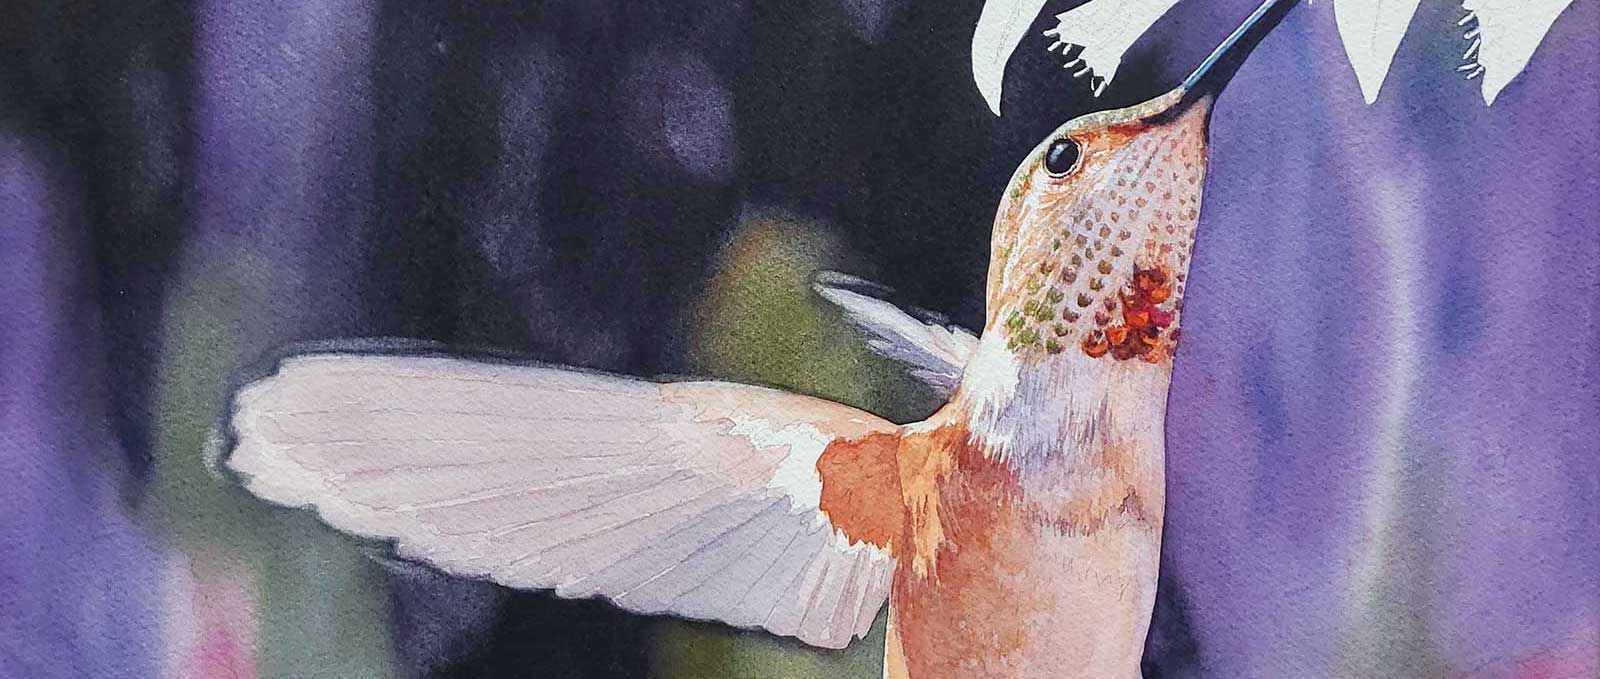
Stage 5 Building up Layers
As I build the layers on the hummingbird’s feathers, I continue to adjust the values to create the feeling of light hitting the bird. I use the white of the paper for my whites. I use vibrant colors in the sunlit areas and more muted colors on the shadow side. I use a small flat brush with water to soften the edges of the wings before painting them. I lift a little color in the background to give the wings movement.
 Stage 6
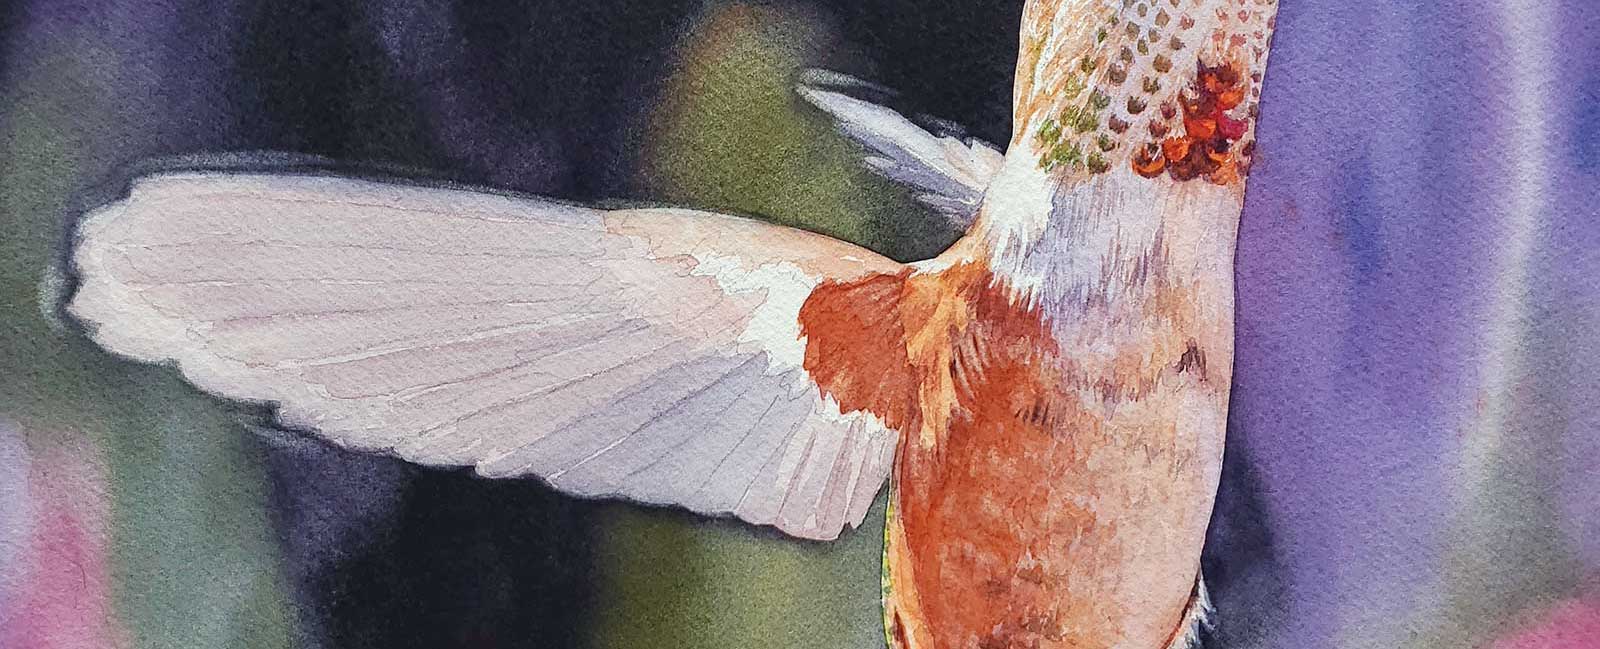
Stage 6 Washes of Color
I continue to build the layers of the feathers and adjust with washes of color to darken parts of the bird. As a finishing touch, I paint little marks to suggest small feathers on his side and belly.
 Stage 7
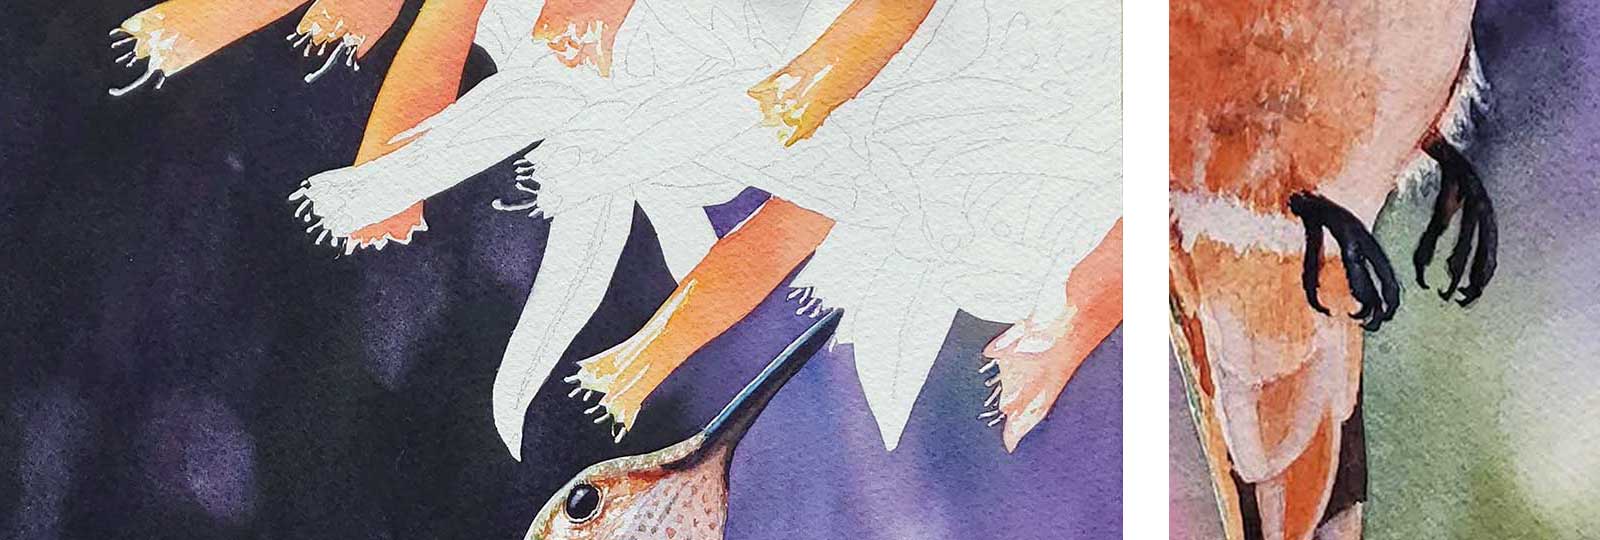
Stage 7 Finishing the Bird
I finish the bird by painting in his tiny feet and begin work on the Cuphea flowers. The first layer of the flowers are light washes of corals and oranges, and I paint around the white highlights.
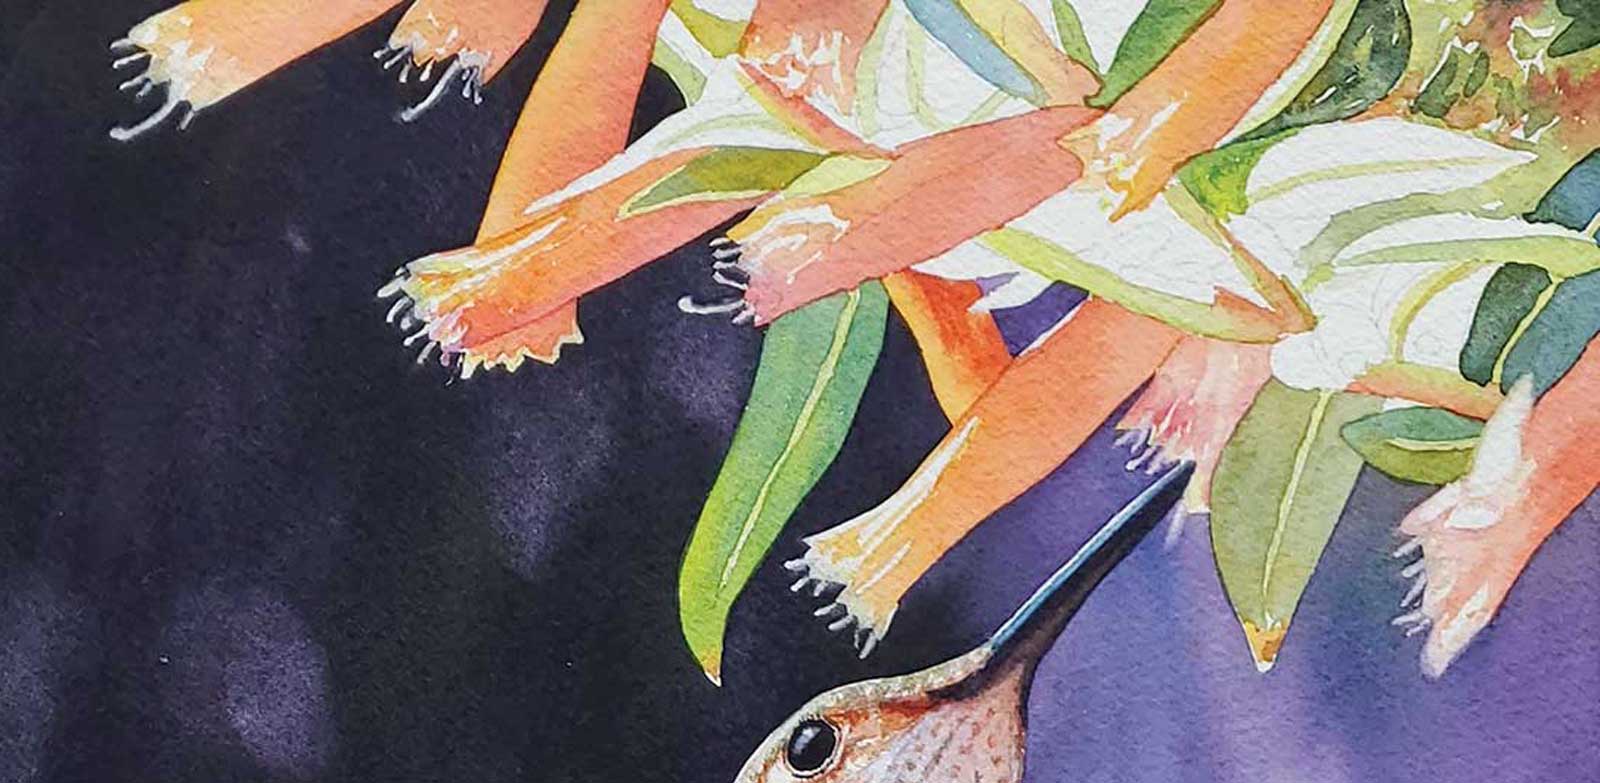 Stage 8
Stage 8 Leaves and Greenery
I then begin to add some of the leaves with a variety of greens. As I place paint on the flowers and leaves, I continue to judge the values and add layers where needed.
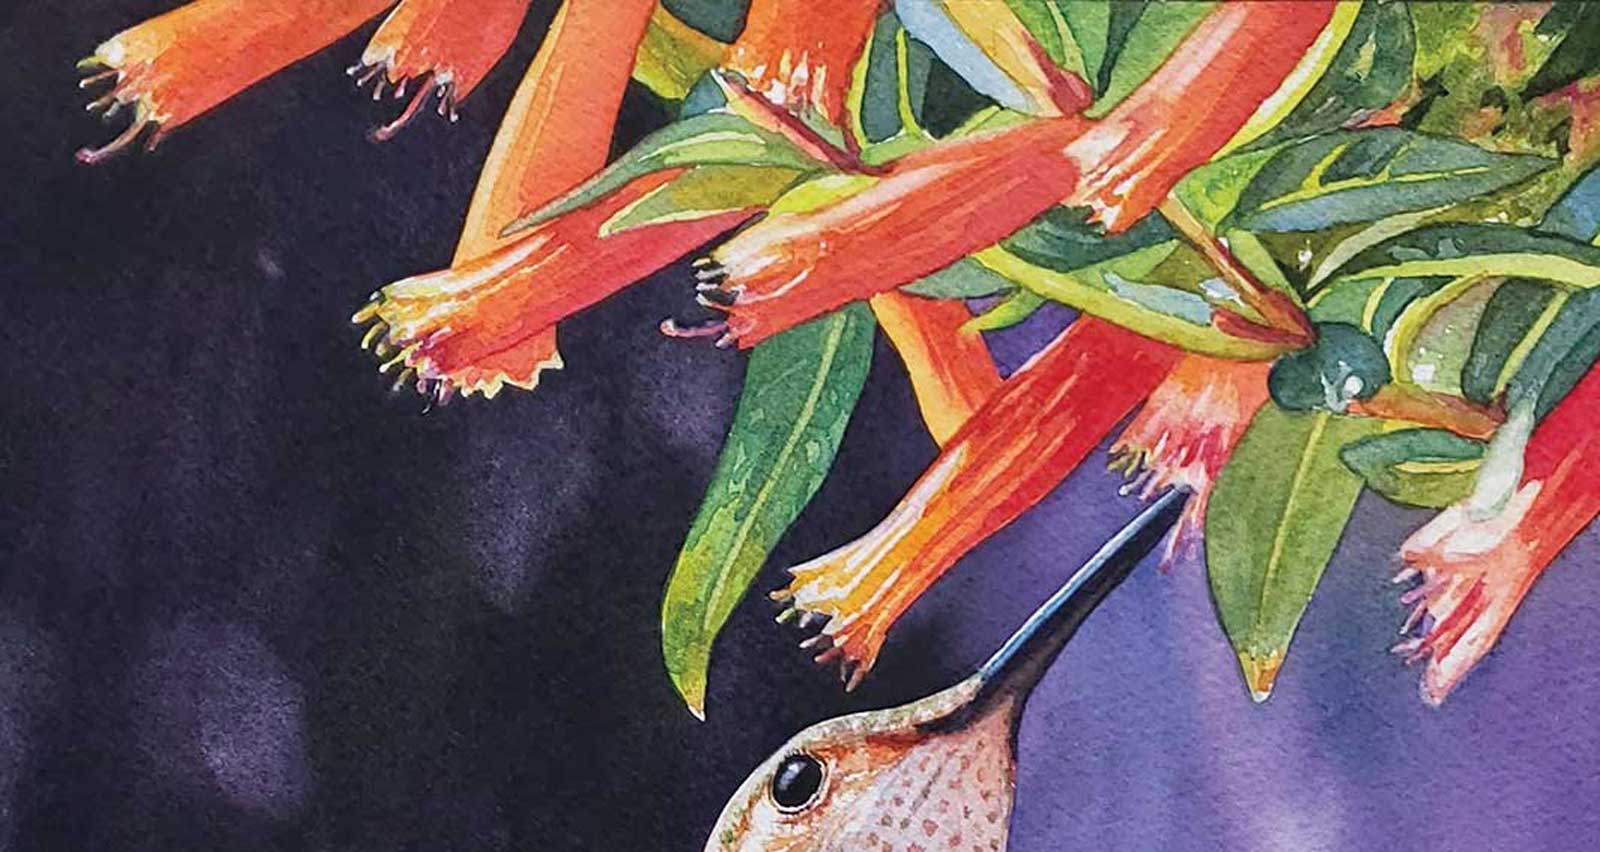 Stage 9
Stage 9 Shadows
I paint on darker orange shadows to give form to the flowers. I finish up the flowers with darker greens and shadows on the leaves.
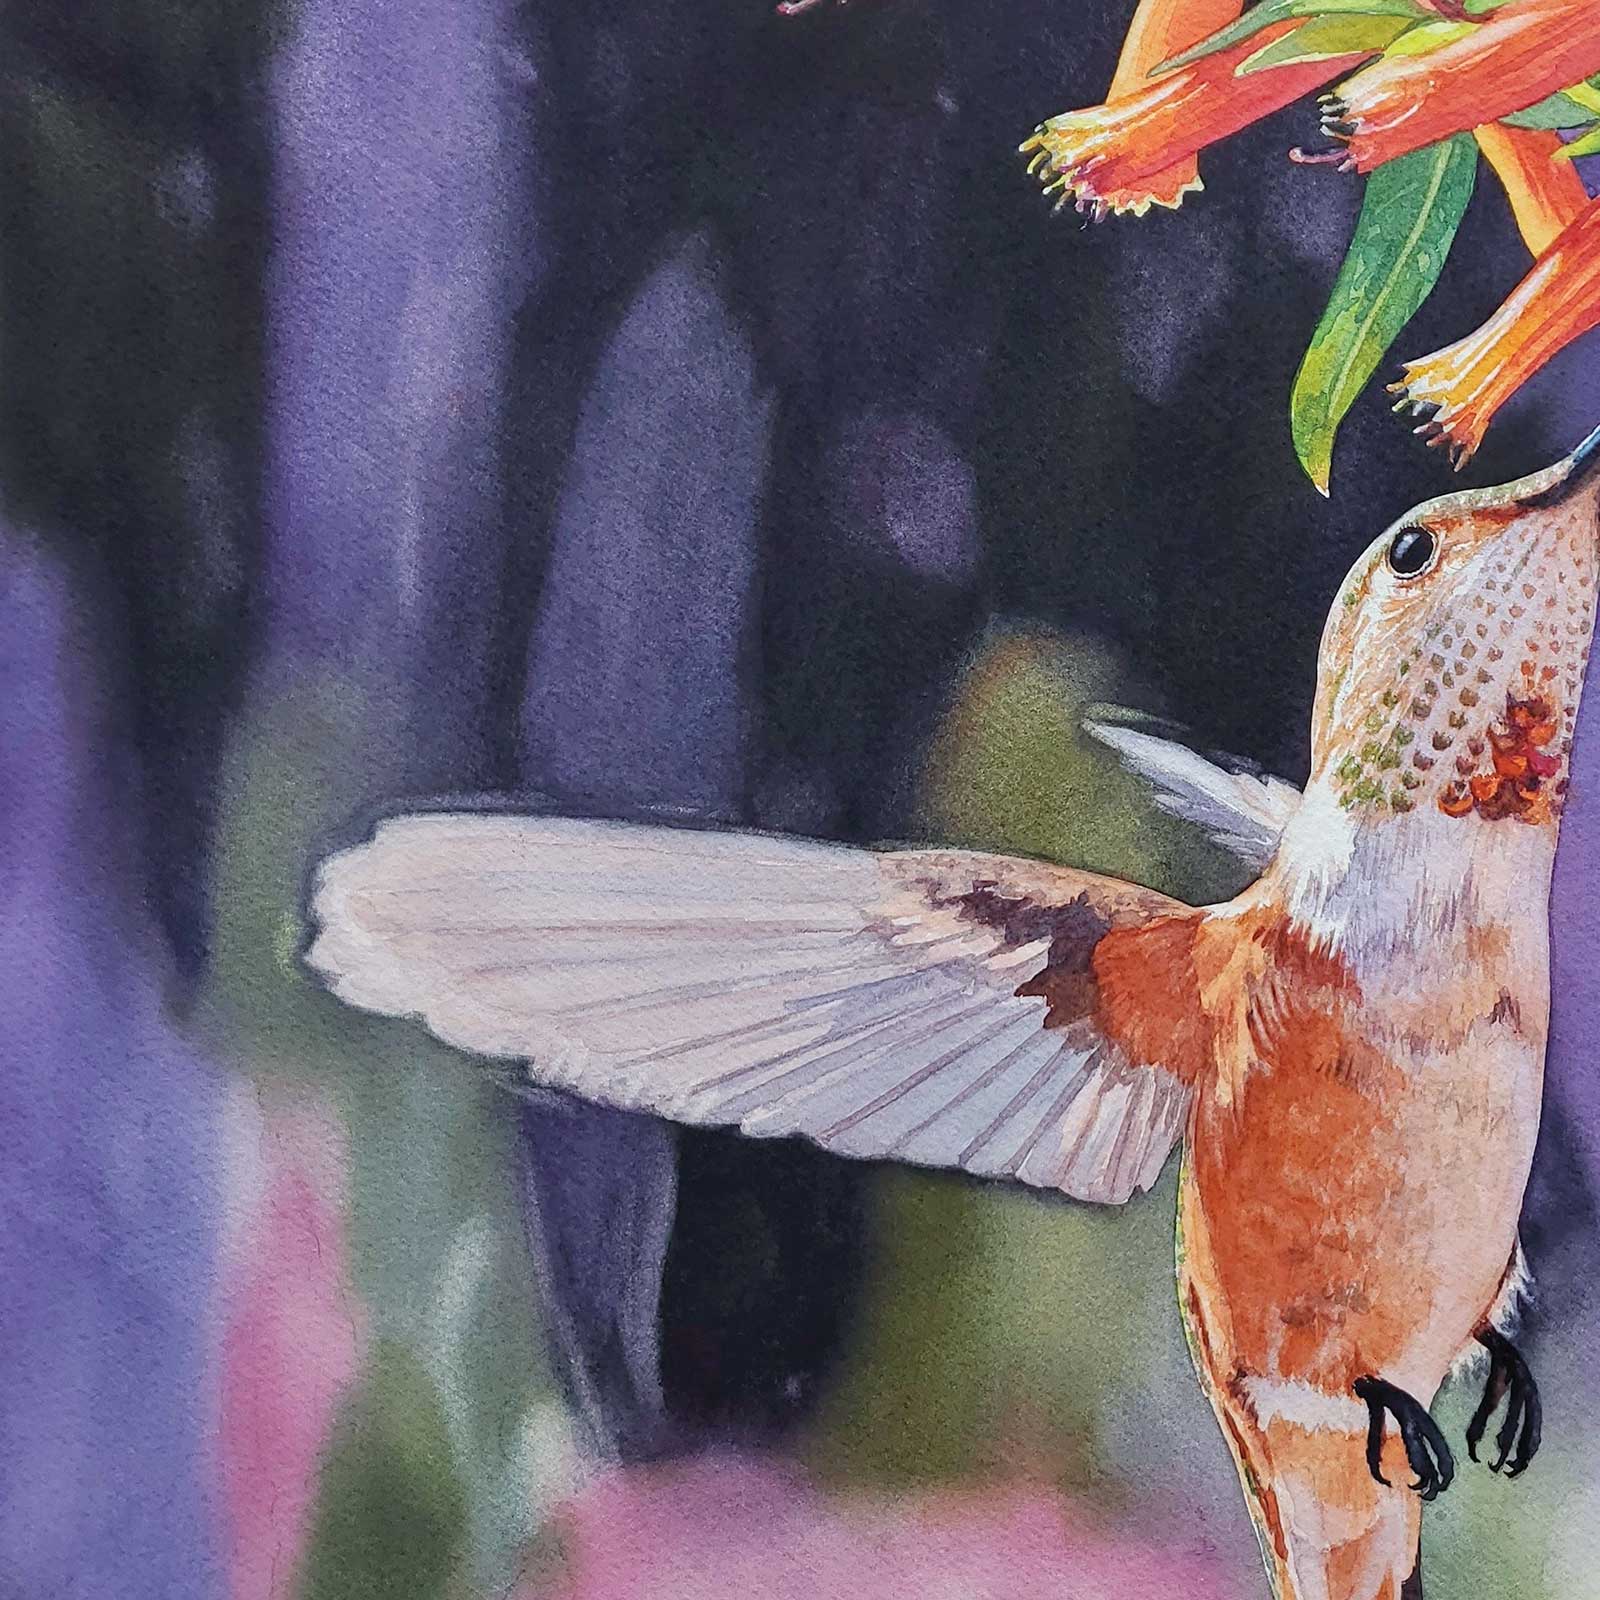 Stage 10
Stage 10 Final Review
I review my paintings when I approach the end. If I see something, I usually wait a day or two before making a change. For this painting, I decided the dark shape in the background was too large and chose to lift some color and add another blurry purple flower stem.
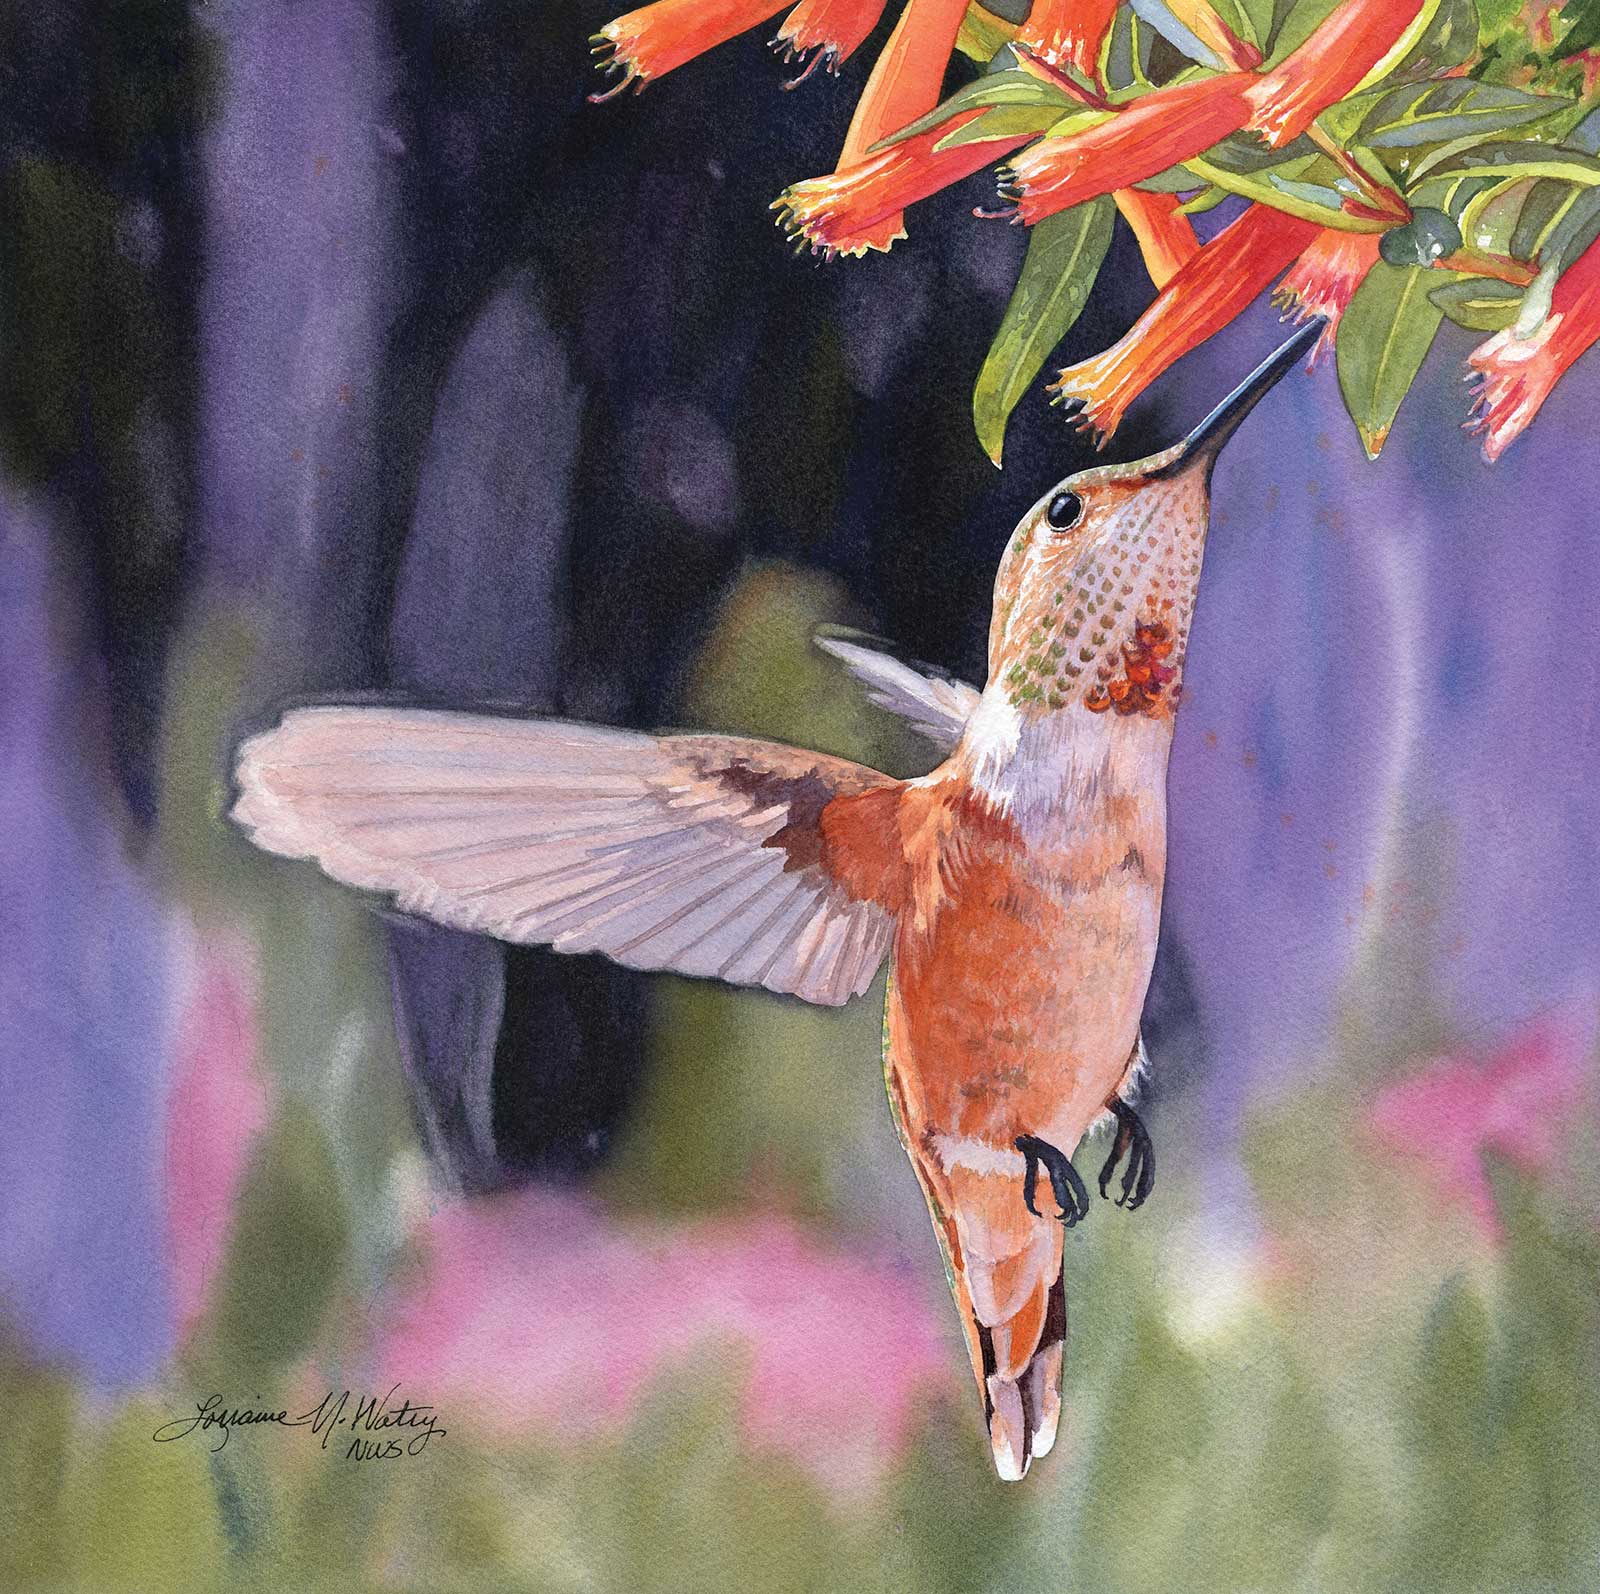 Stage 11
Stage 11 Finished Artwork
Flight of Fancy, transparent watercolor, 12 x 12" (30 x 30 cm)
About the Artist
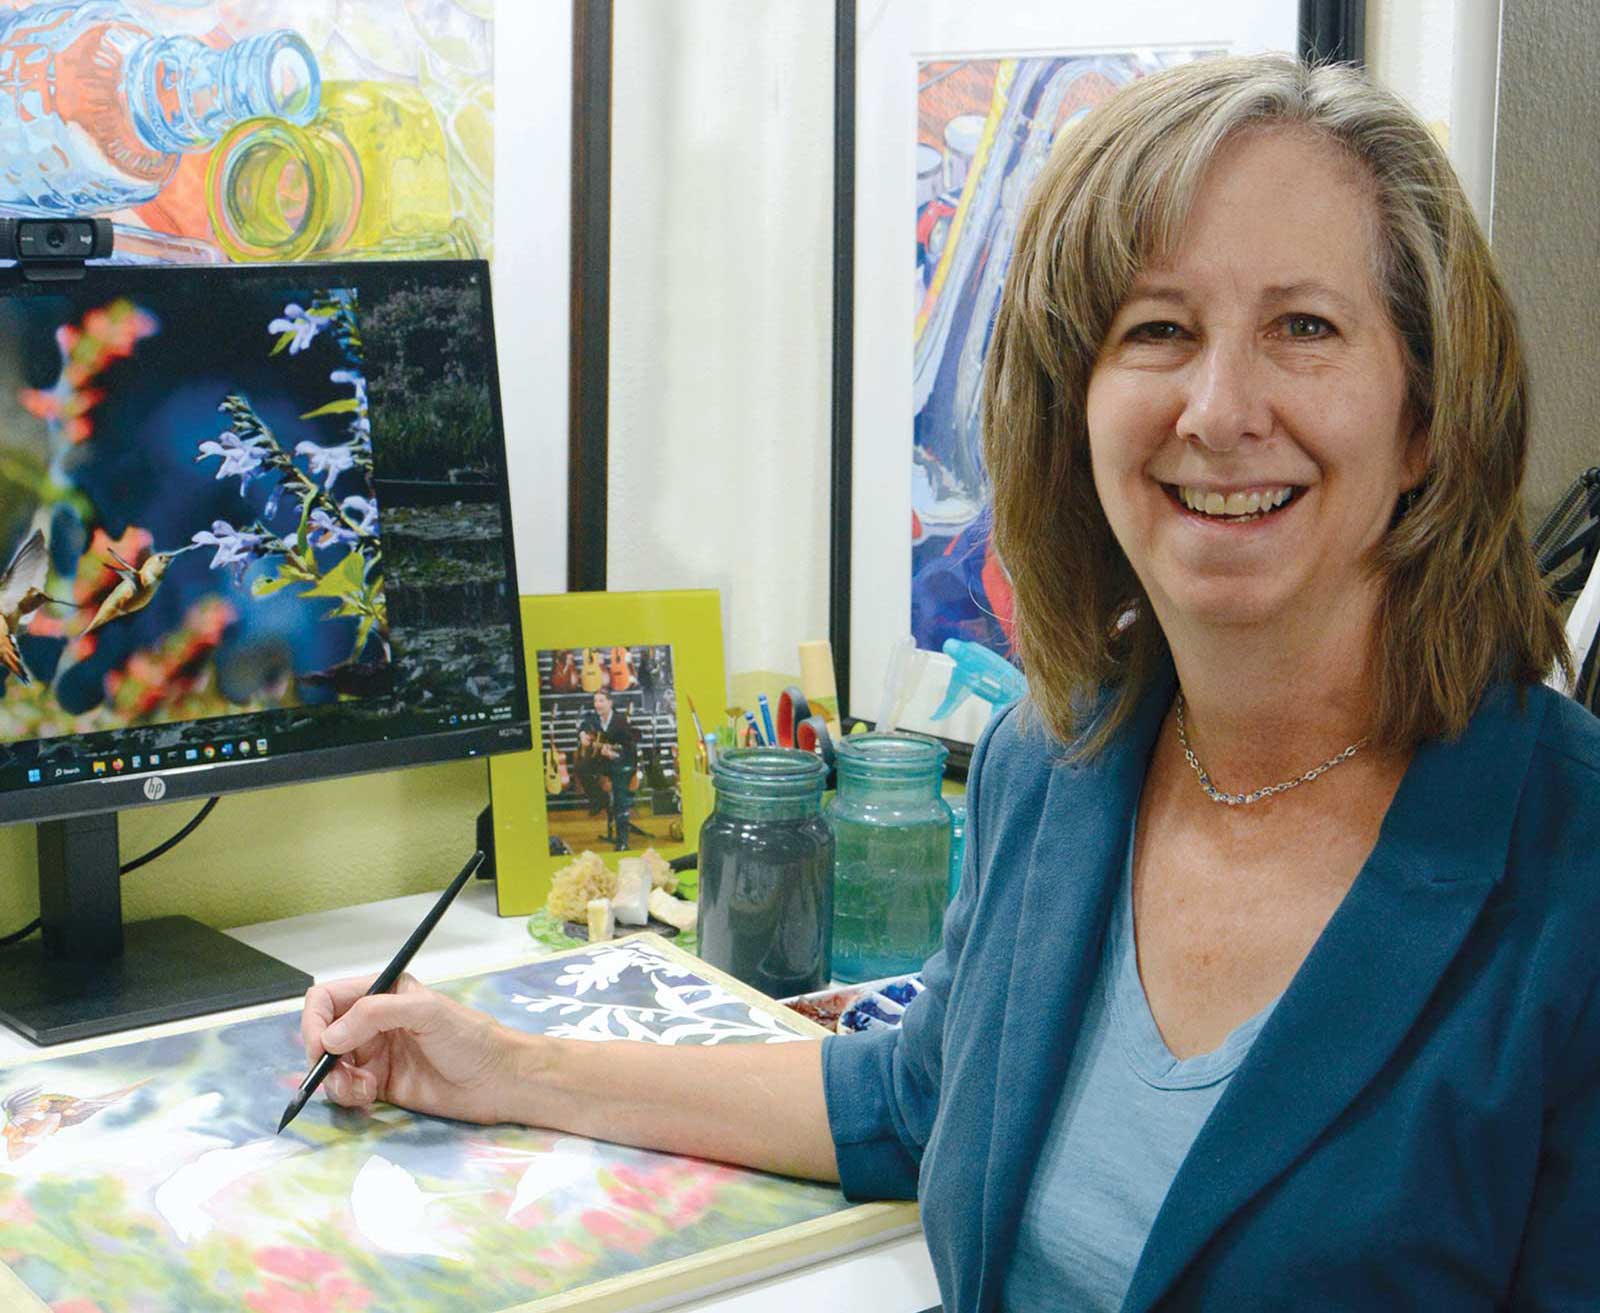 Lorraine Watry
Colorado native Lorraine Watry is a contemporary artist influenced by bright light and beautiful views. She is an award-winning artist focusing on waterscapes, wildlife and reflective objects. Watry is a Signature Member of the National Watercolor Society, among other organizations. Her paintings have been juried into national and international exhibitions, including NWS, AWS, TWSA, FabrianoinAcquerello, AWA and Birds in Art. Watry teaches in-person and online workshops, is a “Master Artist” mentor for Mastrius, and her watercolor YouTube channel has over 27,000 followers. She is published in Splash: The Best of Watercolor series: Splash 14, Splash 20 and Splash 23.
Contact at
www.lorrainewatrystudio.com