


In general, many people are suspicious of acrylic, but I think it gives the artist freedom. Of course, the colors darken, which is a huge drawback, and it also dries quickly. So we will take all these disadvantages and turn them into advantages. Whenever beginning a new painting, I always advise artists to first admire what they want to portray. See what is closer, what is further, what is in the shadow and what is in the light. After that moment of “admiring,” you need to decide what will be in the foreground, mid- and background of your composition.
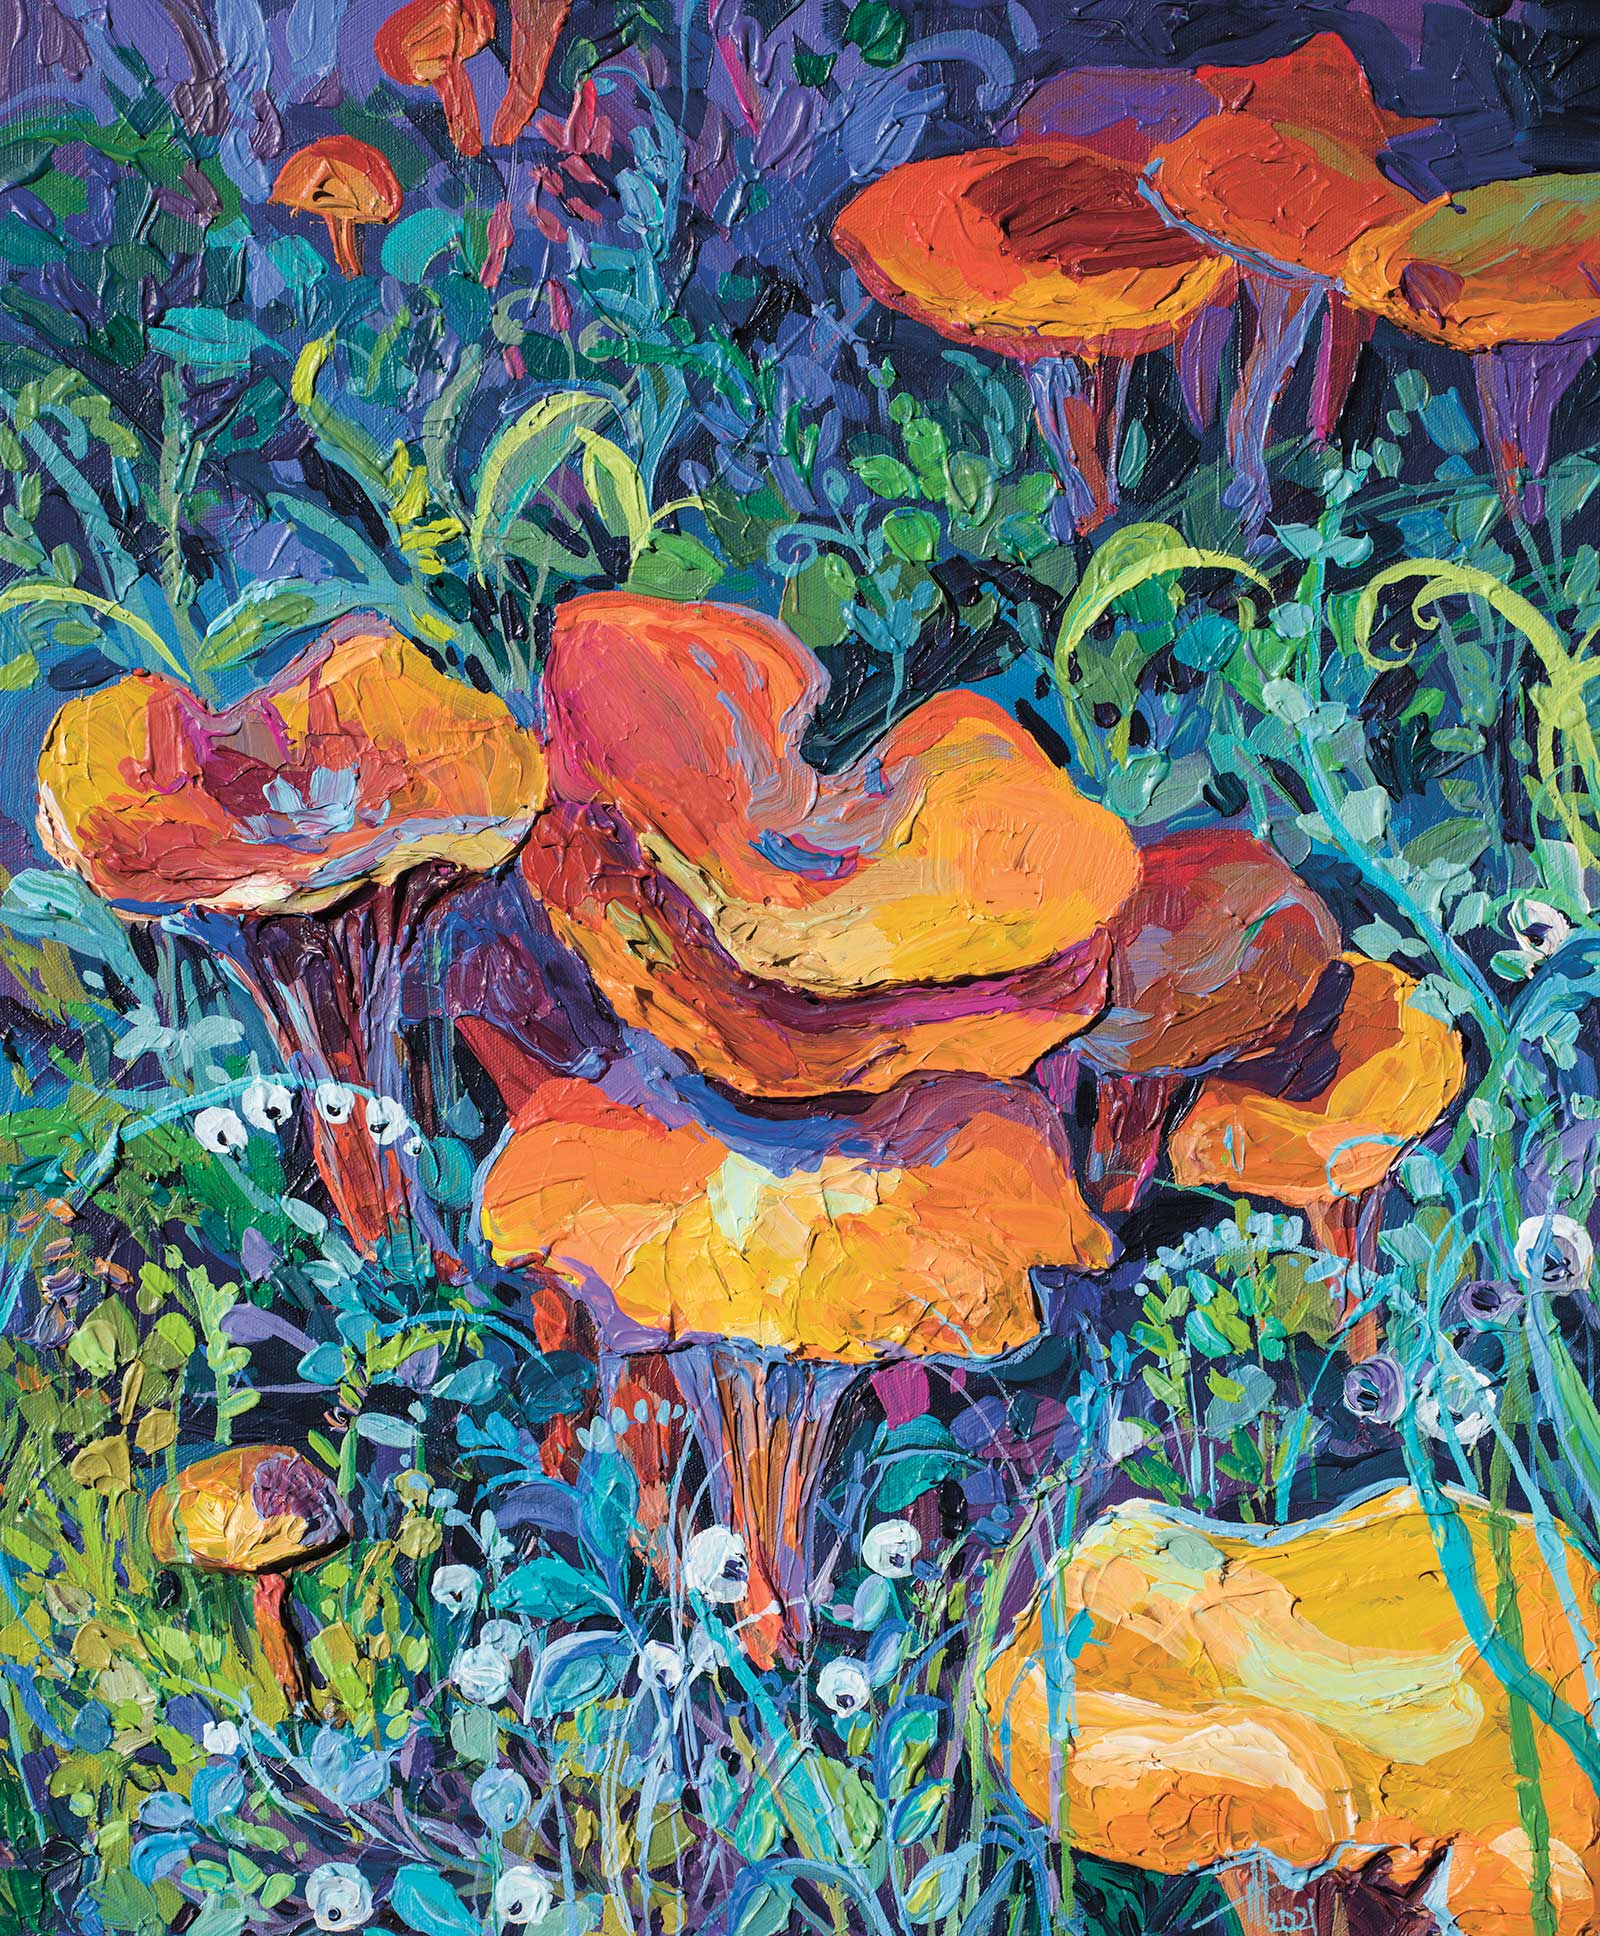
Chanterelles, acrylic on canvas, 23½ x 19½" (60 x 50 cm) Our whole family loves to go to the forest to pick mushrooms, but, unfortunately, not this year. Those who have children know what it is like to go to the forest with a little man at the age of 1½. It is difficult for a kid to walk through the forest, and he is usually always in your arms. In the picture of the chanterelles, they grow all at once in a group. He found one, so we looked around for more!
We start simply with acrylic, without water, and if you need texture, you can add gel. It’s important not to paint blindly, but to truly experiment with every brushstroke. Use both brushes and knives for painting. I also love the scraper, and in general anything that can give us an interesting texture on the canvas. Go from background to foreground, painting in layers. What is in the foreground we paint with gel and acrylic. And at the end, we’ll draw the details with a thin acrylic and water brush–by the way, this is the only moment where I add water.
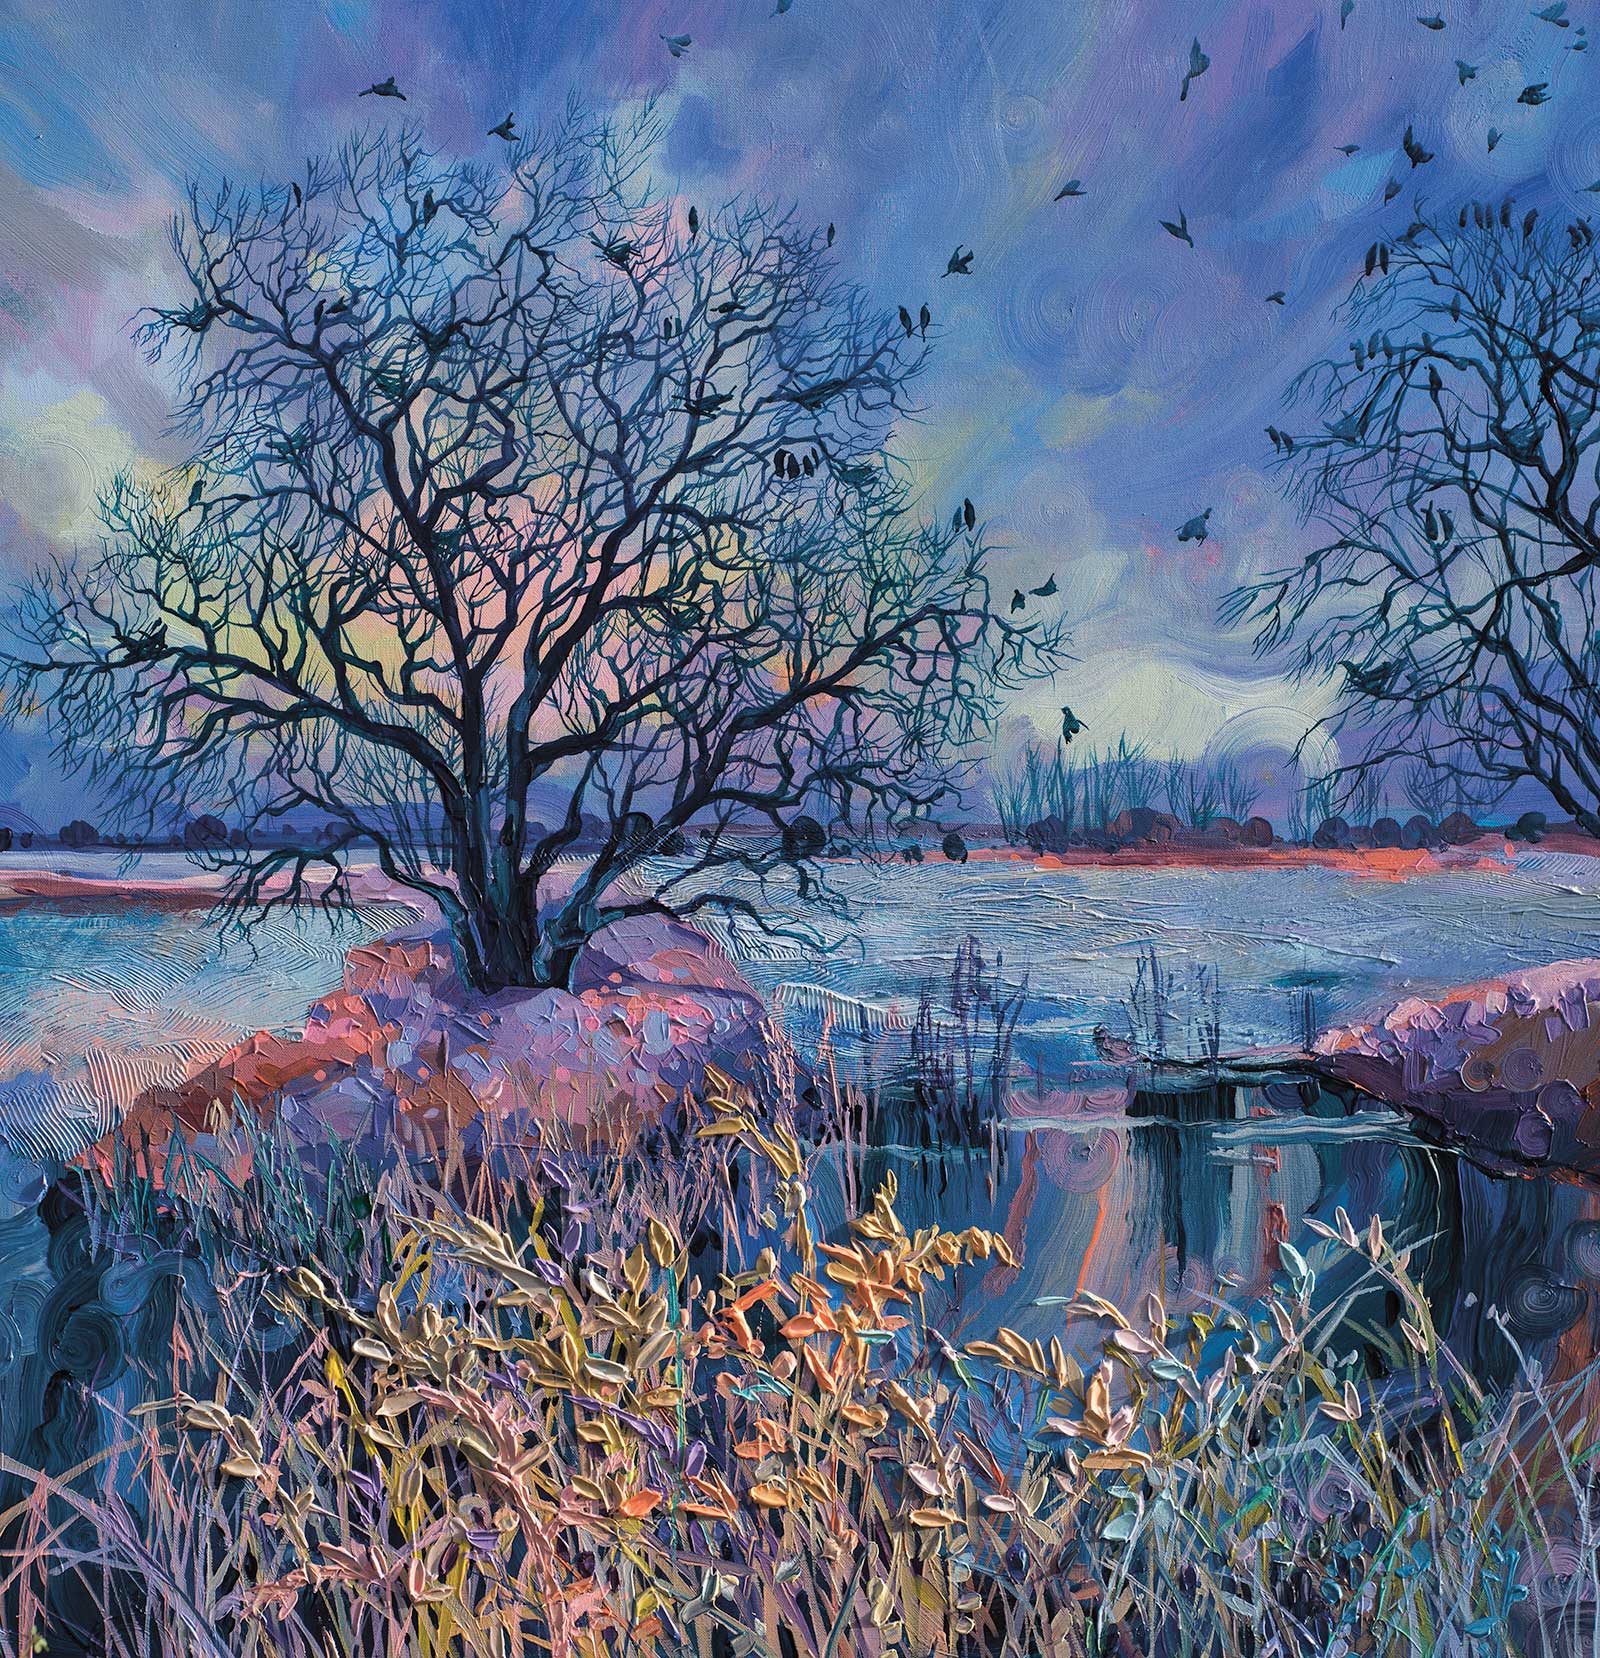
10 days before winter, acrylic on canvas, 39 x 39" (100 x 100 cm) This is the Netherlands. In general, I really love this country, the people who live in it and the freedom they have. It’s beautiful outdoors here, with lots of water. In this picture, I tried to use acrylic as a watercolor in the sky, beside the pasty grass in the foreground. The center of the picture is the trees, delicate and expressive, and a flock of birds that are preparing to leave their home country.
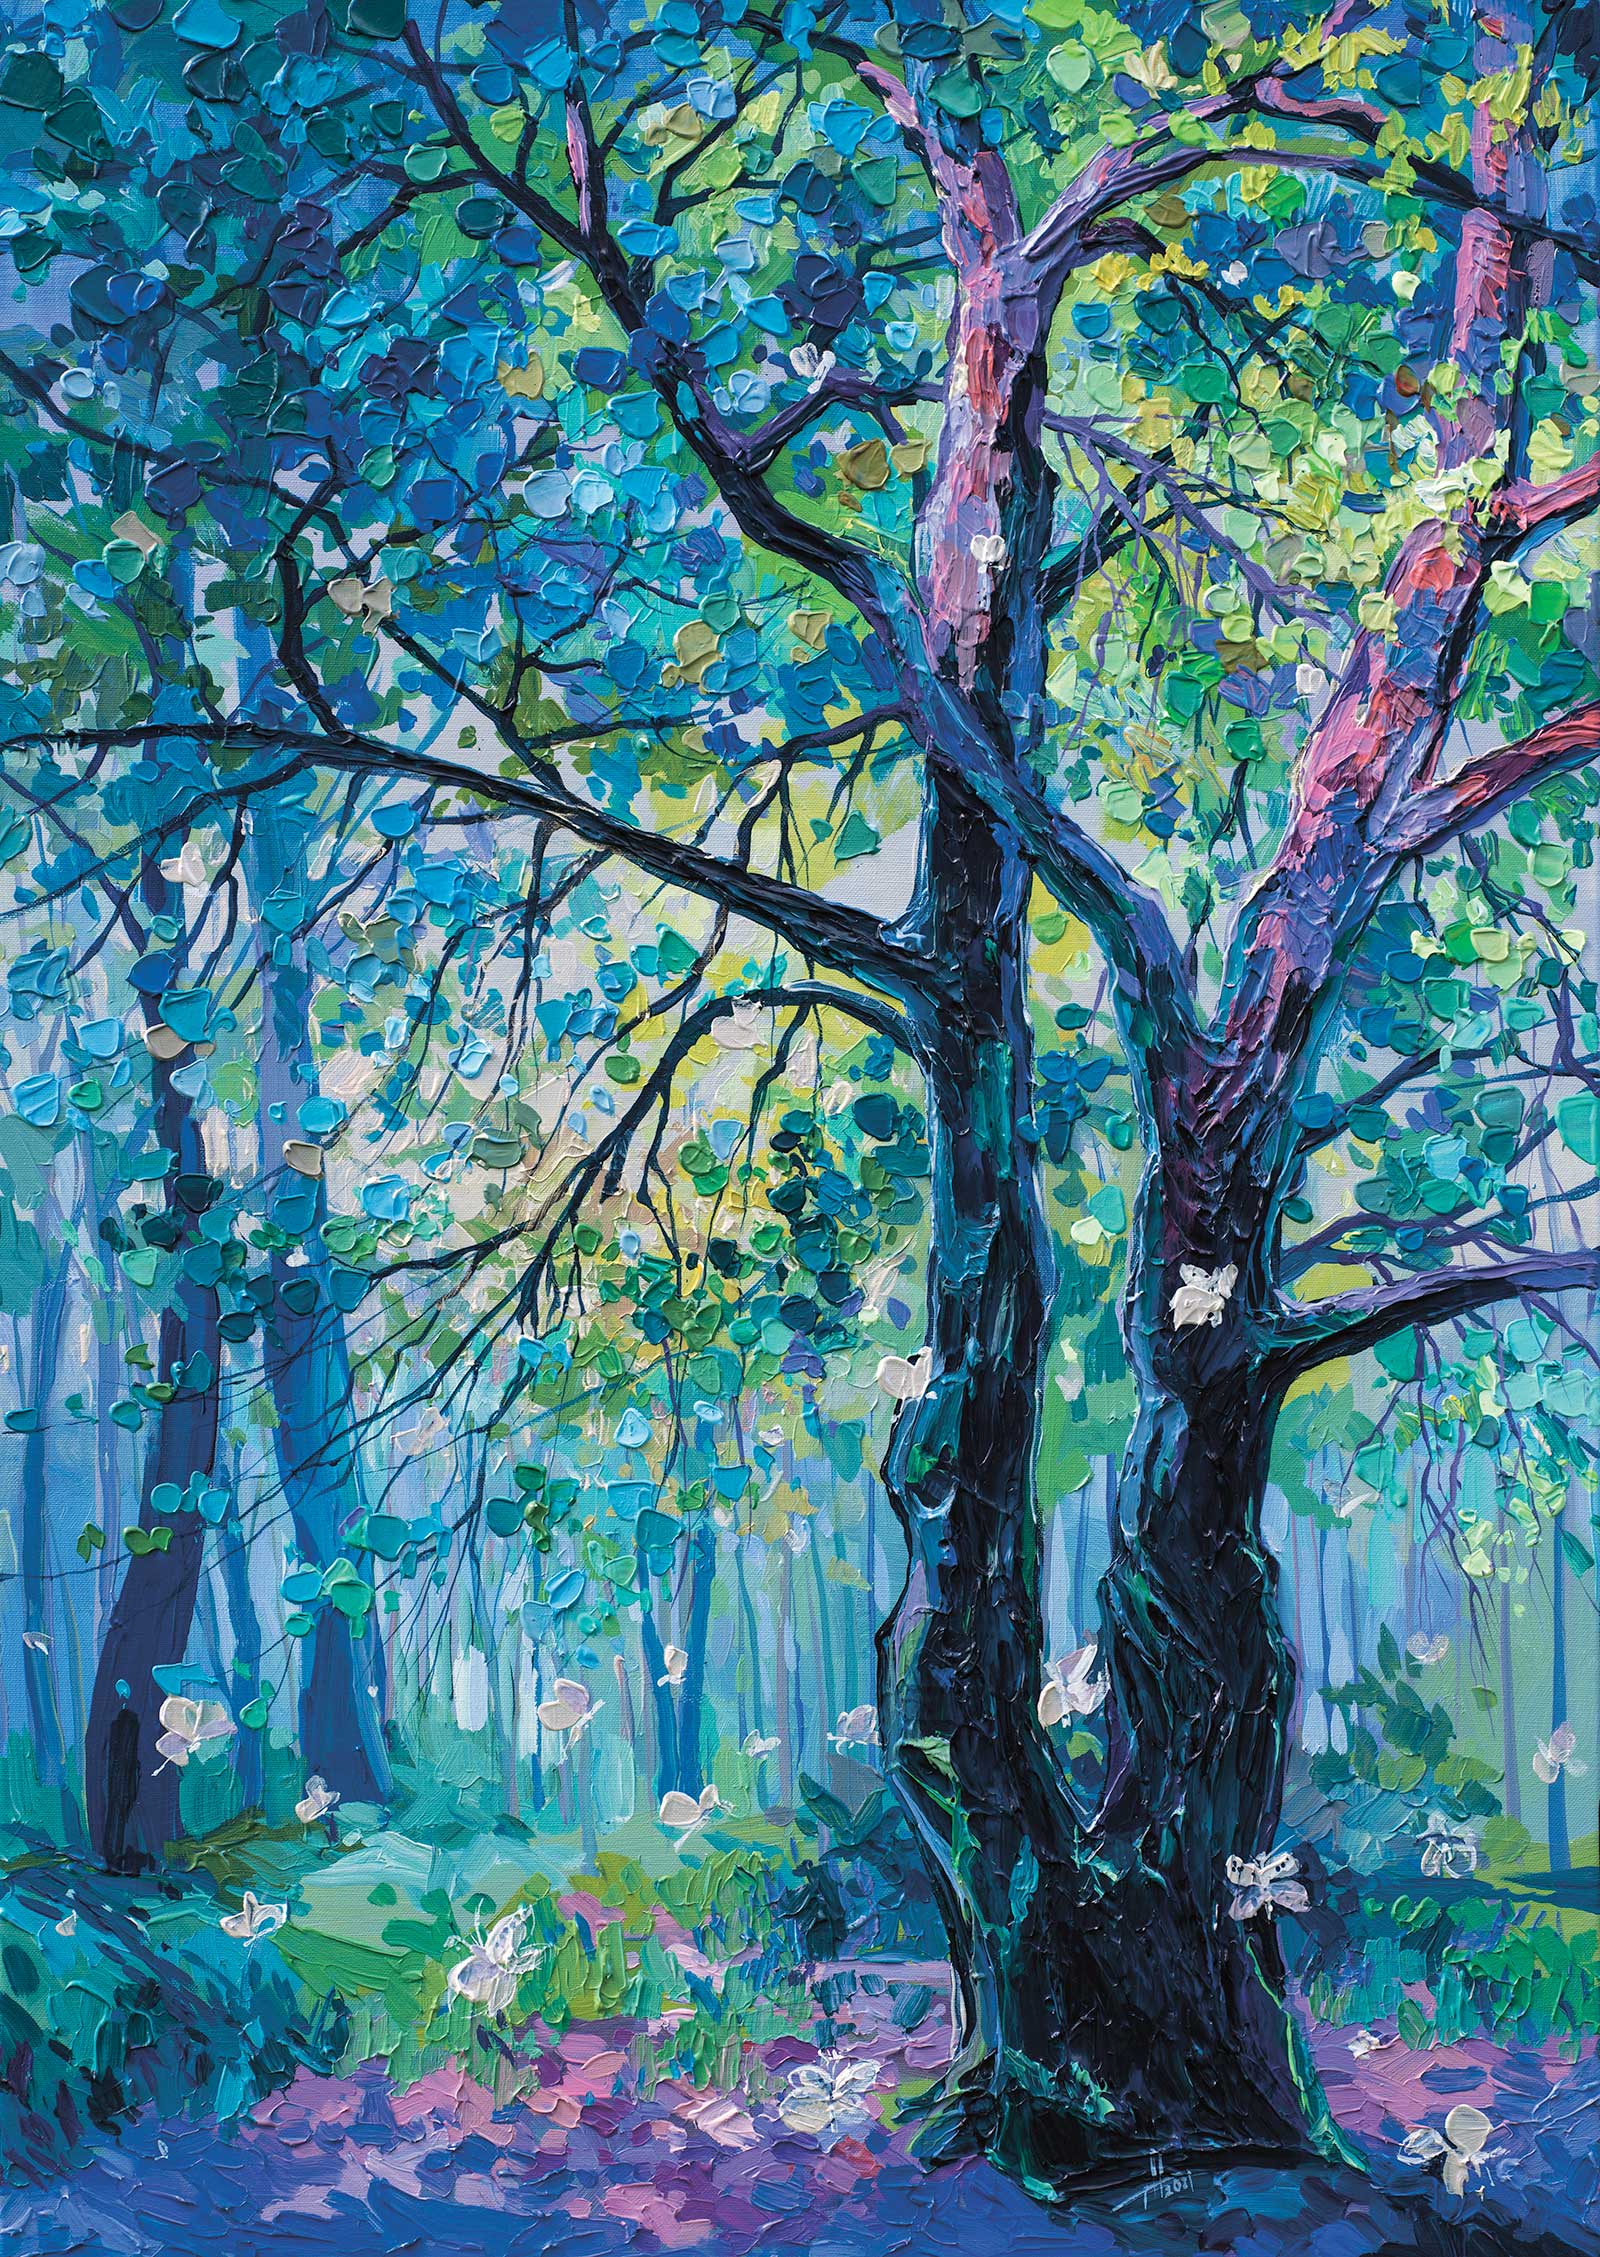
Moths, acrylic on canvas, 39 x 27½" (100 x 70 cm) Have you ever walked in the woods on a warm evening? This is the moment when you walk and listen to the birds singing, how the foliage rustles, enjoying the coolness of the evening forest air. And suddenly, stepping on a branch, many moths rise upward, frightened by a sharp sound. I hope you can feel it too.
Acrylic is a unique medium–it can be painted both as watercolors and as gouache and as oil. In this demonstration, I’ll dive into how I paint textured graphic impressionism.
My Art in the Making I sit and wait, I wait for the fish to swim by itself
 Stage 1
Stage 1 Sketch
First, I sketch with a line. It is important to think about the composition and determine what is in the foreground and what is in the background.
WHAT THE ARTIST USED
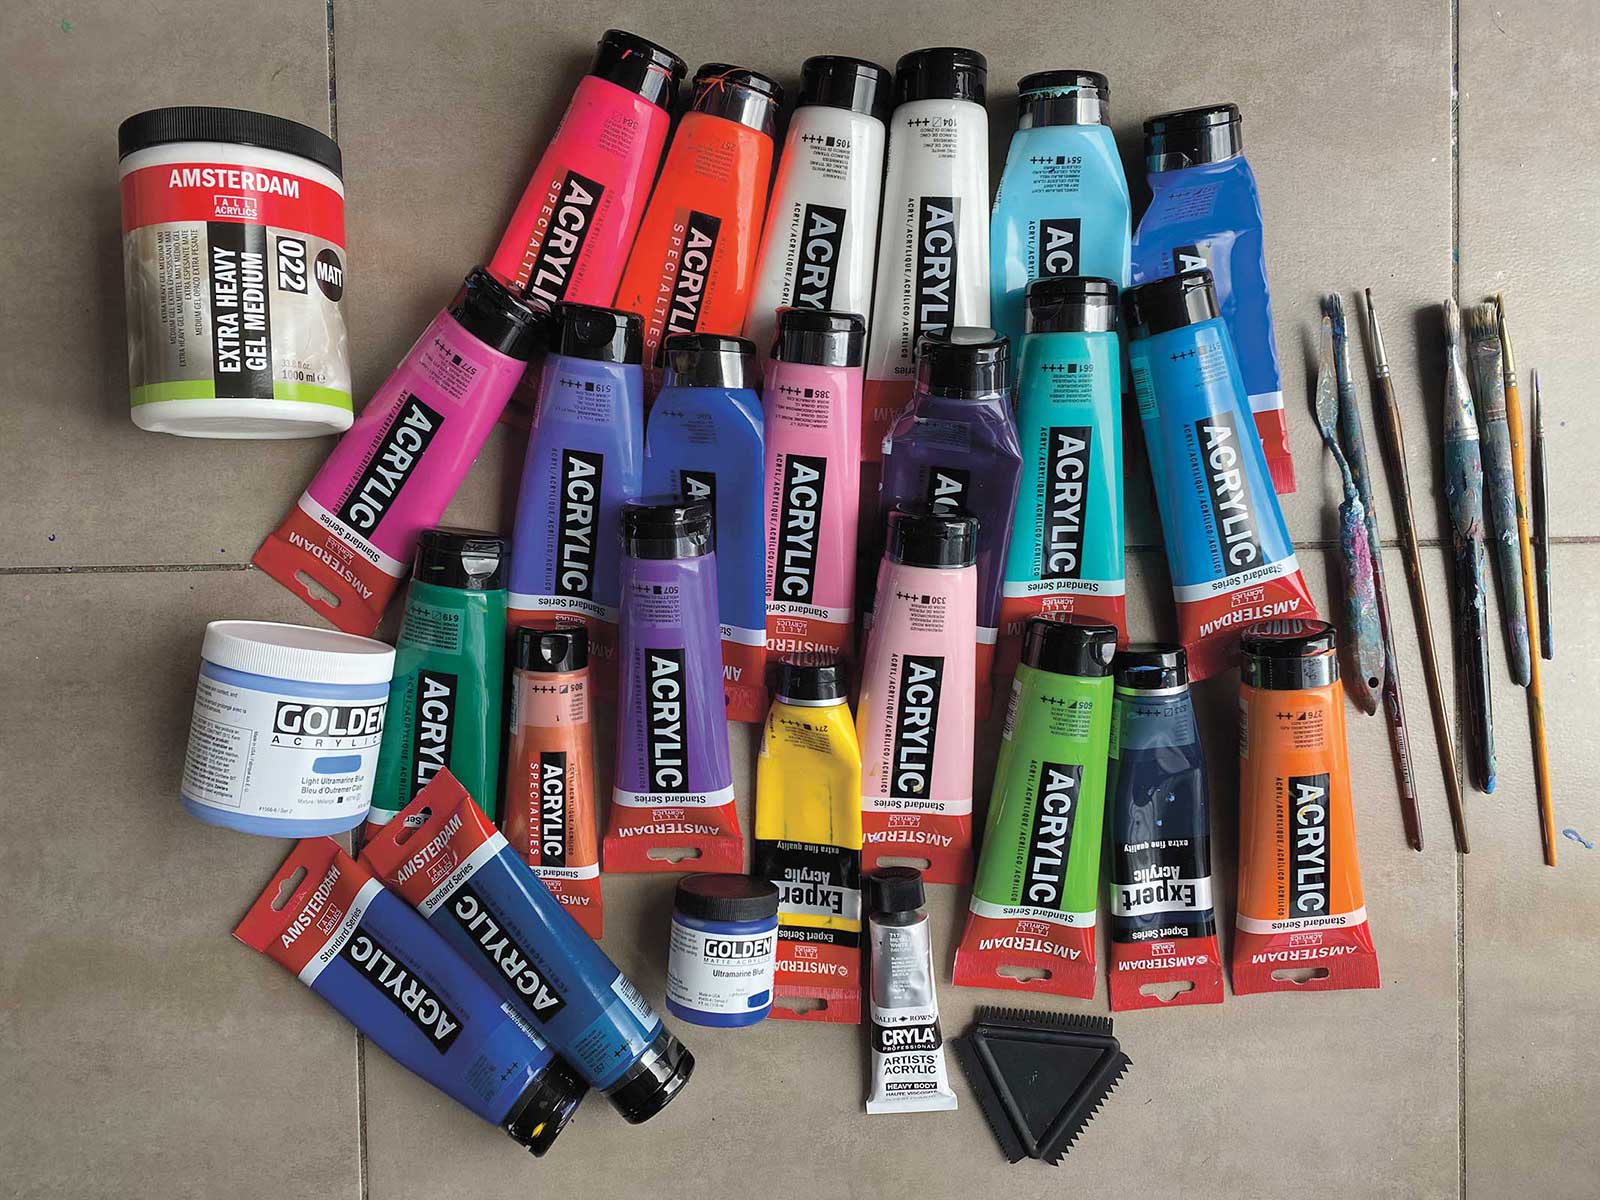
Acrylics
Titanium white, Zinc white, Cobalt blue, Sky blue light, Reflex orange, Reflex rose, Permanent red violet light, Ultramarine violet, Ultramarine violet light, Ultramarine blue, Ultramarine blue light, Quinacridone rose light, Permanent blue violet, Turquoise green, Royal blue, Permanent green deep, Copper, Cadmium yellow medium, Persian rose, Brilliant green, Indigo, Azo orange, Metallic white, Greenwich blue, Phthalo blue
Additional Materials
Canvas, 27½ x 19½", Extra heavy gel, Sculptural spatula or any scraper, Painting knife, Thin synthetic brushes, #2 and 3, Flat synthetic brush, #5, Hard glue brush, #4, 7 and 10
 Stage 2
Stage 2 First Layer of Color
Since acrylic is transparent and I do not want the white canvas to show through, I paint the first layer with color. It can simply be any of your favorite colors or a tonal analysis of the future painting.
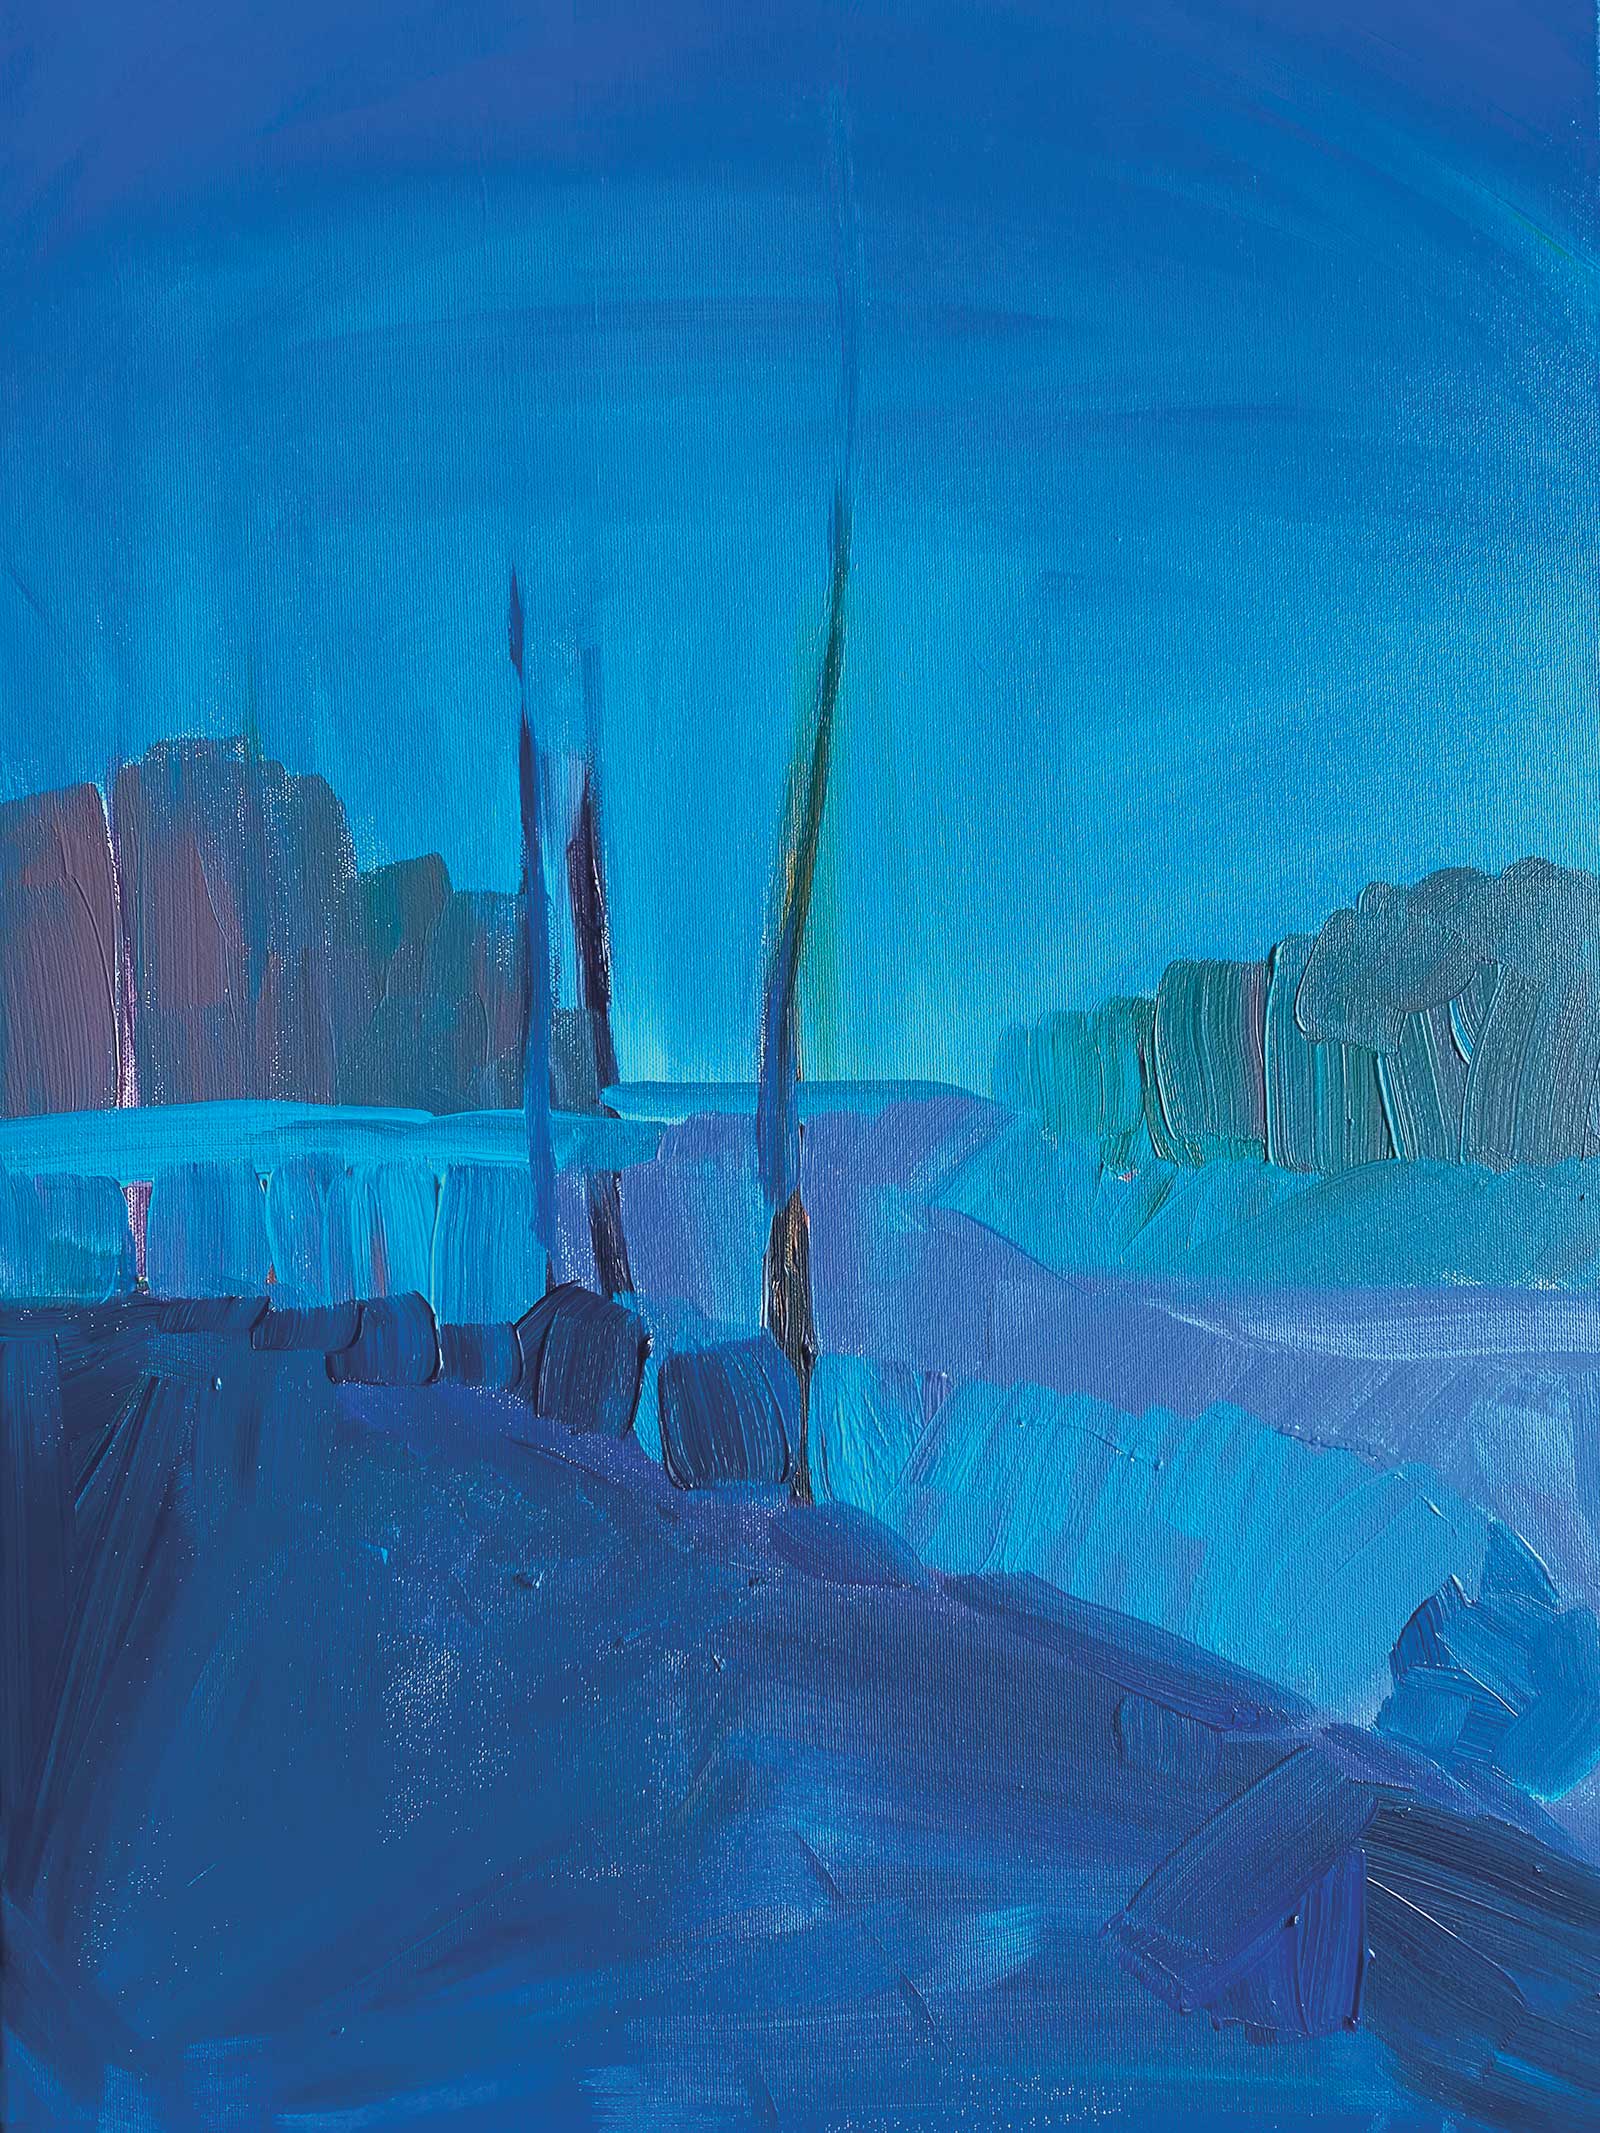
 Stage 3
Stage 3 Second Layer
The third stage of work involves applying the second layer of color; usually this is the background. It should be either simple or unusual. In this painting, it’s the sky. I’ll take translucent and transparent colors (you can always see the transparency of acrylic on the label) and a no. 10 hard brush. For now, the brush should be dry. The sky is lighter at the bottom and darker to the top. This will give a sense of depth and space. I will show the clouds at the bottom with the help of a knife and paint. Then we will analyze the tone and color of the middle ground, forest, lake and foreground. Don’t go into details, but rather paint with a wide brush.
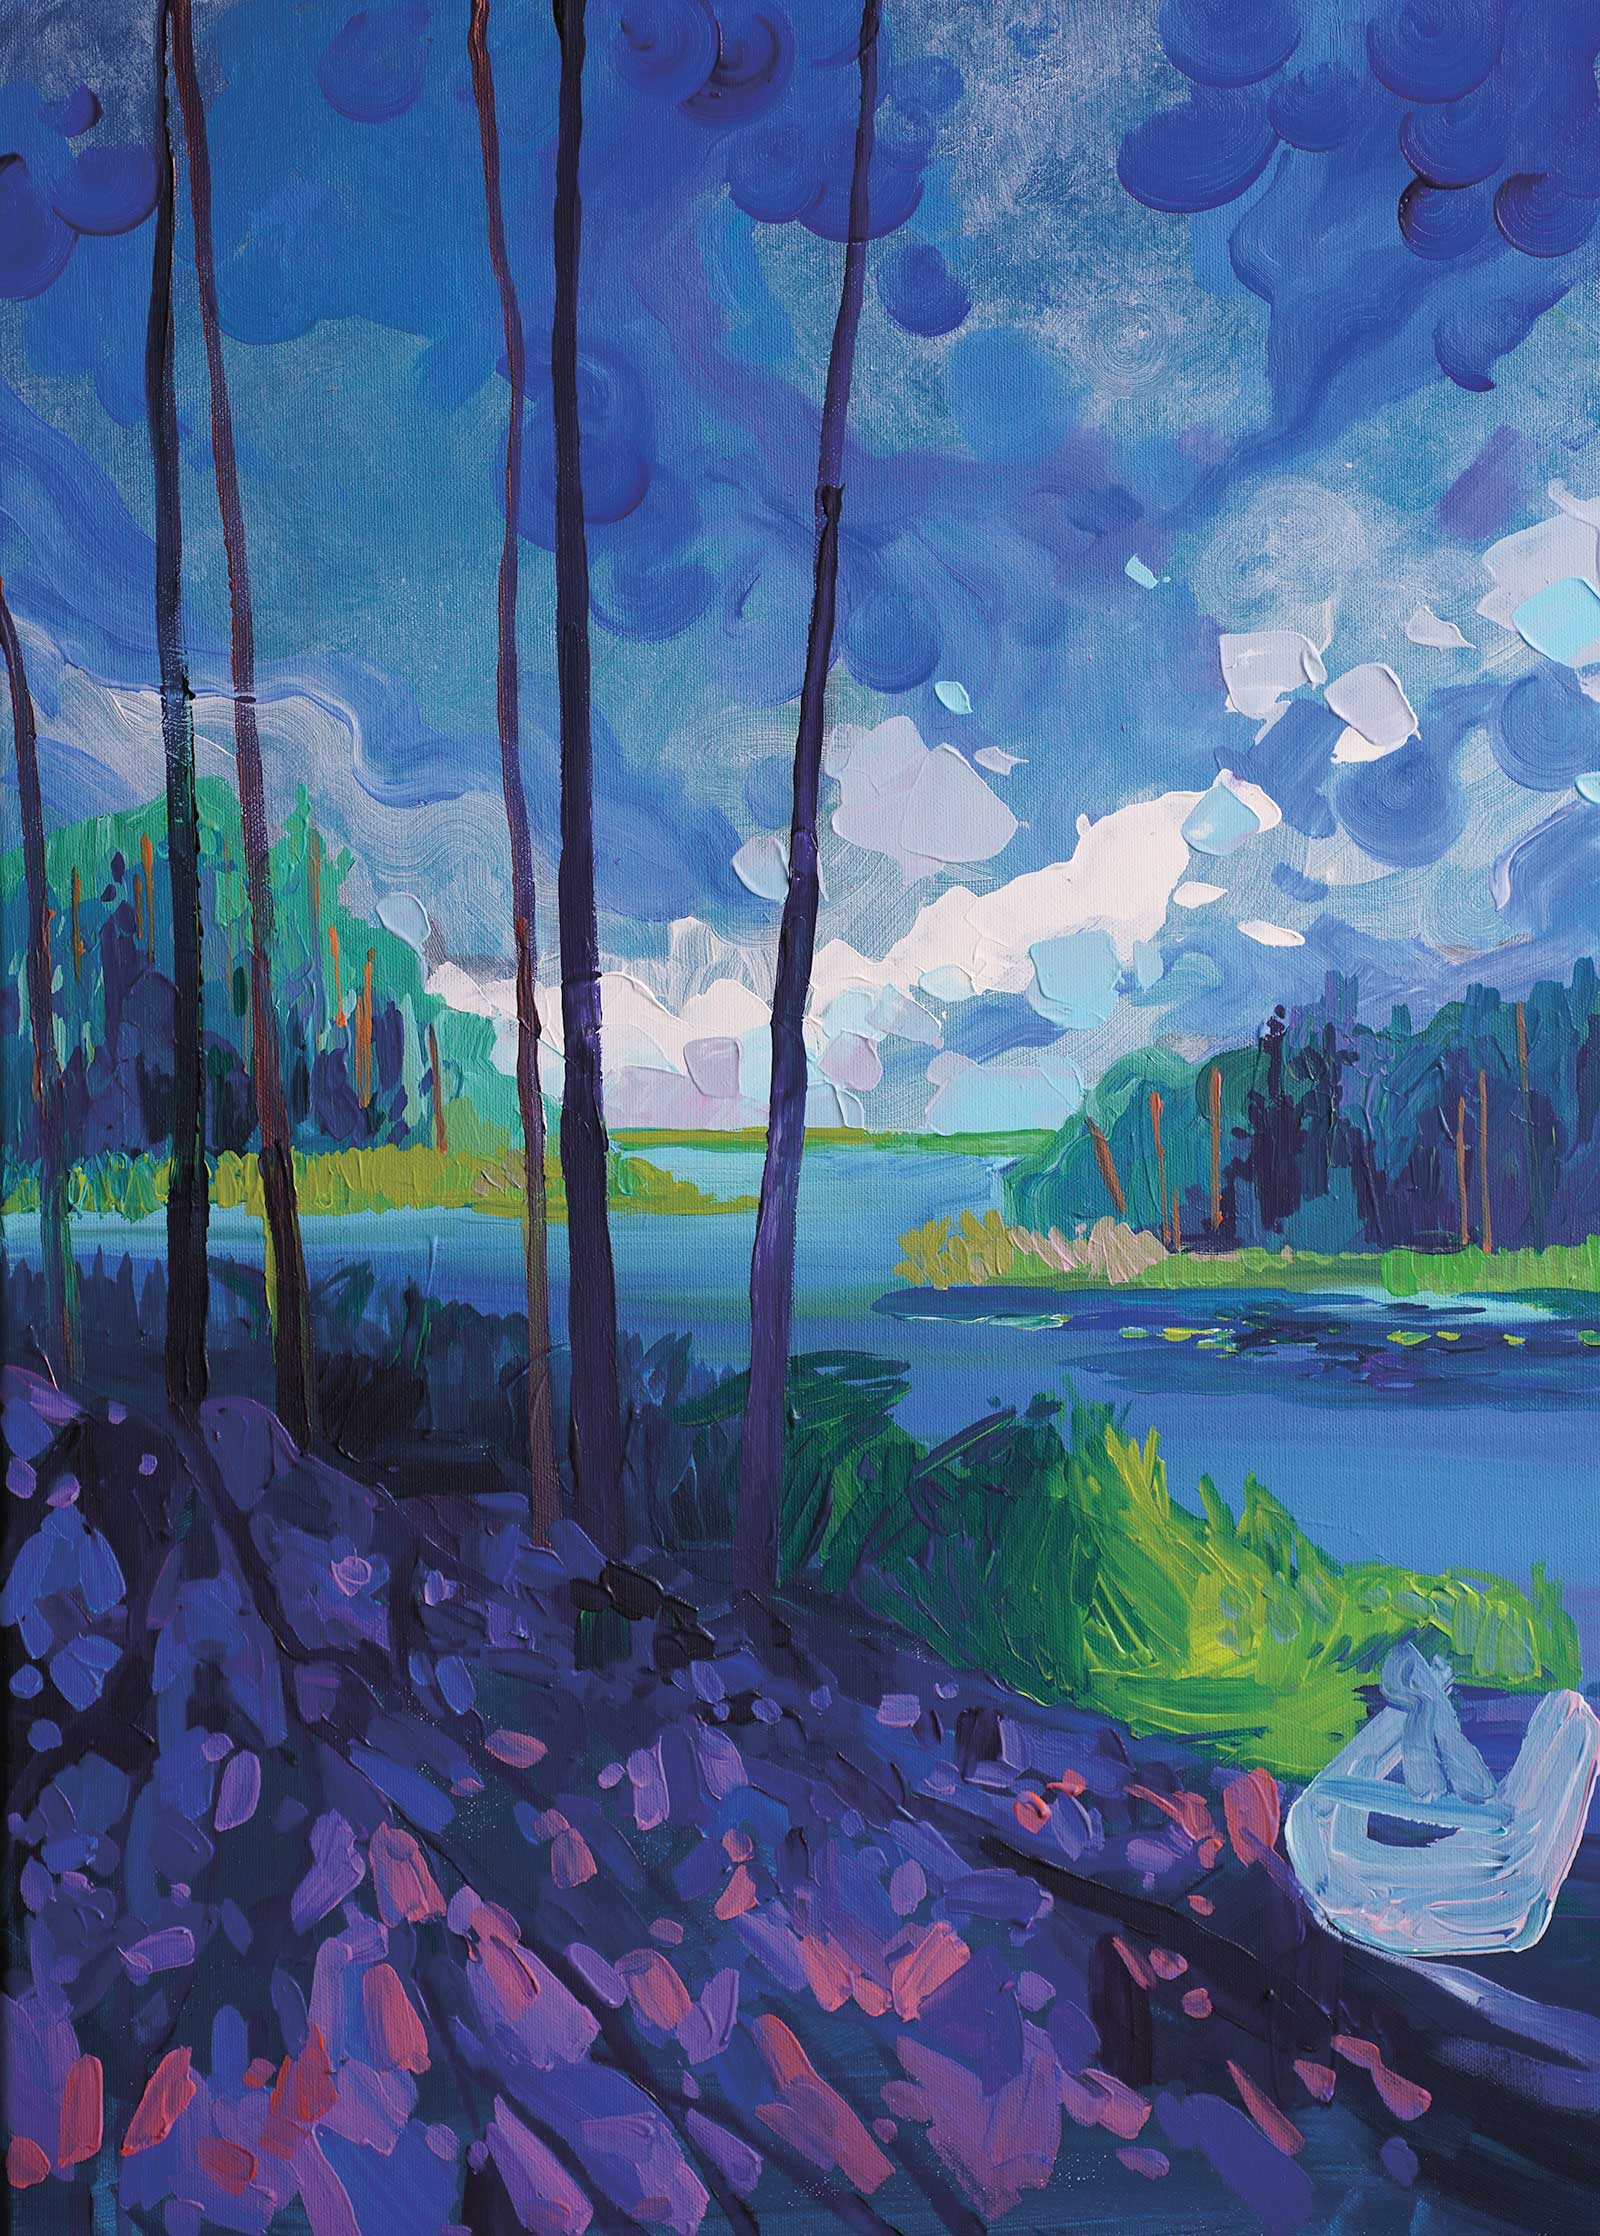
 Stage 4
Stage 4 Applying Gel
Now it’s time for the gel. I decided that in this picture I would show the texture of the grass, the volume of the pines in the foreground and the boat at the bottom right. I’ll start with the grass: I tinted the gel in different shades of green and put the paint on the canvas with a knife. While the acrylic with the gel is wet, it’s time to work with a sculptural spatula, which we’ll drive over the gel, removing parts of it in the direction of the grass growth. Then leave the gel to dry. Moving on to the background, we paint the trunks near the forest and the gaps in the sky. The water farther from us should be lighter, and the water closer to us darker and more detailed. You can paint the reflection of the forest vertically and everything that lies on the water: ripples, water lilies, grass blades. Now the grass portion is completely dry. By lightly pressing the dry brush, texture can be added. Then, with a thin brush, draw some blades of grass, lighter than the rest of the grass.
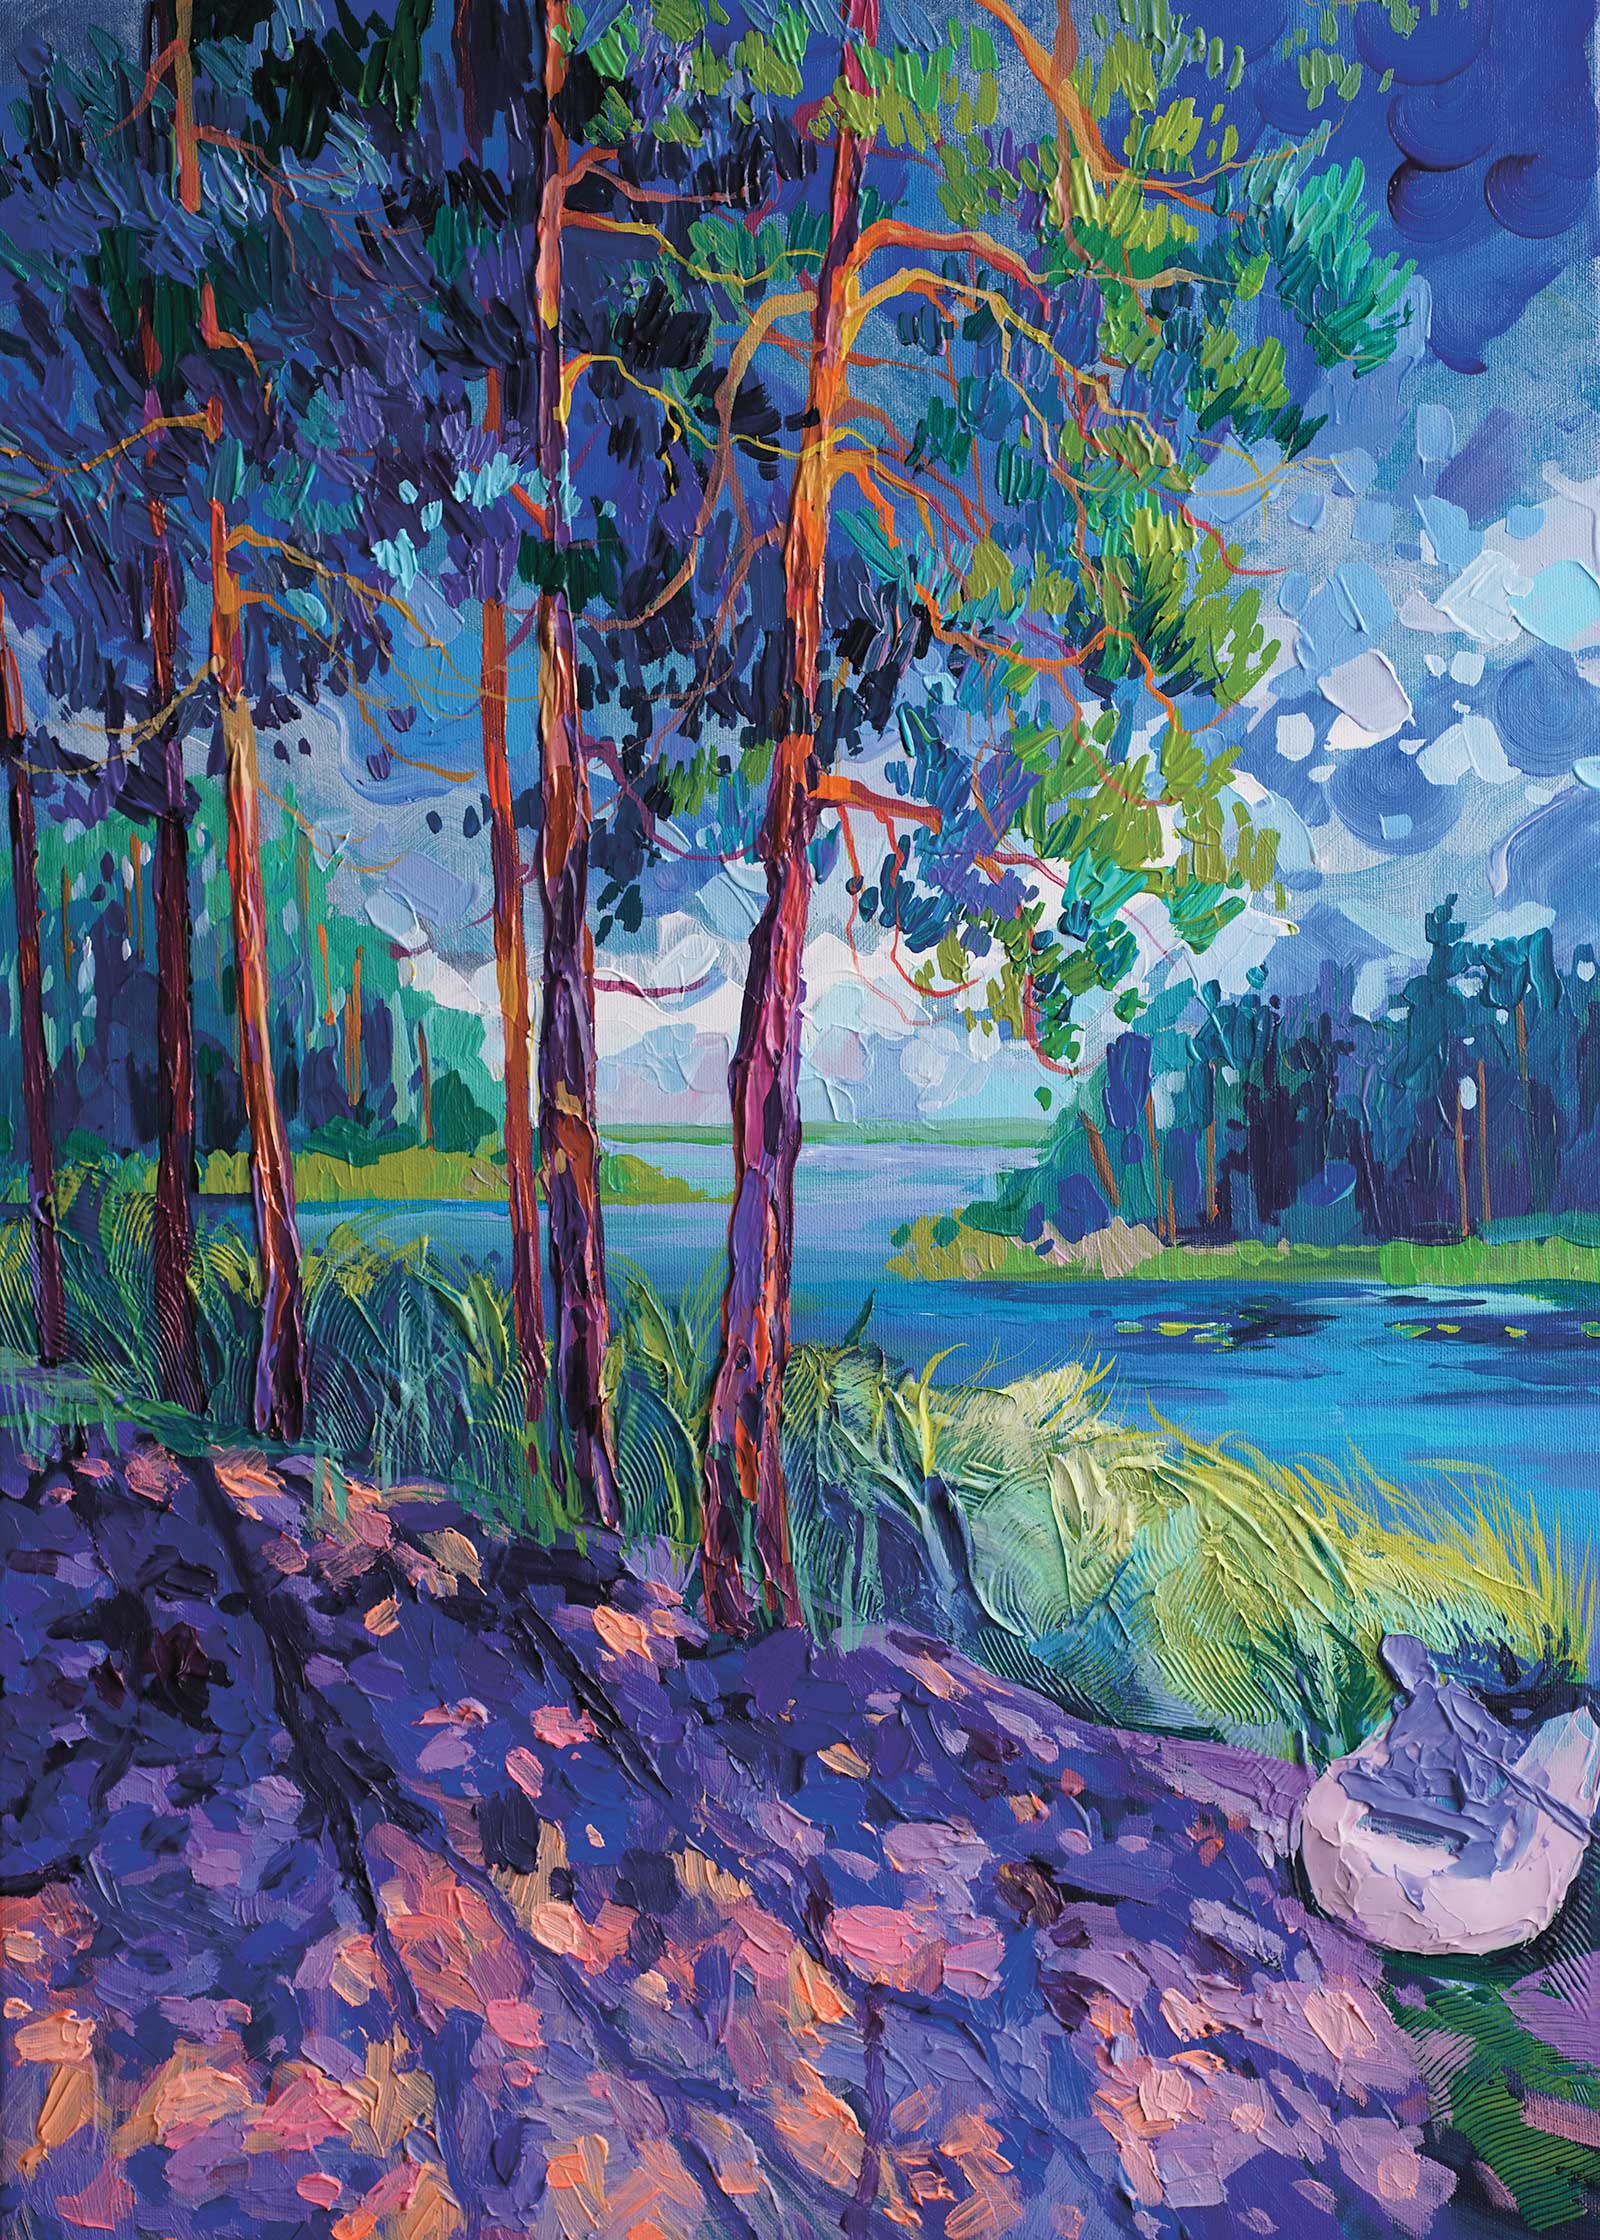 Stage 5
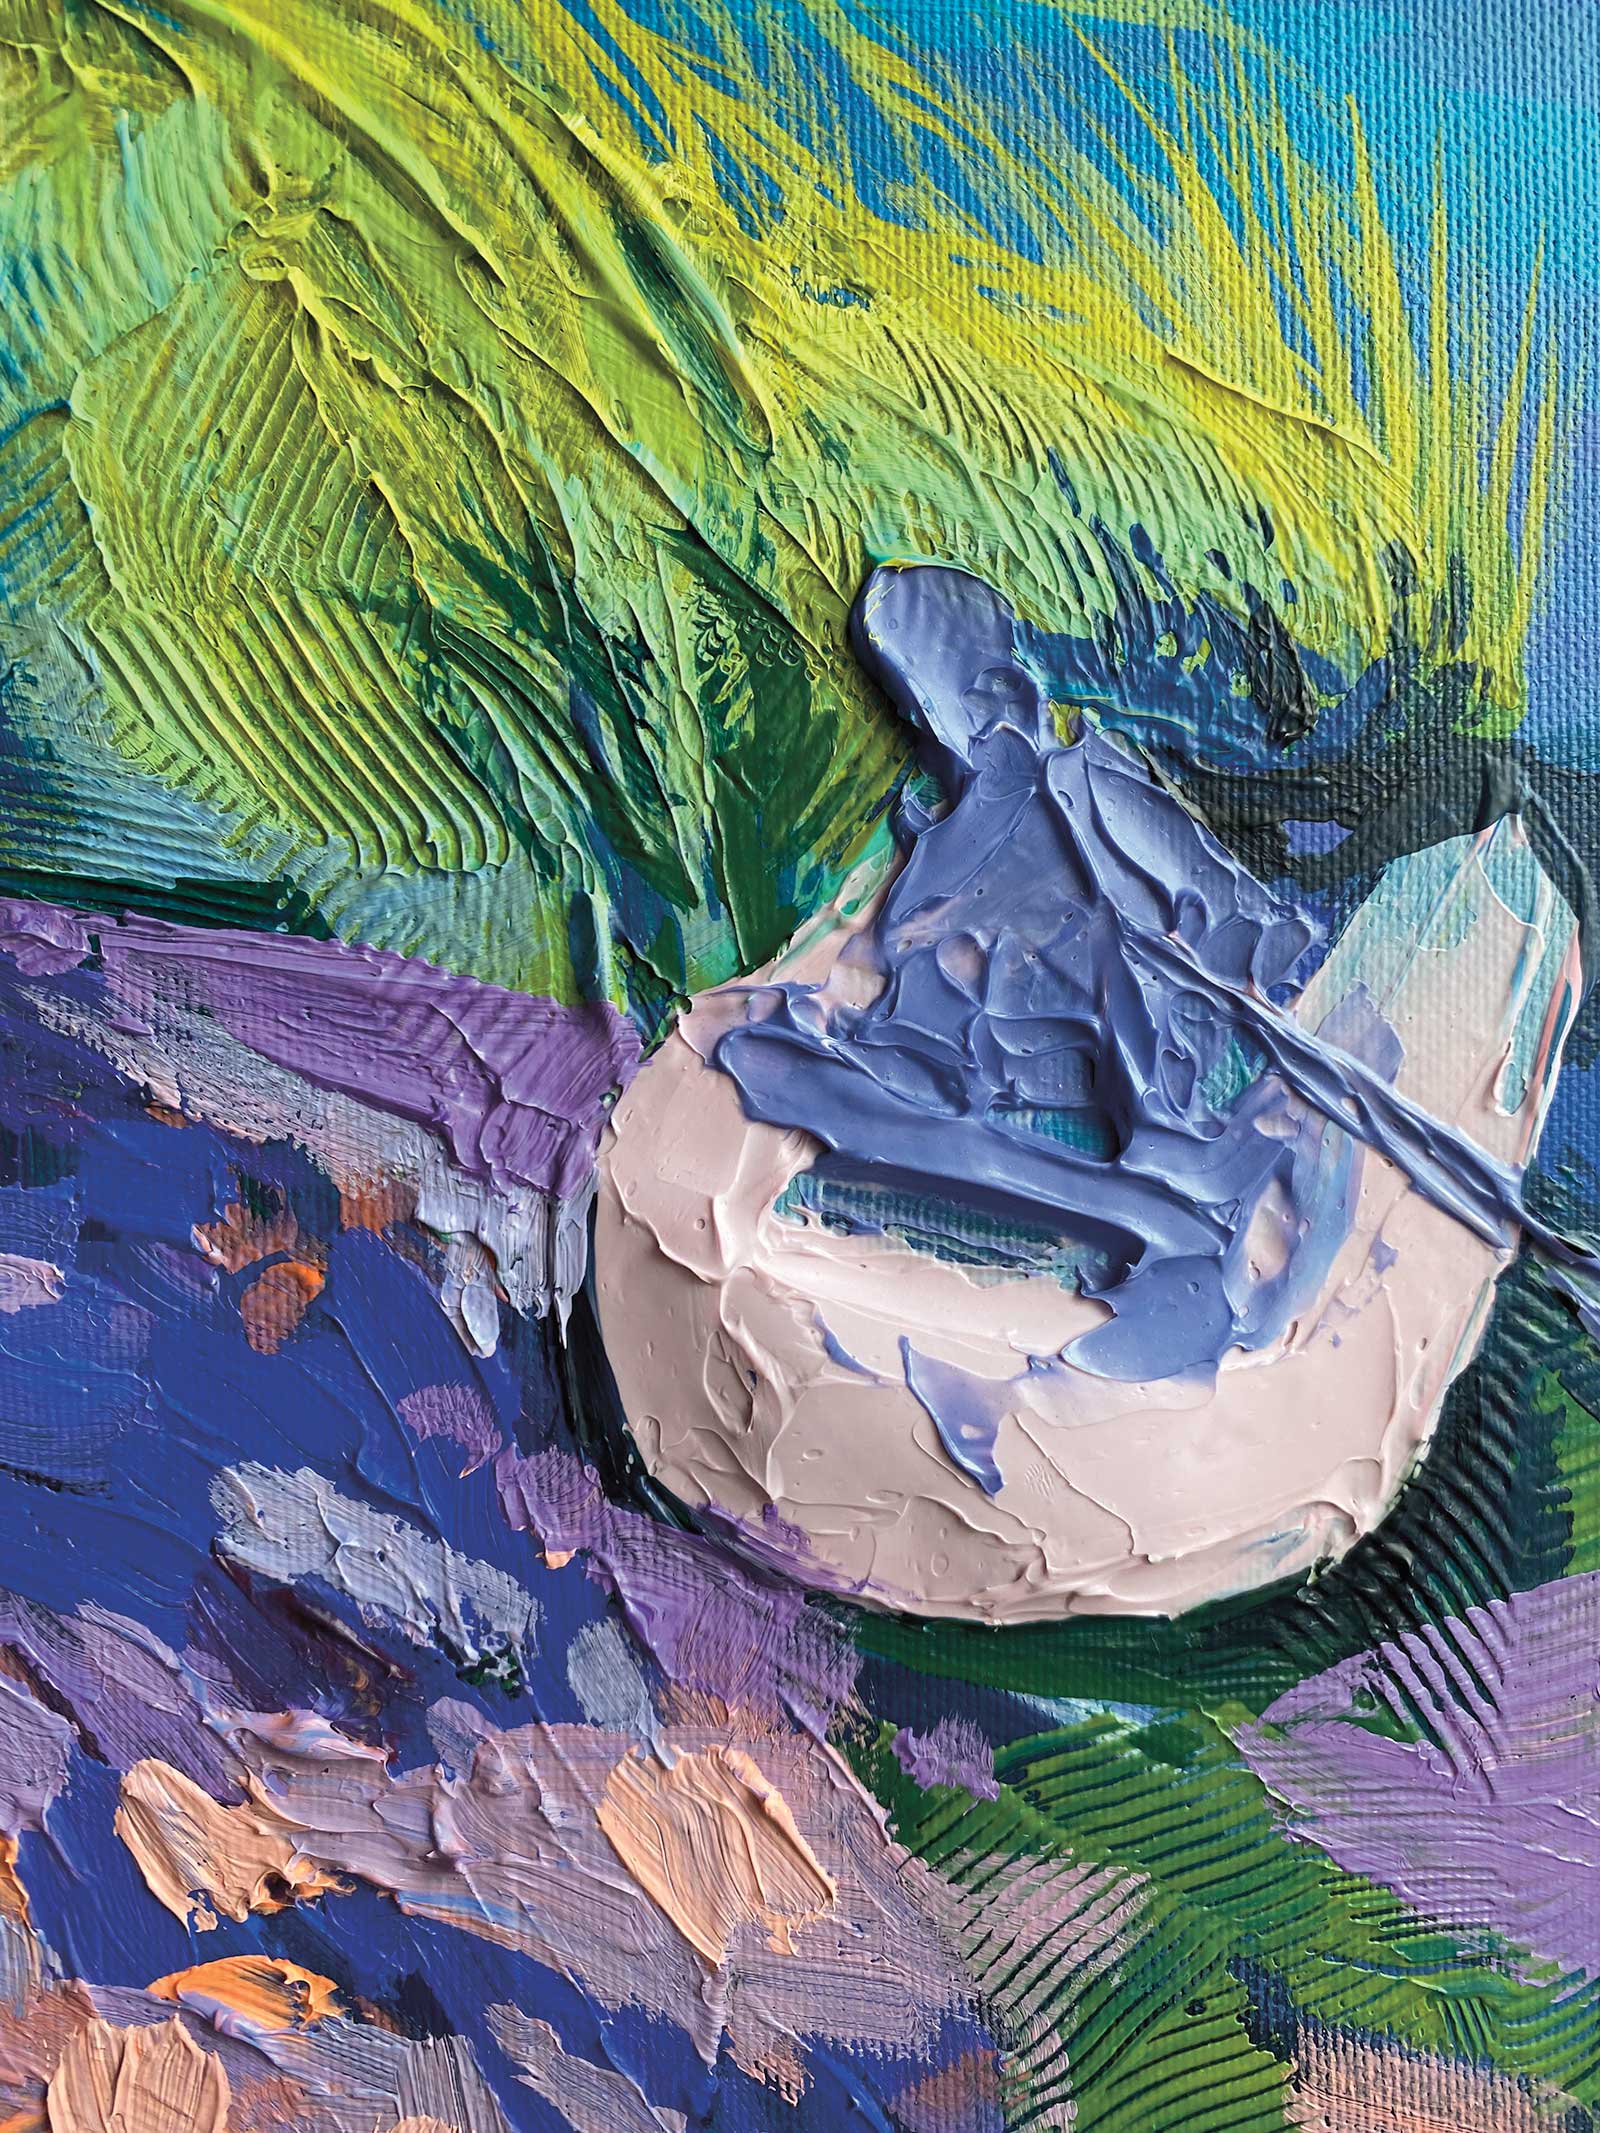
Stage 5 Painting the Needles and Sculpting the Boat
Thickly, with acrylic, I paint the needles of the pine trees. Then I’ll sculpt a boat out of the gel.
 Stage 6
Stage 6 Additional Textures
Using gel and acrylic, I put textured strokes with flat bristles in the foreground. I’m working with the play of light and shadow and the contrast of blue and pink.
 Stage 7
Stage 7 The Details
Now that the boat is dry, let’s draw the details. I’ll add volume to the needles, and when dry, paint some more needles. I then add more detail to the play of light and shadow in the foreground.
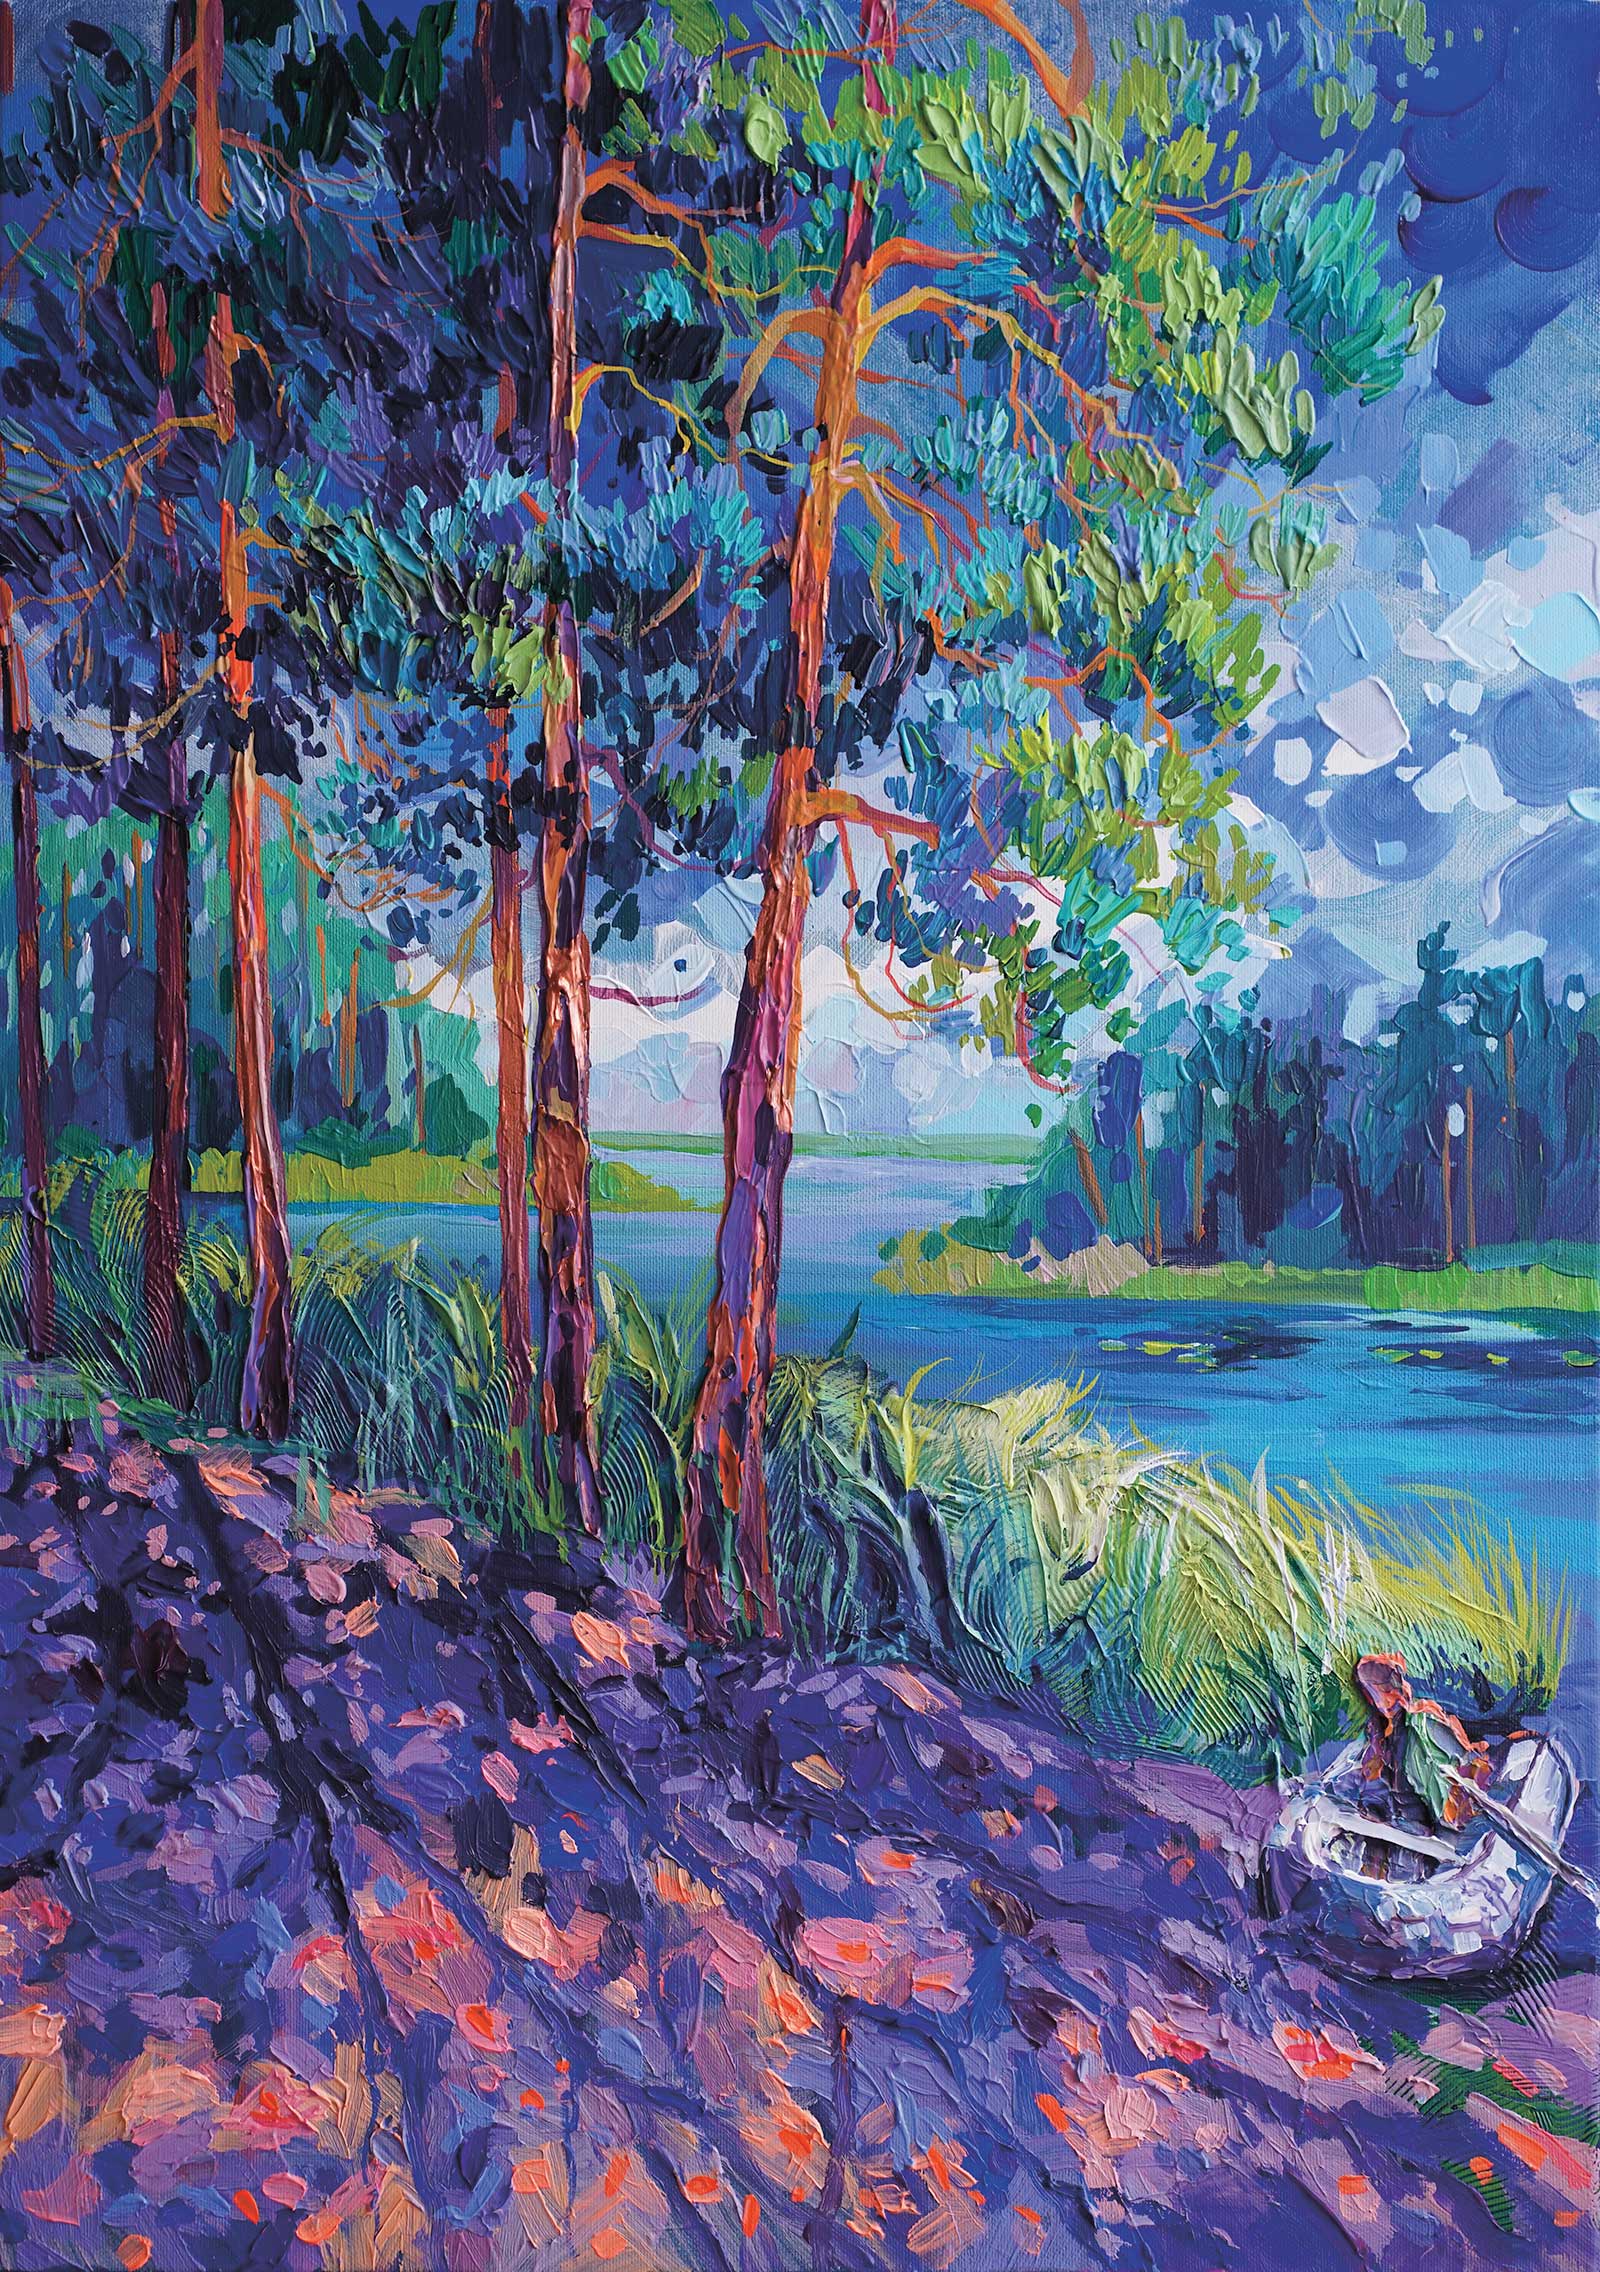
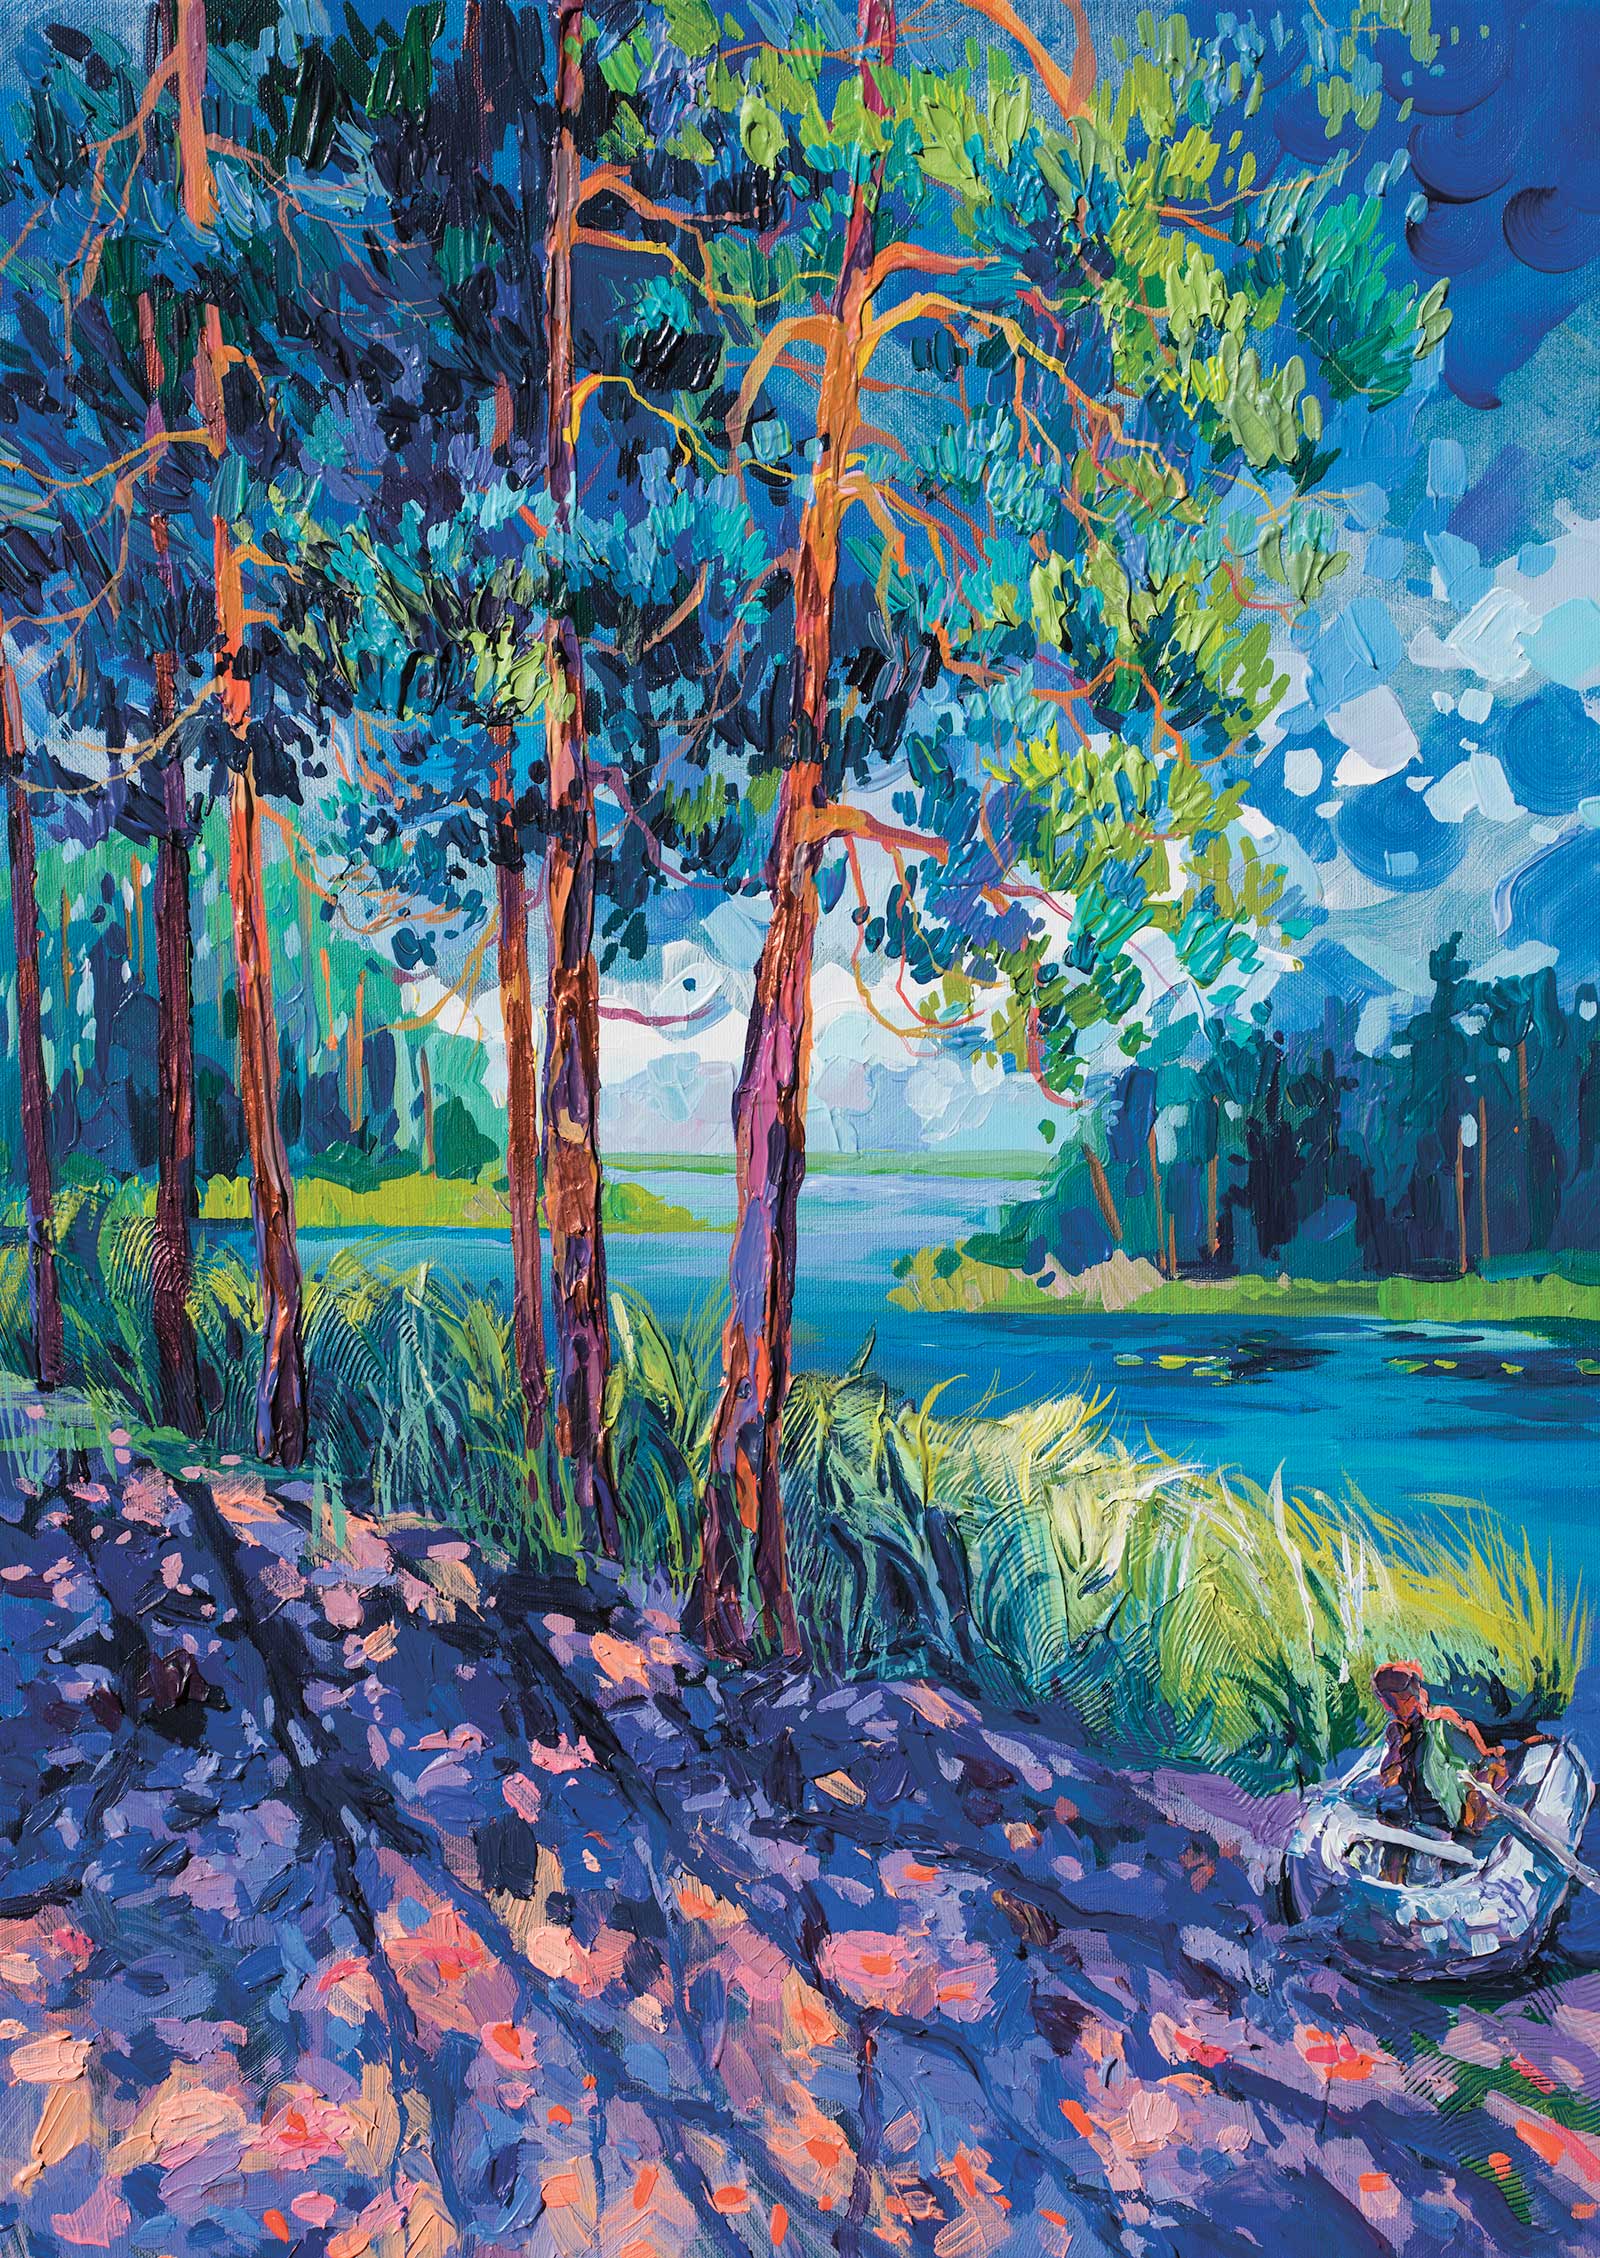 Stage 8
Stage 8 Finished Artwork
I sit and wait, I wait for the fish to swim by itself, acrylic on canvas, 27½ x 19½" (70 x 50 cm)
About the Artist
 Anastasia Trusova
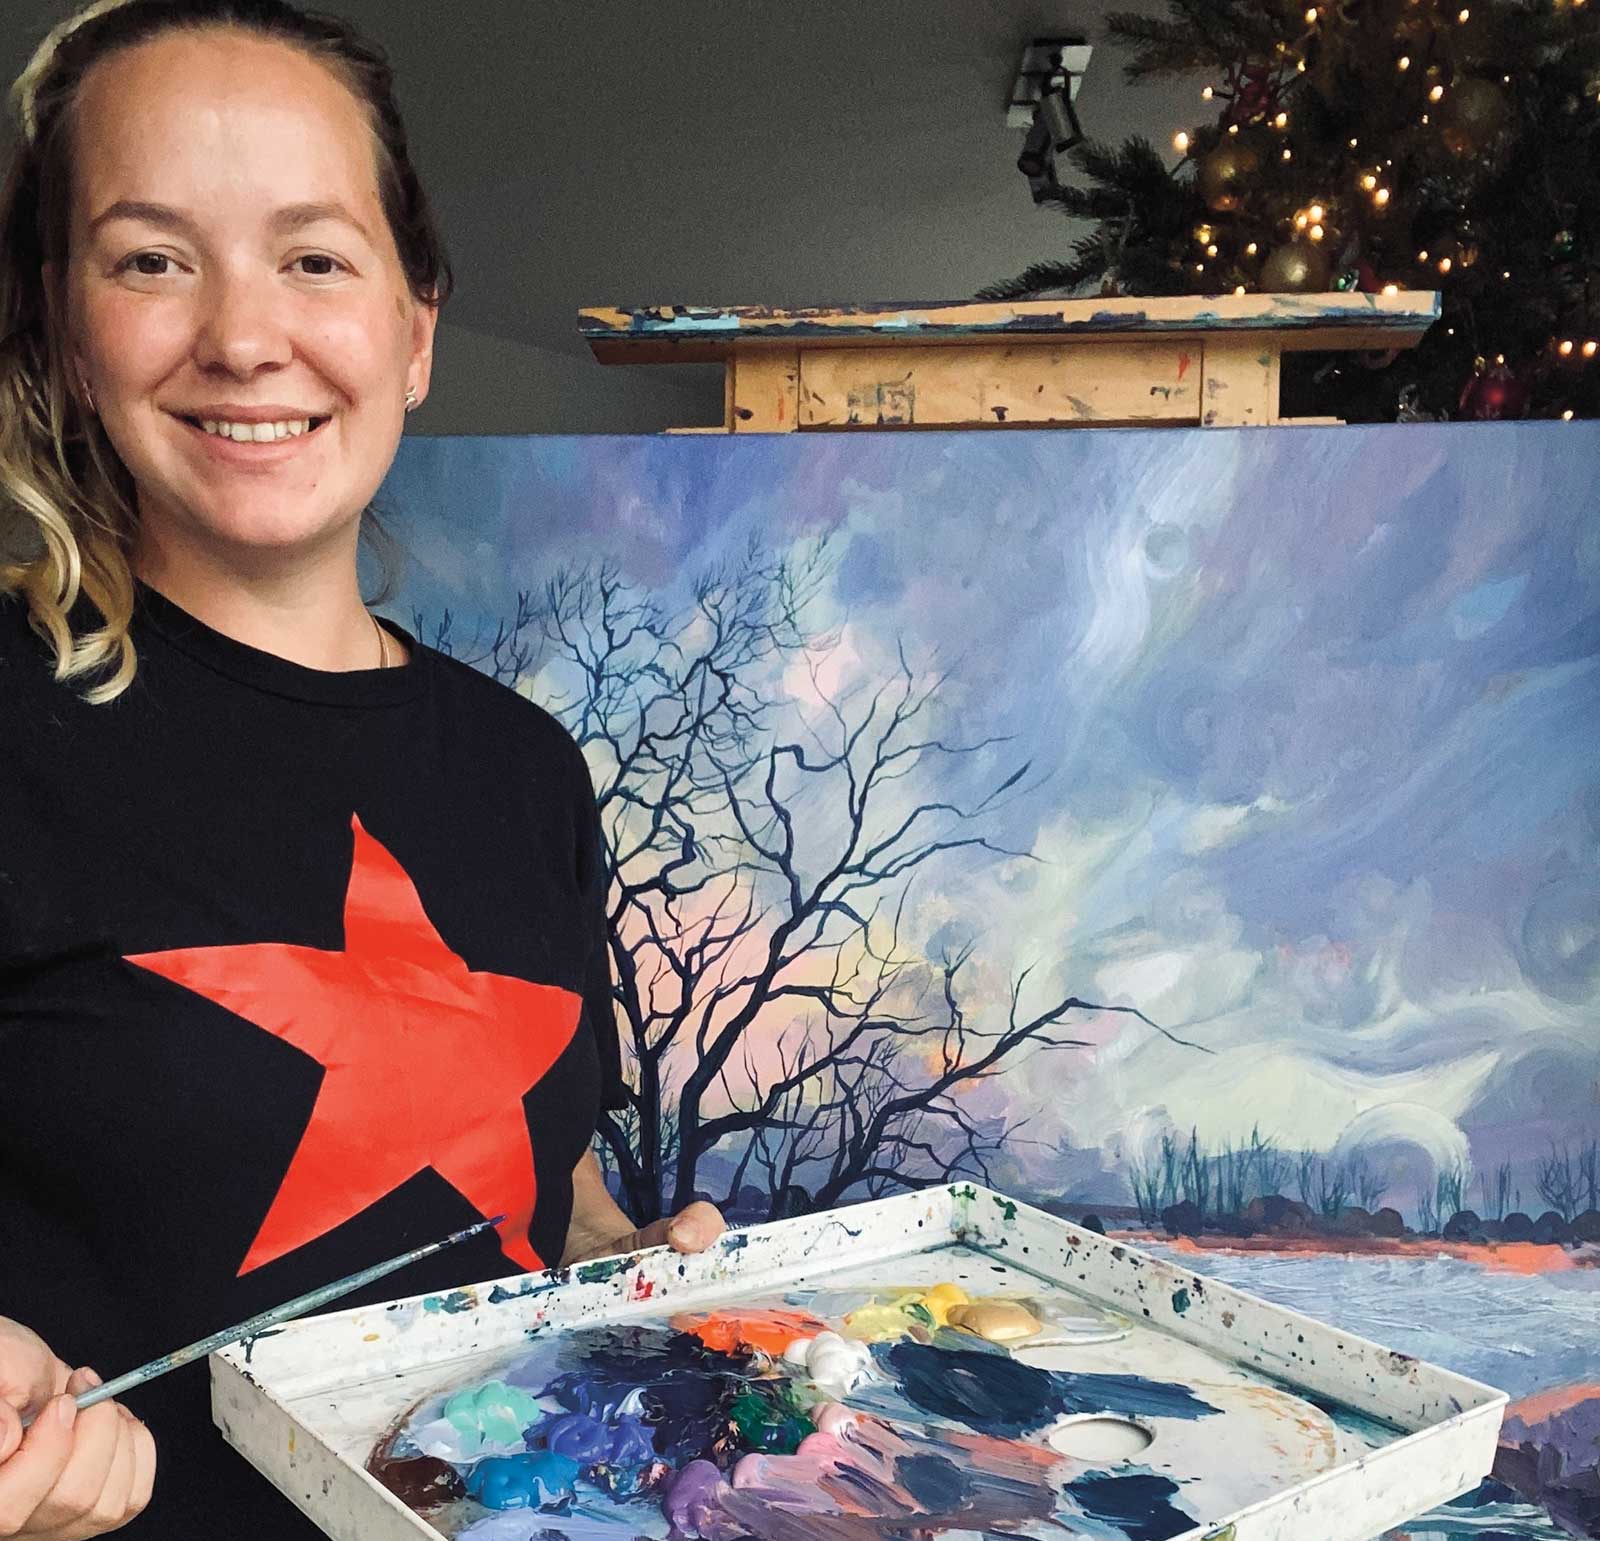
Russian artist Anastasia Trusova has been painting her entire life. After attending art school, she worked for a large international footwear company as an artist and shoe designer, traveling often. Eventually she moved with her husband to Belgium and now periodically participates in personal exhibitions. Her artwork is collected in homes across the world, from England and the United States to Italy and Spain.
Contact at
atrusova@inbox.ru