


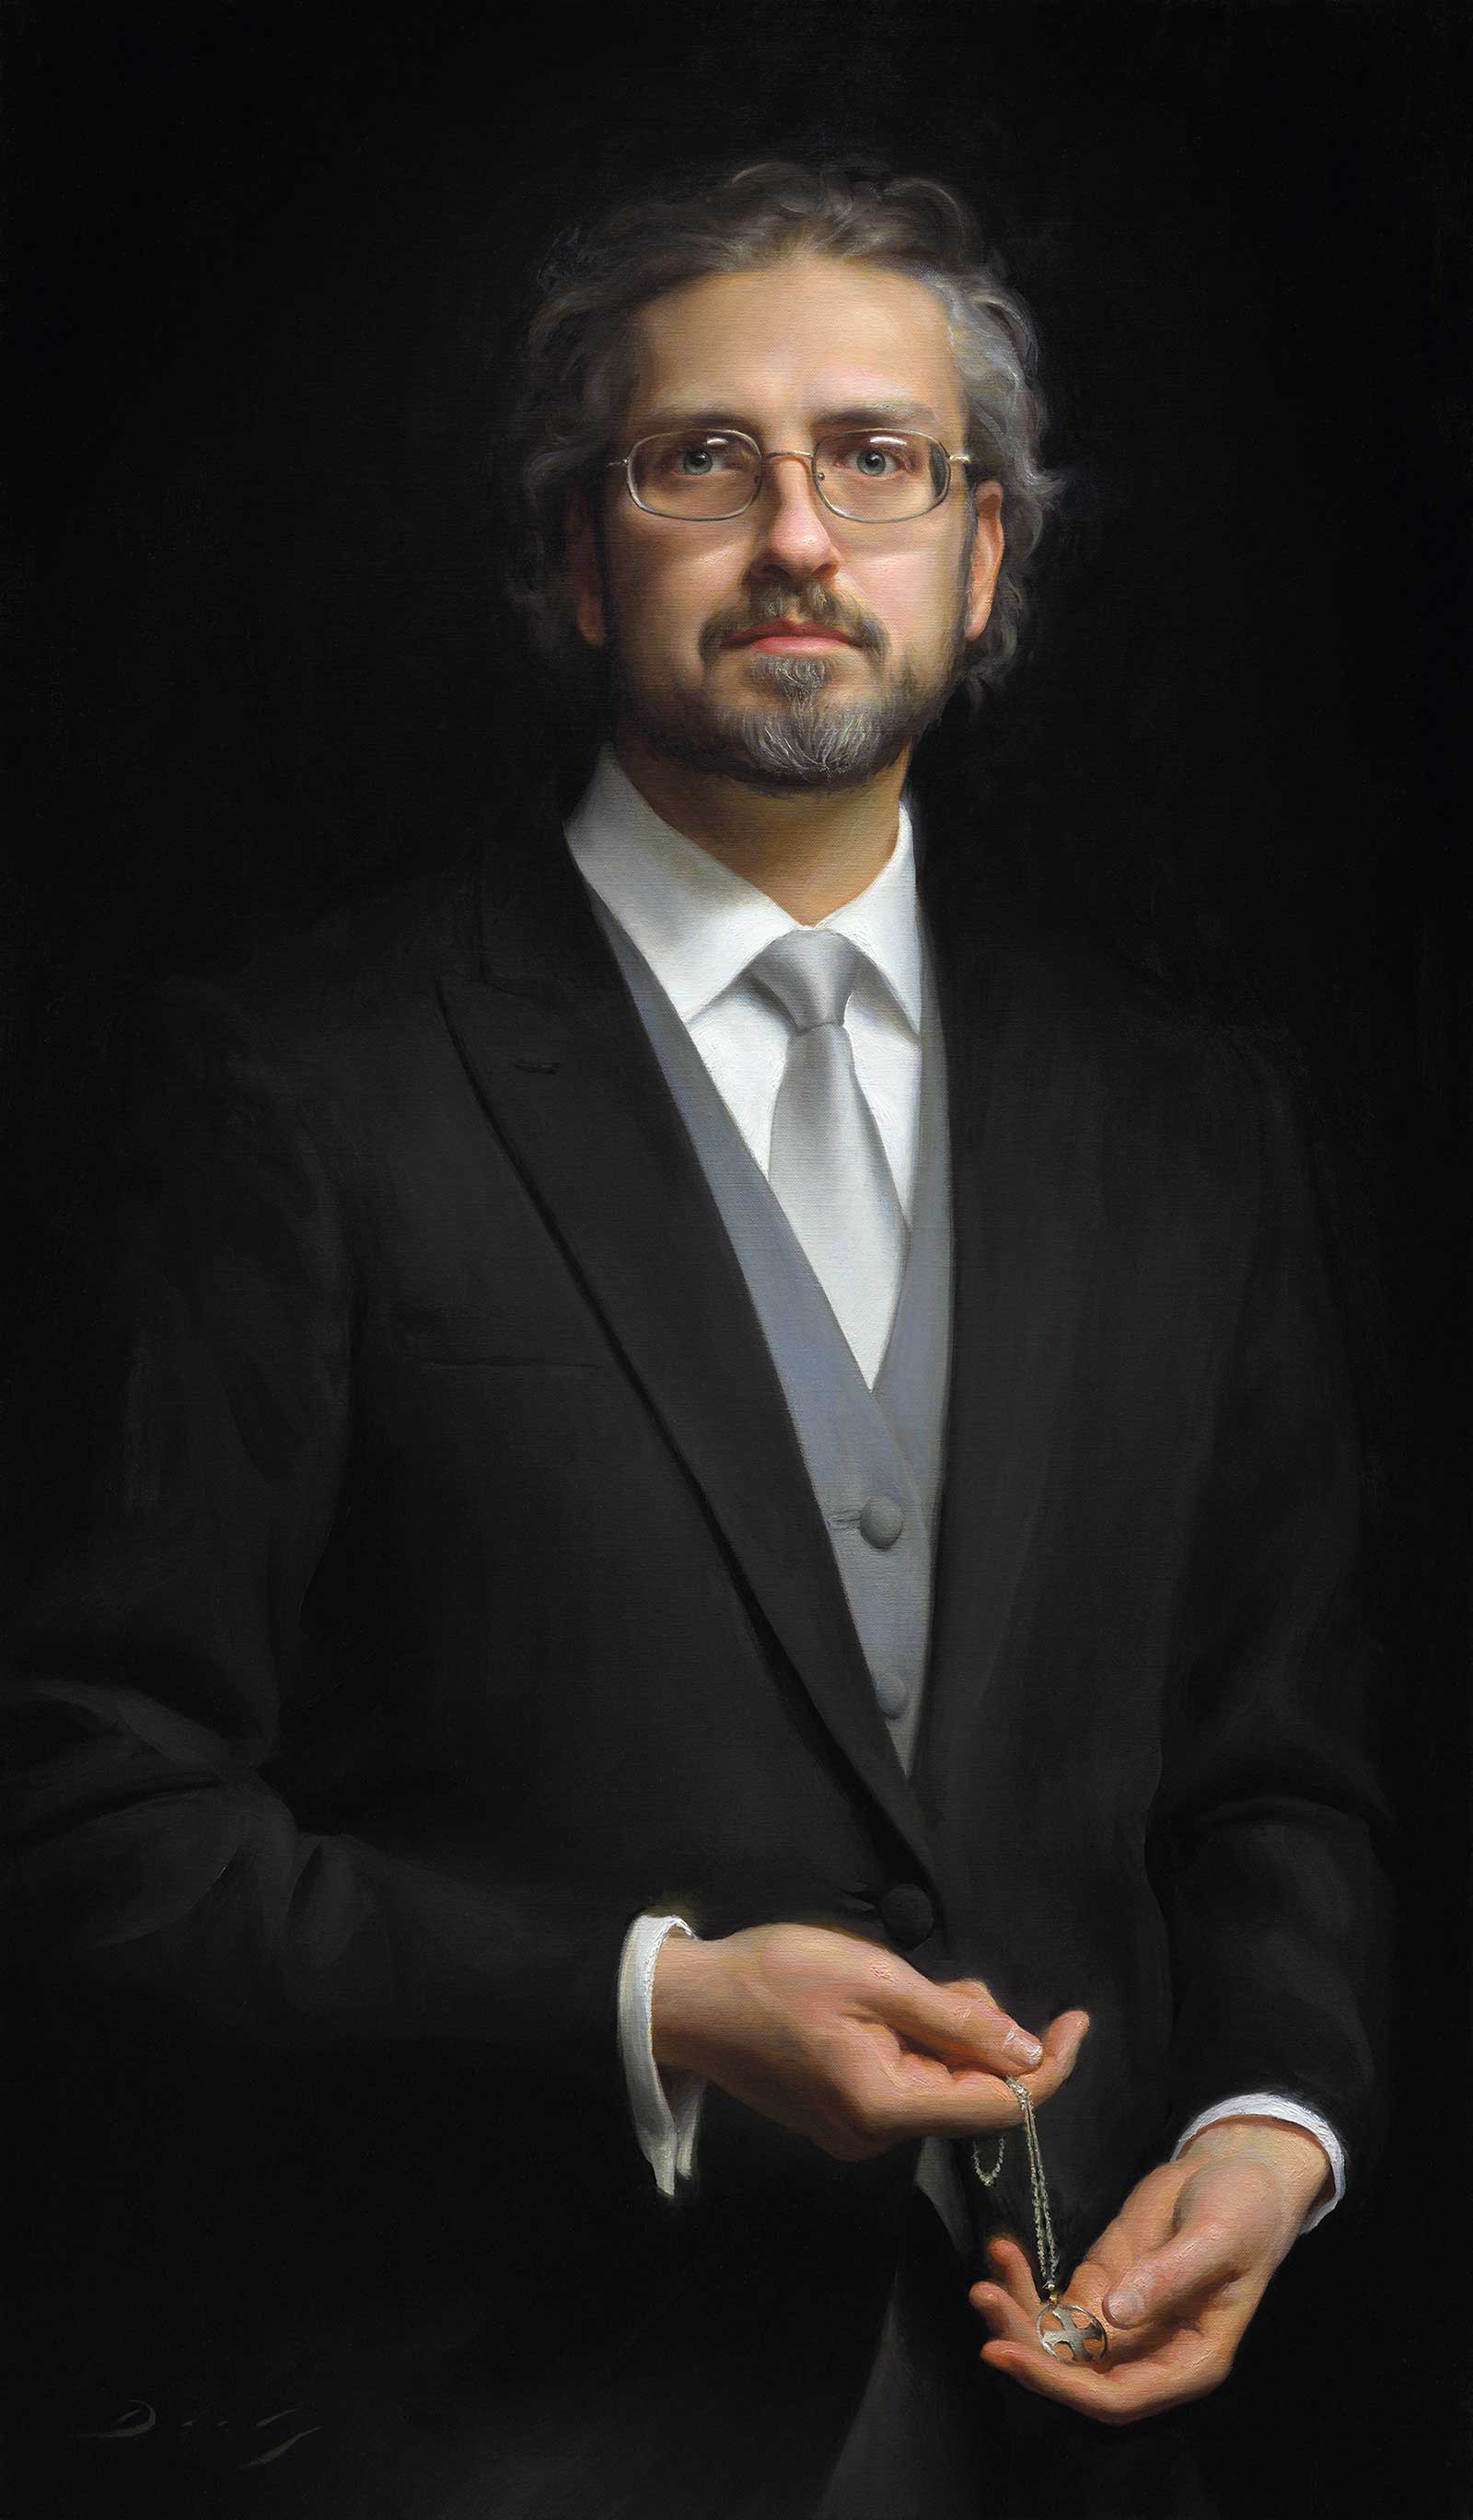
Like most self-portraits, this painting is an intimate one, but I find that even my most personal paintings often arise from rather mundane circumstances. In this case, having reached the end of a roll of linen, I was left with a scrap that would allow for a 23-by-39-inch canvas. Eventually it occurred to me that this canvas could make for an unusually narrow portrait that, at roughly life size, would neatly fit a head at the top and hands at the bottom, highlighting both in an interesting way because of its narrow proportions.
I took it as a welcome opportunity to paint a new self-portrait, which I always enjoy, both for the process of self-reflection and for the occasion to work from life.
For the sake of the composition, I wondered if I should be holding something to justify the emphasis on the hands and decided it would have to be my silver cross. Every week before Sunday worship, I take my cross off its necklace chain and pin it under my lapel before walking out the door. This moment of solemn reflection became the basis for the painting, Self Portrait Preparing for Worship.
 Stage 1
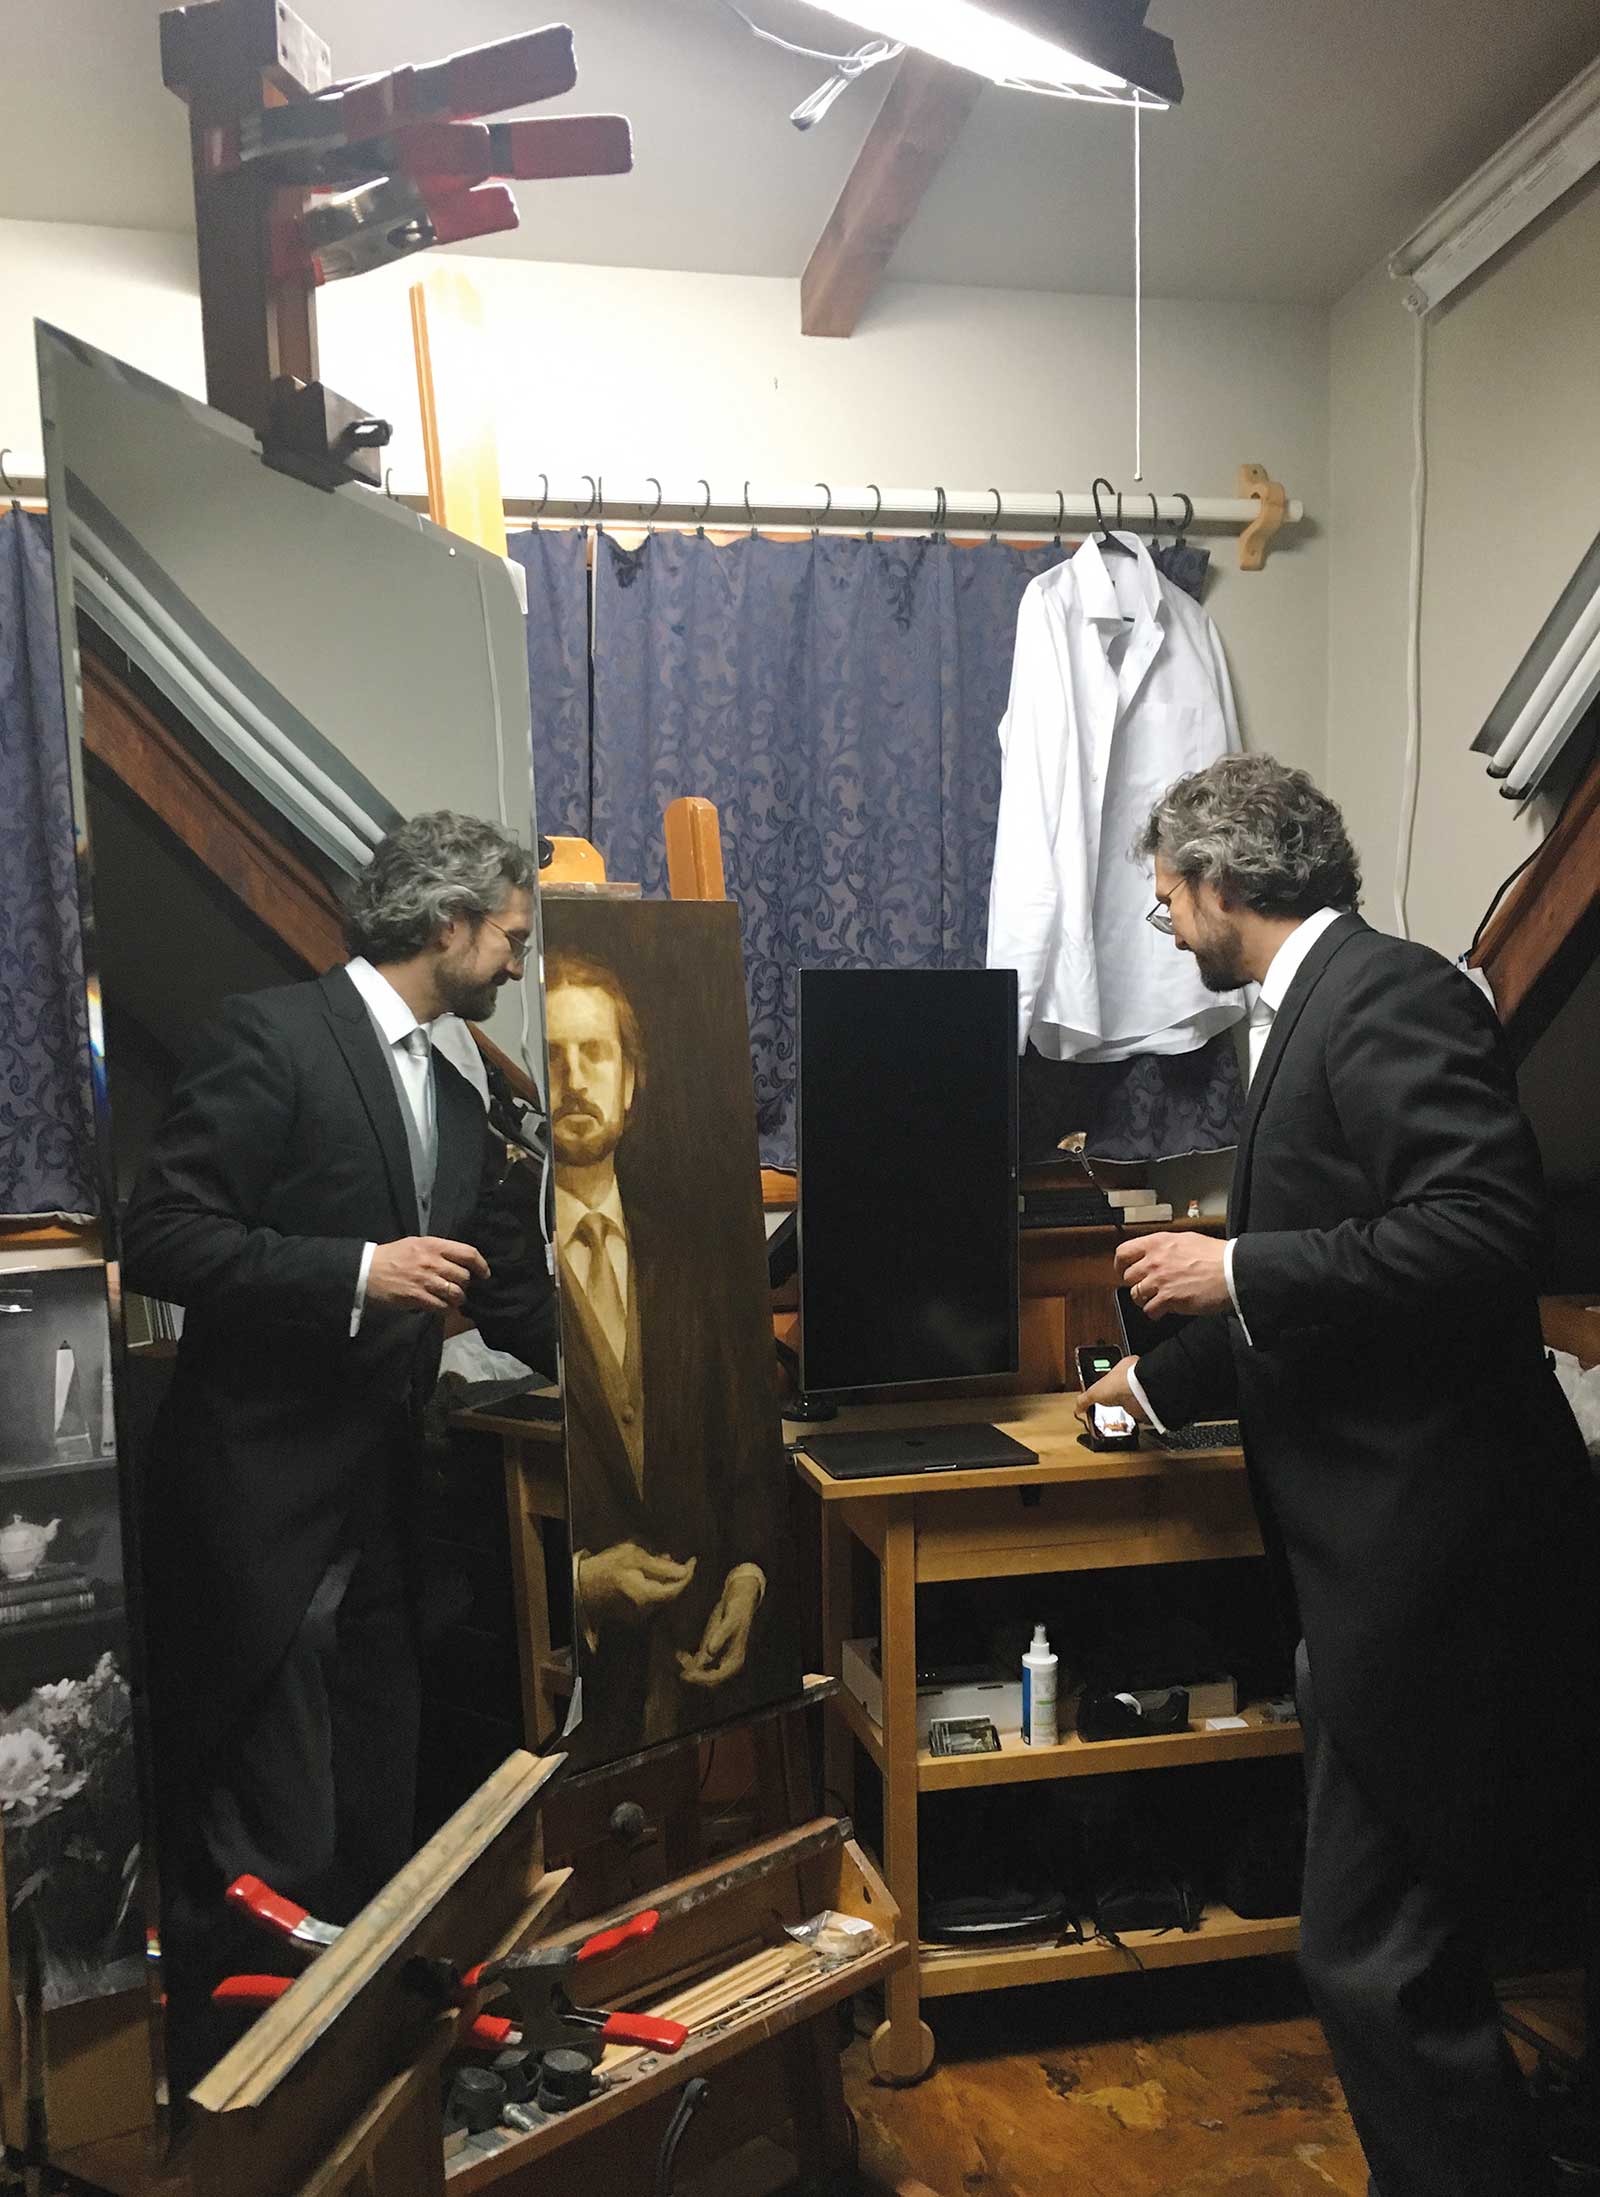
Stage 1 Setup: It is always important to have a good setup before actually beginning to paint. I placed a mirror on an easel directly next to my main easel with the canvas. A fixture of fluorescent bulbs above my head put consistent light on me, my canvas and my palette. I also hung a dark sheet behind me and blocked out my studio windows to eliminate any extraneous lighting.
The only challenge with painting a self-portrait like this is that when you approach the canvas to make a brushstroke, you can’t glance over at the mirror and see yourself at the correct angle. So, it becomes a memory exercise—I would stand a few feet back, try to mentally imprint the type of marks I wanted to make, mix the paint and load the brush, take another look for good measure, walk up and make a few brushstrokes, retreat back to my starting position, and do it all over again until the painting emerged.
 Stage 2
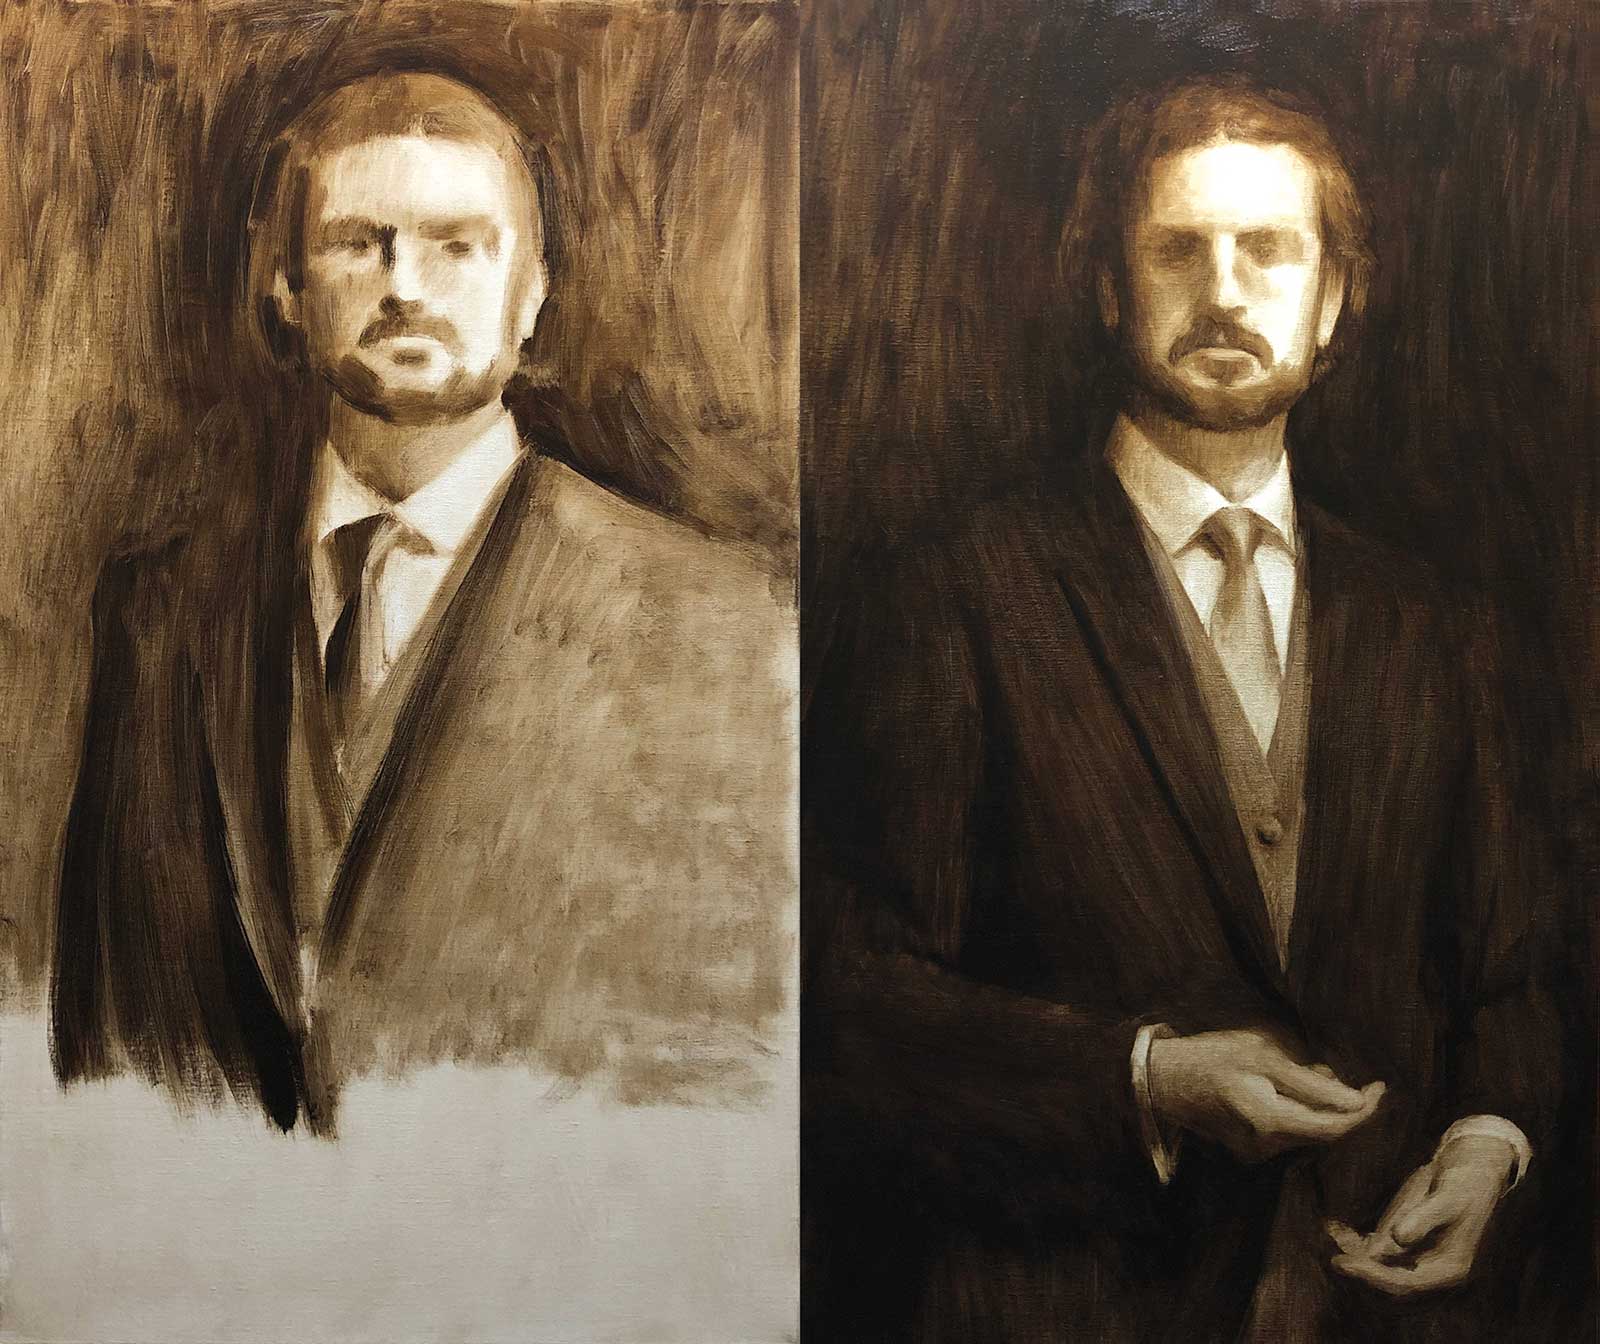
Stage 2 Underpainting: The way I begin a painting varies quite a bit with the circumstances. When working from life, I enjoy discovering the image gradually, working from general to specific. I usually begin with a raw umber wash without any line drawing, just pushing around shapes until I have a value pattern that satisfies me. I typically don’t use paint thinner–just the minimum amount of linseed oil necessary to get the paint to slide around–and I wipe away the paint with a rag to let the original white of the canvas show through for the light areas. As long as the paint stays wet, this process is very flexible. Here you can see that I worked for a while facing one direction before deciding to wipe out what I had done and start over with my shoulders facing the other direction. The image on the right is how I left the underpainting to dry, with the basic value pattern in place but very few details.
 Stages 3-6
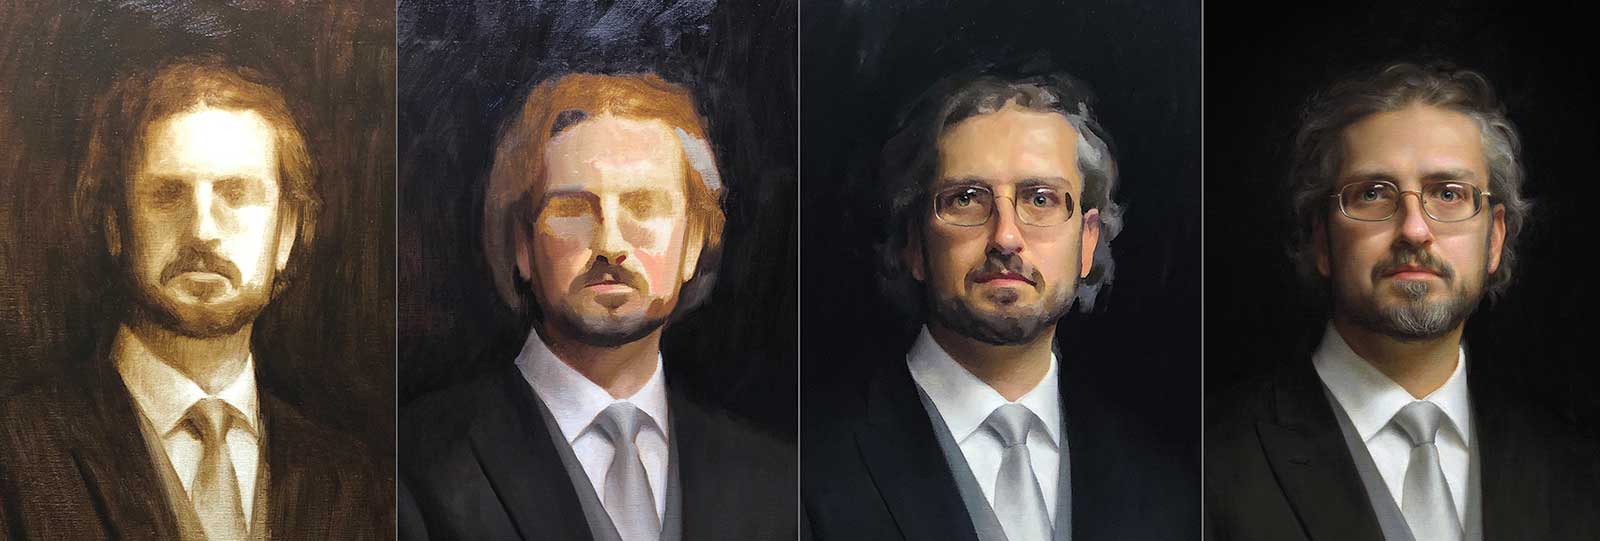
Stages 3-6 Painting Progression: This series of head details shows the basic progression of the painting: umber underpainting; color block-in; adding details and building texture; finished rendering and fine details. I tend to work in anywhere from three to five layers of paint, allowing each layer to dry before beginning the next. Of course, the time I spend on each layer varies greatly. This underpainting took a day to complete, but the upper layers took considerably longer. Painting a picture is a bit like building a house—the rough construction goes very quickly, but then the details and trim work can seem to stretch on forever!
 Stage 7
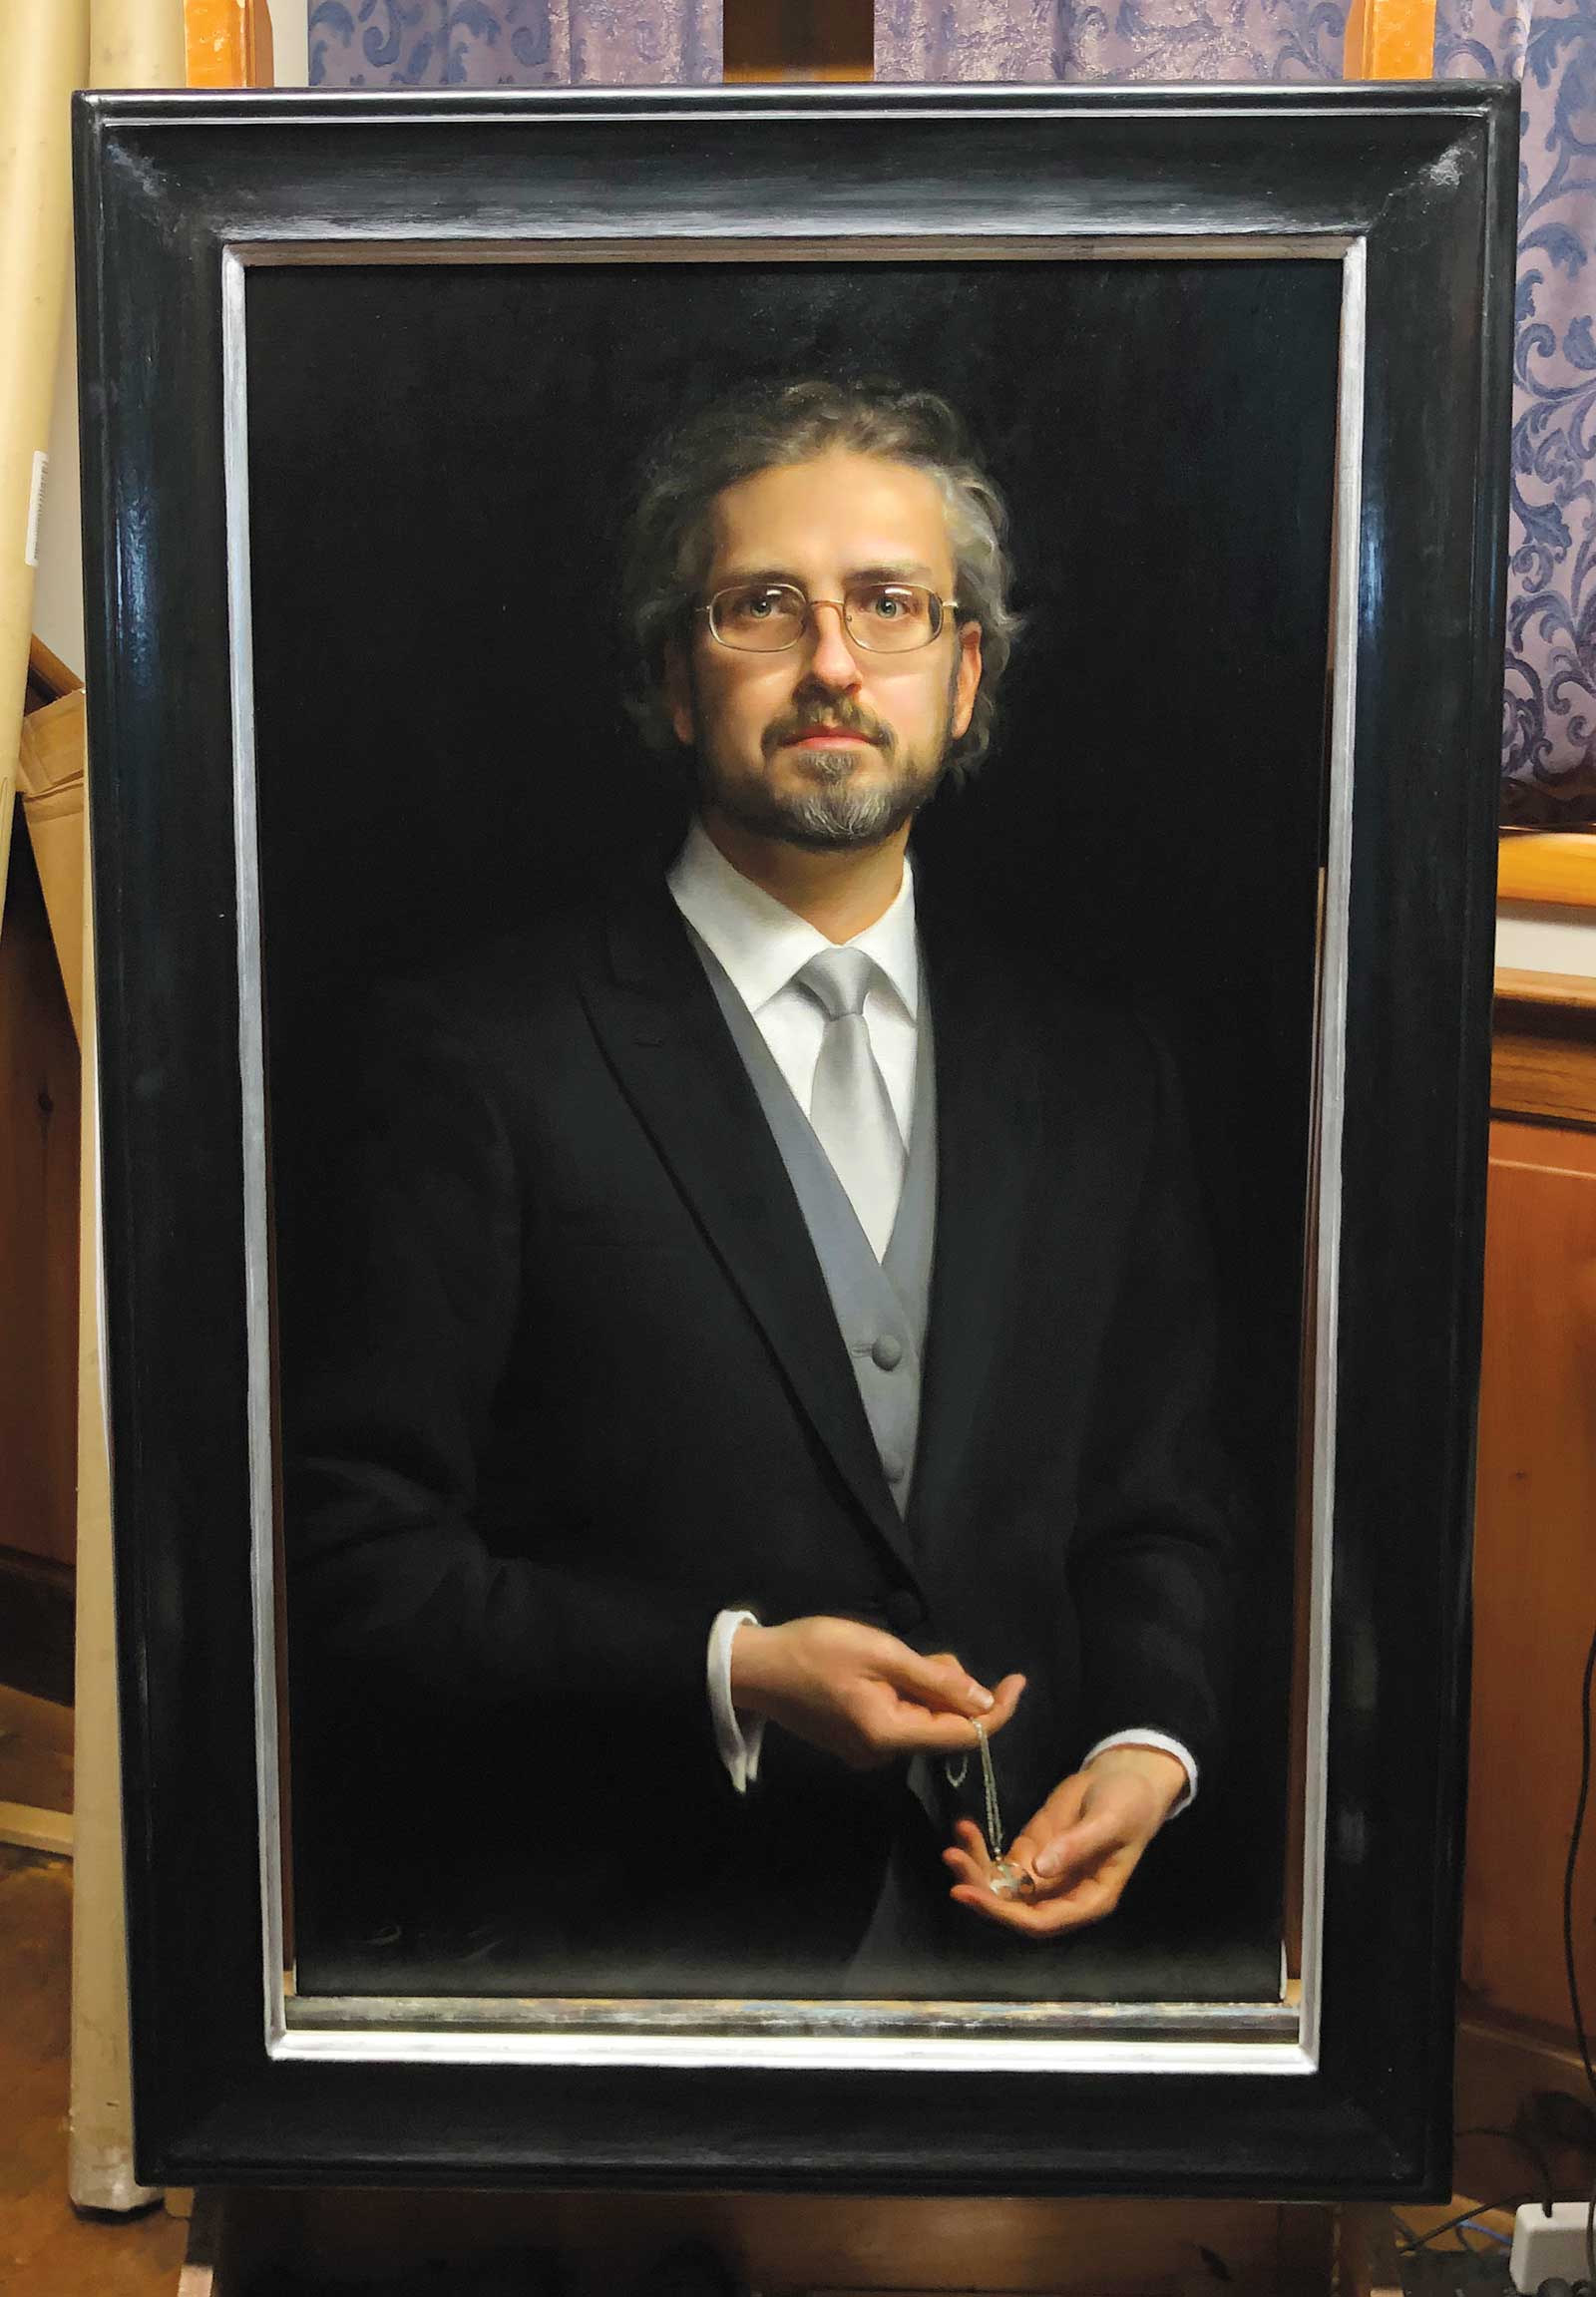
Stage 7 Framing: I made this frame myself, and I was really happy with how it turned out. Sometimes when making final adjustments to a painting, the additional context that the frame provides can help with the subtle rendering decisions. In this case, I had a specific concern: I had worried for much of the painting process that I might have placed myself on the canvas an inch too far to the right. But, after seeing the painting in its frame, I decided that the frame helped balance the space enough to leave the painting as is.
 Stage 8
Stage 8 Finished Artwork: After the finished painting had dried, I brushed on a coat of Gamvar Gloss Varnish. I try to wait a minimum of six weeks before varnishing, and if a painting isn’t needed immediately for an exhibition or unveiling, I will wait up to a year in order to give the paint ample time to dry. Then once the varnish was dry, I took the best high-resolution photo that I could manage, framed the painting, and moved on to my next project. —
Joseph Q. Daily is a classically trained artist living and working in Vestal, New York. The son of two illustrators, he began his formal art training in high school and continued his education at the School of Visual Arts, NYC. Daily was awarded both Best of Show and the People’s Choice Award at the 2005 Portrait Society of America’s International Portrait Competition and a fortuitous meeting with Minnie S. Churchill—director of the (Winston) Churchill Heritage and keynote speaker at the event—threw a struggling career into swift success. Since then, Daily has painted over a hundred commissioned portraits, and his work hangs in collections across America and the UK. Whenever he can, Daily enjoys seeking out paintable subjects in the gardens, fields, and woods surrounding his Vestal home.