


The creation of a good watercolor means carefully working through various stages including the selection of the subject, deciding on the design, and confirming the style I want for the finished painting.
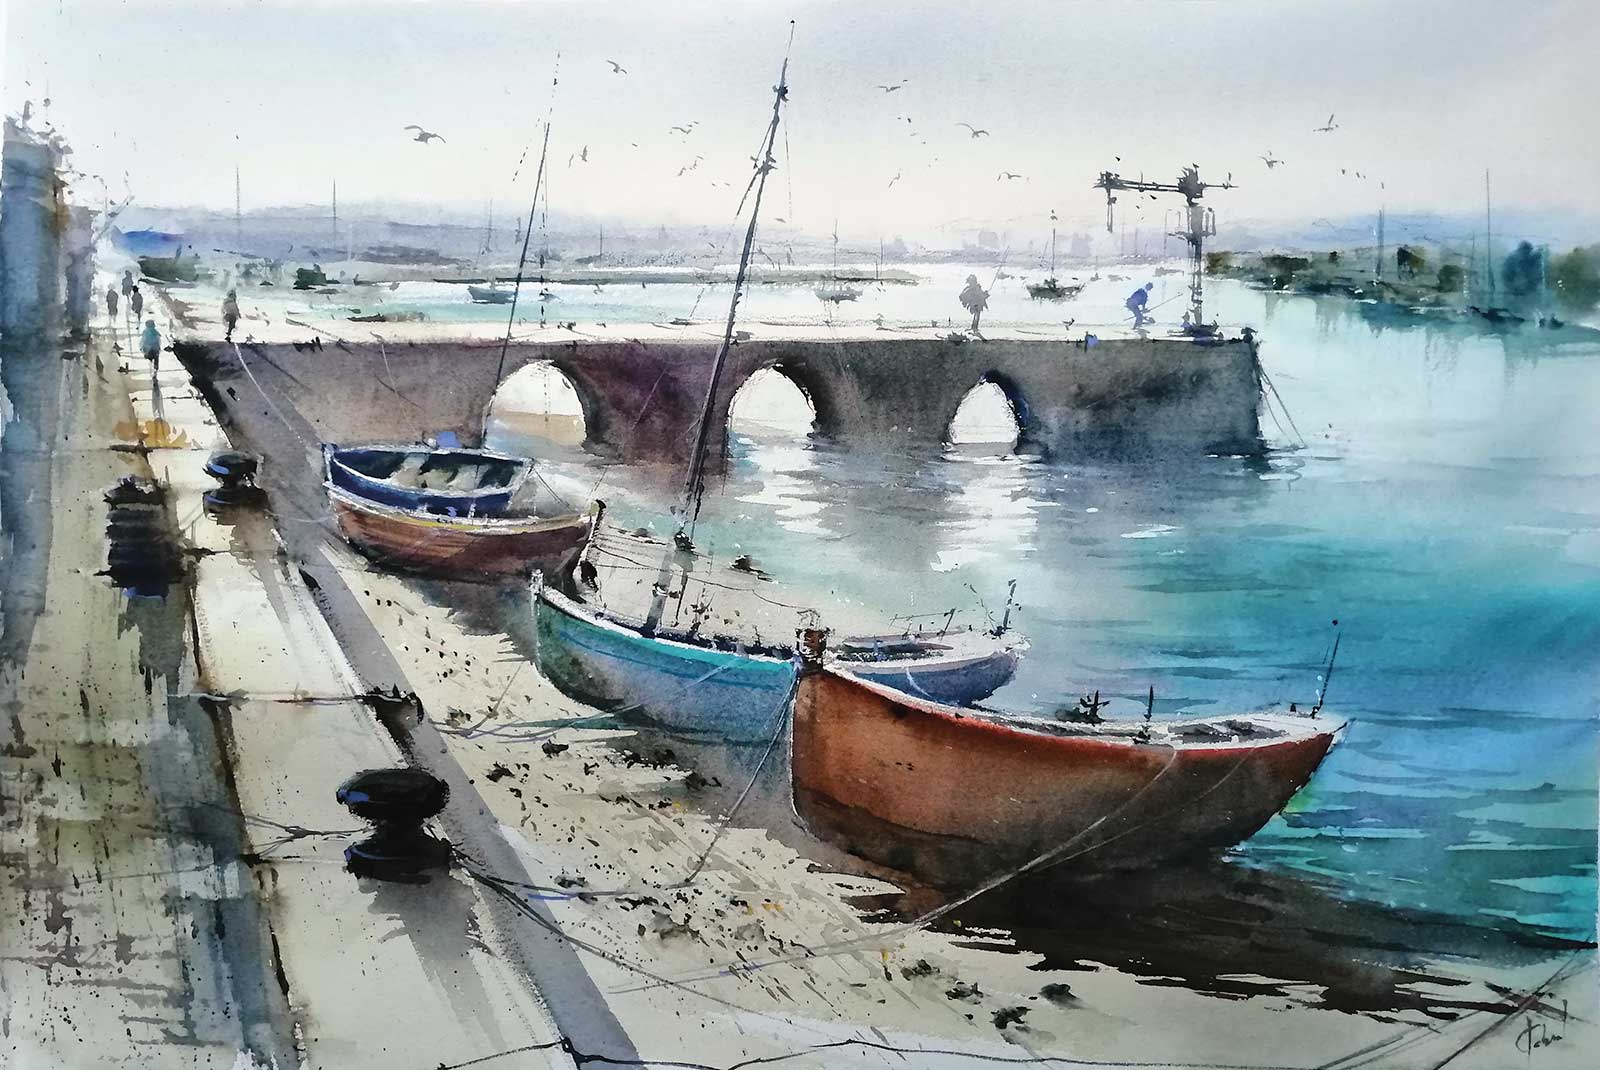 Seixal, watercolor, 15½ x 23" (40 x 58 cm) For this image of a town on the southern shore of the Tejo river, I used faded tones and blues in the background for a sense of perspective and stronger hues and clearer outlines in the foreground. My color choices were ultramarine blue, burnt sienna, raw sienna, Naples yellow and phthalo blue.
The first step is to choose a subject that appeals to me—the colors, the composition and the light must draw me in. I often turn to the landscapes and villages around my home in the Portuguese countryside. With my subject chosen, I proceed to an initial sketch. Then I add in the details that will enrich my final composition, for example, human figures, streetlamps, birds or shadows. This is the moment I give free rein to my imagination. A carefully detailed drawing makes the painting stage much easier because I have already set out for myself the shapes, the light, the perspective and how it is all going to hang together.
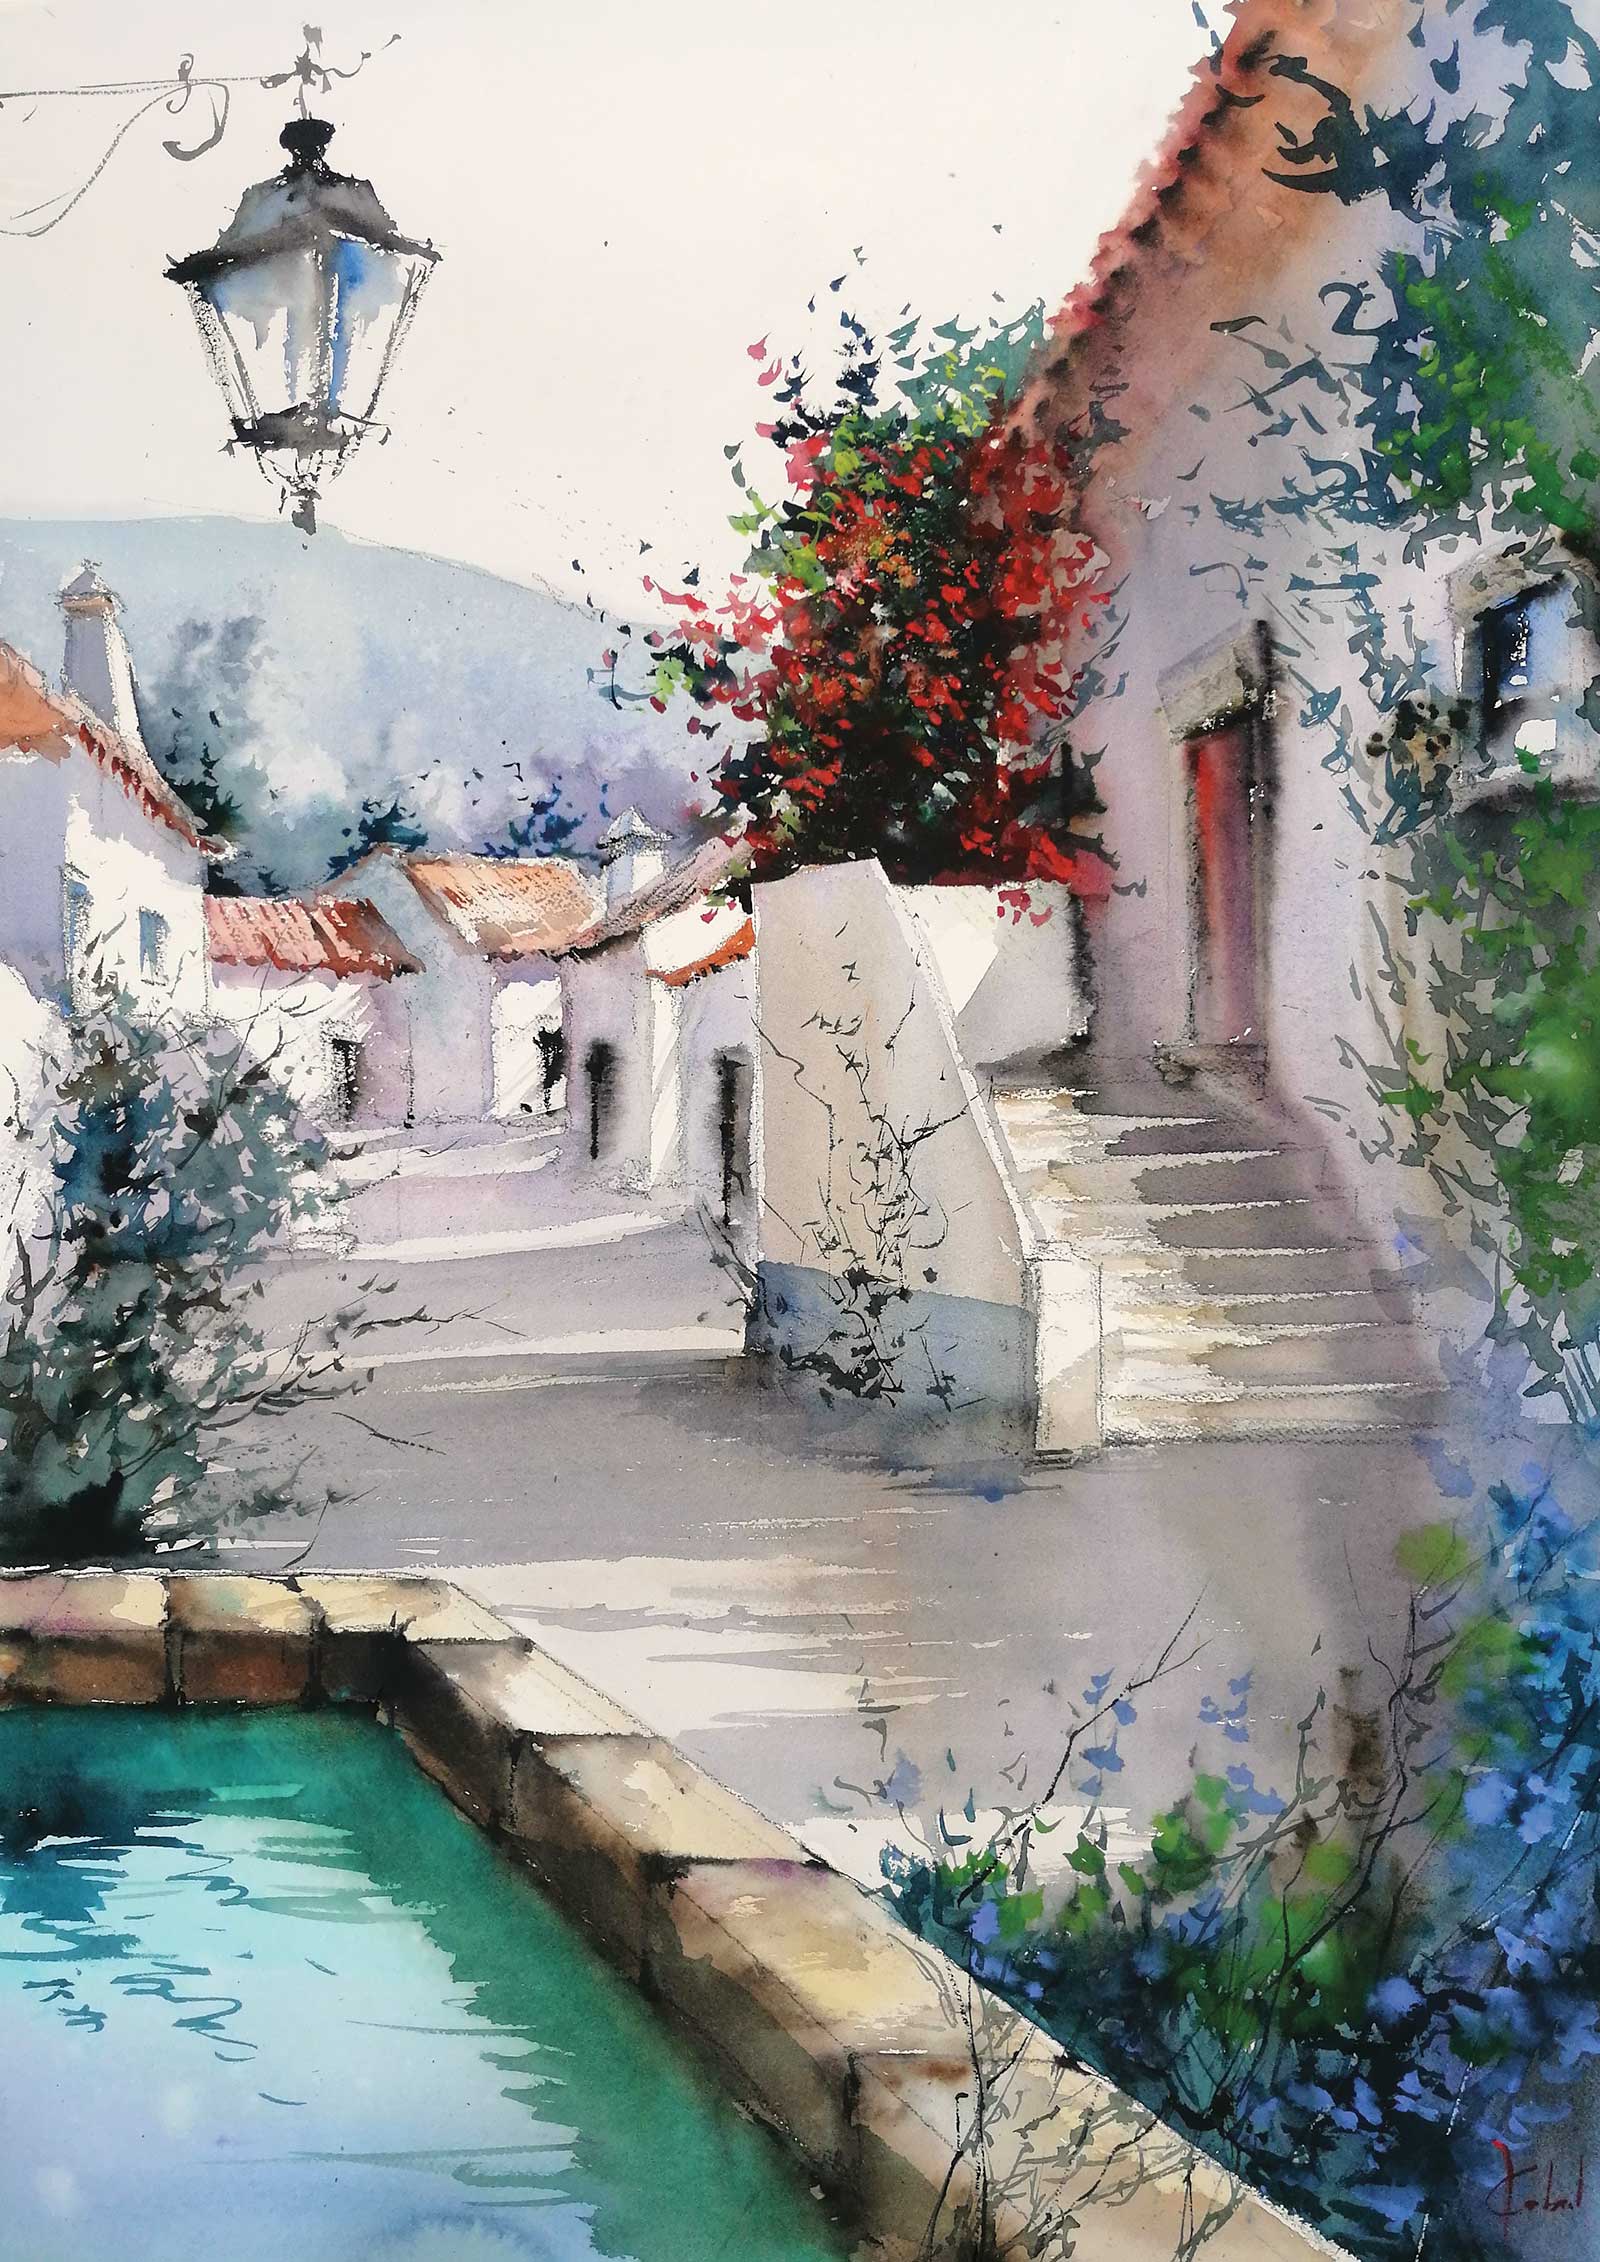 Patio, watercolor, 27½ x 19½" (70 x 50 cm) For this Portuguese landscape, I let the white the paper show through to show the light. I painted the sky, the ground and the shadows with abundant water, and then for the flowers and the details I used strong color and very little water.
Every watercolorist has their own approach to the painting stage. I almost always prefer to start with the top half of the page, and I’ll tilt the paper to a 45-degree angle to allow the water to run down.
I start with dry paper, and then I add water to the sections I’m working on as I go. I add in pigments to the wet part of the paper until I get the color I want. I avoid painting or wetting the paper where I know I am going to want the white of the paper to show through as areas of light. If I accidentally wet or let pigment color a section that I want white, I immediately go over it with paper towel while it’s damp.
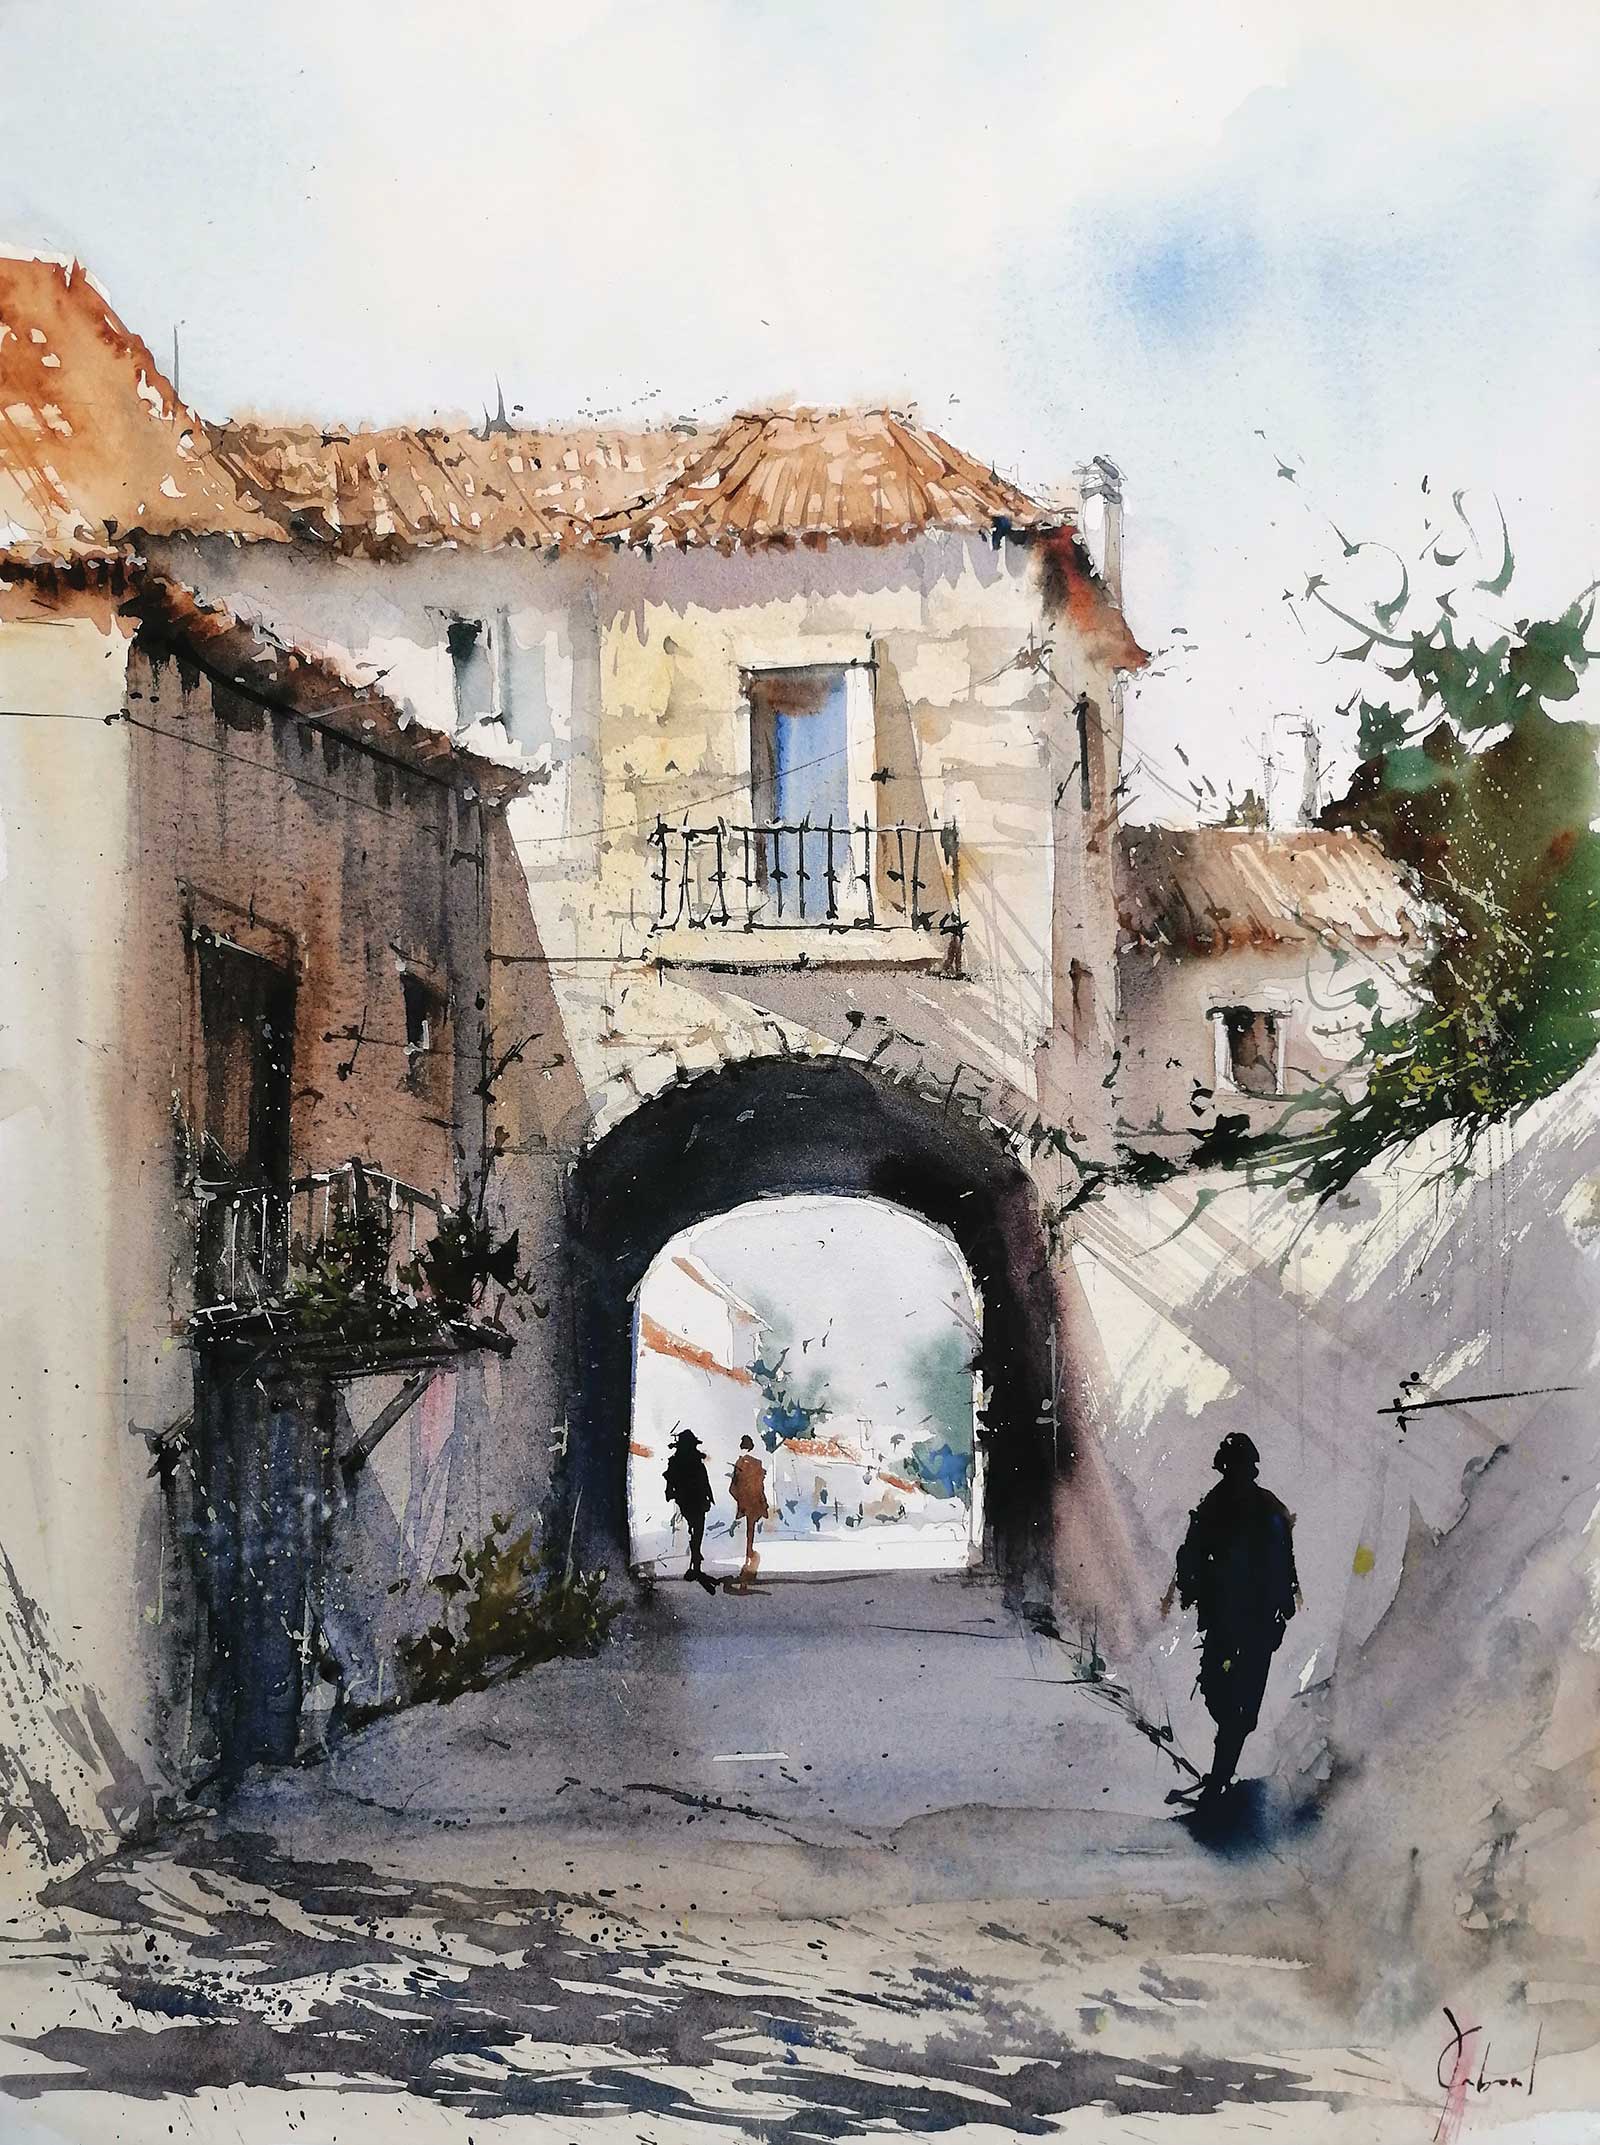 Arches and shade, watercolor, 19½ x 15½" (50 x 40 cm) Naples yellow, burnt umber, burnt sienna and ultramarine blue were all used to paint this watercolor of a Portuguese landscape.
When I want a section to have visible drips, I splash extra water on the brushstrokes and tilt the paper until it is almost vertical, controlling the bleed until I have the effect I want. The secret to achieving transparency in watercolor lies in using rapid brushstrokes, transparent pigments and most importantly in the abundant use of water.
The key to painting watercolors is using water without fear, knowing that accidents will happen and that little by little we learn how to incorporate these unintended effects to create an even better final picture.
When we keep adding brushstrokes to a section of the paper that has already dried, we lose transparency and the same happens if we use undiluted colors. As the watercolor nears completion, I use less water and more color on the foreground, and I finish with undiluted paint for the final touches of light and color.
My Art in the Making TAVIRA
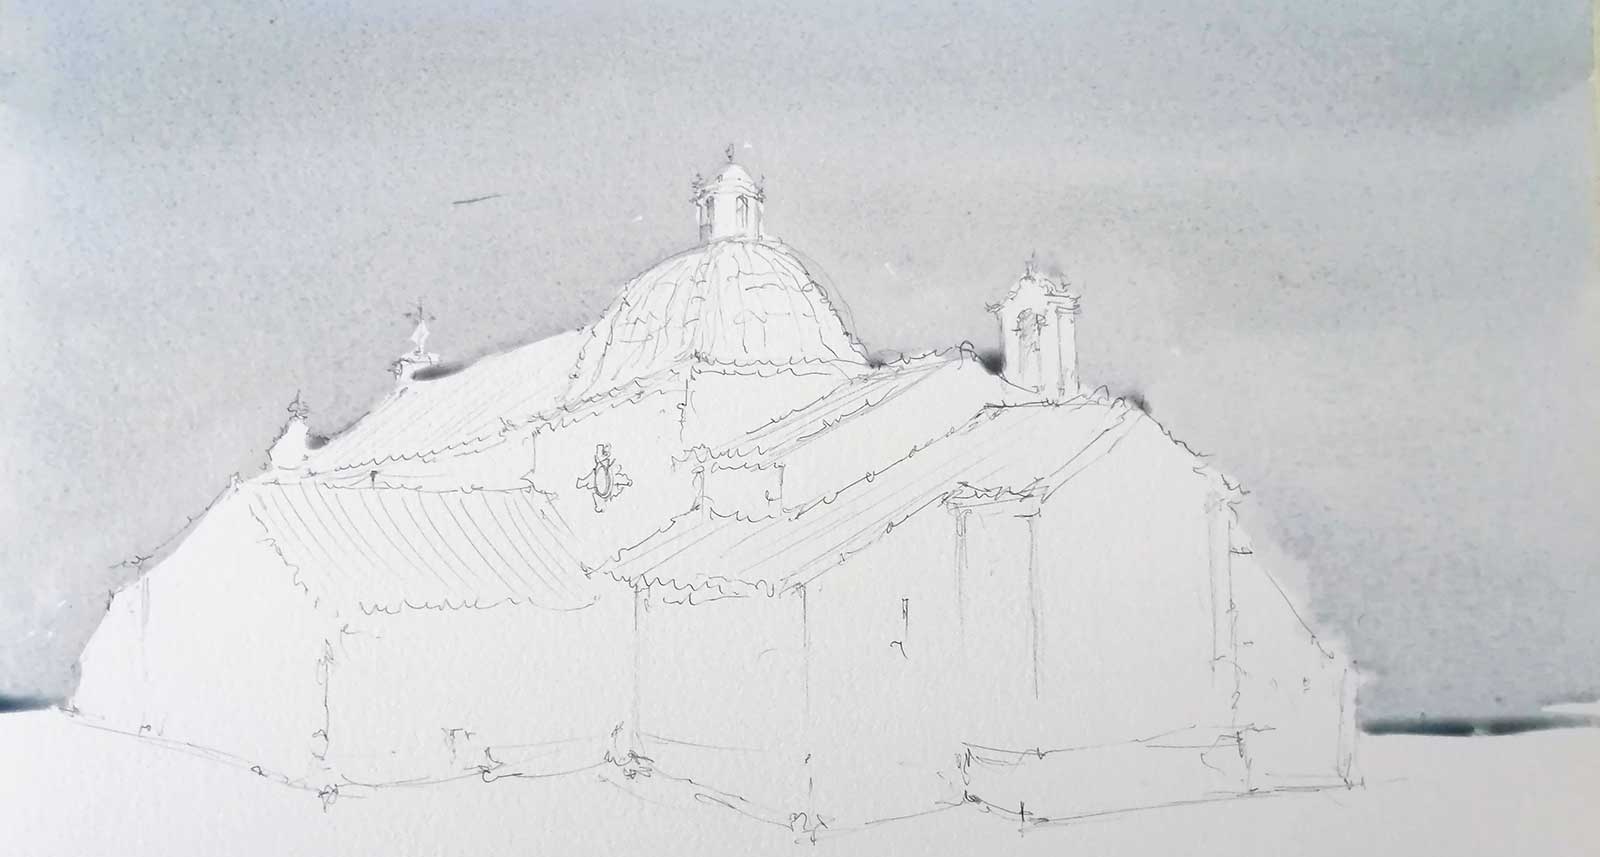
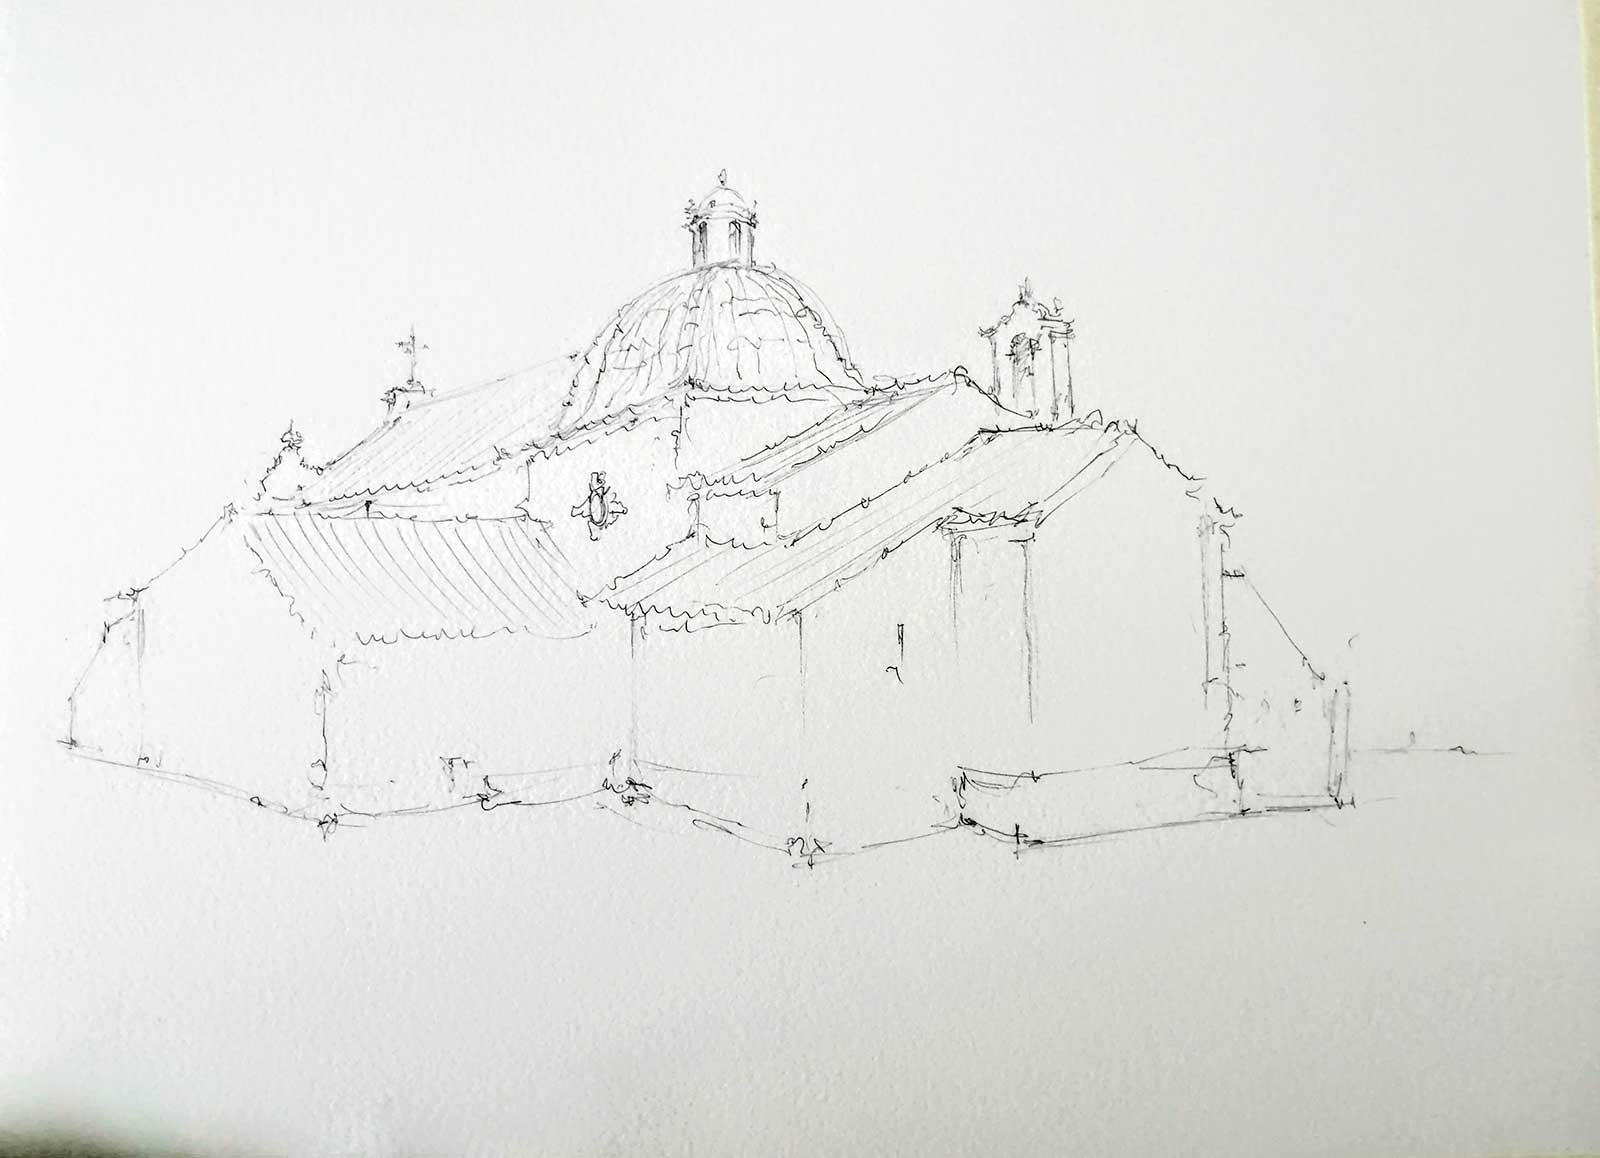 Stage 1Stage 1 Ink Sketch
The first stage begins with making a simple ink drawing.
WHAT THE ARTIST USED
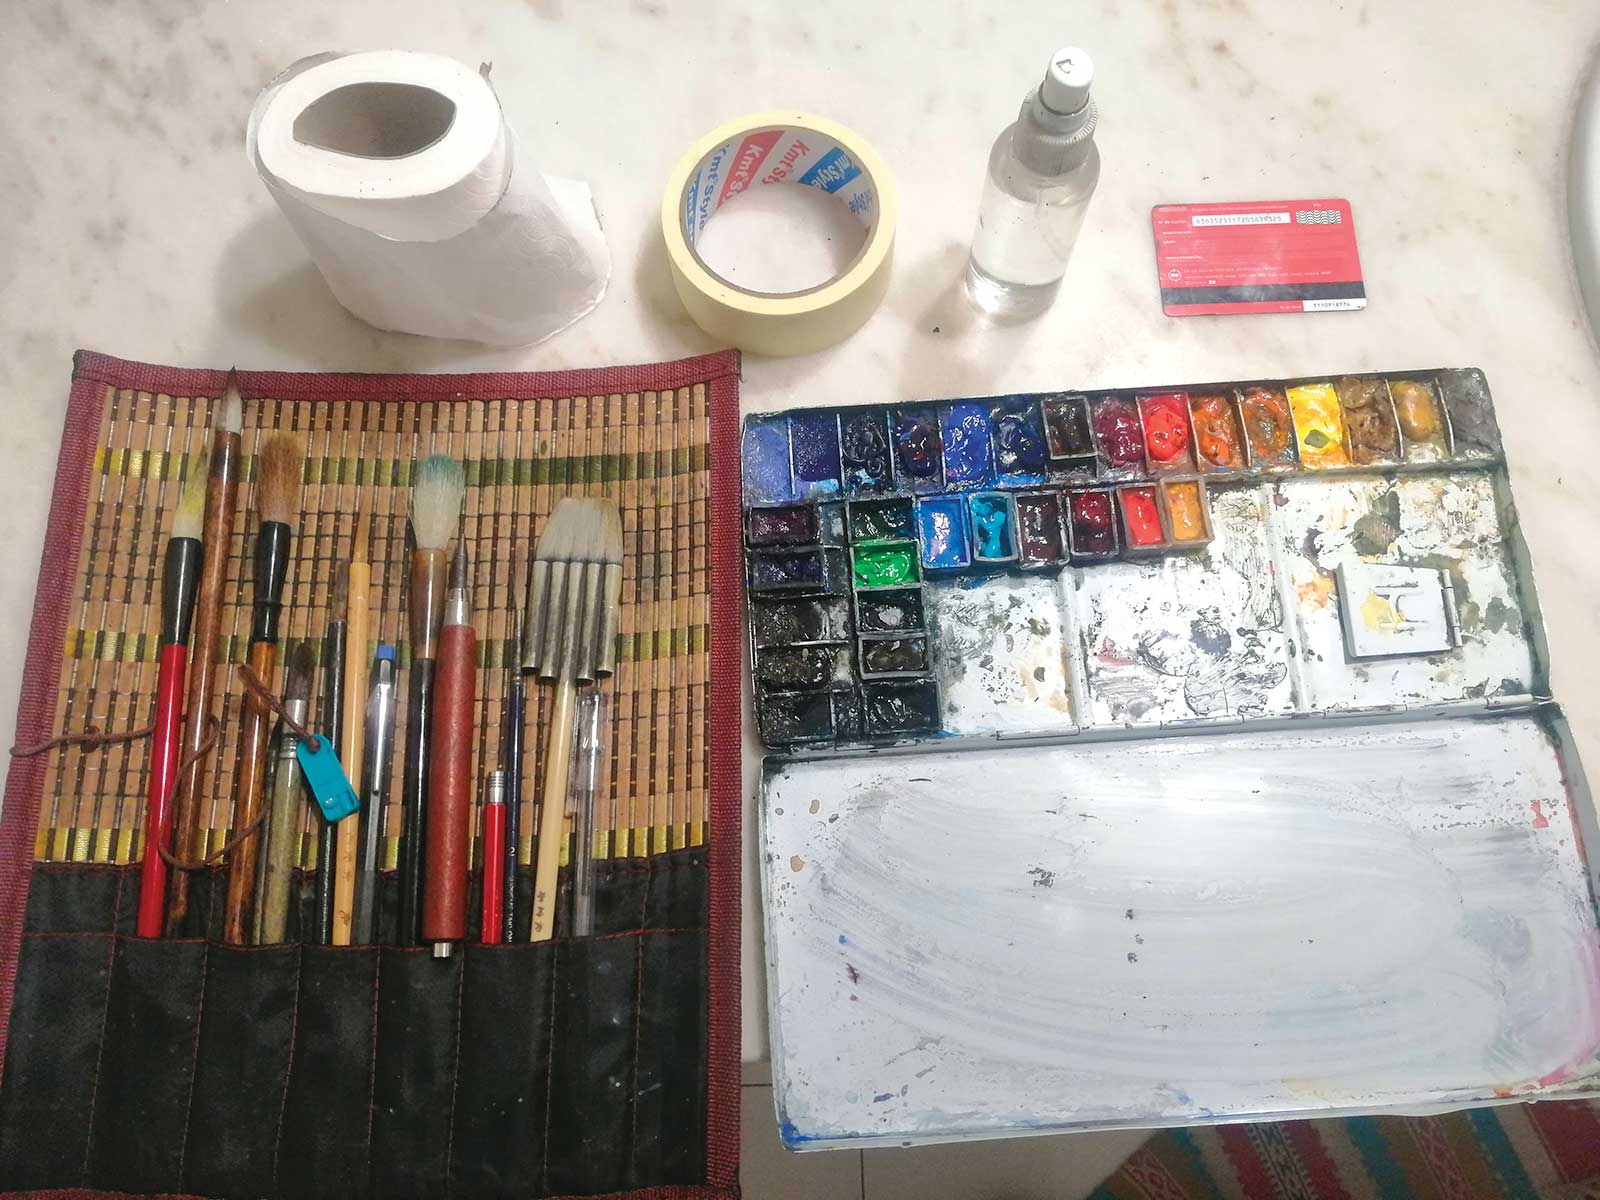 Watercolors
Ultramarine blue, Cobalt blue, Phthalo blue, Lavender, Violet, Burnt sienna, Alizarin crimson, Brown madder, Cadmium red, Cadmium orange, Lemon yellow, Naples yellow, Raw sienna, Yellow ochre, Raw umber, Payne’s gray, Sepia, Hooker green
Brushes
Large, medium and small brushes (primarily Chinese calligraphy brushes)
Additional Supplies
300 gsm paper, Palette, Water bucket, Hand towel, Paper towels, 6B pencil, Tape, Plastic card
 Stage 2
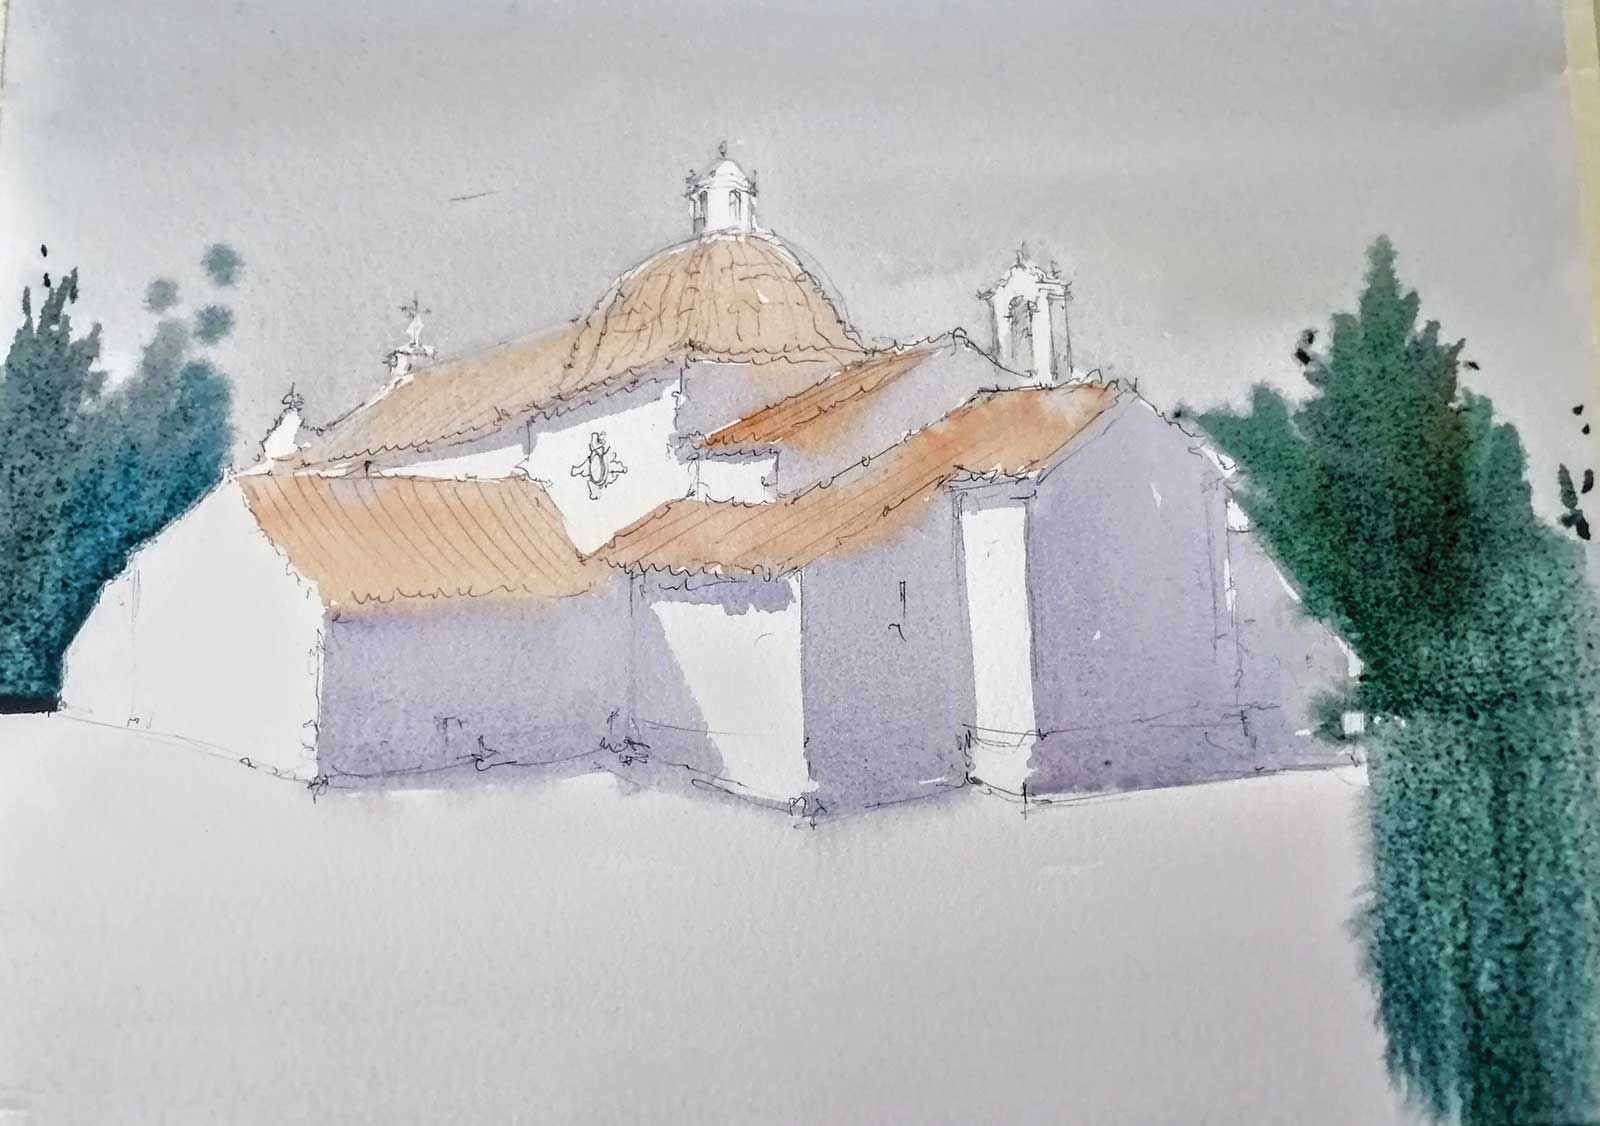
Stage 2 First Applications of Color
With the paper at a 45-degree angle, I use a lot of water with cobalt blue and raw umber. I use a paper towel to soak up the excess water near the rooftops, which are still visible.
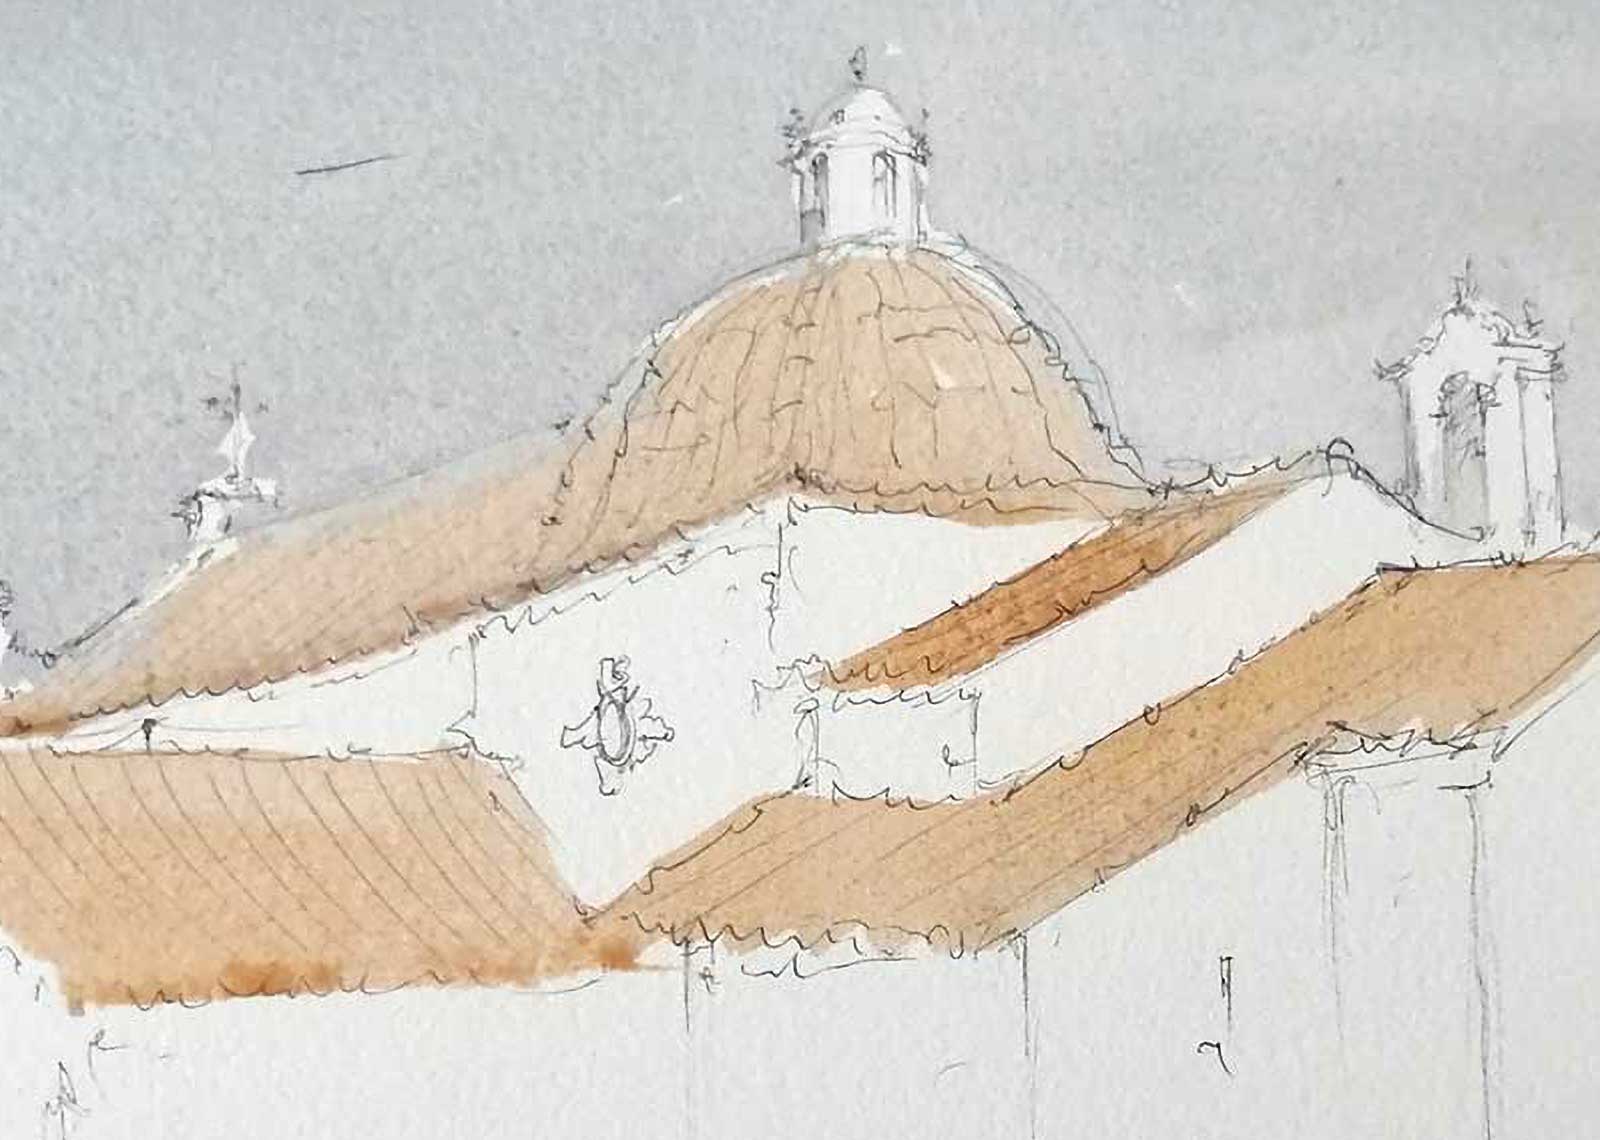 Stage 3
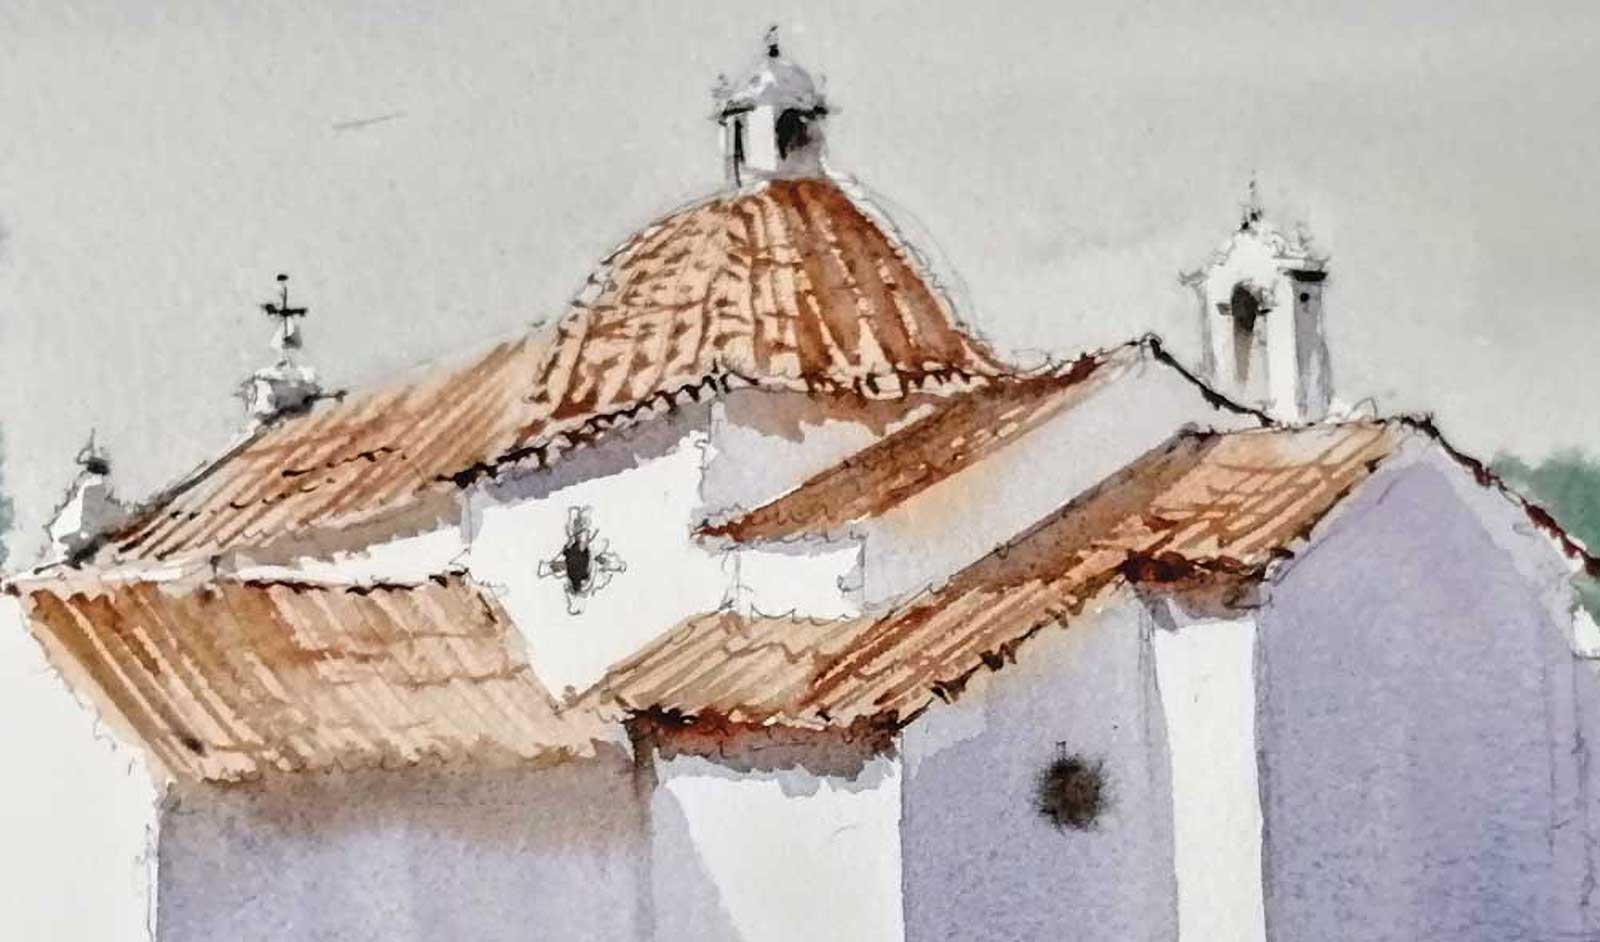
Stage 3 Rooftops
I paint the rooftops with burnt sienna.
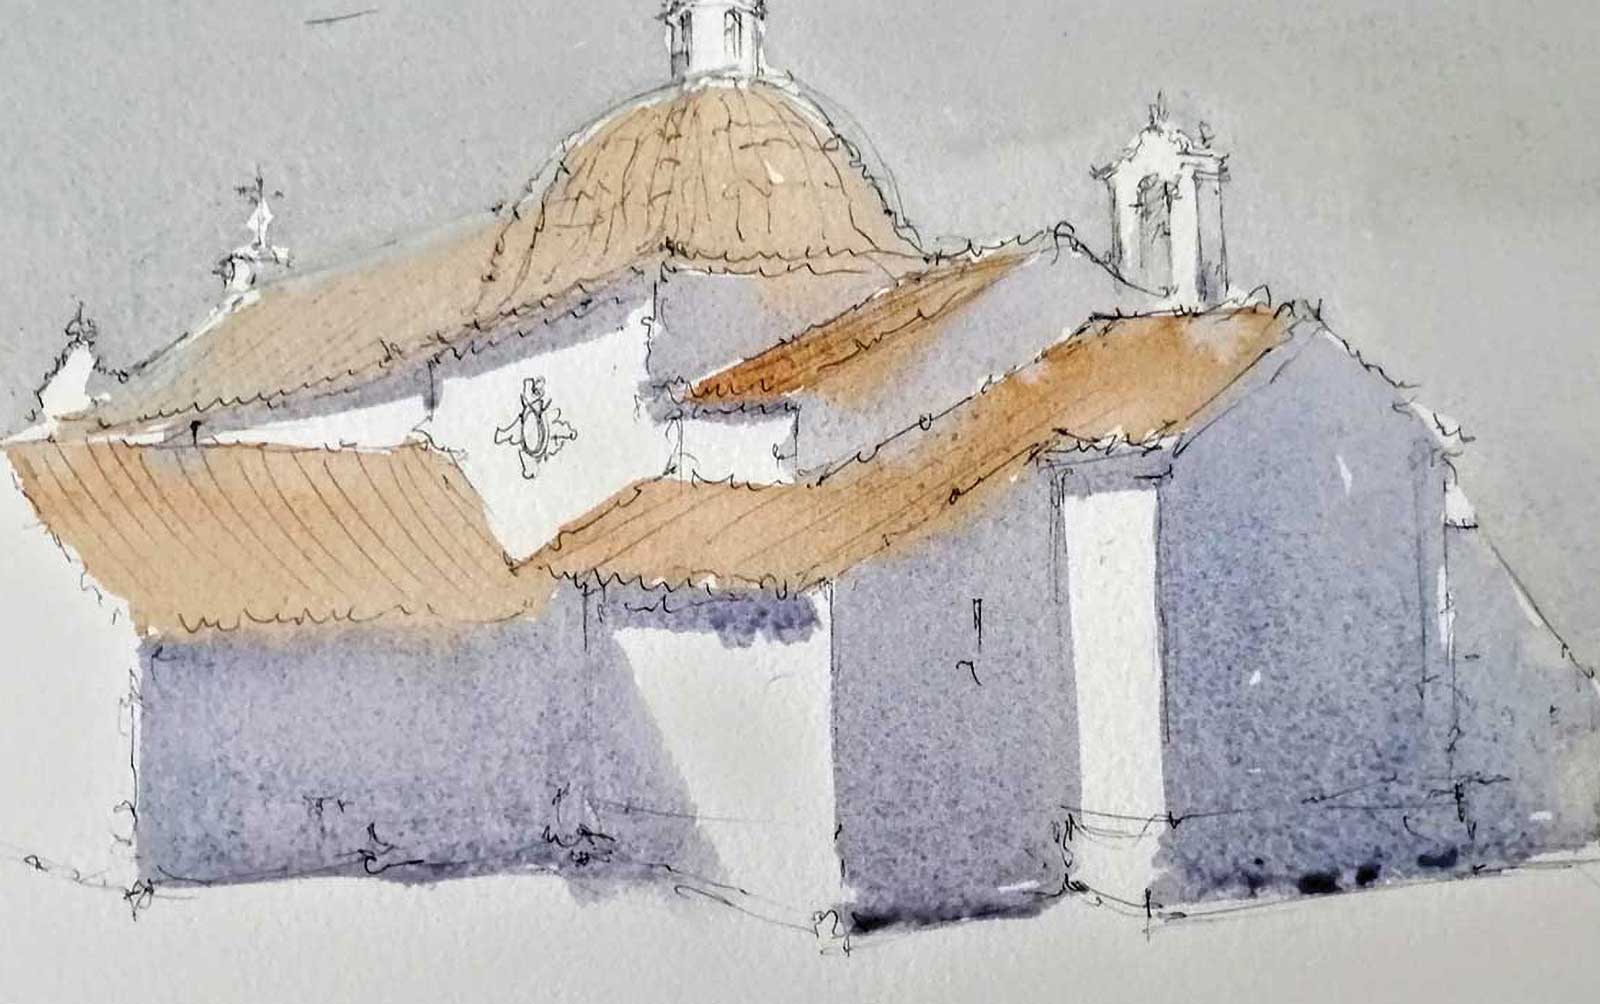 Stage 4
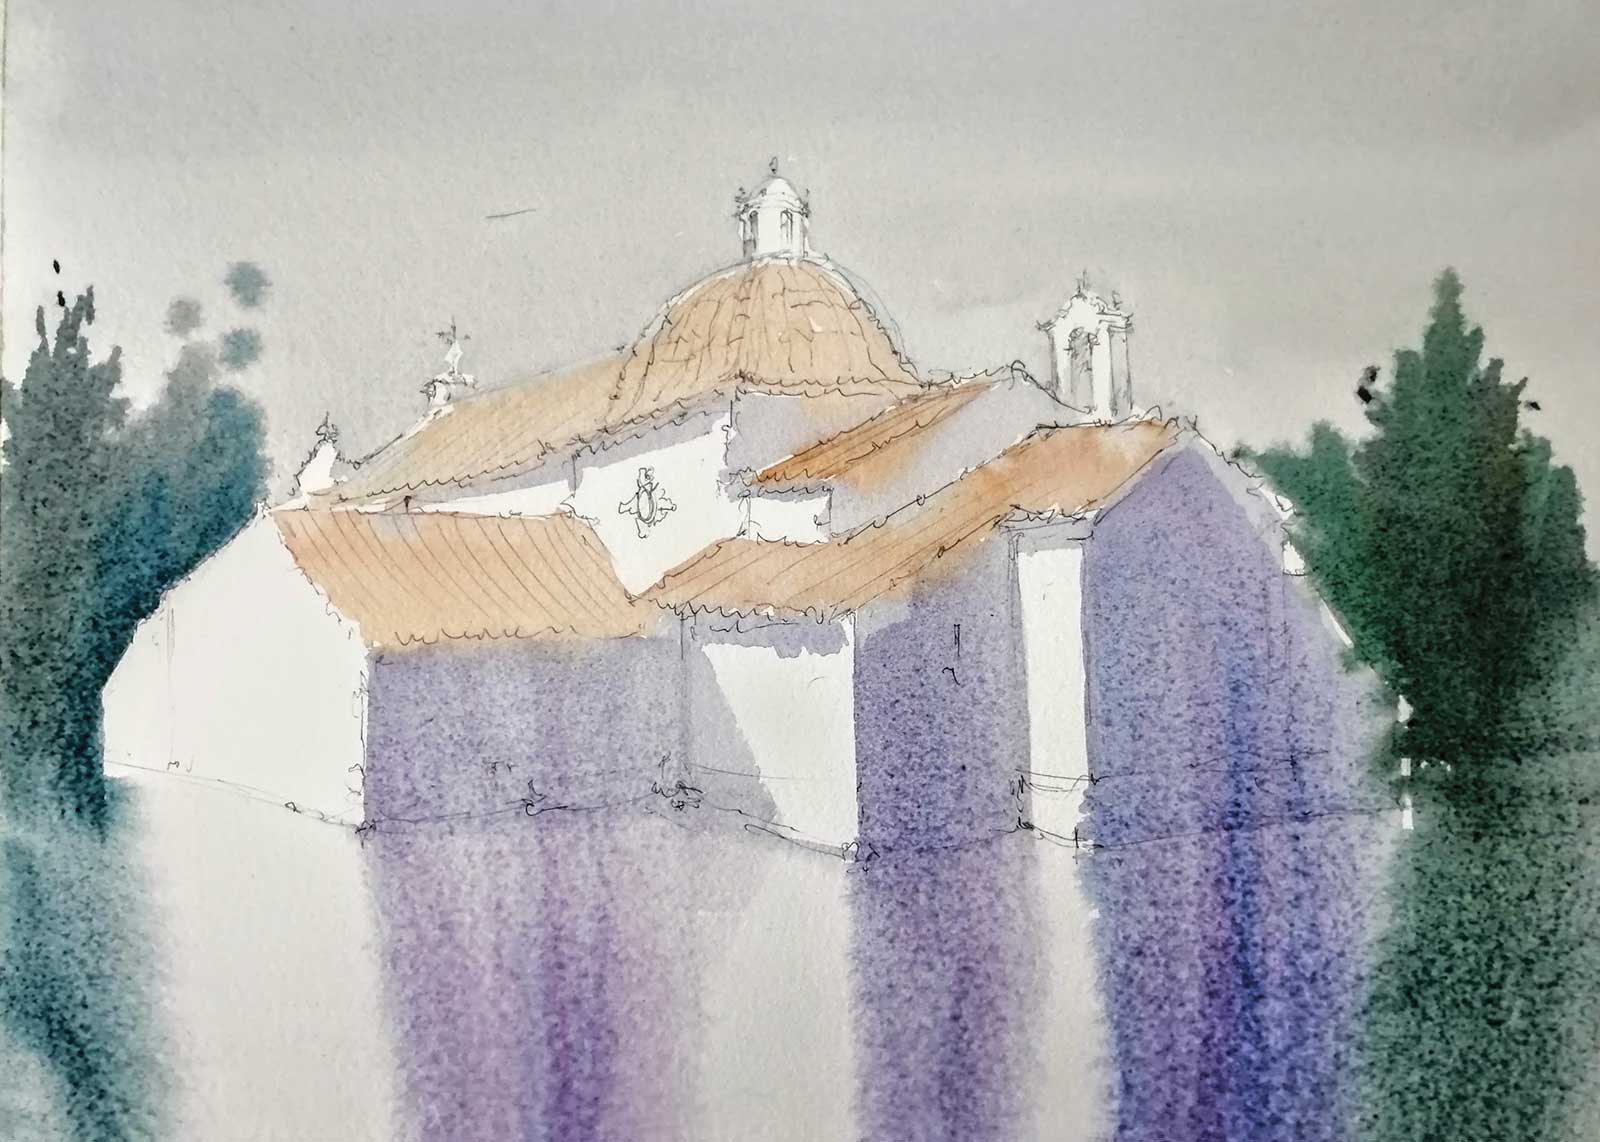
Stage 4 SHADOWS
I paint all the shadowed areas of the facades with a mixture of cobalt blue, raw umber and alizarin crimson.
 Stage 5
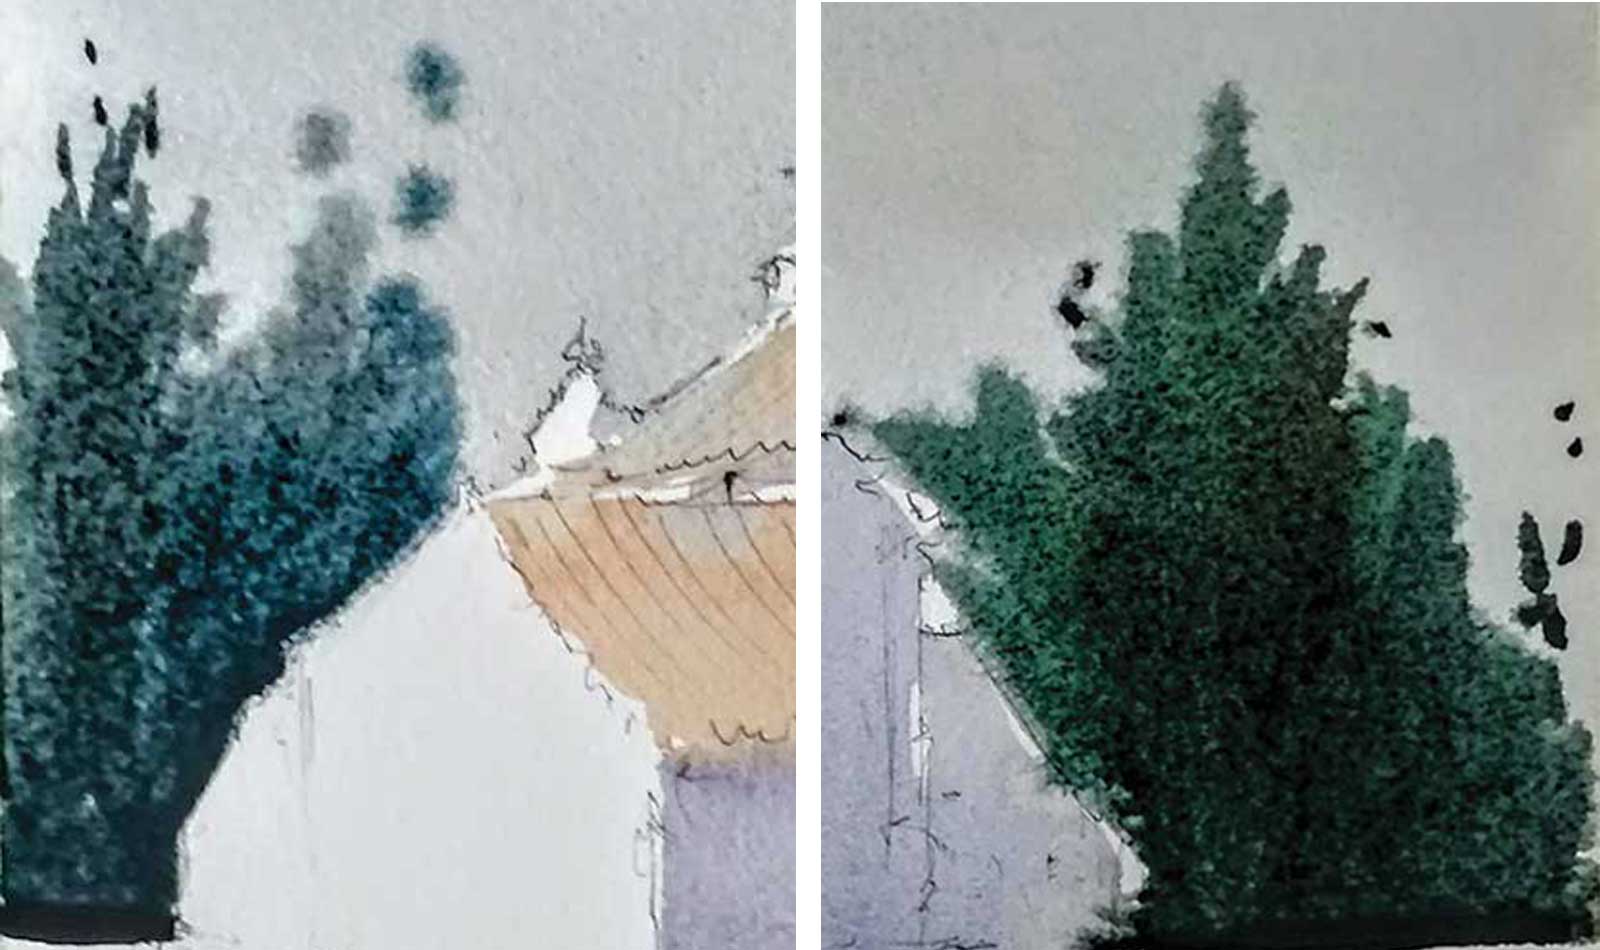
Stage 5 Adding Color to the Trees
I paint the trees next to the house with a mixture of hooker green and burnt sienna.
 Stage 6
 Stage 6
Stage 6 Letting the Pigment Run Down
I soak the paper for the area of the ground before painting it and allow the paint from the facades and the trees to flow down. I might need to paint the facades again to get the original color back.
 Stage 7
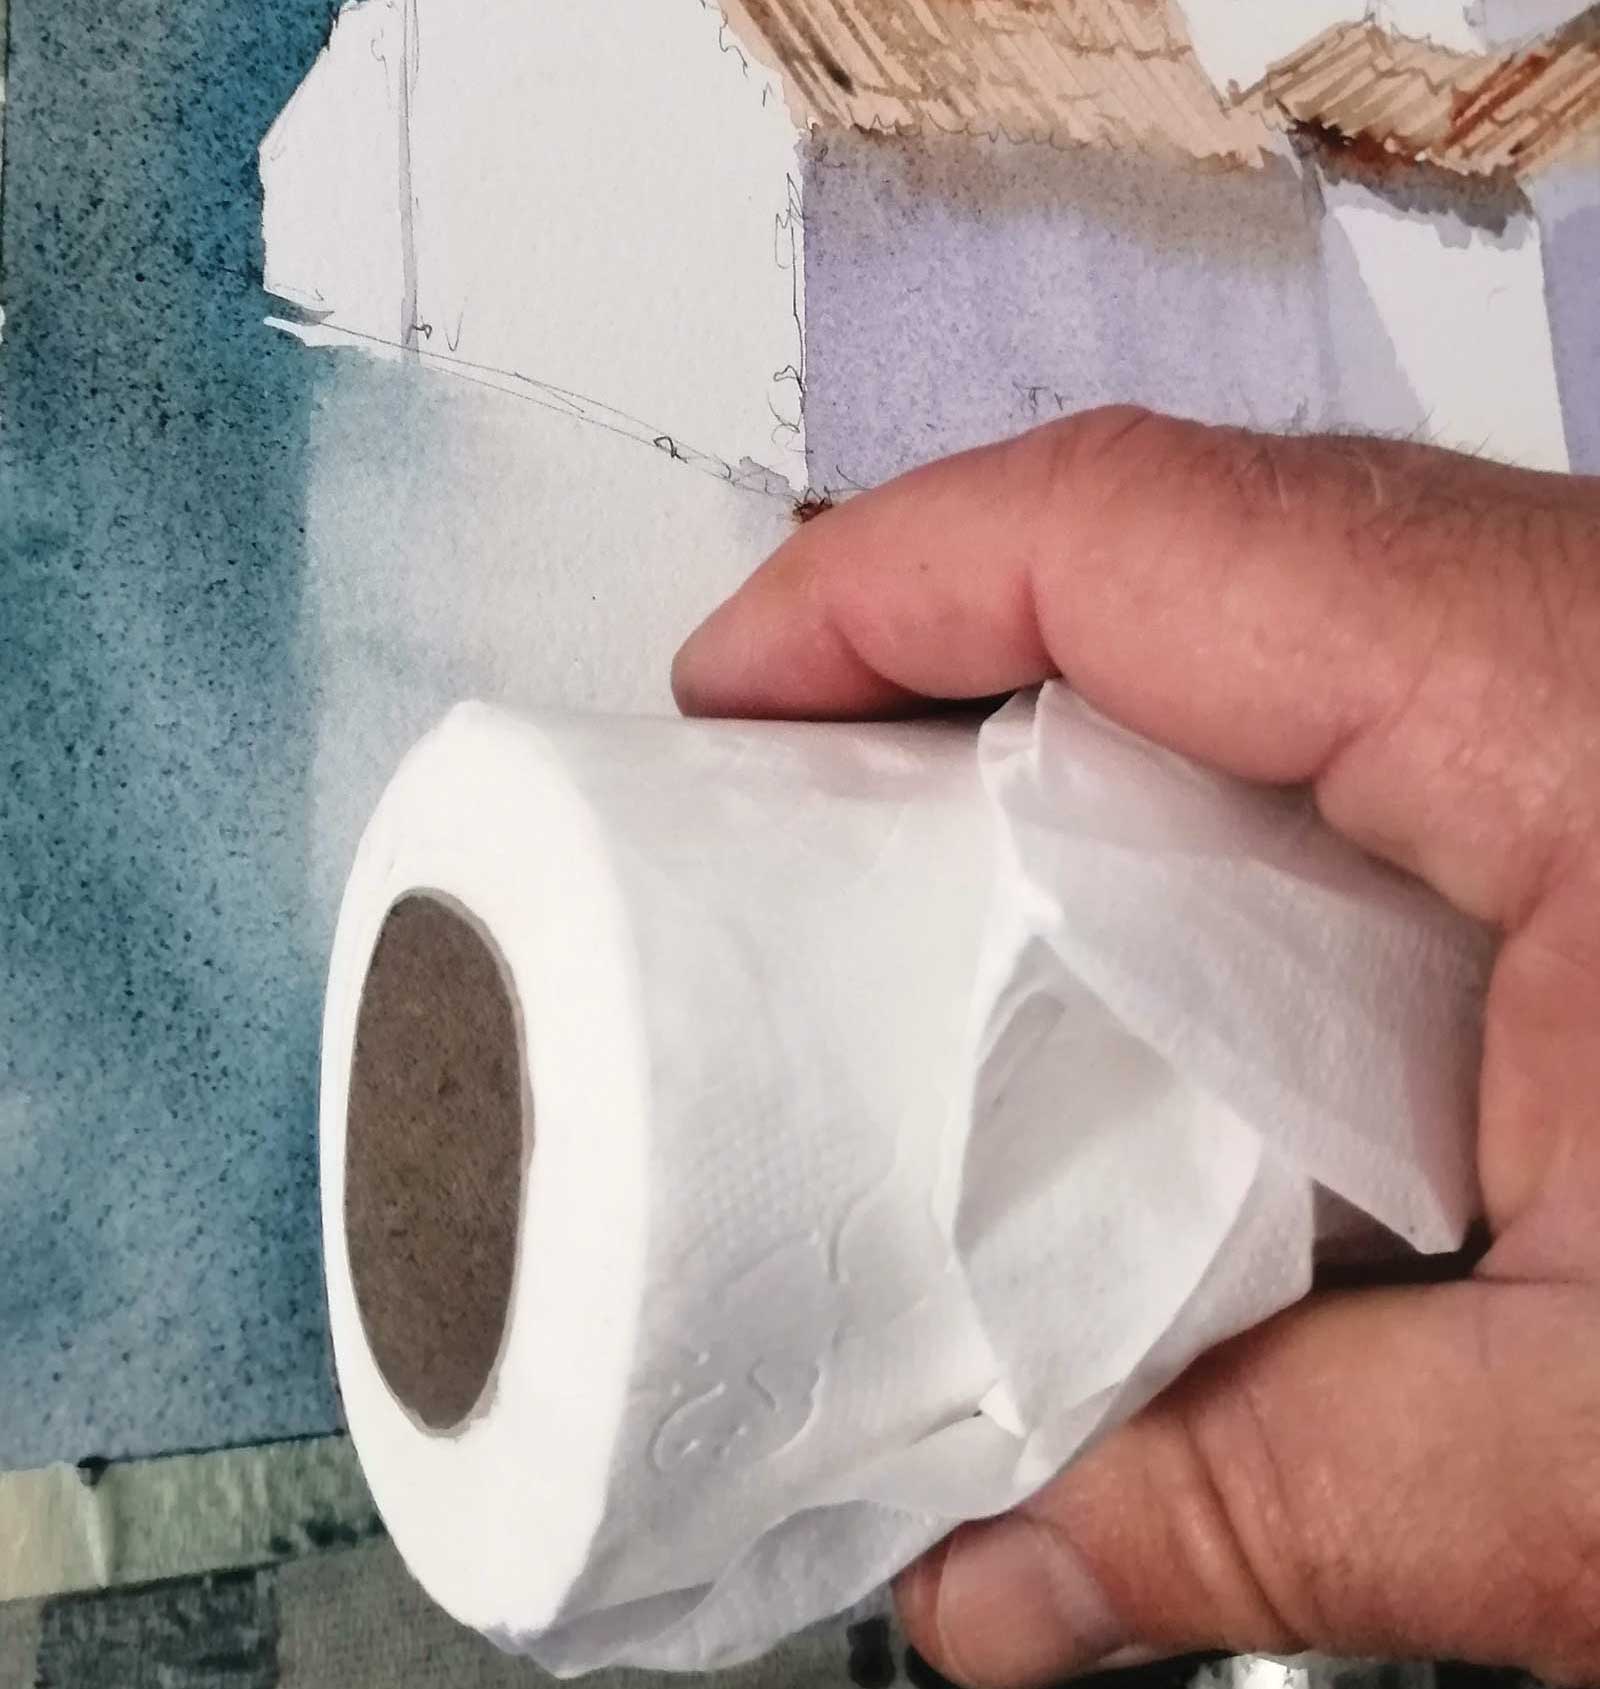
Stage 7 Negative Space
I use absorbent paper to remove paint and let the white of the paper show through.
 Stage 8
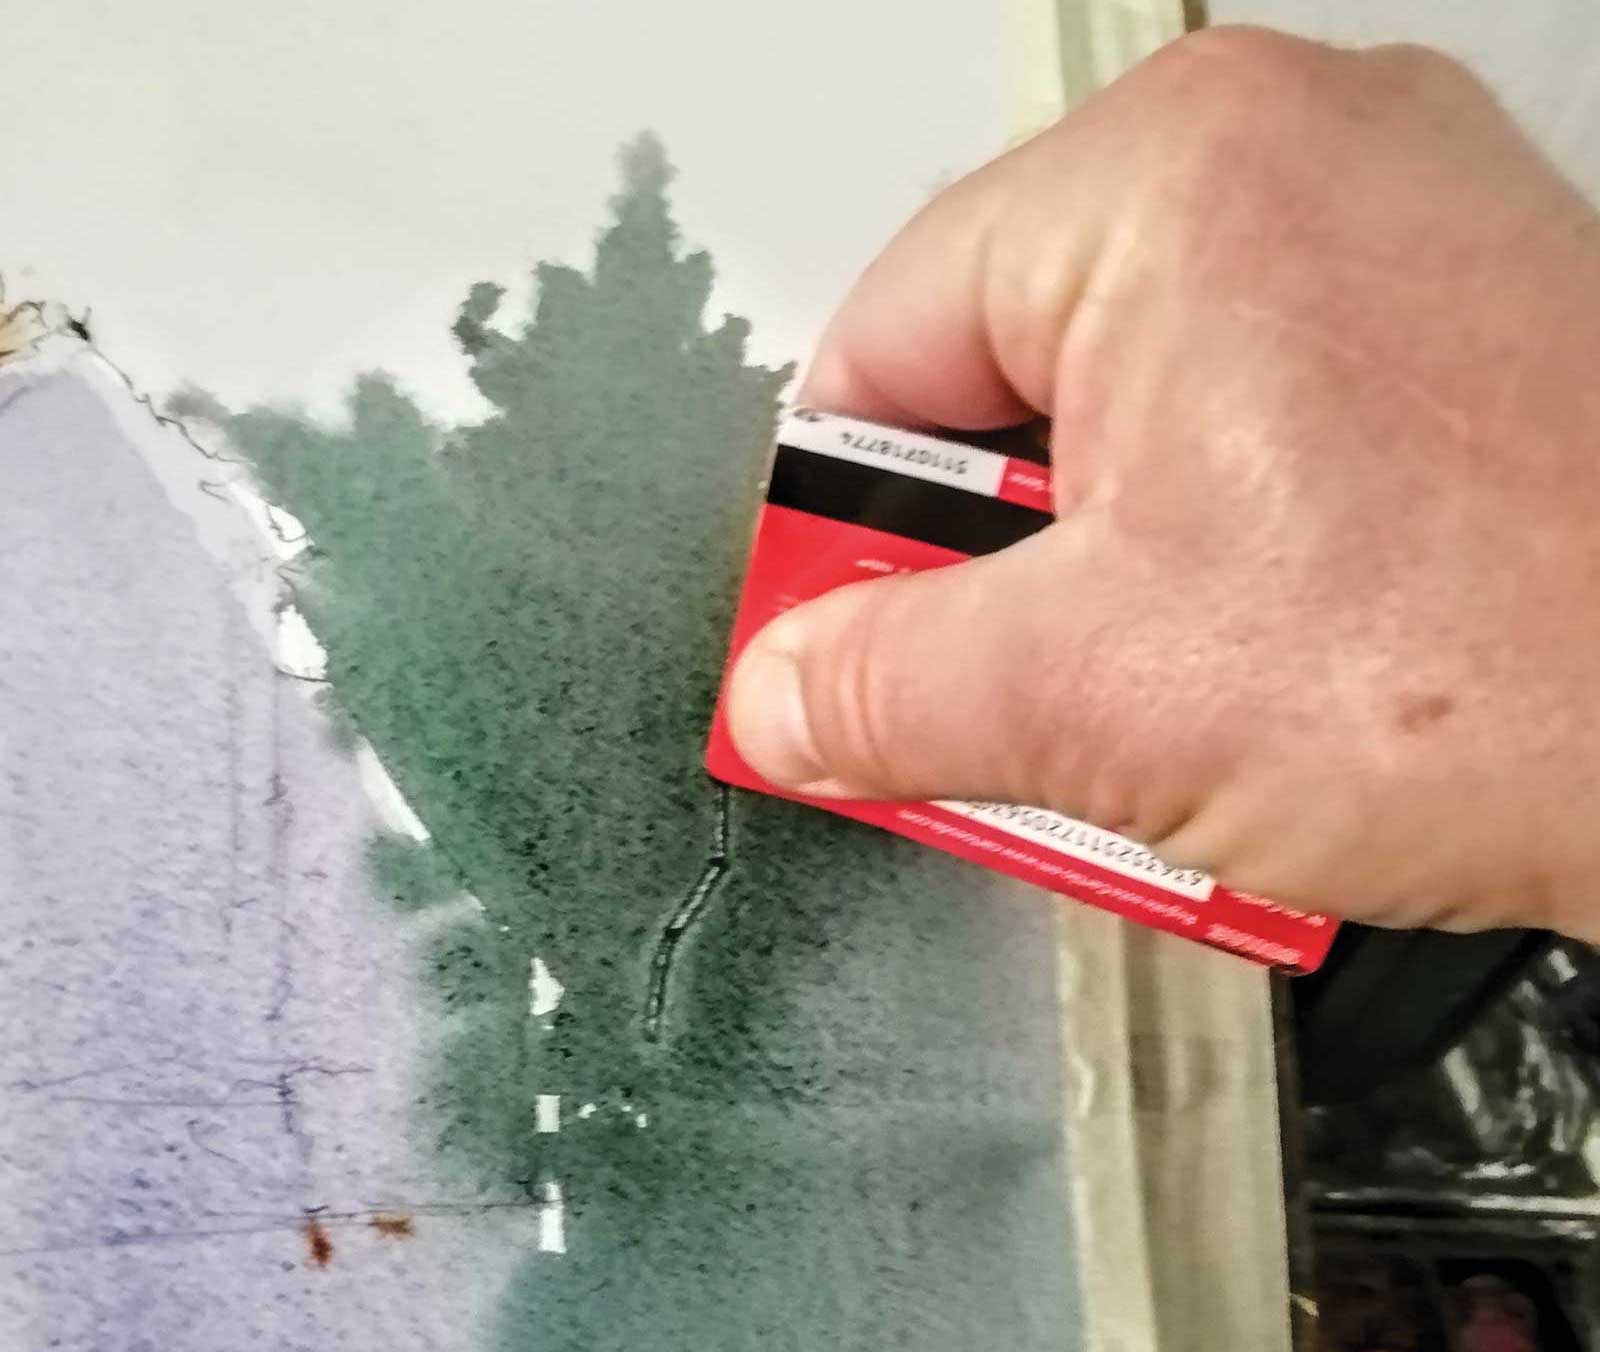
Stage 8 Tree Trunks
I scrape the paint with a plastic card while it’s wet to create the trunks of the trees.
 Stage 9
Stage 9 Focusing on the Darks
At this point I accentuate the darker details on the rooftops.
 Stage 10
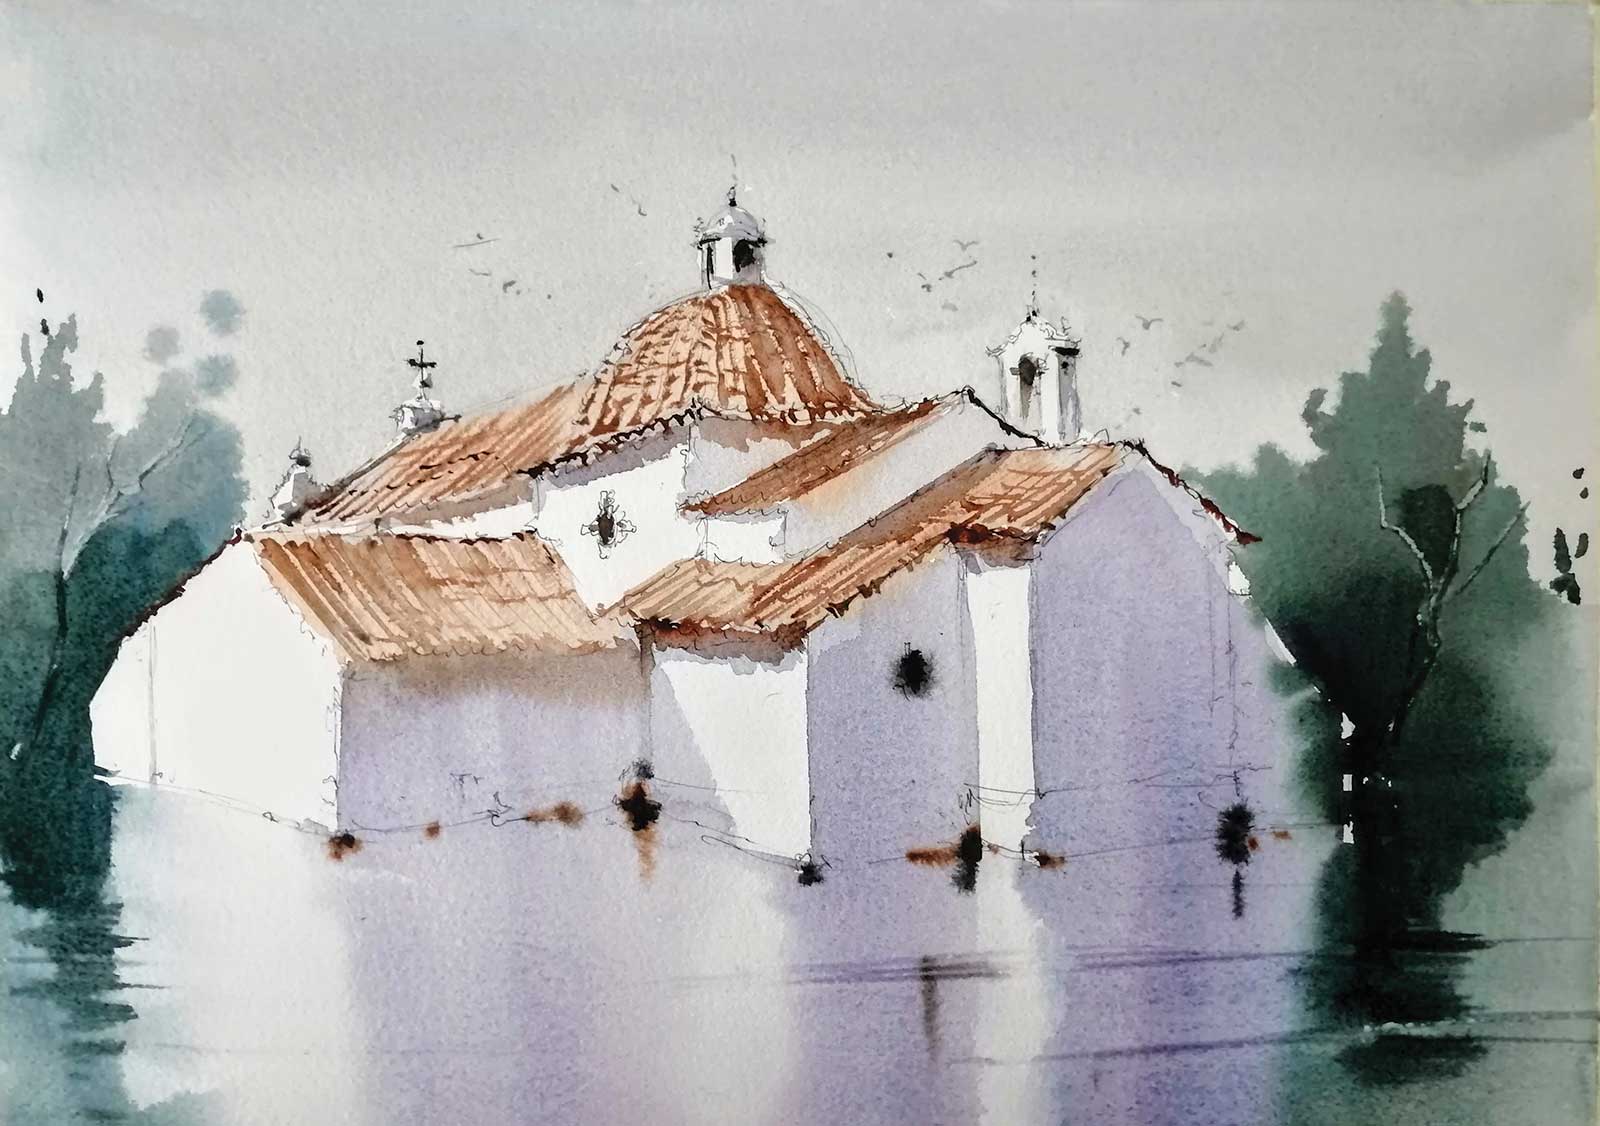
Stage 10 Finished Artwork
TAVIRA, watercolor, 14 x 15½" (36 x 40 cm) I finish everything off by darkening some of the green areas, and the painting is now complete.
About the Artist
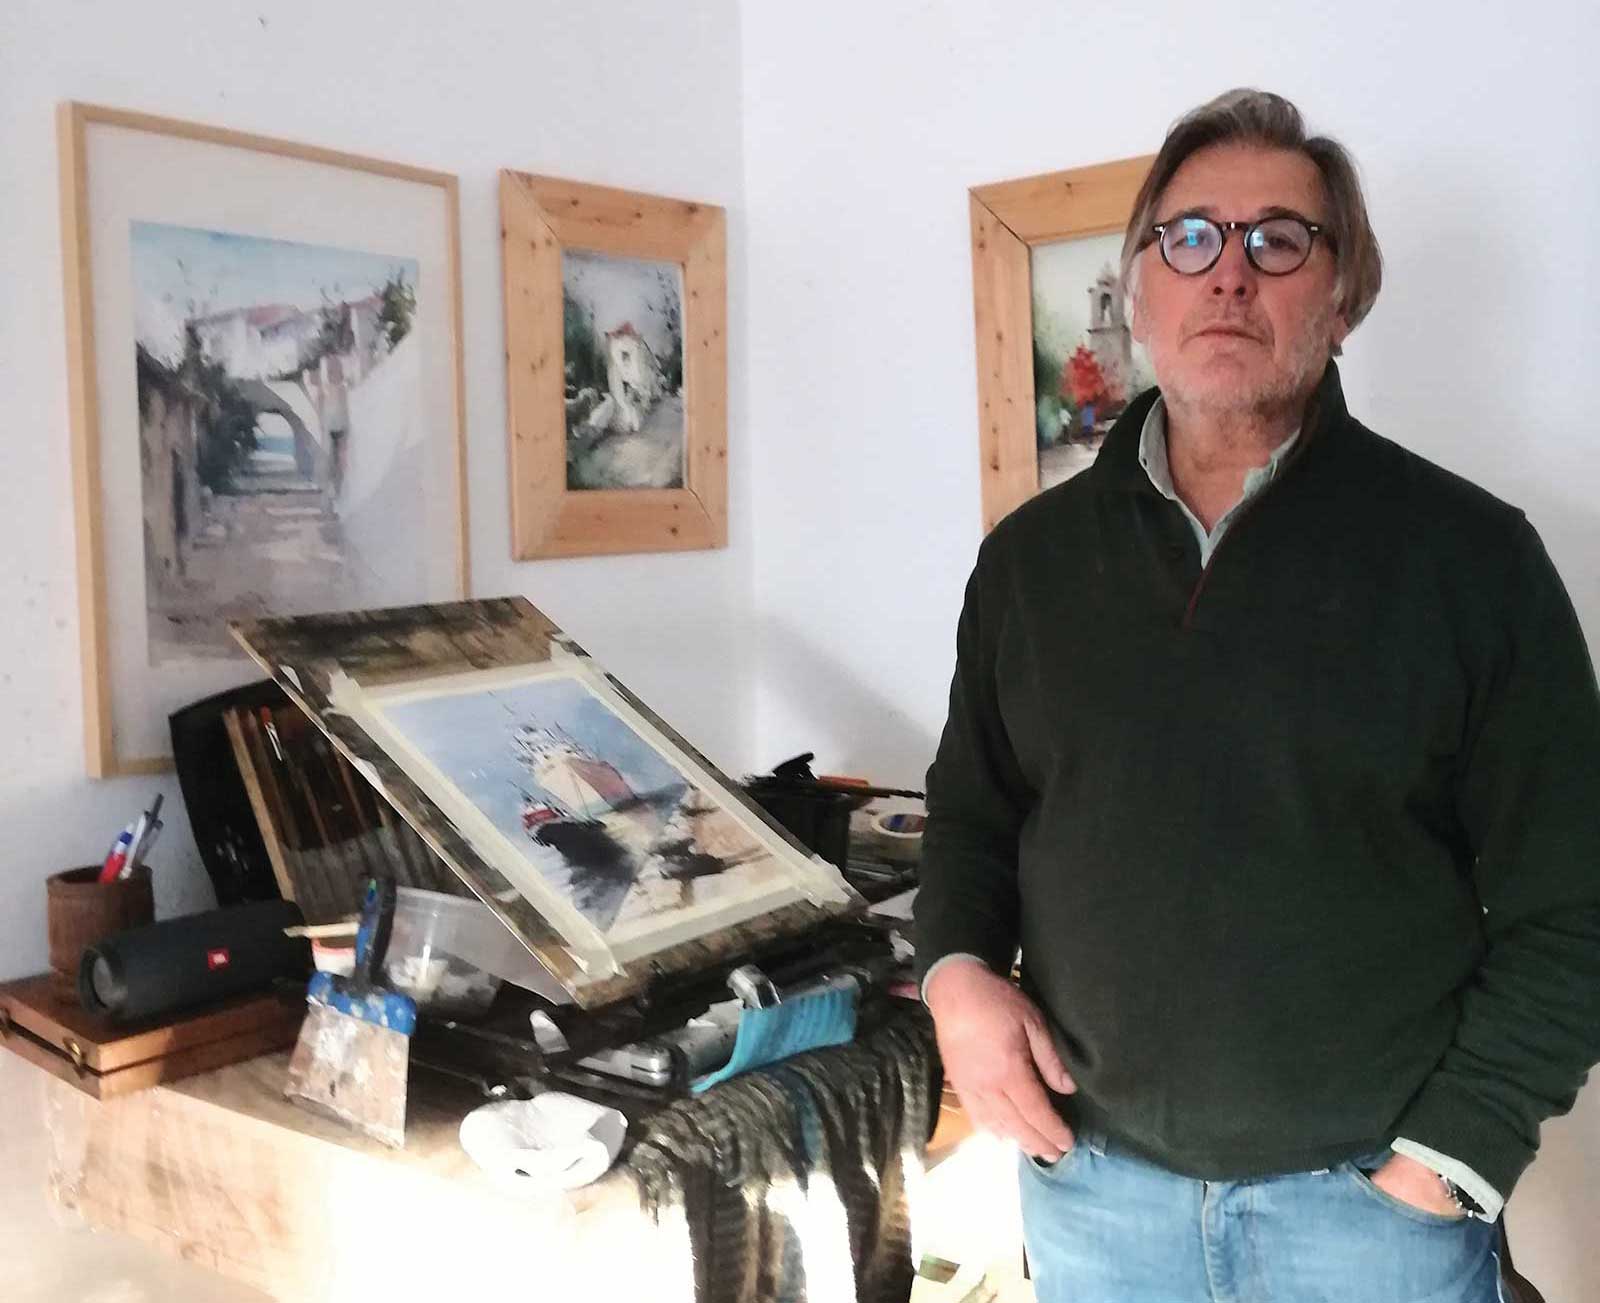 João Cabral
Portuguese artist João Cabral learned how to paint by trying out different mediums until eventually landing on watercolor. He prefers to paint in plein air and consider the outdoors his real studio. He has been invited to international art events in Portugal, Spain, Brazil, Italy and France, and his work can be found in private collections across the world.
Cabral teaches watercolor painting in Portugal and is a founding member and vice president of the Portuguese Watercolor Association (AAPOR). He is also a co-founder of the company Pleinair Destinations. For the last five years, Cabral has been the Portuguese representative in the Fabriano international catalog. Since 1996, the artist has won numerous plein air watercolor painting competitions in Spain and Portugal.
Contact at
www.joaocabral.net