



Painting outdoors is such an amazing experience and what I find most fascinating is how the ever-changing light imparts your painting with a unique expression of your experience that, when captured well, cannot be replicated any other way.
When on location, though, there is much more detail and stimulation than you will ever need. At times it can even be quite overwhelming to even choose what to paint. So, how does one find something worthy of painting? The easiest method is that gut feeling. Speak to any outdoor painter and they will tell you “sometimes you just know.” That said, you also need design and structure in your painting or the likelihood of failure is high. This I know from experience.
When outdoor painting with friends I rarely find that any two of us are painting the same subject. It is very individual, and I cannot even start to tell you what to look for to make your gut instinct happy.
However, I can provide you with a few ideas that may help you decide what to paint when the gut instinct is taking a nap.
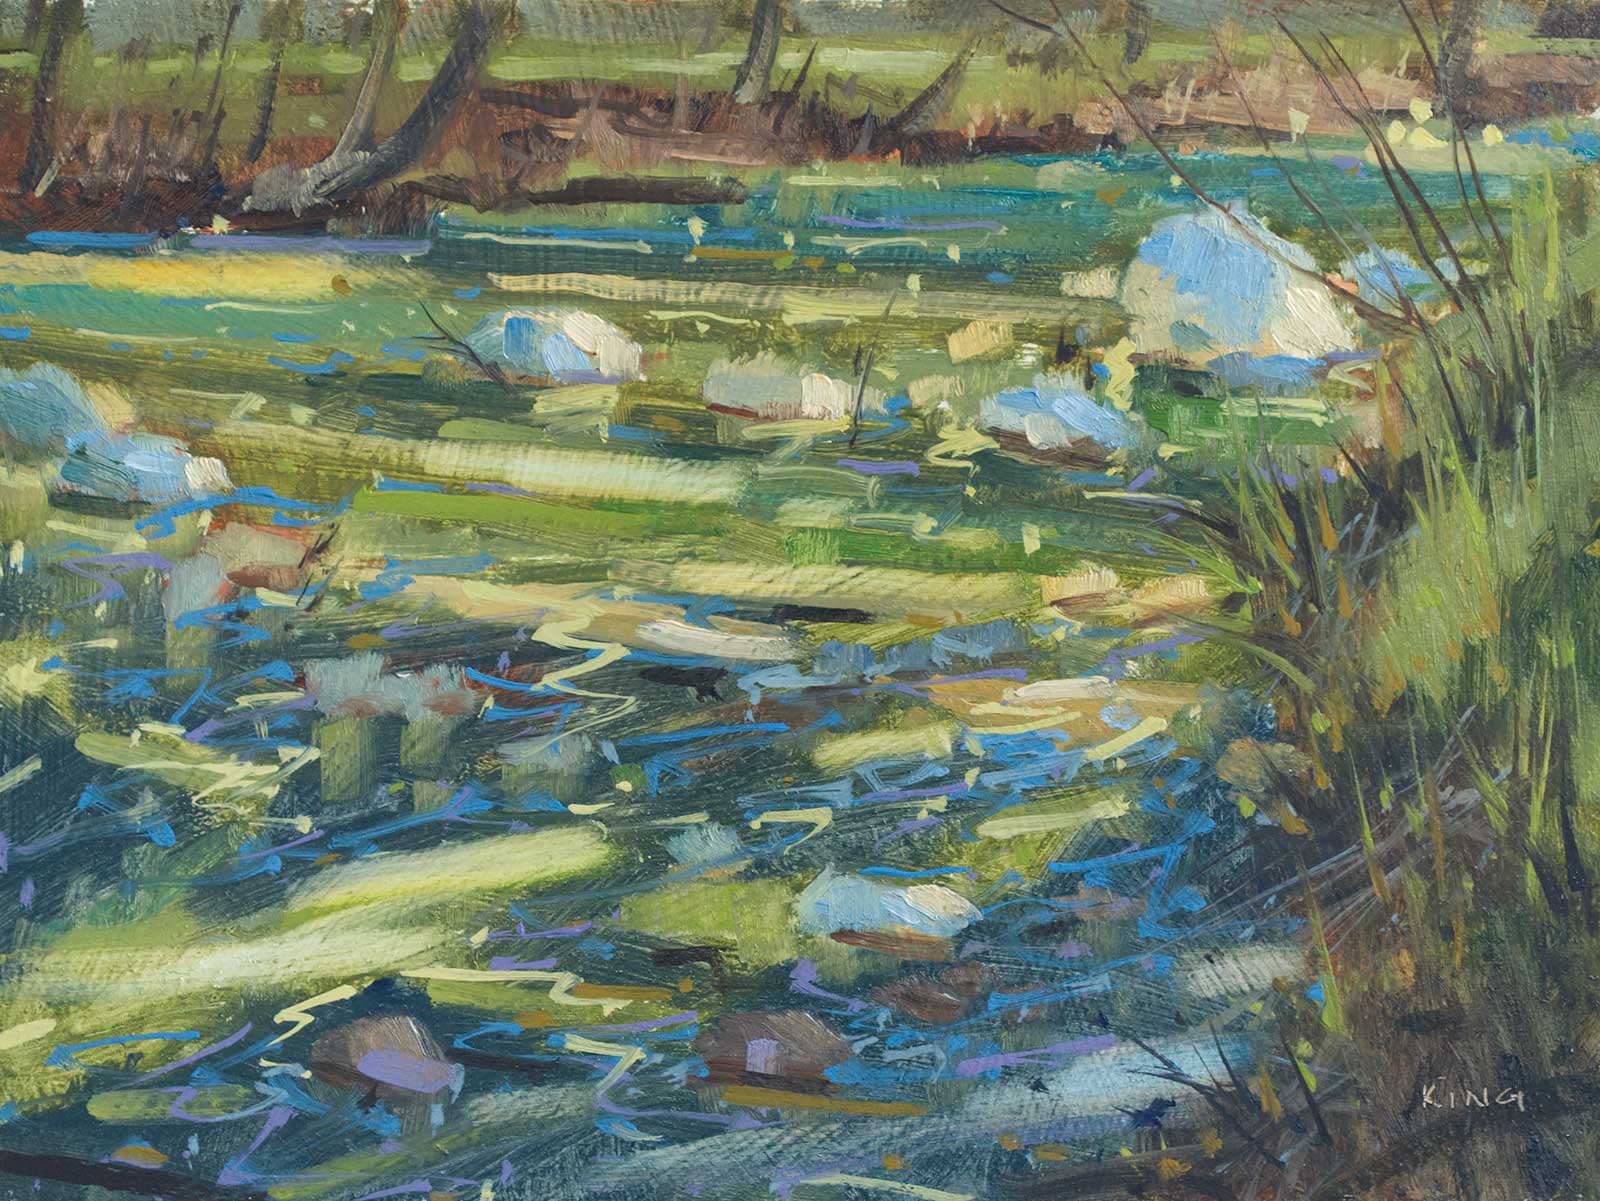
1A Dappled Light, Coquitlam River, oil on board, 9 x 12" (22 x 30 cm)
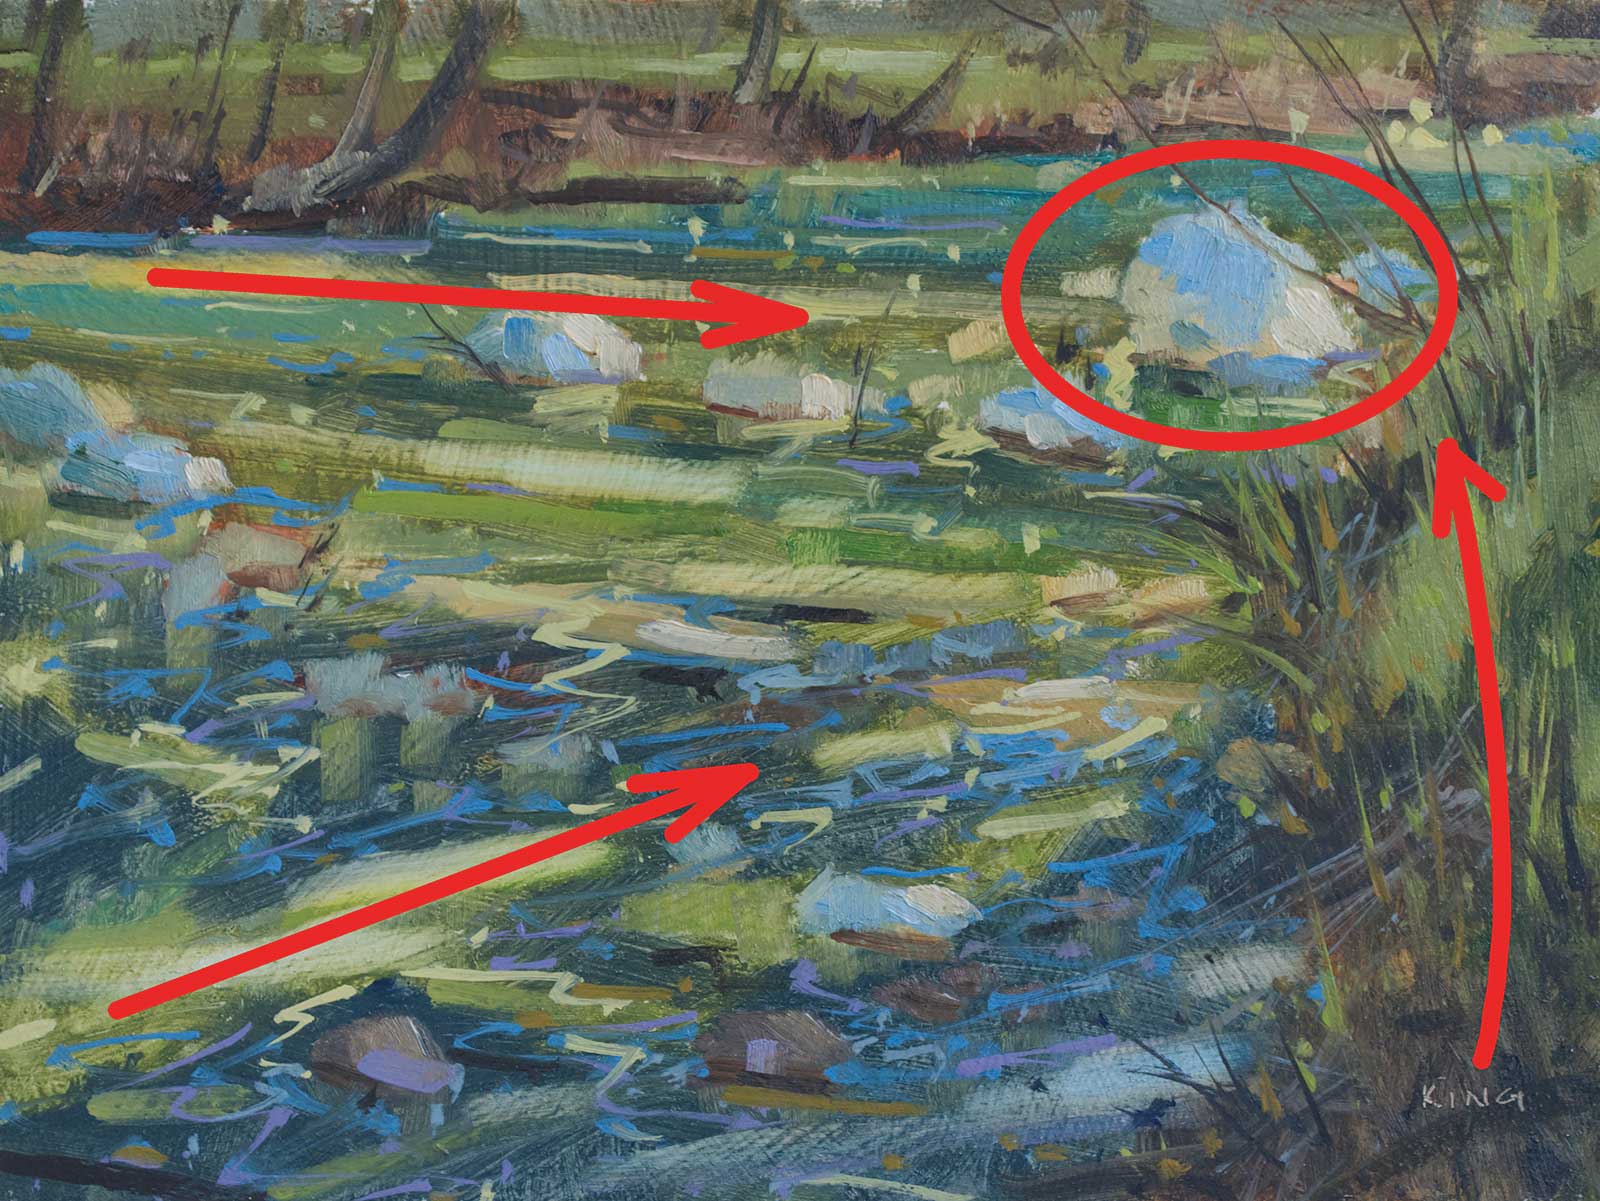
1B
1. Use a viewfinder, whether homemade or purchased, as it is essential for finding an interesting crop. Have it handy when exploring a location, set it to the size of the canvas or board you brought and scan the landscape as you are walking.
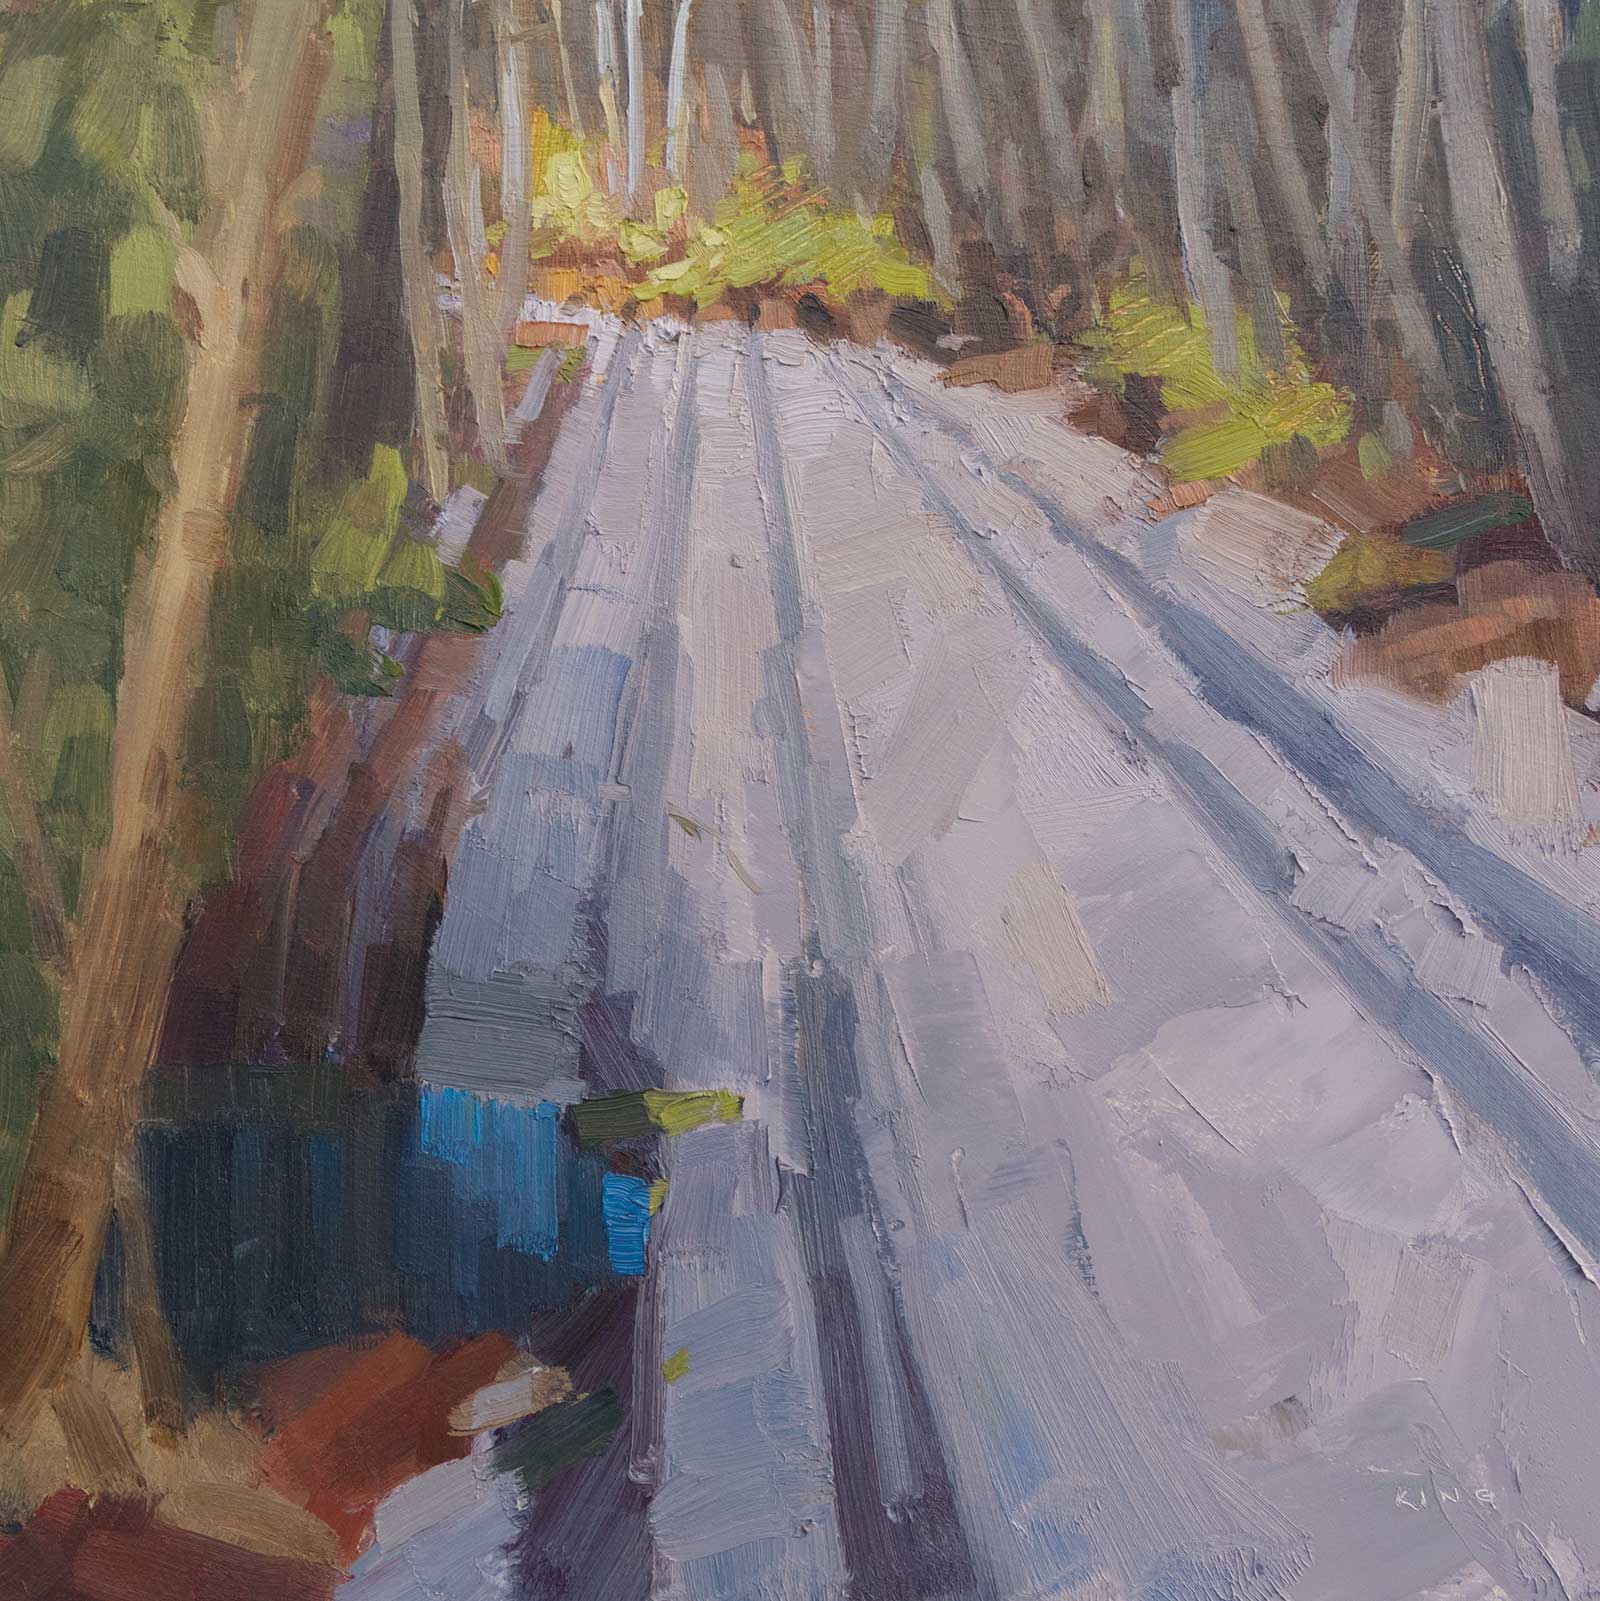
2A In the Shadow of Trees, oil on board, 10 x 10" (25 x 25 cm)
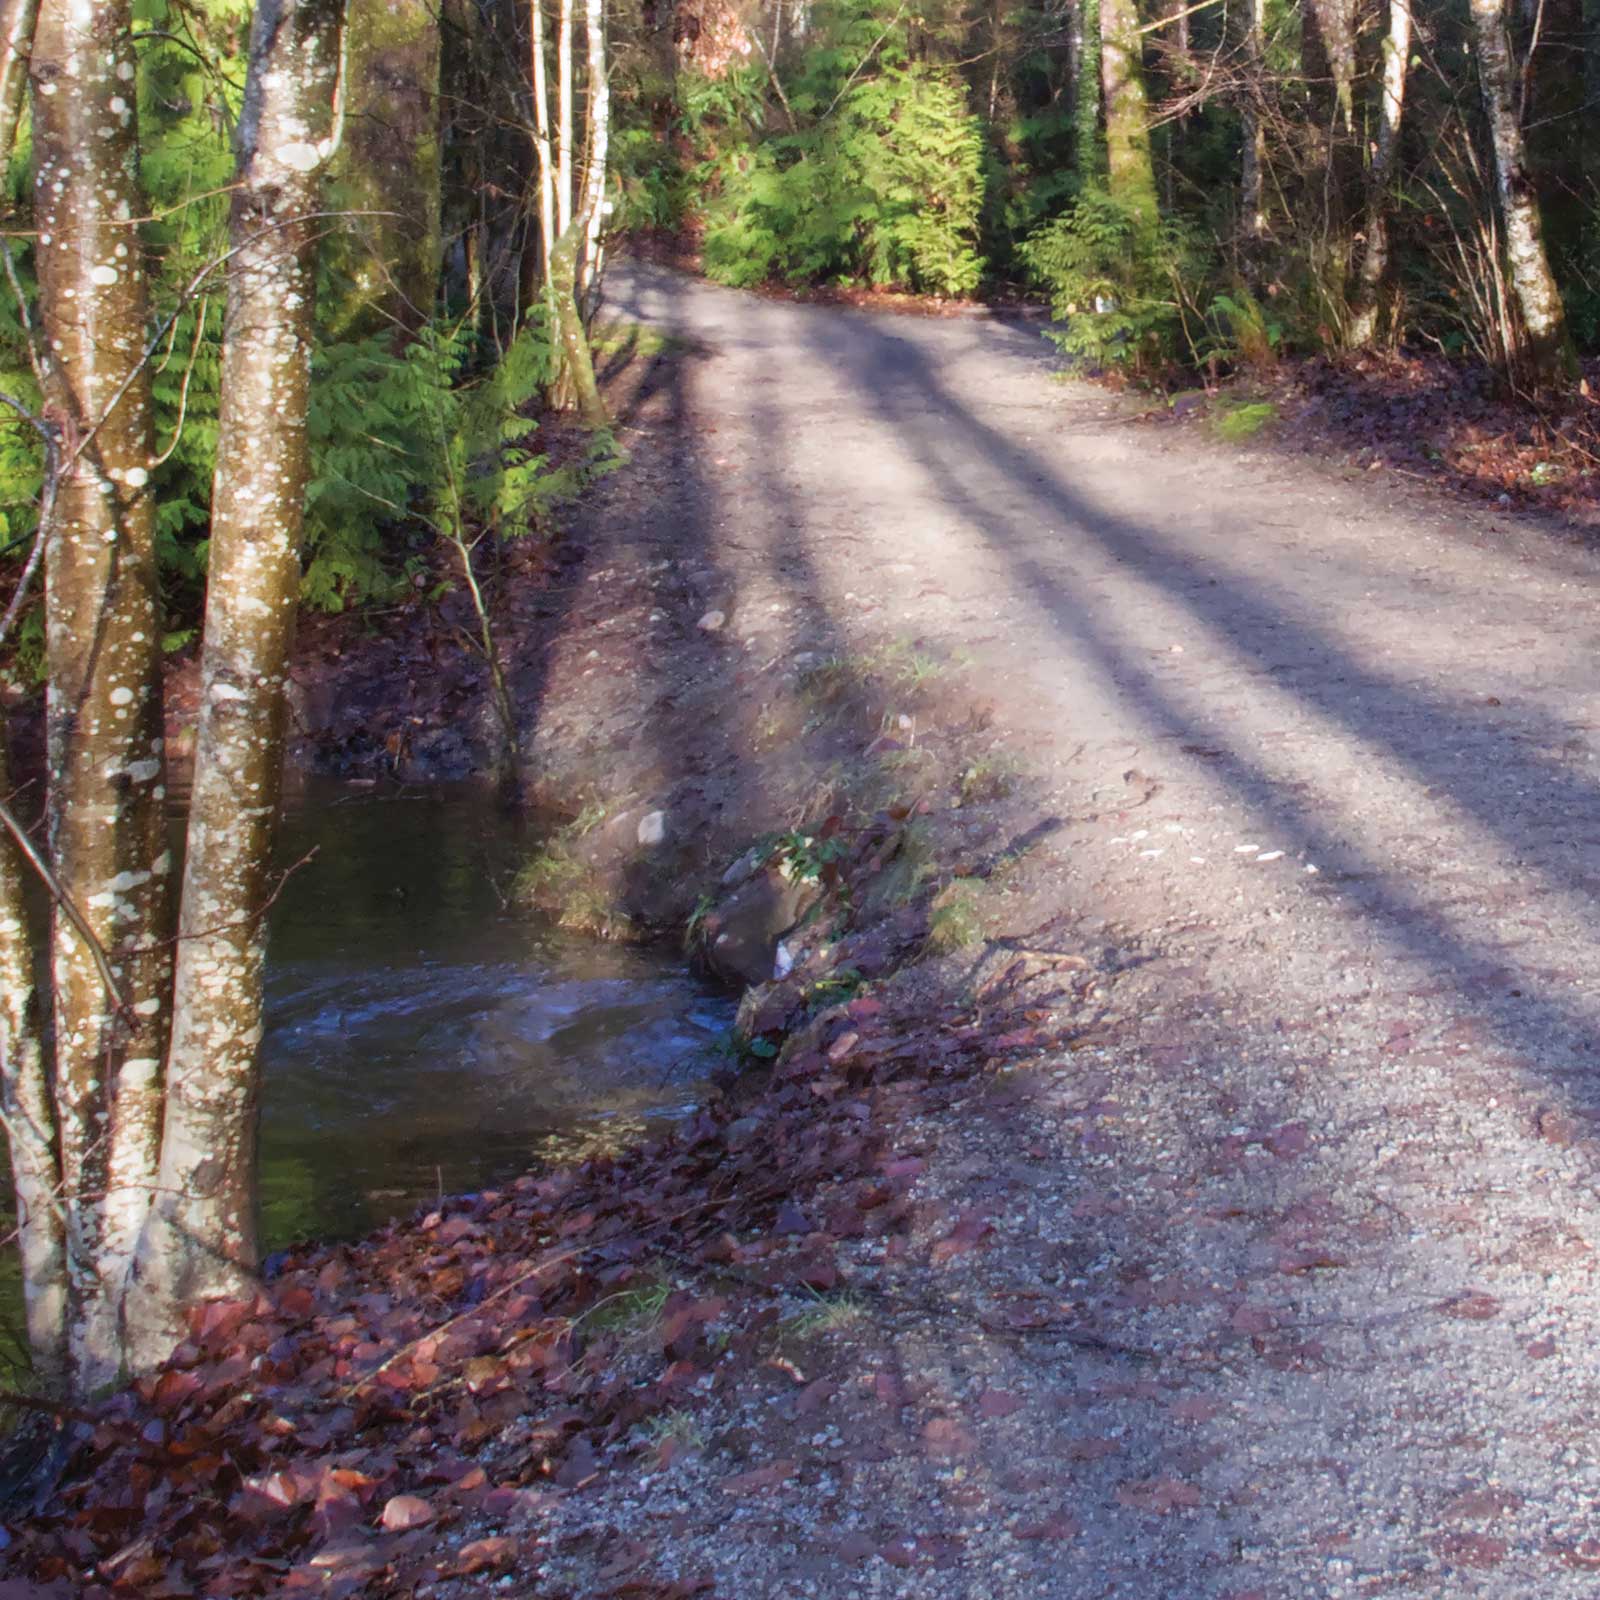
2B
2. The time of day plays a crucial role in what catches your eye as the sun position makes a significant difference in what a location will look like. Much more success will be found during the morning, late afternoon or evening times than between 10 a.m. to 3 p.m. (All highly dependent on the season and if it is a cloudy or foggy day.)
Knowing this, try to explore a location multiple times at different times of day and in different seasons. An area you walked by one day may be a great painting the next time you’re there.
I have had this happen along my local river where I have passed a location over a dozen times on the hunt for something to paint. One day while out exploring, there it was, presenting itself with warm, dappled light over the water with a few lead-in lines and some outstanding colors. I had to setup and move fast so as not to lose my initial impression of what I saw. Sometimes it just comes together. While Image 1A shows the final painting, Image 1B shows you how I was thinking about its structure, knowing I wanted the focal point to be the larger rock upstream with the water and land masses pushing you toward it.
3A
3. Lead-in lines are a fantastic way to control how to move through a painting. Some examples include fallen trees, crop rows in a farmer’s field, rivers, roads, worn paths, a series of rocks, shadows or anything that can lead a viewer into a painting. Image 2A is of an early morning scene with long shadows leading you into the back trees and Image 2B is my painted version of it. While using the shadows of the trees to help guide the viewer into the painting, I am also using value to really get the viewer to jump to the focal point.
 4A
4A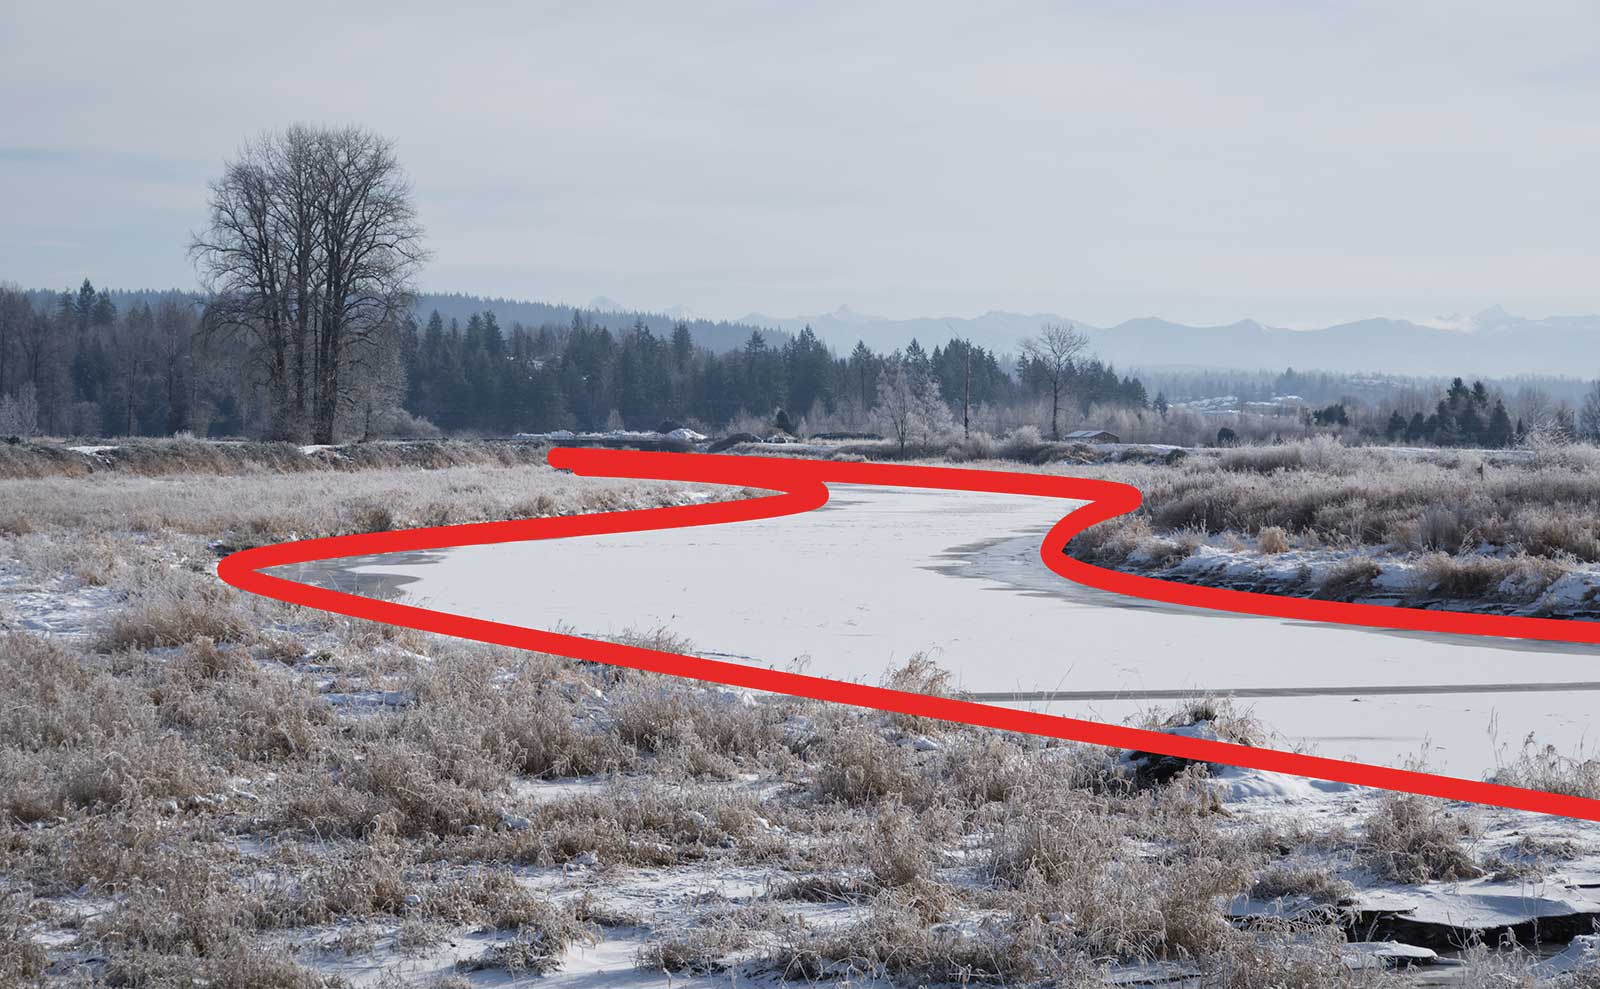 4B
4B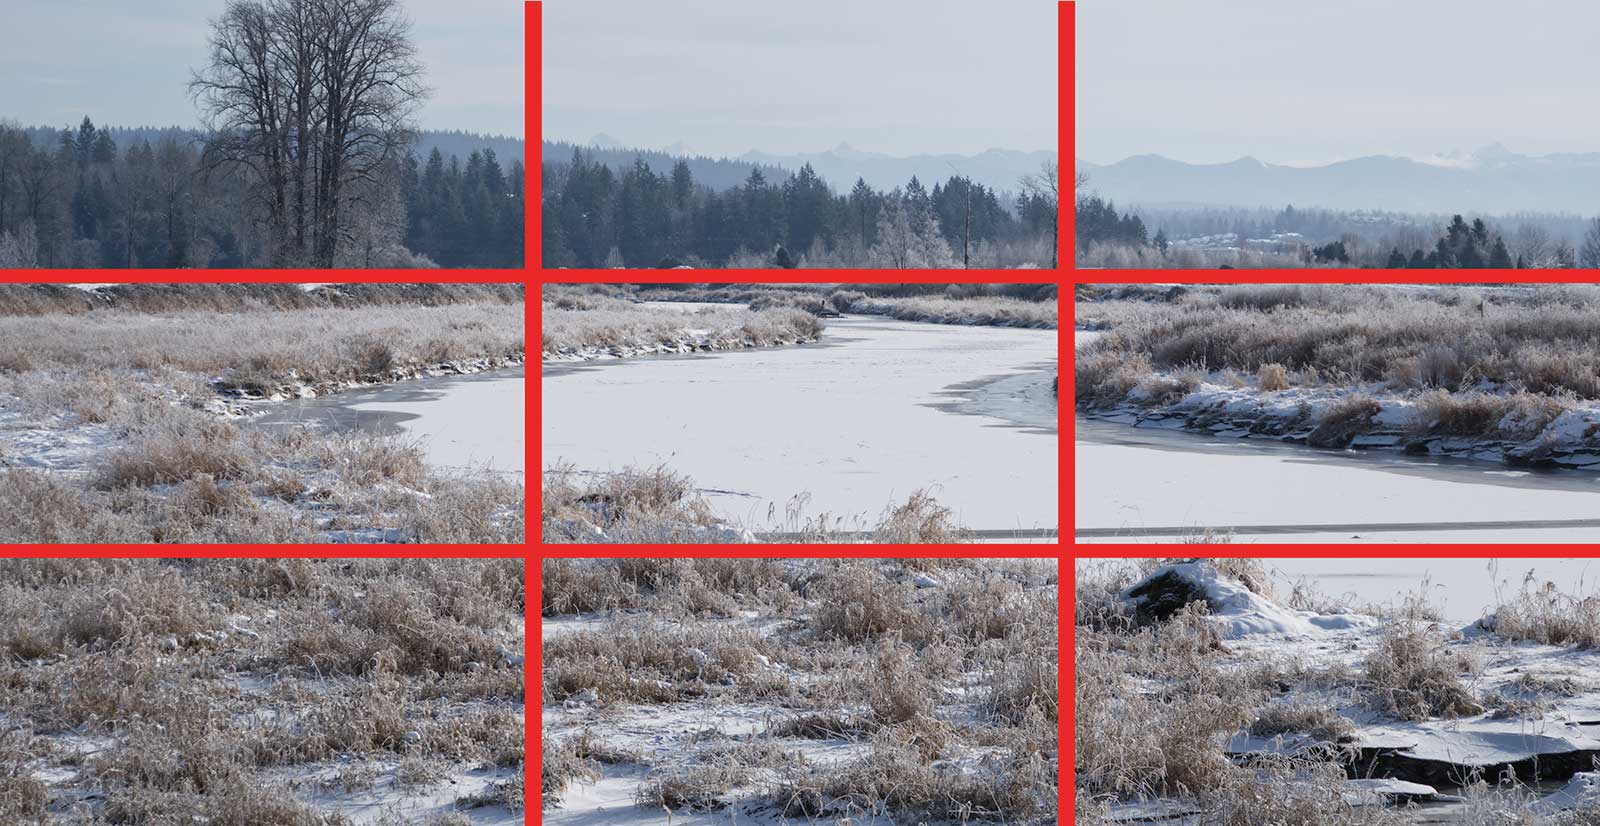 4C
4C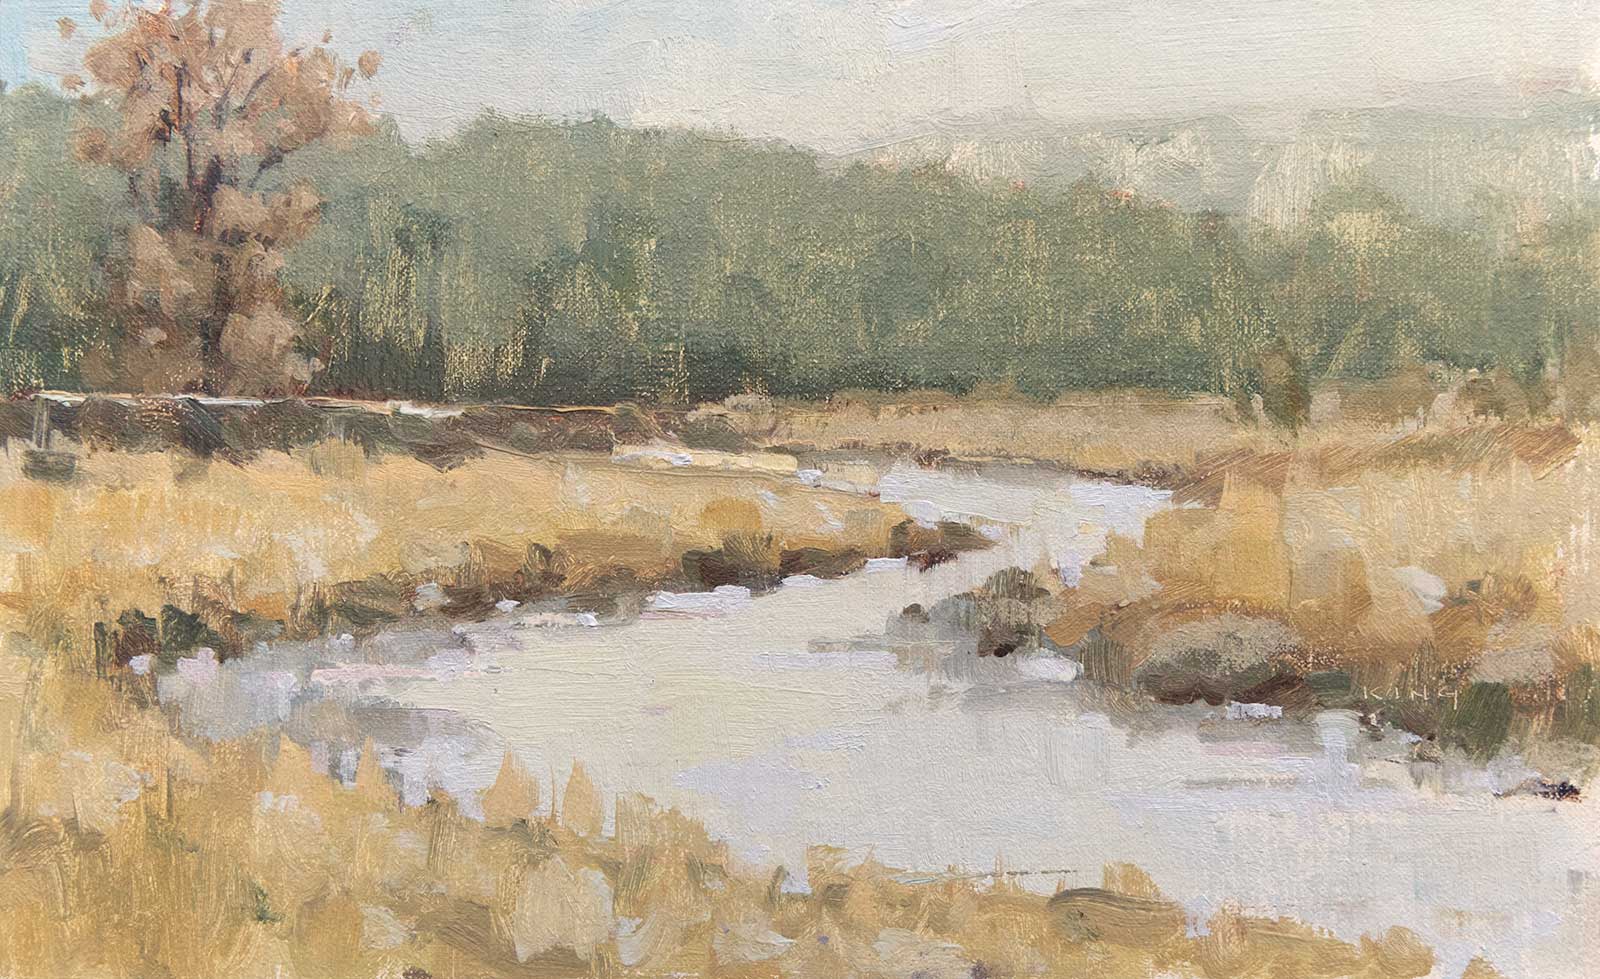
4D Winter on the Alouette River, Pitt Meadows, oil on linen panel, 6 x 9¾" (15 x 24 cm)
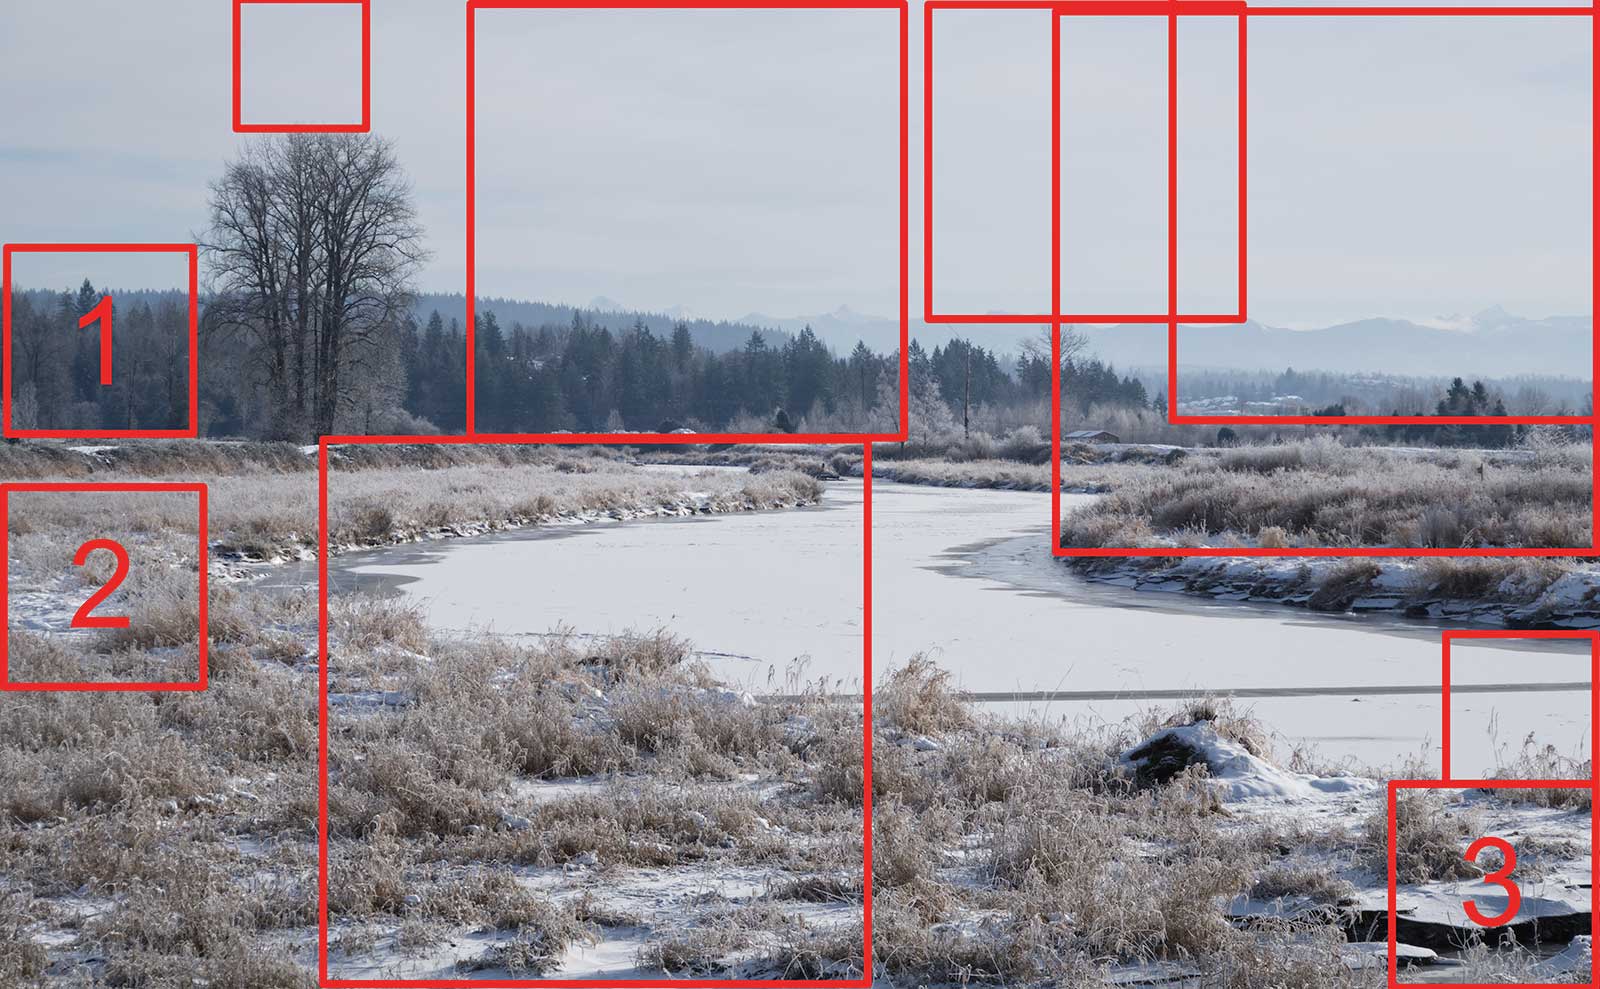
4. Keep your spacing variable. I have a thing where I like to keep the spacing between main areas or various elements within a painting different. Of course, equal spacing of objects, such as boards in a fence, can provide a nice rhythm but when outside in mother nature, there is a much more chaotic sense of things. Thus, variable spacing. In Image 3A the space from the left edge to the tree (1) is different from the space from the left edge to the river (2), which is different from the bottom edge to the water in the river (3). I enjoy doing this, and I always keep it in mind when painting as I find it provides more variety and interest to my work.
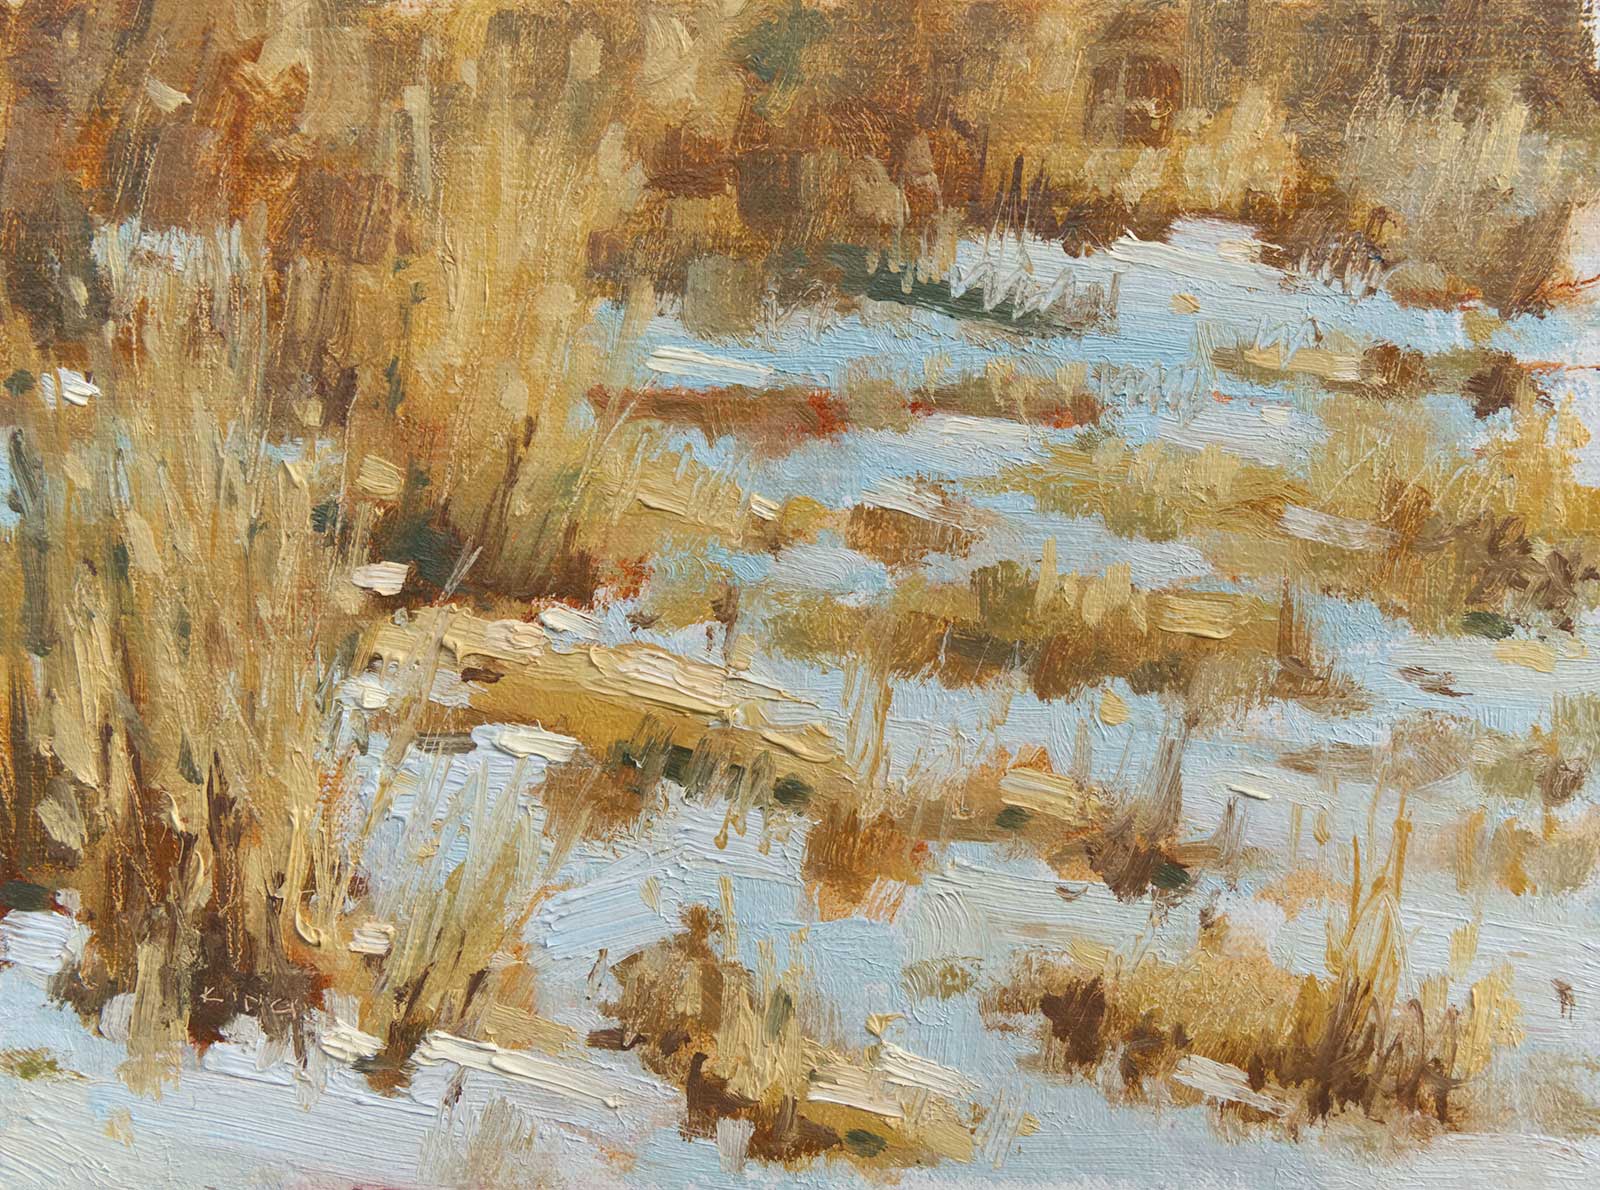
5A Winter Grasses, oil on linen panel, 6 x 8"
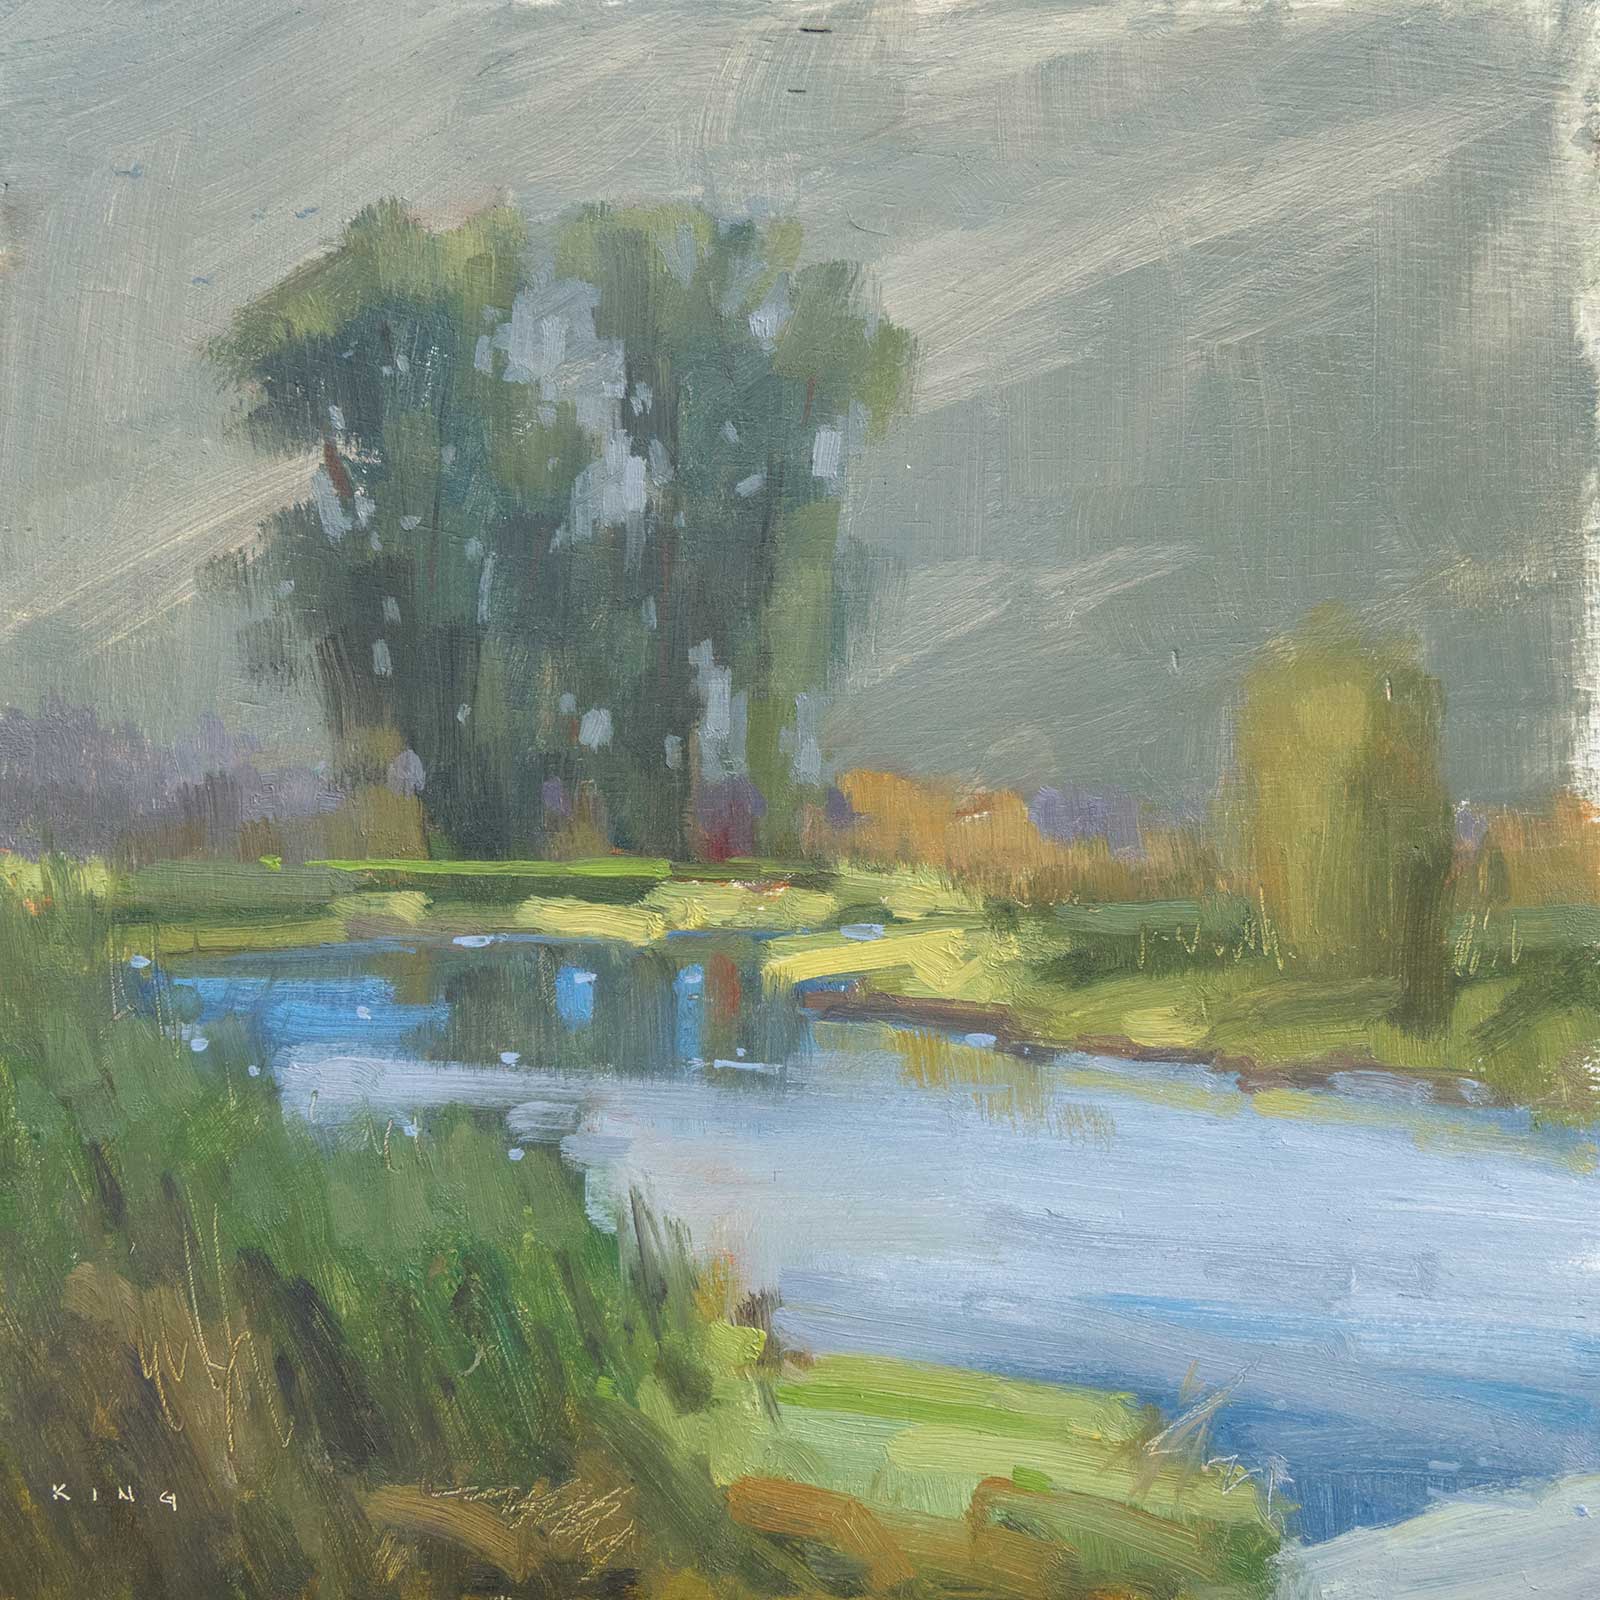
5B Distant Tree, Alouette Tributary, oil on panel, 10 x 10" (25 x 25 cm)
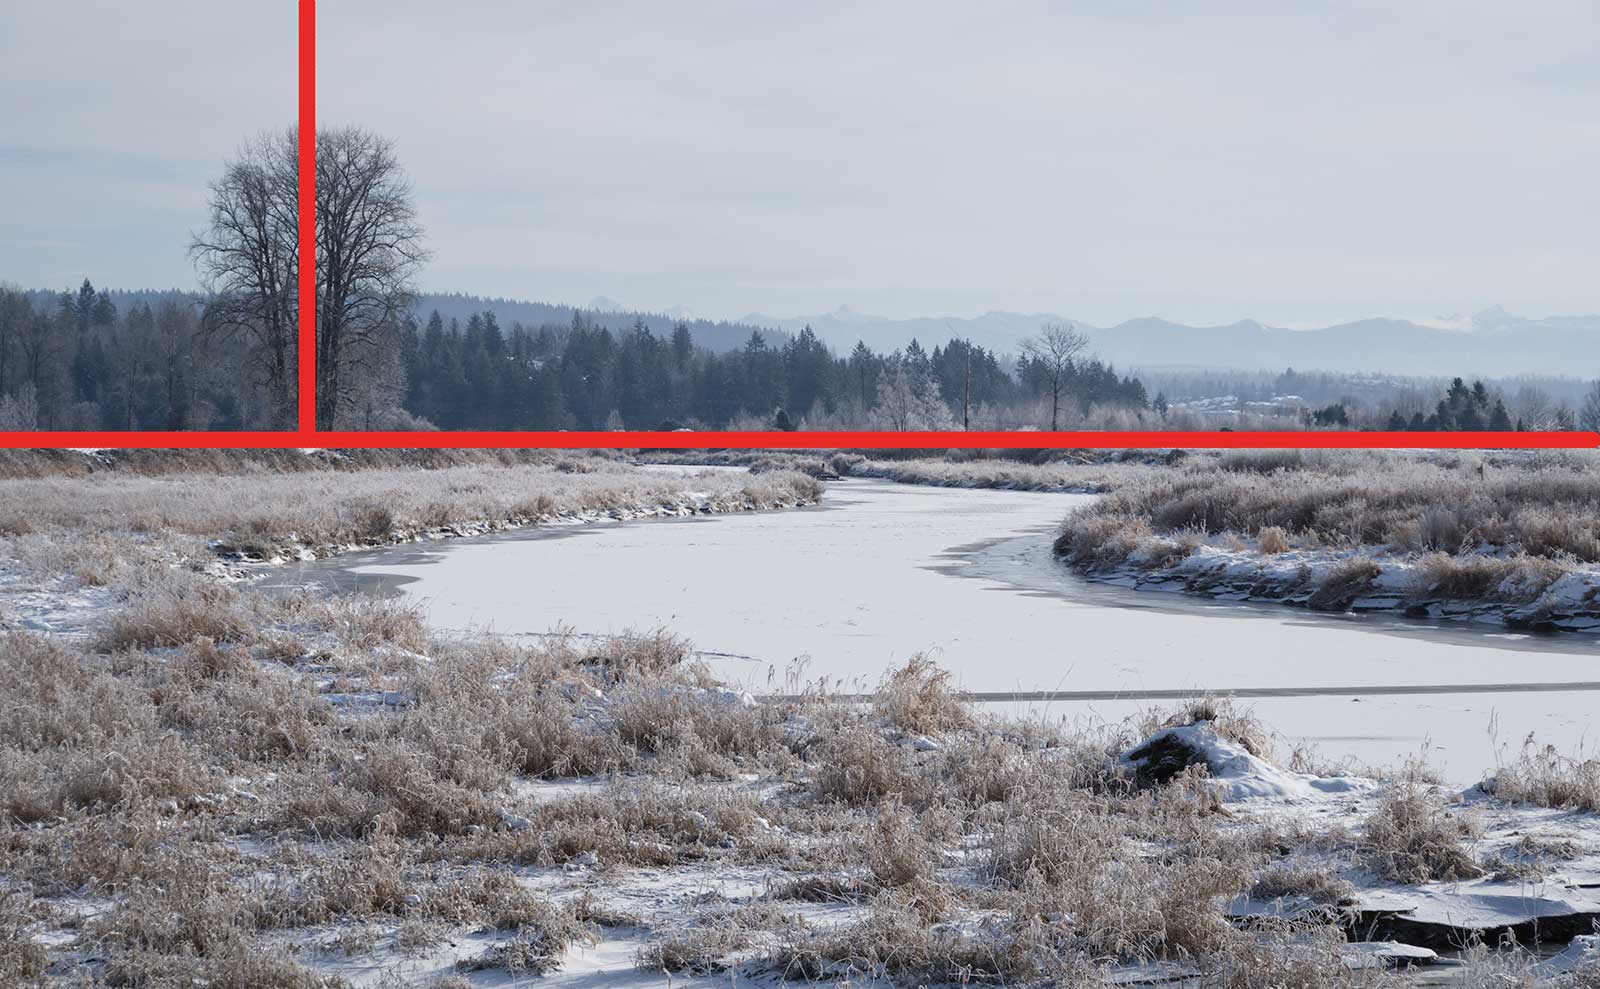
5. Think in terms of various compositional concepts such as L, S, and the rule of thirds as a foundation for your painting. I default to the rule of thirds when I am out exploring, but I like to push the focal points to the edges more than what the rule of thirds suggests, as I like the unbalanced tension it gives. If you are unfamiliar with these various concepts, they are relatively simple to understand. Think of L as a lone tree or a lighthouse towering over the horizon and over to one side. Image 4A (see next page) shows the vertical line, at the tree’s location, coming off the horizon to create an L of sorts. The S is a winding path, a river or a road leading you into the painting. Image 4B shows the same scene but how the river creates the lead in S shape. The rule of thirds involves splitting up your scene into thirds and placing your focal point at one of the four intersections with the horizon on the top or bottom third. Image 4C is the same scene as before but with a different crop so the horizon is on the upper one third line. The position of the tree could be moved over to the intersecting lines but as I said, I would leave the tree in that position to push the tension to the edges. With this crop, the tree is still creating the L and the river still providing the S lead in. Image 4D is my final plein air study of this scene using the above compositional foundations.
6. Last on my list is overlap. Providing overlap can really help depict depth to a painting while at the same time an avenue to guide a viewer through your painting. Image 5A shows a simple scene of dried grasses and snow but with the overlap of grasses over each other and the snow, it has a nice depth to it even though the view can’t be more than 20 feet in depth. For a more scenic painting, Image 5B has the foreground grass on the left overlapping the water, the bush on the right overlapping the horizon line and the main trees overlapping the distance mountains, which all help with the sense of depth. Additionally, the S foundation of the river is helping lead the viewer into the main focal point.
Like everything worth learning, there seems to be more concepts and guidelines to follow the more you dive into it. Everything always seems easier when you don’t know what you’re doing. With the above ideas, I hope at least one will help you with your decisions on what to consider when choosing a scene to paint. No need to apply all of these at once, just one or two. My goal is to give you a few tools the next time you’re out exploring, trying to decide what to paint.