


There’s a special bond between pets and humans. As an artist, I enjoy exploring that bond through pet portraits. Trading in my keyboard for a paintbrush, one of my earliest pieces was an oil portrait of my own dog, Katana. I dabbled in human portraiture as well and with relative success. I even took a stab at still life, but nothing gave me quite as much joy or satisfaction as painting my sweet puppy.
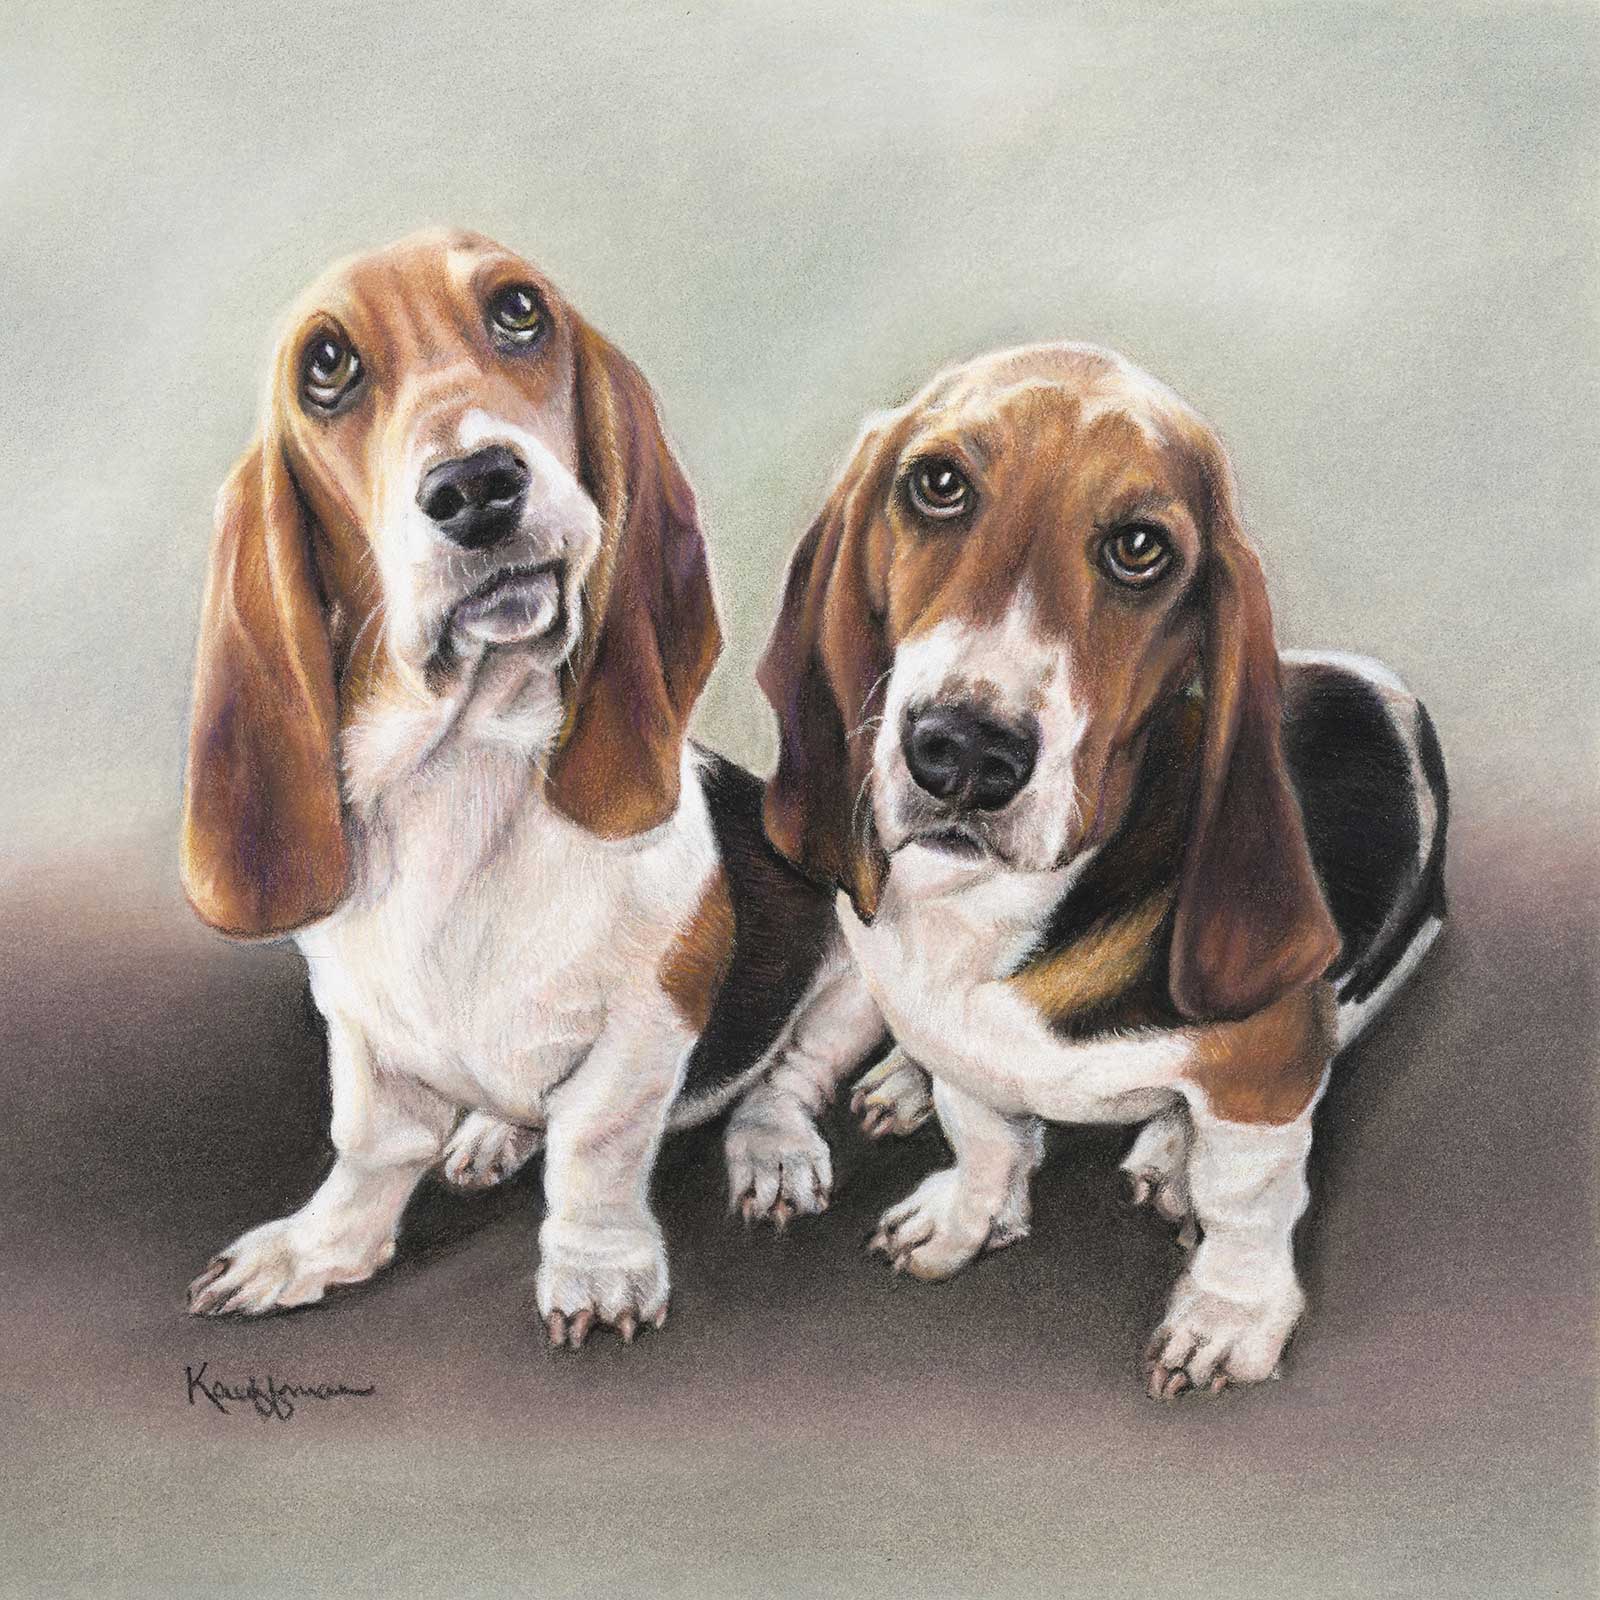
COPPER & BISBEE, colored pencil, 10 x 10" (25 x 25 cm) These adorable basset hound pups were not keen on posing together. Combining them into a single portrait using separate and slightly dim reference photos was a new challenge. Before beginning the piece I spent some time in Photoshop experimenting with proportion, lighting and composition.
About the time I started turning my attention more towards pets, I ran across a few really interesting videos on colored pencil. I had tried the medium before, found it frustrating and promptly retreated back to oil painting. Intrigued by the techniques, materials and use of solvent being demonstrated in these particular tutorials I decided to give colored pencil another shot. My second attempt, it seemed, was wildly better than the first. I was hooked. Colored pencil, realism and dogs were a perfect combination.
Of course, everyone has a favorite photo or two of their fur baby, but they’re often taken spur of the moment. Unfortunately, those snaps do not always make the best portrait references. If I have the opportunity to take a few of my own, that’s terrific. However, that’s not an option if the commission isn’t local or for a beloved one that has already passed on. Learning to work with what’s available to create a custom keepsake can be quite a challenge but certainly a rewarding one.
I’ve always been a fan of realism and my style definitely reflects that. I find colored pencil to be an excellent medium for rich color and rendering fine detail. Combined with PanPastels and blending solvent I can work quickly through the early stages while still achieving a high level of realism in the later stages and final touches.
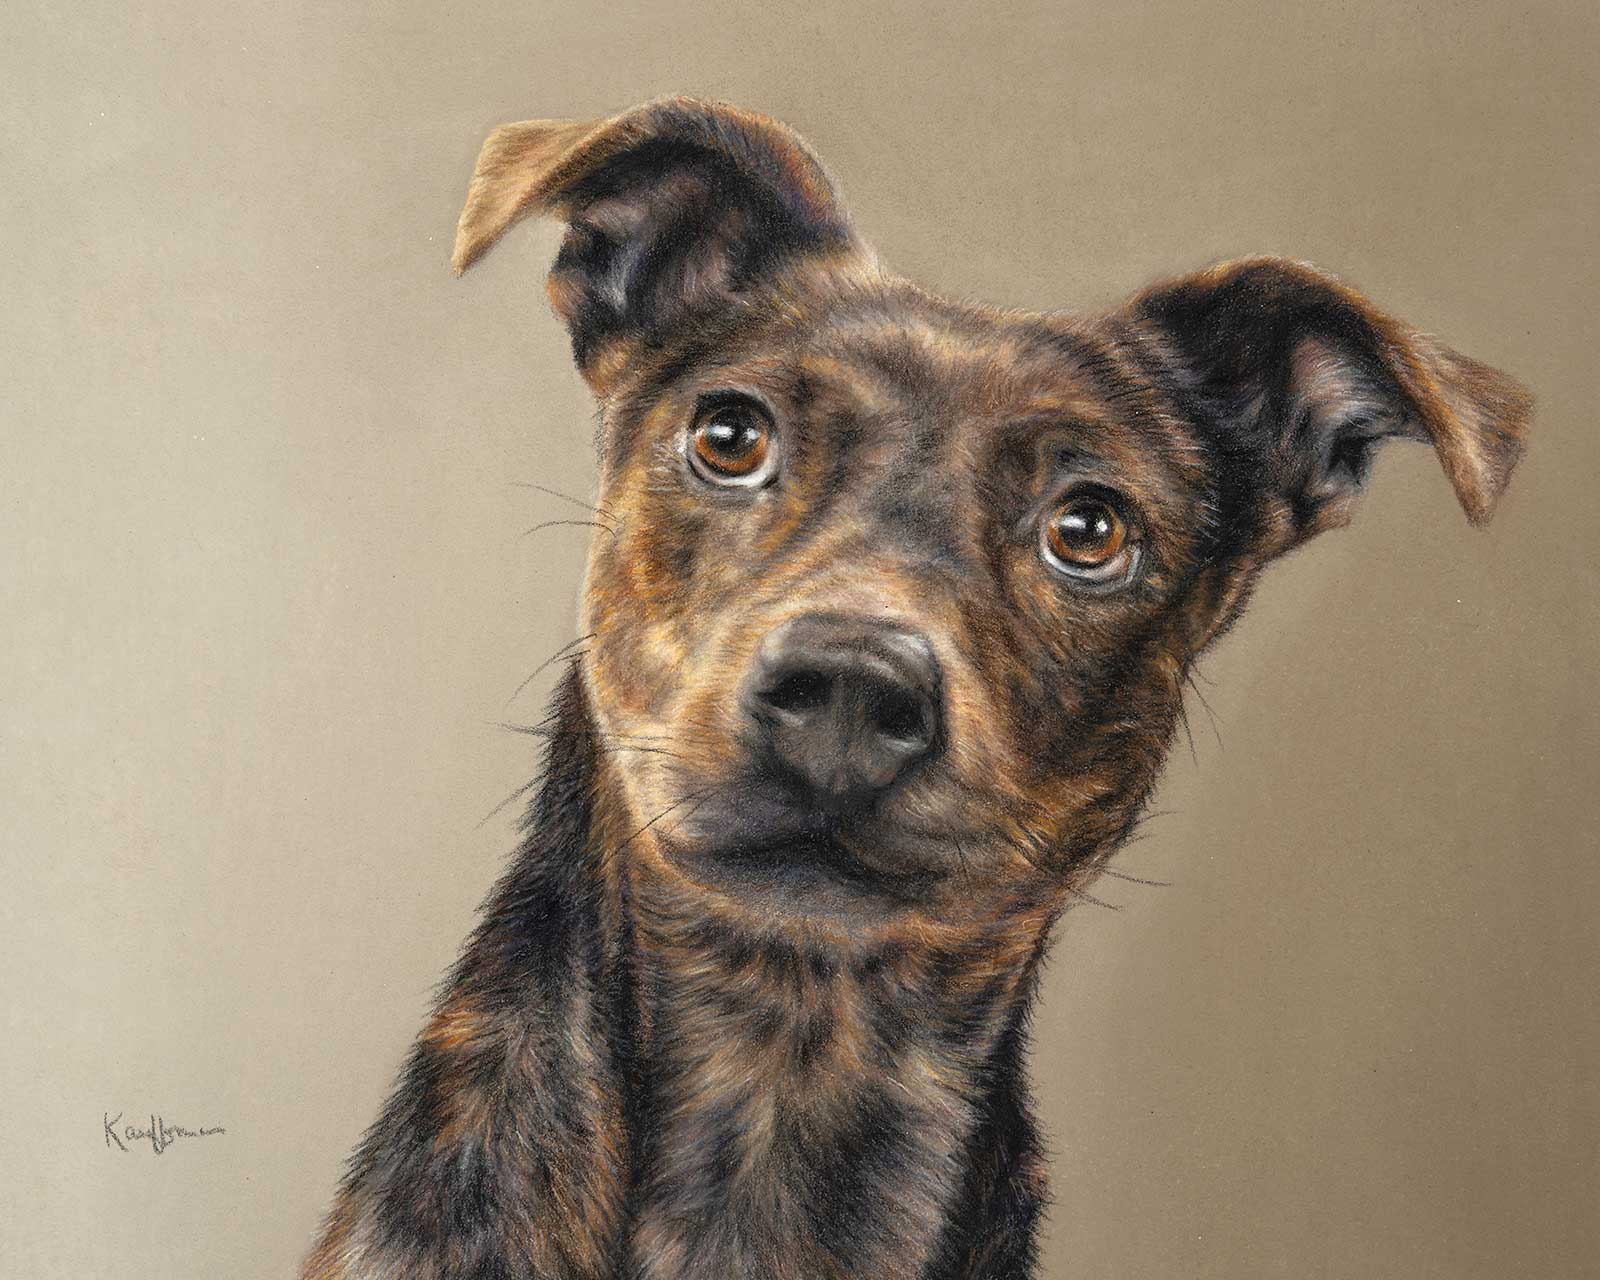
LOUIS, colored pencil and PanPastel, 9 x 12" (22 x 30 cm) Louis was one of 40 rescue dogs I photographed for a series that was made into a fundraising calendar. Initially, I didn’t think he would be a calendar boy. He wasn’t much for sitting still. But, sorting through my photos, I realized I got a couple of good shots and he really has great character.
Having a decent close-up head shot is key. It’s all about the eyes—those wonderful windows to the soul. Making sure I have the correct shape and placement of the eyes are the crucial first steps. Then I line up the nose, muzzle and ears in relation to the eyes and the overall shape and angle of the head. I like to keep my sketches fairly simple, only blocking in the outline, major areas of color and noting any unique markings.
My primary reference photo just needs to be a good representation of the animal’s expression. Even if the lighting is poor or the image is washed out or a bit dark, I can still work with it by getting additional photos that accurately portray color and fur texture. These days, many people have Instagram or Facebook accounts solely dedicated to their pets which is a huge plus. When necessary, I can practically “Frankenstein” a reasonable reference in Photoshop from the generous assortment of pictures on social media. Where there’s a will, there is a way.
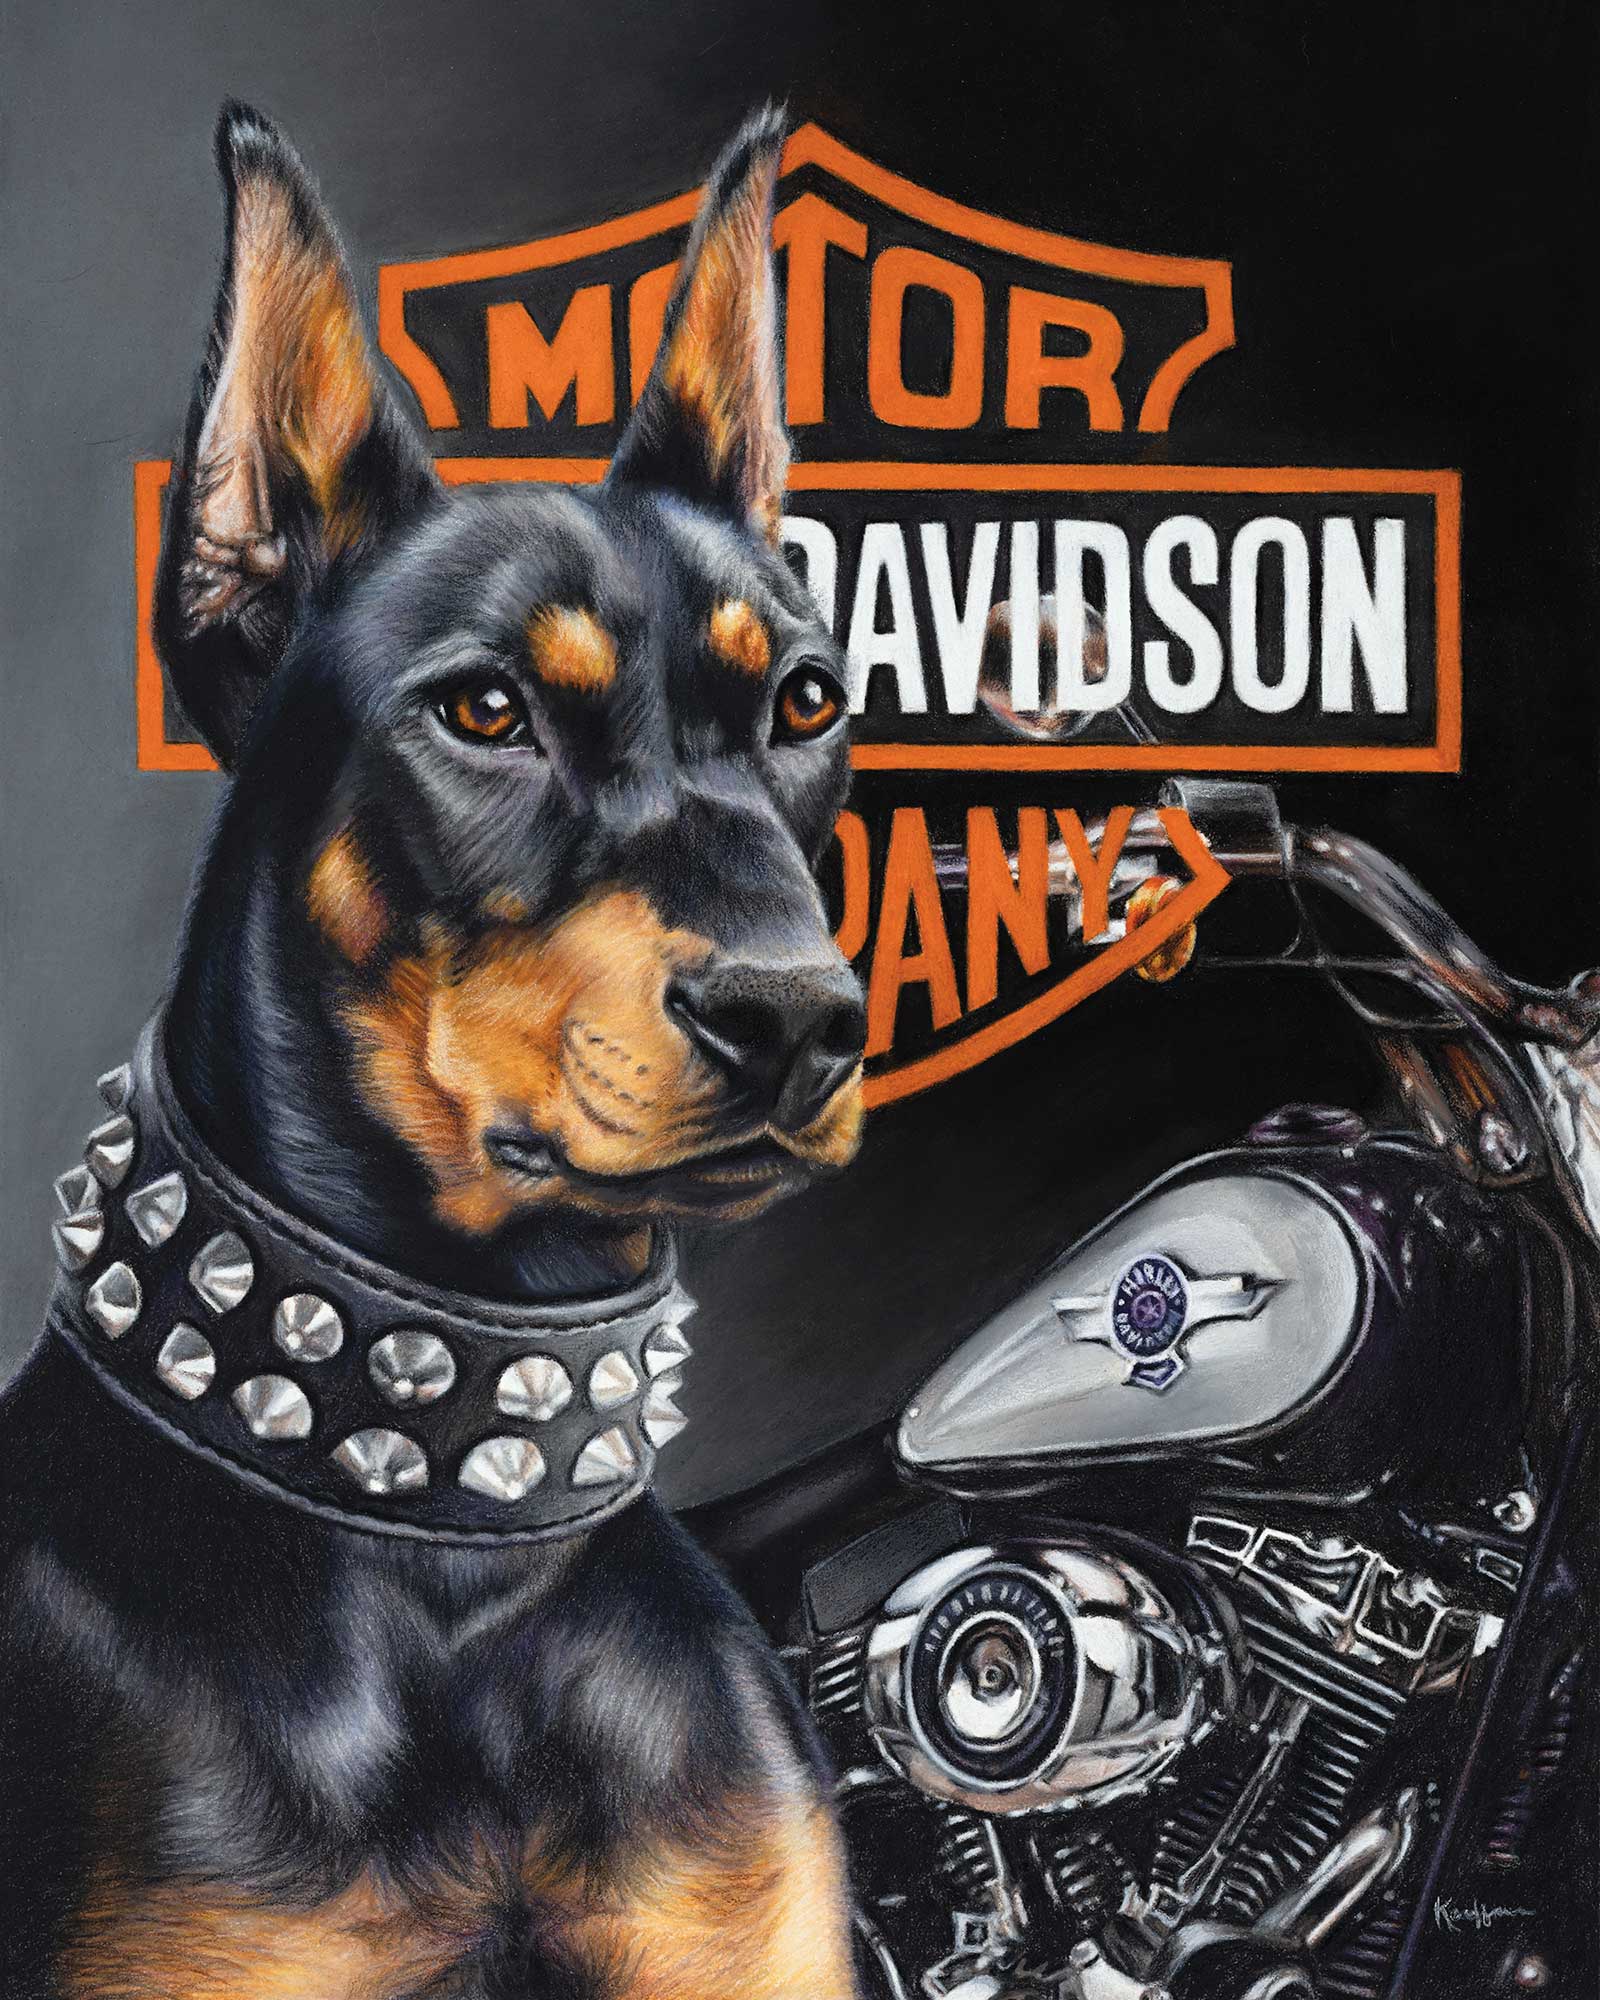
A DOG AND A HOG, colored pencil, 14 x 11" (35 x 27 cm) Feeling a bit of “cuteness overload” from recent portraits, I decided to try something a little more “badass” for my own amusement. I love that Harley Davidson is not just a brand, it’s a whole culture — kind of like dog lovers but with a lot of chrome and leather.
I believe every pet, purebred or pure mutt, deserves to be immortalized with a portrait. From an artistic perspective, there is an added advantage over human commissions in that no one has ever asked me if I could make their pet younger, thinner or better looking. I love that our furry friends are all absolutely perfect just the way they are.
My Art in the Making ONYX
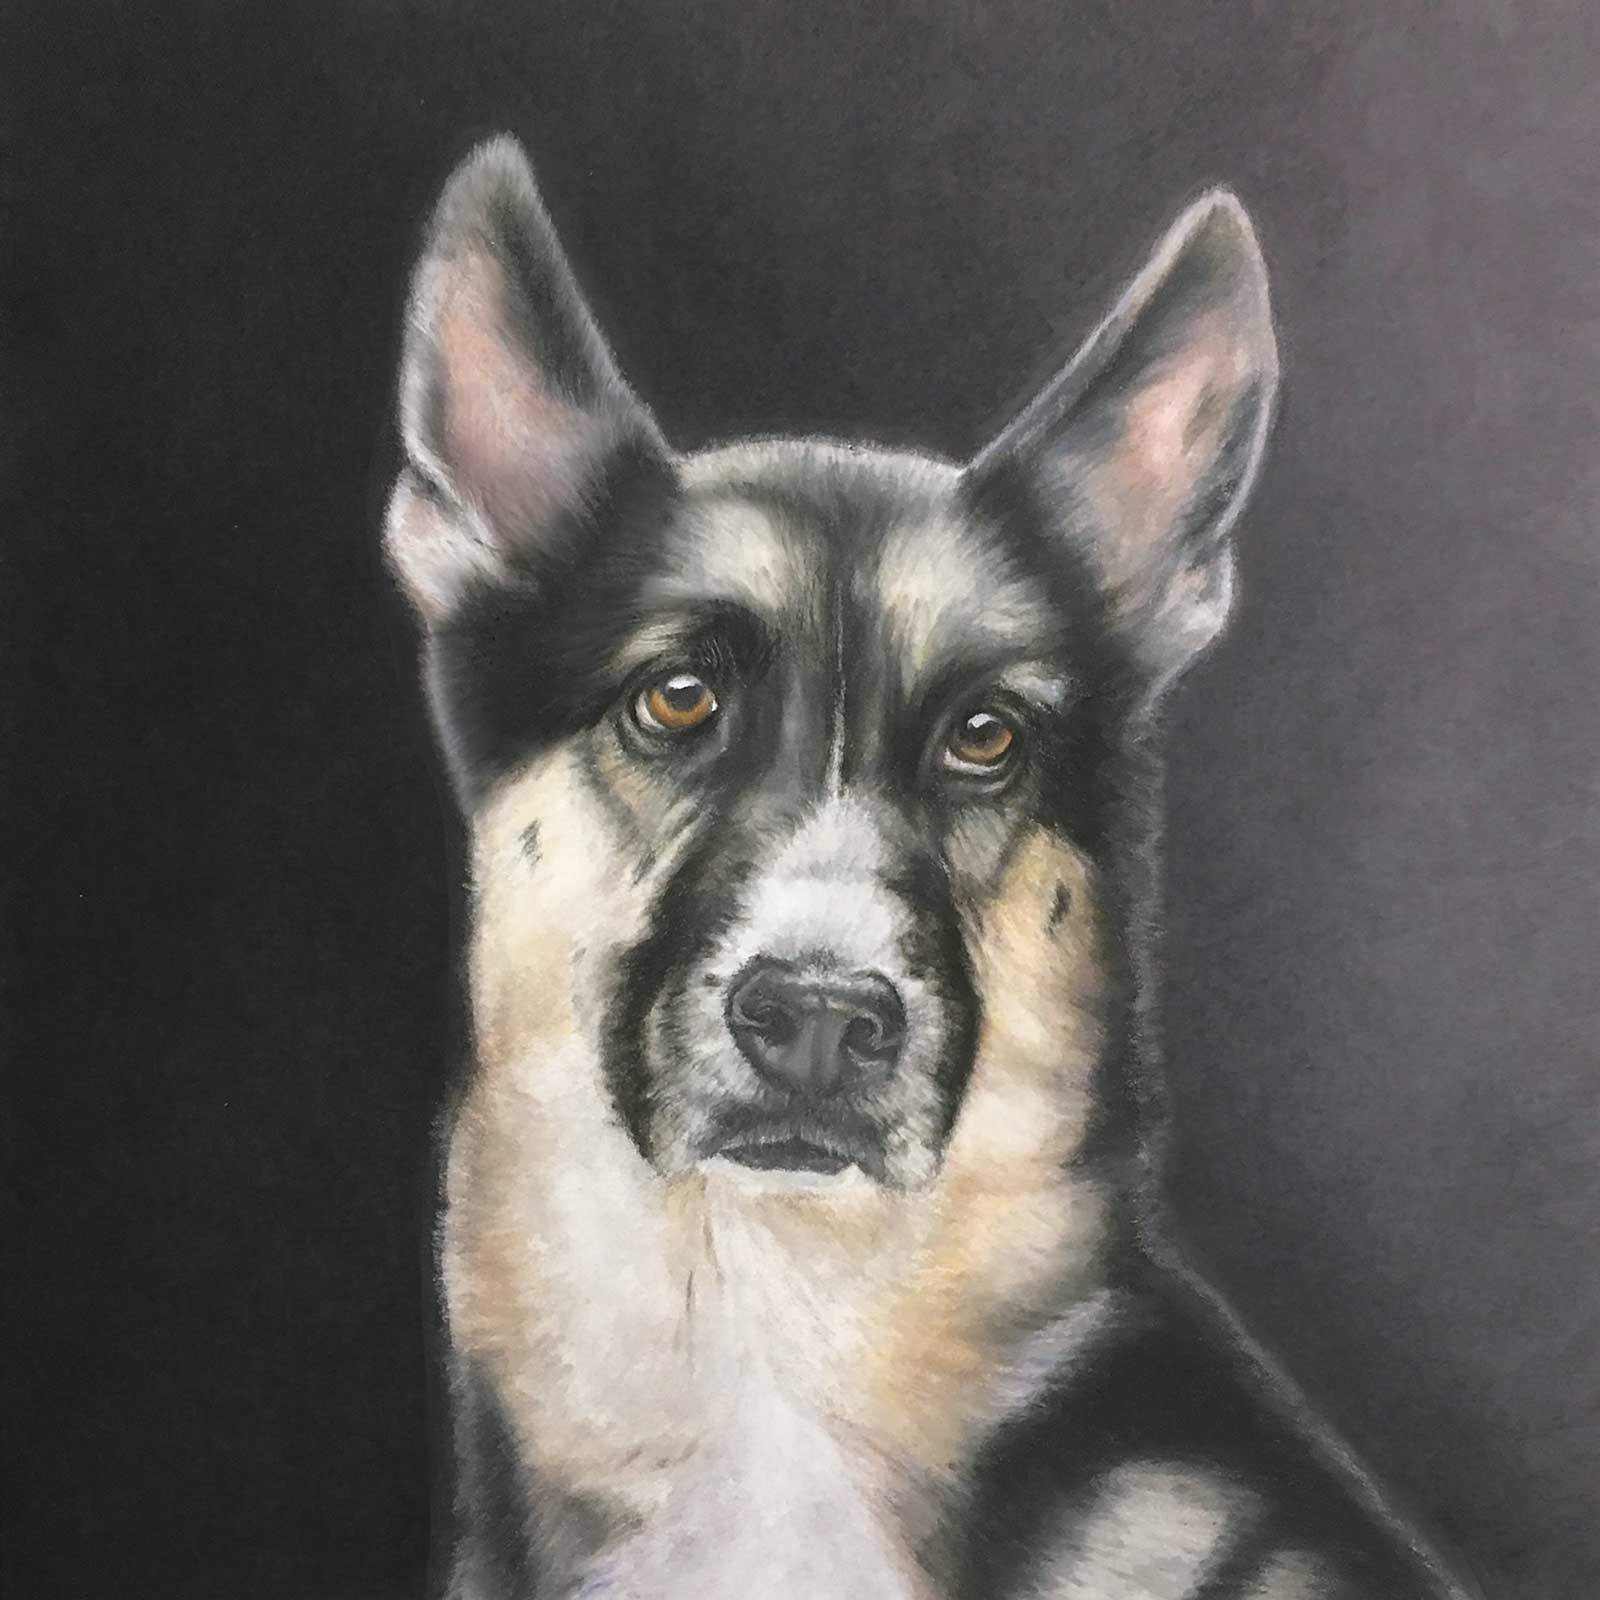
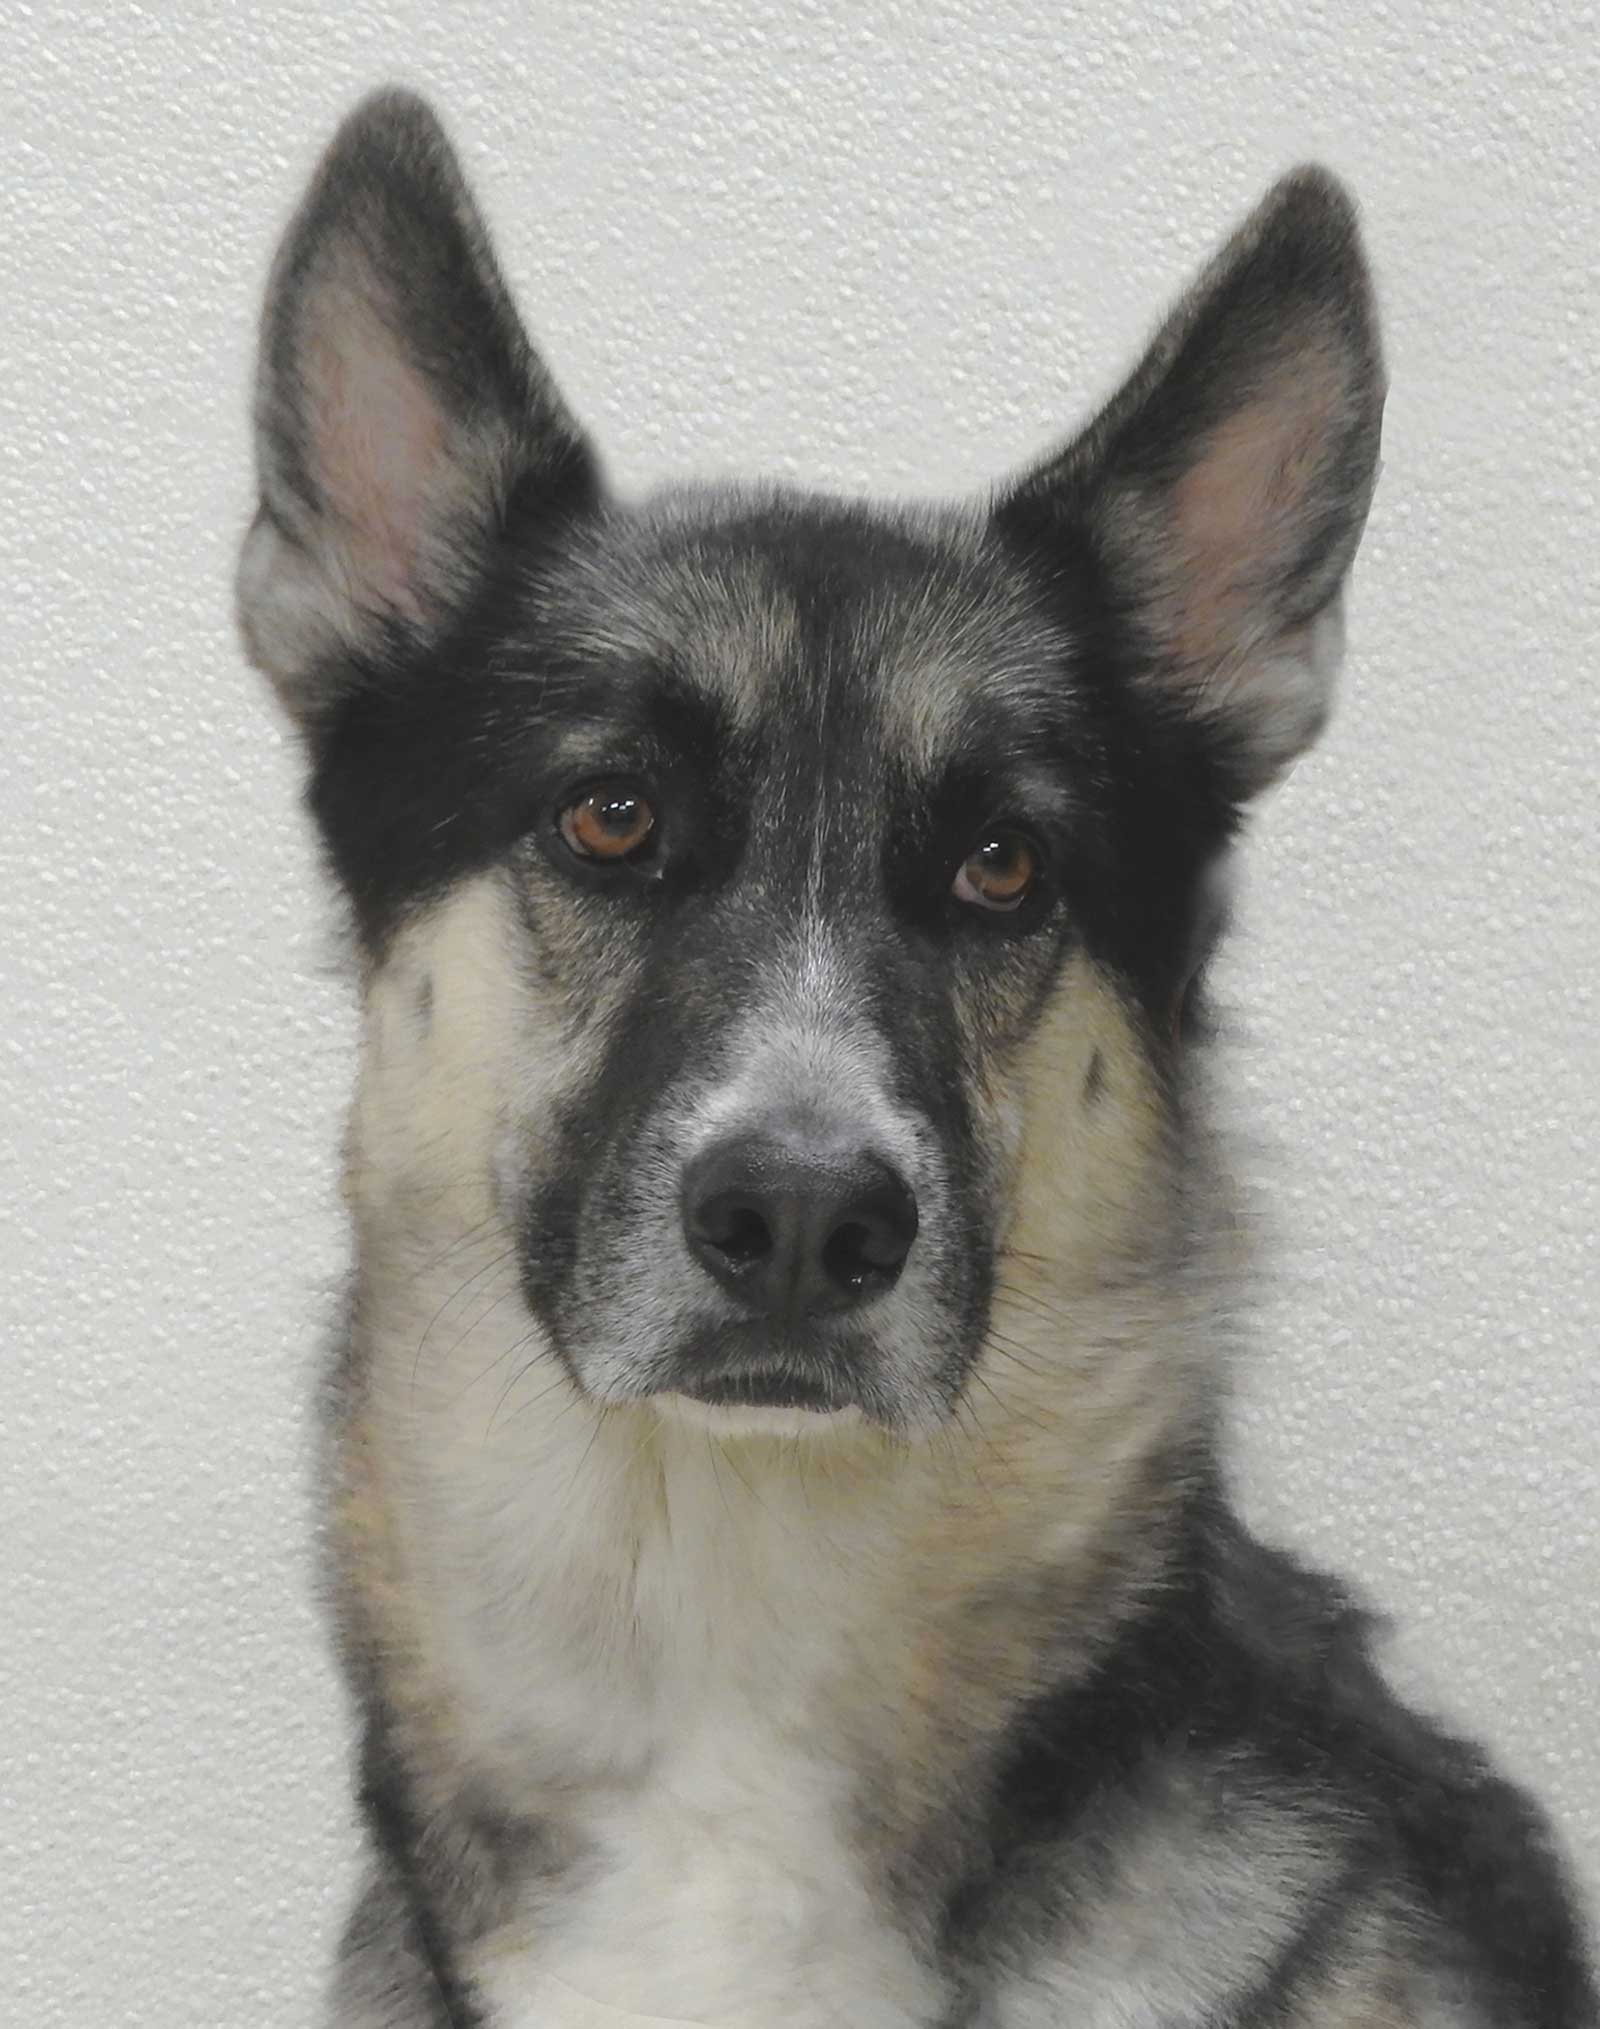 Reference Photo
My model was provided courtesy of HALO Animal Rescue. Onyx was gracious enough to sit for photos in exchange for a few treats. Shelter lighting is not ideal so neither is my photo, but that’s okay. My goal is to capture his loving eyes and handsome face, and bring out the rich color and contrast of his beautiful coat. The finished piece will be 10 by 10 inches. As a side note, I’m pleased to report Onyx was adopted not long after our photoshoot.
WHAT THE ARTIST USED
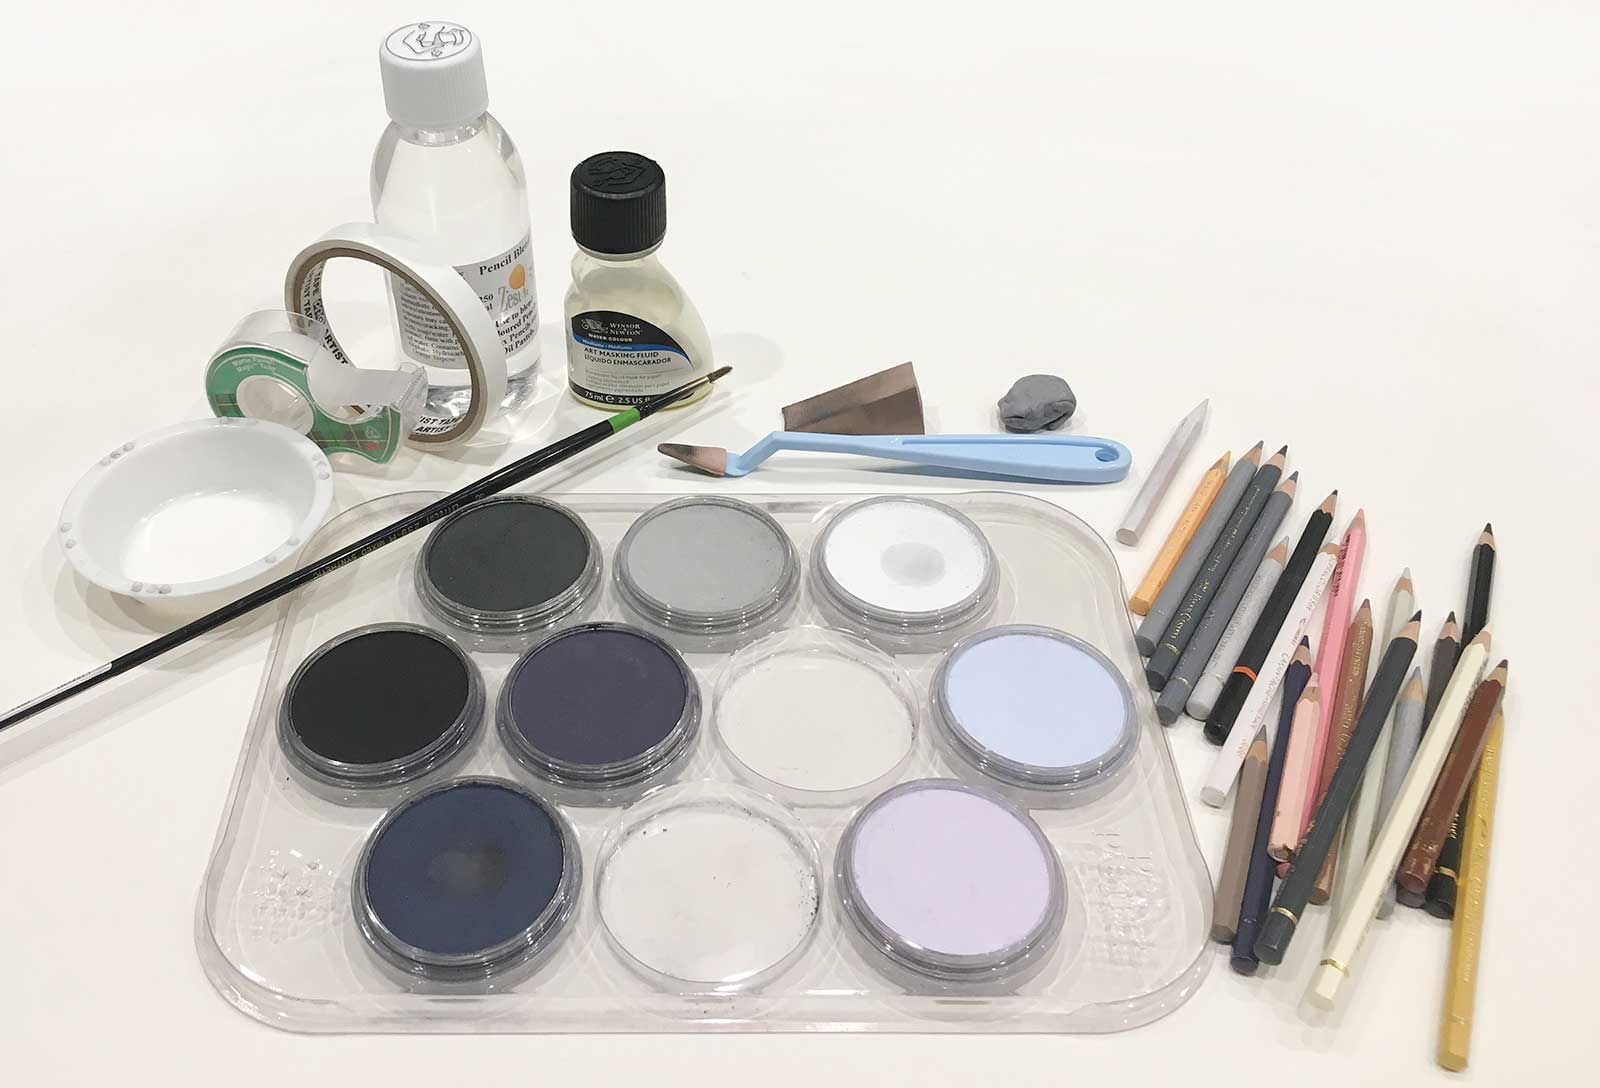
PanPastels
Black, Payne’s gray extra dark, Violet extra dark, Neutral gray, Neutral gray extra dark, Violet tint, Ultramarine blue tint, White
Colored Pencils
Caran D’Ache Pablo
Ivory black, Sepia, Slate gray, Brownish beige, Brownish orange, Brown, Indigo blue, Salmon pink, Granite rose, Apricot, Light ochre, Ash gray, Cream, White, Colorless blender
Faber-Castell Polychromos
Cold gray I, Cold gray II, Cold gray III, Cold gray IV, Cold gray V
Additional Materials
Masonite board, White artist tape, White Clairefontaine Pastelmat, Masking fluid (yellow), Wedge sponge, Plastic knife tool with sponge cover, Kneaded eraser, Pencil blend solvent, Round brush, size 8, Small plastic dish, Paper towels, Scotch tape, 3B graphite pencil
 Stage 1
Stage 1 Getting Started
Using white artist tape, I secure my astelmat to a piece of Masonite board, transfer my sketch, and apply masking fluid around the inside edges of my subject.
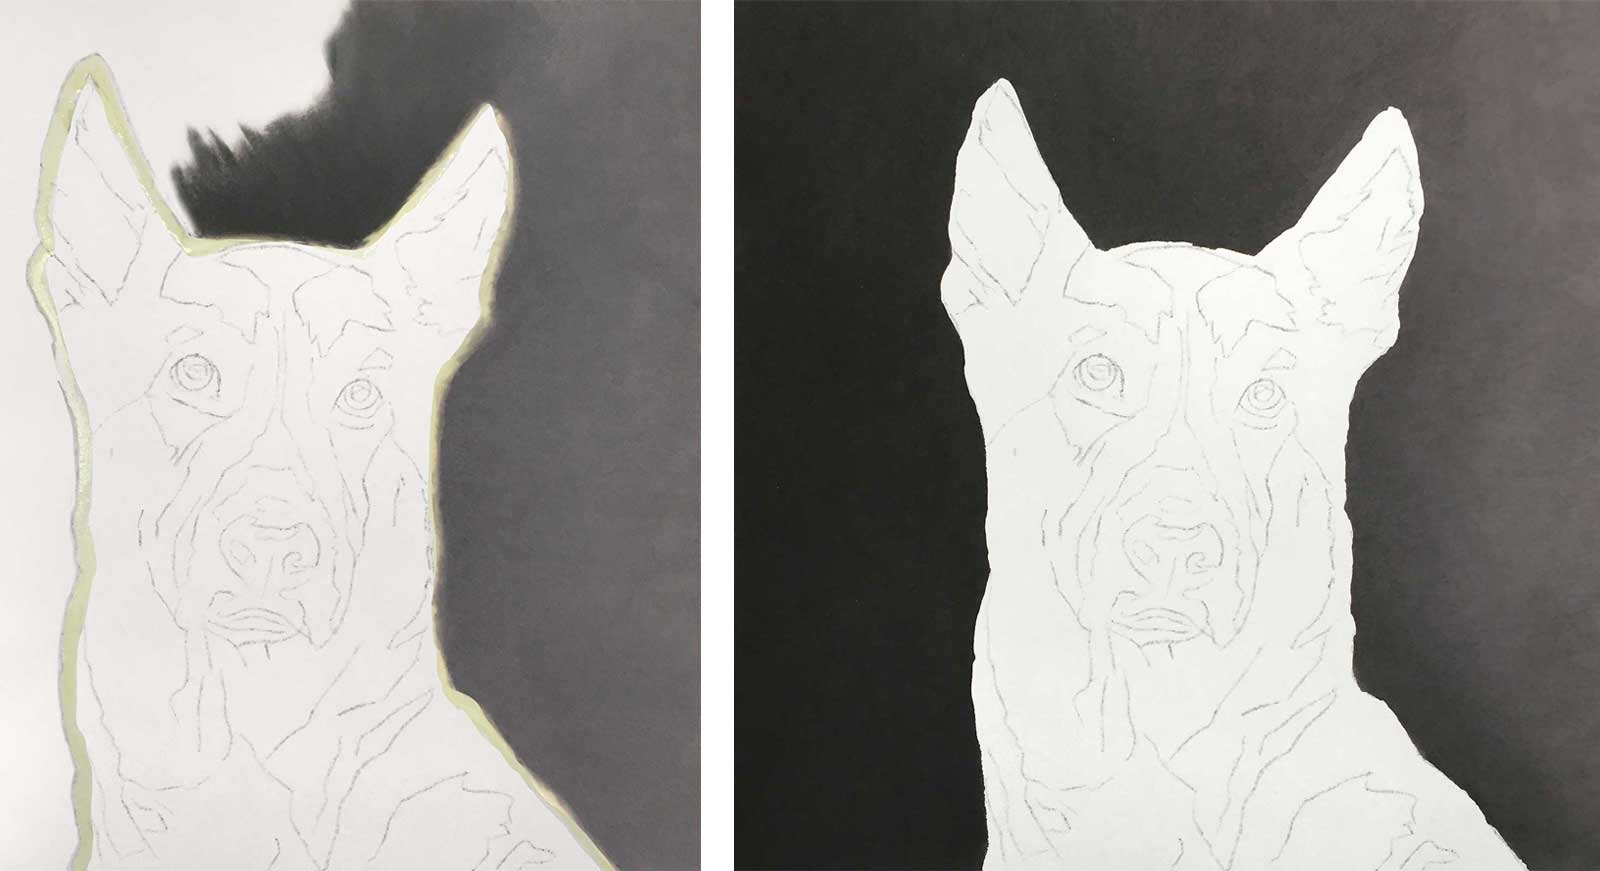 Stage 2
Stage 2 Laying in the Background
I use PanPastels and a wedge sponge to create a soft gradient background. Moving from light to dark, I work outward from the edges of the subject and peel up the masking upon completion.
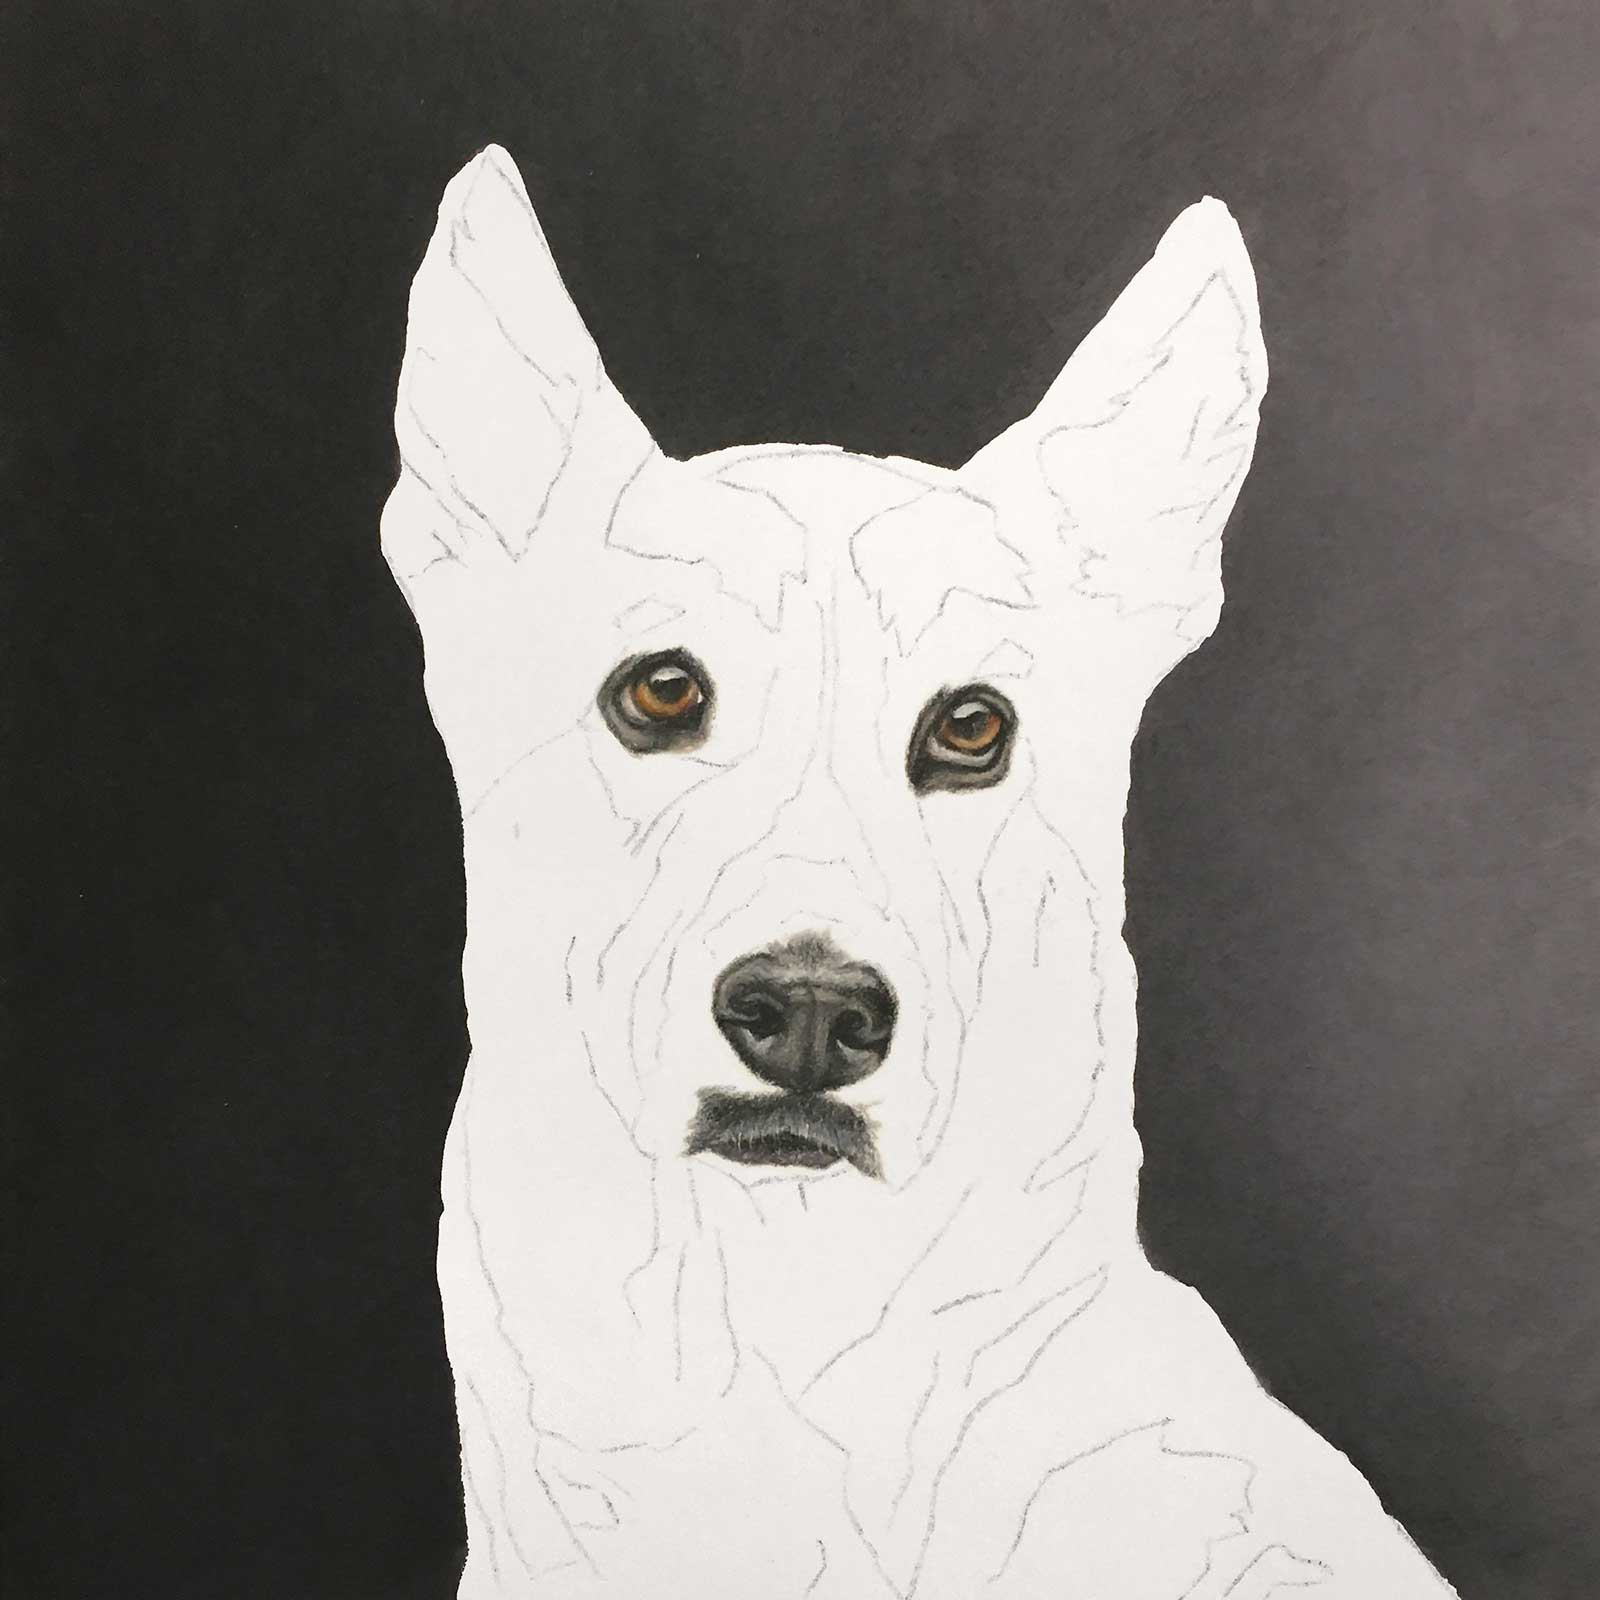 Stage 3
Stage 3 Eyes, Nose and Muzzle
I work in some of the detail in these areas even at this early stage. They’re the cornerstones, so to speak. If accurate, the rest will fall into place as the piece progresses.
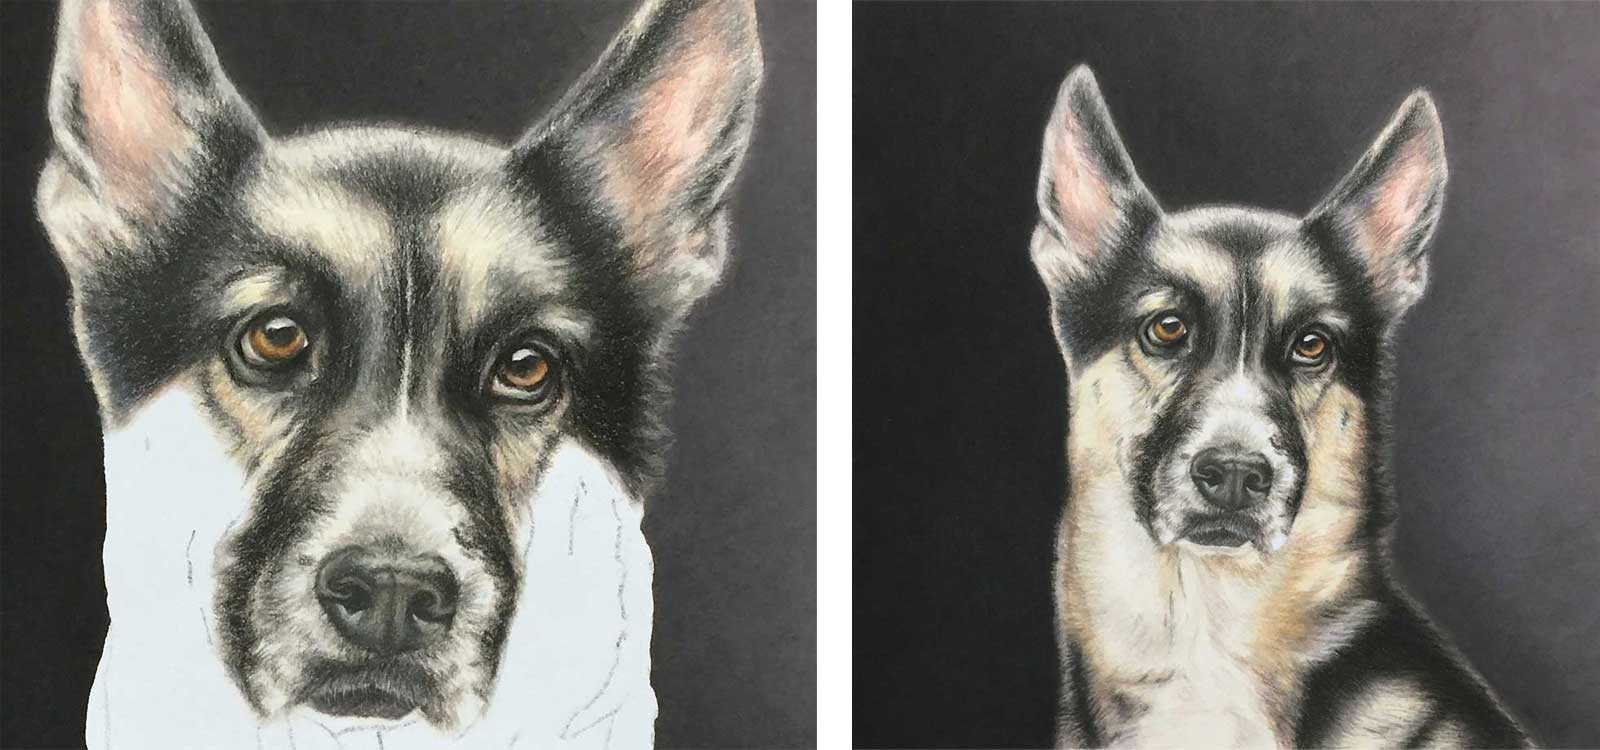 Stage 4
Stage 4 First Layer of Color
Starting with the ears I block in the large areas of color. Keeping my pencil strokes consistent with the direction of the fur, I work my way down through the head, neck and chest.
 Stage 5
Stage 5 Blending with Solvent
Applying solvent with a size 8 round brush, I blend the lightest areas first and gradually work toward the darkest areas. I let the piece dry for several hours.
 Stage 6
Stage 6 Getting into the Details
Again, starting with the eyes, nose, and muzzle, then moving to the ears and working my way down, I dial in color, create fur texture and build contrast.
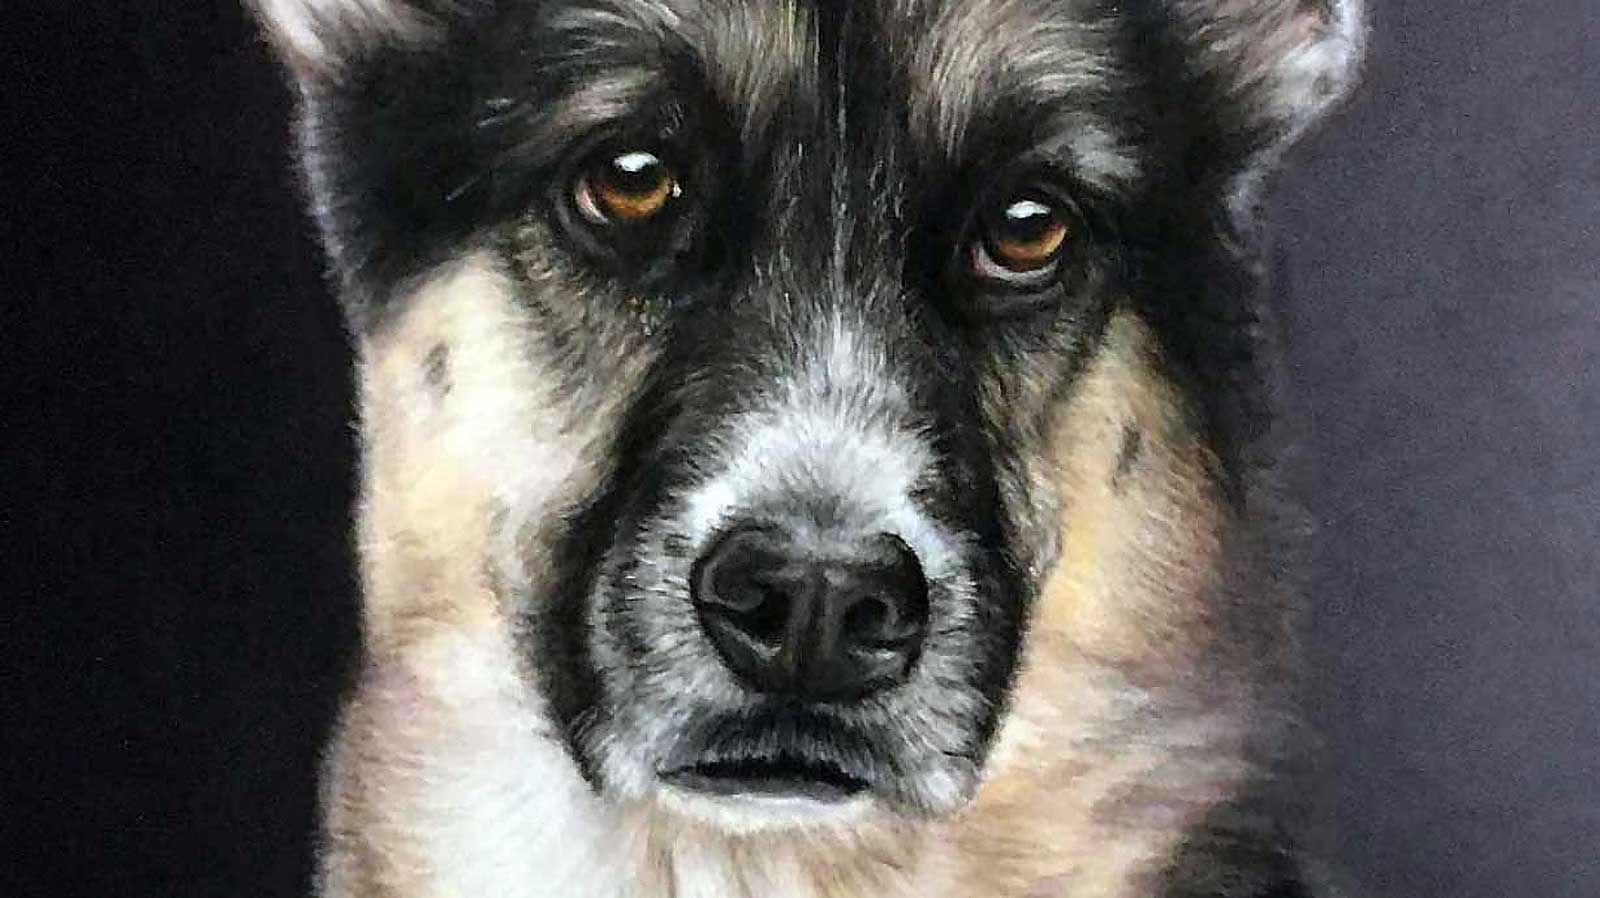
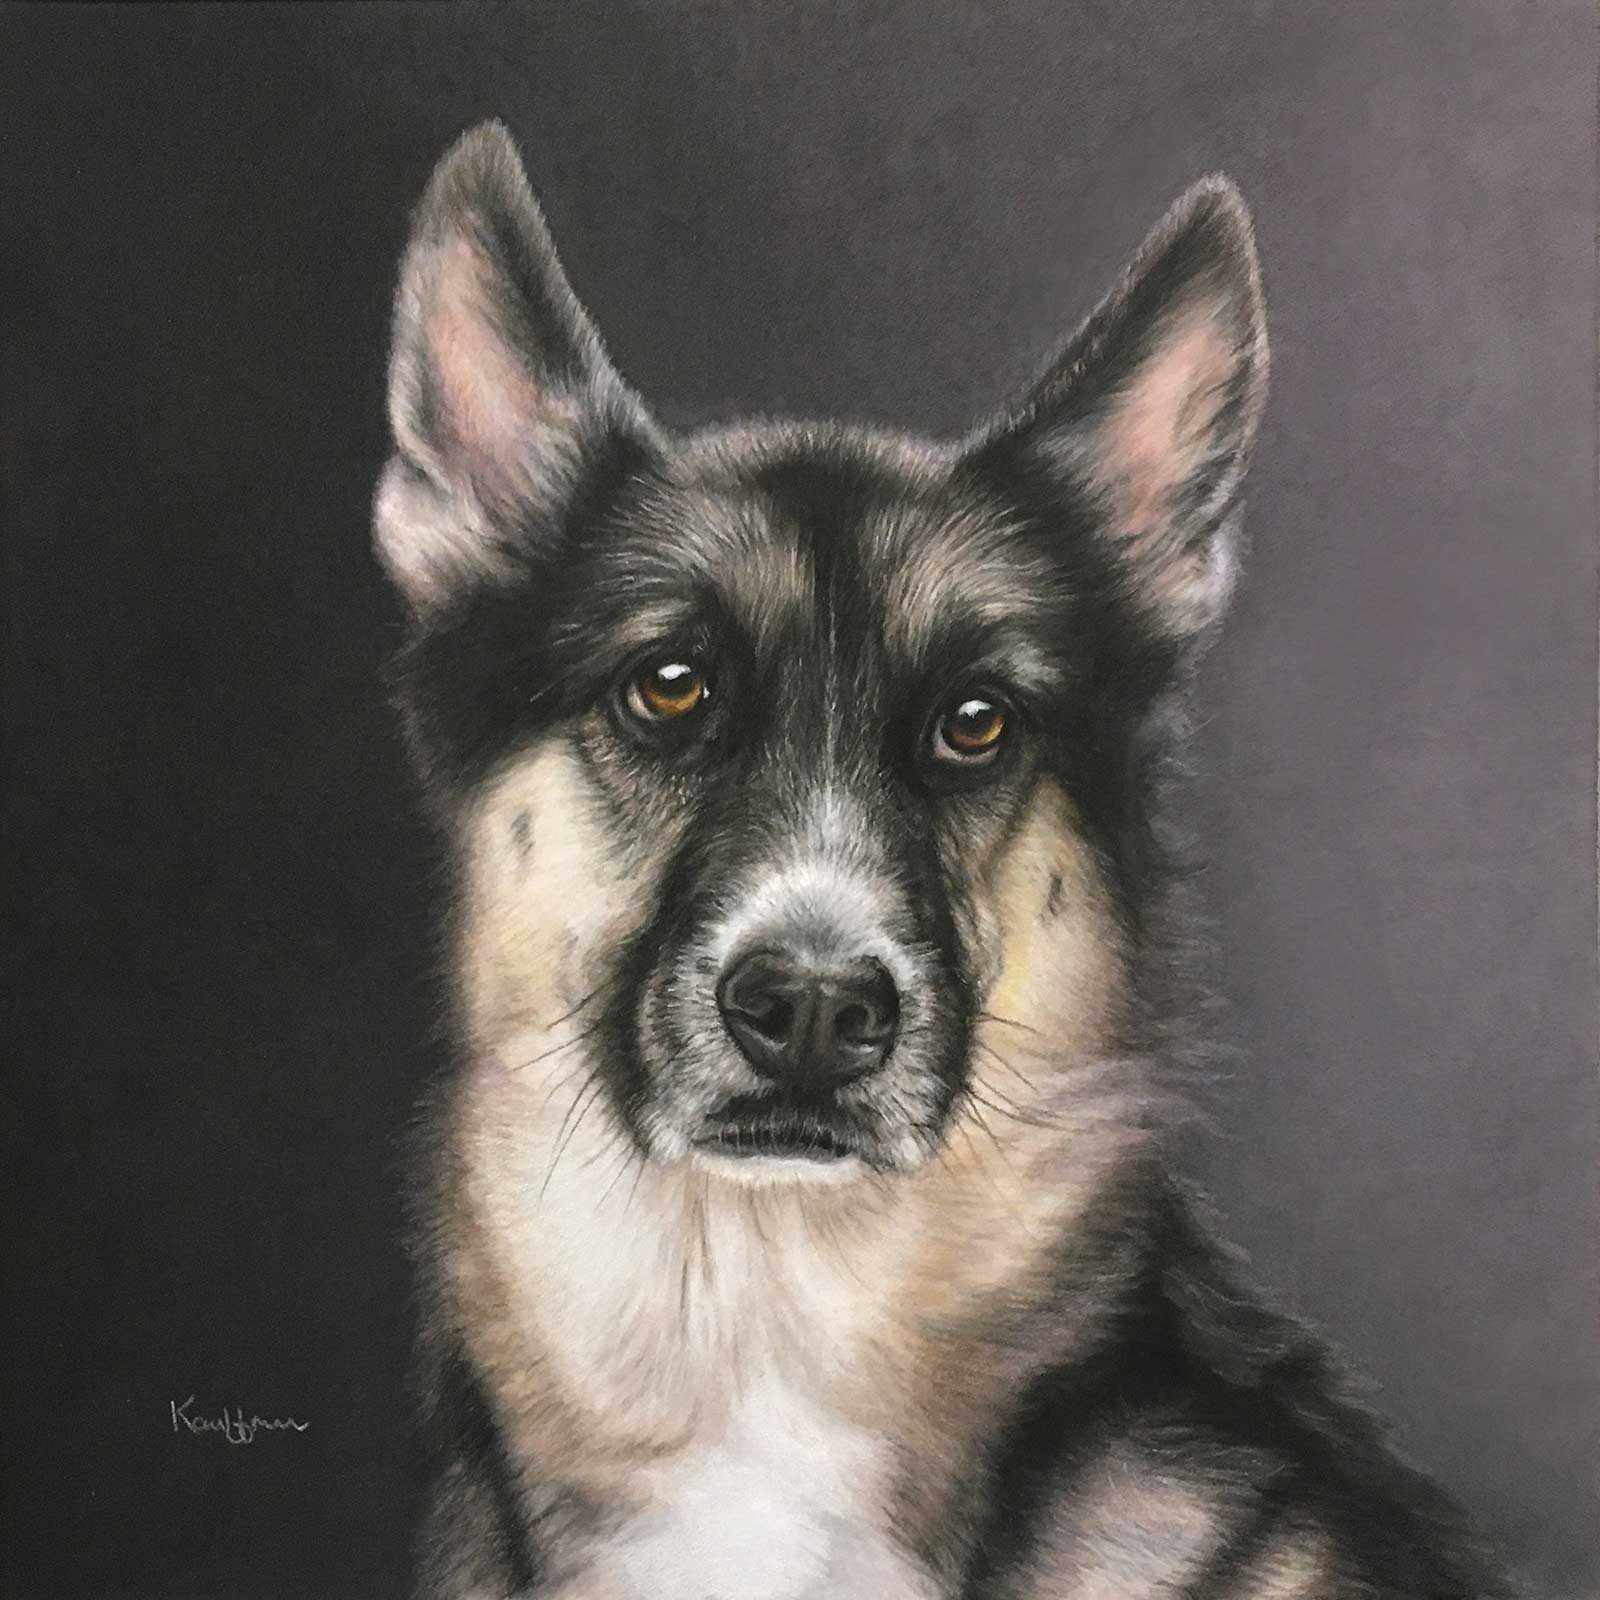 Stage 7
Stage 7 Finishing Touches
ONYX, colored pencil and PanPastel, 10 x 10" (25 x 25 cm) I pop the highlights and darken shadows as needed, add the whiskers and extend the soft furry edges over the background.
About the Artist
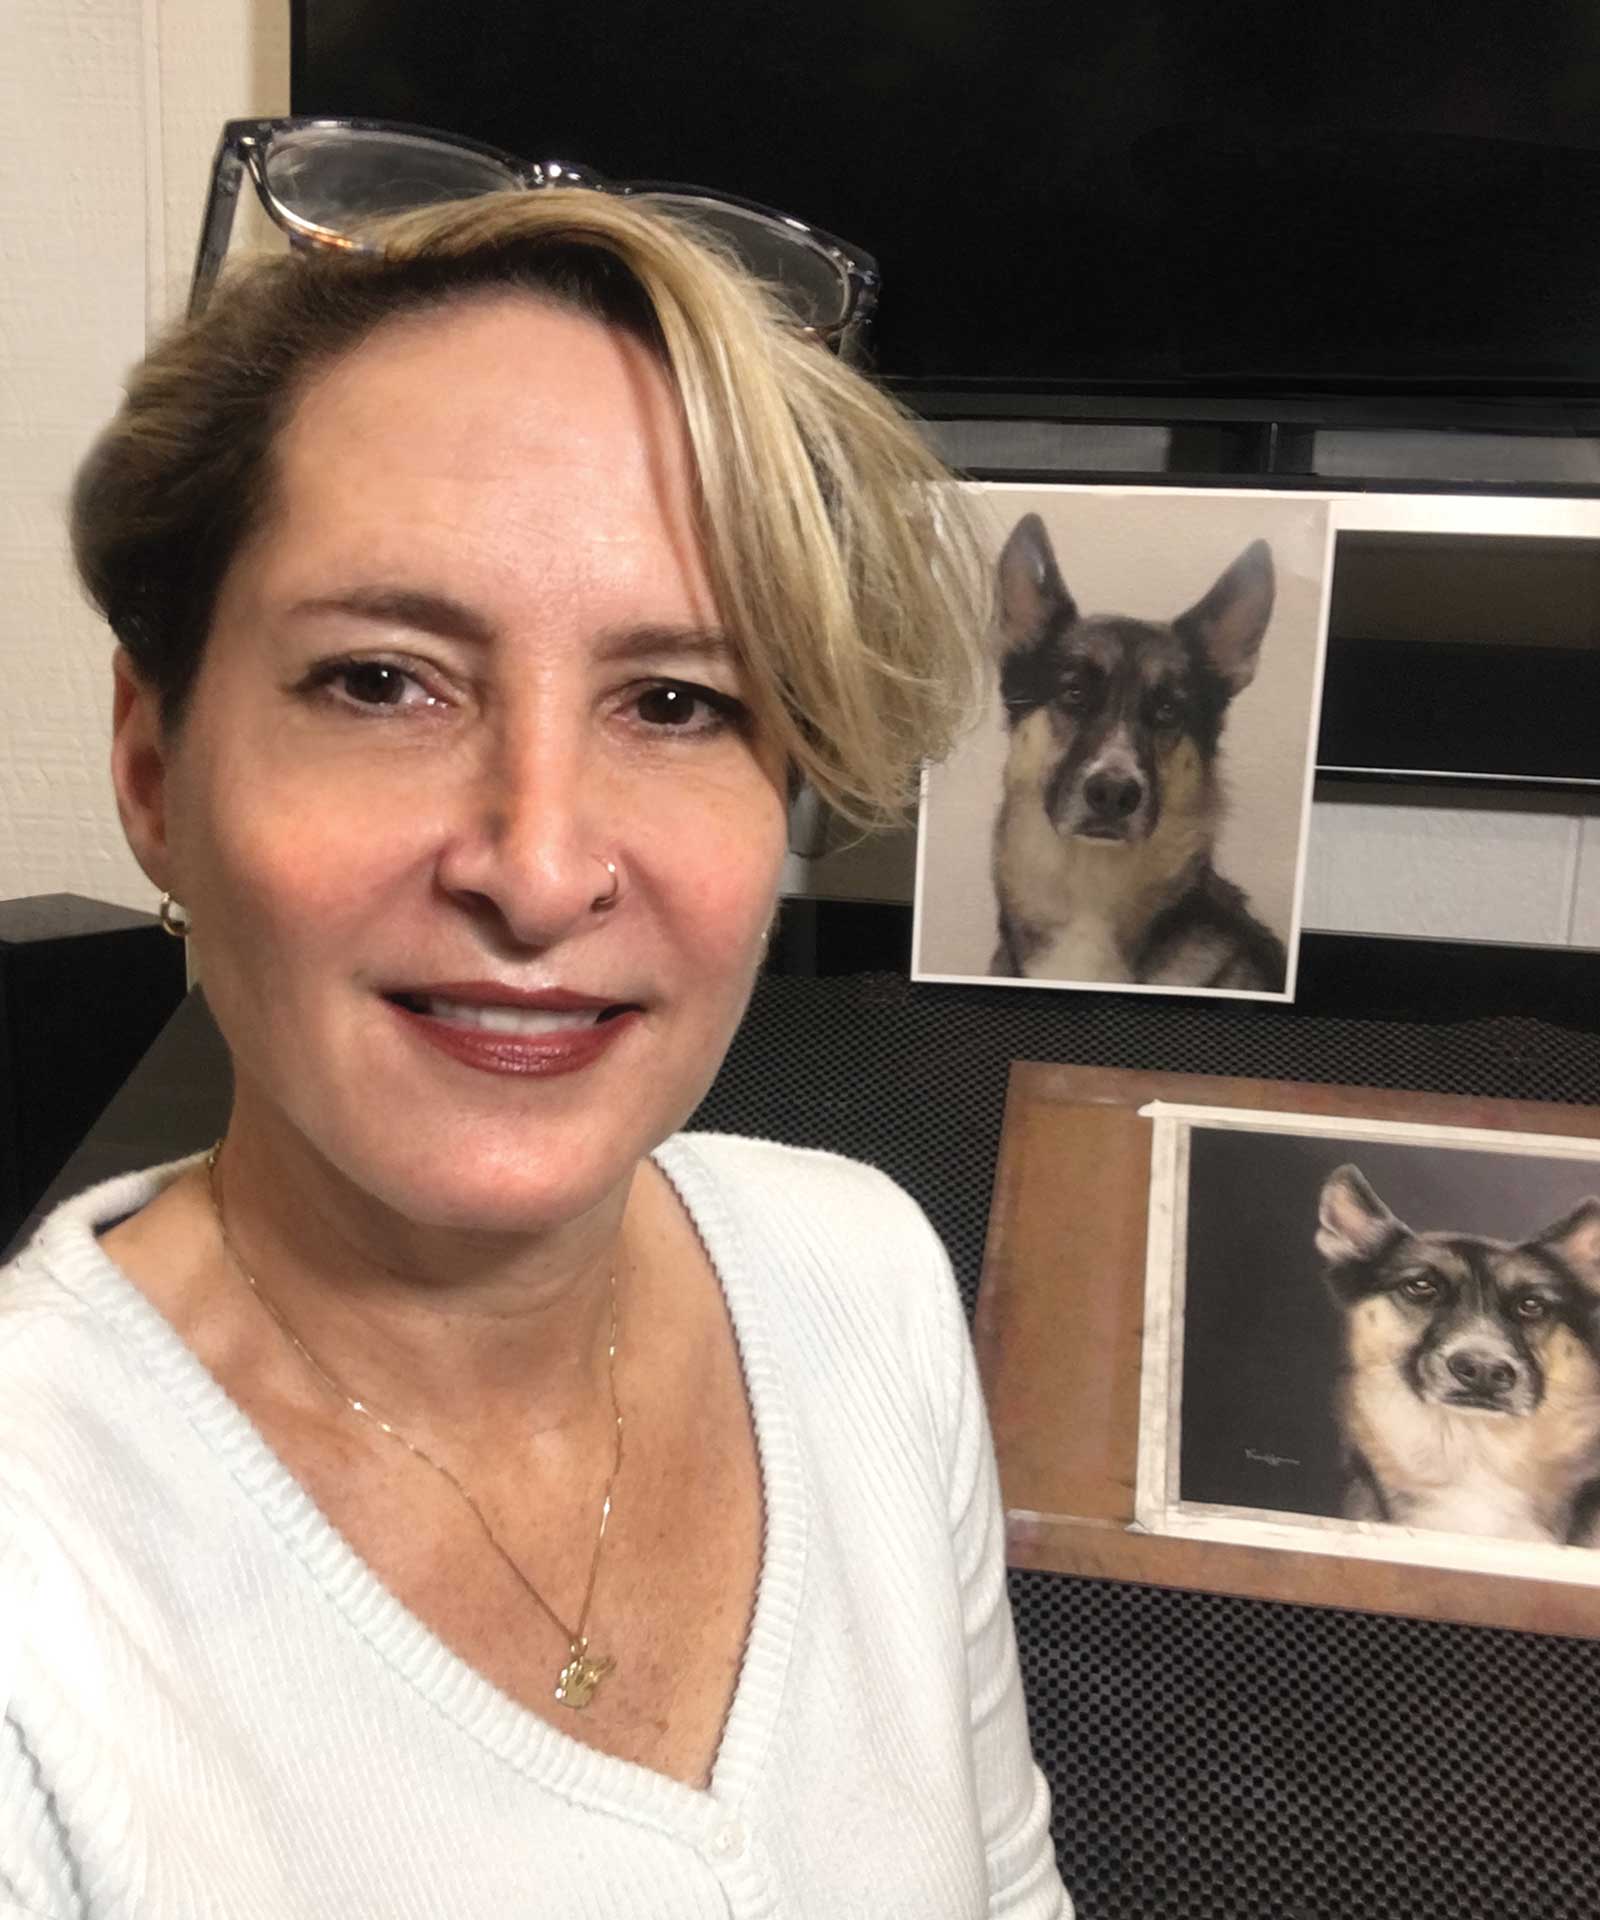 Erika Kauffman
Erika Kauffman is primarily self-taught. After spending 20 years as a freelance graphic and web designer, she stepped away from the keyboard to return to her first love—fine art. She started out working in oil but colored pencil has since become her medium of choice. Combining a love of realism with an even greater love of dogs (and other furry friends) has steered her focus toward pet portraits, for now. Her most recent project was a series of 12 rescue dogs that were made into a 2022 fundraising calendar for HALO Animal Rescue. Kauffman was accepted into the International Guild of Realism in 2017 and has had several pieces included in the Guild’s annual juried exhibitions. She is also a member of CPSA.
Contact at
azrenpup@gmail.com
www.renaissancepup.com