


I once had an art teacher describe the job of an artist as being the same as that of a magician; both are masters of deception. The painter who practices realism deceives the viewer by making a two-dimensional surface appear three-dimensional, using little more than paint and a brush. My grandfather was an amateur magician, so I appreciate the comparison. To enhance my abilities of “deception,” I attended the Atelier School of Classical Realism in Oakland, California, taught by David Hardy, and I will continue my studies at the Grand Central Atelier in New York City.
 Teapot I, oil and acrylic on paper, 22 x 15” (55 x 38 cm) I made this painting in 2017, but it feels like a lifetime ago. With this piece in particular, I felt that I had turned a corner in painting realism that set me on a path to where I am today. The teapot is painted in thinned down oils, which is why many people mistake it for being a watercolor painting.
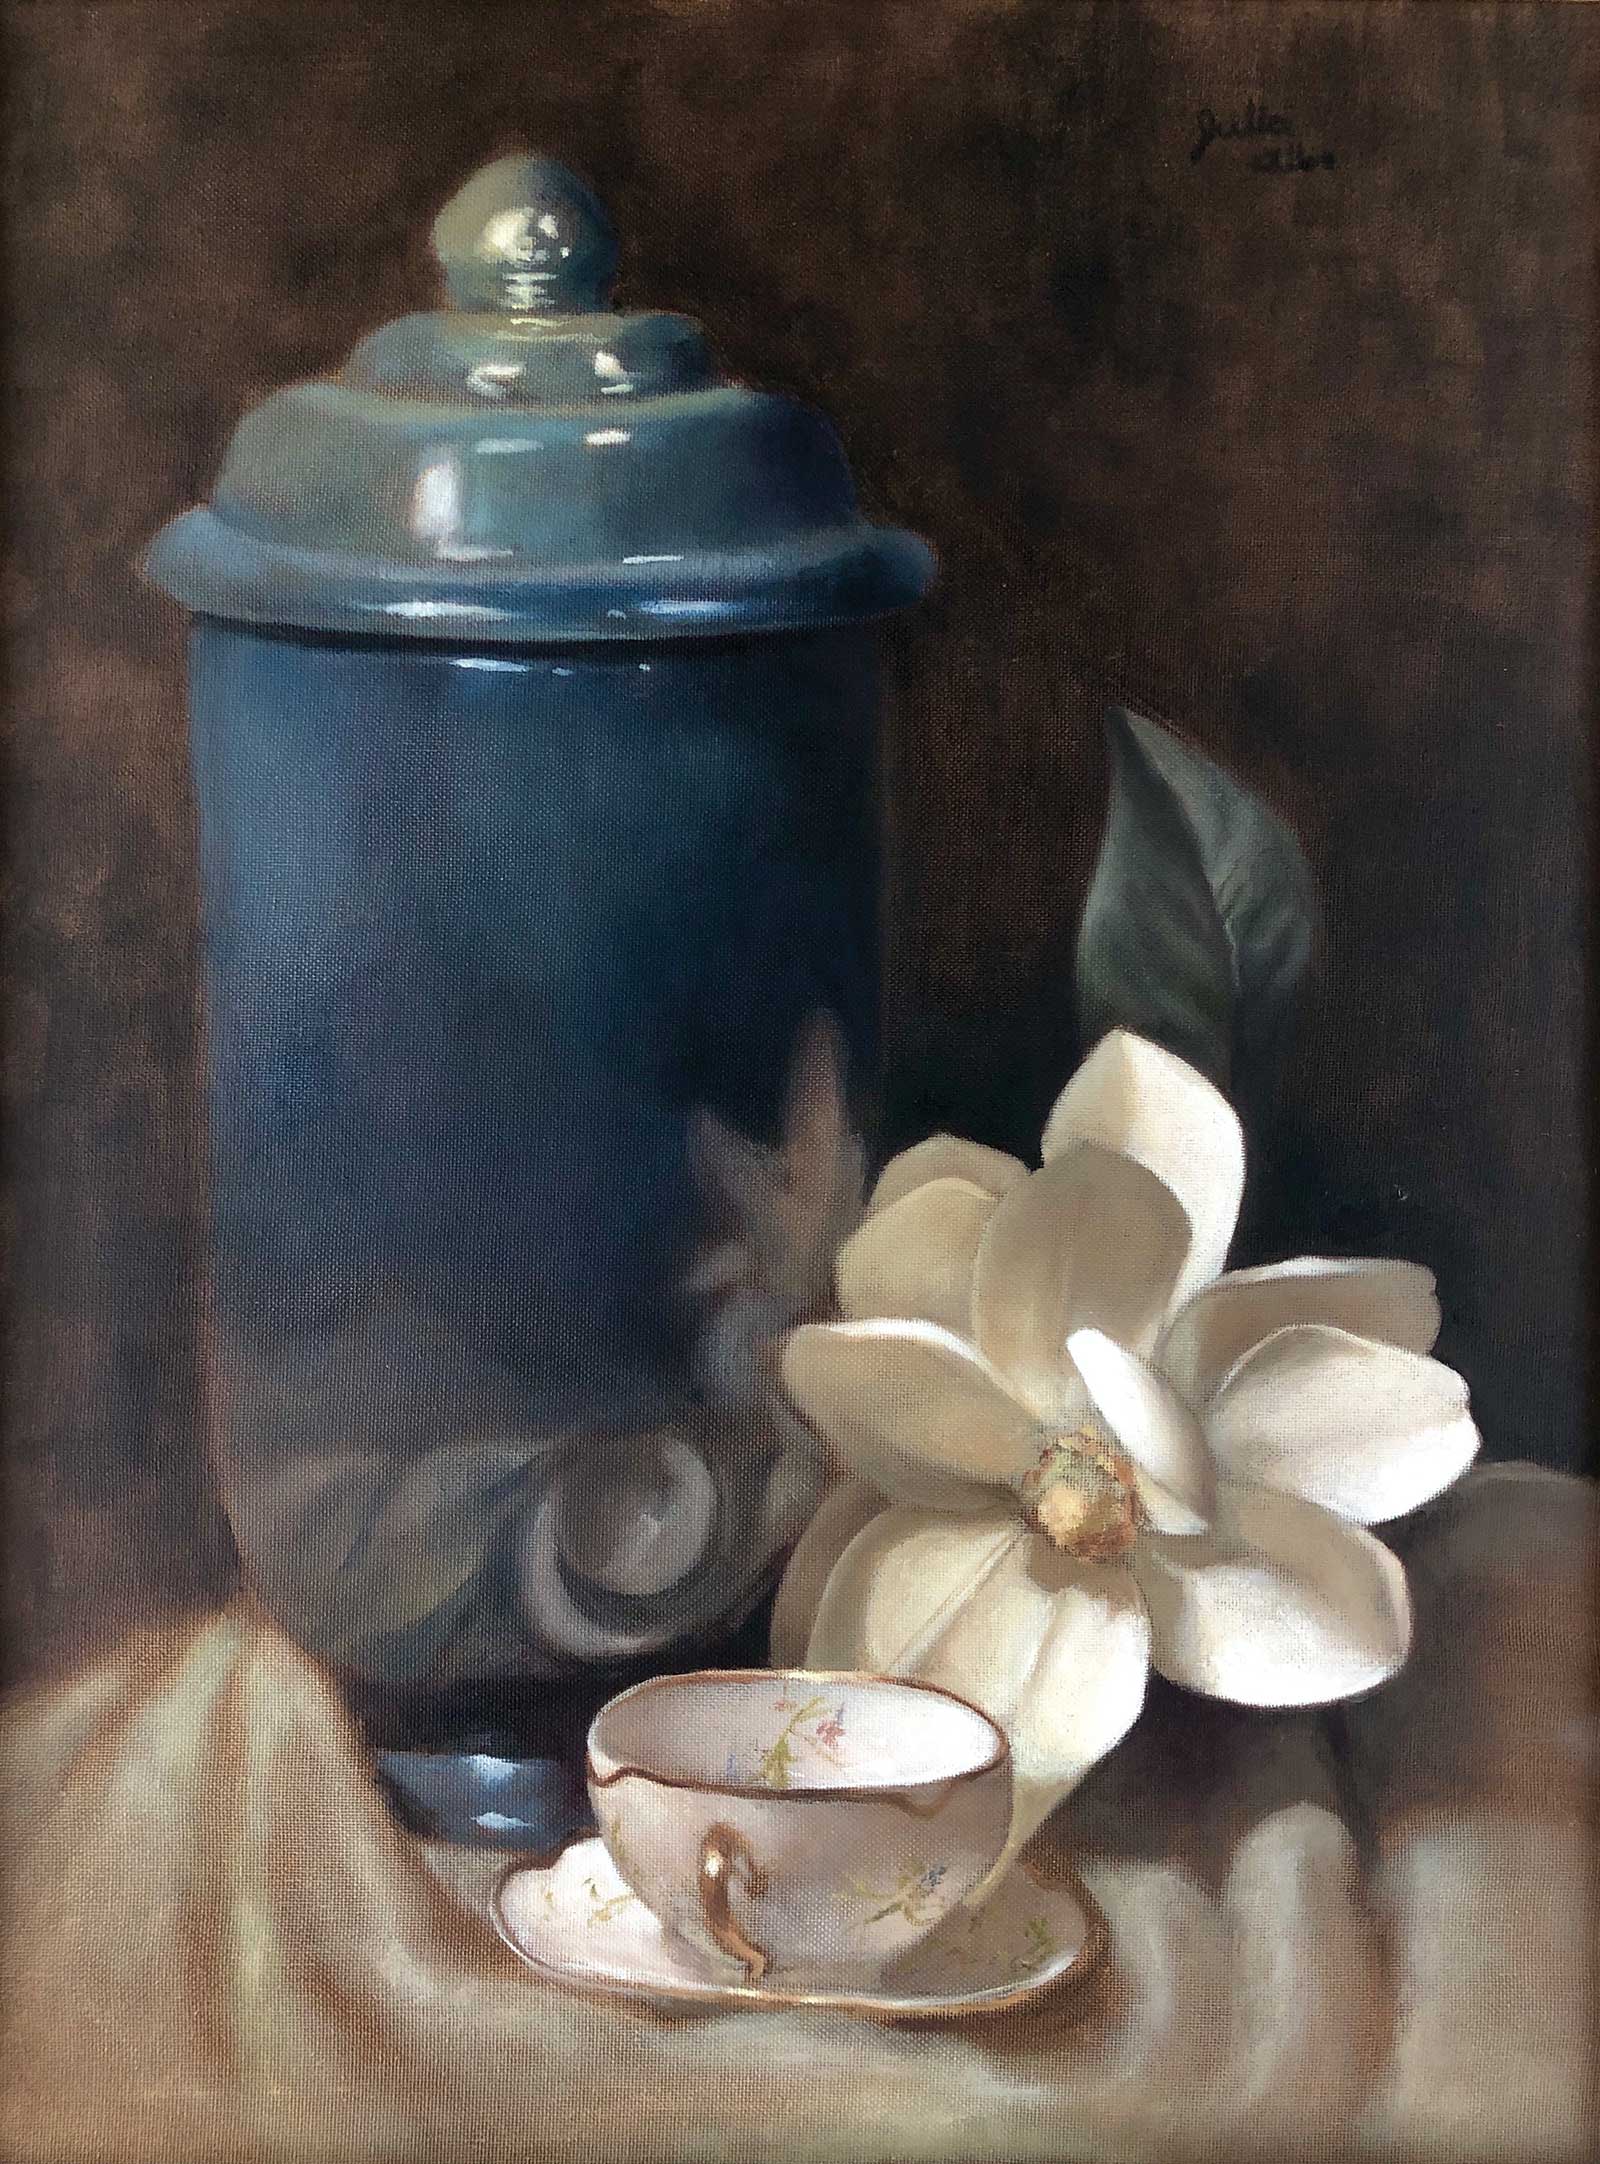
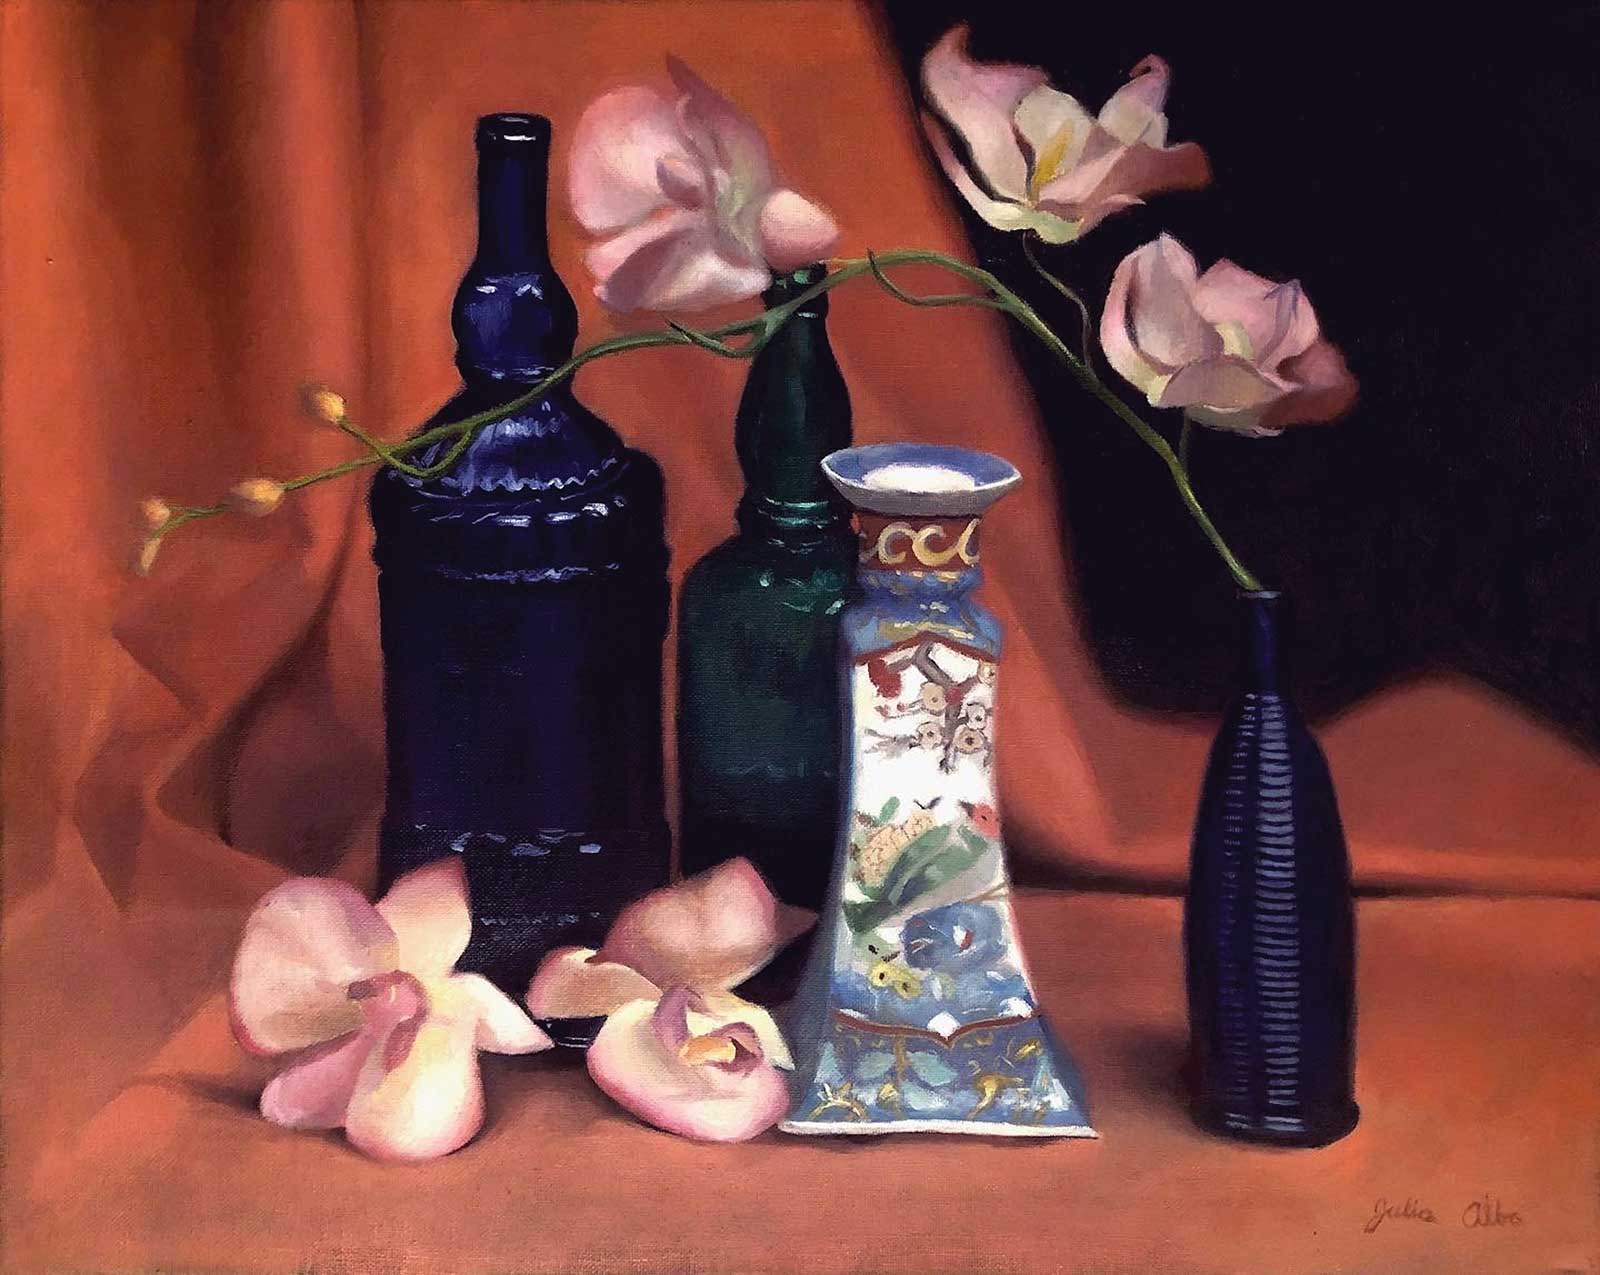
Antique Gift, oil on canvas, 24 x 18” (60 x 45 cm) This painting was also created at the Atelier School of Classical Realism. I enjoyed painting reflections because of the challenging nature of it, especially when it’s painted from life.
To study art at an atelier means to learn the classical way of painting and drawing through direct observation. Painting from life allows you to see changes in colors and tonal value that can be warped in a photo. I’m not against painting from photos as I also use reference pictures in many of my works, but there are benefits to acquiring the skills needed to paint from life. Studying at an atelier also teaches you to take a much slower approach to painting and drawing.
Candlestick, oil on canvas, 16 x 20” (40 x 50 cm) This piece was painted at the Atelier School of Classical Realism. I wanted to create a more classic composition and inject a little colorful pattern, which is displayed in the candlestick.
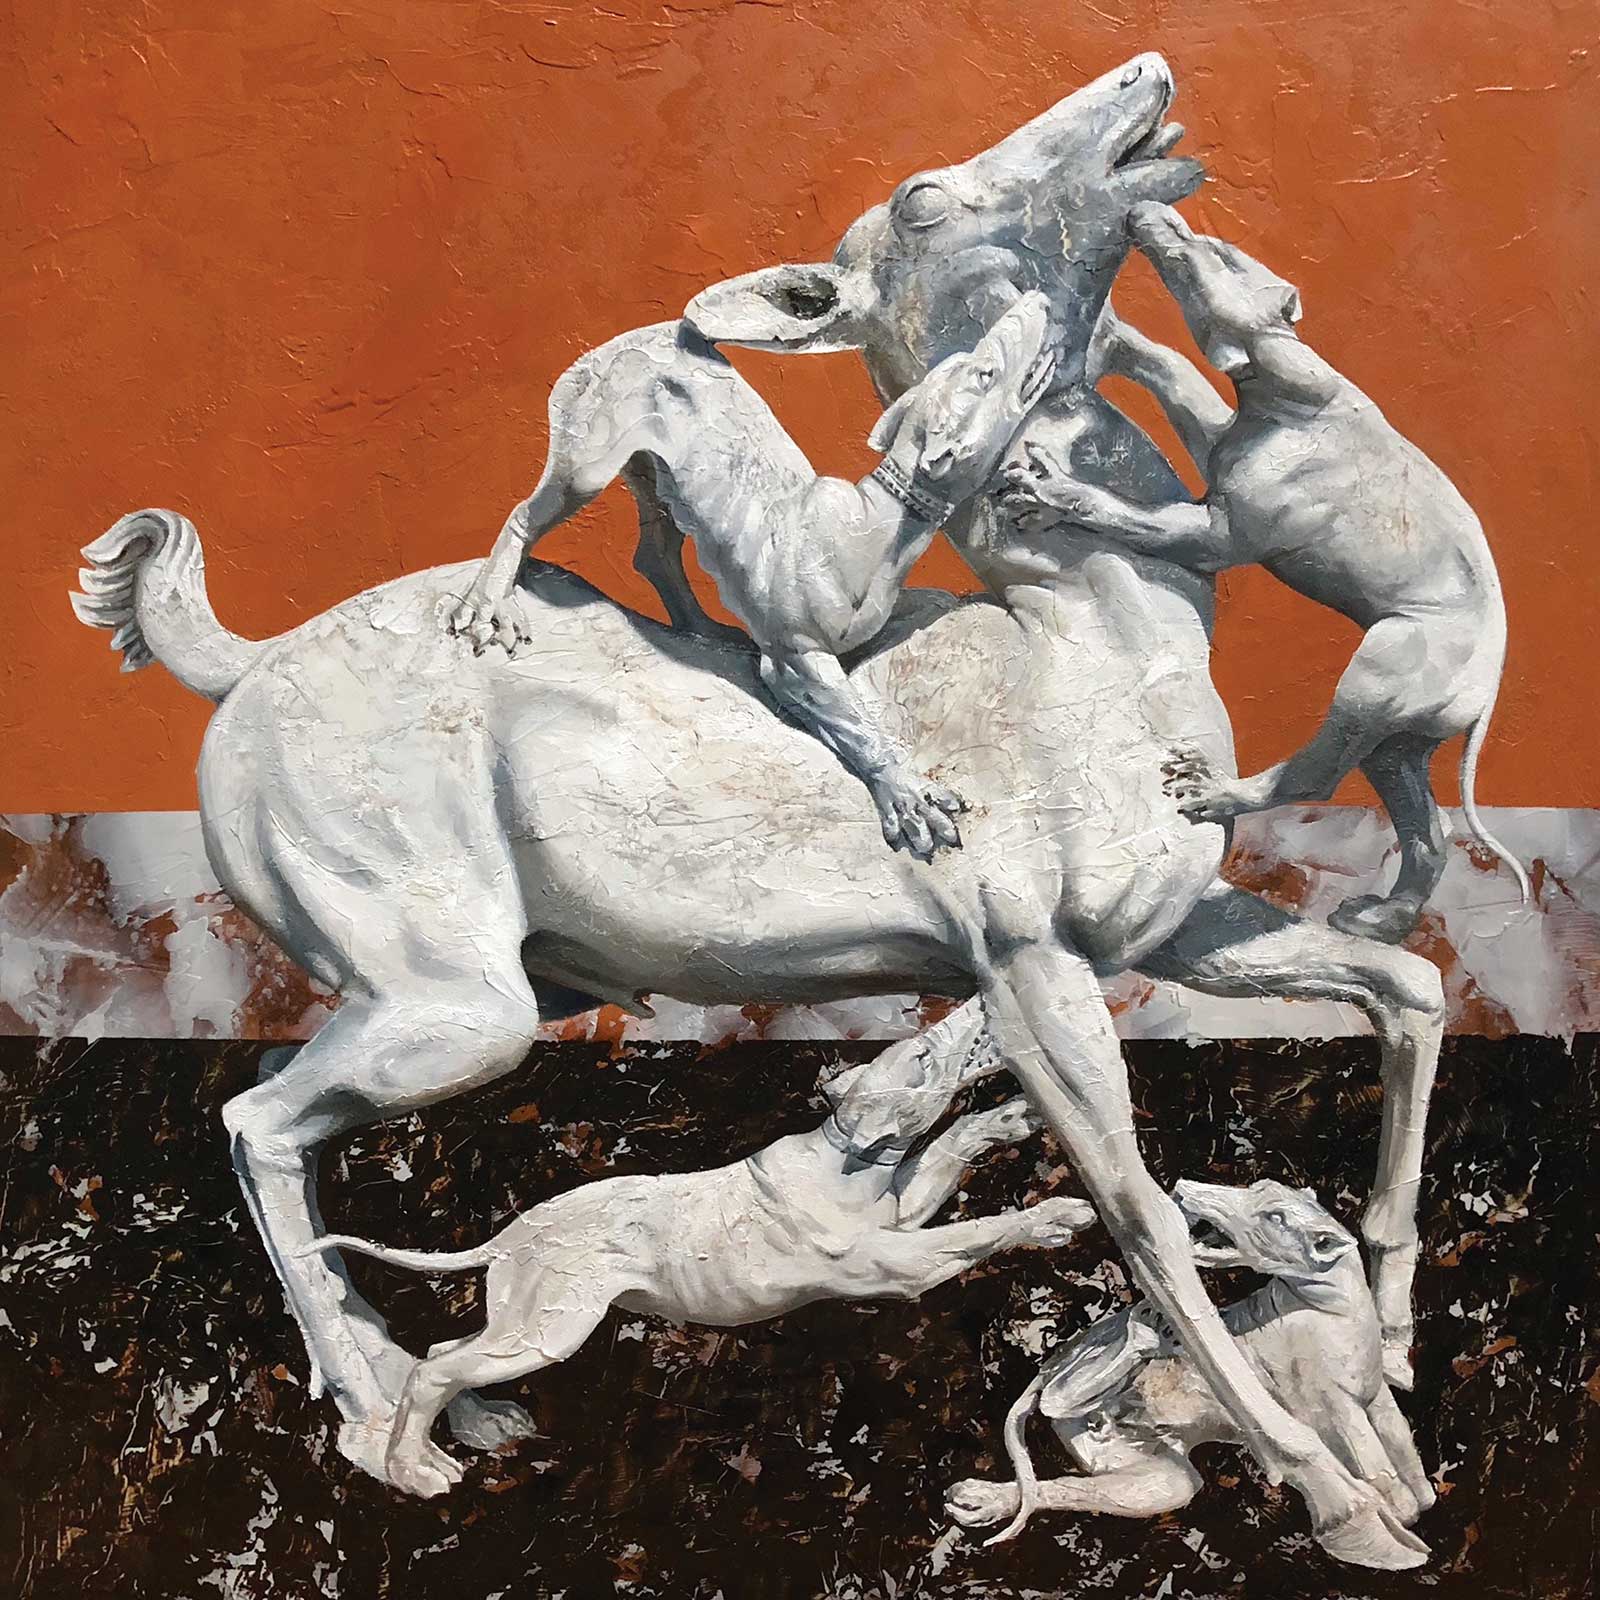
Anxiety I, oil on panel, 24 x 24” (60 x 60 cm) I painted this sculpture from the National Archeological Museum in Naples, Italy. I used molding paste and muted colors to make the surface of the painting look like a crumbling fresco in an effort to blend the past with the present.
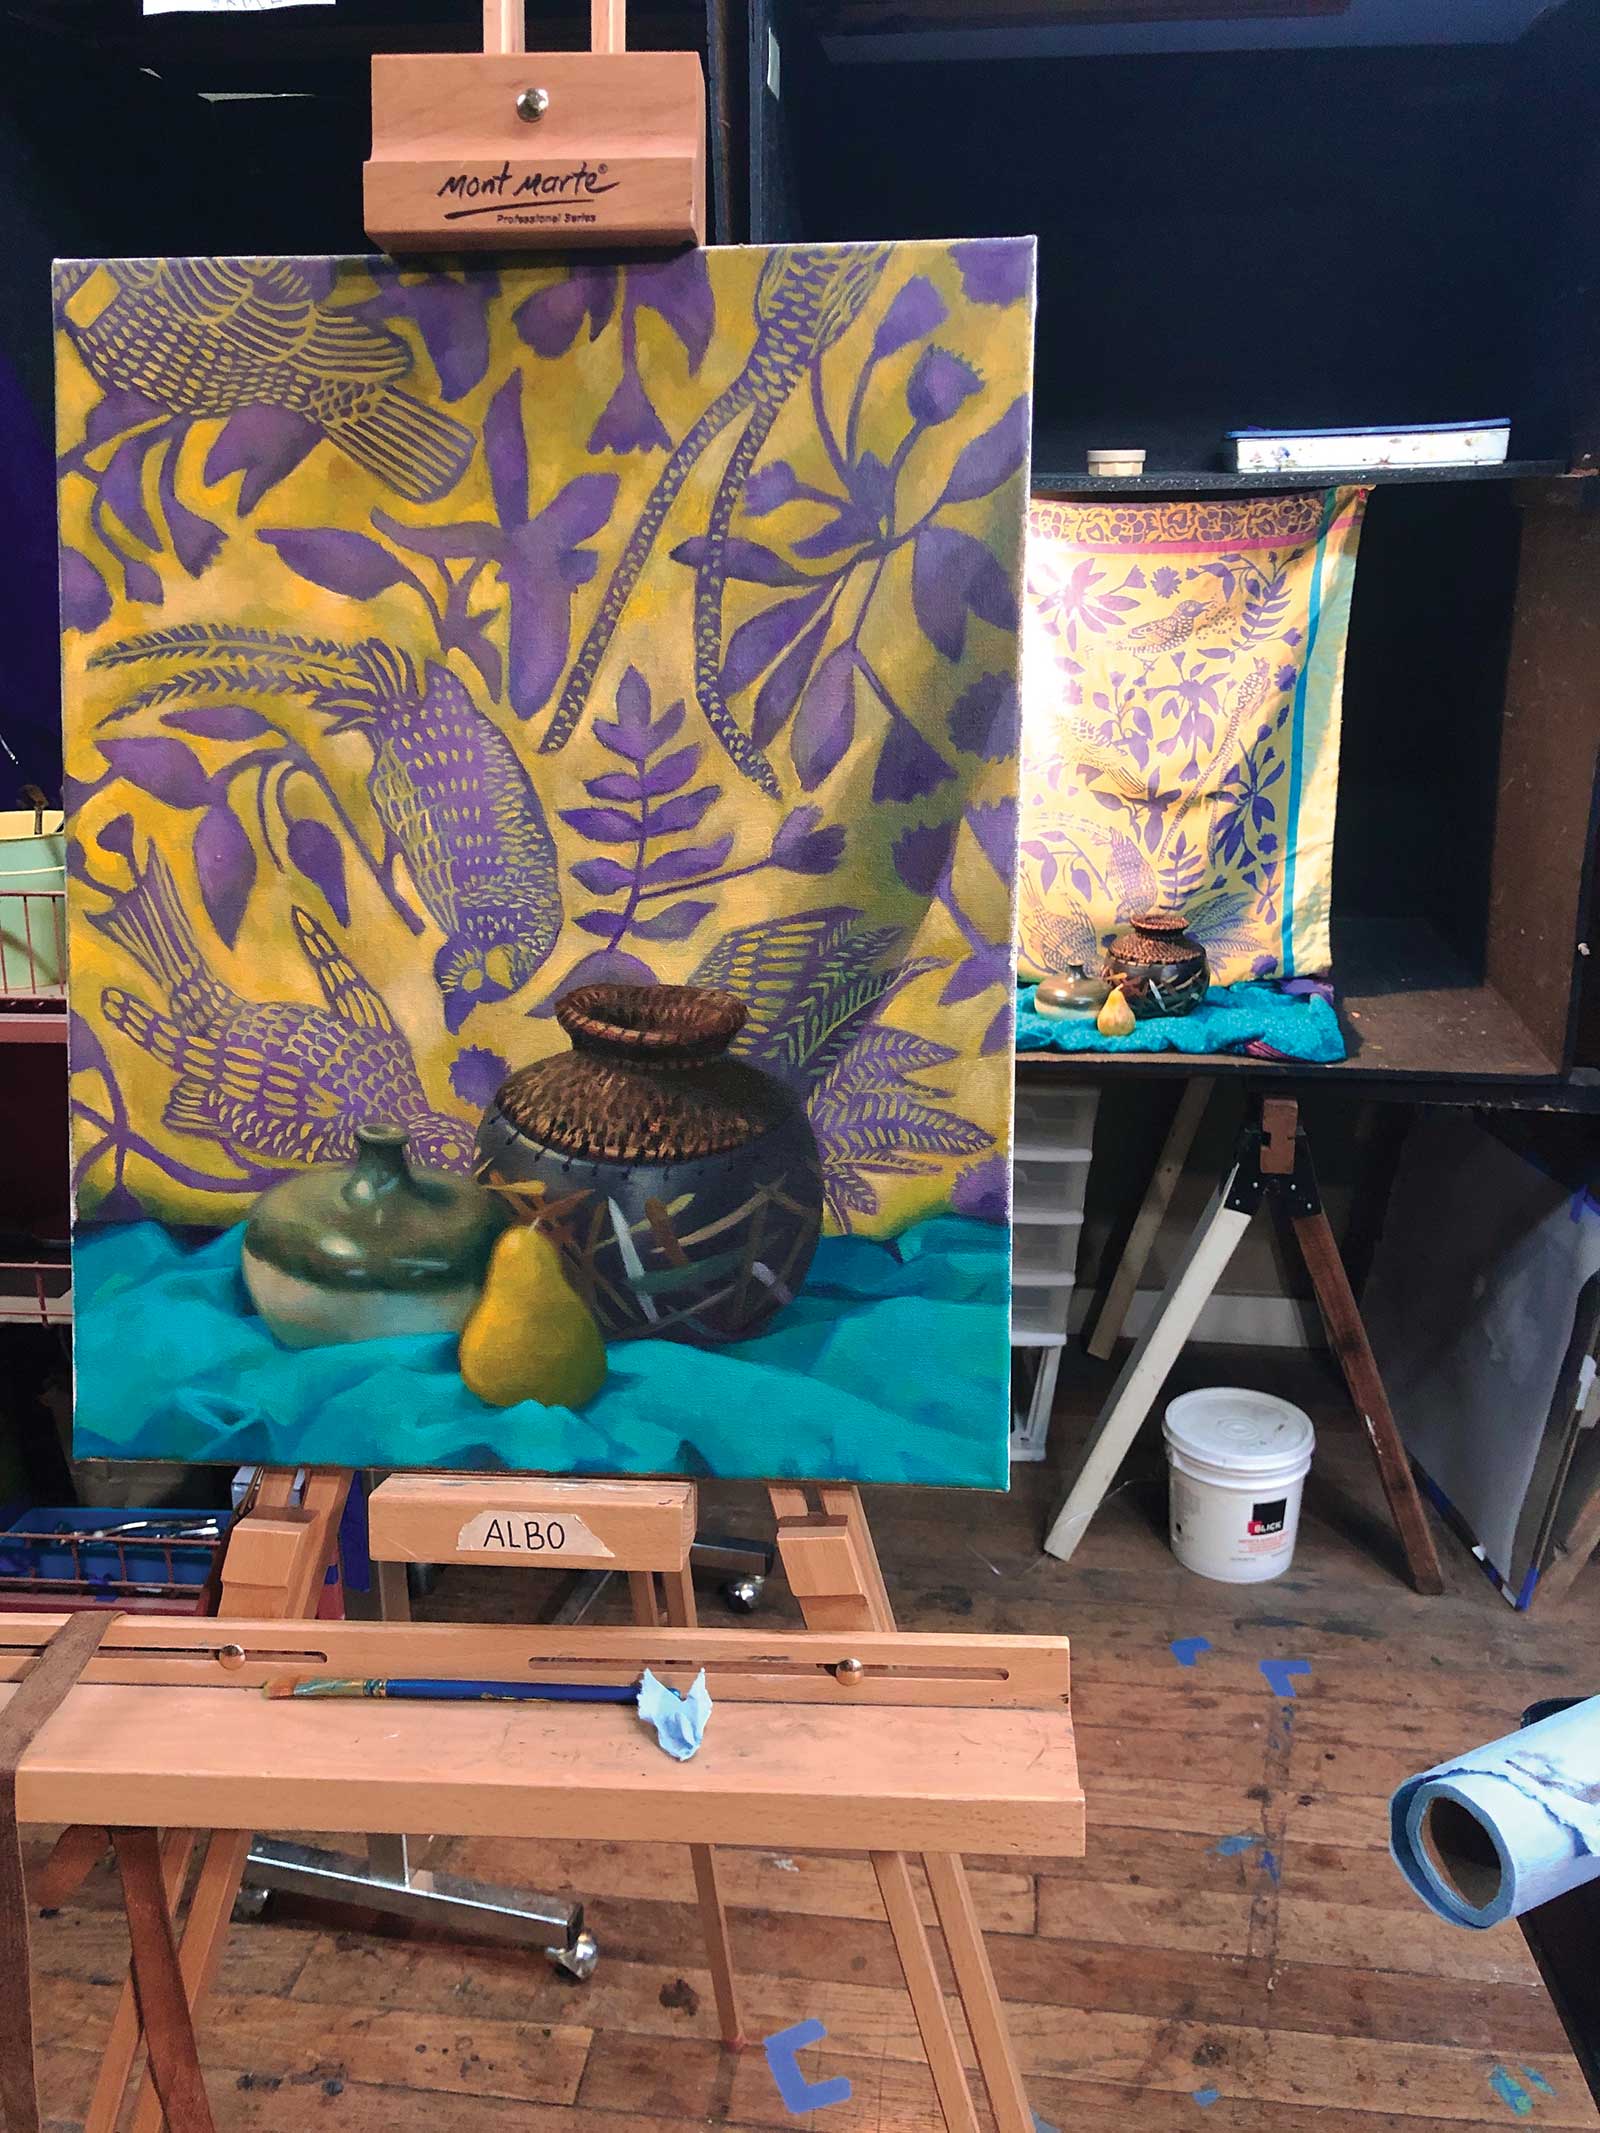
My Art in the Making Still Life #12
For this painting I constantly stepped away from my easel to look back and forth at my still life and painting from my “view spot.” In other words, I never look at my still life from where I’m painting at my easel. If I want to compare the still life to my painting, then I step a few feet away to my view spot. Observing from this spot helps me to better gauge what needs readjusting since I’m able to see both my painting and still life from a distance. When working from direct observation, one must become acutely aware of the subtle shifts in value, at every stage, comparing the lights and shadows in one section with the rest of the painting.
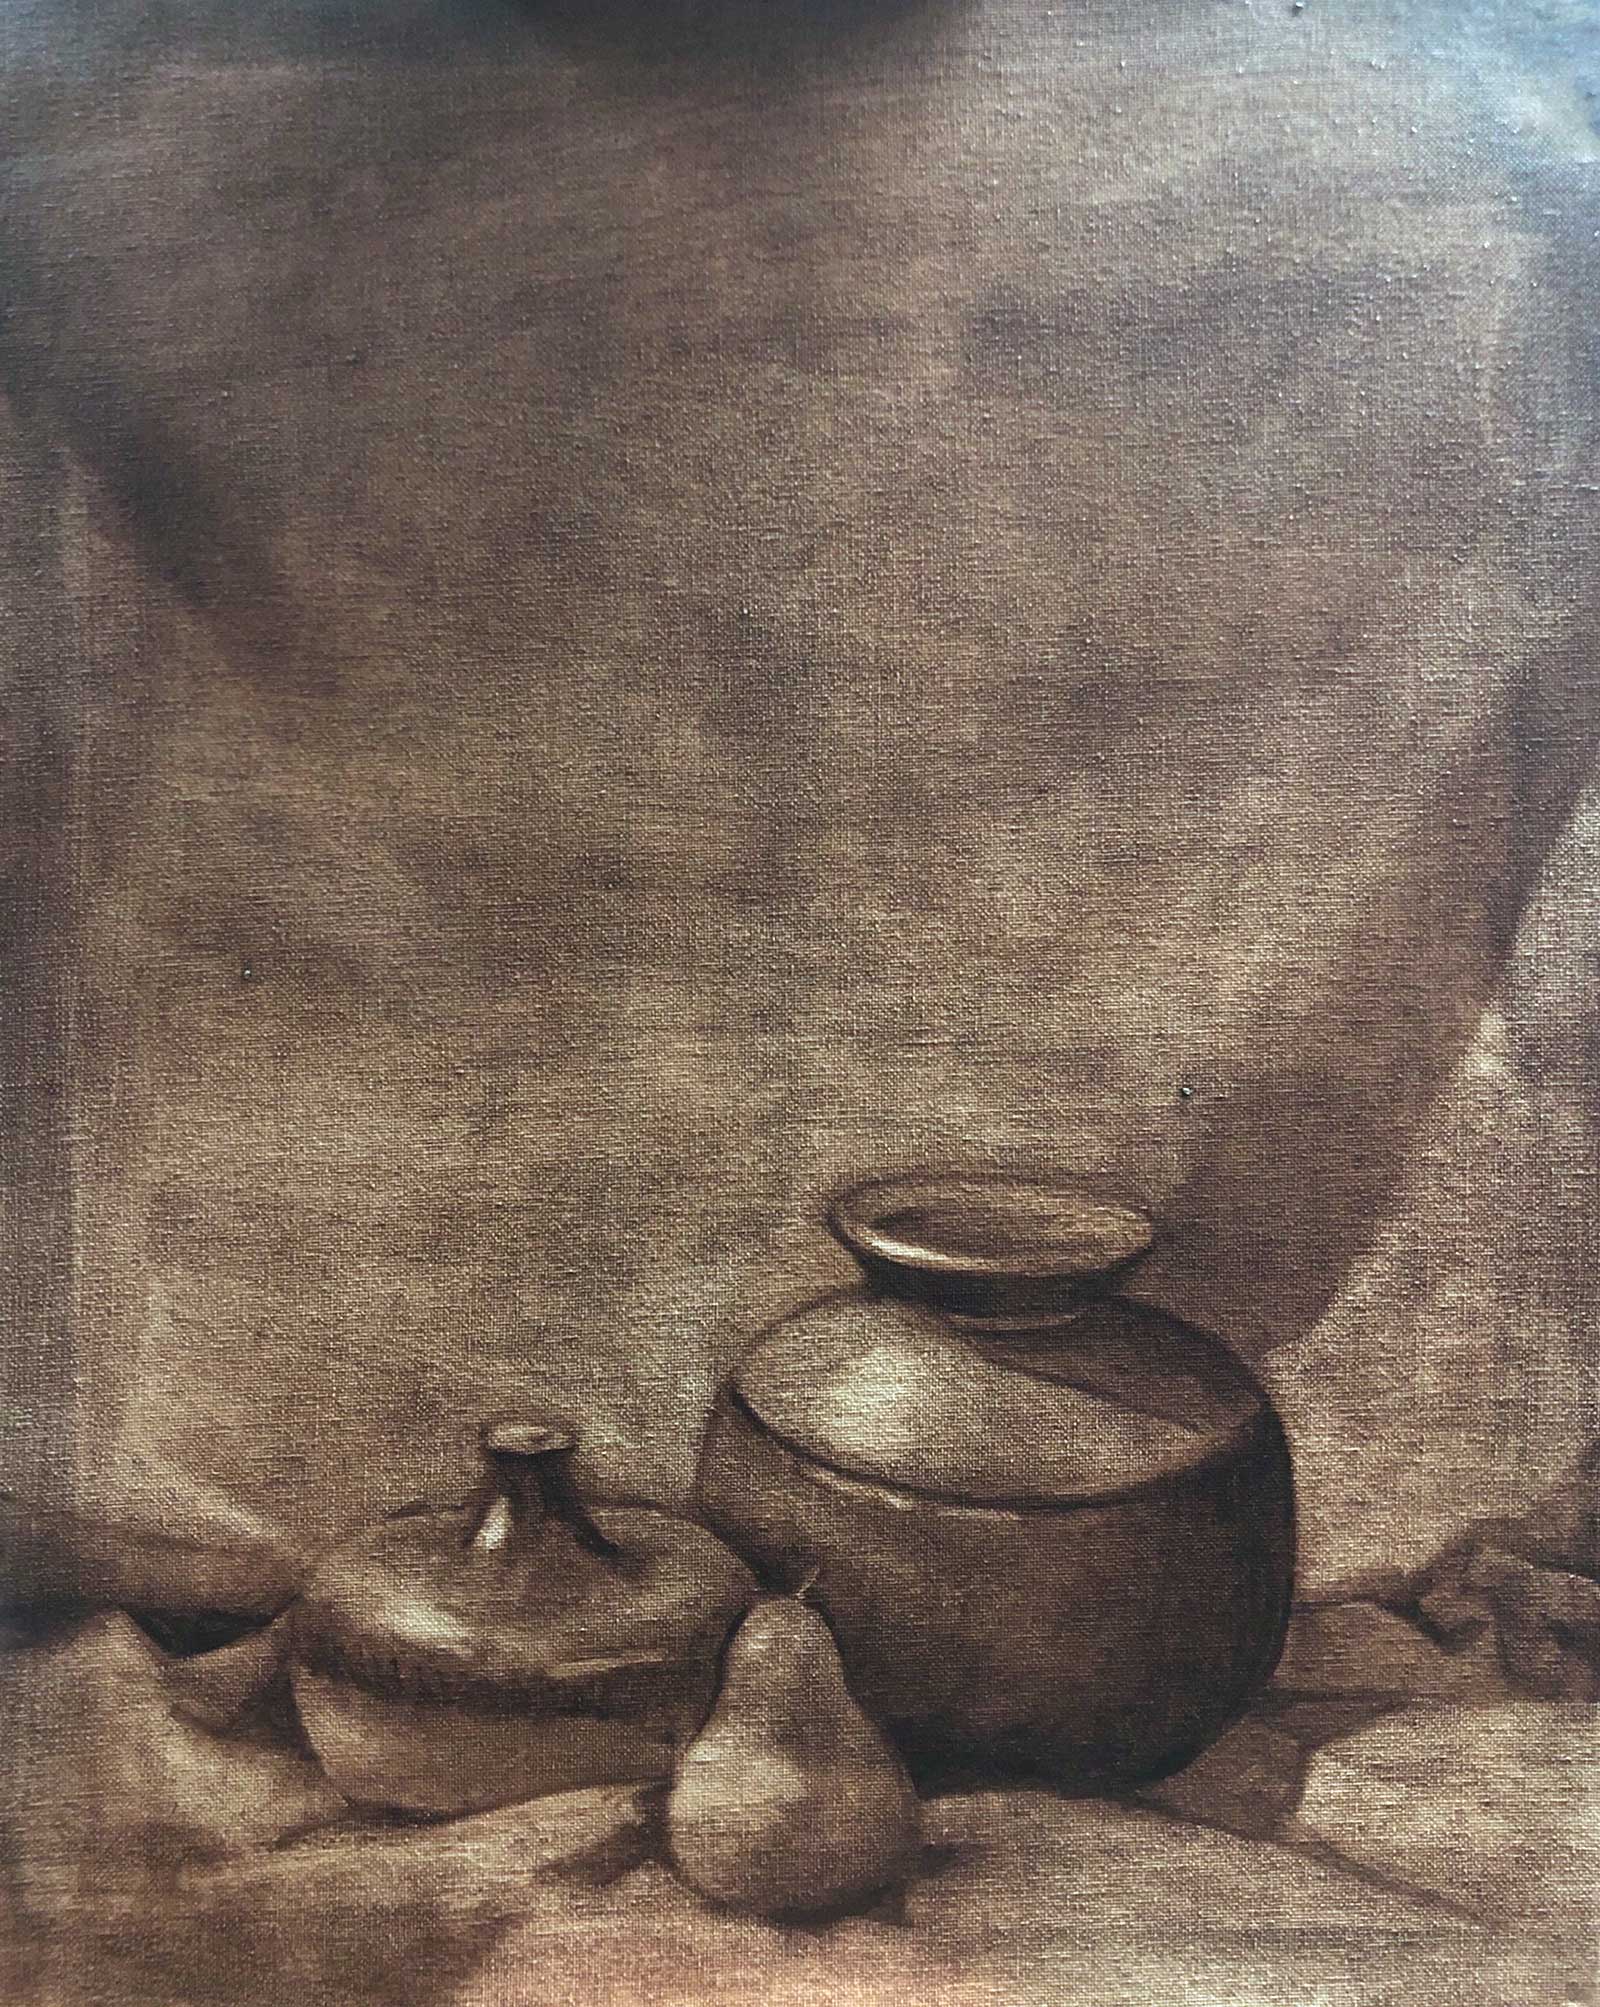
For the underpainting I stained my canvas with burnt umber oil paint and then wiped away the lightest parts of my painting using a rag. I then added burnt umber to the darkest parts of the image. Creating the underpainting is beneficial because it helps me map out a painting and establish the value structure. Understanding tonal value is immensely important when training at an atelier. Typically, when students first study at an atelier, the focus is on analyzing and capturing value in order to create form. It’s only after students master drawing and painting in black and white that they move on to color.
The objects and textiles I chose for this oil painting were greatly influenced by color. I wanted something bold, both in terms of color and design. When adding the patterned fabric, it was not my intention to make it exact; rather, I wanted to take some artistic liberties while keeping the objects more in line with what I was seeing. Determining color and analyzing color temperature is another challenge to painting. I was taught by David Hardy to take into consideration whether the light source is warm or cool. A cool light source means that the strong light will be the local color, and as we move to the shadows it becomes warmer. At the shadow edge it becomes cool, the lightest part of the shadow changes to warm and the darkest part turns back to cool. It can be challenging to grasp, but I try to be cognizant of these subtle shifts. I know there’s a lot more for me to learn about painting and drawing from life and will continue to search for understanding in this area. Just as a magician must continuously practice to make their deception look natural, so must an artist strive to aptly capture nature.
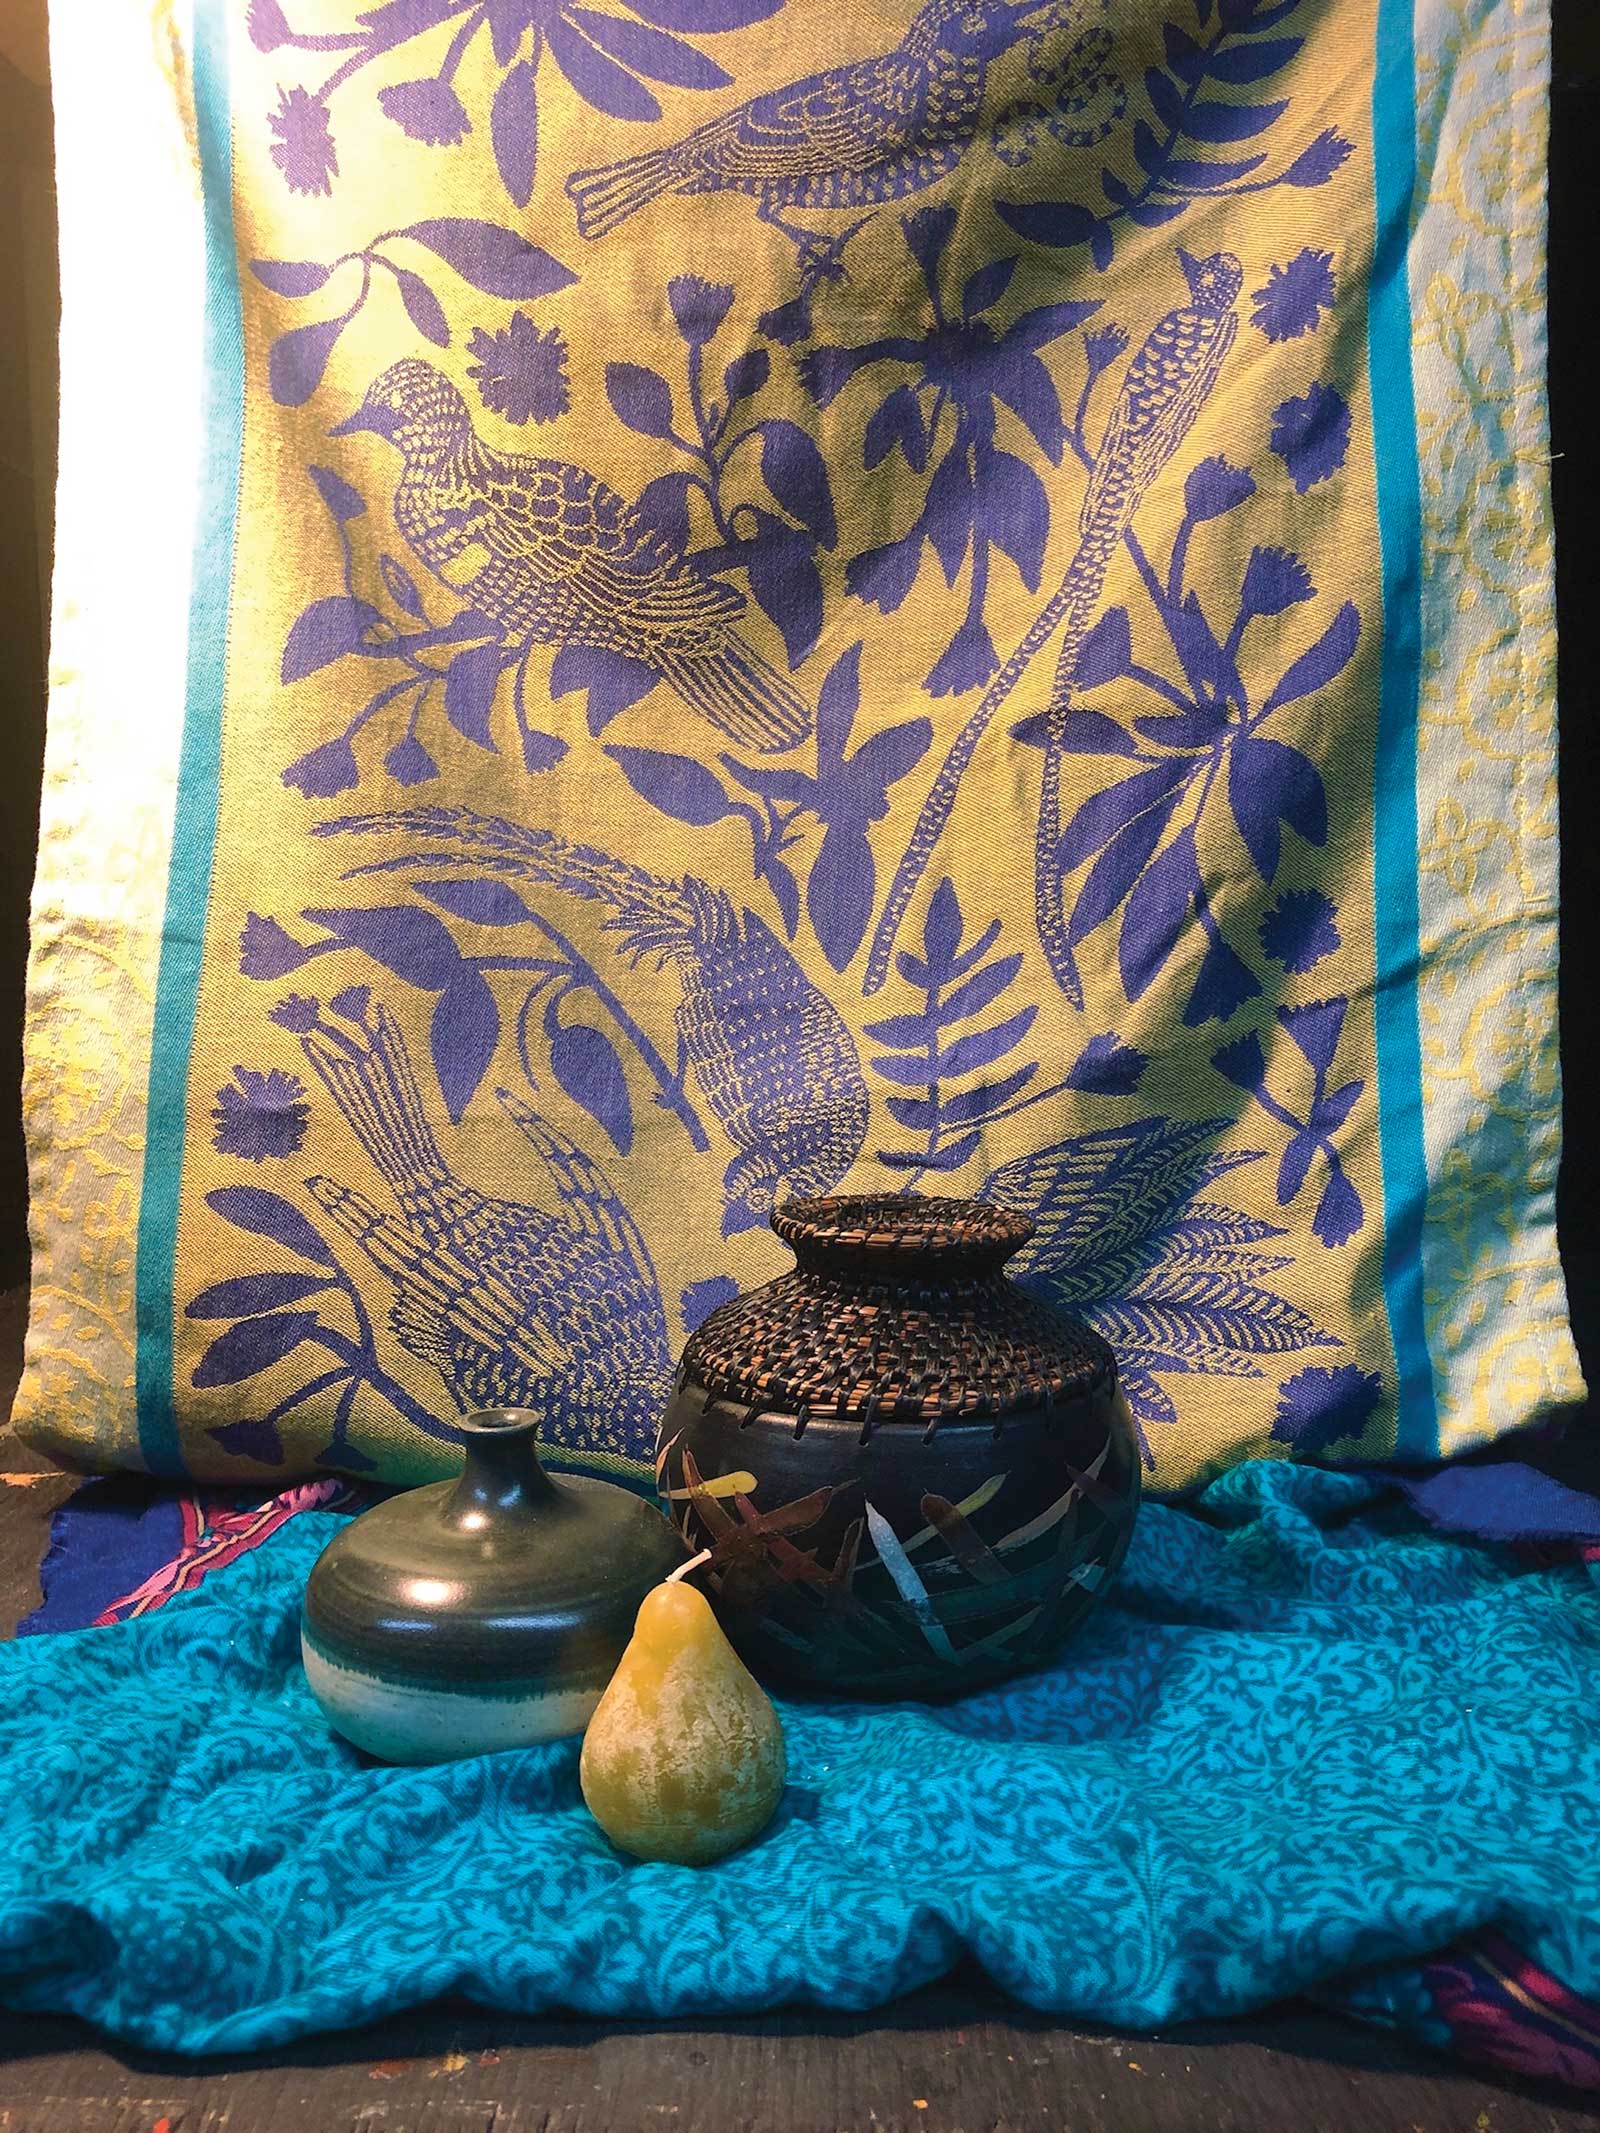 Stage 1Stage 1 Picking Subject Matter
Stage 1For my still life I found objects and textiles from around my house that incorporate bright colors and have an eye-catching design. I then set up the still life in front of my easel to work from as opposed to working from a photo.
 Stage 2
Stage 2 Underpainting
The underpainting is used to map out my image and form the values. I first apply Utrecht Rabbit Skin Glue and then stain my canvas with burnt umber oil paint. With the paint still wet, I lightly wipe it away with a rag to create the highlights, then add more burnt umber for the shadows. While I’m not transferring a drawing onto my canvas or making any sort of measurements, I’m still able to attain some accuracy by simply focusing on the highlights and shadows I see in my still life.
 Stage 3
Stage 3 Outline
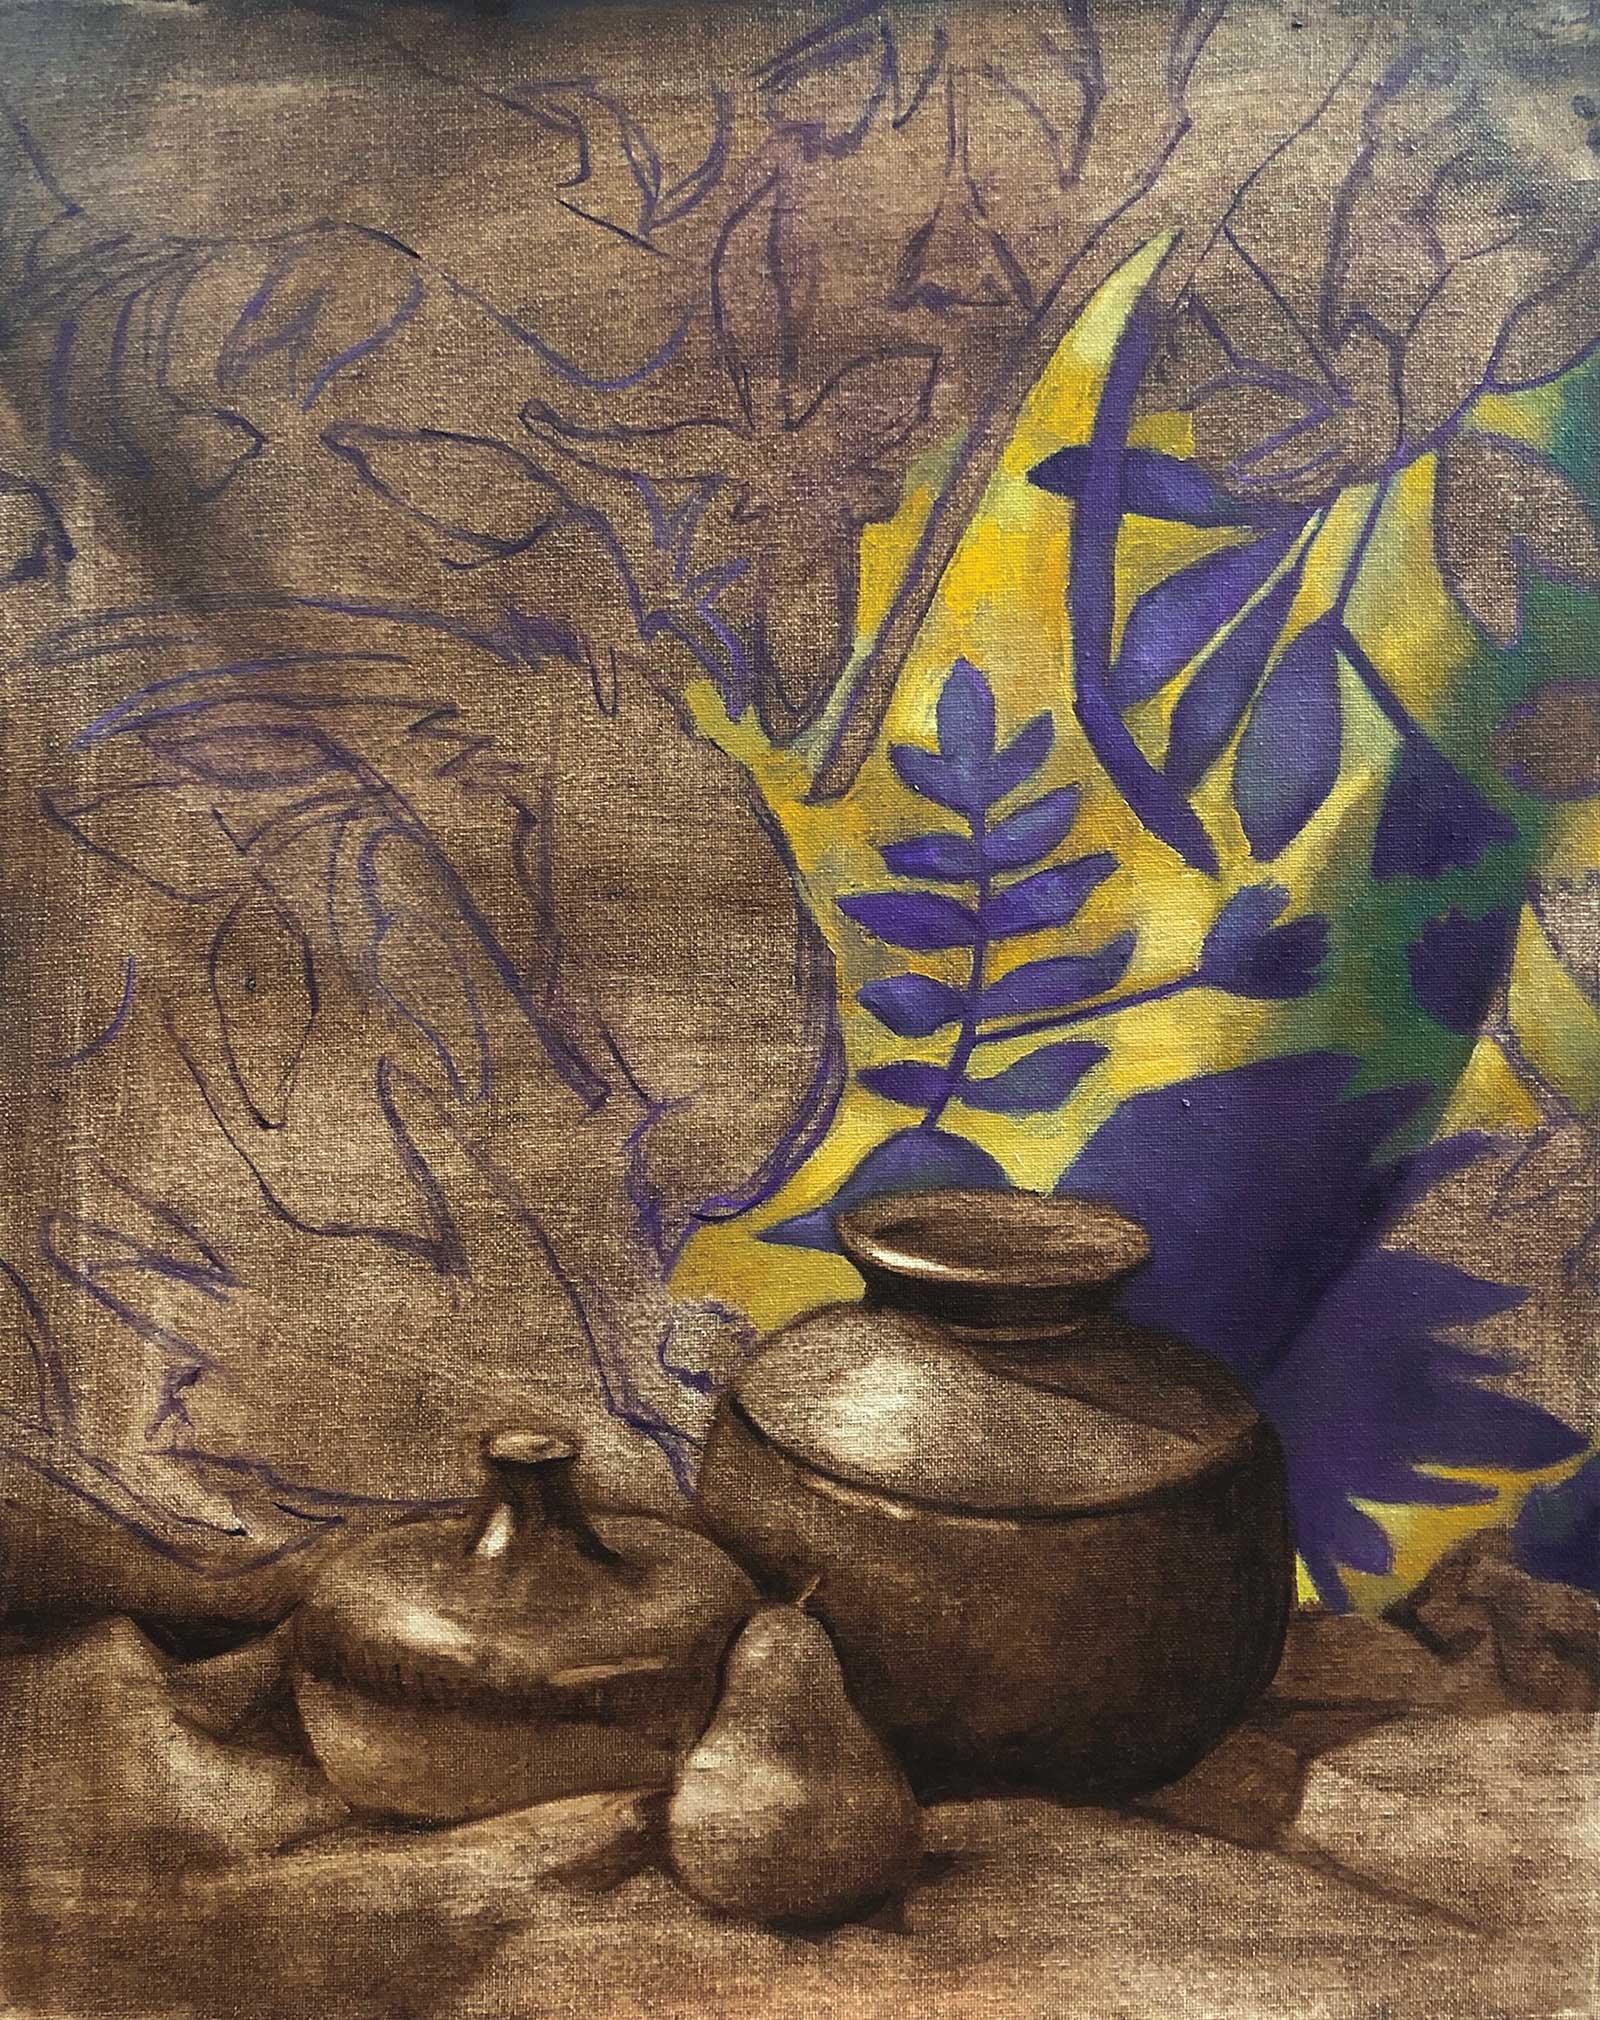
As I observe my still life from my view spot, I start working on the background and begin by outlining the patterned fabric with paint and a small brush.
 Stage 4
Stage 4 Textiles
In applying the method of direct painting which is painting wet on wet, I try to capture the rich colors of the textiles first. Since the colors are so intense, I want to produce the fabrics before moving to the objects in the still life.
 Stage 5
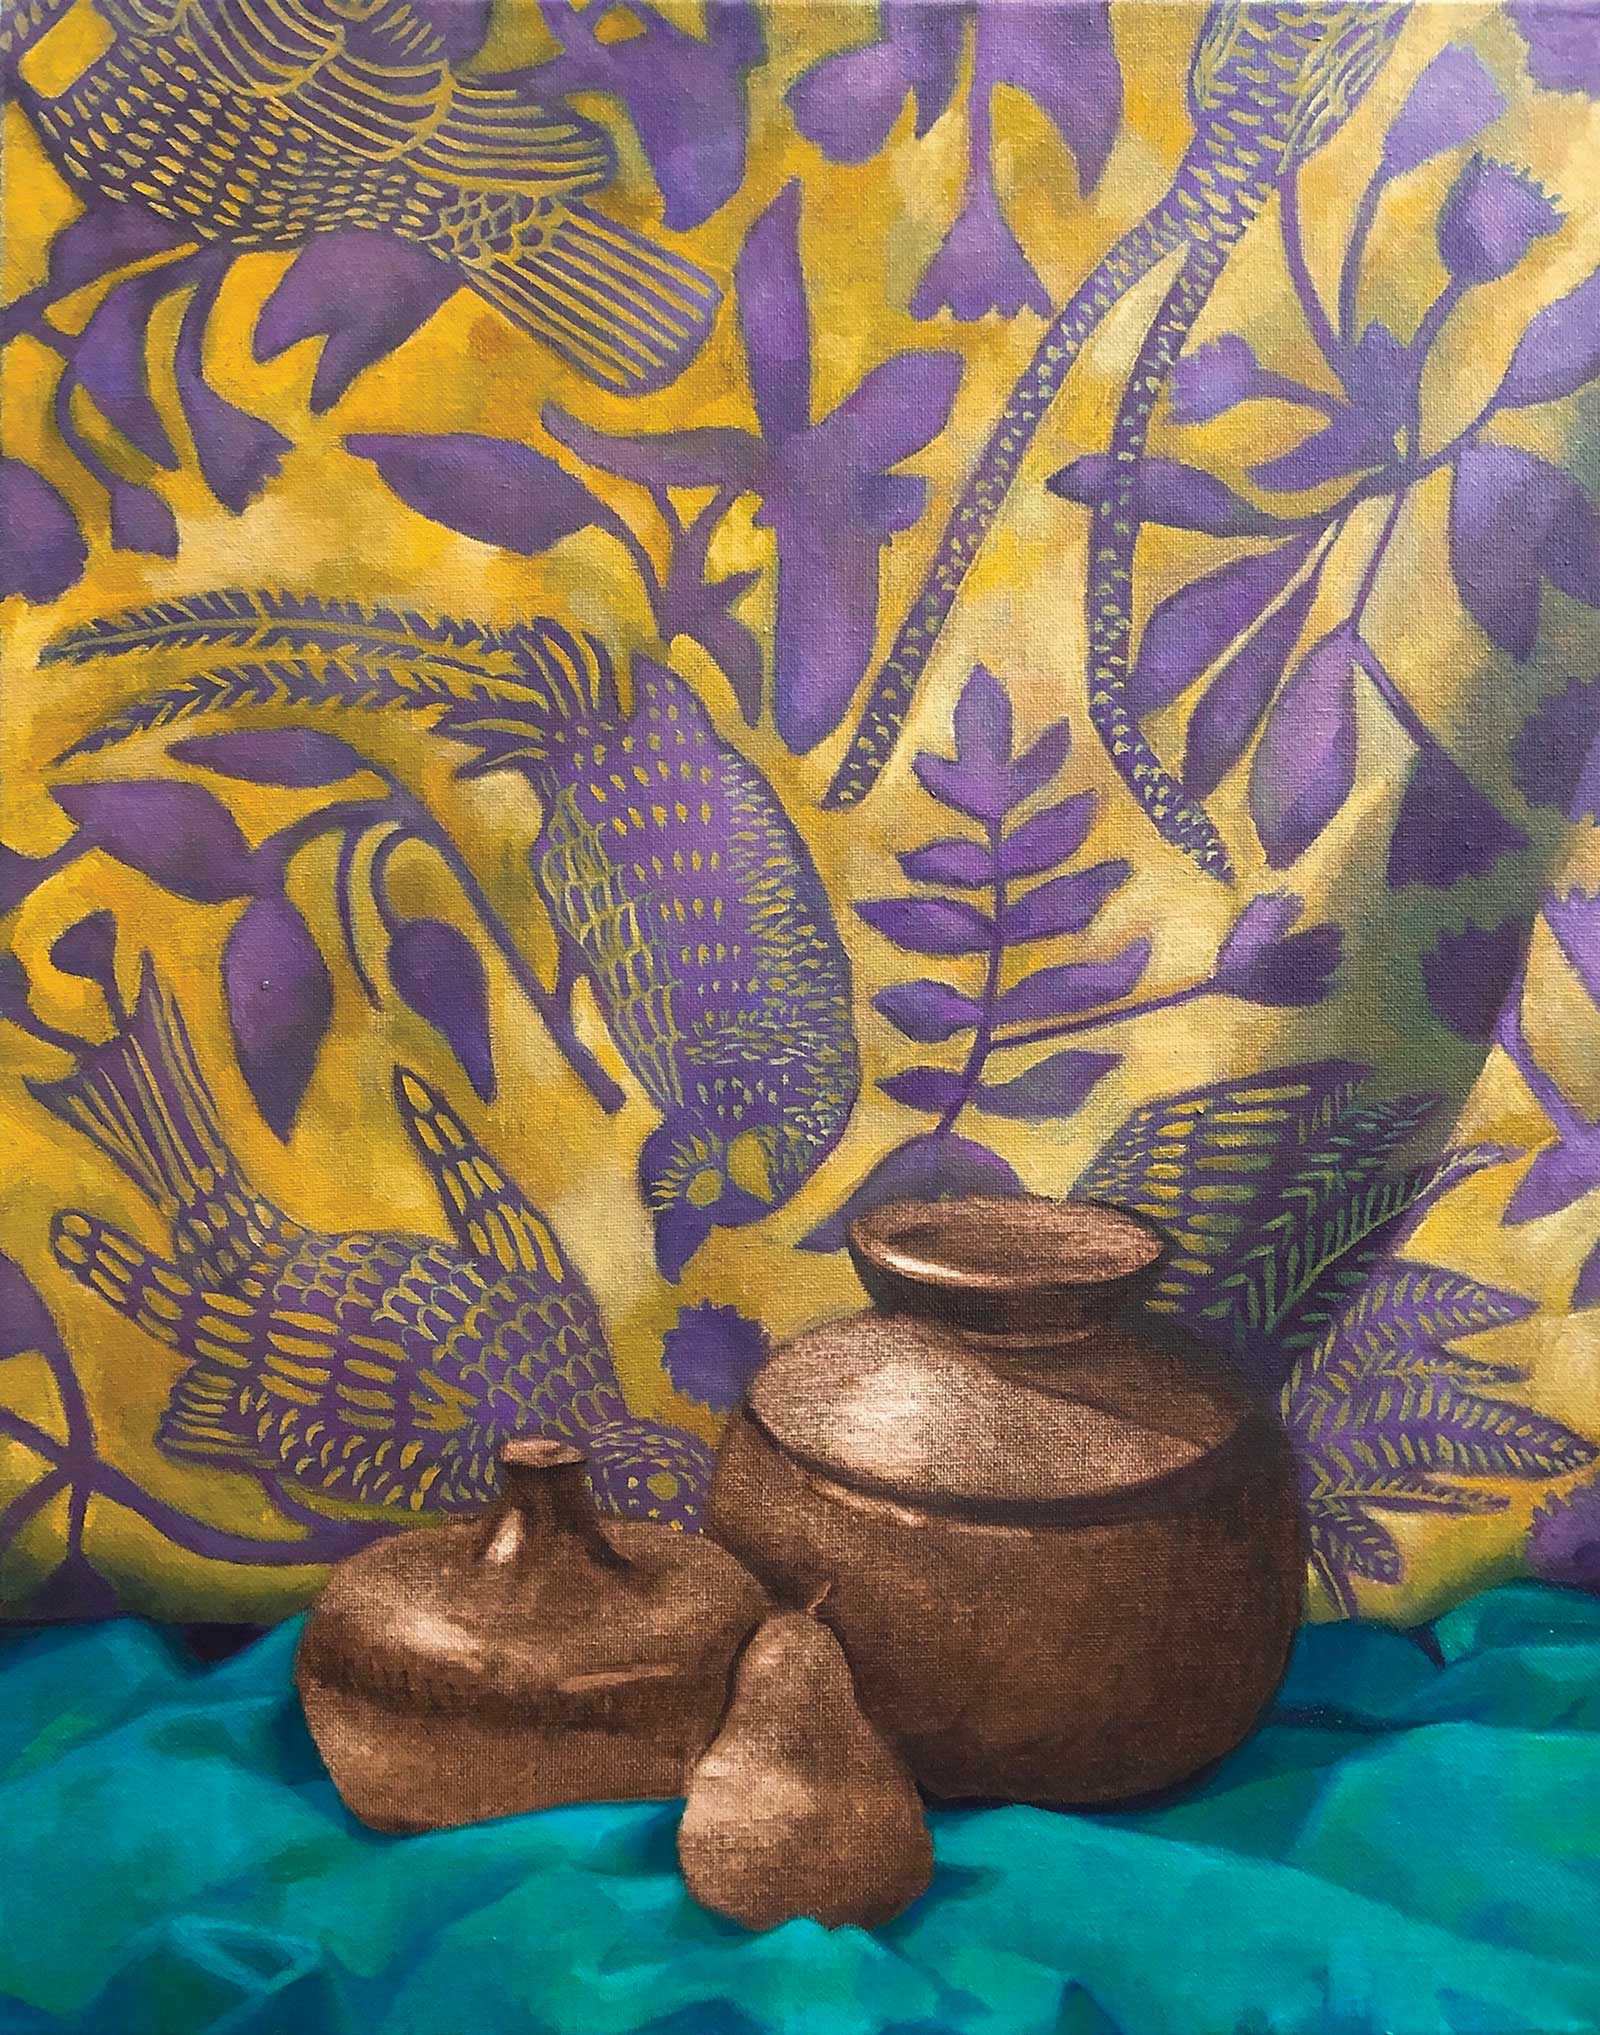
Stage 5 Still Life
Painting the still life is a slow process that involves being aware of the subtle shifts in value and color temperature. I don’t expect to get it right the first time, and I fix any inconsistencies in an iterative process.
 Stage 6
Stage 6 View Spot
At each step I’ve been walking back and forth from my easel to my view spot, which is a few feet away from my easel, to determine what to adjust. I’m never looking at my still life from my easel because I need to be able to see both my subject matter and painting from a distance in order to easily compare the two.
 Stage 7
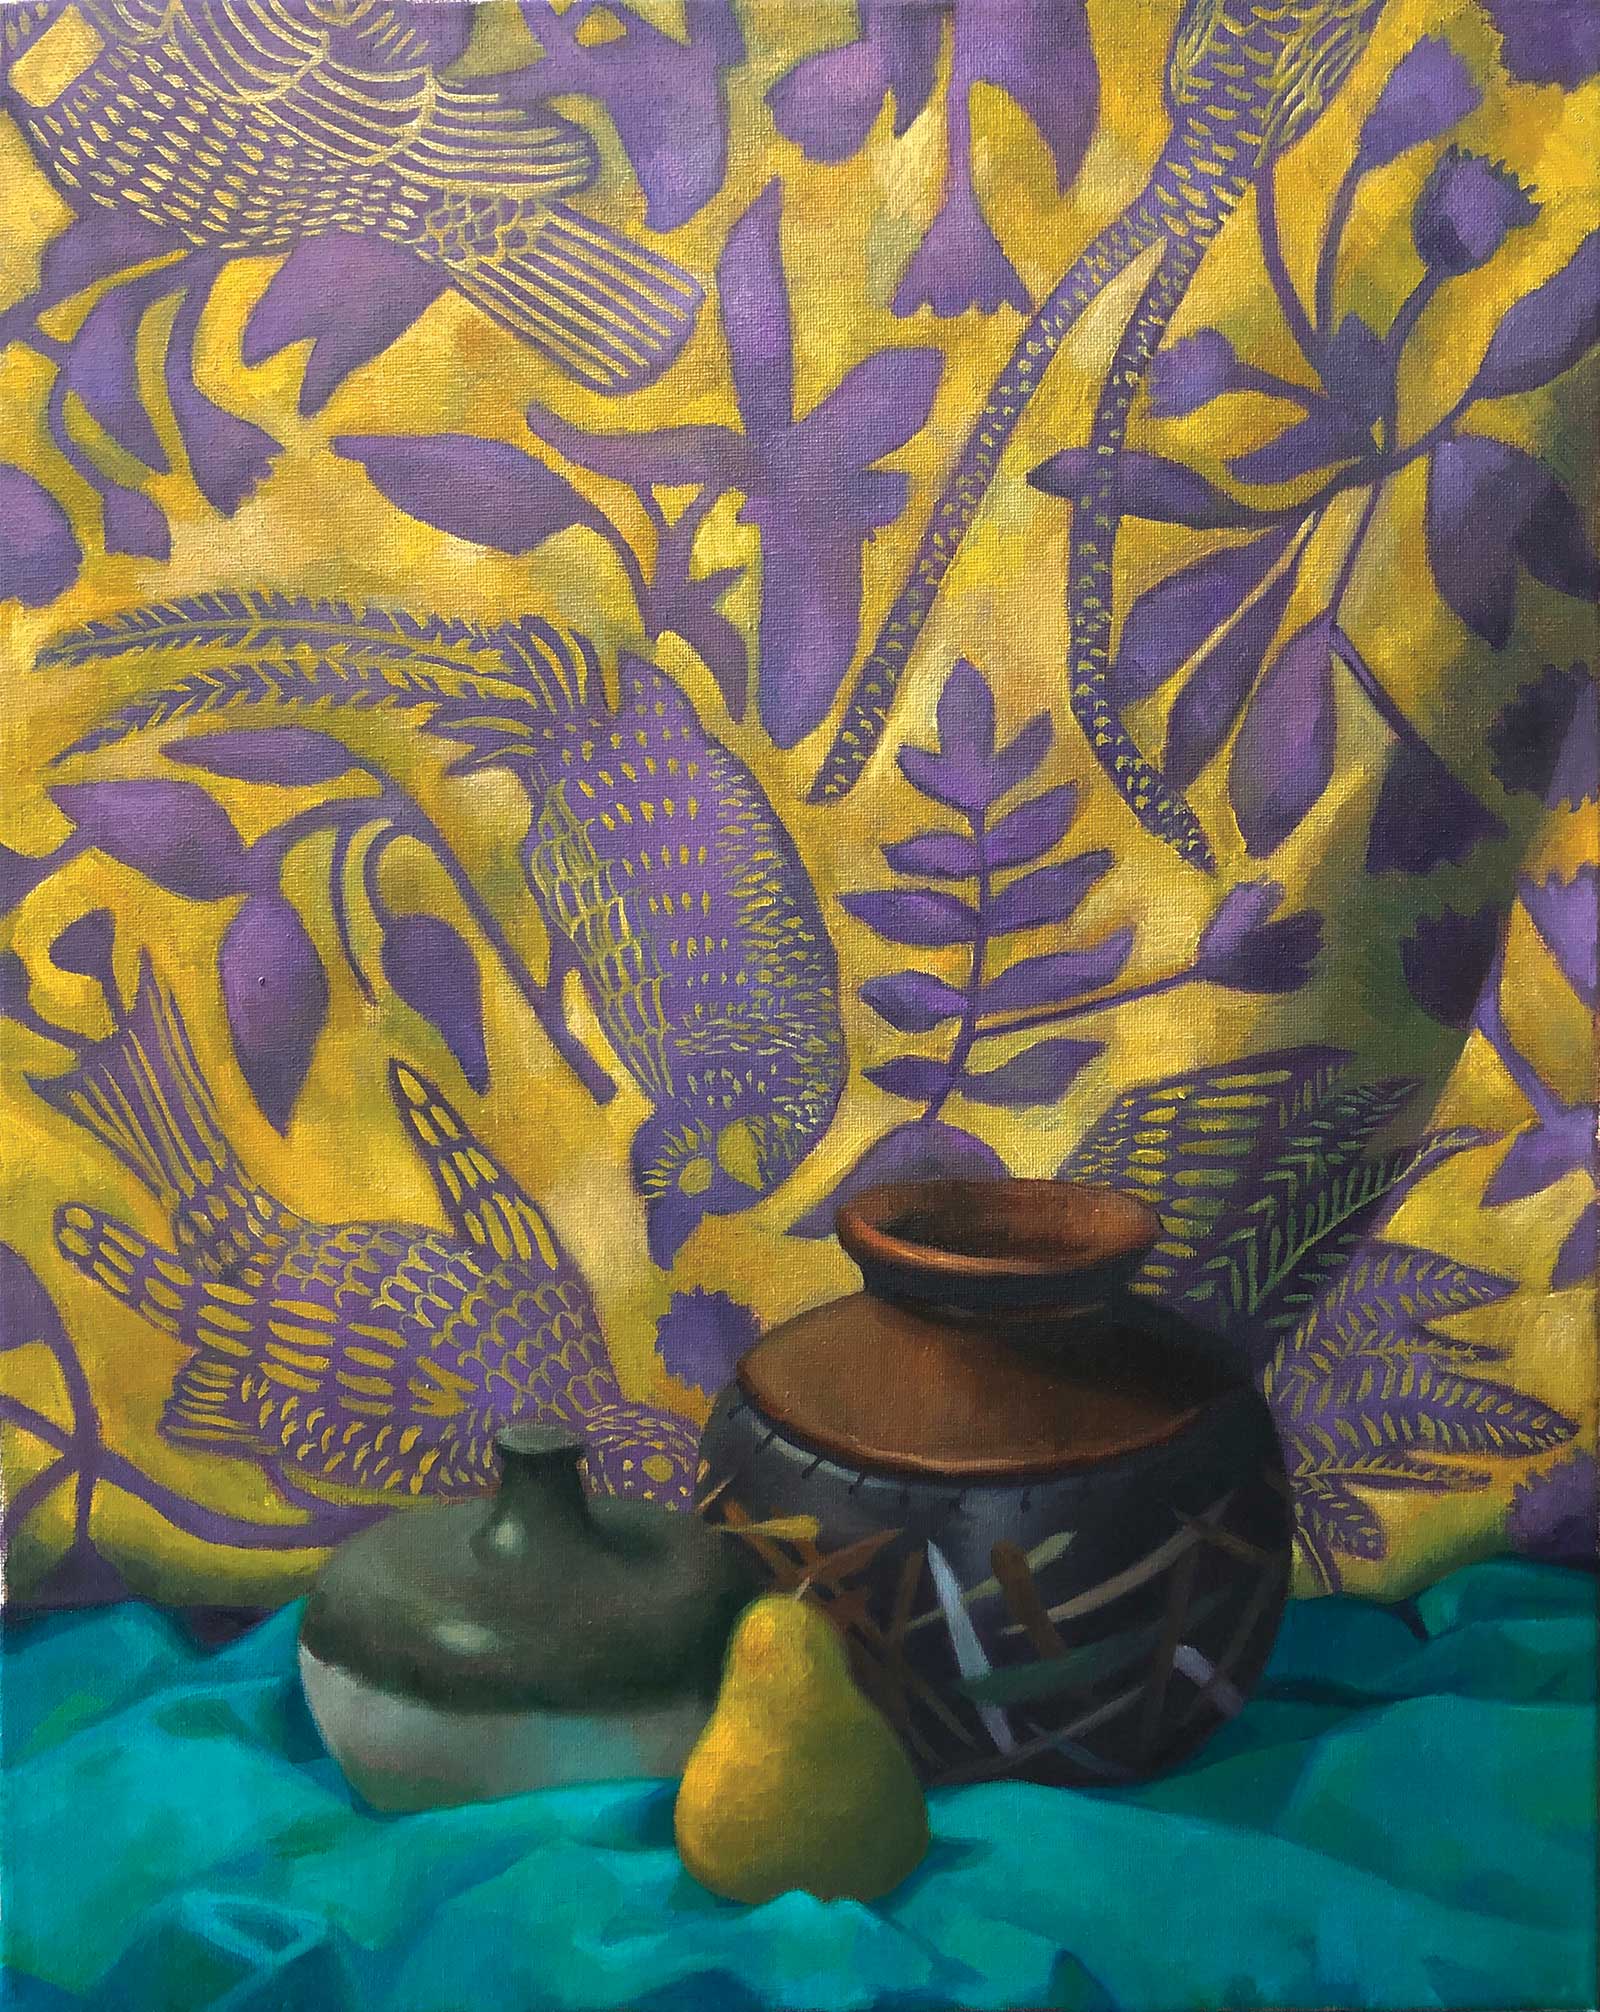
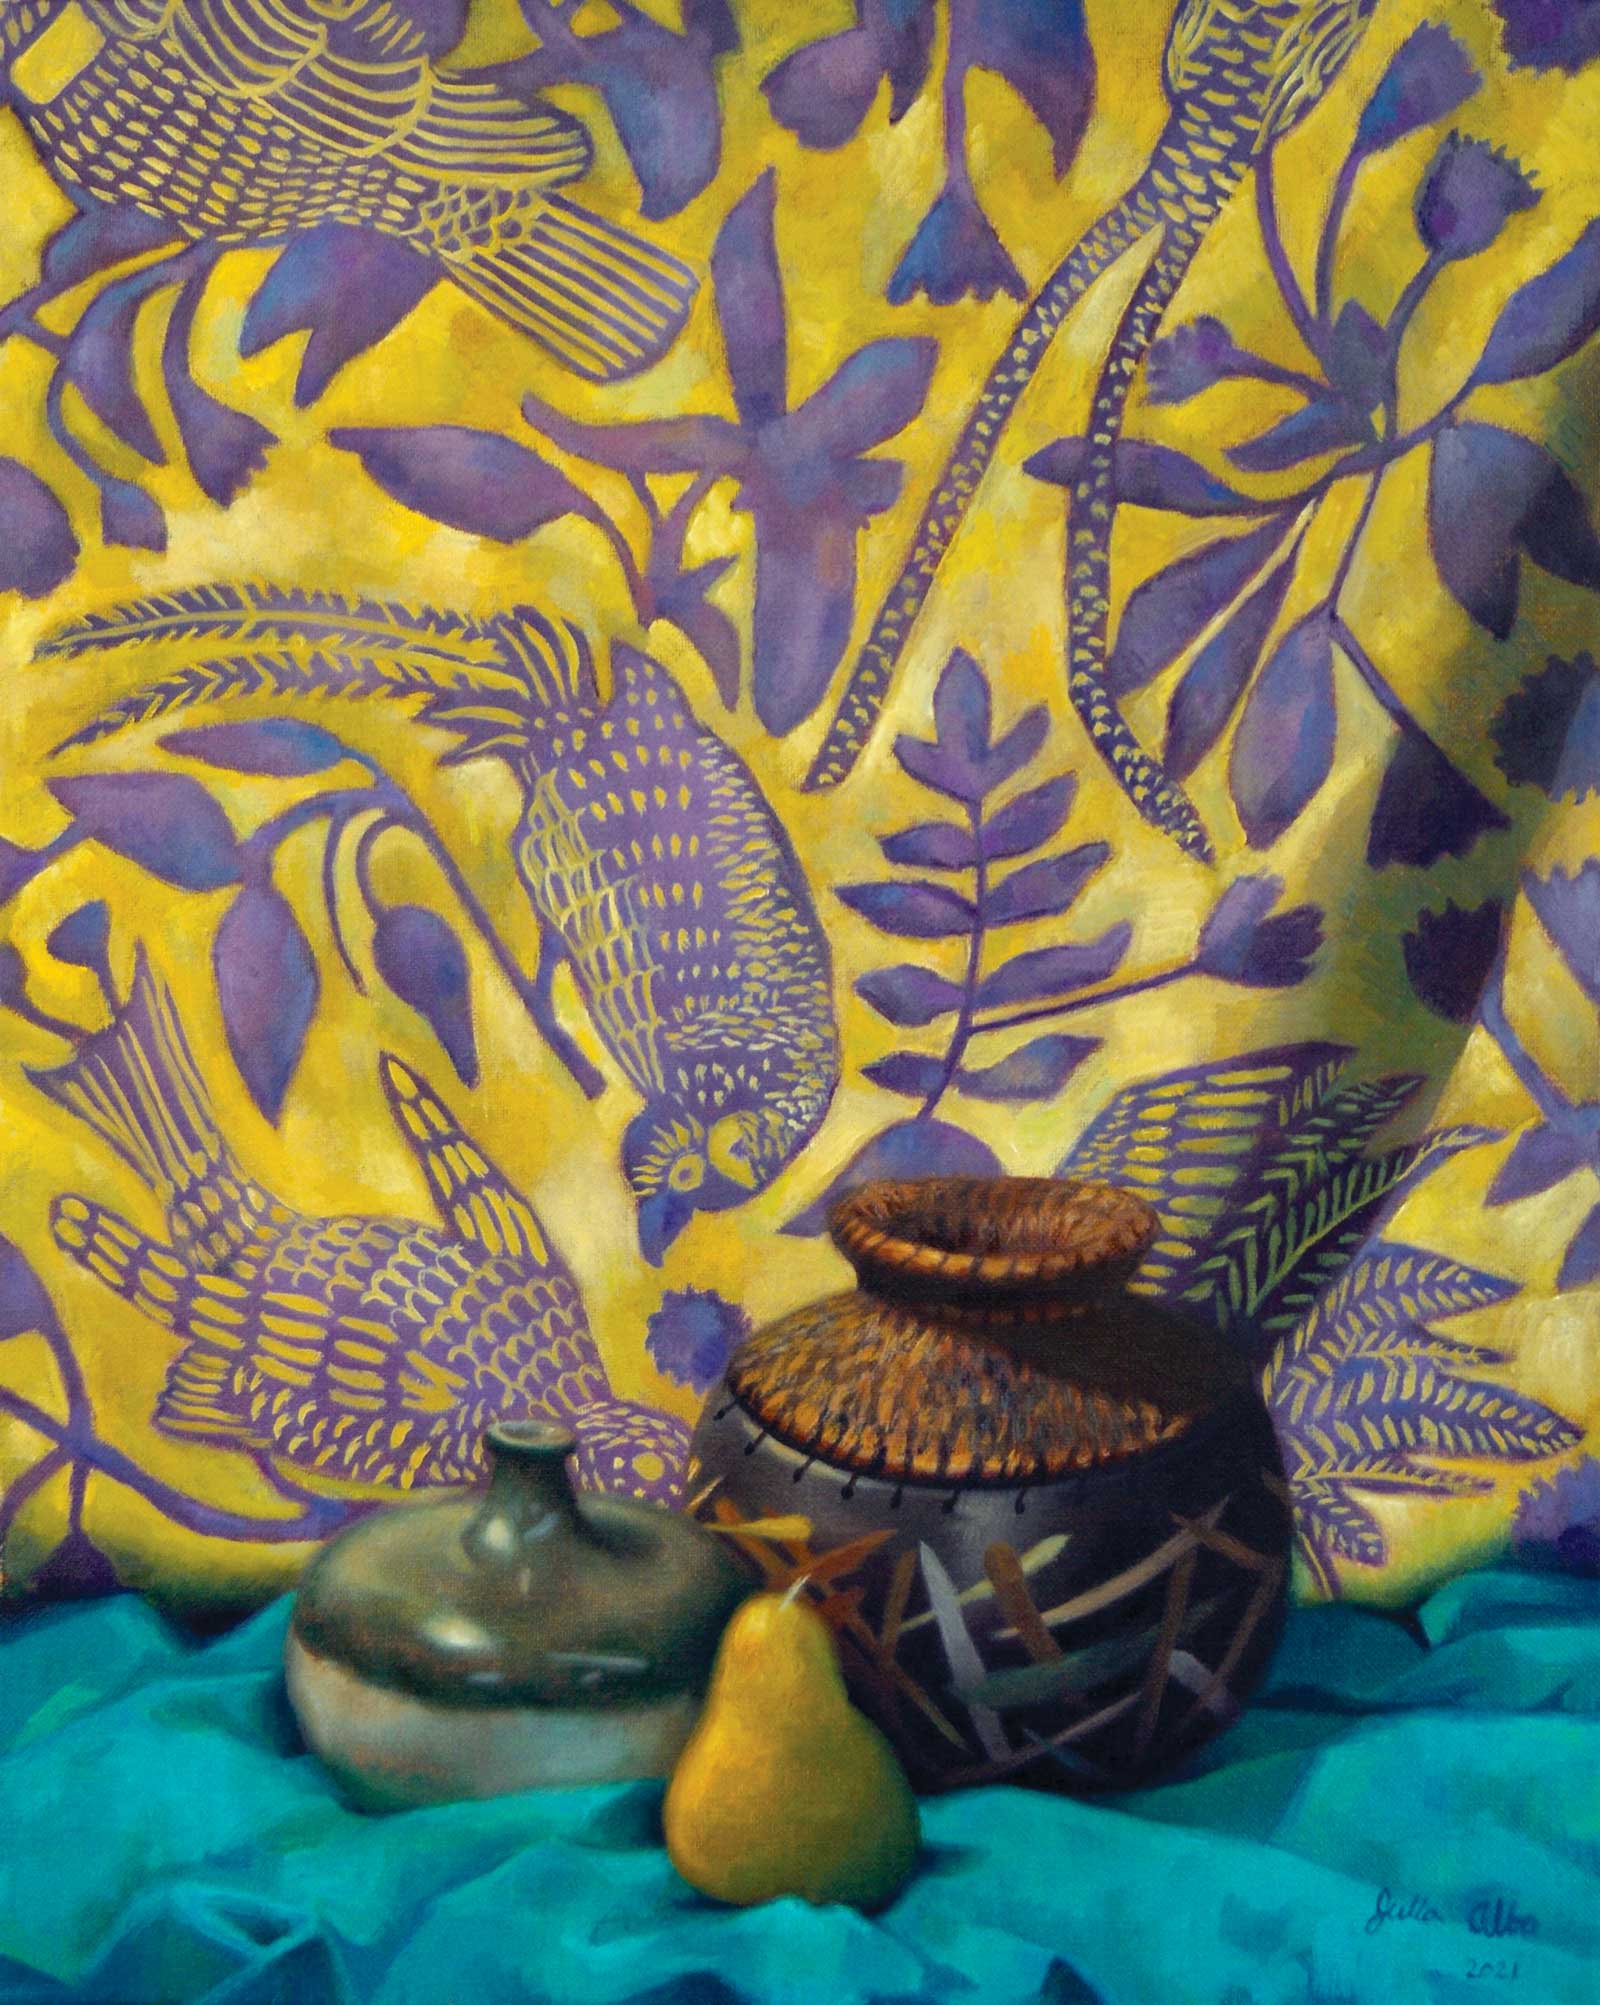
Stage 7 Finished Artwork
Still Life #12, oil, 20 x 16" (50 x 40 cm)
After going back into my painting to make fixes in value and color I finally finished this oil painting. In total, it took me around 26 hours to complete.
About the Artist
 Julia AlboJulia Albo received her Bachelor of Fine Arts degree with an emphasis in painting from Sonoma State University in 2018. Wanting to further develop her technical skill, she later attended the Atelier School of Classical Realism in Oakland, California. When the pandemic hit, it became clear to her that she gained a lot of knowledge by training at an atelier and wanted to continue that trajectory in order to grow as an artist. Currently, she is studying in the four-year Core Program at the Grand Central Atelier in New York City.
 Her work has been shown in numerous exhibitions across the West Coast. One such exhibition was the 2018 Left Coast Annual Juried Show in the Sanchez Art Center in Pacifica, California. Claudia Schmuckli, curator in charge for Contemporary Art and Programming at the Fine Arts Museums of San Francisco, was the juror for the show.
Contact at
www.juliaalboart.com