


Food painting is my comfort zone. Living in Italy, where life revolves around meals and ingredients for those meals, where things you put on your table change as the seasons change, I couldn’t help but fall in love with the idea that even a simple fruit or vegetable can tell a story. In my paintings, I try to create dynamic and fun still lifes, full of color and expression.
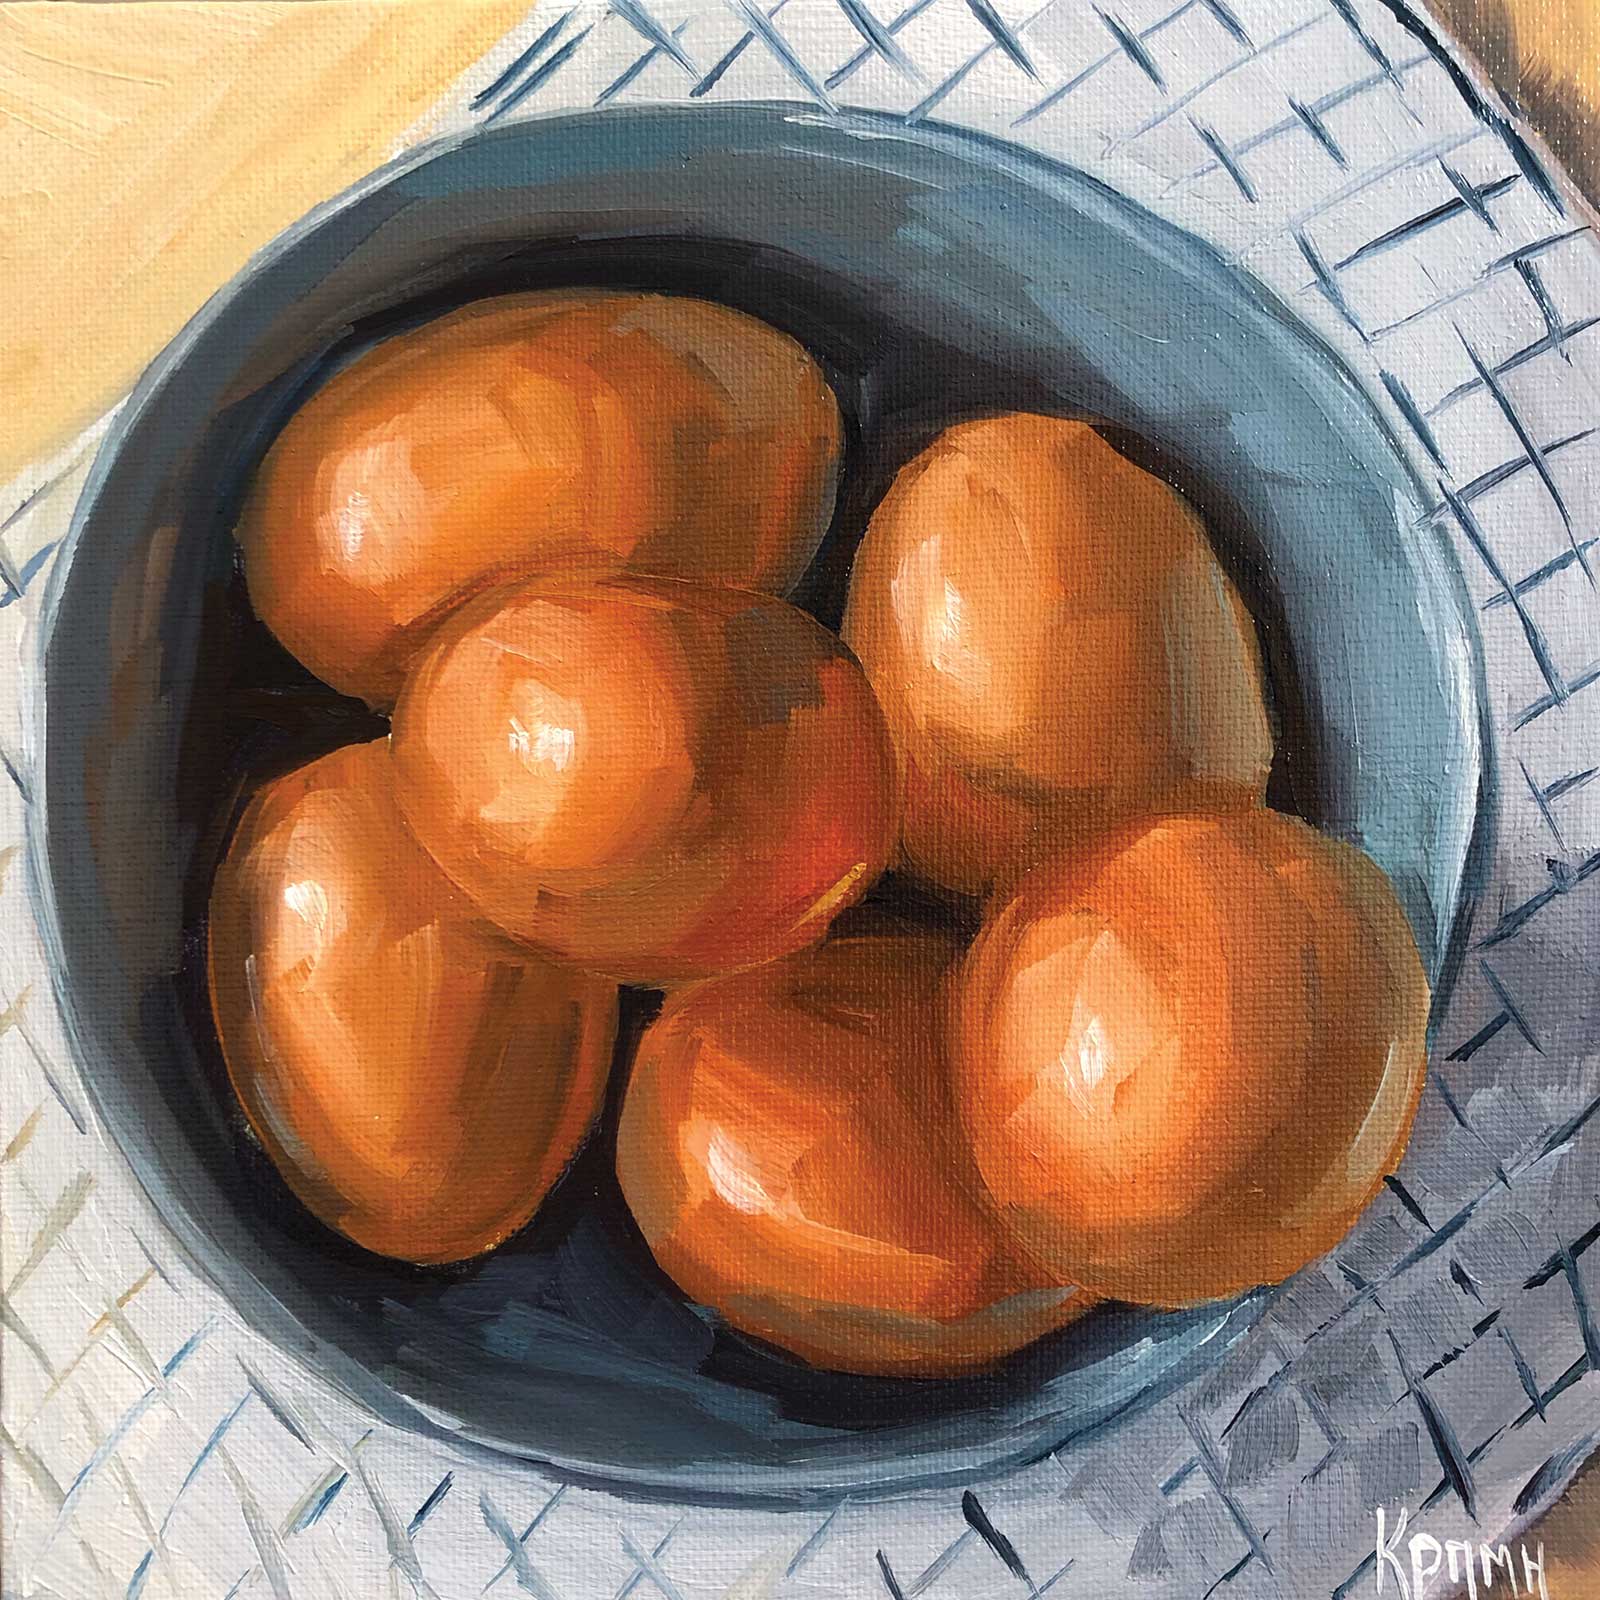
Golden eggs, oil on canvas panel, 8 x 8” (20 x 20 cm) The goal here was to express the values right, and keep the brushwork loose enough so that it would become the protagonist of this painting as well, together with the subject.
I’m a “disciple” of the daily painting philosophy, popularized by Carol Marine, and my paintings are relatively small, painted with oils in the alla prima technique (wet-on-wet) in one sitting. I teach oil painting to beginners online.
I normally do not premix the colors for a painting, but I do mark the values in the painting before working with colors. So, before I start mixing the paints, I create a sketch with burnt umber or burnt sienna, where I outline the main shapes with a thin brush, and then block in the main values using a bigger brush. Sometimes I go the opposite way—first, tone the canvas with burnt umber, and then wipe off the shapes of my subject and mark the values this way, by wiping off more or less paint. However, I find this technique a bit complicated for beginners, and it’s not always easy on cotton and linen canvases. So, when I teach, I start with a white canvas and build my way through to the value map: a monochrome underpainting, roughly indicating the darkest and the lightest areas of the painting. I find it helpful not only for correct color mixing but also to check if the composition works out. Seeing all the shapes and values interacting with each other in harmony helps to foresee if the completed painting will be a success, and if not, it’s easier to make corrections at this stage.
When it comes to the colors, I start with the darkest ones and move to the lighter ones, step by step. If the background in my setup is lighter than the subject I’m painting, I usually block in the subject first, and the background after. And vice versa, I’ll start with the dark background, if the subject is lighter in value. This method helps to avoid making a mess, especially if you tend not to clean the brushes thoroughly during the process.
When painting alla prima, you have to find a way to mix the paint of the right consistency, so that your fresh strokes don’t get mixed into the old ones too easily. I always look for the balance between visible brushwork and somewhat smooth gradients. The lighter my mix gets, the thicker the paint—this helps create texture and add bolder brushwork to my subject, which gives them a more dynamic and original look.
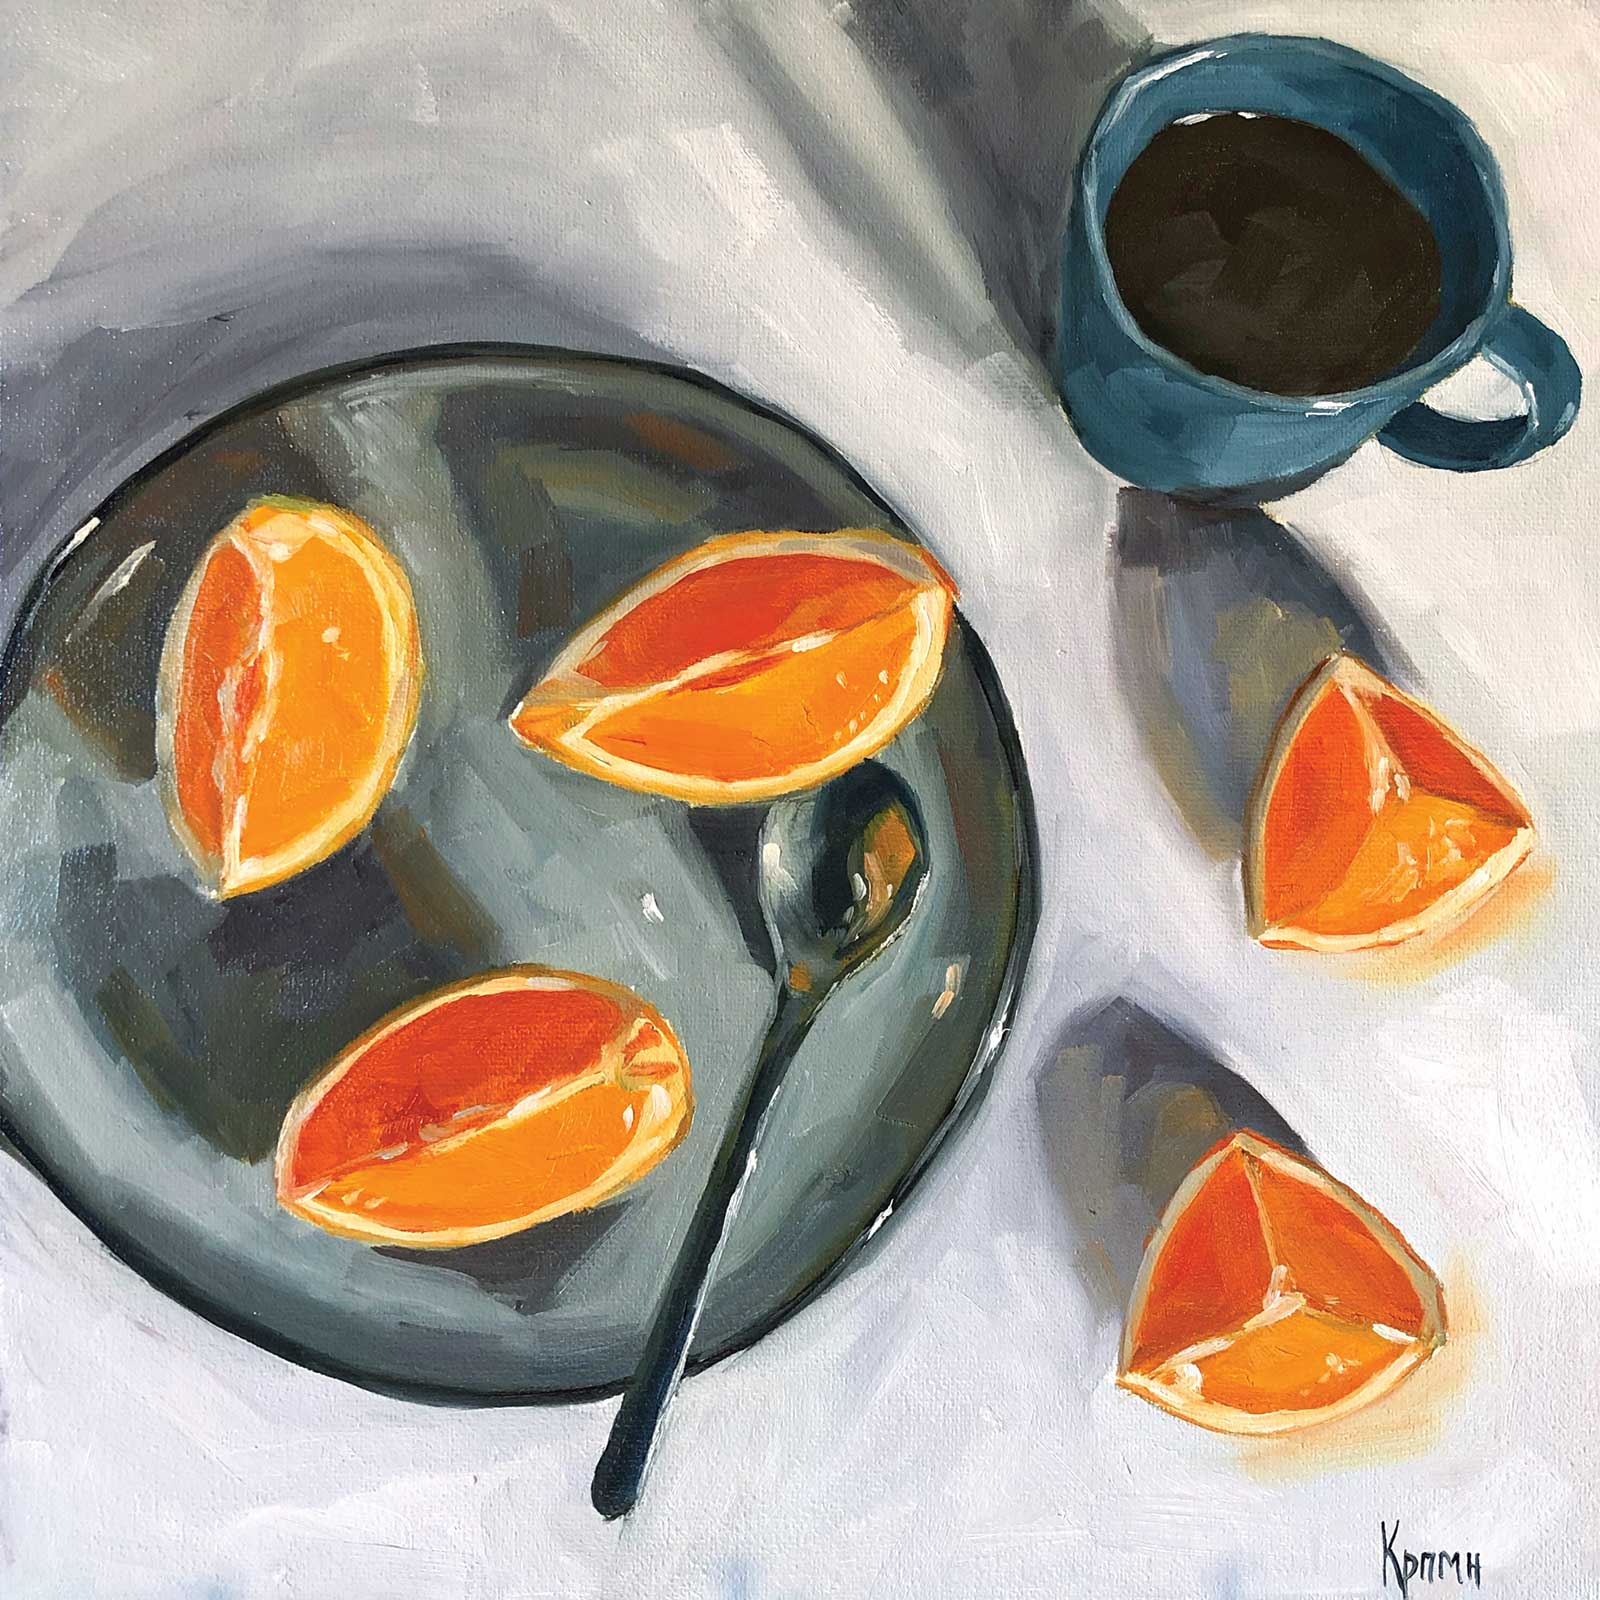
Orange puzzle, oil on canvas panel, 12 x 12” (30 x 30 cm) This painting was a successful combination of saturated orange and more neutral blues against the background. I like the blue mug as much as the orange slices, as well as the play of light here.
I paint mostly with flat synthetic brushes, sizes 1 to 16. Of course, it’s better to switch to a smaller brush for some final touches, but I often recommend sticking to a bigger brush for as long as you can to loosen up your style and train your hand to be more precise. The more I manage to accomplish with a bigger brush, the more interesting the painting looks in the end. I like the somewhat “incomplete” and “imperfect” look of my fruits and veggies.
As for the hues in my palette, I use mostly primaries, but more than one of each: normally I’d have two yellows, three reds and three blues on my palette, plus titanium white, burnt umber and burnt sienna.
I’m all in for experimenting with colors and giving in to the creative process, but I figured out for myself that having a plan and knowing the steps is a better way to go if I’m looking to accomplish a harmonious and visually attractive painting. Thinking through the composition, values and color palette, and having a value sketch done before everything else, is what helps me create better art.
My Art in the Making The tomato parade
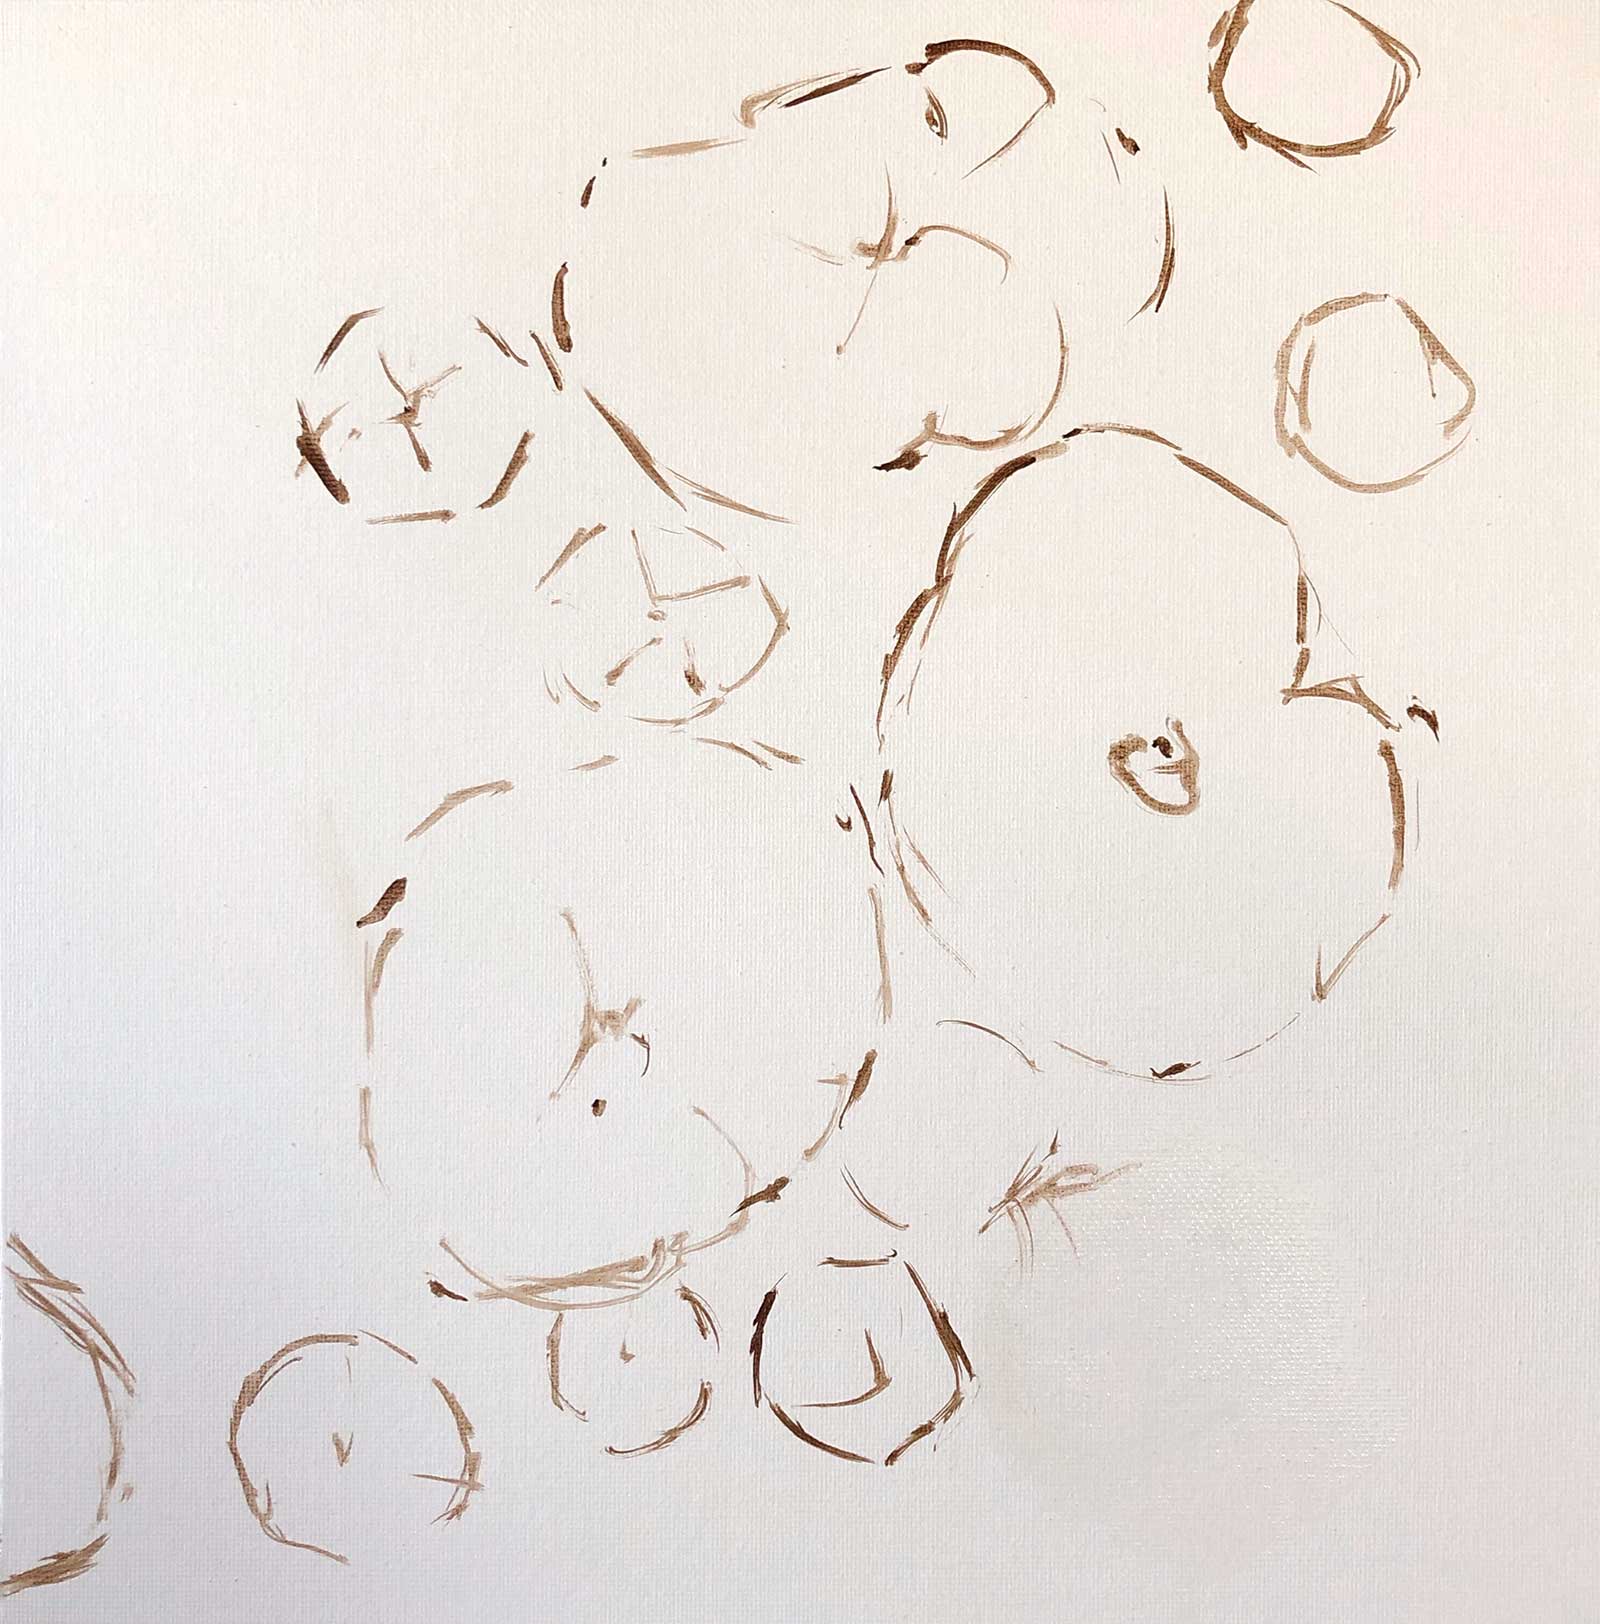 Stage 1
Stage 1 Roughing in Shapes
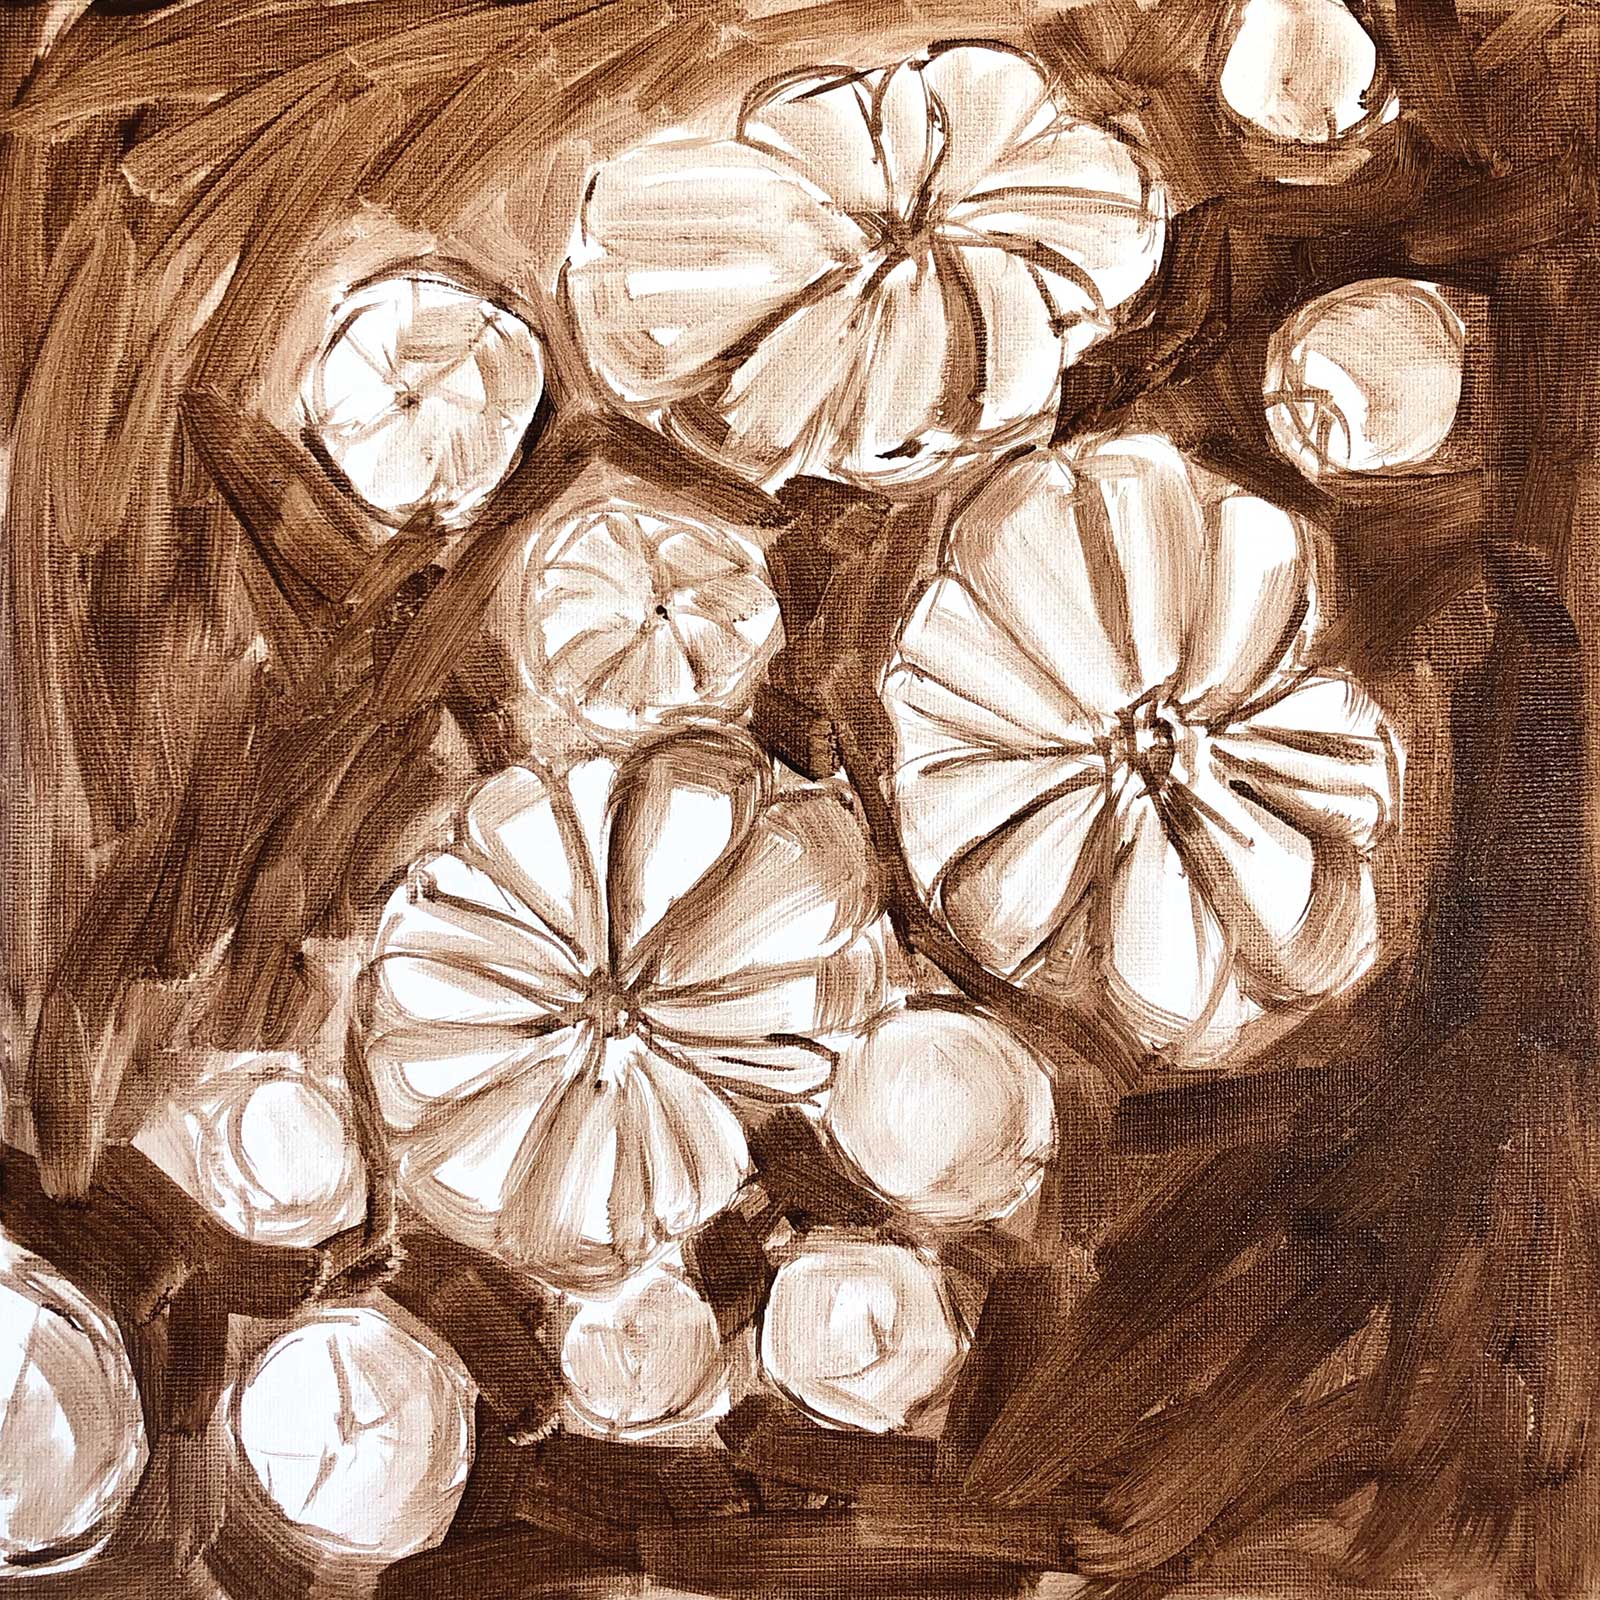
Using burnt umber, thinned with white spirit, and a round synthetic size 1 brush, I roughly mark the main shapes on the canvas.
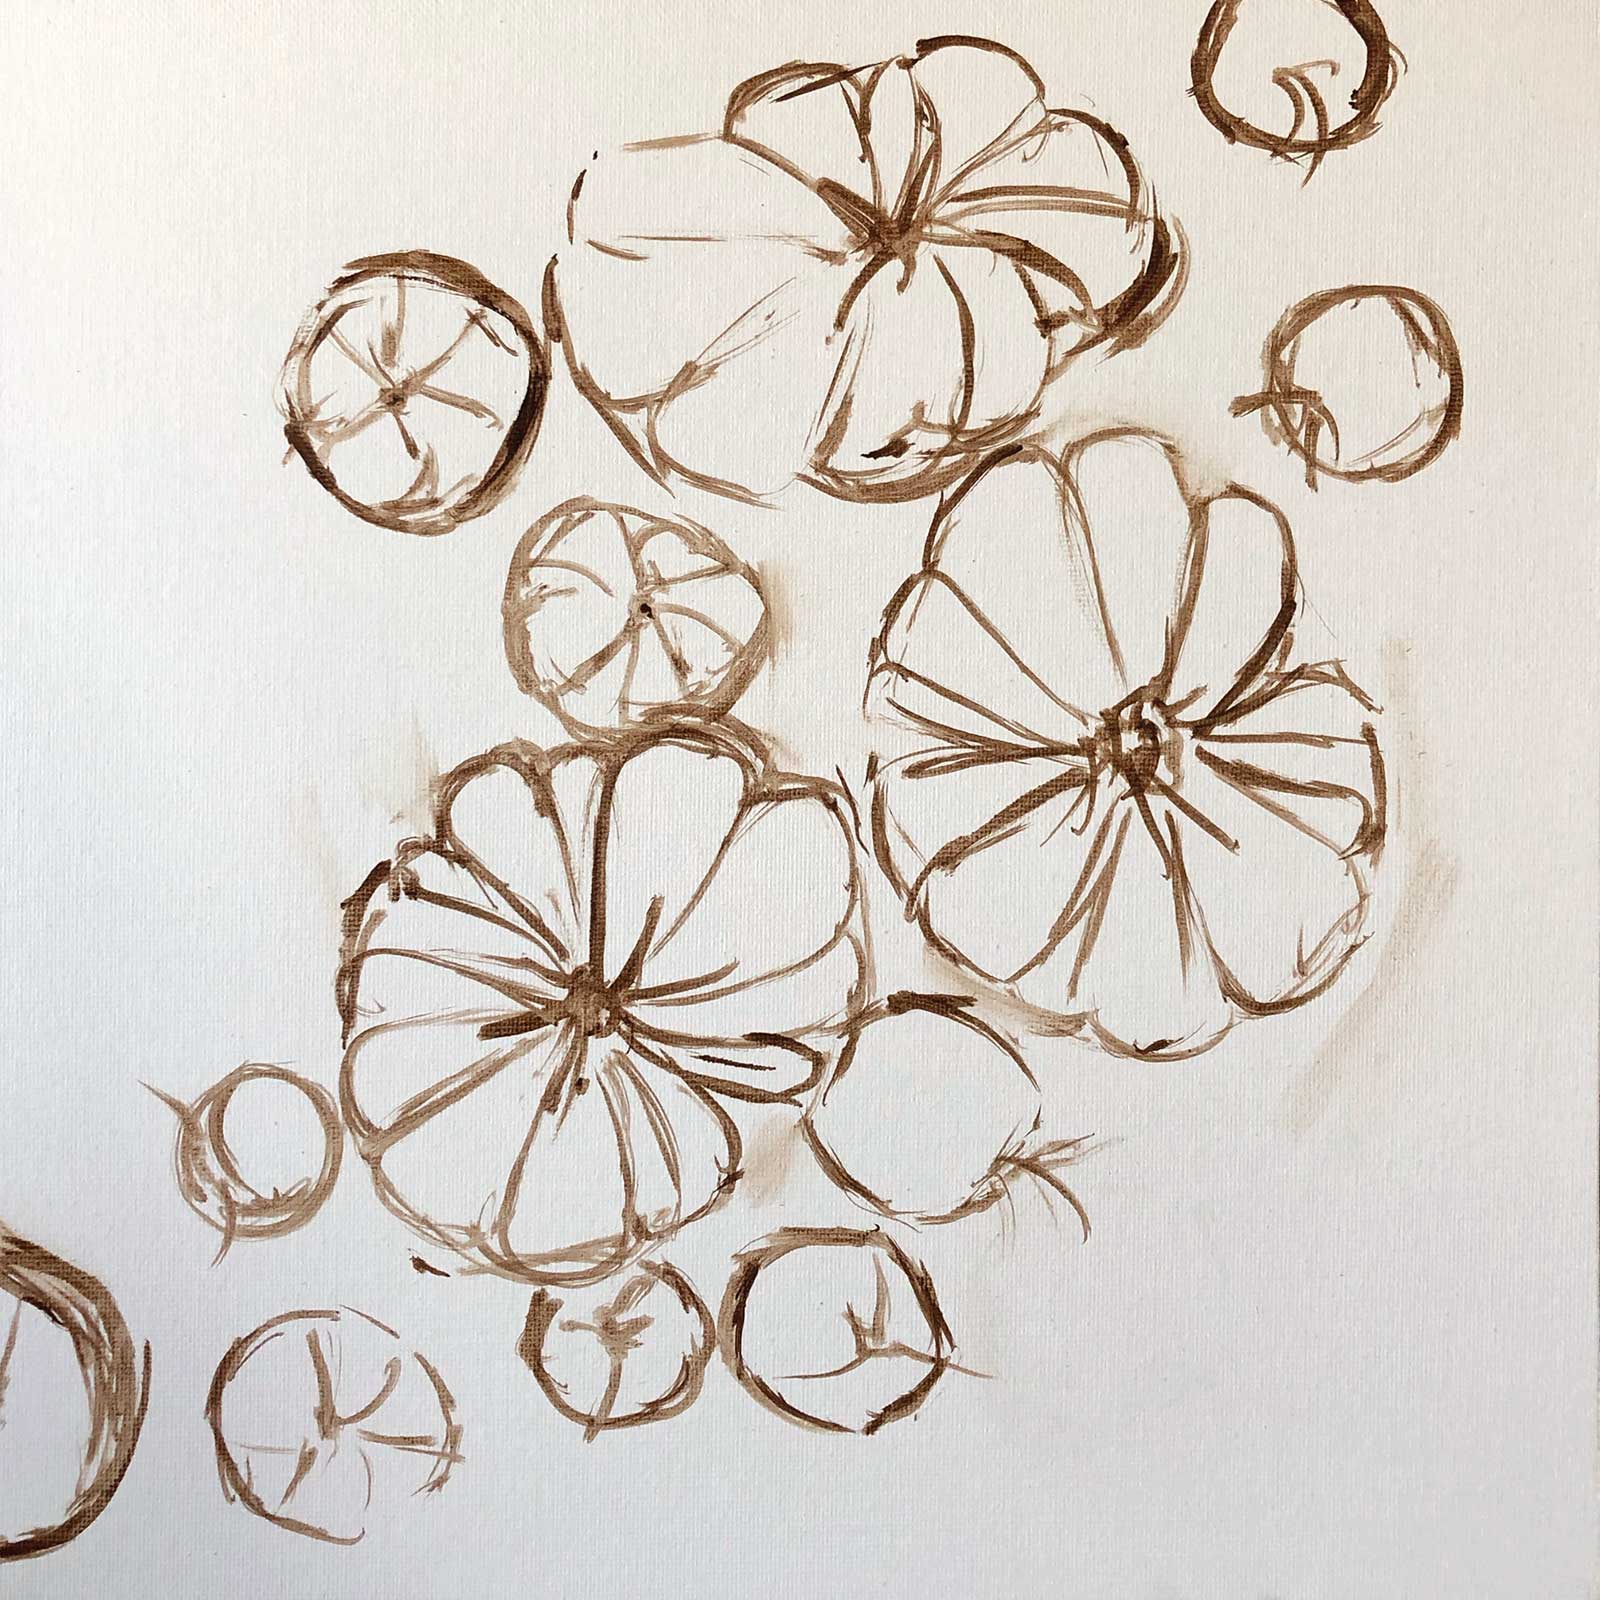 Stage 2
Stage 2 Detailed Sketch
Stage 2Stage 2 Detailed Sketch
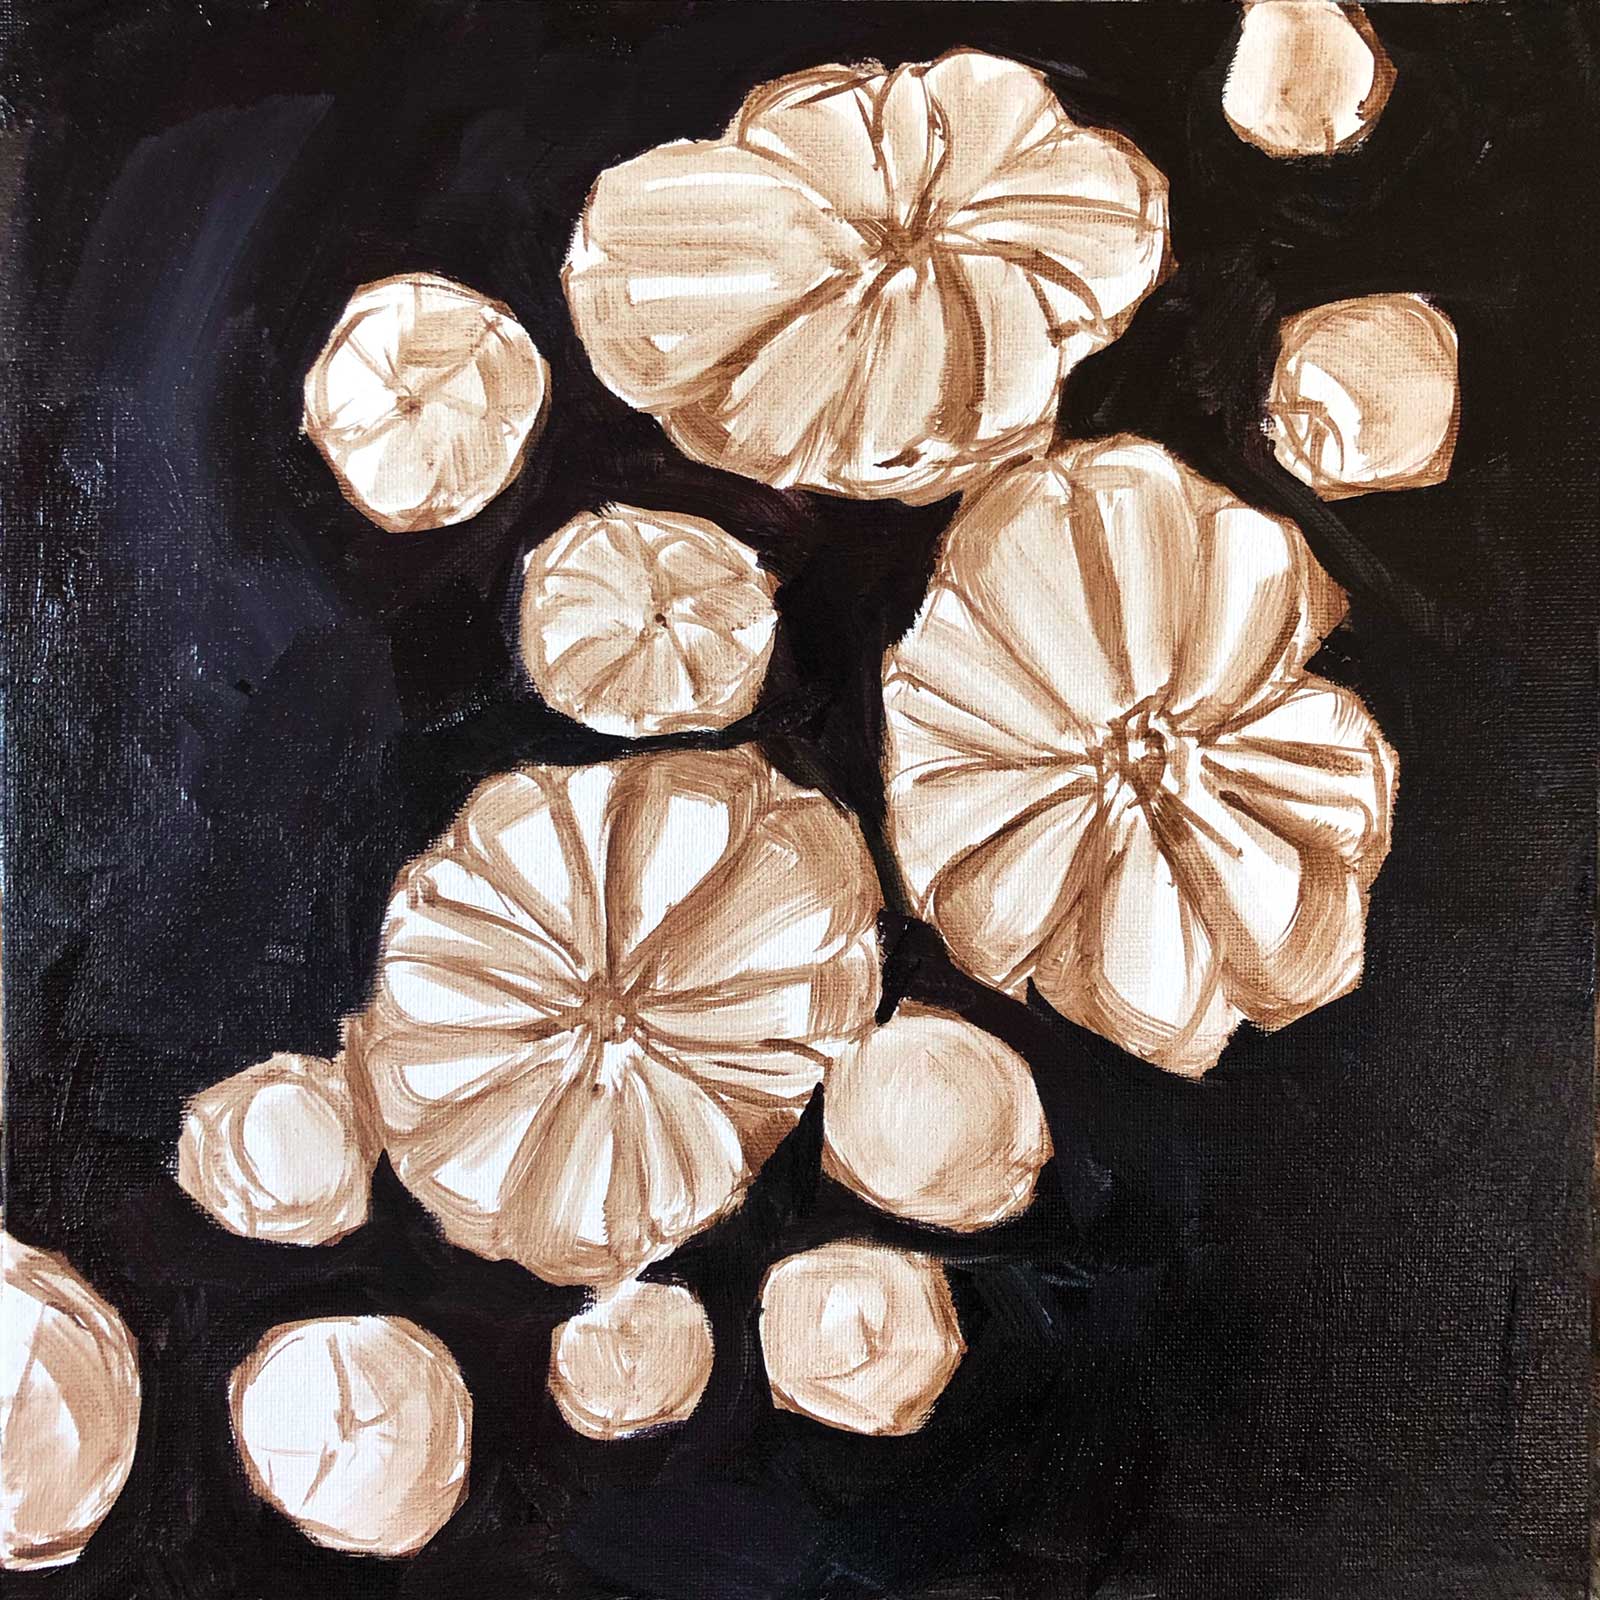
When satisfied with the composition, using the same brush and color, I create a more detailed sketch.
 Stage 3
Stage 3 Main Values
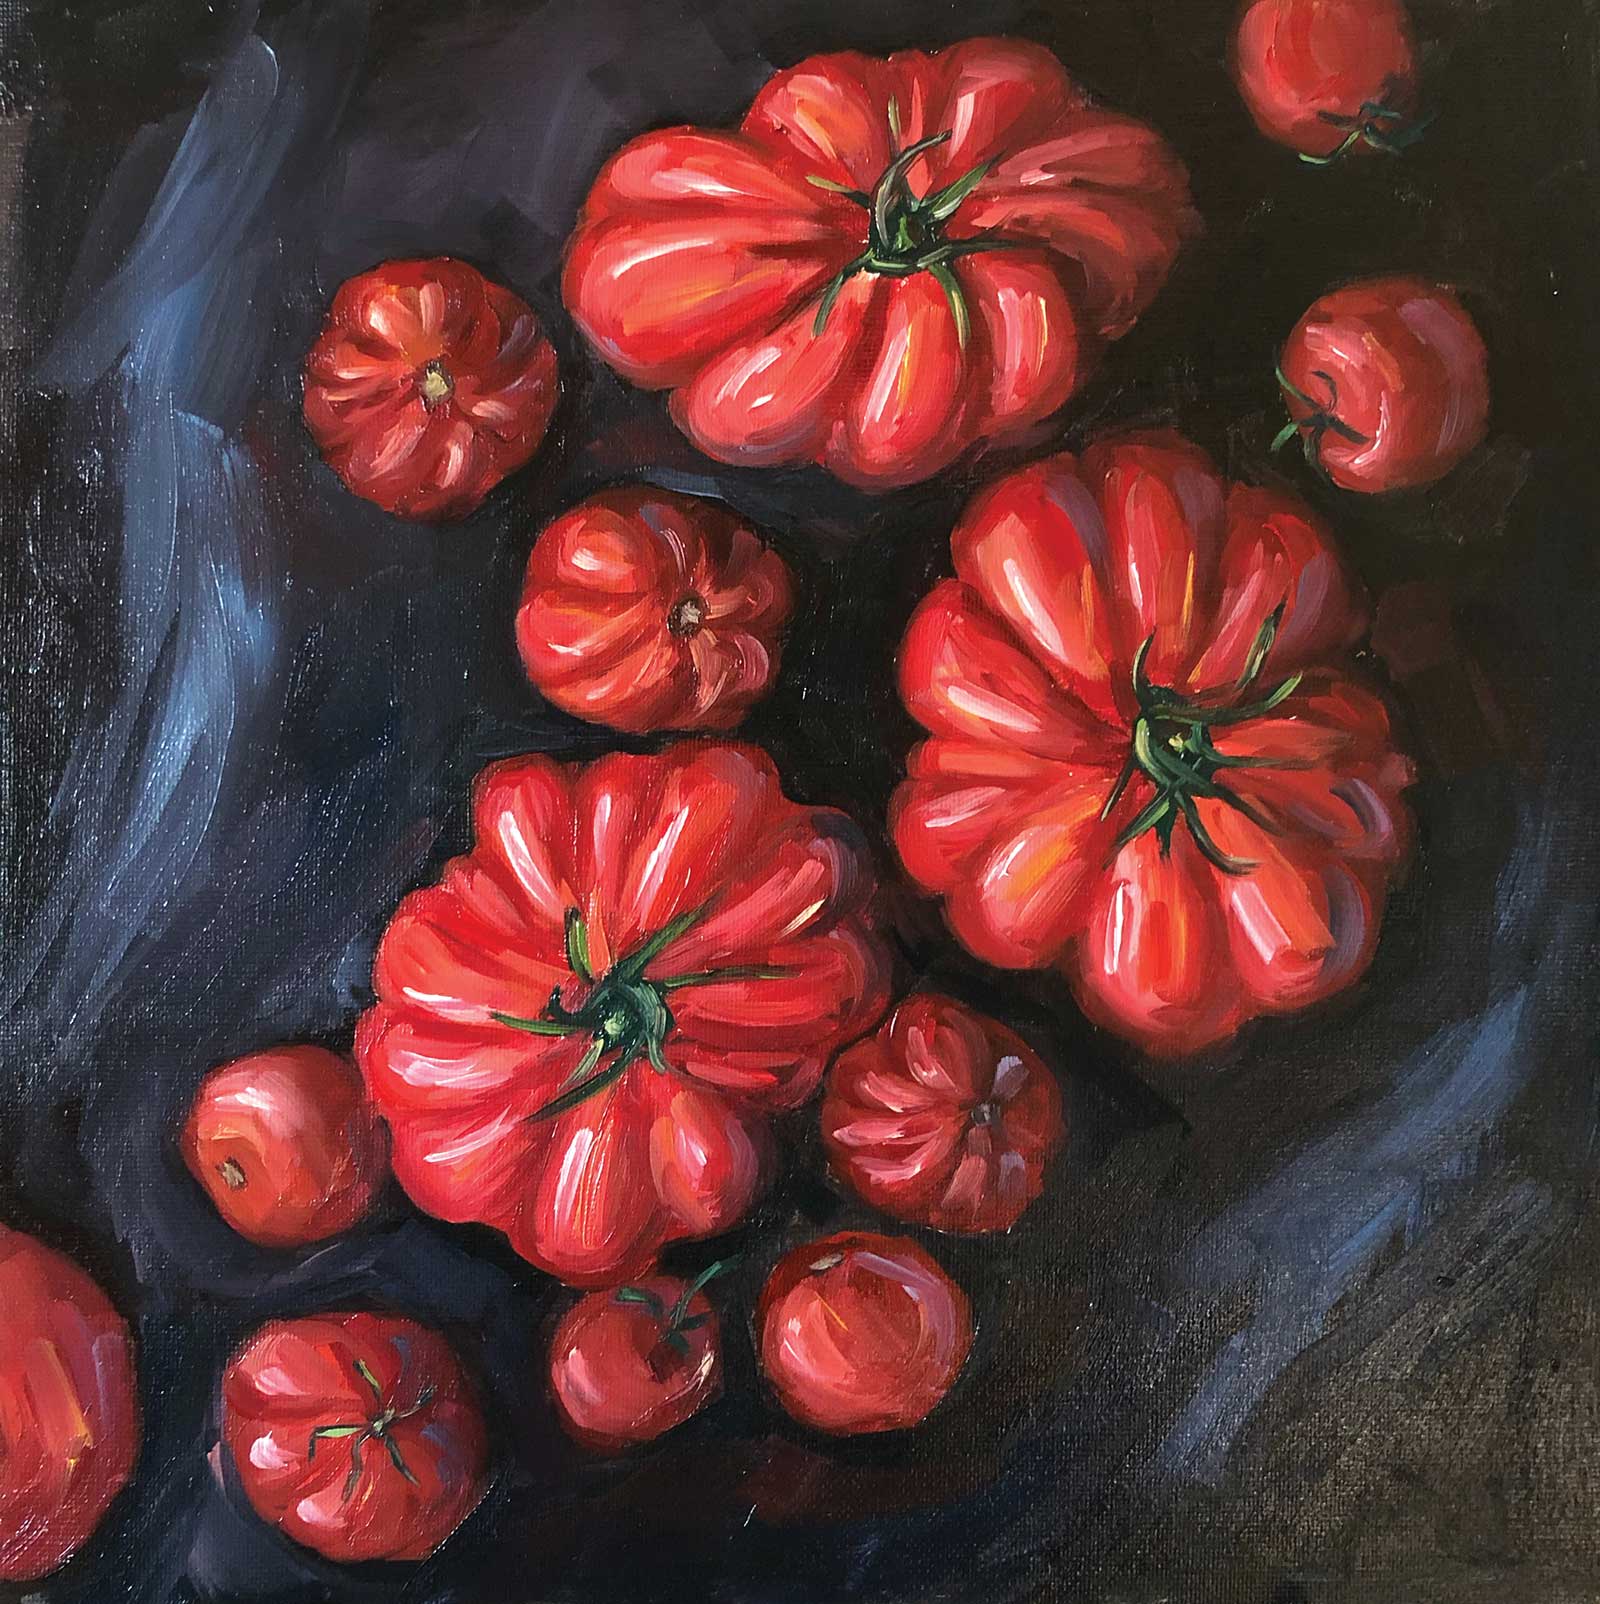
With a flat synthetic brush size 12 and burnt umber, using white spirit for thinning the paint, I mark the main value shapes in the painting. Using more paint for darker shapes, I create the value map/underpainting, also making sure the composition works out this way.
 Stage 4
Stage 4 Color Work
Starting with the largest and the darkest area of the painting, I begin blocking in the background. I’m making it almost entirely monotonous, only adding a few lighter brushstrokes on the left side, since that’s where the light comes from.
 Stage5
Stage 5 Blocking in Shadows
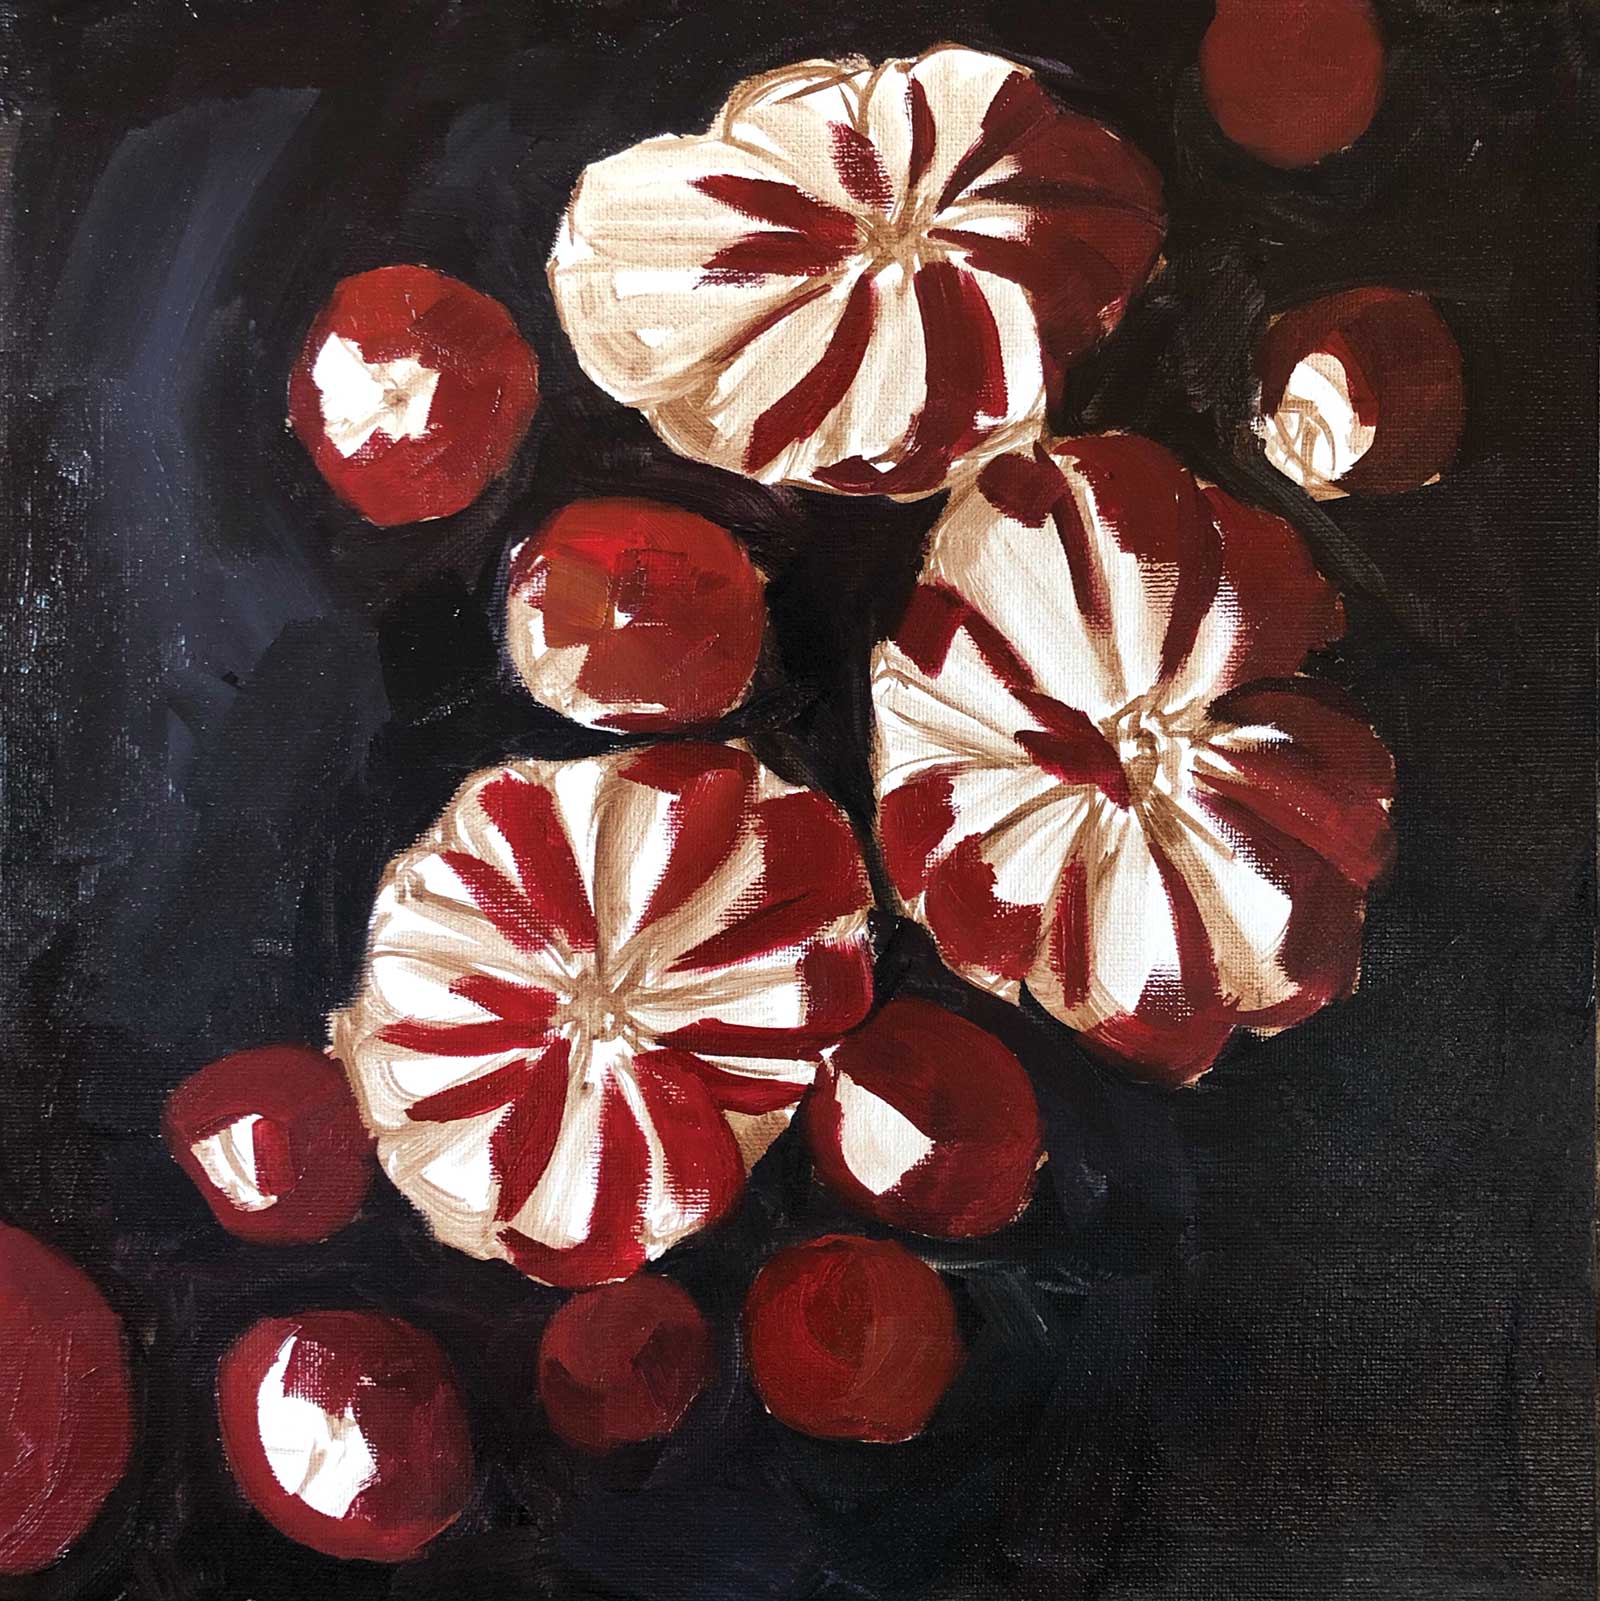
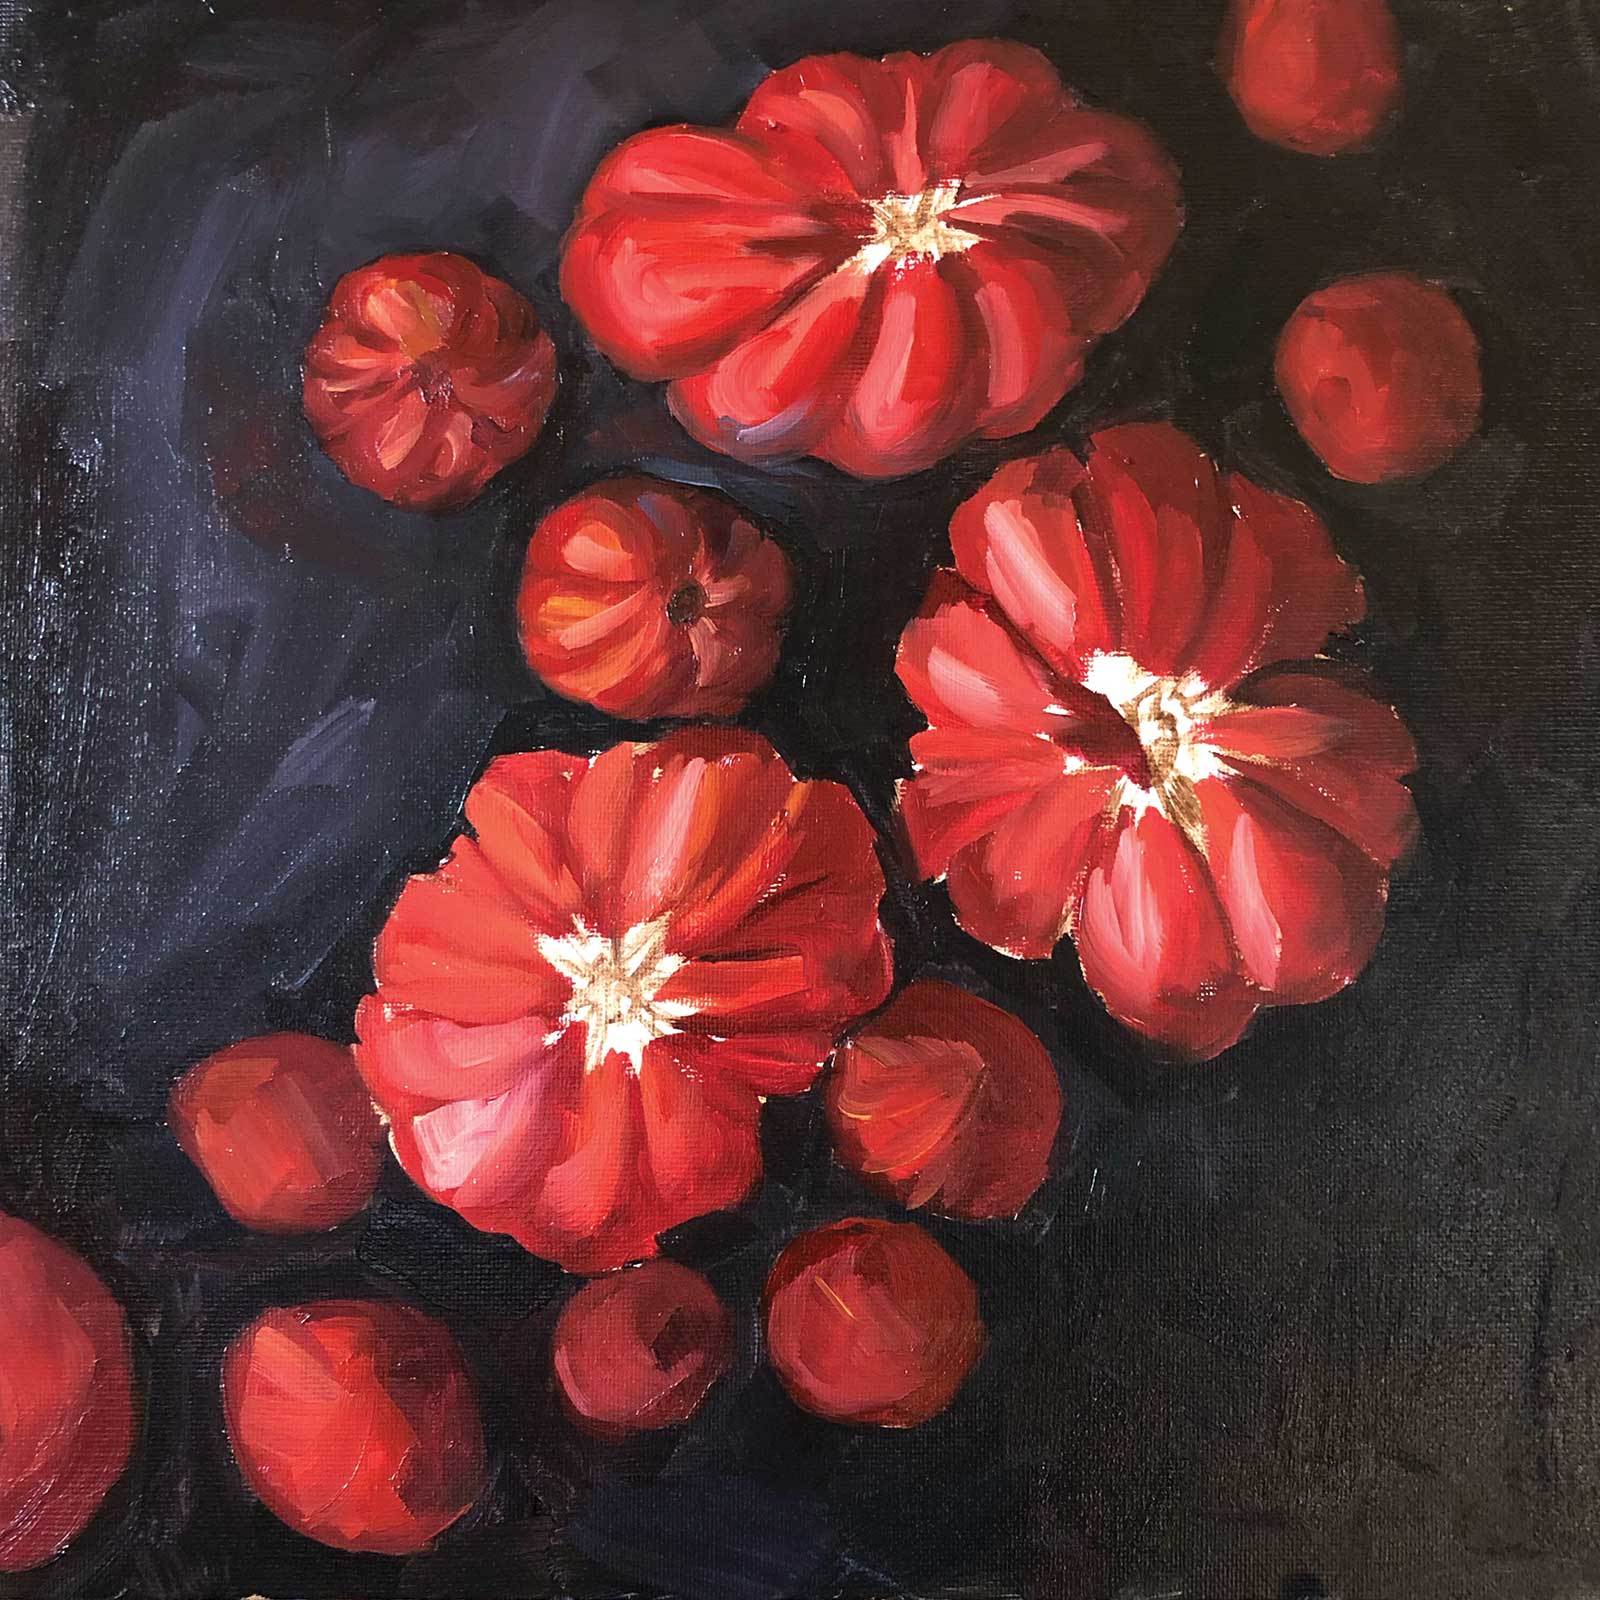
Mixing darker red, I block in the shadowed sides of the tomatoes. For smaller ones it’s fine to block them in almost entirely, especially those on the right side, which is more shadowed. I’m leaving the sides blank, which are better exposed to light.
 Stage 6
Stage 6 Creating Volume
With lighter and brighter reds, I’m now blocking in the rest of the tomatoes, creating volume and marking the areas for future highlights. The centers of the large tomatoes are left blank since they’re mostly dark and will need more detailed and accurate work later.
 Stage 7
Stage 7 Details
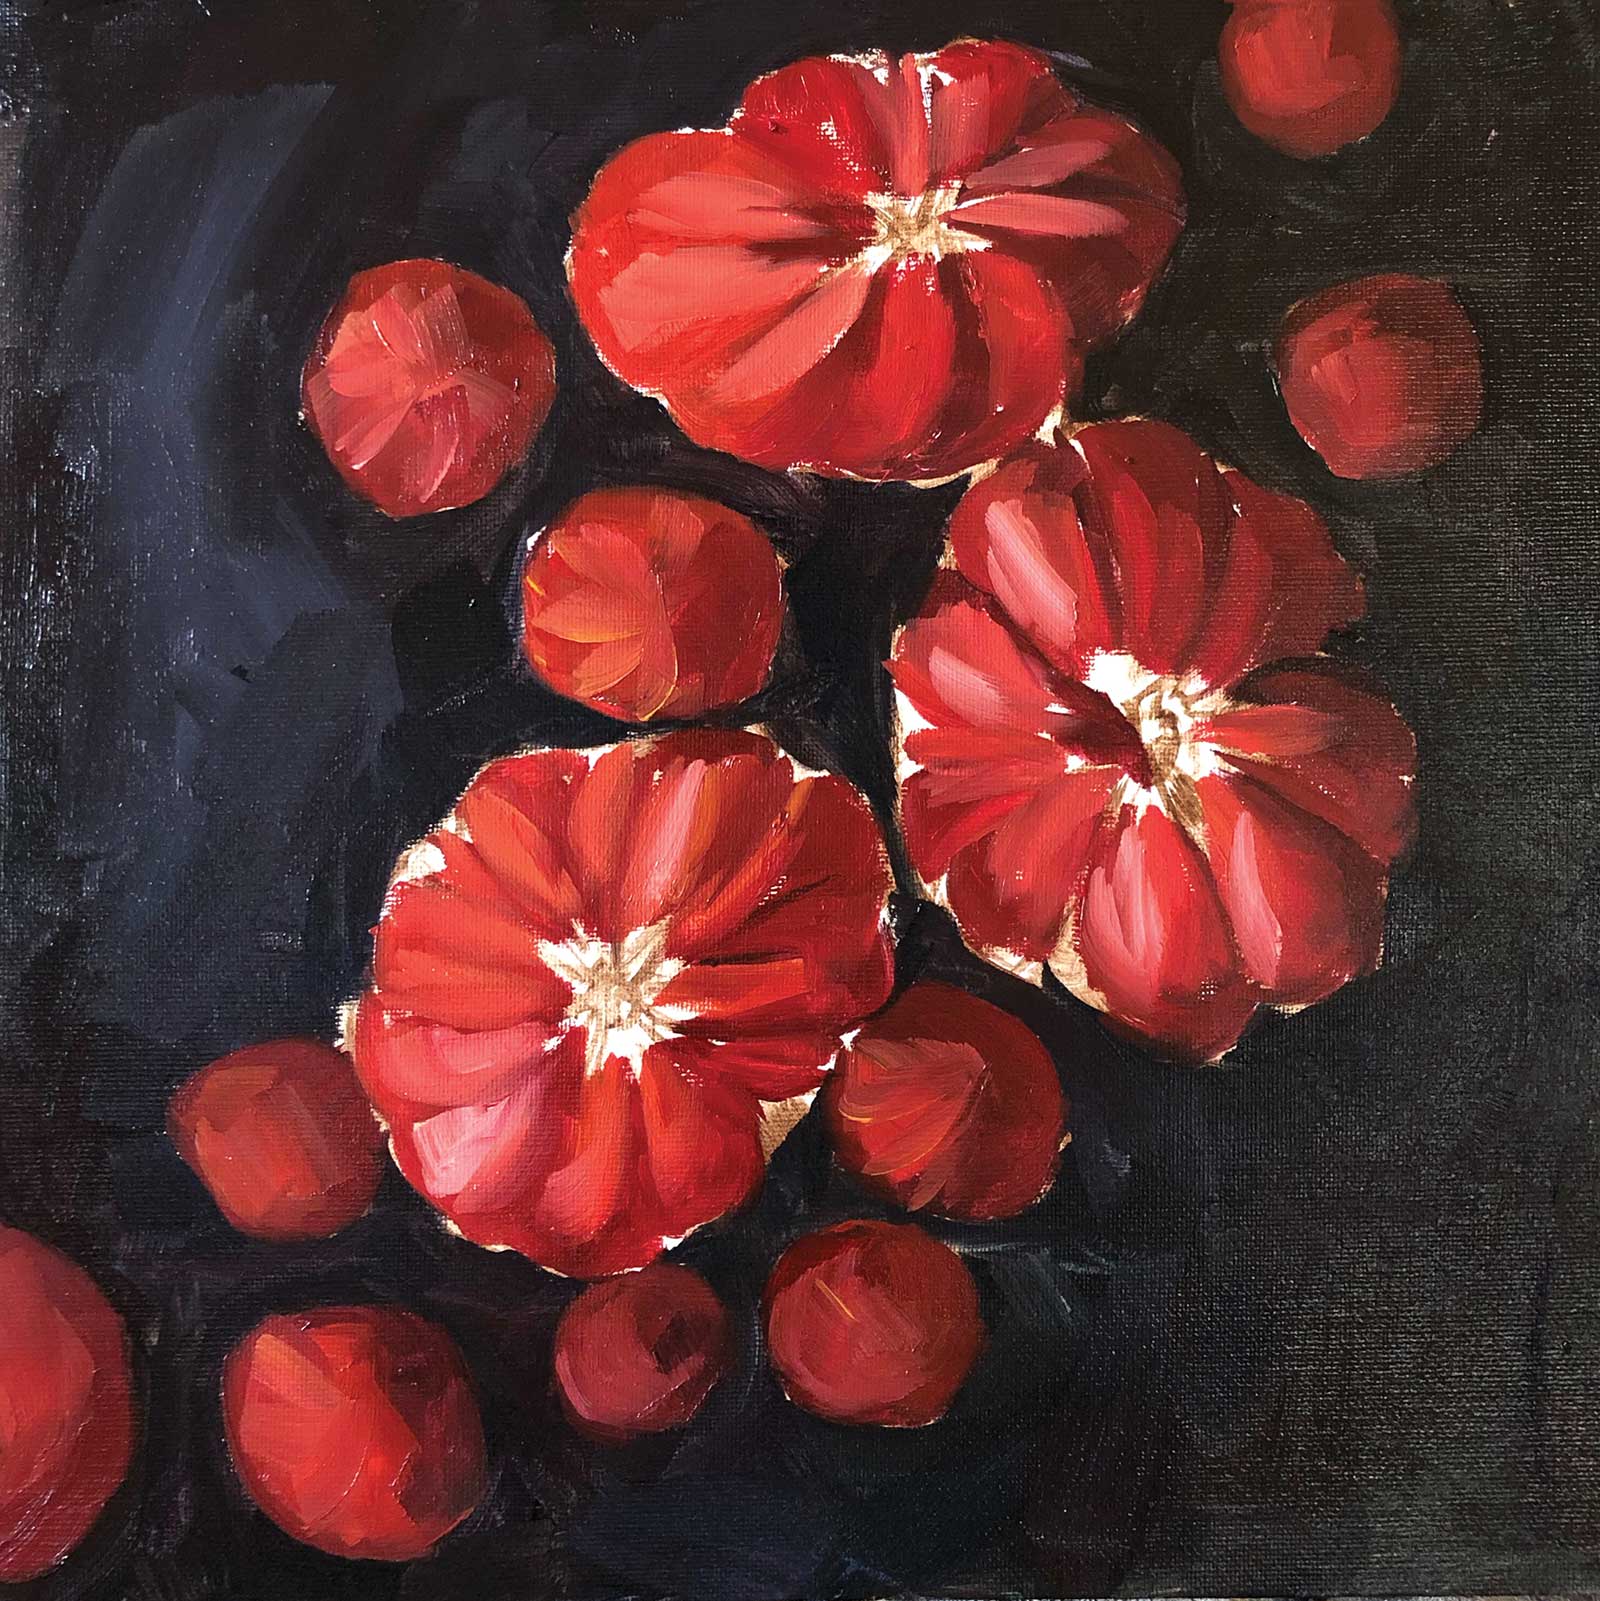
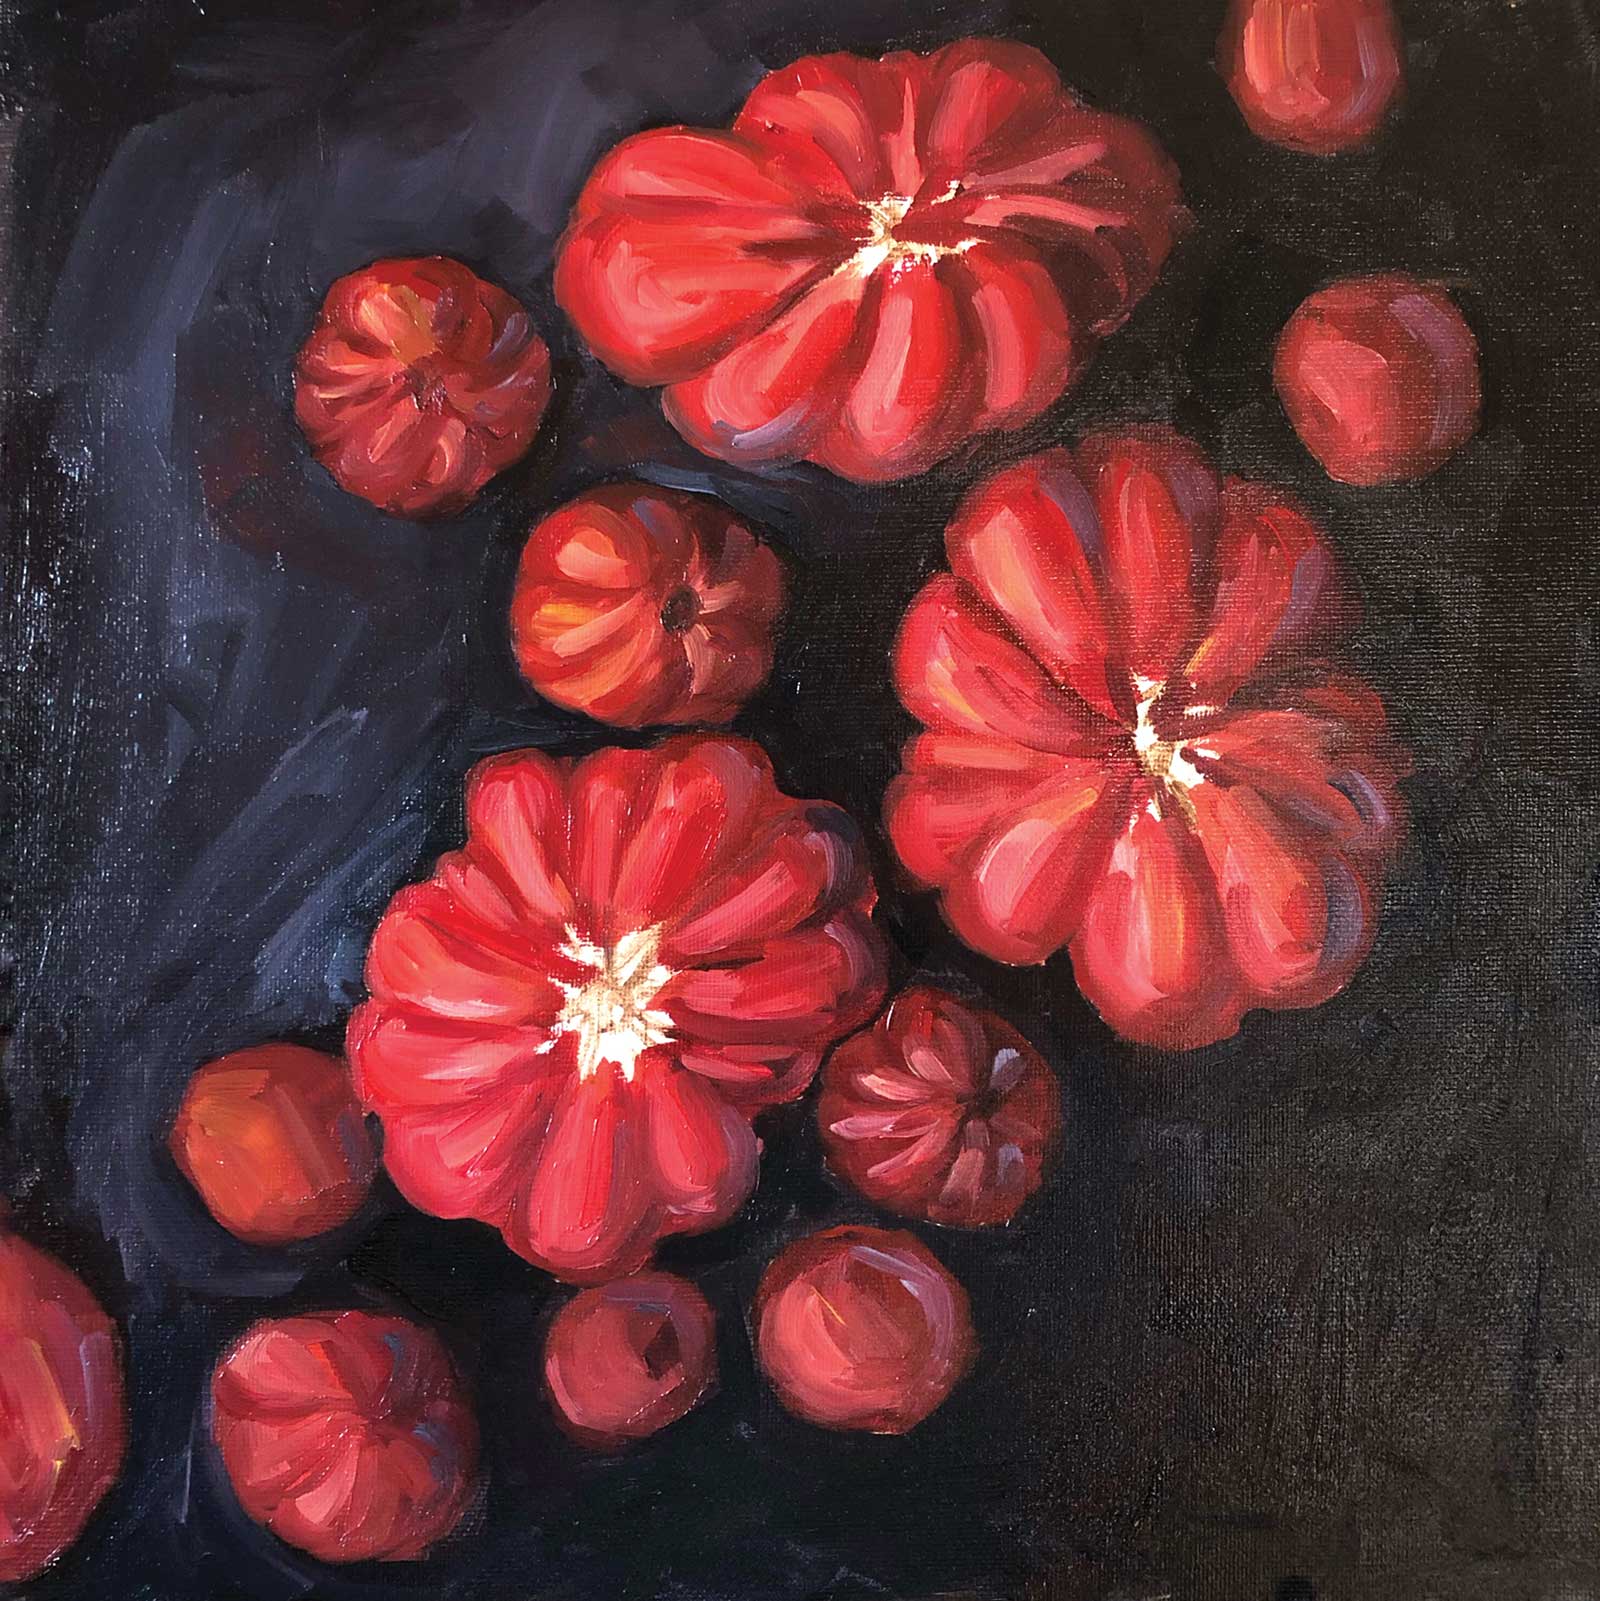
I then add more details to the tomatoes in the top part of the painting, creating more volume, adding reflections and refining the edges.
 Stage 8
Stage 8 Tightening Up
Continuing the process for the bottom tomatoes, I create neater edges and add reflections.
 Stage 9
Stage 9 Adding the Tomato Greens
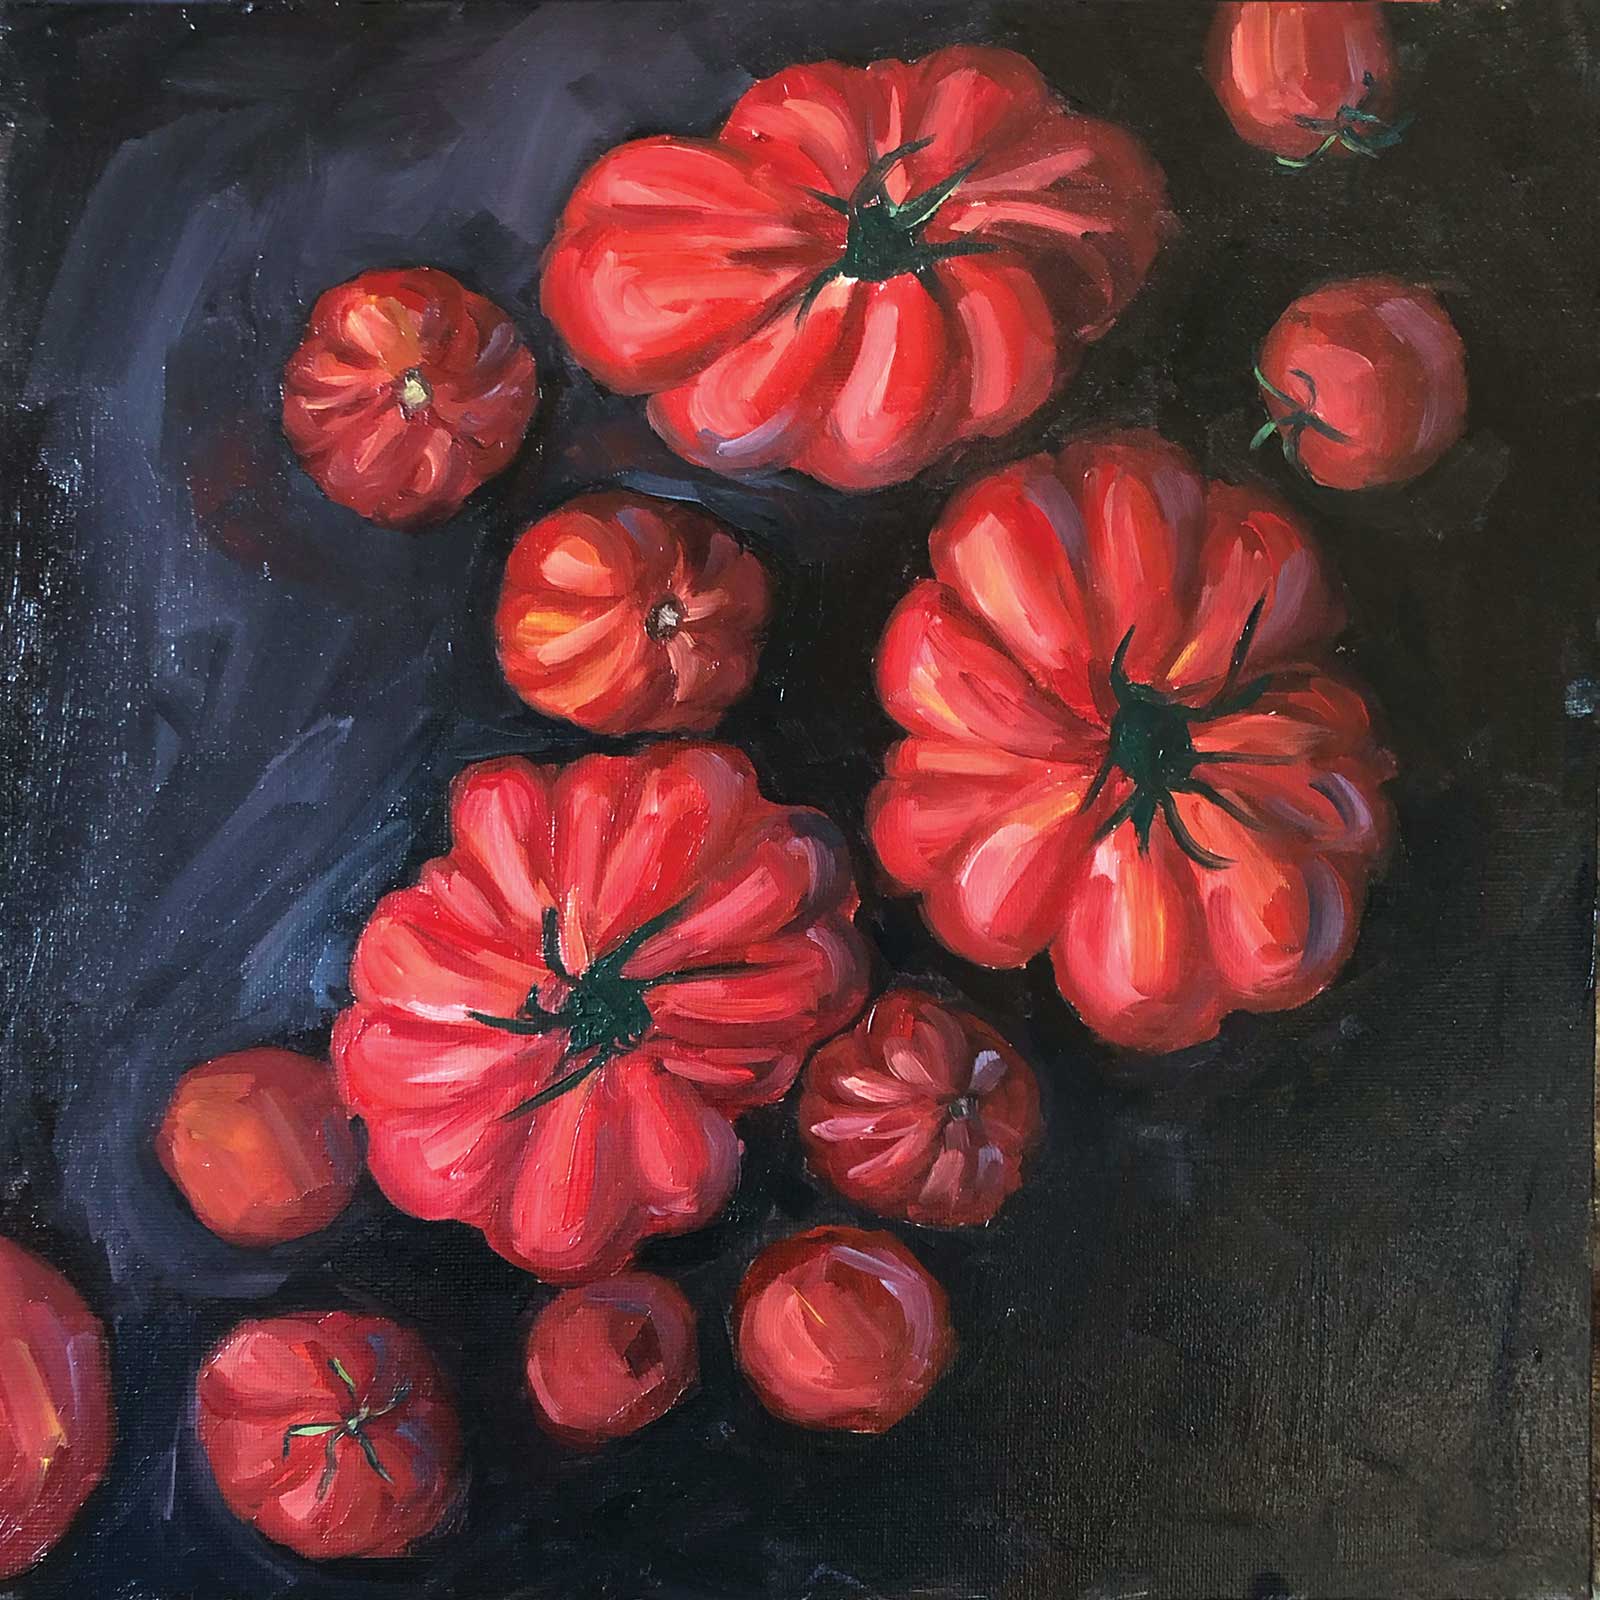
With a thin brush, I’m now adding the greens to the tomatoes—blocking in the centers of the big tomatoes and adding leaves to the small ones as well.
 Stage 10
Stage 10 More Volume and Highlights
Stage 10Stage 10 More Volume and Highlights
With a lighter green, I’m adding volume to the leaves and highlighting the stems.
 Stage 11
Stage 11 Enhancing the Background
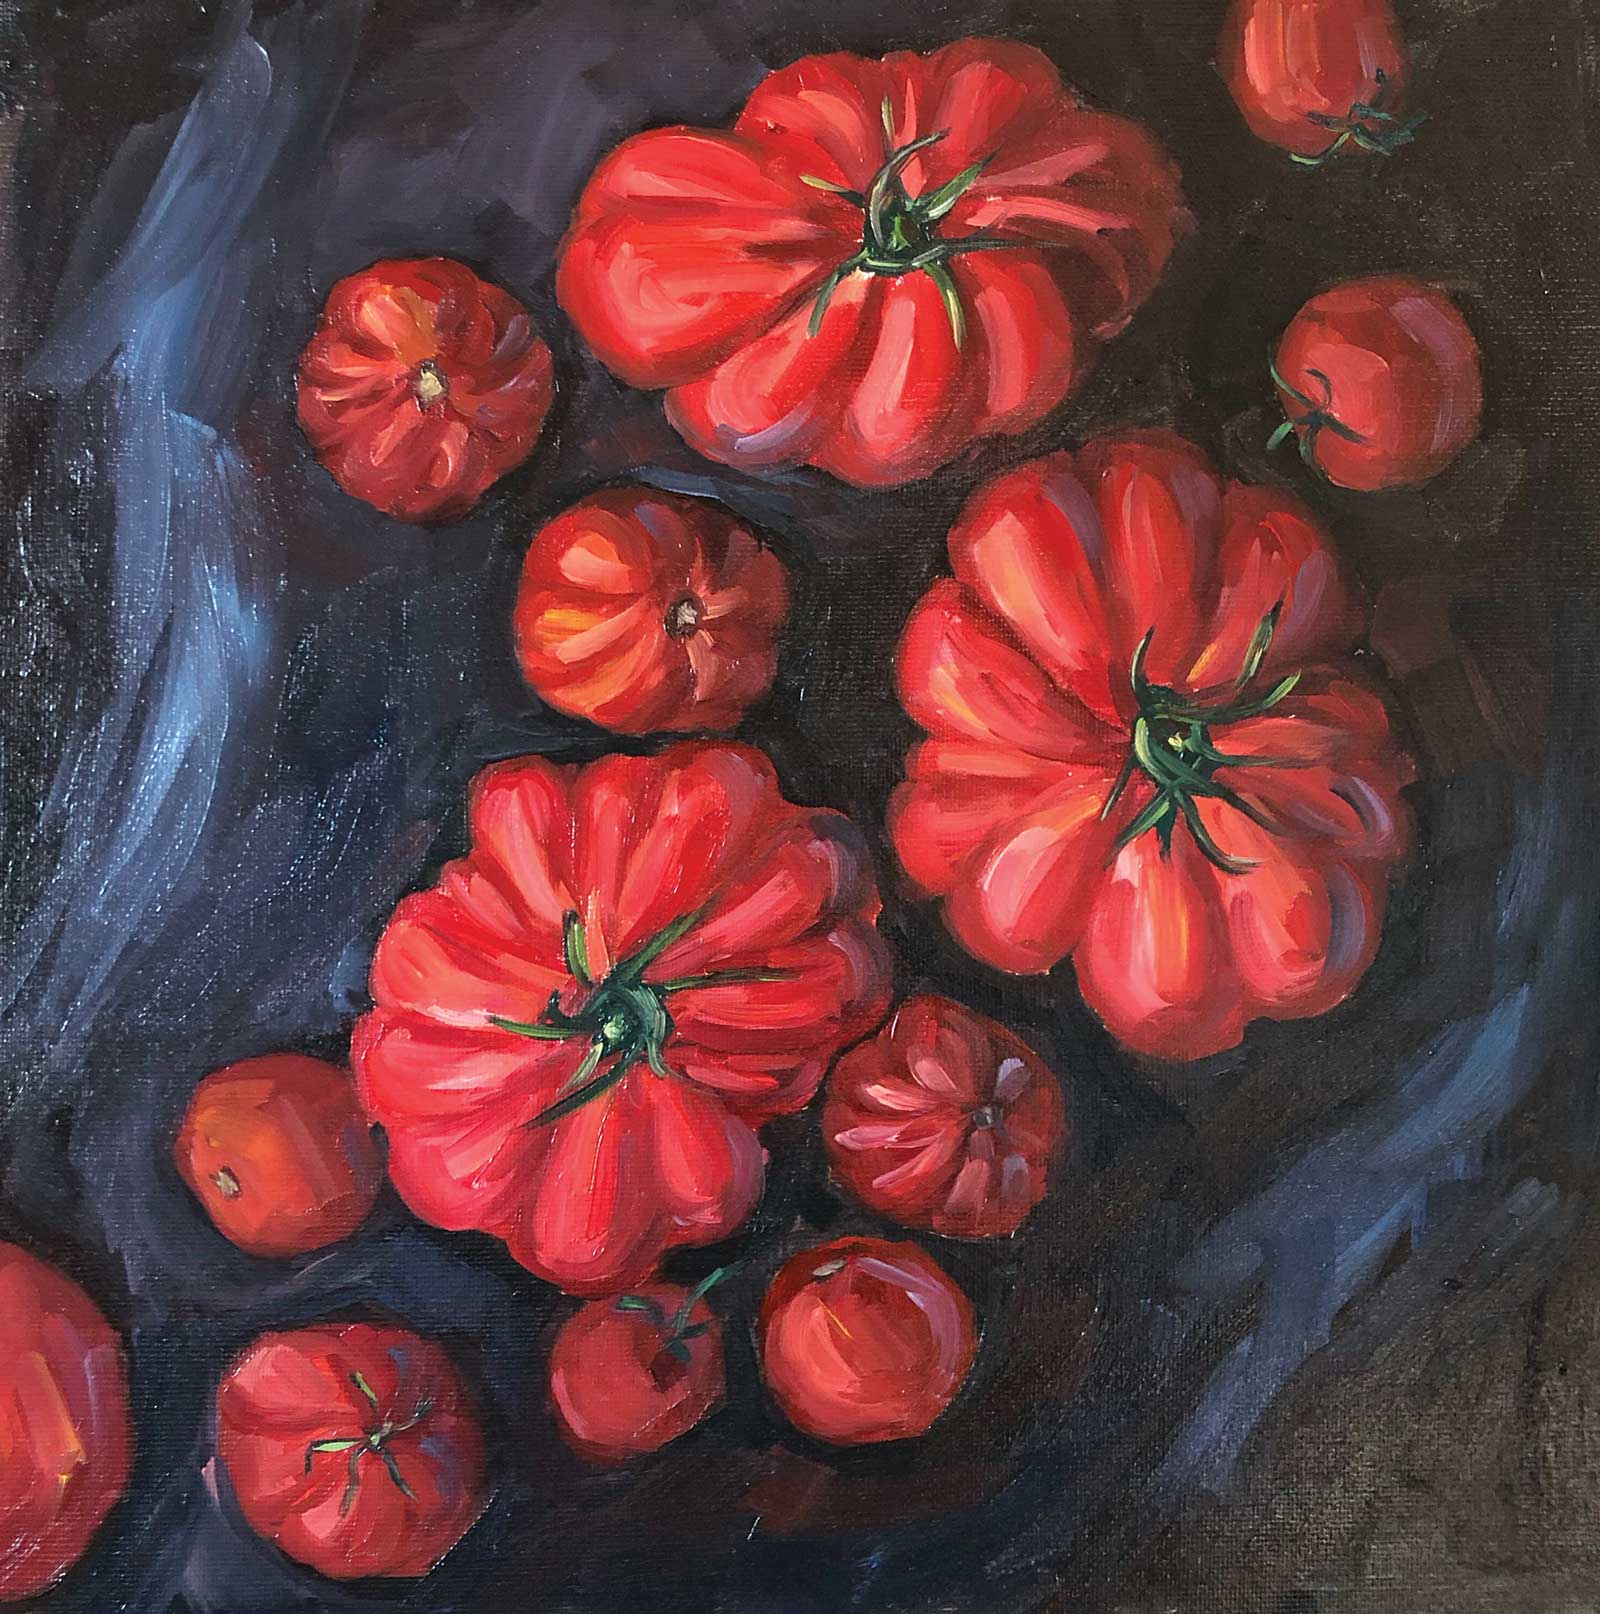
I’m adding a few lighter brushstrokes to the background on both the left and right sides, as they add some dynamism to the composition and create the illusion of volume around the tomatoes too. Plus it makes the background more interesting and visually attractive.
 Stage 12
Stage 12 Final Touches
The tomato parade, oil on canvas panel, 12 x 12" (30 x 30 cm)
Refining the edges of the tomatoes, I add a few bolder strokes with reds and yellows to create a more exciting brushwork effect. I finish up with stronger highlights on the large tomatoes. Done!
About the Artist
 Natalia Karpman
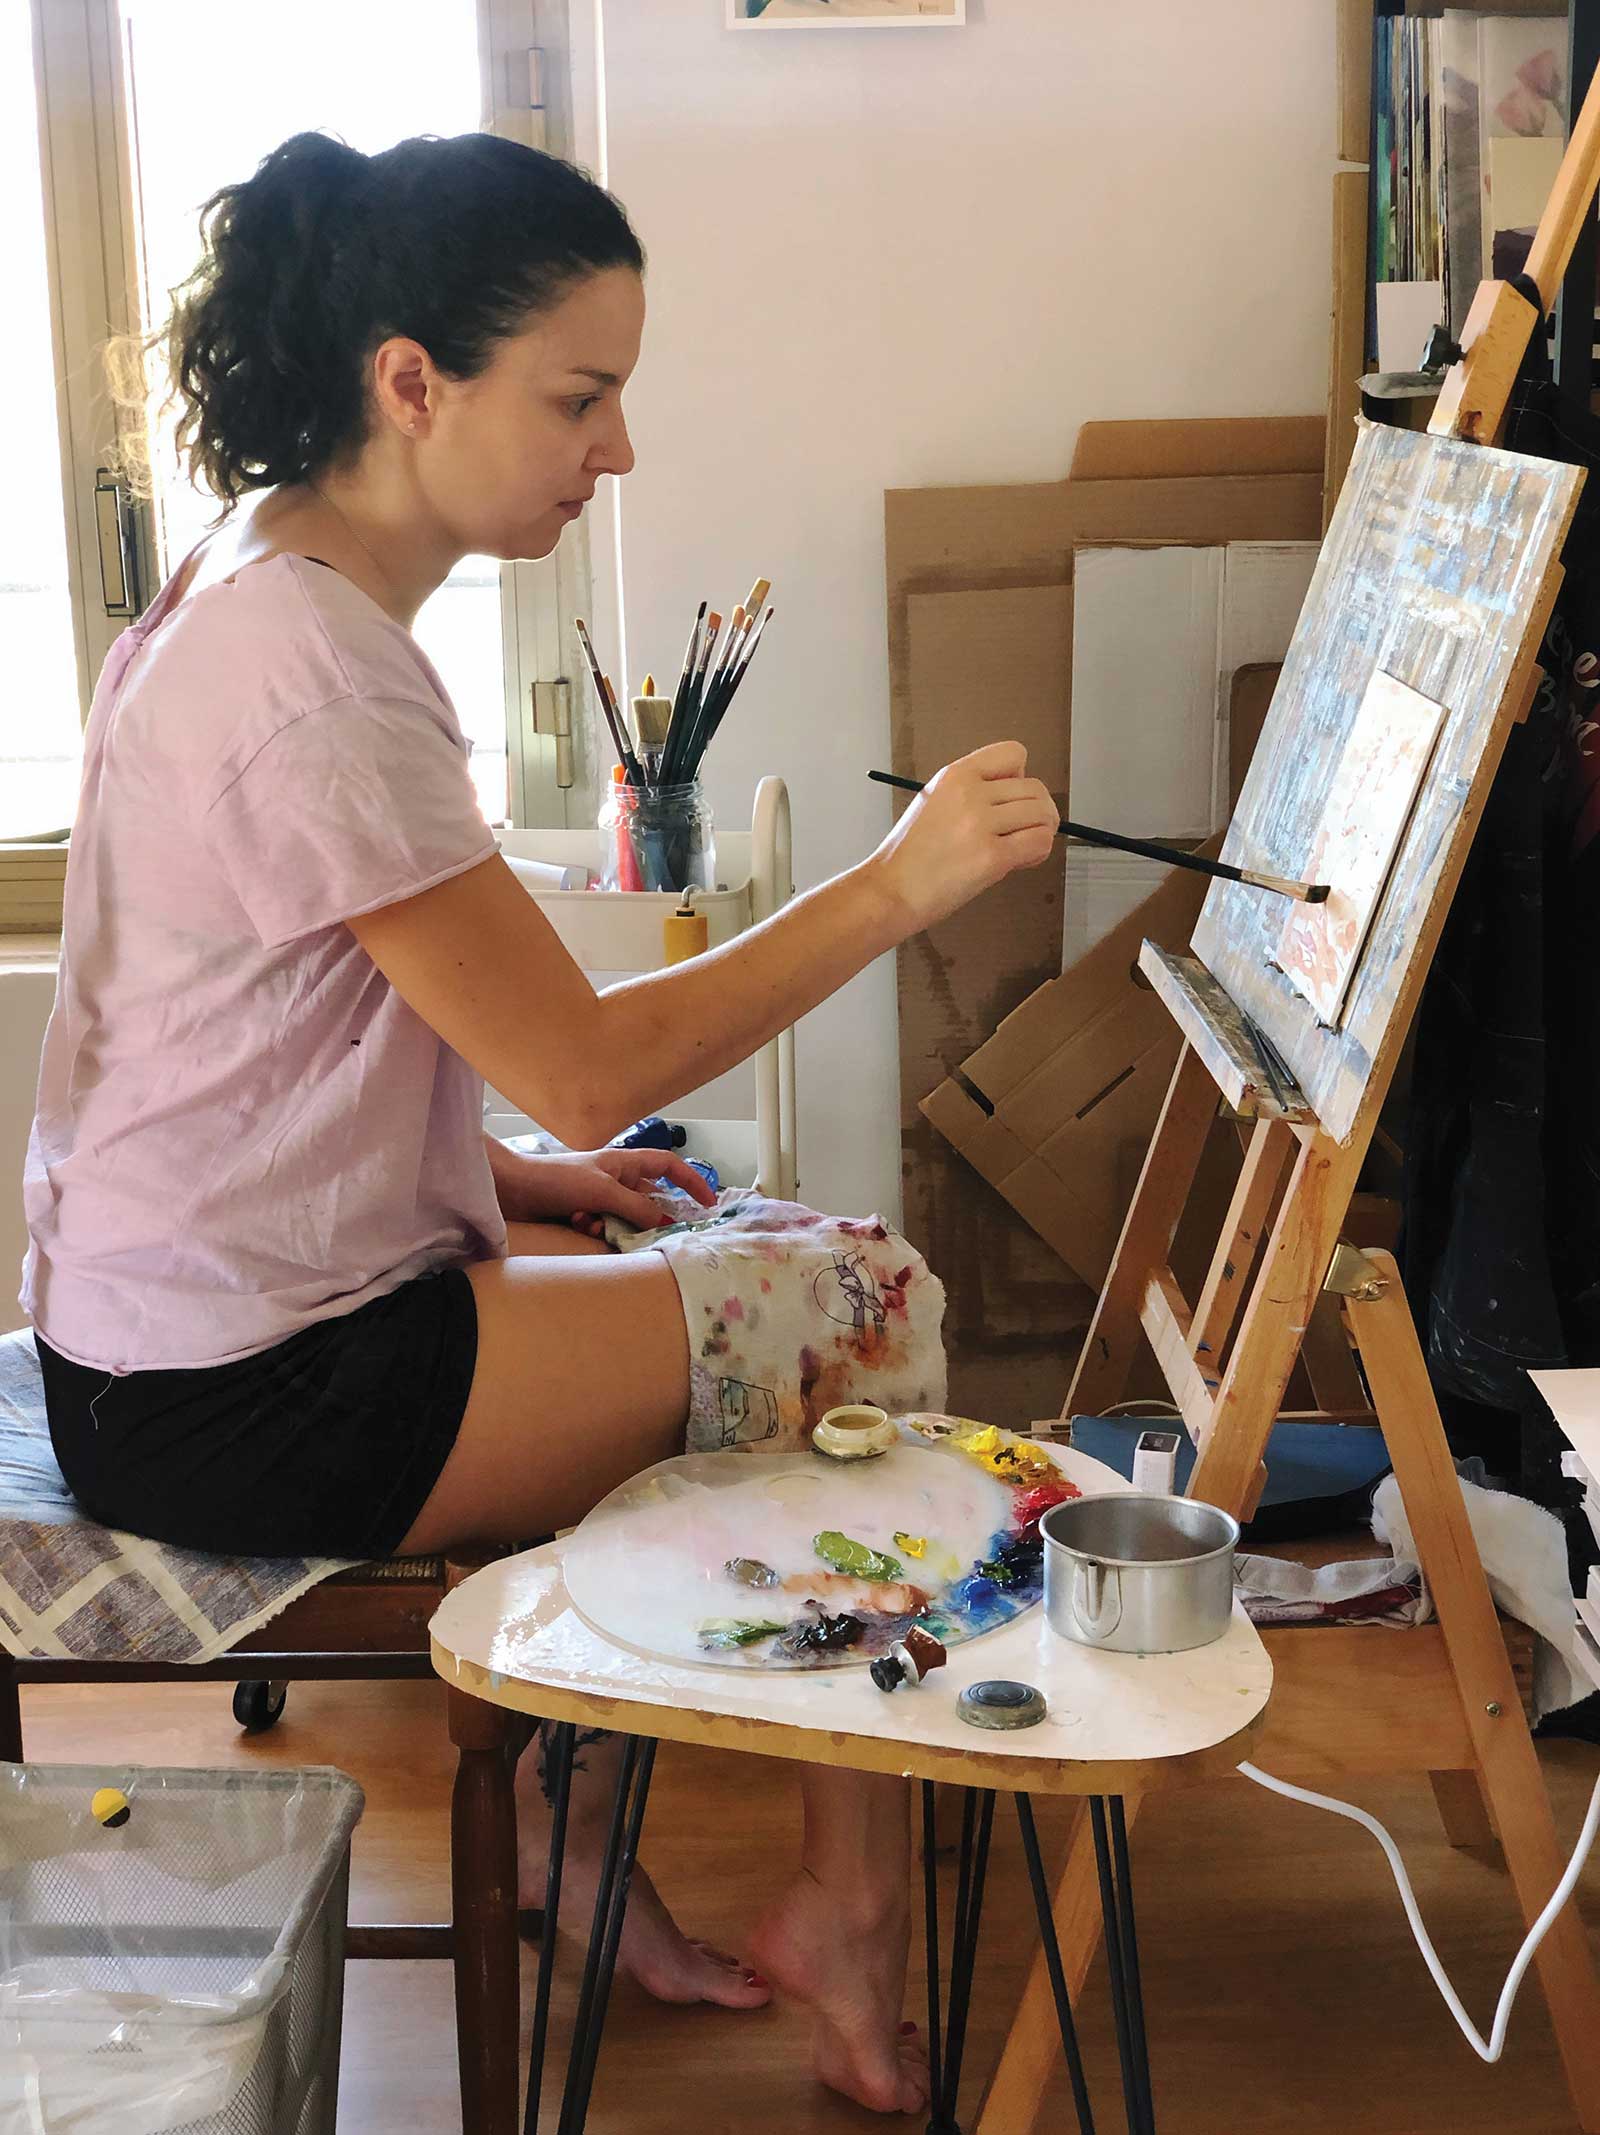
Natalia Karpman is a self-taught artist living in Umbria, Italy. She creates colorful and lively art, mostly focusing on still life in small formats. Her art is about the beauty of ordinary and familiar things—it catches the eye with the richness of color, the simplicity of shapes and the boldness of the brushwork.
Karpman’s art and her expressive painting style quickly gained popularity on social media. Her paintings are purchased for private collections in many countries across the world. They are also showcased in The Good Gallery in the heart of Paris.
Since 2021, Karpman has been teaching oil painting to beginners. There are video lessons and courses available online (in English), which are accessible from anywhere in the world, anytime.