


My artistic style is about realism, detail, color, contrast and texture. I like to think of myself as a contemporary botanical artist. I was trained in the traditional style of botanical art, at the Geelong School of Botanical Art. The subject is usually a flower, fruit or vegetable. It is drawn from real life, to scale, on a white background, and is scientifically accurate. It is here that I learned the basics of drawing, first in graphite and then colored pencil. Although I have developed my own style, much of what I learned can be seen in my work. Now my emphasis is more on artistic interpretation and I do like to push the boundaries.
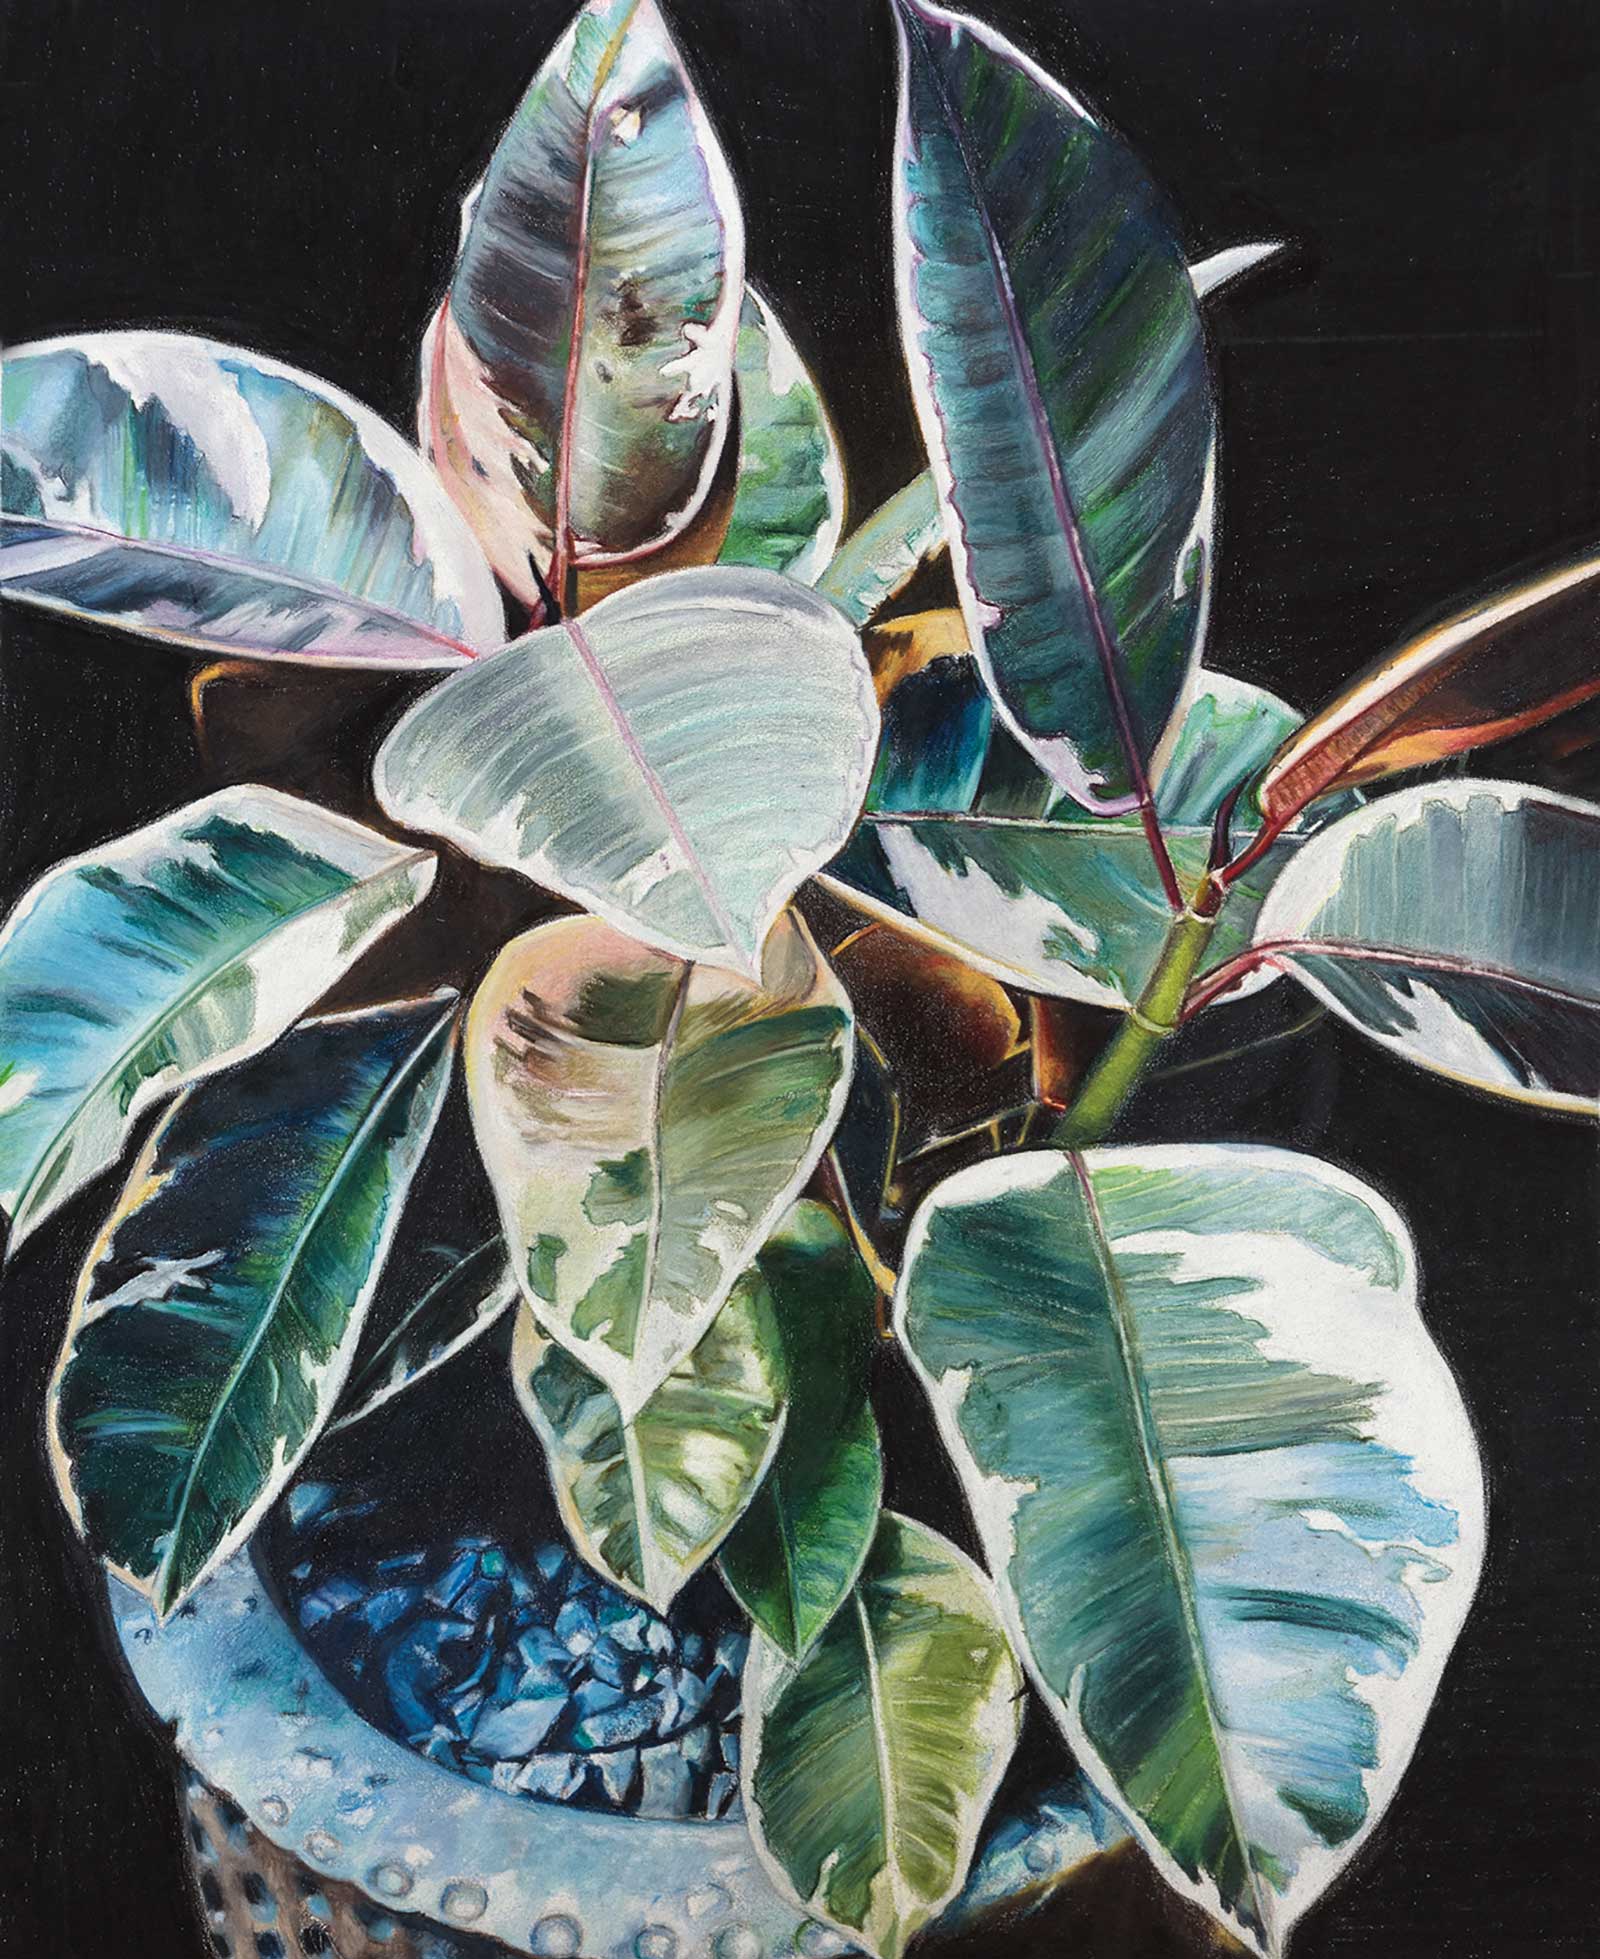
Ficus Elastica, colored pencil, 13 x 10½" (34 x 27 cm) This is the largest drawing I have done. I really loved working with this blue-green palette, which contrasted well against the black background.
I found that I preferred to use photographs as a reference, and I liked to add a background, sometimes a dark background. I prefer a less technical method and like to blend colors into a ‘painterly’ style.
The technique of colored pencil is about layering and blending colors. You cannot mix color pencils in a palette, they are mixed directly on the paper. Many layers of pencil are required to build up enough saturation of color so that the “tooth” of the paper is filled in is burnished. After I have done three to four layers of color, I like to use a Caran D’Ache Luminance white pencil to smooth out the pencil strokes. More layers of color are then added. It is very important that the pencil has a very sharp point and only light pressure is used. If heavy pressure is applied, the tooth will be flattened and it will not be possible to add more layers. I like to use small, circular strokes which gives a smooth coverage of the paper.
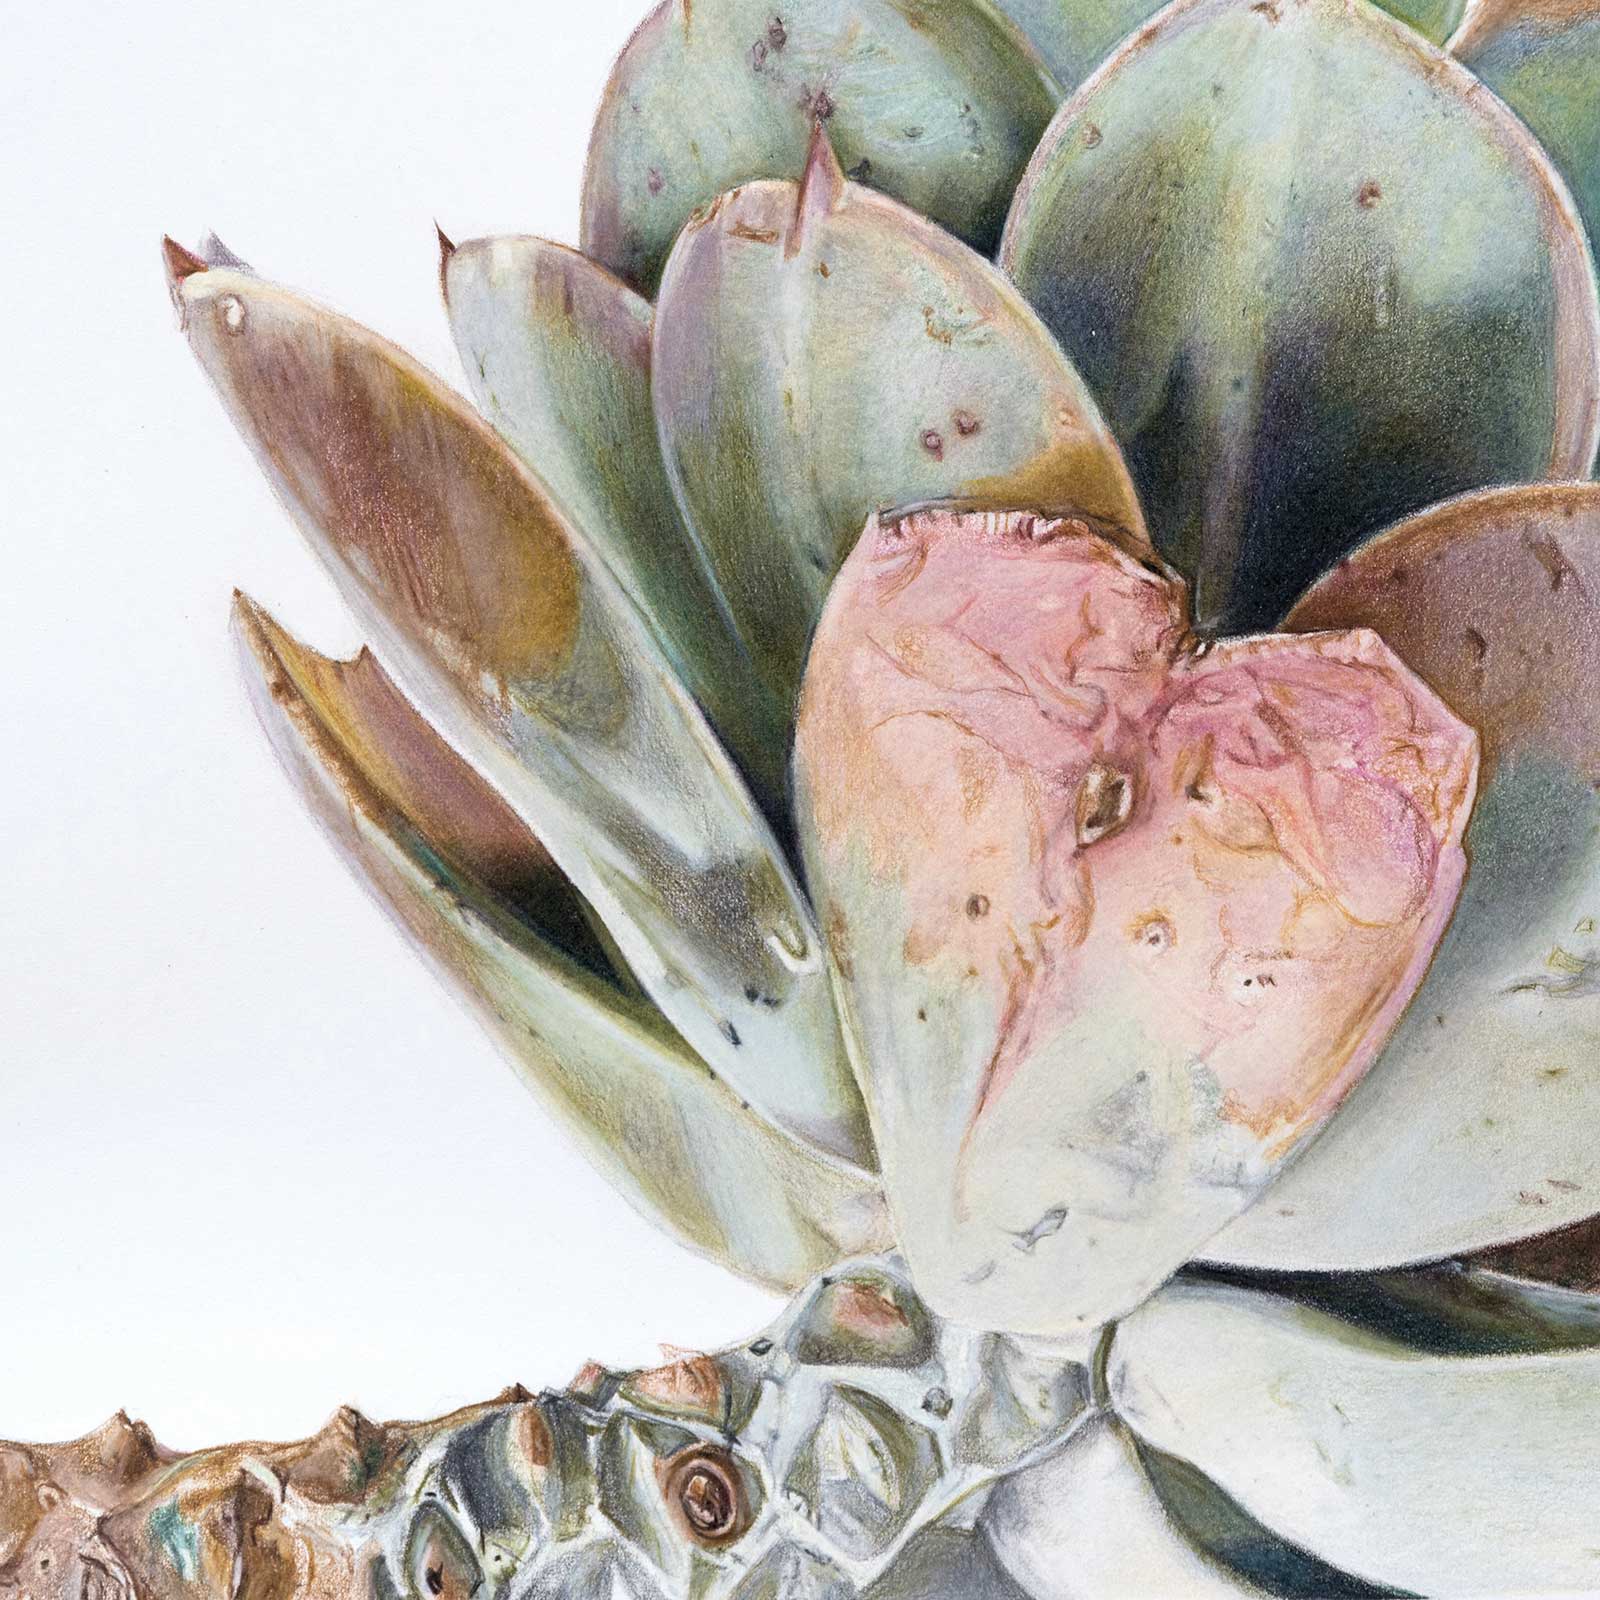
Succulent, colored pencil, 8 x 8" (20 x 20 cm) The focal point of this drawing was the textured, pink, heart-shaped leaf, which contrasts with the soft blue-greens.
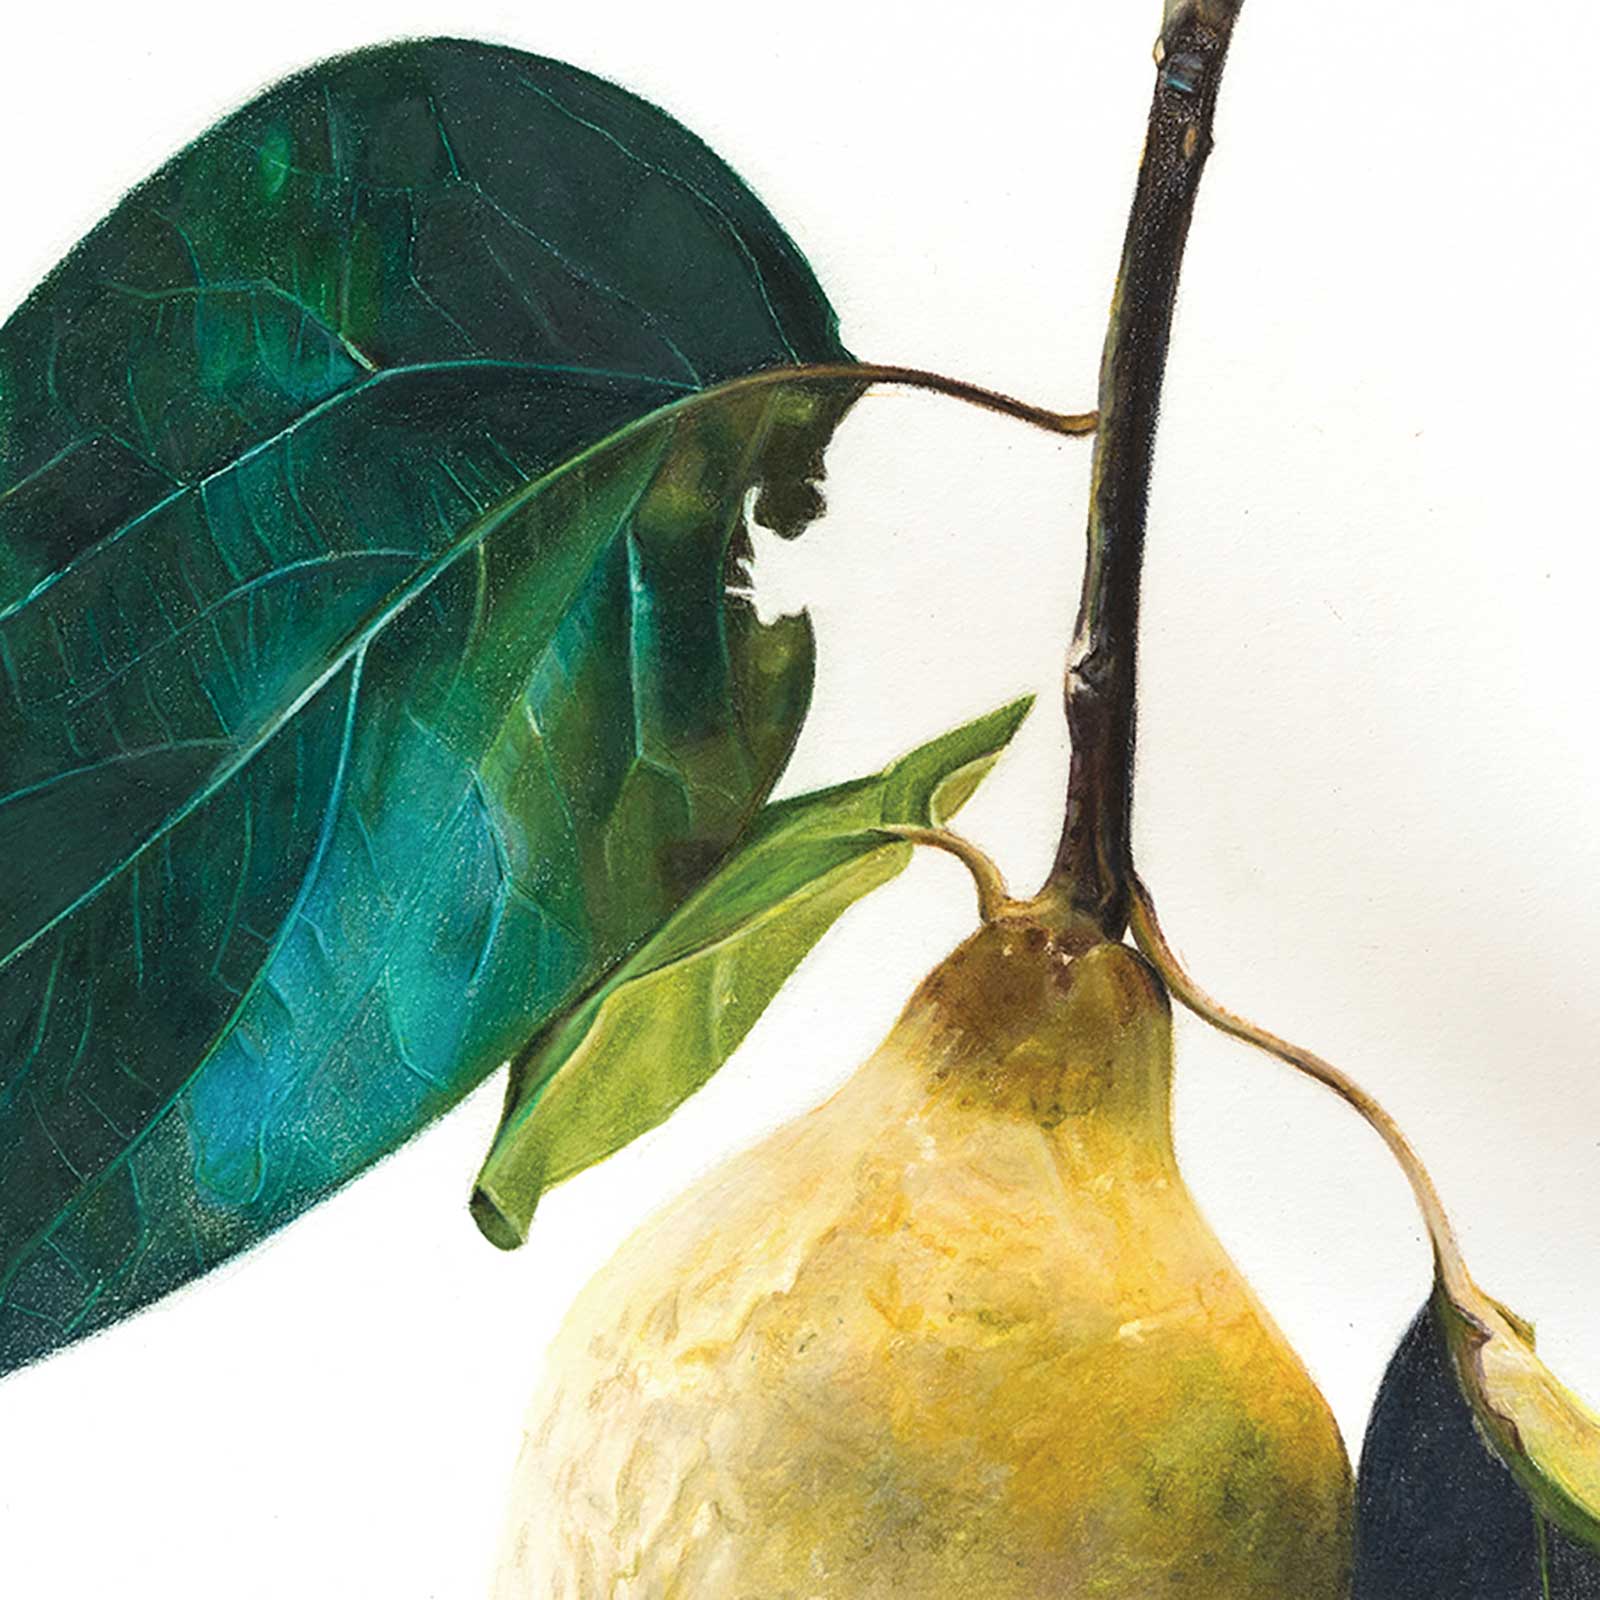
Quince, colored pencil, 8 x 8" (20 x 20 cm) The highlights of this drawing are the color of the leaf (so many blues and greens were used) and the texture of the quince.
I like to experiment with different papers as pencils react differently on different surfaces. I have found that hot-pressed watercolor paper, which has a smooth surface, allows for many layers of colored pencil, and will keep sharp details. Recently I have tried Pastelmat and drafting film – both very different surfaces, but I have enjoyed working on both. It is an exciting time, as the use of colored pencil as a medium is relatively recent, but it is becoming increasingly popular and acknowledged as a fine art medium. —
My Art in the Making Timeless
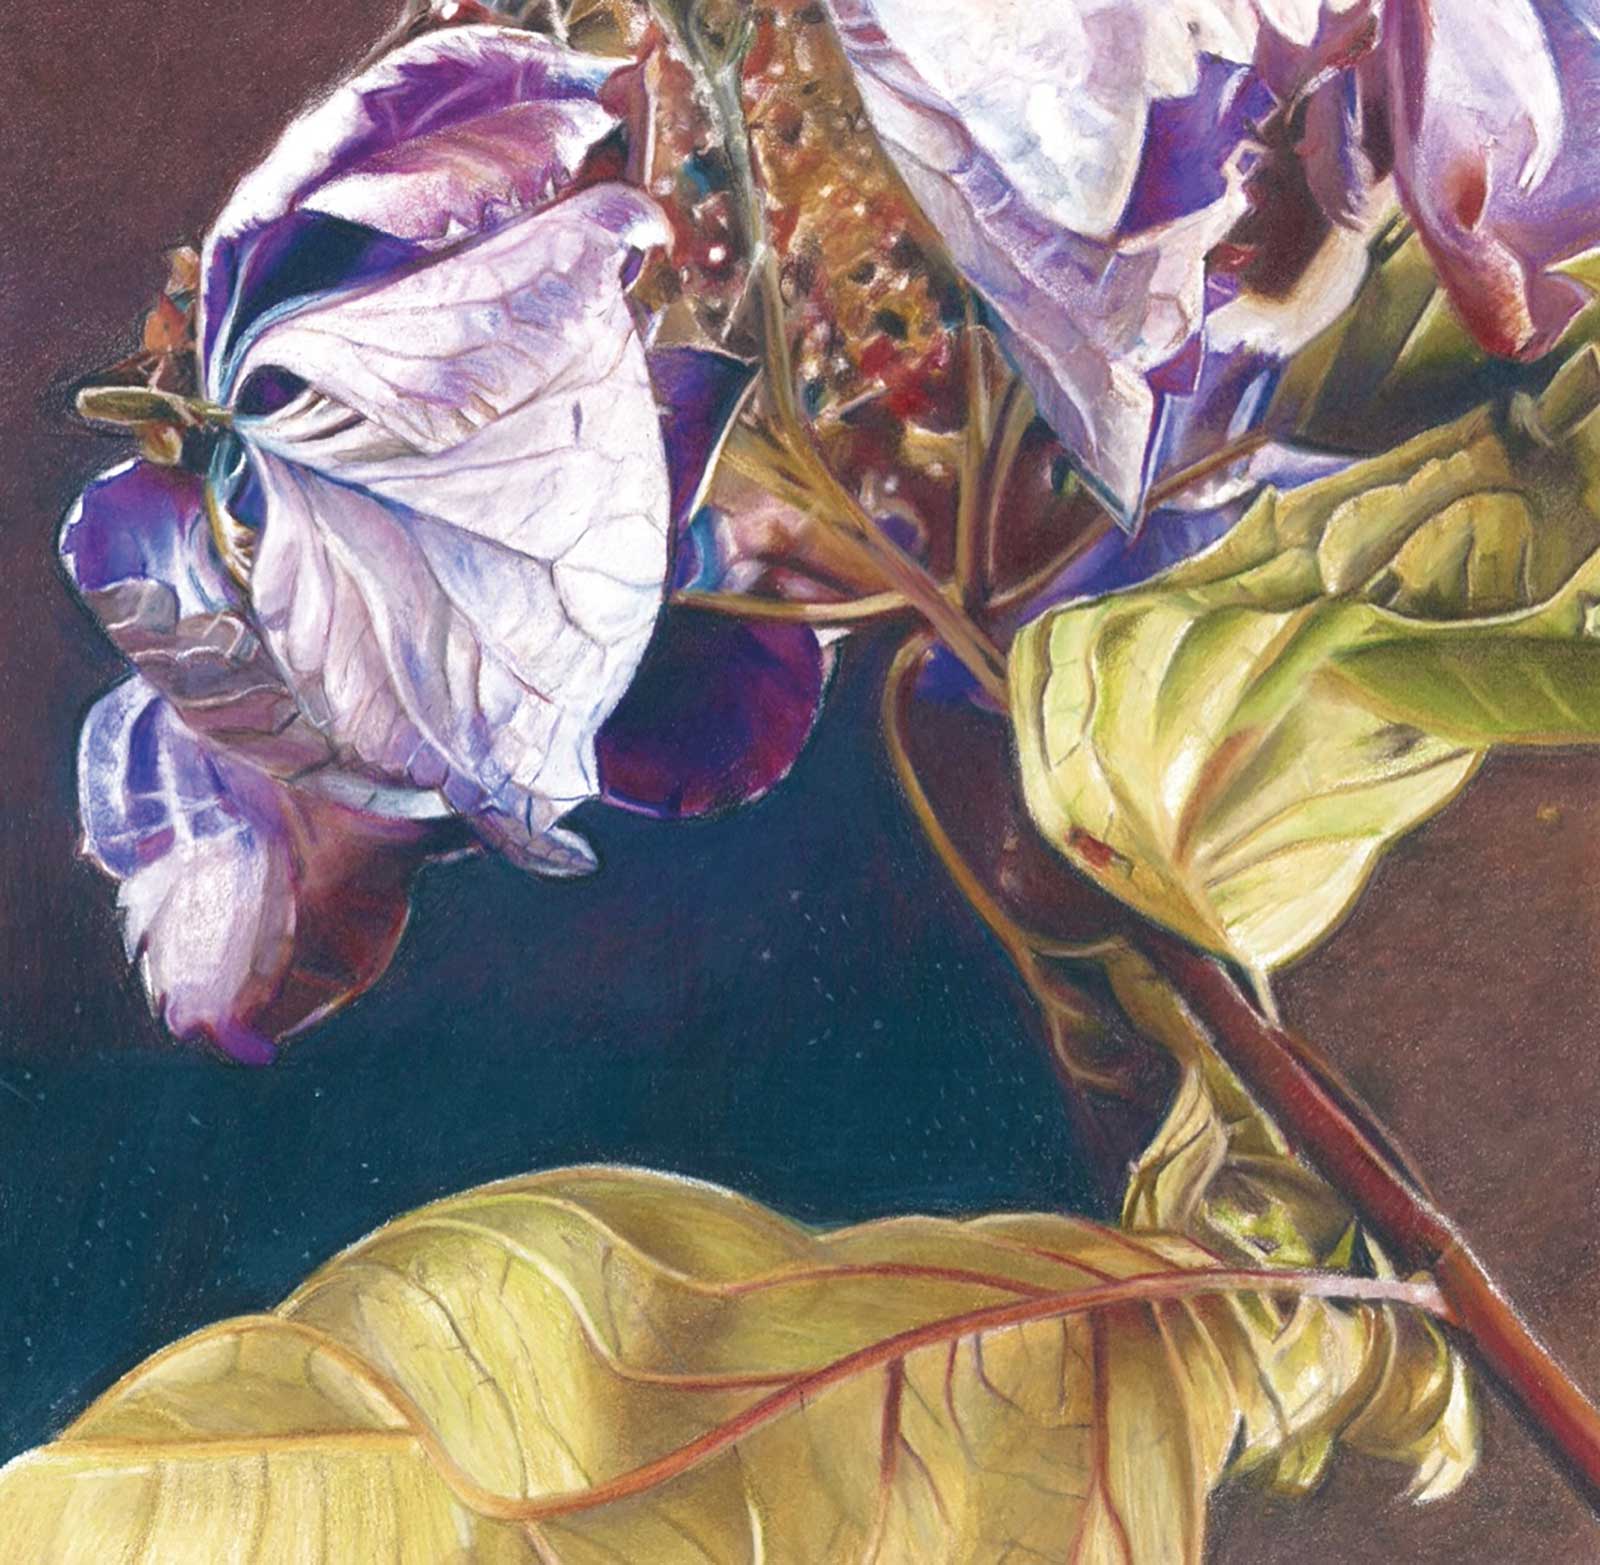
For this artwork I wanted to draw something unique and challenging, which would reflect the beauty and intricacy of nature. My inspiration came from some dried hydrangea flowers—not the classic hydrangea, but one called hydrangea macrophylla, “purple lace cap.”
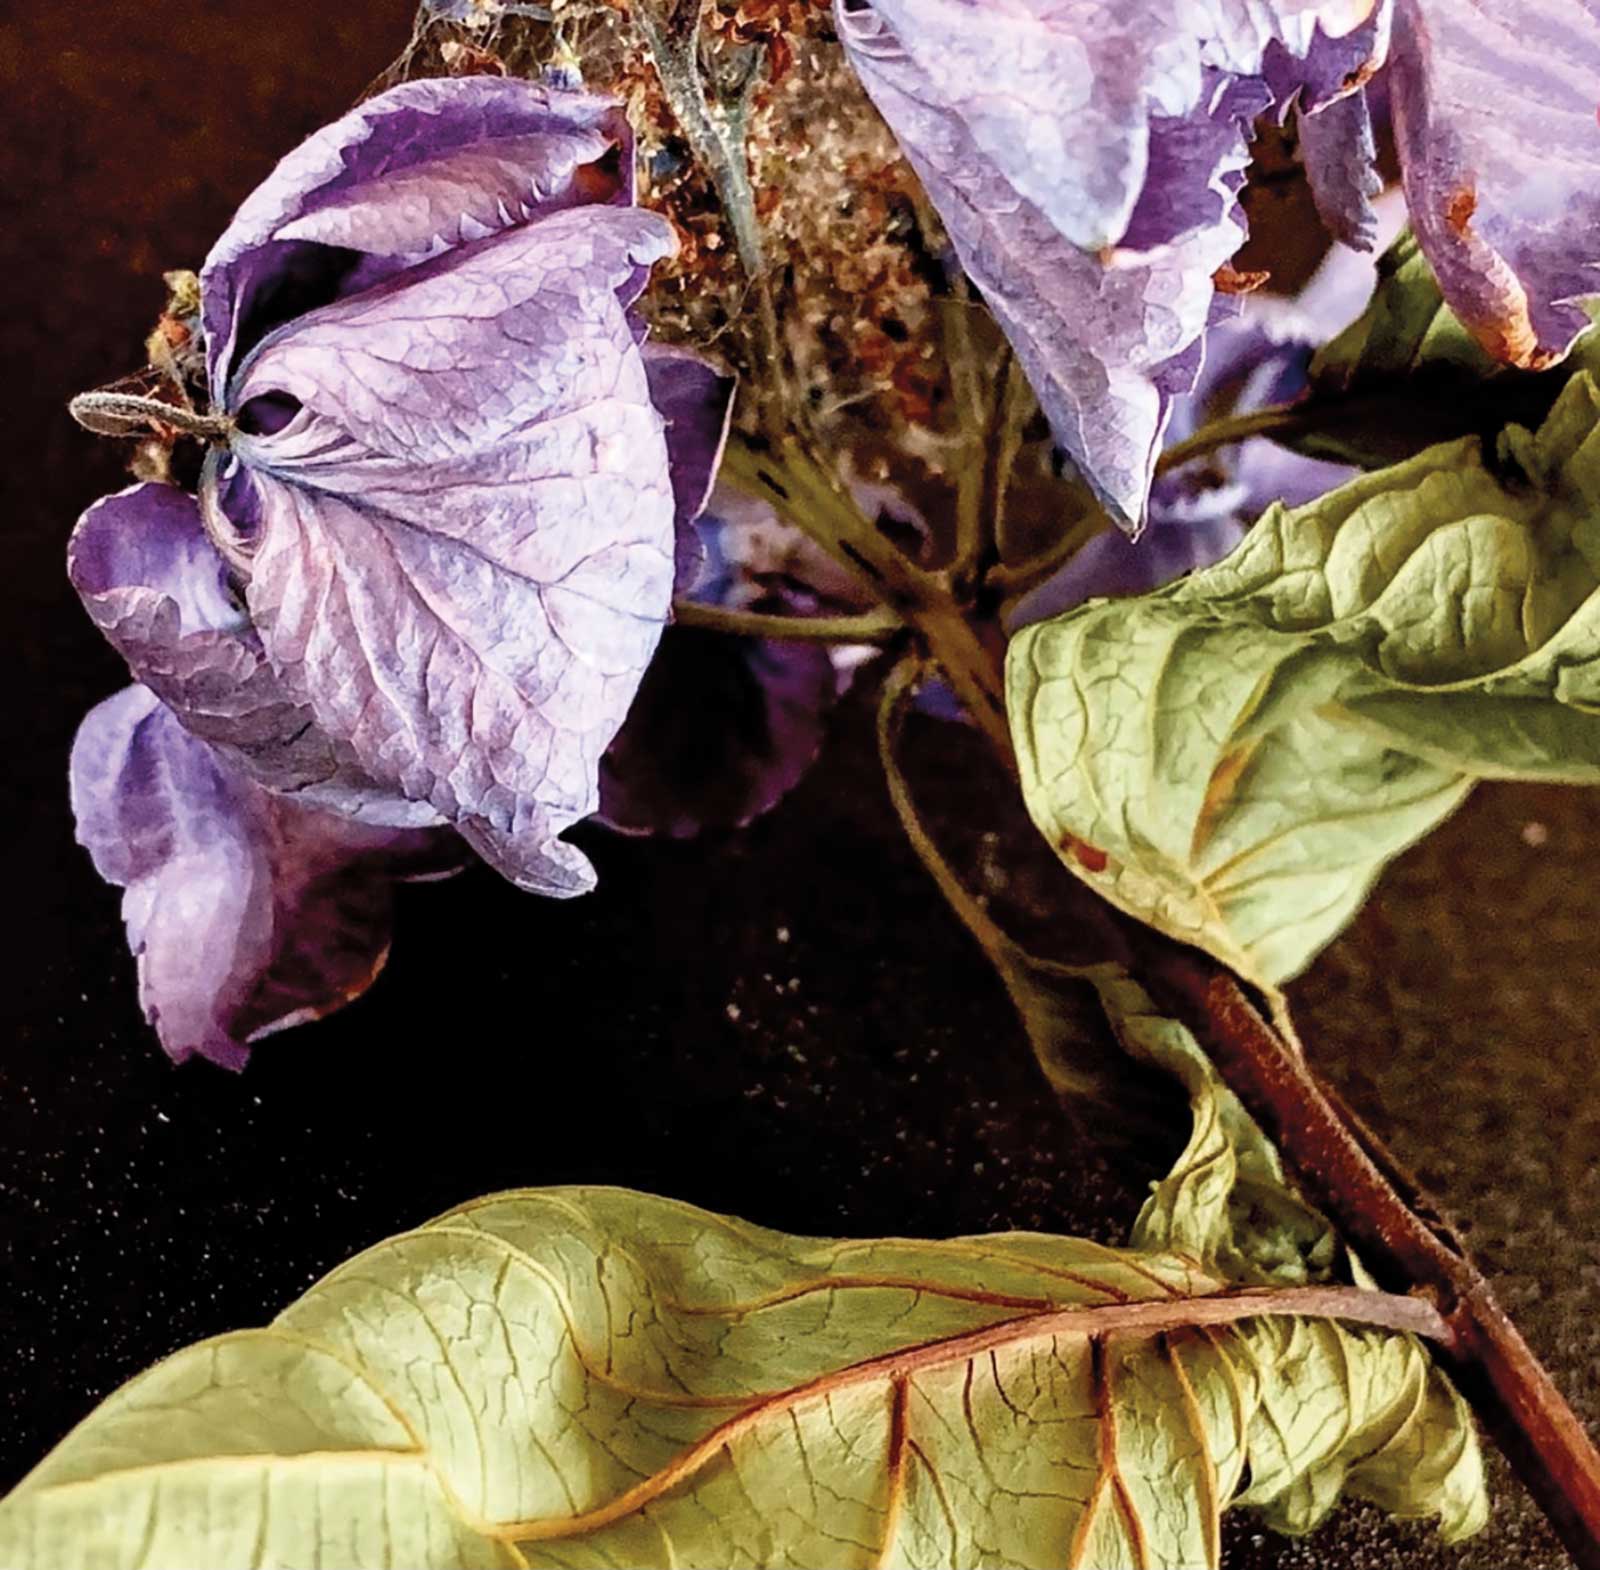 Photo reference
My creative process begins with taking my own reference photos. I was excited when I saw the photo of the hydrangea, captivated by the details, color and flowing lines. Even though it is the most complex drawing I have ever done, I knew I had to draw it. It was a non-traditional approach to capturing a magnified image of a hydrangea flower, and I was daunted by the technical challenge. The photo is then edited to brighten and enhance the colors, and add contrast. I also like to convert the photo into black and white to see the range of tonal values.
The focal point of the drawing, the pink/mauve flower, was well positioned. The lighting draws interest to the flower which stands out against the dark background. The overall layout is triangular in composition, which leads the viewer’s eye through the drawing. Depth has been created by leaves and petals in the foreground and a flower cluster in the background.
My medium of choice is colored pencil. It takes time to create a colored pencil drawing. This is a very slow and labor-intensive medium, and it requires patience as drawings can take many, many hours. I find that it suits my realistic rendering style, and drawing with colored pencils can be very relaxing and meditative.
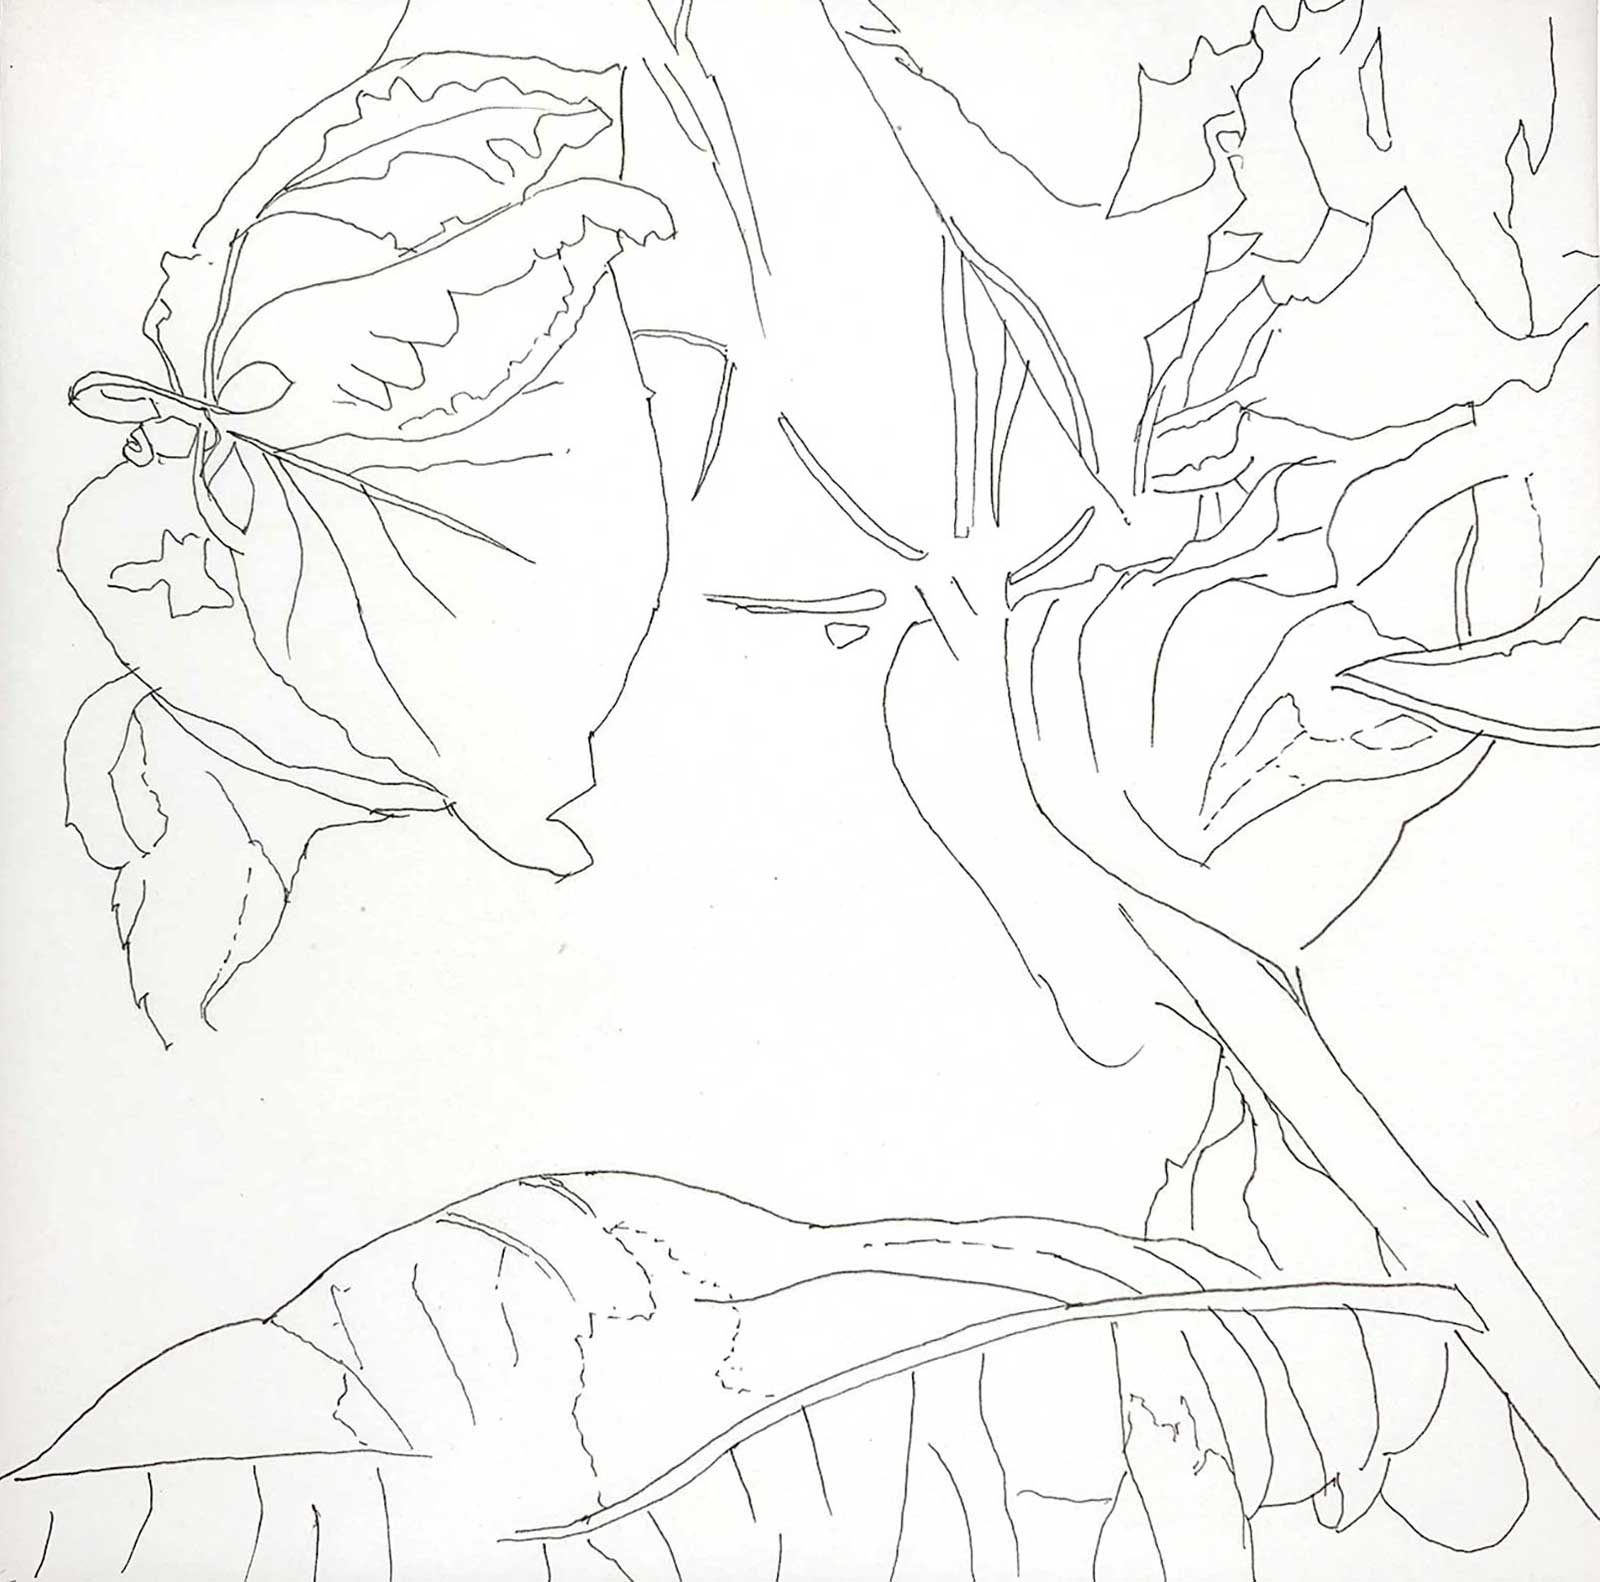 Stage 1
Stage 1 Line Drawing
The line drawing I have created from the photo reference is a simple outline with not too much detail. To transfer the line drawing to the paper, a light box is used. The paper is placed over the line drawing and lightly traced with a 4H graphite pencil.
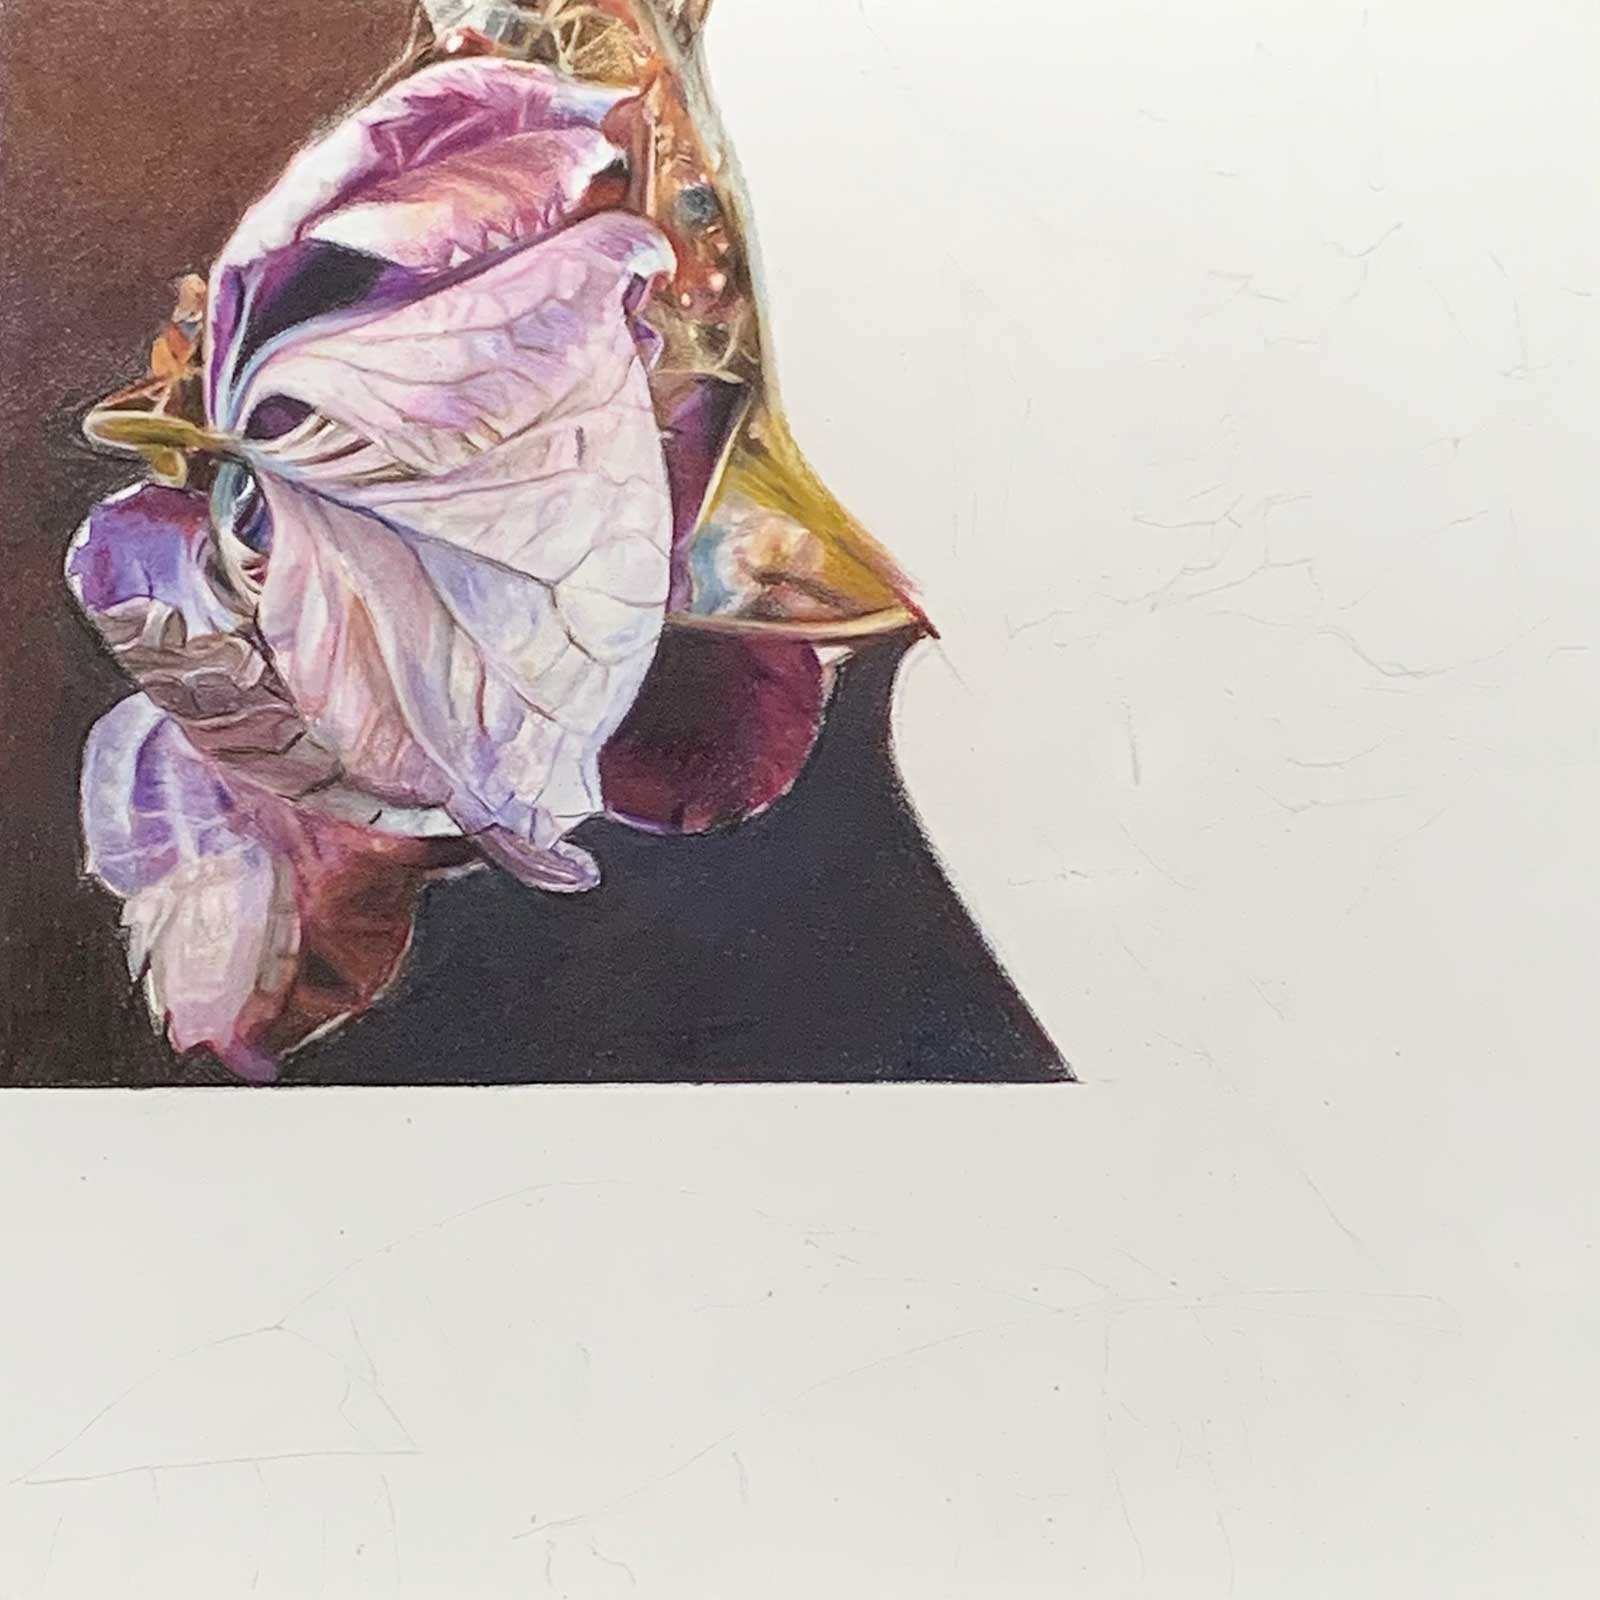 Stage 2
Stage 2 Background and Focal Point
As the drawing was a complicated composition, I worked by breaking it down into sections and drawing an area at a time. I started with the background first to help judge tonal values. The colors used in the background in multiple layers, were a combination of payne’s gray, dark indigo, black, sepia, caput mortuum and caput mortuum violet. The pink-purple petal is the focal point of the composition so it needed to be highlighted.
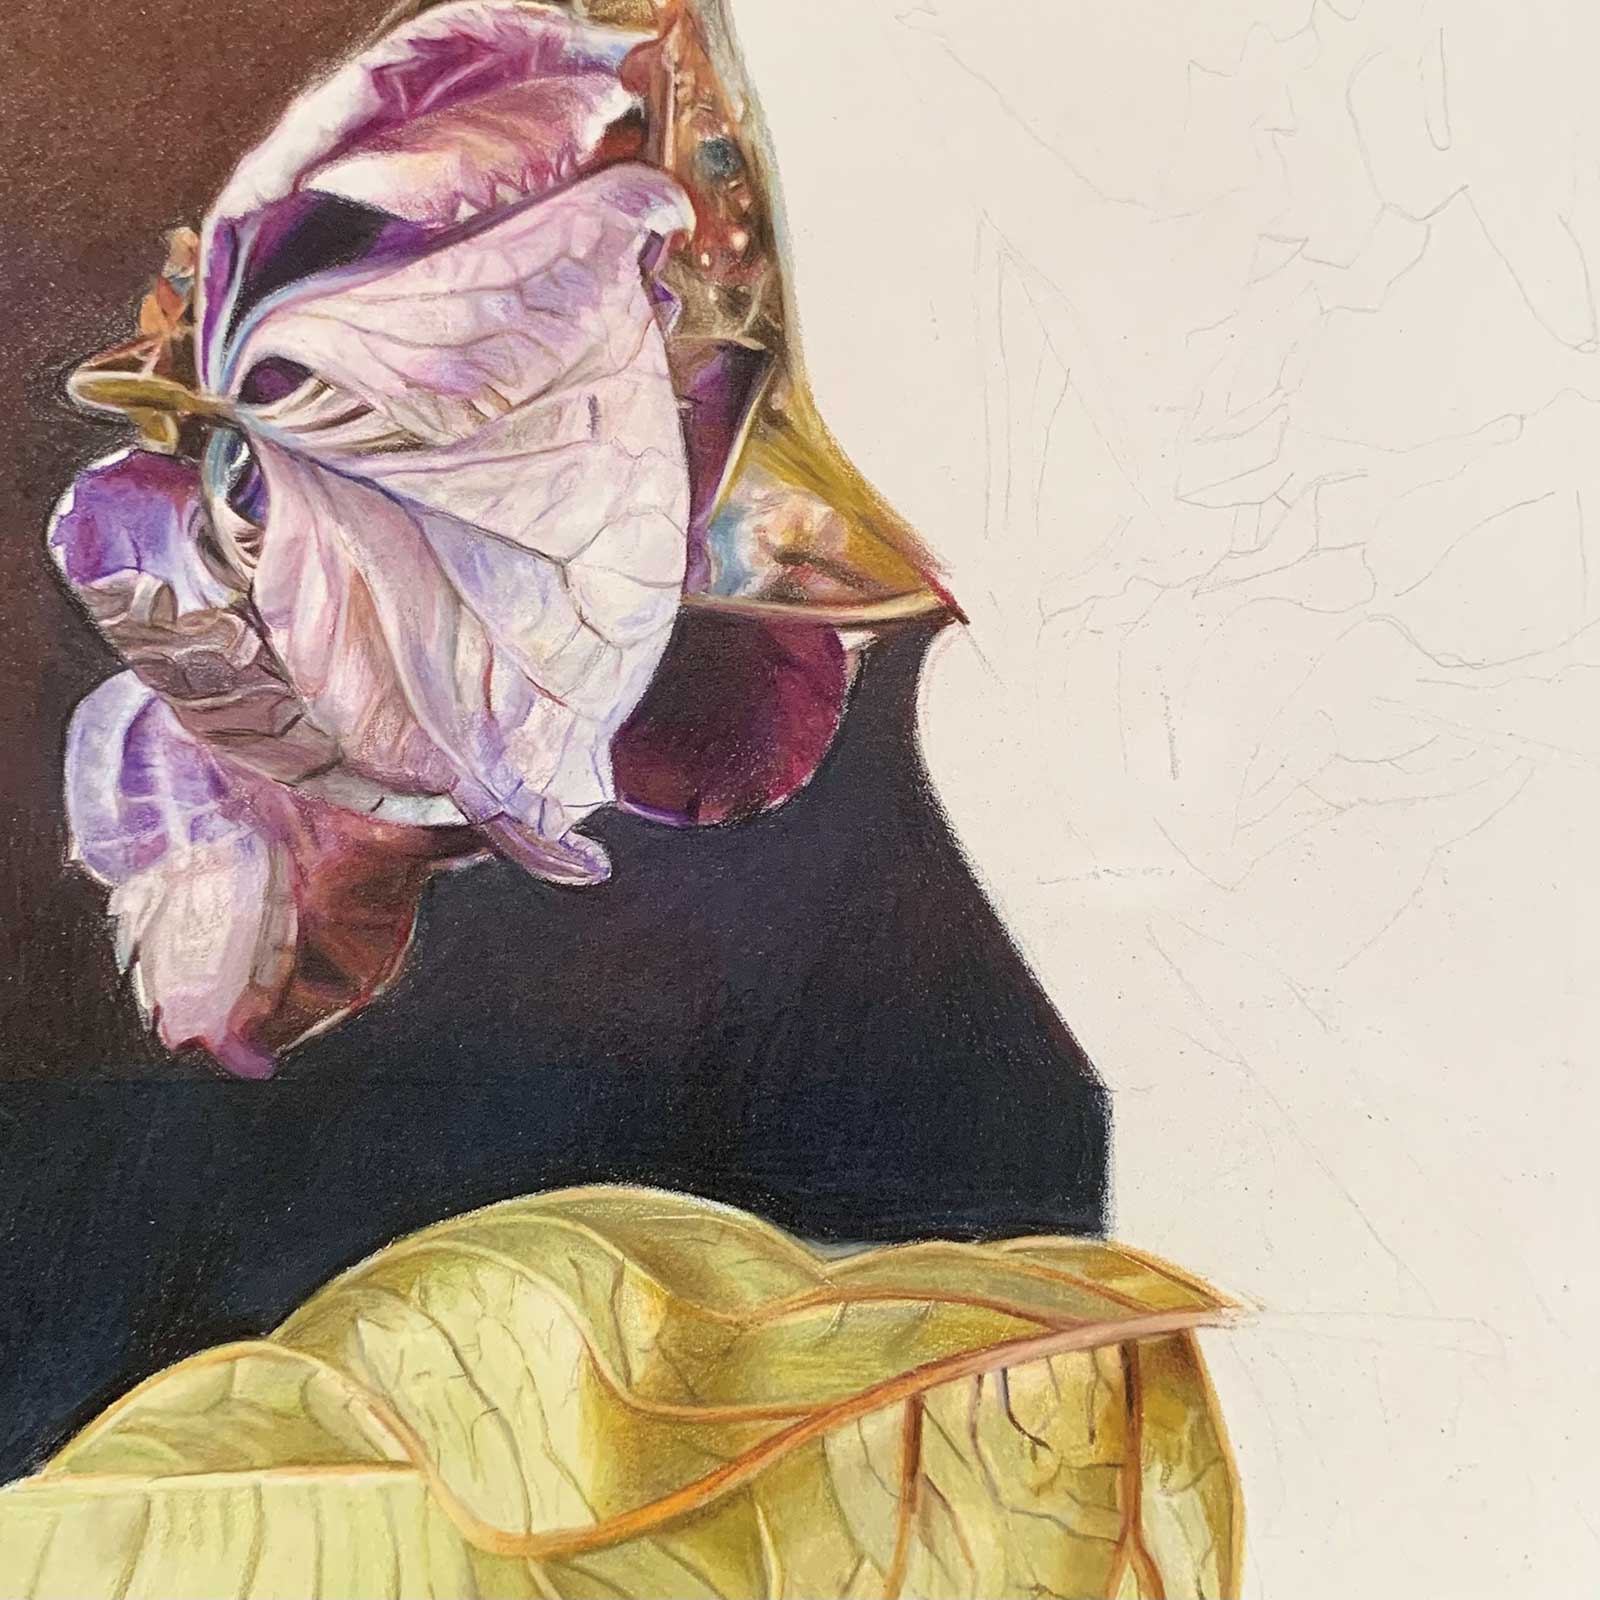 Stage 3
Stage 3 Leaf Contrast
The light values of the leaf in the foreground contrast with the dark values in the background. The main colors used in the leaf were green ochre, raw umber, olive brown, cream, primrose, nougat, buff titanium and pale yellow. The flowing curves of the leaf add movement and the veination is highlighted with burnt ochre.
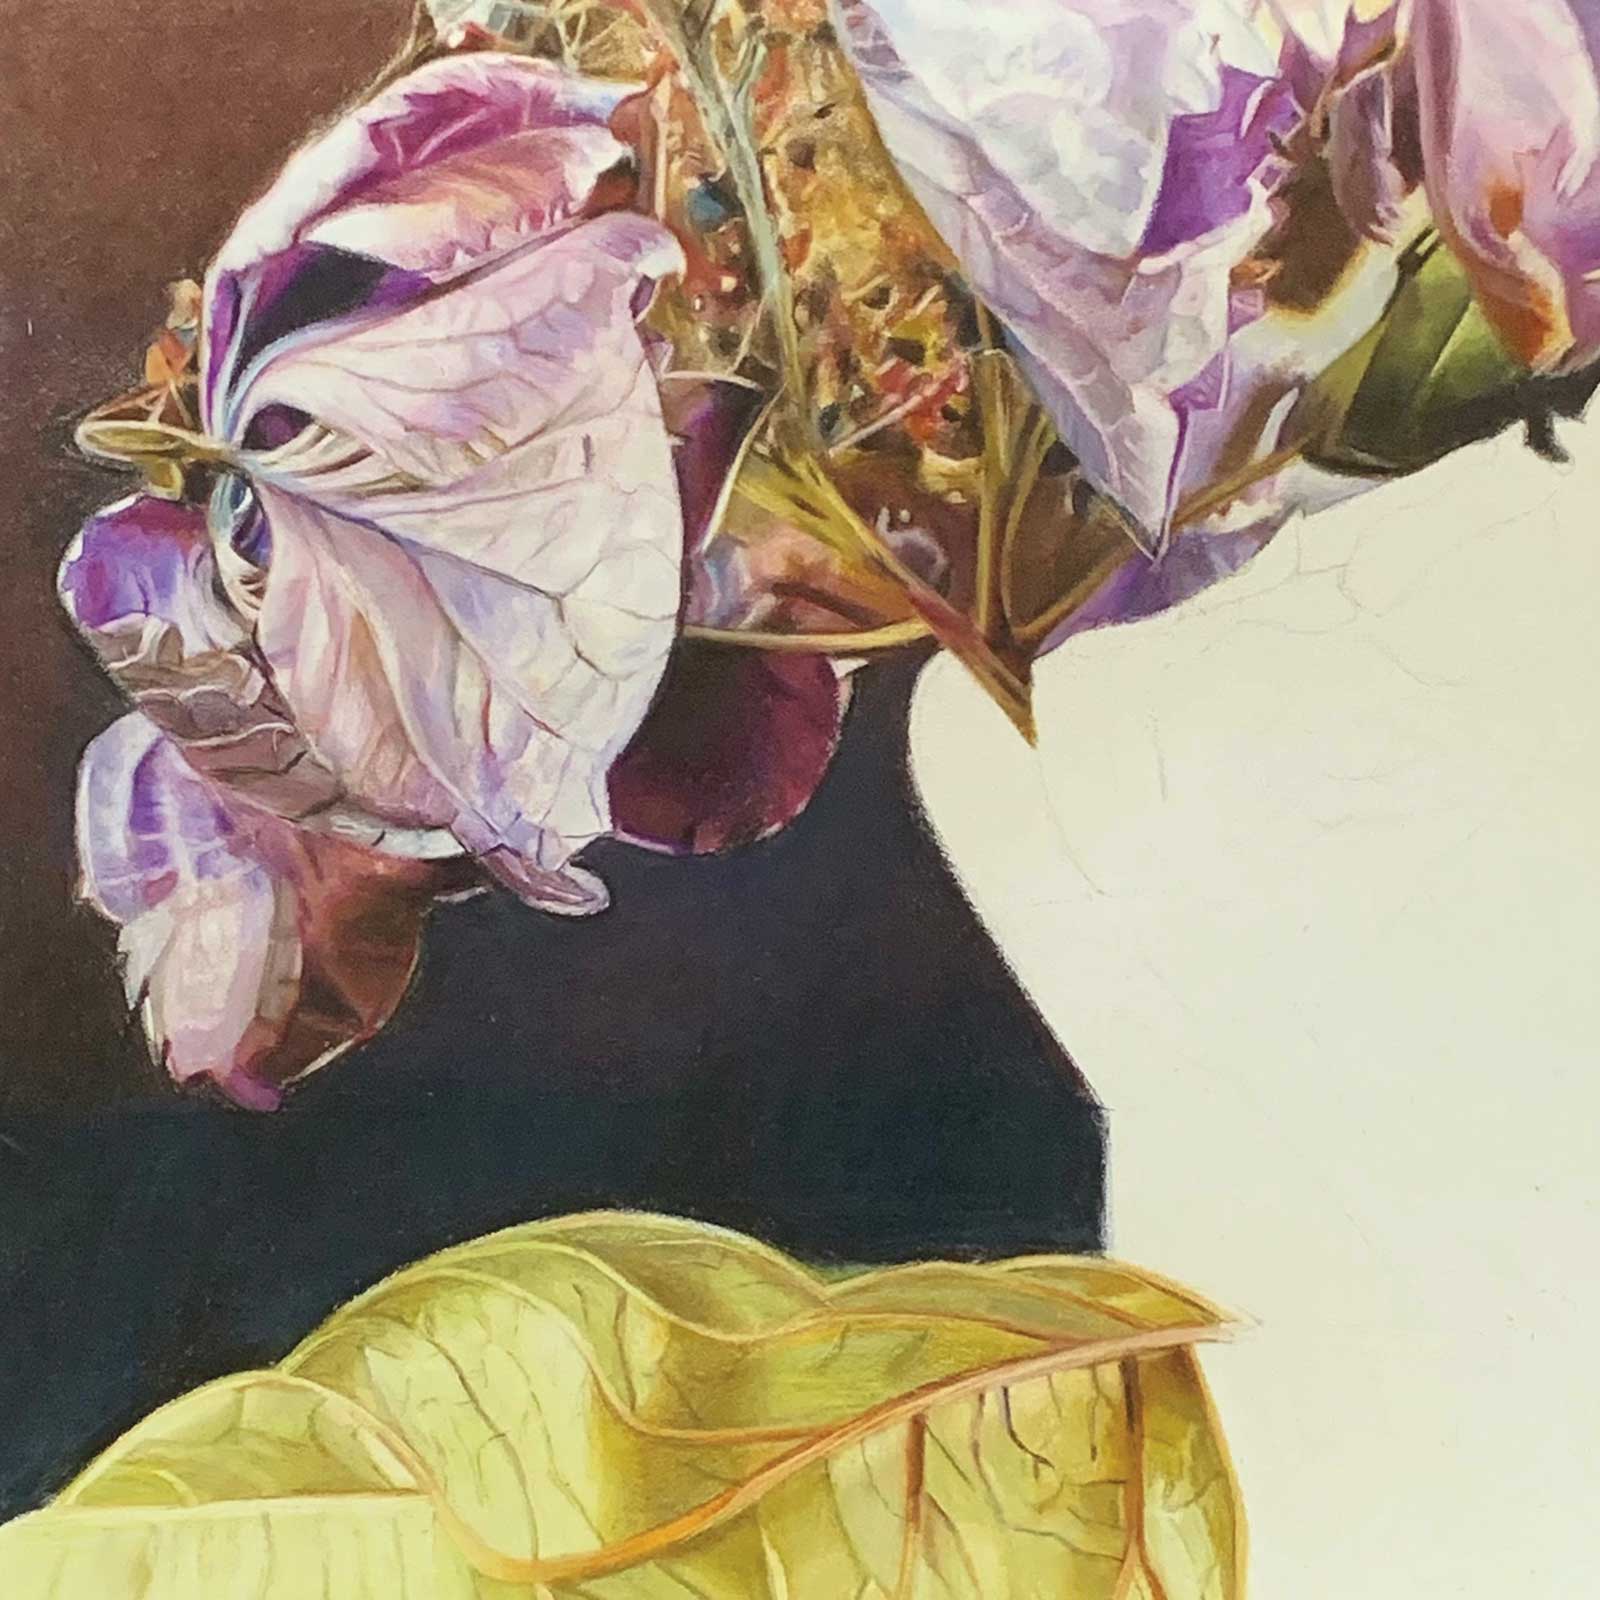 Stage 4
Stage 4 Flower Cluster and Petals
The flower cluster is made up of many tiny florets which recede into the background, behind the focal point. I used the battery eraser to lift the pigment to create highlights. To create depth the pink-mauve petal is in the foreground.
 Stage 5
Stage 5 Fine Tuning
Timeless, colored pencil, 8 x 8" (20 x 20 cm)
The final section of the drawing was completed with a leaf and the bottom leaf finished. The brown background was added with the addition of some texture. I meticulously went over the whole drawing. The intensity of color was increased, especially the mauves and purples, and contrast emphasized. I added more color and highlights to the flower cluster to make it “pop.” I did more work on the veination in the leaves, so that it was a more subtle transition. The battery eraser lifted highlighted areas, and a ceramic pen cutter was used for fine lines and details.
About the Artist
 Jen Urquhart
Jen Urquhart works from her home in the beautiful countryside of Stonehaven, a rural area near Geelong, Victoria, Australia. She is surrounded by nature, with old eucalyptus and a large native garden. Much of the inspiration for her artwork comes from her garden.
In 2017, Urquhart enrolled in a Botanical Art Course, where for three years she learned the basics of drawing flowers, fruit and vegetables, first in graphite, and then colored pencil. Since her retirement from a career in alternative health, she has had the time to learn as much as she can about colored pencil techniques and draws almost every day. She finds drawing in colored pencil to be a form of relaxation and a meditative experience. For her, a great source of inspiration comes from Instagram, where so much can be learned from other artists.
Urquhart is a member of the Botanical Art Society of Australia and has exhibited her artwork in the Geelong School of Botanical Art’s Inspired by Nature exhibition. She has also had a solo exhibition of her botanical art Botanika in Geelong.
Represented by
L’Orangerie Art & Interiors; Buninyong, Victoria, Australia, www.oldvicarageshop.com
Contact at
jeurq@bigpond.net.au